

Made from 5 ingredients, this is perfect Swiss meringue buttercream. Written in easy terms with in-depth instructions and troubleshooting tips, this post teaches you how to make the best meringue buttercream even if you’ve failed before or if it’s your first try. This frosting is creamy, silky smooth, holds its shape beautifully, and the best part—and why everyone loves it—is that it’s not extra sweet like traditional American vanilla buttercream.
Do you want to master Swiss Meringue Buttercream (SMBC) but are too nervous to try it? I get it, the thought of making meringue as the base of a frosting sounds complicated, timely, and intimidating. Let me break down that barrier for you—this recipe is where you start.
What is Swiss Meringue Buttercream?
Swiss meringue buttercream joins other varieties—French and Italian—as a stable, not overly sweet frosting. The process for each is a little different, but the Swiss method is arguably the easiest. Swiss meringue buttercream is made from cooked egg whites and sugar, butter, and flavorings like vanilla and salt. Whip the cooked egg whites and sugar into stiff peaks, then slowly add the butter before adding flavors. It’s out-of-this-world creamy, extra smooth, and the perfect sweetness for any confection. The whipping process is long and where some trouble can start, including never reaching stiff peaks. The butter can also melt, leaving you with SMBC soup. Or you can over-whip everything into curdles.
It’s a little more complicated than my whipped frosting, but it’s worth it! Today I’m putting you on the right SMBC track, plus there’s usually a fix for everything—and I teach you how in this post.
This Swiss Meringue Buttercream Is:
- Made from 5 basic ingredients
- Silky smooth and buttery
- Thick and ultra creamy
- Perfect for piping or spreading
- Flavored with vanilla and a touch of salt
- Not cloyingly sweet like traditional frosting
Ingredients
Let me explain why each ingredient is important. Feel free to keep scrolling to the full recipe written below.
- Egg Whites: Egg whites and sugar form the meringue. Just as I recommend when making French macarons, use fresh eggs instead of carton egg whites. Here are all my recipes using leftover egg yolks. Success tip: Eggs separate much easier when they’re cold.
- Granulated Sugar: Use regular granulated sugar, not confectioners’ sugar.
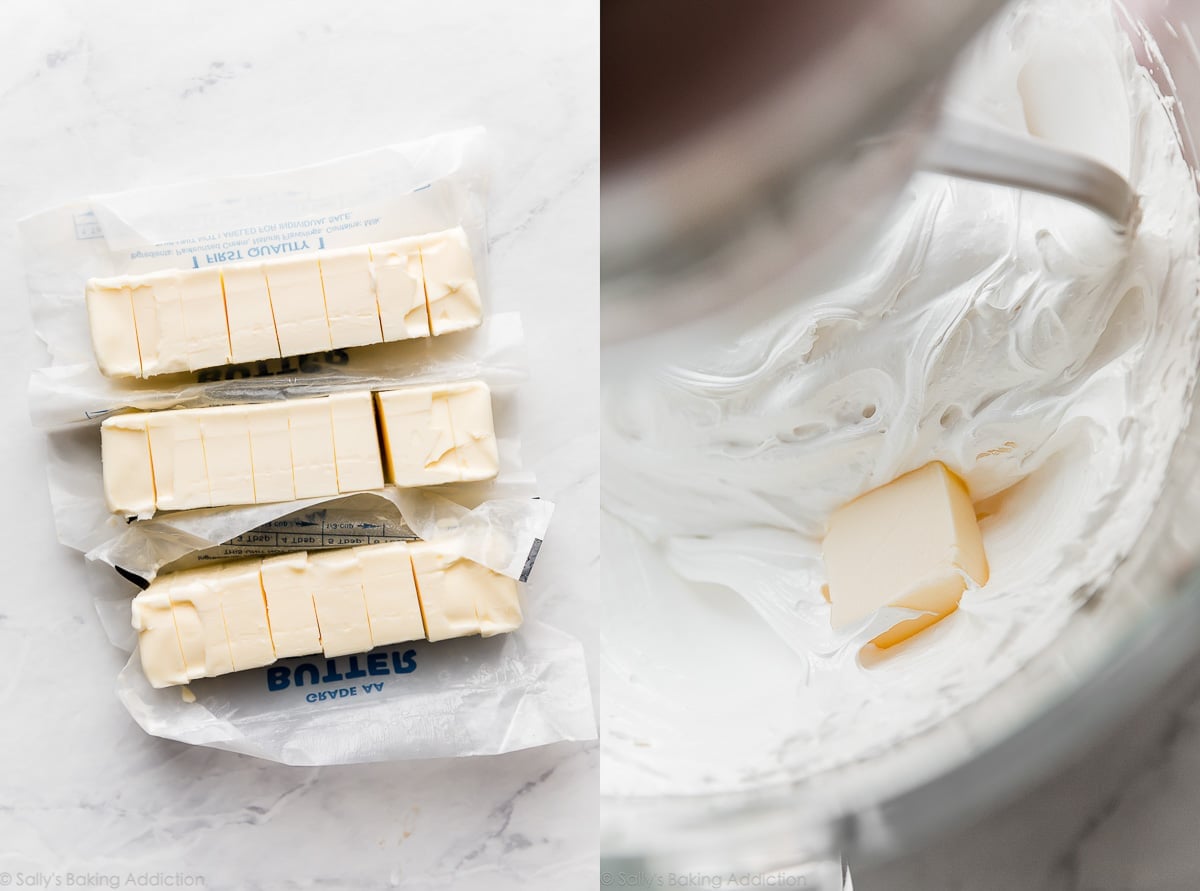
- Unsalted Butter: Butter turns meringue into meringue buttercream. I recommend unsalted butter because salted butter tastes overpowering. Keep in mind that the frosting will turn soupy and thin if the butter is too warm. Make sure you’re using butter that is slightly cooler than proper room temperature butter. Remove butter from the refrigerator and set it out for just 30-40 minutes before you need to use it. It should be cool to the touch, about 60°F (16°C). For accuracy, I recommend using an instant read thermometer. Cut butter into Tablespoon size pieces before using.
- Vanilla Extract: Adds flavor. See FAQs below for other flavor options.
- Salt: Some SMBC recipes don’t use salt, but I strongly recommend it for another layer of flavor. You may be wondering why you can’t just use salted butter and skip the added salt, so make sure you review Salted Vs Unsalted Butter in Baking.
Swiss Meringue Buttercream Video Tutorial
How to Make Swiss Meringue Buttercream
Here’s an overview of the steps. Full instructions available in the recipe below. Feel free to keep scrolling to the full recipe if you’d like!
- Get rid of any grease residue. Wipe all tools that will touch the meringue with a little lemon juice or white vinegar. Grease or fat prevents your meringue from setting up.
- Separate the eggs. Save the yolks for another recipe.
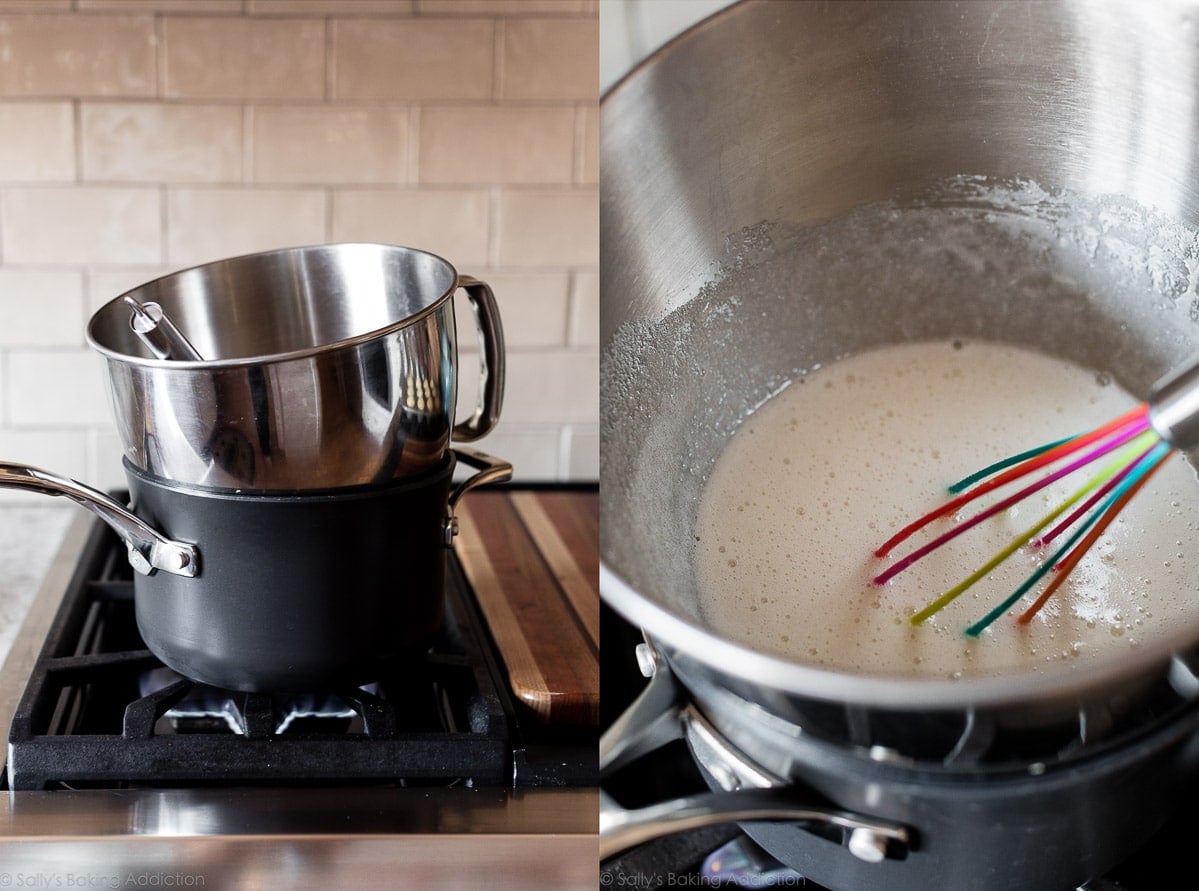
- Cook the egg whites & sugar: Whisk sugar & egg whites together, then set the bowl over a saucepan filled with simmering water. Do not let the bottom of the mixing bowl touch the water. Whisk the whites and sugar constantly until sugar is dissolved and mixture has thinned out. The mixture will be thick and tacky at first, then thin out and appear frothy on top. To test that it’s ready, you can use your finger or an instant read thermometer. Lightly and quickly dip your finger (it’s very hot, be careful) and rub the mixture between your thumb and finger. You shouldn’t feel any sugar granules. If using a thermometer, the temperature should read 160°F (71°C).
- Whip it: Transfer warm mixture to the bowl of a stand mixer fitted with a whisk attachment (if you aren’t already using the metal bowl that comes with it). Beat until stiff peaks form and the meringue is no longer warm to touch, at least 10-15 minutes. On particularly humid days, it will take longer. If it’s still not reaching stiff peaks, stop the mixer, place the bowl in the refrigerator for 10 minutes, then return to the mixer and continue beating until stiff peaks form.
- If the bowl and meringue still feel warm at this point, wait until both cool to room temperature (around 70°F (21°C)) before adding the butter.
- Add the butter and flavor: Switch the stand mixer to the paddle attachment and add the butter 1 Tablespoon at a time. Wait for the butter to fully mix in before adding the next. After all the butter has been added, beat in vanilla and salt. Done!
A small egg separator is a helpful tool in this recipe.
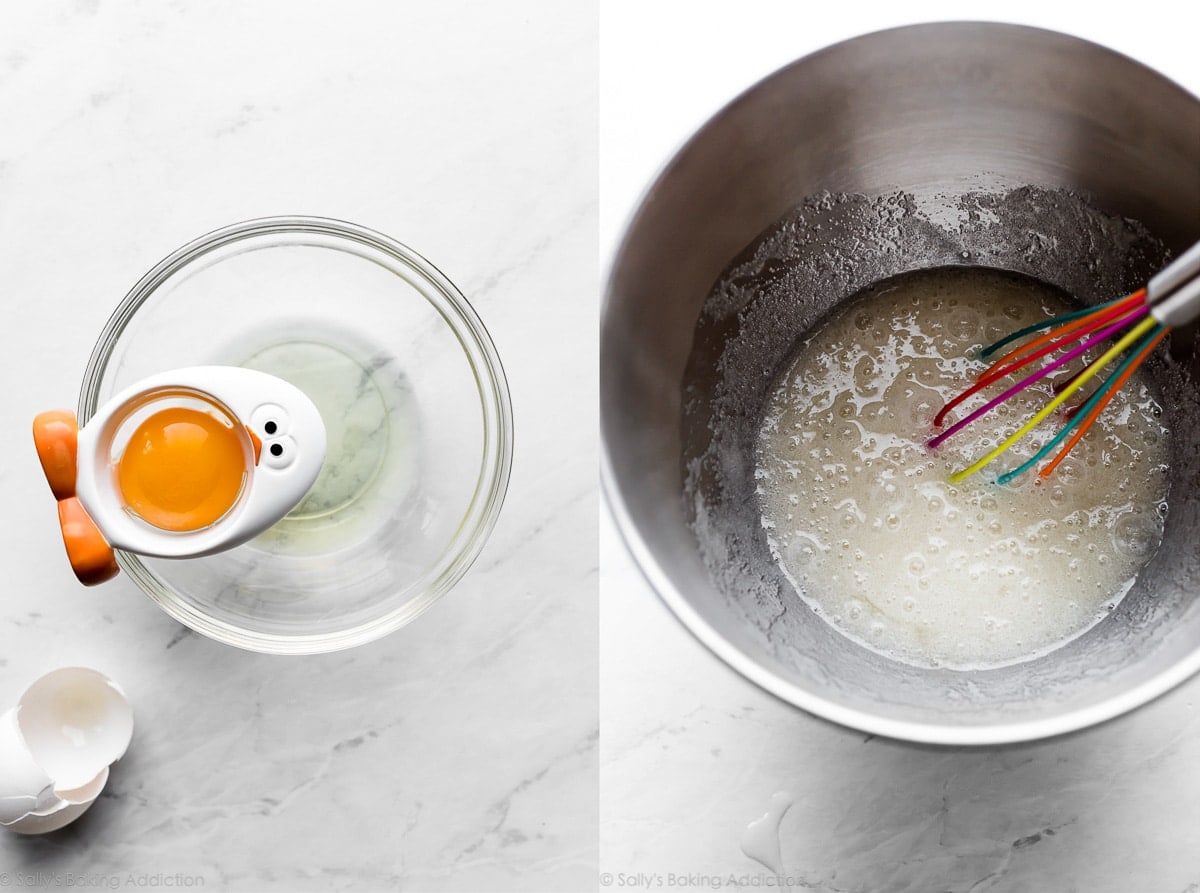
Cook and whisk egg whites and sugar over indirect heat. When it’s ready, the mixture will be frothy on top and thin. (Below, right.)
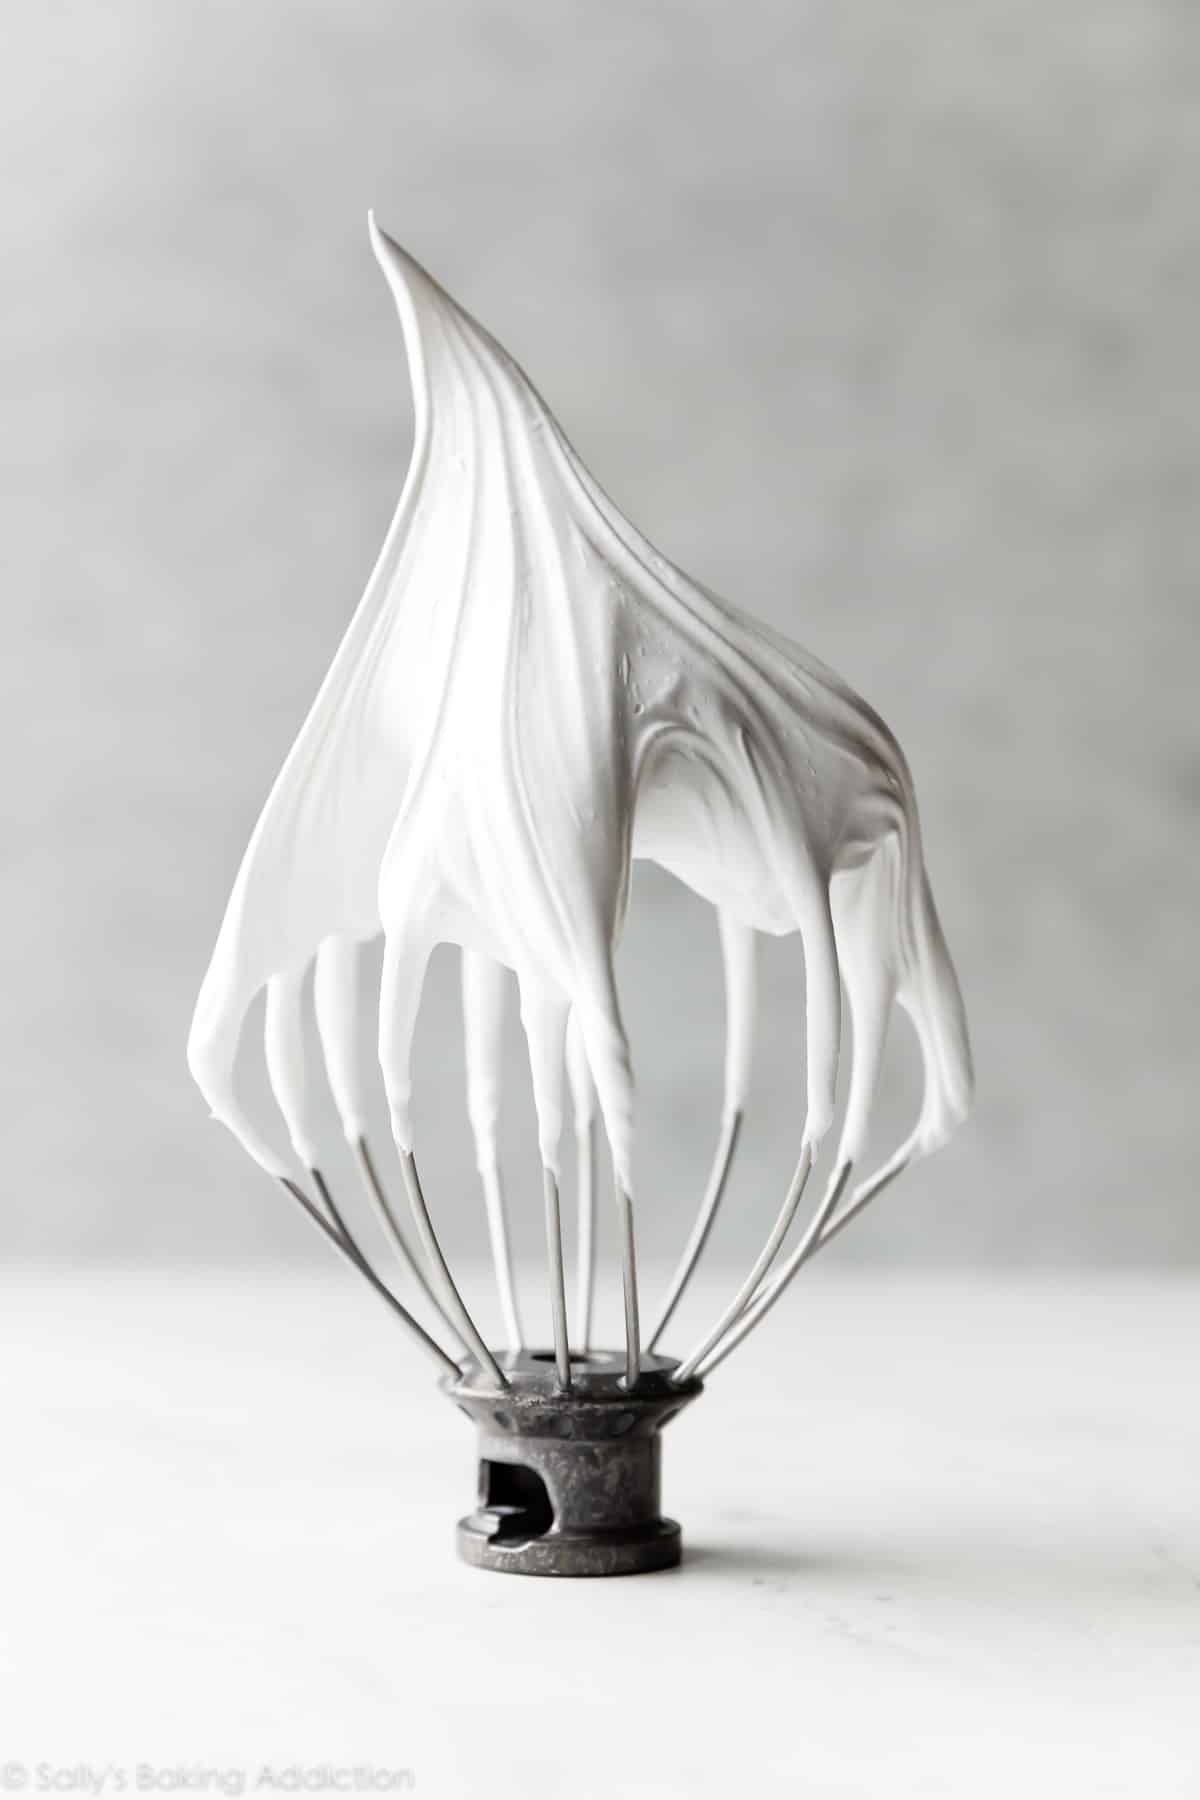
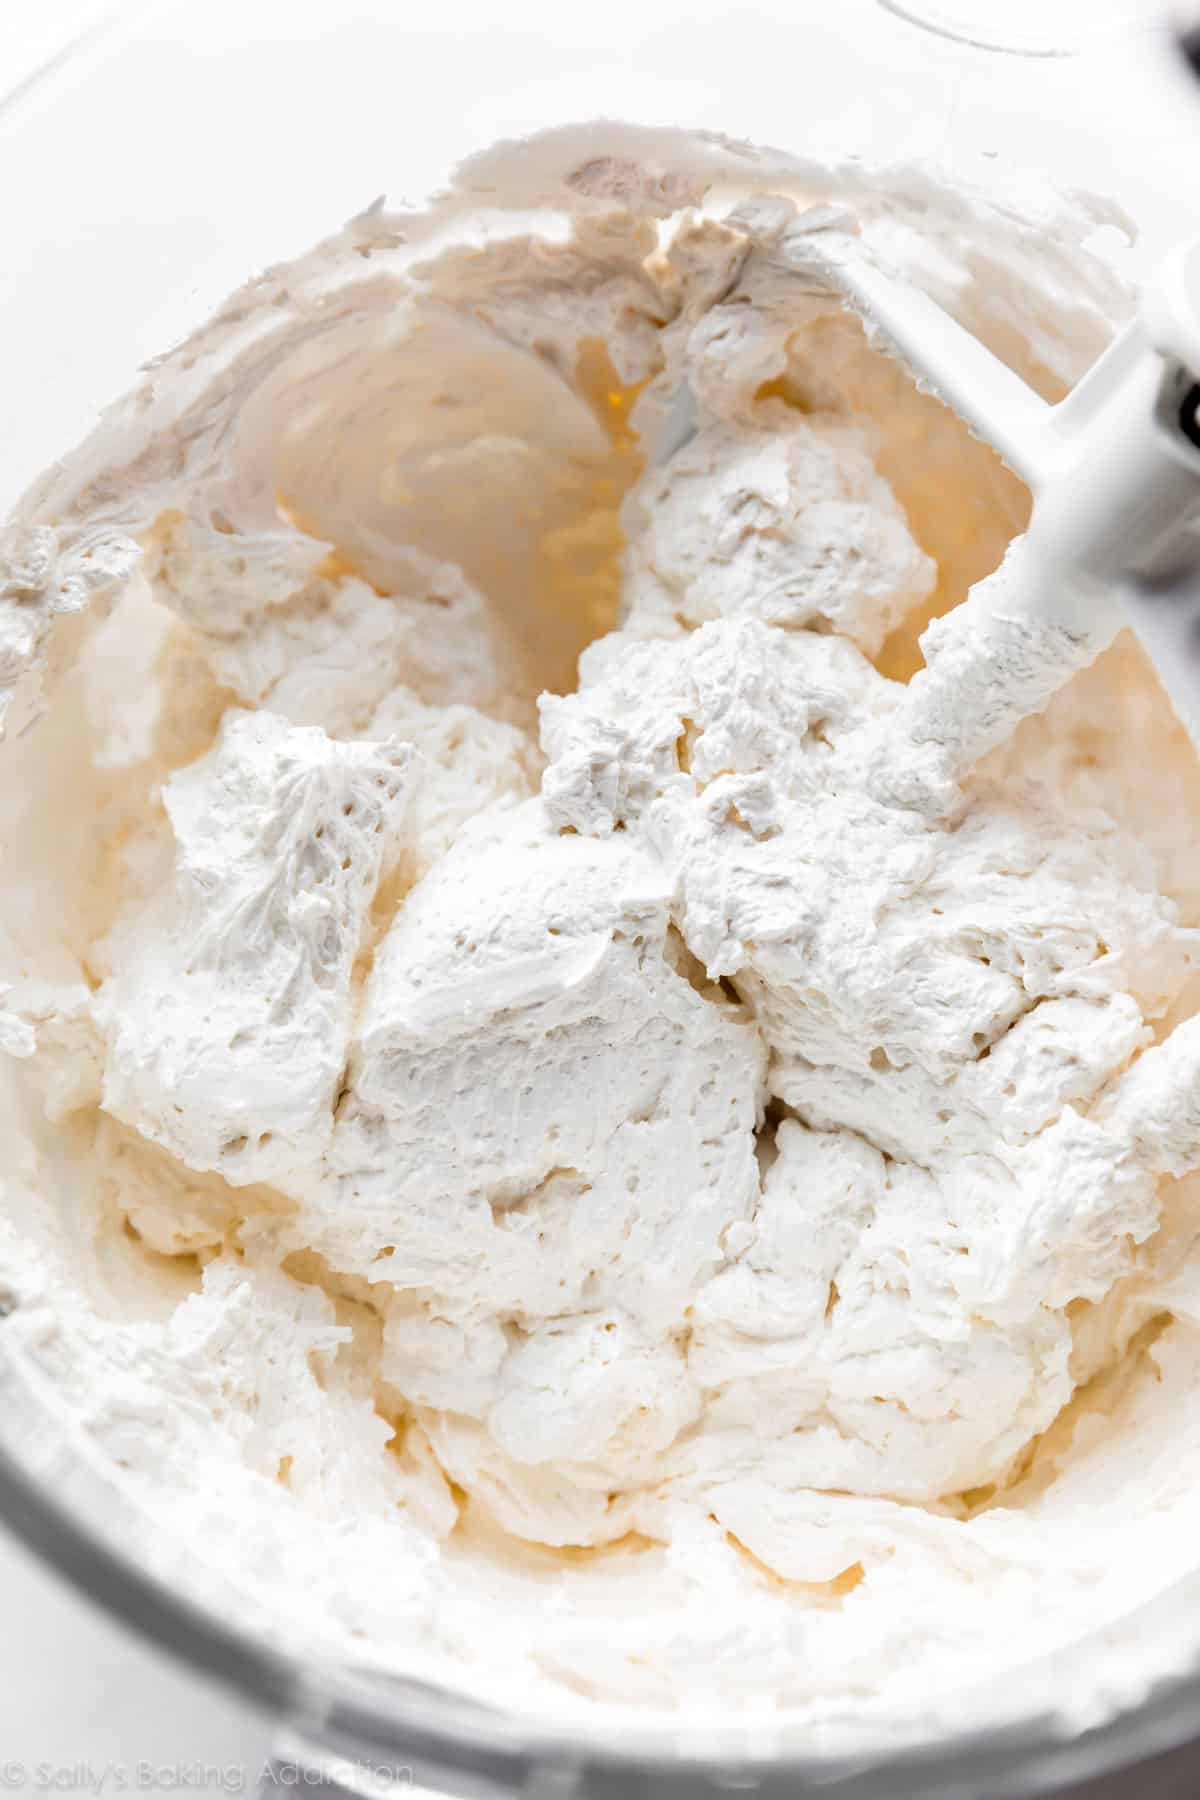
What Are Stiff Peaks?
After several minutes of mixing, the meringue should form stiff glossy peaks. This means it forms stiff, smooth, and sharp points in the bowl or on the lifted whisk attachment.
Stiff peaks do not droop down.
After reaching stiff peaks, let the meringue cool for a bit, then beat in the butter 1 Tablespoon at a time.
Success Tip: Because butter needs to be on the cooler side, I don’t remove it from the refrigerator and cut it into Tbsp pieces until I start whipping the meringue.
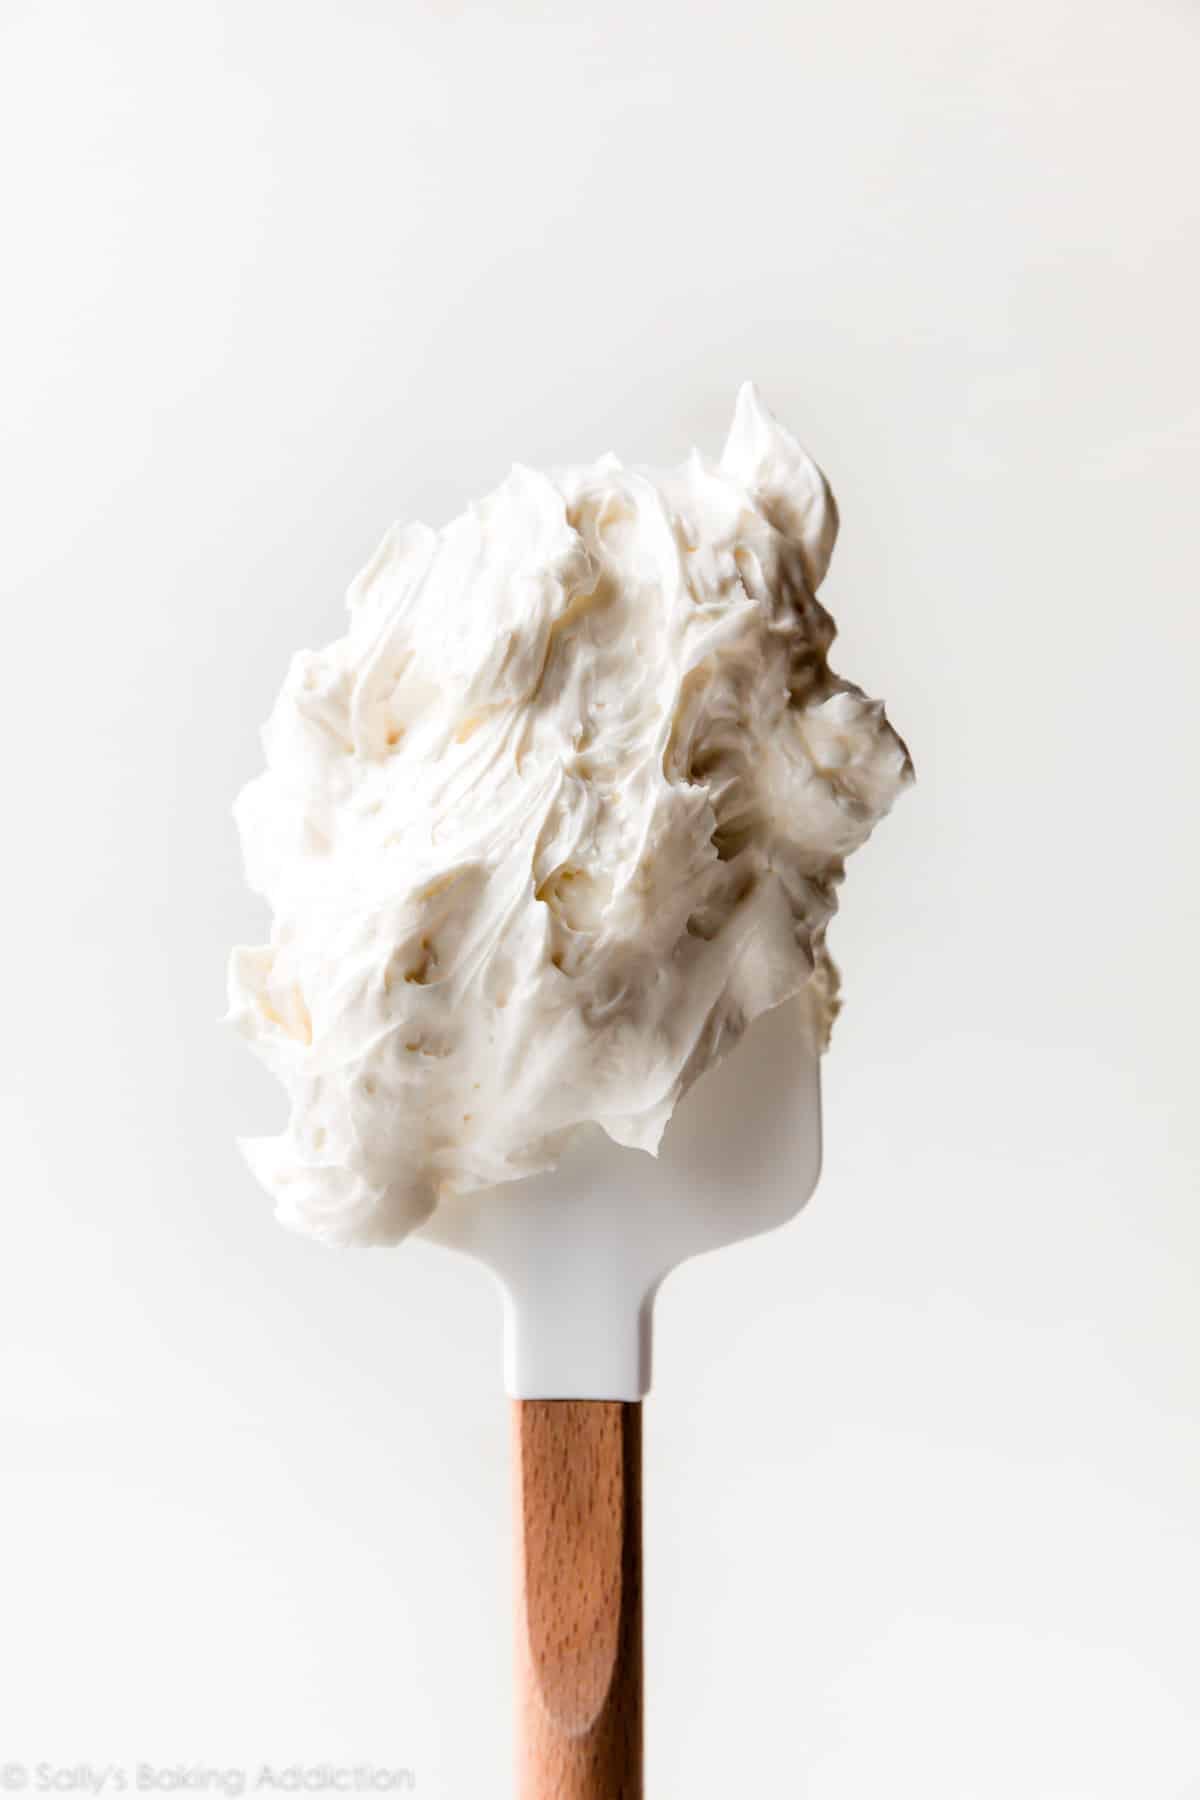
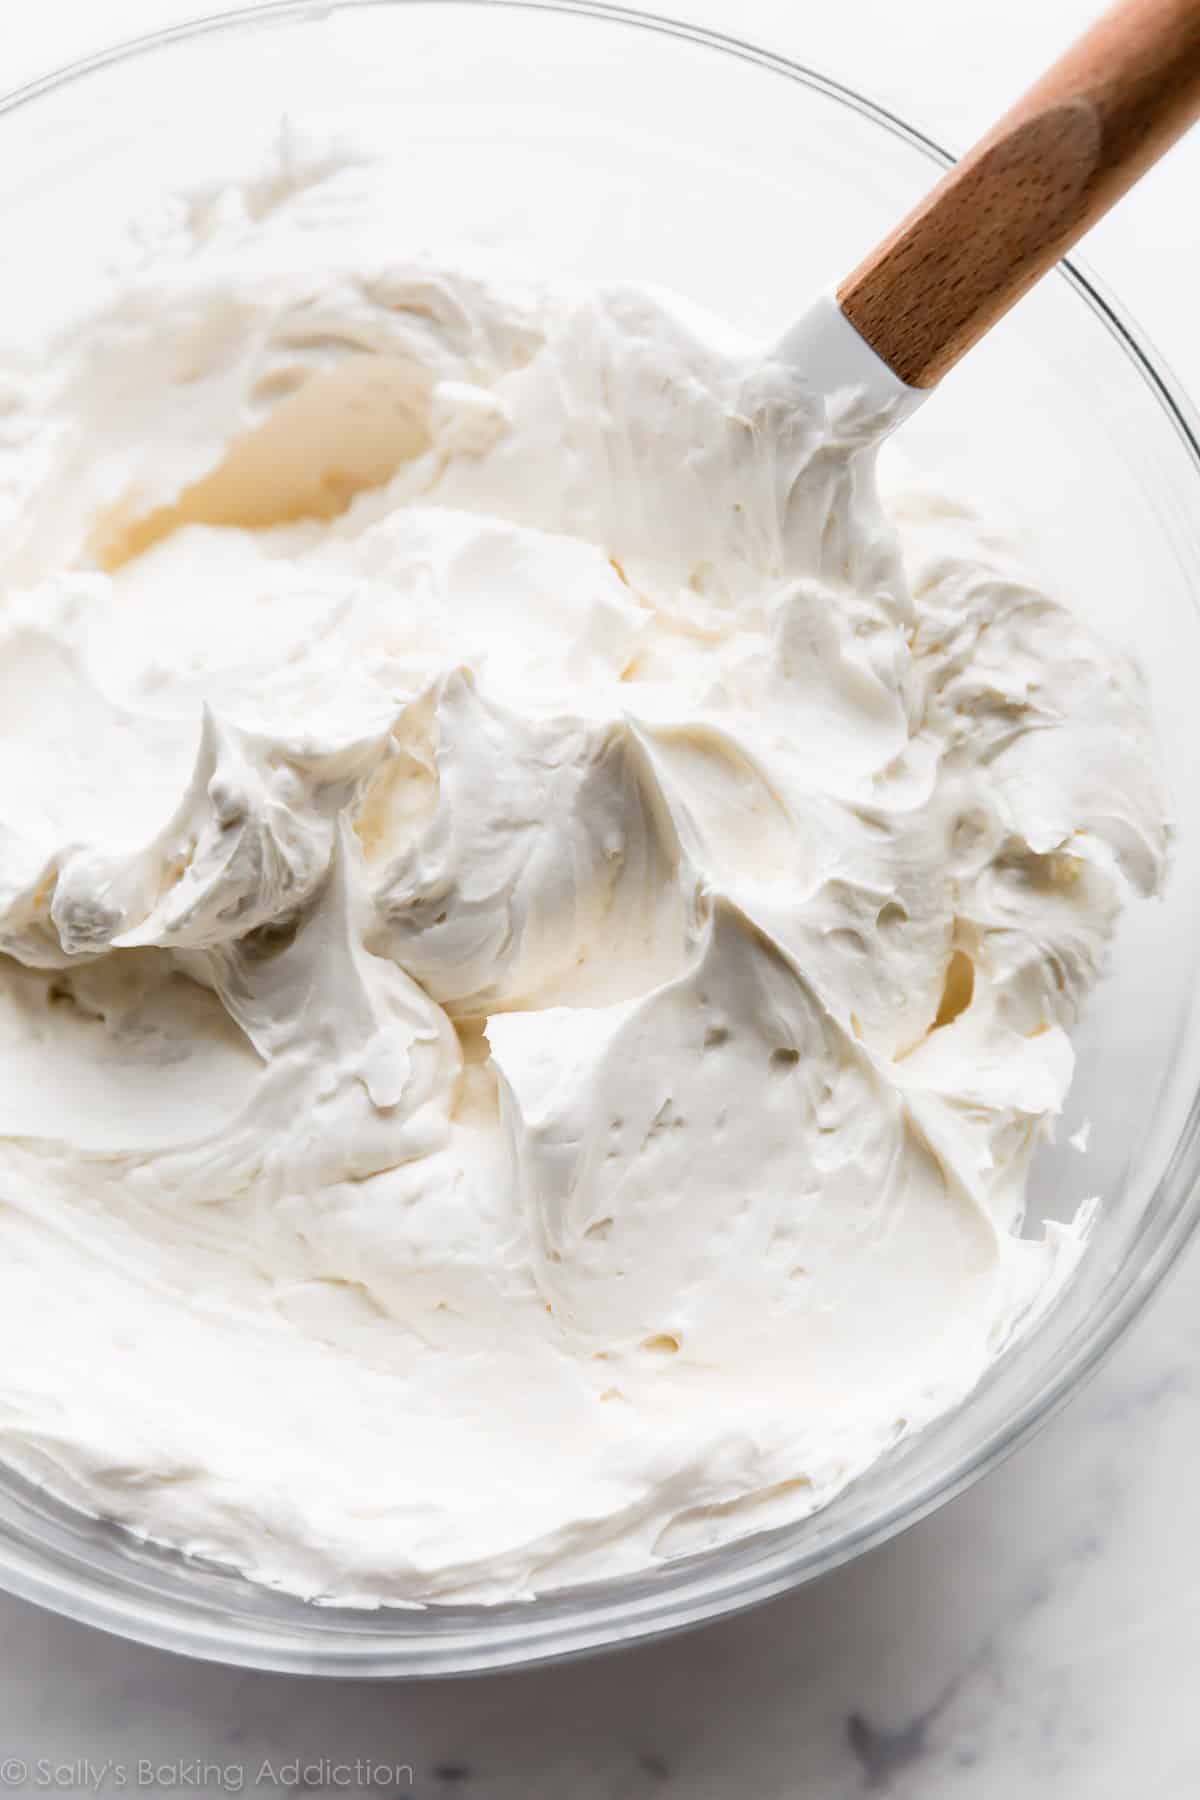
Add vanilla and salt, then you’re done. Buttercream is now deliciously creamy and smooth!
5 Helpful Tools
- Saucepan & heatproof bowl: Cook egg whites and sugar on indirect heat in a heatproof bowl set over a pan of simmering water. (I just use the metal mixing bowl that comes with a stand mixer.) This cooking method is essentially how we cook the eggs in French silk pie and make homemade marshmallow creme. If you own a double boiler, just use that.
- Whisk: Constantly whisking the egg whites and sugar as they gently cook is key.
- Electric Mixer: Beating the meringue into stiff peaks requires an electric mixer. I strongly recommend a stand mixer, but a handheld mixer can work. Give your arm a break every few minutes because the beating steps are tiresome. A handheld mixer will take longer to beat the meringue, too.
- Egg Separator: Though not required, it’s vastly helpful to have an egg separator to ensure no yolks make it into the mixing bowl. I generally recommend stocking your kitchen with an egg separator because they’re an inexpensive tool you can use for so many recipes like French macarons and chocolate soufflé.
- Instant Read Thermometer: Though also not required, it’s helpful to have an instant read thermometer (or a candy/oil thermometer) to determine the safe temperature of cooked egg whites, as well as the ideal temperature for the butter. Less mistakes this way.
Provided you aren’t allergic to any of these ingredients, yes. The eggs are cooked to 160°F (71°C), which is considered safe to eat for everyone including pregnant women and children. As always, use your best judgement and feel free to consult a Dr if you’re concerned.
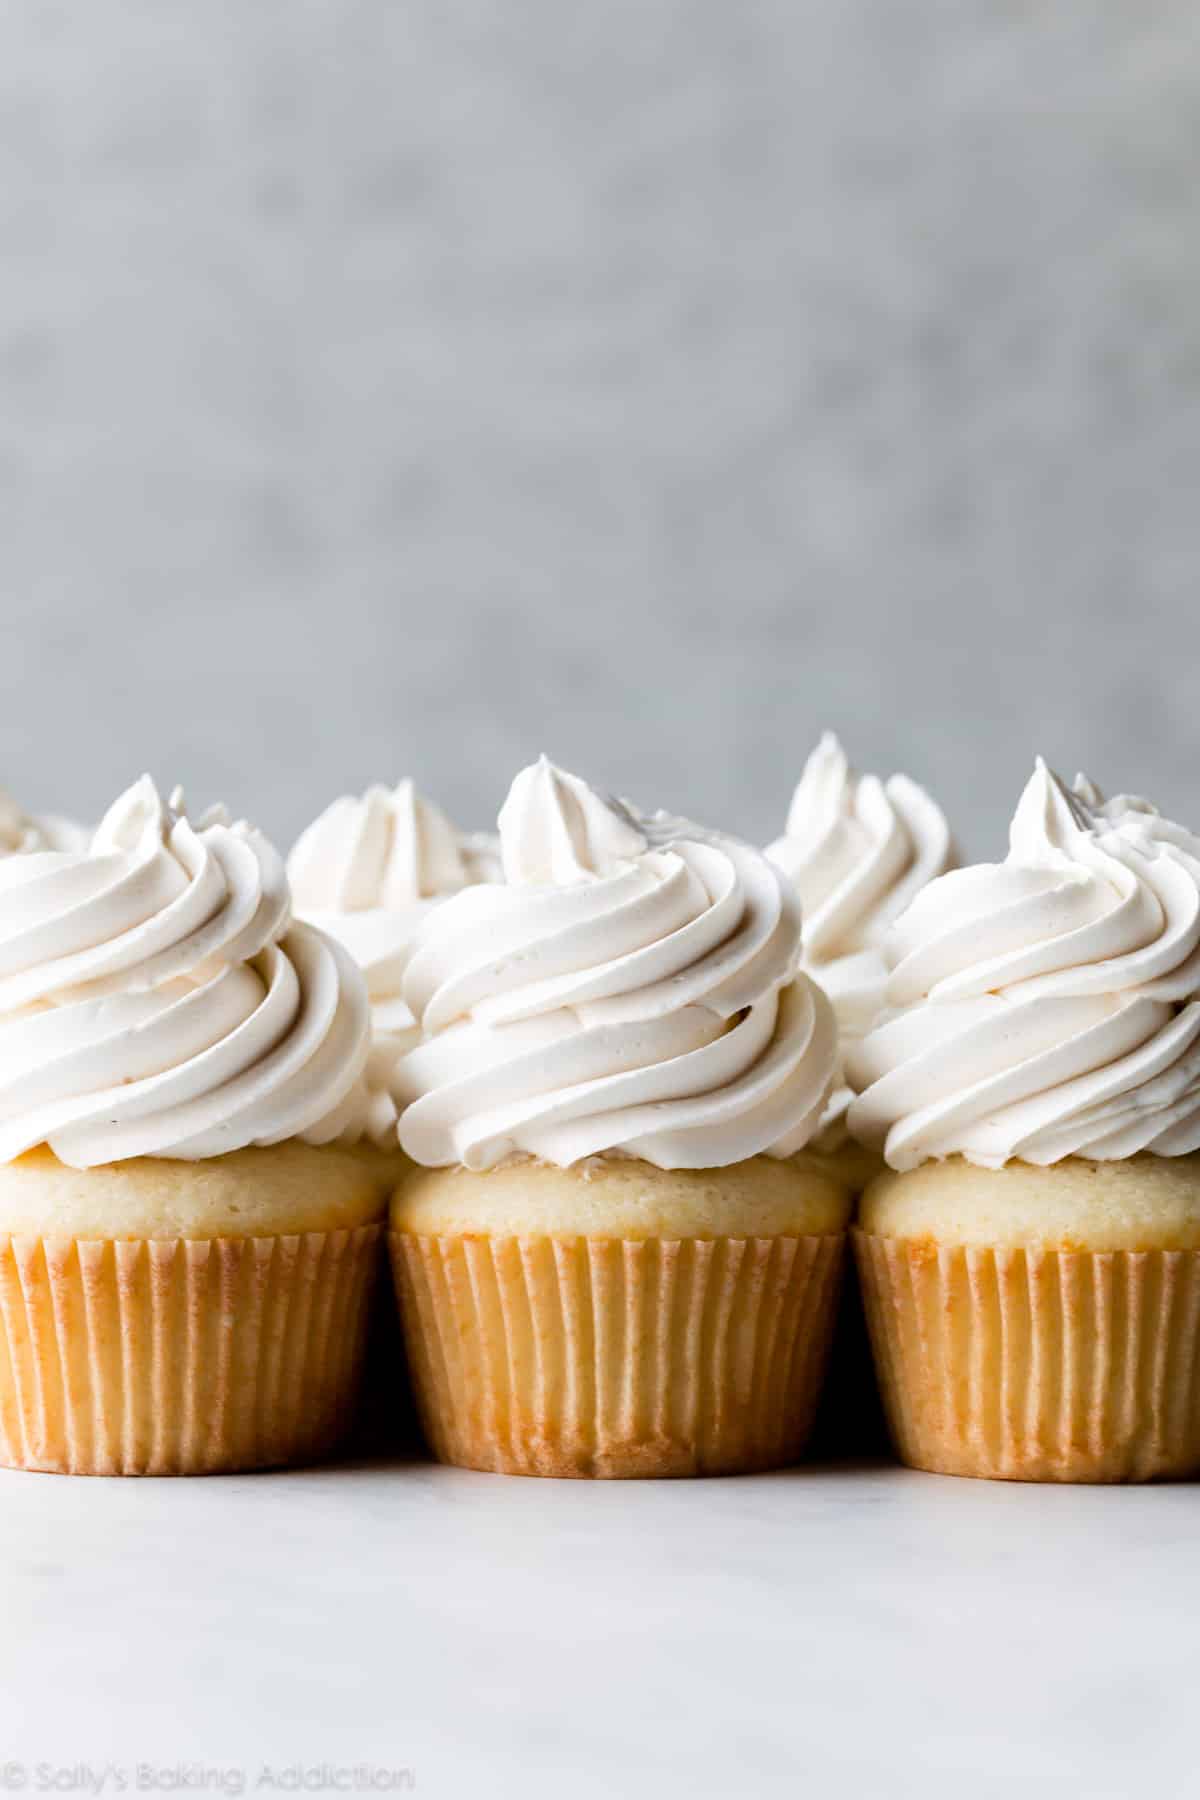
No, Swiss meringue buttercream does not crust or dry out like American buttercream can. That’s why SMBC is excellent for creating the smoothest frosting detail on cakes and perfectly piped (yet still fluffy tasting!) designs.
Yes, Swiss meringue buttercream is stable at room temperature. Though if eating on a particularly humid day, keep your frosted confections in the refrigerator as close to serving as you can. You can use SMBC under fondant-topped cakes and confections, too.
Yes and it’s best to tint SMBC with gel food coloring so you aren’t adding a lot of extra liquid. Beat food coloring into the frosting on low speed after you add the vanilla extract and salt.
Yes. Swiss meringue buttercream is great left covered at room temperature for 1-2 days, but after that, refrigerate it for up to 5 days or freeze up to 3 months. If freezing, store in an airtight container, then thaw it at room temperature on the counter. Once completely at room temperature, about 72°F (22°C), place into the bowl of your stand mixer fitted with a paddle attachment and beat for 2-3 minutes until creamy again. If it separates or curdles, see troubleshooting tips below.
Replace some (about 1 teaspoon) of vanilla extract with 1 teaspoon of another flavor extract such as lemon, coconut, orange, maple, or even 1 teaspoon of espresso powder. Taste, then add a touch more if desired. For potent extracts, like peppermint or almond, replace 1 teaspoon of the vanilla with just 1/2 teaspoon. For chocolate Swiss meringue buttercream, beat 8 ounces of pure melted and slightly cooled chocolate into the buttercream when you add the vanilla and salt. Make sure you’re using pure baking chocolate (the 4 ounce bars) like Baker’s or Ghirardelli brands found in the baking aisle.
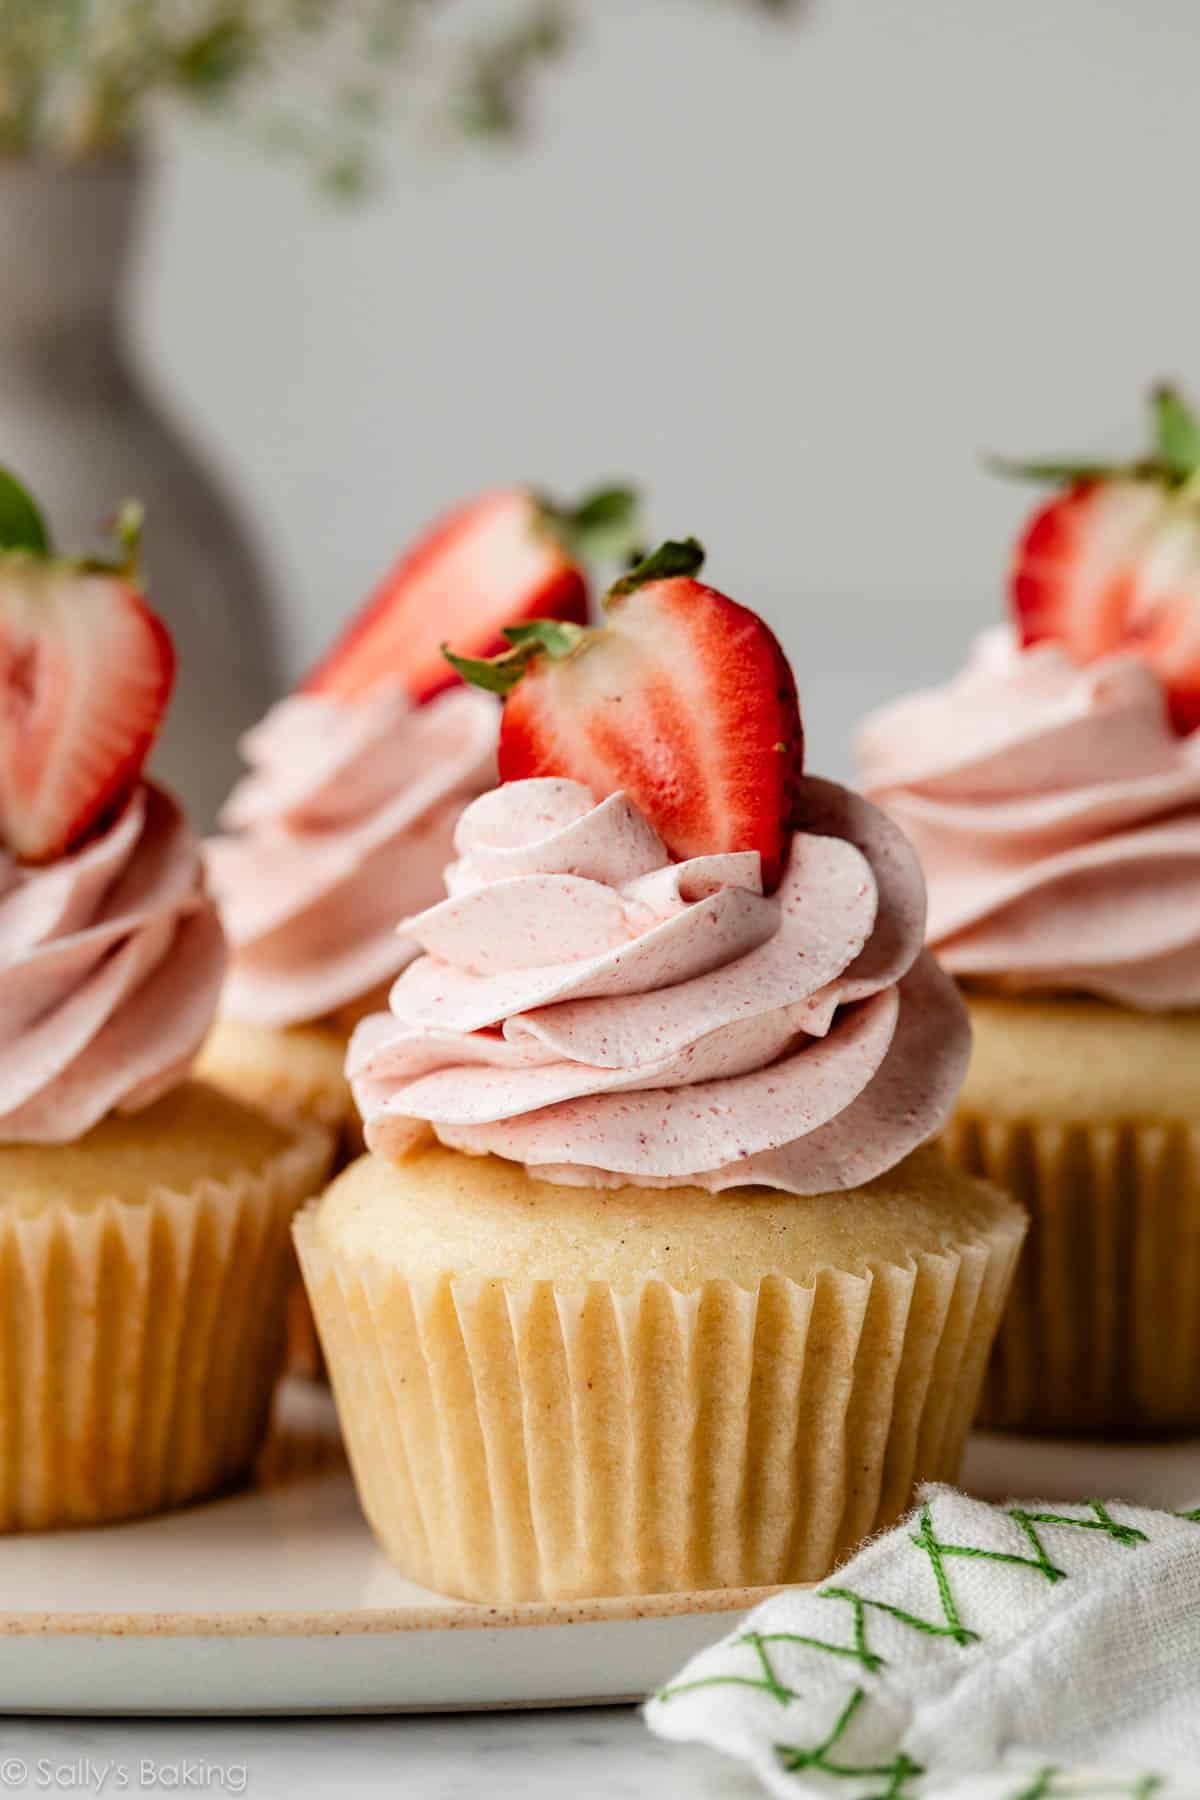
Yes! Using a food processor or blender, process 1 cup (about 25g) freeze-dried strawberries into a powdery crumb. You should have around 1/2 cup. If it’s not grinding down fine enough, you can sift it with a fine mesh sieve to rid larger seeds/pieces. Add the strawberry crumb powder when you add the vanilla.
Troubleshooting Swiss Meringue Buttercream
- Meringue Won’t Reach Stiff Peaks: Step 4 in the recipe below requires a long period of mixing the cooked egg whites and sugar together into stiff peaks. This mixture (the meringue) will never reach stiff peaks if there was a drop of egg yolk (fat) or grease in the mixture, mixing bowl, or on any tools you are using. Wipe down all of your tools with lemon juice or white vinegar, use an egg separator, and separate and add the egg whites one at a time to the mixing bowl. These are all instructions listed out in the recipe below. It’s also helpful to avoid making this on particularly humid days where there’s extra moisture in the air. If you did all of this and it’s still not reaching stiff peaks, the meringue could be too warm or it needs a break. See next.
- My Mixer Needs a Break: By all means, give it a break! Mixers can tire out while beating the cooked egg whites and sugar because this step requires a long period of mixing. If your mixer and its motor needs a break, it’s likely your meringue needs a break too. Stop what you’re doing, remove the whisk attachment (or beaters if you’re using a hand mixer), place the attachment/beaters in the bowl with the meringue, and refrigerate it all (covered or uncovered, doesn’t matter) for 20-30 minutes. This gives your mixer, as well as the meringue and mixing bowl, a chance to cool down. (Important: though it’s best to begin whipping the cooked egg/sugar while it’s still warm, it could simply need a cool break halfway through reaching stiff peaks.)
- Buttercream is Soupy/Too Thin: If your mixture has become too thin and soupy after you add the butter, your butter was likely too warm or the meringue was still too warm. Have no fear—this is fixable by bringing down its temperature. Place the entire bowl in the refrigerator (covered or uncovered, doesn’t matter) for 20 minutes to cool down, then return it to the mixer and beat on medium-high speed until thickened. Any longer than this will solidify the butter, so only refrigerate in 20 minute spurts. If it’s still soupy, place back in the refrigerator for longer before re-whipping again.
- Buttercream Only Tastes like Butter: The main ingredient, besides egg whites, is butter. Make sure you’re using unsalted butter because salted butter leaves your frosting with an overwhelmingly salty/buttery flavor. Use pure vanilla extract to flavor it and add a pinch of regular table salt. Other flavored extracts work too—see the Ingredients section above.
- Buttercream Solidified in the Refrigerator: There’s a lot of butter in this frosting, so if it’s stored in a bowl in the refrigerator, it will solidify into one large mass just like a bowl of cookie dough. Two ways to fix this: sit it on the counter and bring it to room temperature. Once completely at room temperature, about 72°F (22°C), place into the bowl of your stand mixer fitted with a paddle attachment and beat for 2-3 minutes until creamy again. If you don’t have time to wait for it to come to room temperature or if your home isn’t warm enough, follow the same instructions as #3 in this list (Buttercream is Curdled/Too Thick). Placing over gentle heat will melt the edges and when whipped, the melty edges and solid center will come together into 1 smooth frosting.
- Buttercream is Curdled/Too Thick: If your meringue has separated, curdled, or is too thick at any point after you mix in all of the butter, just keep beating because it will eventually come together. If it’s only getting thicker and chunkier, there’s a quick fix—and it’s my favorite. Place the mixture in your heat-proof bowl back over a pot of 2 inches of simmering water. Without stirring, let the edges of the meringue warm up and become liquid (the center of the meringue will still be solid), about 1-2 minutes. Remove from heat and return to the mixer. Beat meringue on low speed for 30 seconds, then switch to medium-high speed and beat until smooth, about 2 minutes. I have to do this 75% of the time, but I LOVE it because partially melting the SMBC then re-whipping actually creates a creamier frosting.
Pictured below: Curdled buttercream. See above.
I know it seems complicated, but as long as you remain patient, read through this post, watch the video, prepare yourself by reviewing the recipe before beginning, you will be rewarded with the most luscious, not-overly-sweet frosting ever.
How to Use It:
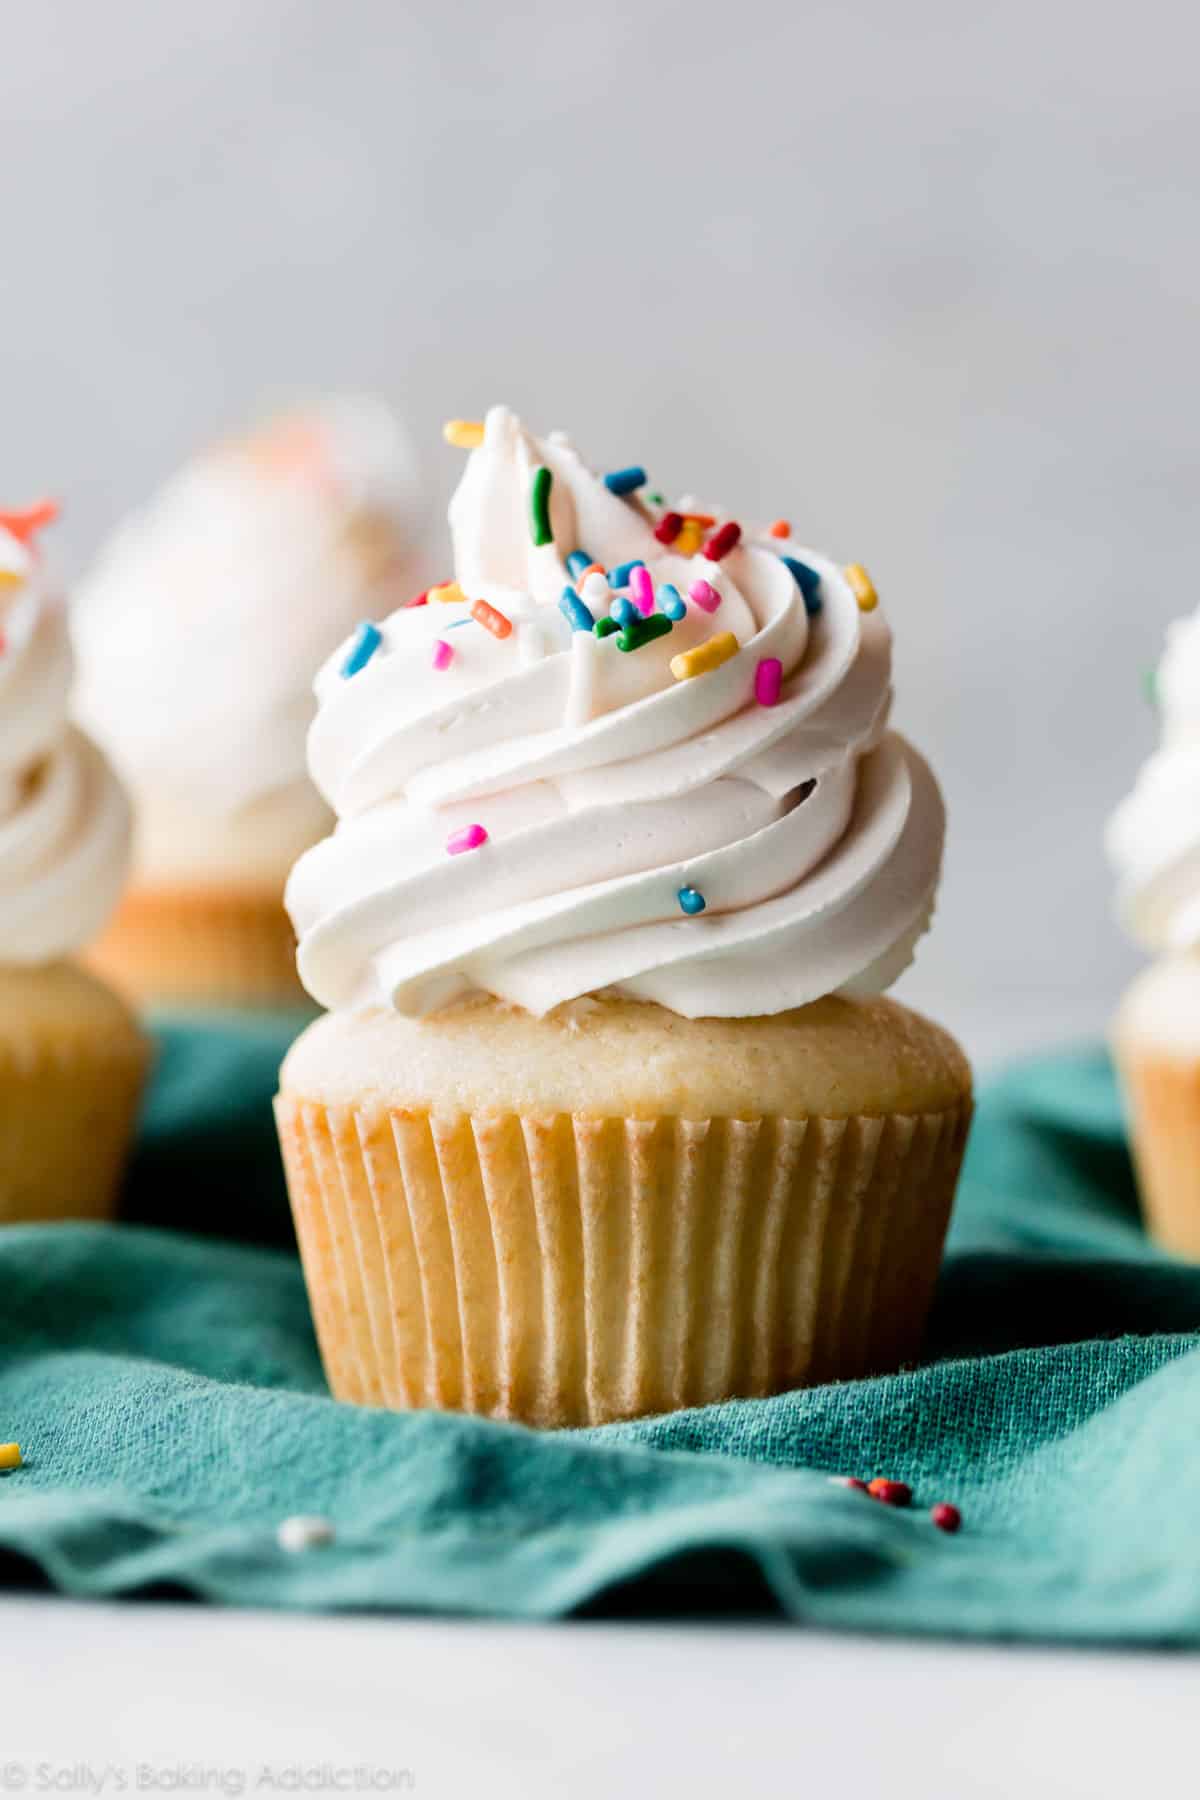
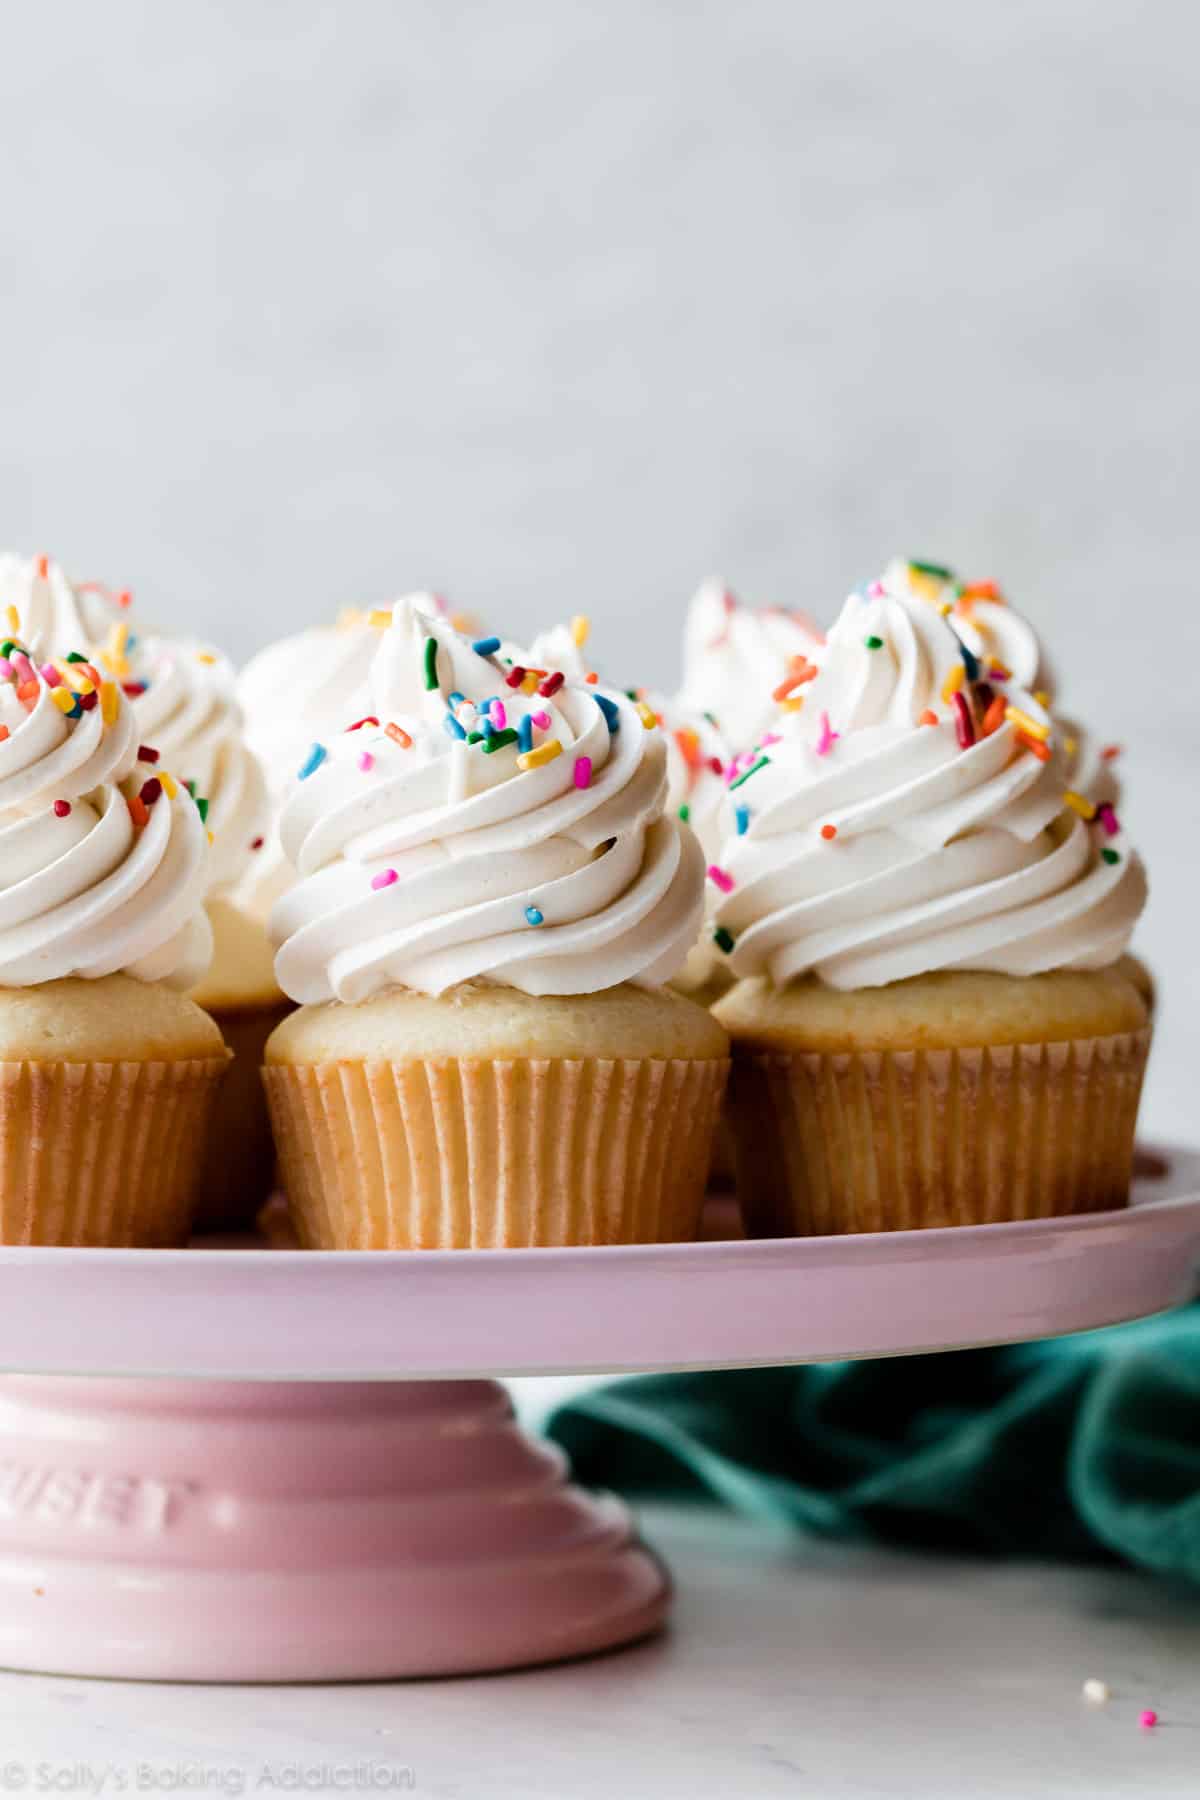
- Pipe it. My favorite piping tips and a video on how to use piping tips will be helpful to review.
- Pictured: I used Ateco 849 and piped a tall swirl onto my vanilla cupcakes
- Try it on Yellow Cupcakes, Chocolate Cupcakes, or any of my cupcake recipes
- Use it as the frosting for White Cake, Yellow Cake, Carrot Cake, Vanilla Sheet Cake, or Chocolate Cake
- Pair it with citrus flavors on top of lemon blueberry cupcakes or citrus cake.
- As a filling for macarons or whoopie pies
- Instead of buttercream to decorate Halloween cupcakes.
- See “Yield” recipe note below for more ideas.

Swiss Meringue Buttercream
- Prep Time: 25 minutes
- Cook Time: 5 minutes
- Total Time: 30 minutes
- Yield: 5 cups
- Category: Frosting
- Method: Whipping
- Cuisine: European
Description
This is vanilla Swiss Meringue Buttercream perfection. It’s the ideal balance of sweet and creamy, without being as cloyingly sugary as American buttercream. (This is a far cry from how sweet that is!) Thick, sturdy, and perfectly pipe-able. This in-depth recipe sets you up for success on your 1st try.
Ingredients
- 6 large egg whites (approximately 180g)
- 2 cups (400g) granulated sugar
- 1 and 1/2 cups (340g) unsalted butter, softened but still cool and cut into Tbsp size pieces (*see note*)
- 2 teaspoons pure vanilla extract
- 1/8 teaspoon salt
Instructions
- Watch the video tutorial above, review the troubleshooting tips, and read the recipe in full before beginning. Make sure all the tools you are using are completely cleaned, dried, and grease-free. A quick wipe with a little lemon juice or white vinegar is very helpful.
- Separate the eggs: If you haven’t done so yet, separate the eggs first. Separate 1 egg white in a small bowl, then place the egg white in your heatproof mixing bowl. Repeat with the remaining egg whites. This way, if a yolk breaks in one of them, you don’t waste the whole batch.
- Whisk sugar into the egg whites, then set the bowl over a saucepan filled with just two inches of simmering water over medium heat. Do not let the bottom of the egg whites bowl touch the water. Whisk the whites and sugar constantly until sugar is dissolved and mixture has thinned out, about 4 minutes. The mixture will be thick and tacky at first, then thin out and be frothy white on top. To test that it’s ready, you can use your finger or an instant read thermometer. Lightly and quickly dip your finger (it’s very hot, be careful) and rub the mixture between your thumb and finger. You shouldn’t feel any sugar granules. If using a thermometer, the temperature should read 160°F (71°C).
- No need to let it cool down to start this next step—it’s important to begin mixing while it is still warm. Transfer mixture to the bowl of a stand mixer fitted with a whisk attachment (if you aren’t already using the metal bowl that comes with it). You can use a hand mixer instead, but this step takes awhile and your arm tires quickly. On medium-high speed, beat the mixture until stiff glossy peaks form and the meringue is no longer warm to the touch, at least 10-15 minutes. On particularly humid days, this has taken me up to 17-18 minutes. If it’s still not reaching stiff peaks, stop the mixer, place the bowl—uncovered—in the refrigerator for 10 minutes, then return to the mixer and continue beating until stiff peaks form. (This has always worked for me when it’s taking forever to reach stiff peaks.)
- If the bowl and meringue still feel warm, wait until both cool to room temperature (around 70°F (21°C)) before adding the butter in the next step. Feel free to place it in the refrigerator. A warm bowl and meringue will melt the butter.
- Switch the stand mixer to the paddle attachment. On medium-high speed, add the butter 1 Tablespoon at a time. Wait for the butter to fully mix in before adding the next Tablespoon. After all the butter has been added, turn the mixer down to medium speed and fully beat in the vanilla and salt, about 30 seconds.
- Your Swiss meringue buttercream should be thick, creamy, and silky smooth and is ready to use on any cake, cupcake, or other confection.
- Too Thick or Too Thin: If your meringue has separated, curdled, or is too thick at any point after you mix in all of the butter, place the mixture in your heat-proof bowl back over a pot of 2 inches of simmering water. Without stirring, let the edges of the meringue warm up and become liquid (the center of the meringue will still be solid), about 1-2 minutes. Remove from heat and return to the mixer. Beat meringue on low speed for 30 seconds, then switch to medium-high speed and beat until smooth, about 2 minutes. Works every time. If your mixture has become too thin and soupy after you add the butter, place the entire bowl in the refrigerator (covered or uncovered, doesn’t matter) for 20 minutes to cool down, then return it to the mixer and beat on medium-high speed until thickened. Any longer than this will solidify the butter, so only refrigerate in 20 minute spurts. If it’s still soupy, place back in the refrigerator for longer before re-whipping again. More troubleshooting tips in the post above.
Notes
- Make-Ahead, Storing, & Freezing Instructions: Swiss meringue buttercream is great left covered at room temperature for 1-2 days, but after that, refrigerate it for up to 5 days or freeze up to 3 months. If freezing, store in an airtight container, then thaw it at room temperature on the counter. Once completely at room temperature, about 72°F (22°C), place into the bowl of your stand mixer fitted with a paddle attachment and beat for 2-3 minutes until creamy again. If it separates or curdles, see step 8.
- Special Tools (affiliate links): Electric Mixer (Handheld or Stand) | Instant Read Thermometer | Egg White Separator | Whisk | Double Boiler
- Yield: This recipe yields about 5 cups of frosting, which is enough to fill and frost a two layer 9-inch cake with a generous amount, to fill and frost a three layer 9-inch cake with just enough frosting, to lightly frost 2 dozen cupcakes, to heavily frost 1 dozen cupcakes (I had just enough for the huge swirls on 12 of the pictured cupcakes), or a 9×13 inch sheet cake (with some frosting leftover).
- Egg Whites: For best success, I recommend using fresh eggs instead of carton egg whites. Here are all my recipes using leftover egg yolks. Eggs separate much easier when they’re cold. Separate the egg whites one at a time and place the egg white into a large heat-proof mixing bowl (or a double boiler or the metal mixing bowl from your stand mixer) before separating the next. This way, if a yolk breaks in one of them, you don’t waste the whole batch.
- There’s almost always a way to fix “ruined” Swiss Meringue Buttercream and it usually has to do with temperature. See step 8 as well as my troubleshooting tips in the post above.
- Butter: This buttercream will thin out and become liquid-y if the butter is too warm. Make sure you’re using butter that is slightly cooler than proper room temperature butter. Remove butter from the refrigerator and set it out for just 30-40 minutes before you need to add it to the meringue. Sometimes meringue takes longer than usual or it needs a break (see Troubleshooting above) and in that case, you should place the butter back into the refrigerator for a few minutes so it doesn’t get too warm sitting out. The butter should be cool to the touch. For accuracy, I recommend using an instant read thermometer. Butter should be 60°F (16°C).
- Flavors & Colors: For flavor ideas including chocolate, see my Can I add flavors? FAQ above. For coloring, it’s best to tint this frosting with gel food coloring so you aren’t adding a lot of extra liquid. Beat food coloring into the frosting on low speed after you add the vanilla extract and salt.
- Half or Larger Batch: You can halve this recipe. The egg white/sugar mixture won’t take as long to cook and the meringue won’t take as long to reach stiff peaks. I do not recommend making larger batches at a time because it will quickly overcrowd and wear out your mixer. If you need more batches, make them all separately.
Adapted from Martha Stewart. I found it needed less butter, 1 more egg white, and more sugar in order to stabilize properly.


Reader Comments and Reviews
I have been mixing this for two hours now and it is still very glossy and droopy it just won’t stiffen up. How can I fix this?
Hi Diana, did you try refrigerating the whole bowl? That’s what we recommend – see the Troubleshooting section of the post above for details.
Best frosting ever and not so sweet!
would this recipe be enough to fill and crumb coat and cover an 8″ 4 tier cake?
Hi Julie, This recipe yields about 5 cups of frosting, which is enough to fill and frost a two layer 9-inch cake with a generous amount, to fill and frost a three layer 9-inch cake with just enough frosting. So, depending on how heavily you’d like to frost and decorate your cake, you’ll likely want to 1.5x or 2x the recipe.
Hi, Sally. I am trying to figure out how much frosting i will need to frost a half sheet cake that will be double layered. I was thinking to double or even triple this recipe but wanted to ask just incase you have some feedback, tips or recommendation you could provide. I appreciate you.
Hi Kristel! This recipe yields about 5 cups of frosting, which we found to be enough to frost a 9×13 inch sheet cake (with some frosting leftover). Depending on how thick you want the frosting, we would recommend making at least two batches, probably three for a cake that size.
This recipe and the instructions helped me get the batch of gorgeous silky smooth buttercream as promised… it is going to be such fun to use it!
Amazing. Have used this recipe 3 times for wedding cakes. So easy to follow and tastes delicious. Really liked the troubleshooting if needed. Thanks
Great directions, i found it very easy to make. But too much butter. I found it greasy. Next time I’ll try half the butter and see of that takes that slick finish in your mouth off.
With all due respect, I think this recipe is incorrect. You need nearly twice the amount of butter as what is given in this recipe.
Hi Karen, The written recipe is the ratio that we have had the most success with. If you have a different recipe that works for you, you should keep using it!
This recipe is superb, and the directions . I use whites from duck eggs, so I weigh them, and they really amp up the creaminess of the icing. And thanks for sharing how to save split icing! I was too impatient today, and needed to reheat and whip. It didn’t seem to be working, but at the one minute mark it magically came together! I do highly recommend using an instant read thermometer – definitely makes everything easier to execute perfectly.
This recipe tasted phenomenal, but the consistency was way too thin. I put it in the fridge for 20 minutes. Nothing happened. I even put it in the fridge for longer, and still, it was way too thin. I live in a humid house because of the country I live in, but I still put it in the fridge for a really long time so I don’t know what happened. Will be trying again though, hopefully on a less humid day.
I followed as exactly directed and it souped up then I put in fridge, then whipped again-nothing put it back in fridge and it curdled
Can I double this recipe in the same batch?
Hi Thy, we do not recommend making larger batches at a time because it will quickly overcrowd and wear out your mixer. If you need more batches, make them all separately.
Thank you!
I tried this recipe twice I do not know what I’m doing wrong even bought a thermometer for the 2nd try and still no luck, 48oz of butter to waste, but it’s okay I know it’s definitely something I’m doing wrong just don’t know what! 🙁
I am exactly the same followed the recipe exactly and it was curdled did the trouble shooting as stated and is ended up like soup so followed the trouble shooting for that leave in fridge for 20 mins rewhipped and it’s just curdled again after wasting so much money and ingredients on this
Hi, would it be possible to turn this into a chocolate meringue frosting, could i maybe add a little cocao powder
Hi Hadley, we’ve only tested a chocolate version of this using melted and cooled chocolate. We’re sure you can use cocoa powder, but we haven’t tested the perfect amount. Start by beating in 1 Tbsp at a time until you are satisfied with the flavor. Let us know how it turns out for you!
I would like to give it a strawberry or raspberry jam flavoring to go on chocolate cupcakes. You’ve said not to add too much additional liquid in the recipe. How much would you recommended adding? Thank you!
Hi Fleur, for a fruit-flavored buttercream, you can use any freeze dried fruit ground up into a 1/2 cup of powder. Add it in with the vanilla extract and salt. Hope this helps!
I followed the directions to a T. Put it in the fridge to use today since it was pretty humid out. Let it sit out for a bit then tried tore beat it. It has lost it;s OOMPH.. soup. Refridegerated again… not the right consitency. Is there any saving it?
Hi Dianne, this frosting can be particularly tricky on humid days. On particularly humid days, it will take longer to whip into stiff peaks. If it’s still not reaching stiff peaks, stop the mixer, place the bowl in the refrigerator for 10 minutes, then return to the mixer and continue beating until stiff peaks form.
Hi, how long does it last in fridge if it has been frozen before? Thank you!
We would refrigerate up to 5 days.
Thank you! Would it be okay to leave out icing from freezer and his evening (and leave in the fridge) that will be eaten on Sunday?
Has anyone tried this recipe with a dairy free butter like Country Crock sticks?
I just made this with country crock olive oil butter and it came out perfect. I also mixed on low for about 10 minutes to make it super smooth.
Could I use 5 extra large egg whites instead of six?
Hi Kristin! We would weigh the egg whites, if you have a kitchen scale, to make sure they’re the correct amount!
I’ve made this recipe a dozen times now and it’s the best.
Today I made the chocolate version in your notes above, and I used “Ghirardelli Mini Semi Sweet Baking Chips”. It turned out a bit liquidy even at 73°F and whisking in stand mixer quite a while, definitely not a consistency I can do piping with. Is this the difference in a bar of baking chocolate vs. baking chips? I didn’t need it right away so I put it in my freezer- can I save this with some cocoa powder or something later to reduce the liquidyness? I don’t think it was a curdled problem either. Thanks!
It may be the difference between a bar and using the chips. If needed to thicken after thawing, I’m sure beating in some unsweetened cocoa powder will help.
Excellent detailed explanation on how to do it. Followed the directions exactly and it turned out perfect!
I made this for my daughters birthday cake last weekend and it is amazing! I had never made Swiss meringue buttercream before but figured I would give it a go since she likes whipped icing and I prefer American buttercream and she wont eat a whole cake by herself. I couldn’t quite get my egg whites to form stiff peaks, but they were close so I called it and had to move on due to limited time left to decorate. I live in a very hot, very humid environment and the day I made it was exceptionally humid, which I believe may have hindered the stiff peak formation. Even with that little glitch it still turned out perfect and absolutely delicious. I dyed it black with two whole black gel dyes, and was still able to pipe decorate it and it hold its shape at room temperature for 2 days before I decided to stick it in the fridge. I believe this is my new favorite icing recipe! Thank you SO much!
So happy to read this, Misty!
What if the butter didn’t incorporate properly and is a but lumpy?
Hi Jenn, If your meringue has separated, curdled, or is too thick at any point after you mix in all of the butter, just keep beating because it will eventually come together. If it’s only getting thicker and chunkier, there’s a quick fix—and it’s our favorite: Place the mixture in your heat-proof bowl back over a pot of 2 inches of simmering water. Without stirring, let the edges of the meringue warm up and become liquid (the center of the meringue will still be solid), about 1-2 minutes. Remove from heat and return to the mixer. Beat meringue on low speed for 30 seconds, then switch to medium-high speed and beat until smooth, about 2 minutes.
Hi! How much swiss meringue buttercream is needed for a crumb coat, filling and frosting for a 6 inch 3 layer cake? When you say frosting, does that also include a crumb coat? Thanks!
Hi Vaishali, This recipe yields about 5 cups of frosting, which should be plenty to fill, crumb coat, and frost a 3 layer, 6 inch cake. Enjoy!
Hello, can softened and whipped, cream cheese be added to this recipe?
Hi Julie, we’d recommend this whipped frosting recipe that includes cream cheese instead!
I made this twice and I believe there is a possible mistake in the instructions. If one continues to whip the meringue until cool (21 degrees c) one will overbeat the meringue most likely and end up with a gloopy overwhipped meringue. I believe the instructions should have been whip until stiff peaks and if not yet cool, place in refrigirator until 21 degrees c. Secondly I don’t understand how one will get a smooth emulsion if the butter is 16 C and the temperature of the meringue is 21 C.
I followed the recipe just as written and it’s perfect. I did turn my mixer to low until cooled and the meringue wasn’t over beaten in the slightest. The cold butter does cause a curdling stage but this is normal and will fully come together. The recipe works wonderfully.
This is a great recipe! However, it came out too thin despite my perfect stiff peaks. I followed the tip in the instructions by putting it in refrigerator for 20 minutes and beating again in the mixer. It worked! The buttercream returned to the correct consistency within minutes.
I want to frost a cake with this icing and decorate it with palette knife flowers. Here’s my issue: I need to make it two days ahead of time. I can keep it cool, or even cold, if necessary. Should the icing on the decorated cake hold up for 2-2 1/2 days?
Hi Jess, yes, cakes decorated with this frosting can be refrigerated for up to 5 days.
This is seriously the best frosting I’ve ever made! The Swiss meringue adds so much to the buttercream! I only want to do that for all my cakes from now on! Thank you Sally for creating this content to help us moms make amazing cakes for or kids!
Can you use pasteurized egg whites (from a carton) for this recipe?
Hi Susan, For the best results we recommend using fresh eggs instead of carton egg whites.
I would agree that fresh egg whites are typically best, however I have been making this recipe for 3 years now-I only used cartoned egg whites and have never had a problem! 🙂