

Red velvet cake is much more than vanilla cake tinted red. This recipe produces the best red velvet cake with superior buttery, vanilla, and cocoa flavors, as well as a delicious tang from buttermilk. My trick is to whip the egg whites, which guarantees a smooth velvet crumb.
This is my forever favorite red velvet cake recipe. I published it on my blog a few years ago and decided it’s time for clearer recipe instructions and a video tutorial. Many of you love this recipe too, so let’s roll up our sleeves and rev up our mixers!
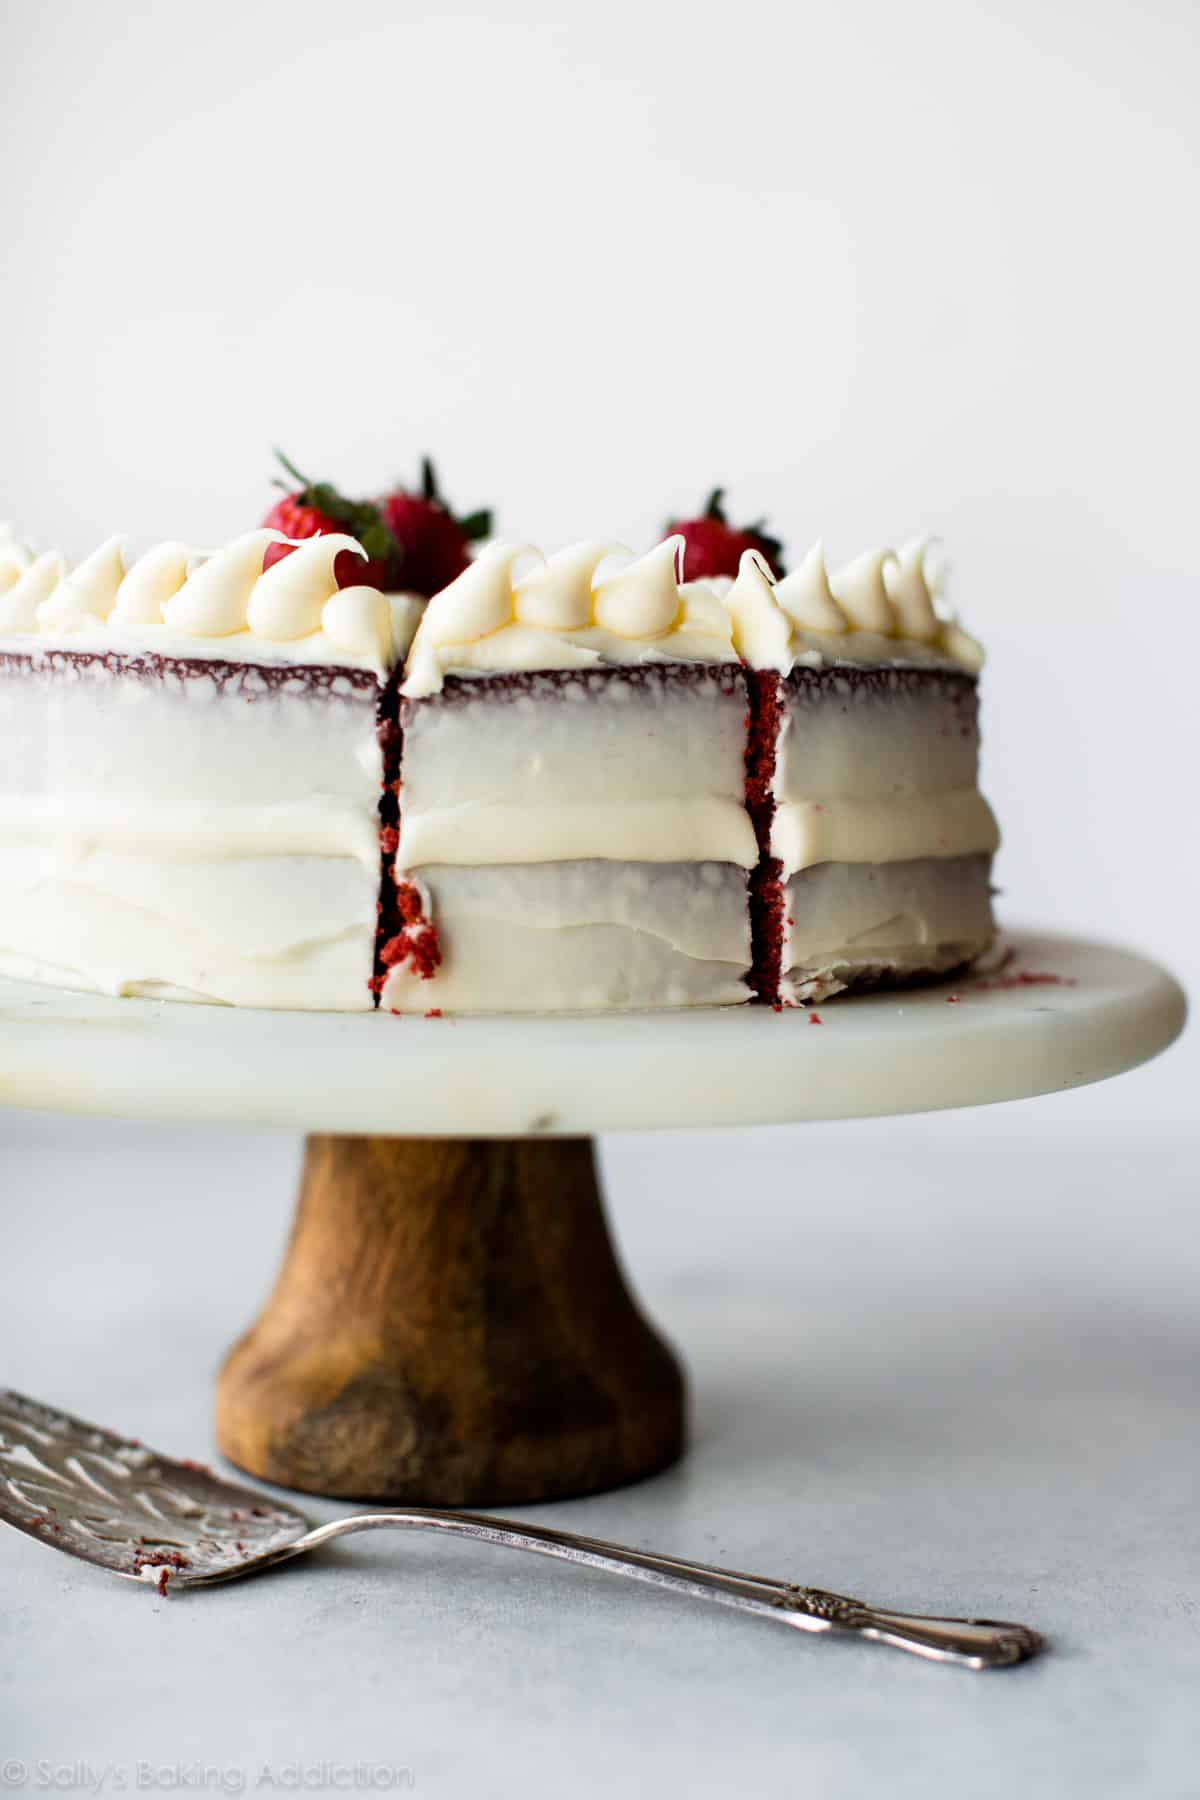
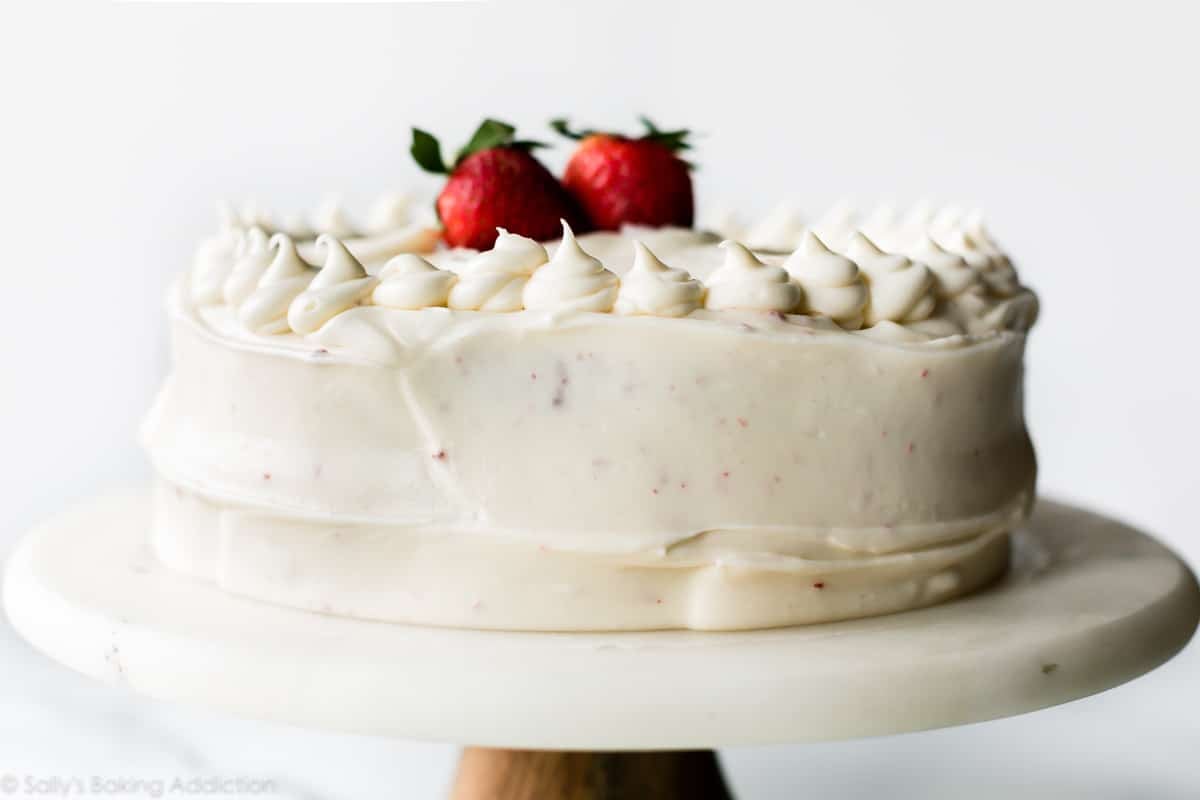
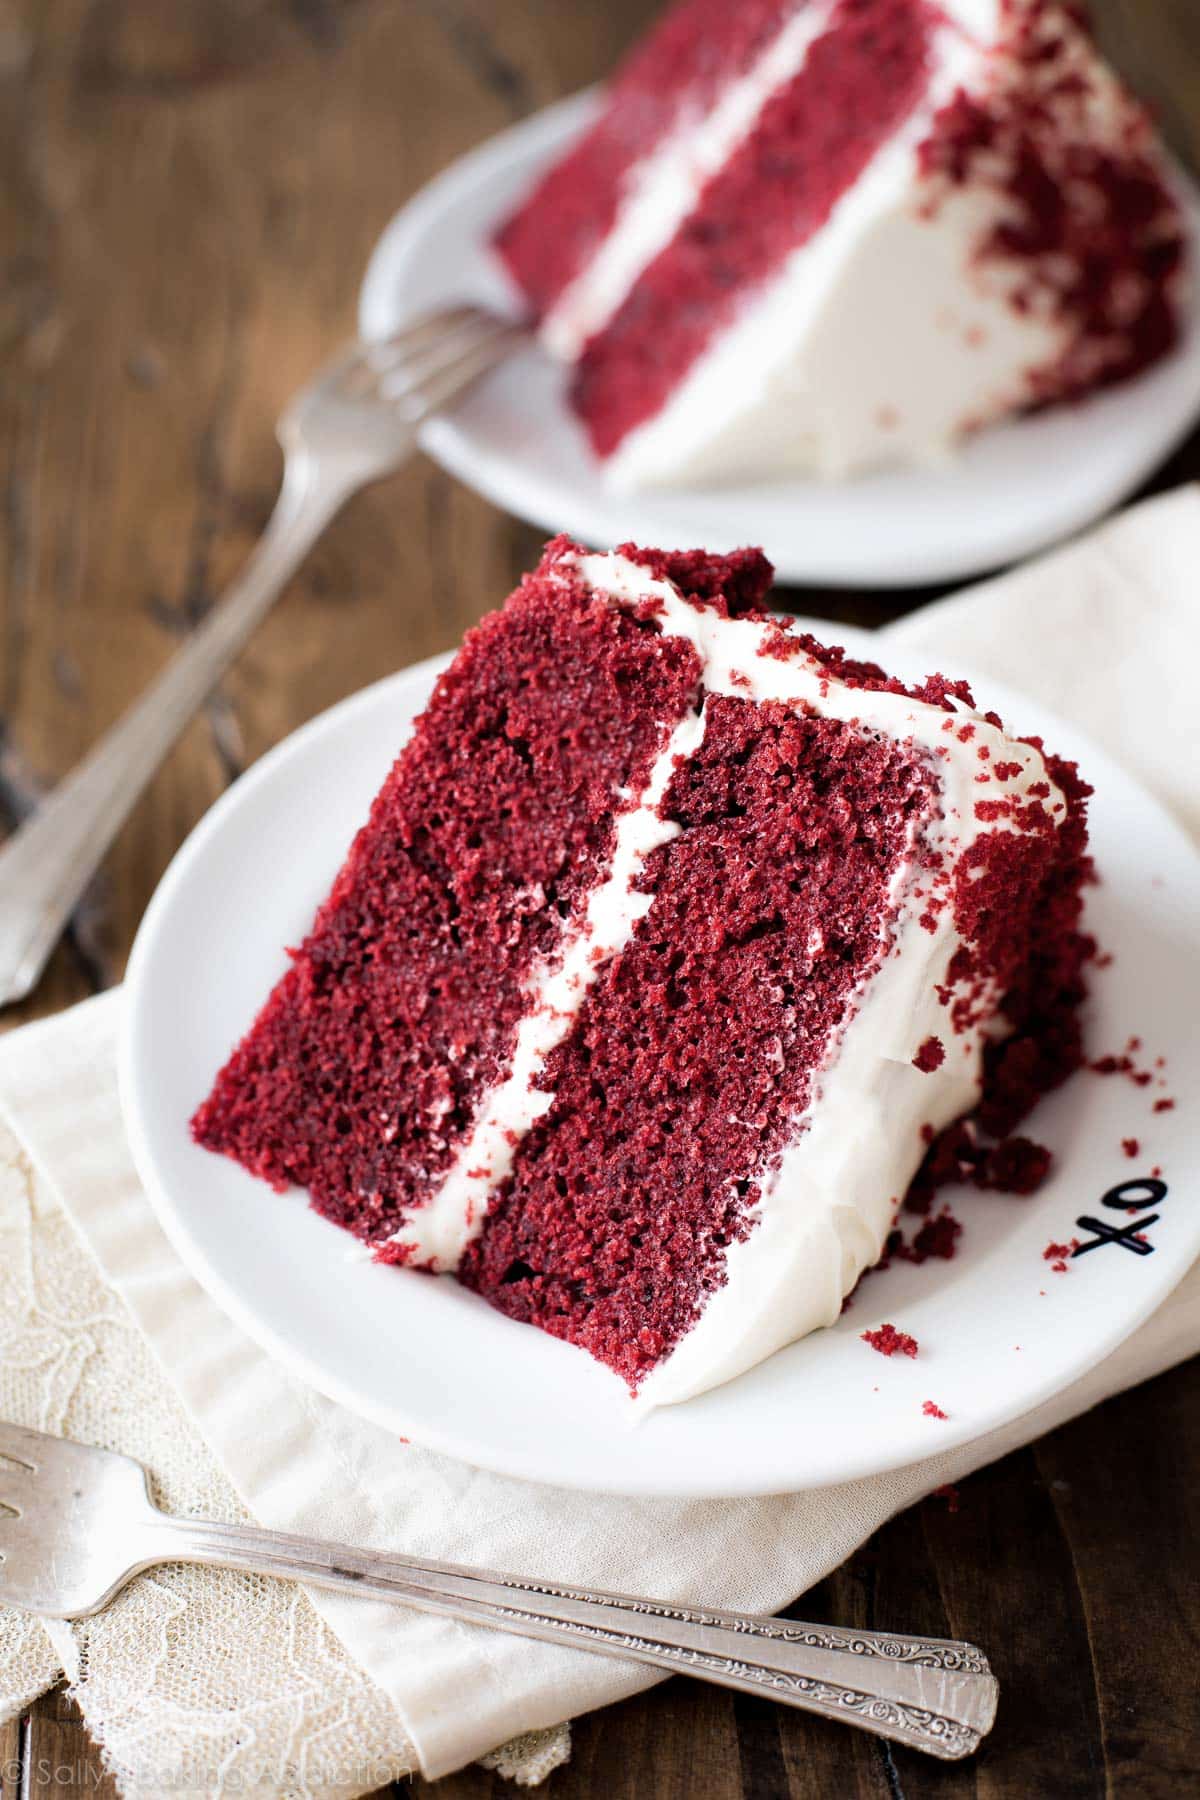
Red velvet cake is the queen of all layer cakes. The “I can’t quite put my finger on the flavor” cake. It’s the sweet marriage of buttermilk and vanilla with a little cocoa for good measure. She’s tall, dramatic, and completely covered in silky cream cheese frosting. This is my best red velvet cake.
What Does Red Velvet Cake Taste Like?
I used to be unsure about red velvet. I don’t really trust a cake that has a mystery flavor. What is red velvet? Is it more like vanilla cake, chocolate cake, or just a butter cake tinted red? From red velvet brownies and red velvet cookies and red velvet cupcakes, I’ve had a lot of fun getting to know red velvet. Red velvet is:
- Mild cocoa flavor
- Tangy buttermilk
- Sweet vanilla
- Very buttery
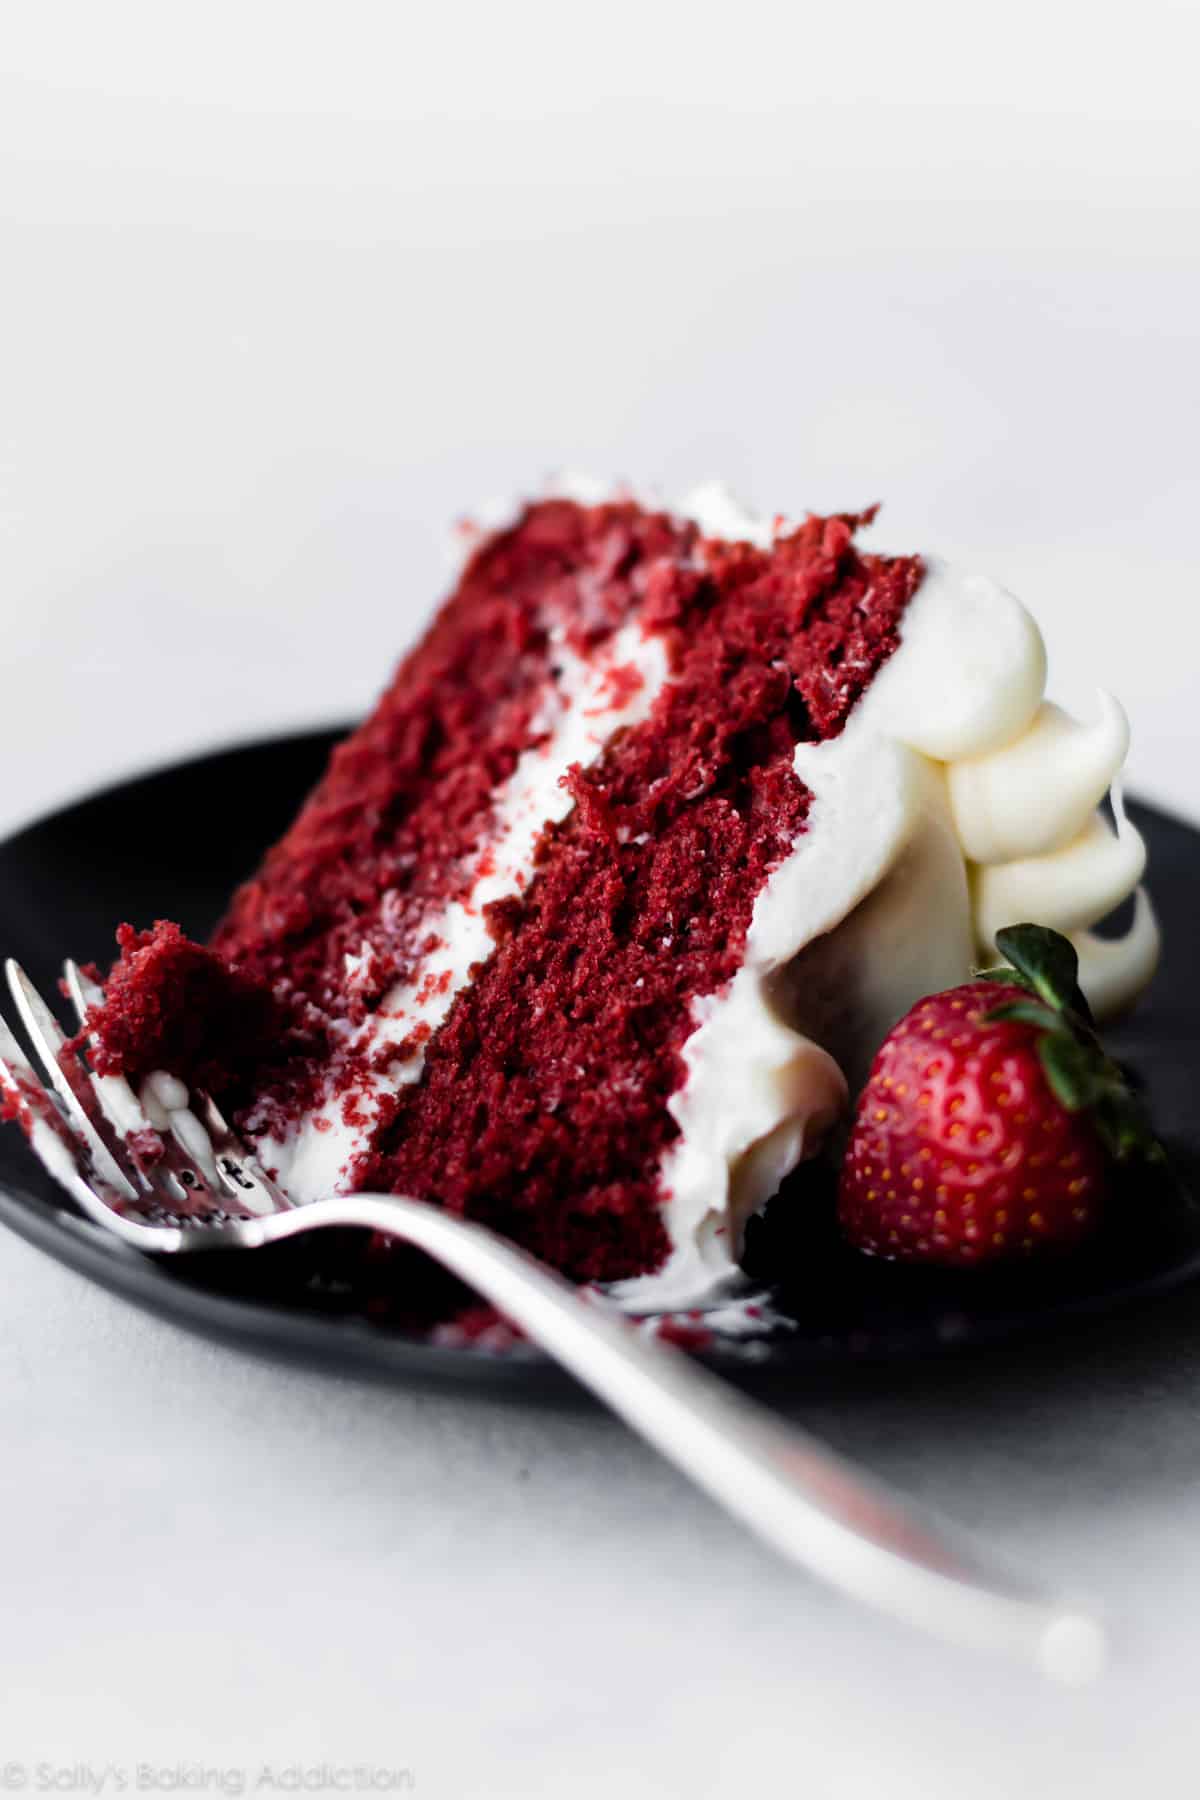
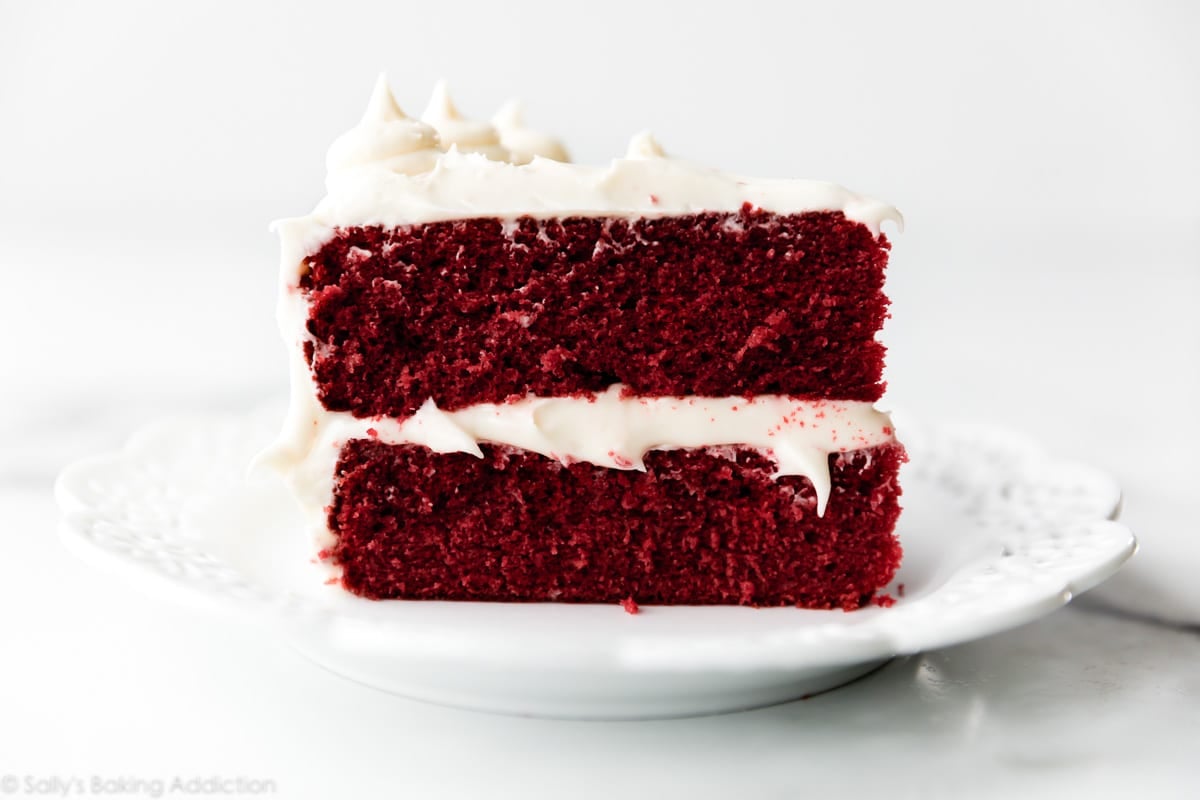
These 4 flavors are essential to the perfect red velvet layer cake. Not only is the flavor outstanding, red velvet cake’s texture is worth writing home about. It’s dense and soft with a moist and velvety crumb. However, the absolute best part about red velvet cake is the cream cheese frosting. Slathered on thick, my cream cheese frosting recipe is delicately sweet and undeniably creamy.
How to Make Red Velvet Cake
I use specific ingredients, certain amounts, and unique mixing techniques to produce my best red velvet cake recipe. Begin by whisking the dry ingredients together, then beat together the wet ingredients. We’ll combine the two, add buttermilk and tint the batter red. More on food coloring below.
- Cake Flour: I highly recommend cake flour. Cake flour is much lighter than all-purpose and the perfect base for a light, soft-crumbed cake texture. Like I mention above, red velvet’s texture is important to the authenticity of the flavor. You will thank me for the recommendation after you taste how incredibly soft this cake is. It’s the texture you find at professional bakeries.
- Unsweetened Cocoa Powder: 2 Tablespoons is plenty for a little cocoa flavor without overpowering the vanilla and butter flavors.
- Butter & Oil: What sets red velvet cake apart from chocolate is its buttery flavor. With only butter, we risk a dry cake. With only oil, we lose the butter flavor and softness that comes with creaming butter & sugar together. So all that’s to say, use both butter and oil. Moist texture, soft and cakey texture, buttery flavor.
- Buttermilk: Buttermilk is tangy, creamy, and makes baked goods extremely moist. You can’t make delicious red velvet cake without it! Additionally, buttermilk helps activate the baking soda to leaven the cake. If you’re interested, I have plenty more on this topic in my Baking with Buttermilk post (including a DIY buttermilk substitute recipe). It’s also a key ingredient in these black velvet cupcakes!
What About the Food Coloring?
Red velvet cake wouldn’t be red without food coloring. I recommend gel food coloring because the color is concentrated, so you need less of it. For natural coloring, use beet powder. If you don’t want to use food coloring, leave it out! The cake will have the same flavor and be a lovely shade of cocoa.
My #1 Trick
I add one simple step to this red velvet cake recipe and it guarantees the BEST texture.
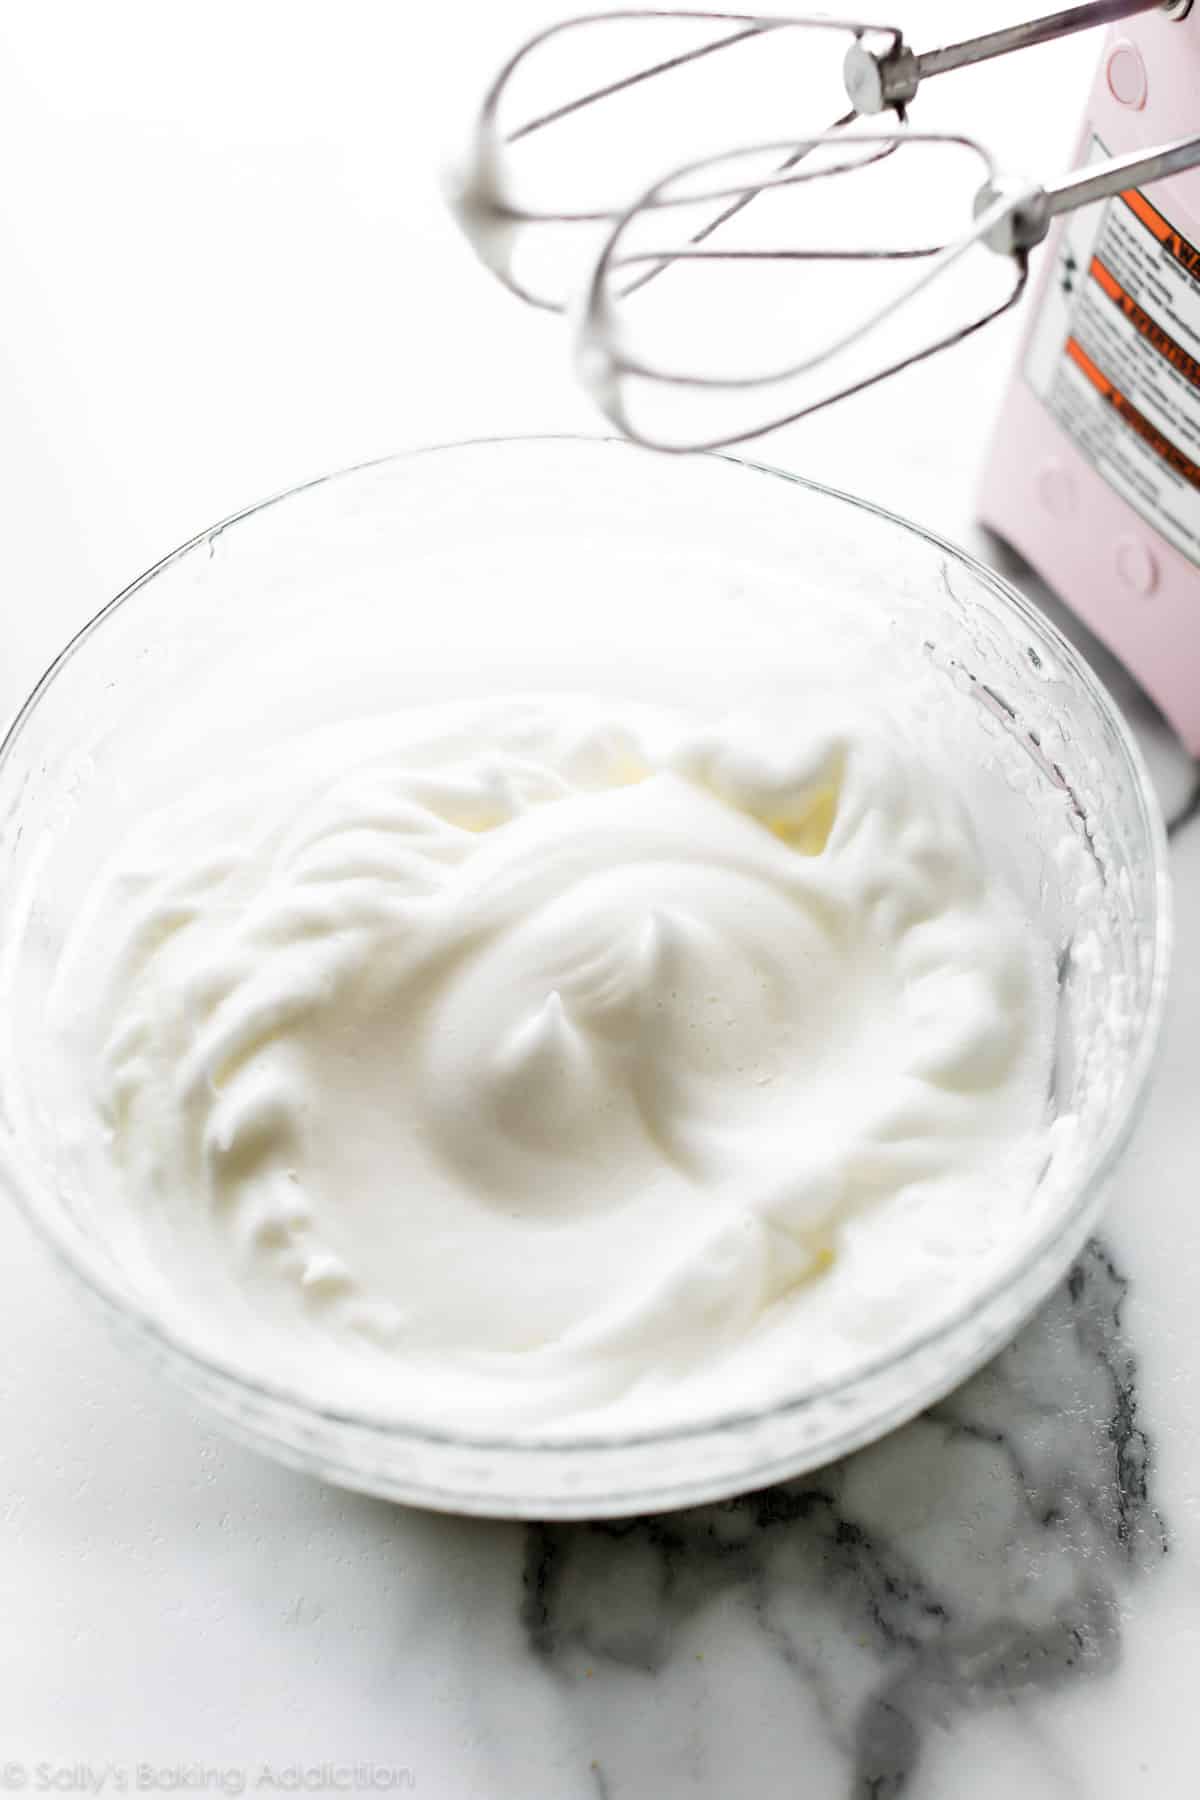
Whip the egg whites separately, then fold into the batter.
This cake recipe requires 4 large eggs. Separate the eggs before starting. Beat the egg yolks with the wet ingredients, then beat the egg whites into fluffy peaks and fold them in last. Beating the egg whites incorporates air and promises a velvet-rich texture.
You will never go back.
Red Velvet Cake Video Tutorial
Cream Cheese Frosting
In my opinion, cream cheese frosting pairs best with red velvet’s flavor and this frosting recipe is really simple. You need brick-style cream cheese, butter, confectioners’ sugar, vanilla extract, and a pinch of salt to offset the sweetness. It glides on seamlessly and is silky smooth. If you’re looking to pipe decoration with this cream cheese frosting, chill it in the refrigerator for 20 minutes. This guarantees the creamy frosting will hold its shape.

Of course, feel free to use traditional vanilla buttercream or Swiss meringue buttercream here if you prefer. Or try white chocolate buttercream frosting!
This recipe converts red velvet skeptics. I should know because I used to be one!
Interested in turning this red velvet beauty into a tiered wedding cake? See my homemade wedding cake for details.
More Classic Cake Recipes
- Vanilla Cake
- Banana Cake
- Pumpkin Cake
- Chocolate Cake
- Strawberry Cake
- Lemon Cake
- German Chocolate Cake
Red Velvet Cake with Cream Cheese Frosting
- Prep Time: 30 minutes
- Cook Time: 30 minutes
- Total Time: 3 hours
- Yield: 12 servings
- Category: Dessert
- Method: Baking
- Cuisine: American
Description
Red velvet cake is much more than vanilla cake tinted red. This recipe produces the best red velvet cake with superior buttery, vanilla, and cocoa flavors, as well as a delicious tang from buttermilk. My trick is to whip the egg whites, which guarantees a smooth velvet crumb.
Ingredients
- 3 cups (360g) cake flour (spooned & leveled)
- 1 teaspoon baking soda
- 2 Tablespoons (10g) unsweetened natural cocoa powder
- 1/2 teaspoon salt
- 1/2 cup (8 Tbsp; 113g) unsalted butter, softened to room temperature
- 2 cups (400g) granulated sugar
- 1 cup (240ml) canola or vegetable oil
- 4 large eggs, room temperature and separated
- 1 Tablespoon pure vanilla extract
- 1 teaspoon distilled white vinegar
- liquid or gel red food coloring
- 1 cup (240ml) buttermilk, at room temperature
Cream Cheese Frosting
- 16 ounces (452g) full-fat brick cream cheese, softened to room temperature
- 3/4 cup (12 Tbsp; 170g) unsalted butter, softened to room temperature
- 5 cups (600g) confectioners’ sugar
- 1 and 1/2 teaspoons pure vanilla extract
- pinch of salt, to taste
Instructions
- Preheat oven to 350°F (177°C). Grease two 9-inch cake pans, line with parchment paper rounds, then grease the parchment paper. Parchment paper helps the cakes seamlessly release from the pans. (If it’s helpful, see this parchment paper rounds for cakes video & post.)
- Make the cake: Whisk the flour, baking soda, cocoa powder, and salt together in a large bowl. Set aside.
- Using a handheld or stand mixer fitted with a paddle attachment, beat the butter and sugar together on medium-high speed until combined, about 1 minute. Scrape down the sides and up the bottom of the bowl with a rubber spatula as needed. Add the oil, egg yolks, vanilla extract, and vinegar and beat on high for 2 minutes. (Set the egg whites aside.) Scrape down the sides and up the bottom of the bowl with a silicone spatula as needed.
- With the mixer on low speed, add the dry ingredients in 2-3 additions alternating with the buttermilk. Beat in your desired amount of food coloring just until combined. I use 1-2 teaspoons gel food coloring.
- In a separate medium bowl, vigorously whisk or beat the 4 egg whites on high speed until fluffy peaks form as pictured above, about 3 minutes. Gently fold into cake batter. The batter will be silky and slightly thick.
- Divide batter between cake pans. Bake for 30-32 minutes or until the tops of the cakes spring back when gently touched and a toothpick inserted in the center comes out clean. If the cakes need a little longer as determined by wet crumbs on the toothpick, bake for longer. However, careful not to overbake as the cakes may dry out. Remove cakes from the oven and cool completely in the pans set on a wire rack. The cakes must be completely cool before frosting and assembling.
- Make the frosting: In a large bowl using a handheld or stand mixer fitted with a whisk or paddle attachment, beat the cream cheese and butter together on medium-high speed until smooth, about 2 minutes. Add the confectioners’ sugar, vanilla extract, and a pinch of salt. Beat on low speed for 30 seconds, then increase to high speed and beat for 3 minutes until completely combined and creamy. Add more confectioners’ sugar if frosting is too thin or an extra pinch of salt if frosting is too sweet. Frosting should be soft, but not runny.
- Assemble and frost: Using a large serrated knife, slice a thin layer off the tops of the cakes to create a flat surface. Discard or crumble over finished cake. Place 1 cake layer on your cake stand or serving plate. Evenly cover the top with frosting. Top with 2nd layer and spread remaining frosting all over the top and sides. I always use an icing spatula and bench scraper for the frosting. I used Wilton piping tip #12 for decoration around the top.
- Refrigerate cake for at least 30-60 minutes before slicing. This helps the cake hold its shape when cutting.
- Cover leftover cake tightly and store in the refrigerator for 5 days. Frosted cake or unfrosted cake layers can be frozen up to 2-3 months. Thaw overnight in the refrigerator and bring to room temperature before decorating/serving.
Notes
- Make Ahead Instructions: The cake layers can be baked, cooled, and covered tightly at room temperature overnight. Likewise, the frosting can be prepared then covered and refrigerated overnight. Let the frosting sit at room temperature to slightly soften for 10 minutes before assembling and frosting.
- Special Tools (affiliate links): 9-inch Round Cake Pans | Glass Mixing Bowls | Whisk | Electric Mixer (Handheld or Stand) | Red Gel Food Coloring or Beet Powder | Silicone Spatula | Cooling Rack | Cake Stand, Serving Plate, or Cake Turntable | Icing Spatula | Bench Scraper | Piping Bag (Reusable or Disposable) | Wilton Piping Tip #12 | Cake Carrier (for storing cake)
- Cake Flour: For best texture and taste, I strongly recommend cake flour. You can find it in the baking aisle and I have many more recipes using it. If you can’t get your hands on cake flour, you can make a DIY cake flour substitute.
- Vinegar: The vinegar helps brighten the red color. Don’t get scared, a touch of vinegar is normal in red velvet desserts! You can’t taste it.
- Why is everything at room temperature? When everything is near the same temperature, they mix together easily, evenly, and produce a uniform texture. It’s important!
- Food Coloring: The amount of red food coloring is up to you. I tested with varying amounts. To get the dark red color you see here, use 2 teaspoons of gel food coloring. You could use liquid food coloring too, but gel food coloring is more potent. You’ll need at least 1 Tablespoon of liquid. Dye the batter until you are pleased with the color. Use beet powder for a natural alternative (mix 1/2 teaspoon beet powder with 2 teaspoons of water before adding) or leave the food coloring out completely.
- Buttermilk: Buttermilk is a key ingredient and flavor in this recipe. You can use low fat or full fat. If you don’t have buttermilk, you can make your own buttermilk substitute. To do so, add 1 and 1/2 teaspoons of fresh lemon juice or white vinegar to a liquid measuring cup. Add enough regular milk (whole milk is best) to make 1 cup. Stir the two together, then let it sit for 5 minutes before using.
- Sheet Cake: This batter fits nicely into a 9×13-inch cake pan or 12×17-inch sheet pan. Same oven temperature. Bake for about 40-45 minutes or 20-25 minutes, respectively. Keep your eye on the cake and use a toothpick to test for doneness.
- 3 Layer Cake: Prepare 3 9-inch cake pans in step 1 and divide the batter evenly between the pans. Bake for about 22-25 minutes.
- Bundt Cake: This cake batter fits into a 10-cup or larger bundt pan. I’m unsure of the exact bake time (likely around an hour), but use a toothpick to test for doneness. Same oven temperature.
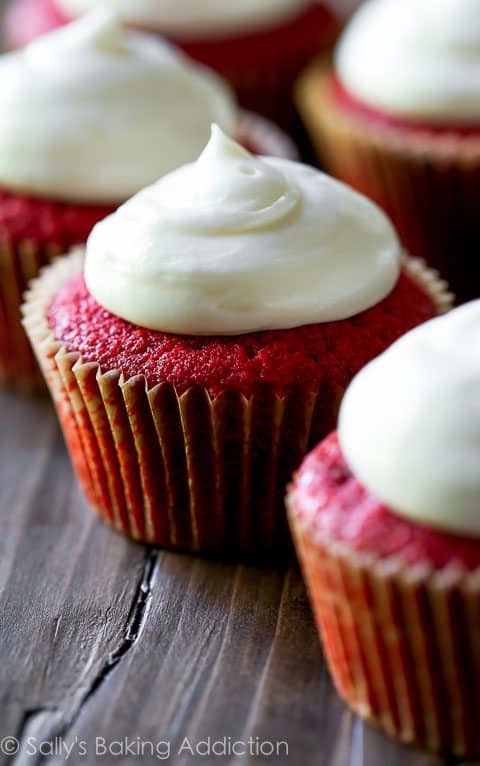
- Cupcakes: You can use this cake batter for 2-3 dozen cupcakes. Fill cupcake liners 1/2 – 2/3 of the way full. Bake for 20-21 minutes or until the tops of the cupcakes spring back when gently touched and a toothpick inserted in the center comes out clean. Use my red velvet cupcakes recipe if you need fewer.
Recipe originally published on Sally’s Baking Recipes in 2015.
Need something smaller? Here are my red velvet cupcakes!


Reader Comments and Reviews
Does the beet powder alter the taste of the cake?
Hi Karen, no, not at all!
Would I be able to use avocado oil in place of the canola?
Hi Melissa, we recommend vegetable oil for best results. You could try avocado oil here, but the flavor may change.
|I have made many recipes from this site and never been disappointed. So, I thought this would be great for my birthday. The cake looks fine so far but the icing is very runny. I added 2/3 cup of icing sugar and still had to spoon it onto the cake. The top layer is sliding off the bottom layer, so I added dowels to stop it from sliding off. Are you sure the amounts are right for the cream cheese? I’ve put everything in the fridge hoping I can salvage it and do the icing when it’s cold. I think it will taste good when all is said and done, but I have company coming for my birthday and wanted to showcase a beautiful cake.
Hi Kim, Are you outside of the U.S.? The type of cream cheese you need to make cream cheese frosting can be difficult to find outside the U.S., and usually that’s the culprit for a runny cream cheese frosting. Or did you perhaps use low fat cream cheese? That would also be too thin for frosting, it would be too runny. We hope you enjoy your cake and have a happy birthday!
Hi Michelle, Thanks for replying. I’m in Canada. We have the same cream cheese as in the U.S. and I used full fat. After I refrigerated everything for 1/2 hour, the icing was still runny but workable. Then, everything went in the fridge overnight. It served up fine the next day and the cake and icing were delicious!
I don’t know what happened, I can only theorize that my kitchen may have been too warm that day causing the butter and cream cheese to melt.
I guess all’s well that ends well 🙂
Sally, I’ll have a few more people than this recipe says it will serve. Could I 1.5x it and make 3 layers, or would that put too much weight on the bottom layer?
Hi MaryAnn, You can divide this batter between 3 9-inch cake pans. The bake time will be a little shorter since the cakes will be thinner. No need to make more batter!
Sorry, did you miss the part where I need a bit more cake?
Sally you seriously outdid yourself with this one! I made it today for my family, but ended up bringing it to my Grandparent’s for all my extended relatives. Let me tell you, not a single crumb was left. I tweaked the sugar a little to make it less sweet, but regardless it was so delicious. It was moist, dense, fluffy and the icing was spot on. Thank you for this new household staple!
Amazing recipe! This was my first ever red velvet and it was a huge hit with all the guests! I’m always able to make your recipes without a test run because they are perfect every time! Thank you Sally!!!
Hello for the creme cheese frosting above your notes you say add a splash of milk and I fine see that on your ingredients to use?
Please reply, thanks
Diane
Hi Diane, you are right, that was a mistake in the blog post, and I’ve deleted it. No milk needed!
hi! i was wondering if i could use extra virgin olive oil and if so should it be the same amount? thank you! v
Hi Valeria, while olive oil could work, the flavor will change quite a bit and we don’t recommend it here.
How much does the batter differ for 8 inch rounds?
Hi Francesca, for an 8 inch cake, we recommend using 3 8-inch cake pans. The cakes will be very thick using two 8 inch cake pans and may not bake evenly– or may even overflow. Bake for about 23-26 minutes. Or, you can bake 2 layers, filling your pans no more than half way, and use the leftover batter for a few cupcakes on the side.
I made this cake for my niece’s birthday and it was delicious. Everyone love it! The cake was moist and light and not overly sweet which went well with the icing. My only problem was that there was too much cake batter for my 9 inch cake pans which almost overflowed the pans. Maybe I whipped the egg whites too much? Next time, I’ll make myself a couple of cupcakes with the extra batter.
Hi Nancy, we’re so glad the cake was a hit! Were your pans shorter? We use 9×2-inch round pans and the pans are filled about half way. You can also make it as a 3-layer cake if you wish: Prepare 3 9-inch cake pans in step 1 and divide the batter evenly between the pans. Bake for about 22-25 minutes. Thanks again for giving this one a try!
Why are my cupcakes sinking in the middle? Thanks!
Hi Mary, are you baking this red velvet cake as cupcakes? Could they have been overfilled? Overfilled or under-baked cupcakes will fall. Easy fixes for next time!
I ended up making this cake tonight for an impending get together followed the very detailed instructions it is still cooling can’t hardly wait to frost and try a piece
The best Red velvet recipe ever I have used it and my customers love it thank you for sharing
Hi Sally
I can across this recipe I was wondering can I bake this recipe in a 10” round pan or do I need to double or make changes to the recipe.
Thank you
Hi Rina, Here is everything you need to know about converting recipes to different Cake Pan Sizes.
Hi- my daughter wants to try this for her 16th birthday party. Can we make it the day before? If so should it go in fridge? Also, can she pipe the cream cheese frosting around the edge of cake or will it be too soft to hold up? (She wants a fancy piped edge around the top/outside of cake) Thank you!
Hi Jessica, the cake layers can be baked, cooled, and then covered tightly and stored at room temperature overnight. Likewise, the frosting can be prepared and then covered and refrigerated overnight. Let the frosting sit at room temperature to slightly soften for 10 minutes before assembling and frosting. And yes, this frosting can be piped! Cream cheese frosting will hold its decorative piped shape if you refrigerate it prior to piping. Fit your piping bag with a piping tip, fill your bag with the frosting, then refrigerate it for 20-30 minutes before piping. However, don’t expect it to be as sturdy as buttercream. Cream cheese isn’t super stable, so save intricate piped designs for vanilla buttercream. Instead, stick with a basic round tip for piping. Happy birthday!
Hi Sally, I’m looking to make 3 6” round cake layers….would you suggest doing 1 1/2 batches? I think a double batch would be too much. Does that sound right?
Hi Debbie, you can make a 6-inch cake using the amounts in this red velvet cupcake recipe.
I wish I had added more white vinegar and cocoa powder I can’t taste anything … I’ve looked into other recipes to see what I lacked and some recipes have more vinegar and cocoa powder.
I would of given this recipe a 5 star because we love it, it tastes so yummy! But, this recipe is so incredibly moist that its very hard to work with. Its like falling apart moist.. i never would’ve thought id remove a star on a cake recipe due to how moist it is lol.. i tried this recipe as cupcakes and and as a cake. (I even baked them slightly longer than recommended). The cupcakes were so moist that the crumbs would rip with the paper and the cake was SO hard to layer! I would love to know if there’s any way to make it slightly less moist without jeopardizing the yummy flavours!
Hi Maude, we’re glad you enjoyed this recipe! Is it particularly hot and/or humid where you live? Those conditions can sometimes cause cakes (particularly the outsides) to get moist and sticky.
This is not red velvet cake. There is both way too much cocoa and too much sugar and flour among other things. I’ve been making red velvet cakes for 30 years and have never seen this recipe. This changes the whole flavor profile of the cake, and not in a good way.
Thank you for your feedback. Sorry you are disappointed. I don’t find 10g of cocoa to be too much for this amount of batter; the flavor isn’t overpowering at all. Were you able to give the recipe a try or are you commenting on the combination and ratio of ingredients listed?
Hi Sally! I absolutely love all of your recipes! Question for this cake recipe- could I calculate this recipe to only make a small 4 inch cake? Making it for a tasting and I don’t want to waste!
Hi Lee, you can certainly try scaling this recipe down for your needs. This Cake Pan Sizes and Conversions Guide will help. Thank you for making and trusting our recipes!
Hi Sally,
Tried this recipe before and loved it. I now need to make it GF – can I just sub gluten free all purpose flour for the cake flour? Or what would you suggest? Thanks
Hi Francesca, we haven’t tested this recipe with a gluten-free flour blend, so we’re unsure of the results. Although some readers report using an all-purpose 1:1 gluten-free flour in many of our recipes with success, you should expect slightly different results anytime you substitute ingredients. Let us know if you give it a try!
Hi Sally,
Since the recipe calls for two 9 inch pans and I do three 8 inch pans instead, do you anticipate I would need more frosting to account for an additional layer?
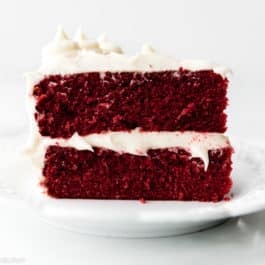
Is the cream cheese frosting stiff enough to also be used for decoration on top? Some pictures look like it keep a shape, but there’s also one picture here that has decoration on top (the naked cake)
Hi Stacy, The frosting should be enough to cover 3 8 inch cakes. This frosting is pretty soft. It is fine for writing. We have used it for simple decorations with plain round tips – you can fill your piping bag and place the entire thing in the refrigerator before piping to help it hold it’s shape. For more intricate designs or textured tips you will want to make a small batch of thick buttercream frosting.
I’ve been told to use the convection setting on my oven. What are your thoughts?
Hi Maria, all of the recipes on this site are written for conventional settings. Convection/fan ovens are fantastic for cooking and roasting. If you have the choice, we recommend conventional settings when baking cakes, breads, etc. The flow of air from convection heat can cause baked goods to rise and bake unevenly and it also pulls moisture out of the oven. If you do use convection settings for baking, lower your temperature by 25 degrees F and keep in mind that things may still take less time to bake. Hope this helps!
Hi, it’s probably important to use natural cocoa powder vs dutch processed? When I made red velvet muffins one time, the color was pretty dark and brownish. (Maybe that recipe also called for too much cocoa, not sure :))
Thanks!
Hi Jazz, you need unsweetened natural cocoa powder for this cake, not Dutch. If you’re interested in learning about why, we have a post on the difference between Dutch-processed and natural cocoa powder here.
I was really disappointed with the cake recipe. Cake was nice and moist… but it was just a cake. It did not have the red velvet cake texture, it was just like any other good cake with red velvet cake flavor. I give two stars because the buttercream was nice, but i cut down the sugar to about 200 grams and it was already quite sweet, i cant imagine what 600 grams would be like. I dont think seperating the yolks and whites and incorporating seperately helps with the texture issue, its just what you do for a sponge cake, and this had the exact texture of a sponge cake. I was going for a layered cake for a birthday but i just turned it into cake pops.
Okay, I am generally very sceptic about recipes off the internet But this one came out perfect. I had to adjust the oven temp somewhat as i am in Johannesburg – 5000 f above sea level. Then I also did read or looked and dumped 500ml buttermilk into the mix and not 250… (No comments please). But, despite this the recipe came out perfect. I had to bake it a bit longer though. I will save this one as a definate yes!
My cake fell in the middle 🙁 I’m assuming I didn’t bake it long enough. Any way I can save it?
Hi Tom, we’re happy to help troubleshoot. Were your pans overfilled by chance? The batter should be evenly distributed between the two 9-inch round pans (not filled to the top). A little sinking is normal, but it could also be possible that your cakes just needed a few extra minutes in the oven. You can use a toothpick to test for doneness. Thank you for giving this recipe a try!
hello! for the cream, I live in Europe and there is only the cream cheese in the package and it is softer, how can I make the cream more Thick?
Hi Franci, Yes, we know this is an issue and it’s very frustrating! Look for a soft white cheese with around 33% fat content. Also, some people have reported that they strain off excess liquid from the tub type of cream cheese before using. And we’ve also had UK readers report that they’ve had success subbing half mascarpone for half the cream cheese. If you try any of these, please let us know how it turns out!
Good morning. I would love to see a recipe for the original Red Velvet Cake frosting listed as an option with the Red Velvet Cake recipe. Ermine frosting (or some call it cooked milk frosting) is, in my opinion anyway, so much better than cream cheese frosting because cream cheese frosting can so easily overpower the delicate flavor of the cake. The recipe I was given in the mid 70’s included the Ermine recipe so that’s what I’ve always made. My Red Velvet Cake is good, but I occasionally try other recipes and will try your recipe next. It looks like it will make more batter than mine and that would be good. I’m sorry if my comment about Ermine or Cooked Milk Frosting is a redundant comment. I didn’t have time to read 22 pages of comments. 🙂
Hi Darla, we do not have an ermine frosting recipe at this time, but feel free to use one you like with our cake recipe. We hope you enjoy it!
Hi Darla, I was going to ask the same question. I love the cooked milk frosting but is a lot more difficult to make than the cream cheese version. My recipe came from a 90 year old baker. Not sure where or when it was invented.
Hi! I do not like buoy the taste that red food colouring gives, and I don’t want to use beet root powder. In traditional red velvet cake, it is simply the reaction between the cocoa powder and the vinegar that makes it red, although more of a rusty colour. I see that your recipe uses both these ingredients, so would I get that effect if I left out the food colouring? Should I increase the amount of cocoa powder and/or vinegar? Thanks 🙂
Hi Lilly, We added the food coloring here to make the cake a vibrant red color. You can skip the food coloring without making any changes to the recipe and the cake will taste exactly the same, just be more of a reddish-brown.
Absolutely terrible recipe.
The frosting is way to runny. Liks the texture of water. Added 100gms more sugar to fix it after seeing other people’s comments. It became way too sweet. Disgusting infact.
Even after adding the 100 was not thick enough. She has not recipe tested this. This is what happens when non professionals write recipes.
You are supposed to blind test
Three times. By three different people who do not know you.
Cake sucked. Tasted oily.
Thought you were a good site but this is the second recipe that bombed.
Hi Zenobia, thanks for your feedback. I appreciate receiving feedback like this, but some of your comments were uncalled for and rude. I extensively test my recipes, probably more than actually needed. I have a team who helps and we are fiercely dedicated to this. As a published cookbook author, I wouldn’t have a career if I didn’t test my recipes. Are you outside of the U.S.? The type of cream cheese you need to make cream cheese frosting can be difficult to find outside the U.S., and usually that’s the culprit for a runny cream cheese frosting.