

These red velvet cake-inspired chocolate chip cookies marry the velvet-soft texture and light cocoa undertones from the popular cake flavor with the gooey goodness and crisp edges of classic chocolate chip cookies. Combining brown sugar, cocoa powder, vanilla, and buttermilk, these aren’t just cookies tinted red—they truly capture the flavor and appearance of both iconic desserts.
I originally published this recipe in 2013 and have since added new photos and success tips.
Is red velvet a mystery flavor to you? It used to be for me, and I really didn’t understand the hype. I don’t make red velvet treats often, but when I do, I always try to get these 4 flavors into every bite:
- Mild cocoa
- Tangy buttermilk
- Sweet vanilla
- Rich butter
When done right, these 4 flavors are outstanding together! And today’s red velvet chocolate chip cookies nail it.
One reader, Margaret, commented: “I made these with white chocolate chips. They are a new contender for favorite in our house! They were so so good!! Color and consistency turned out just right. Will definitely be making these again. ★★★★★“
Here’s Why You’ll Love These Red Velvet Cookies
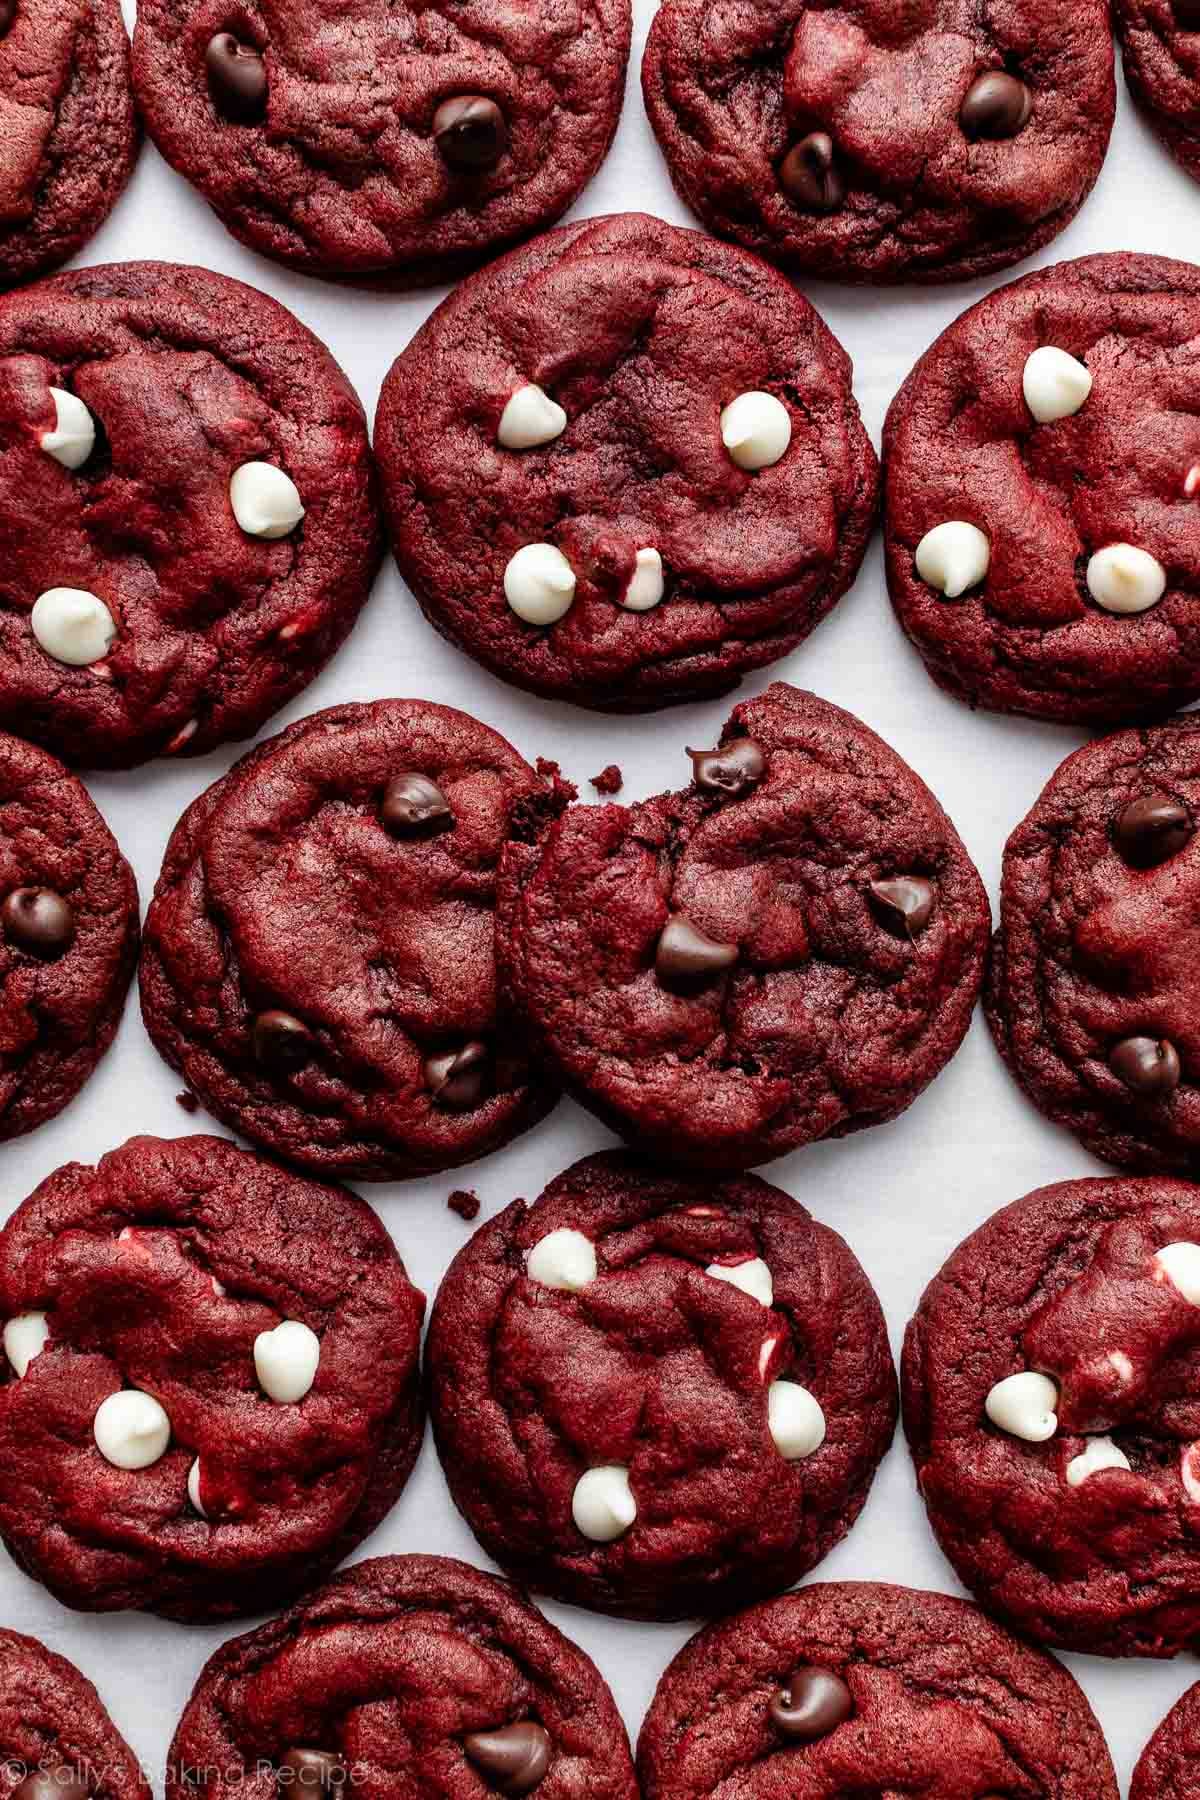
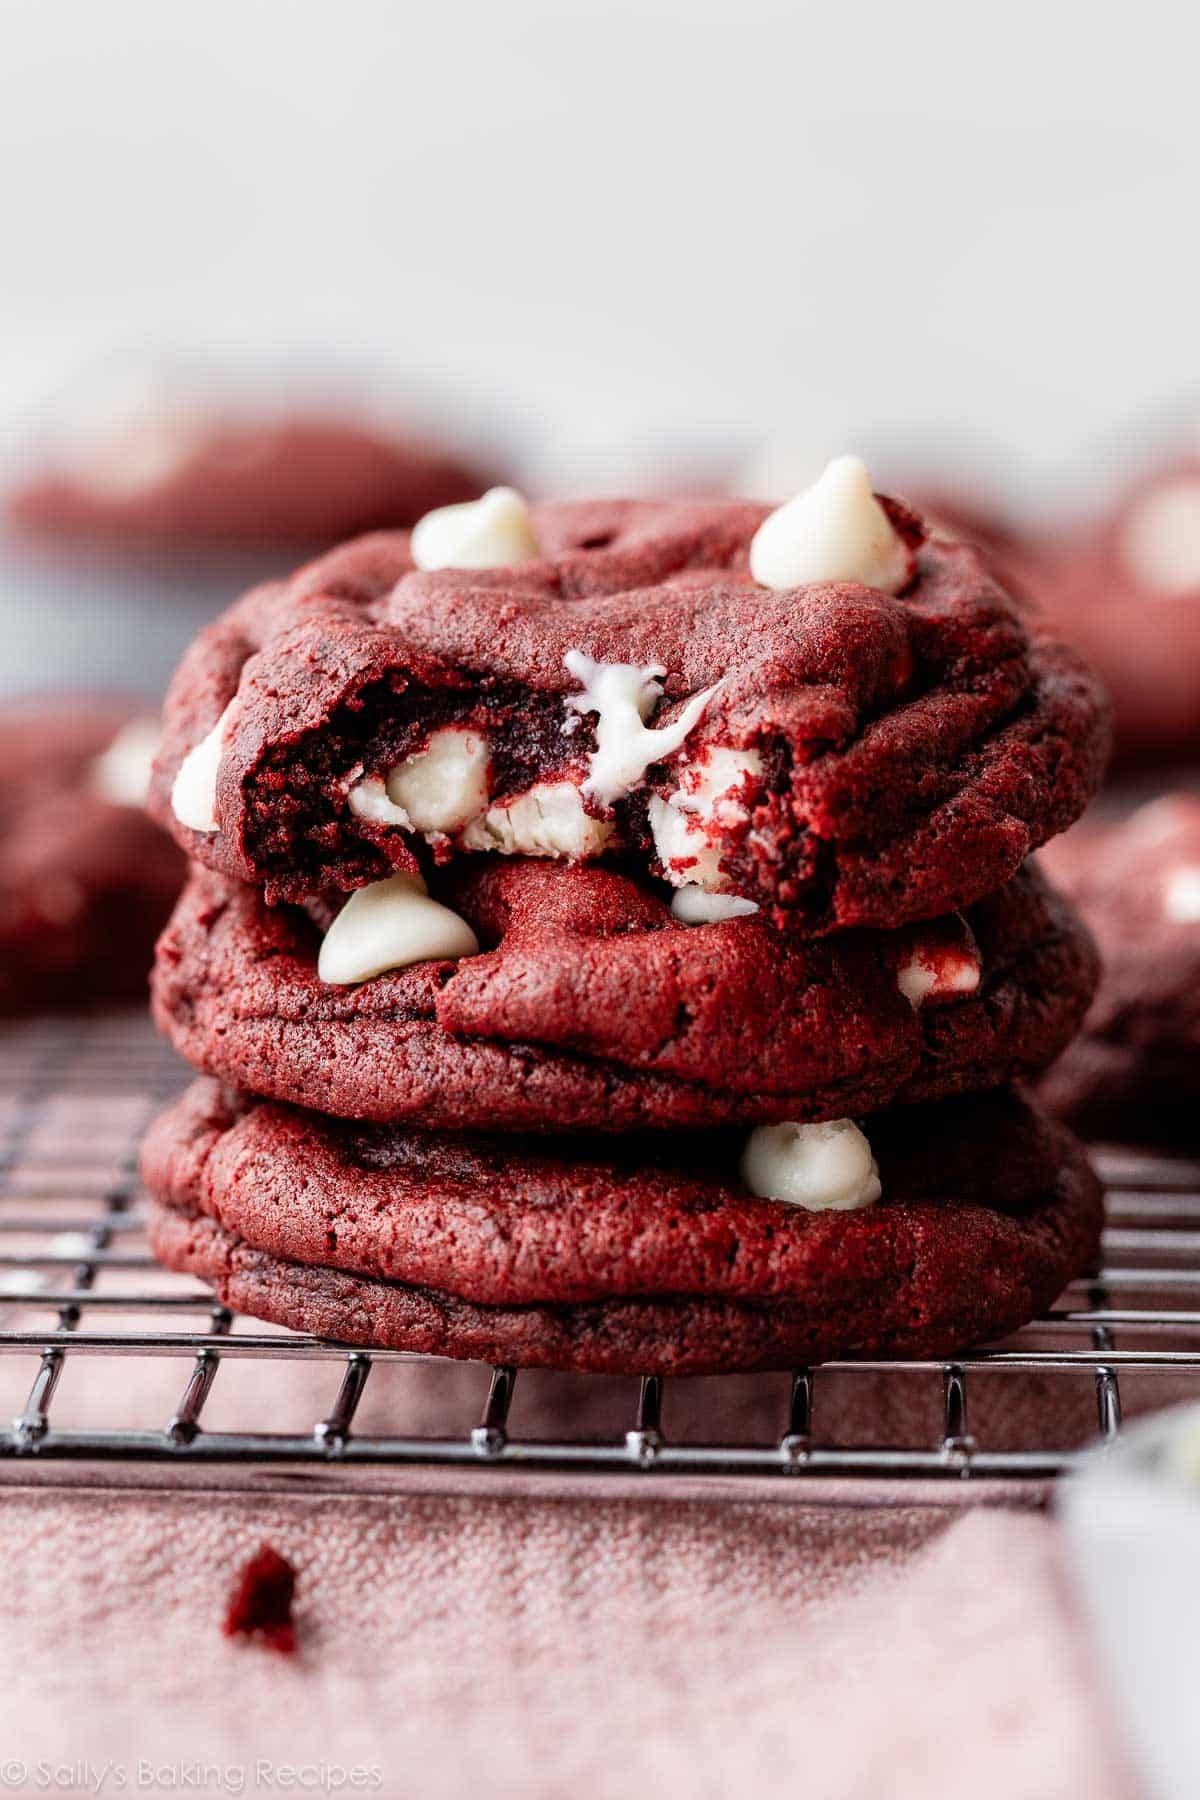
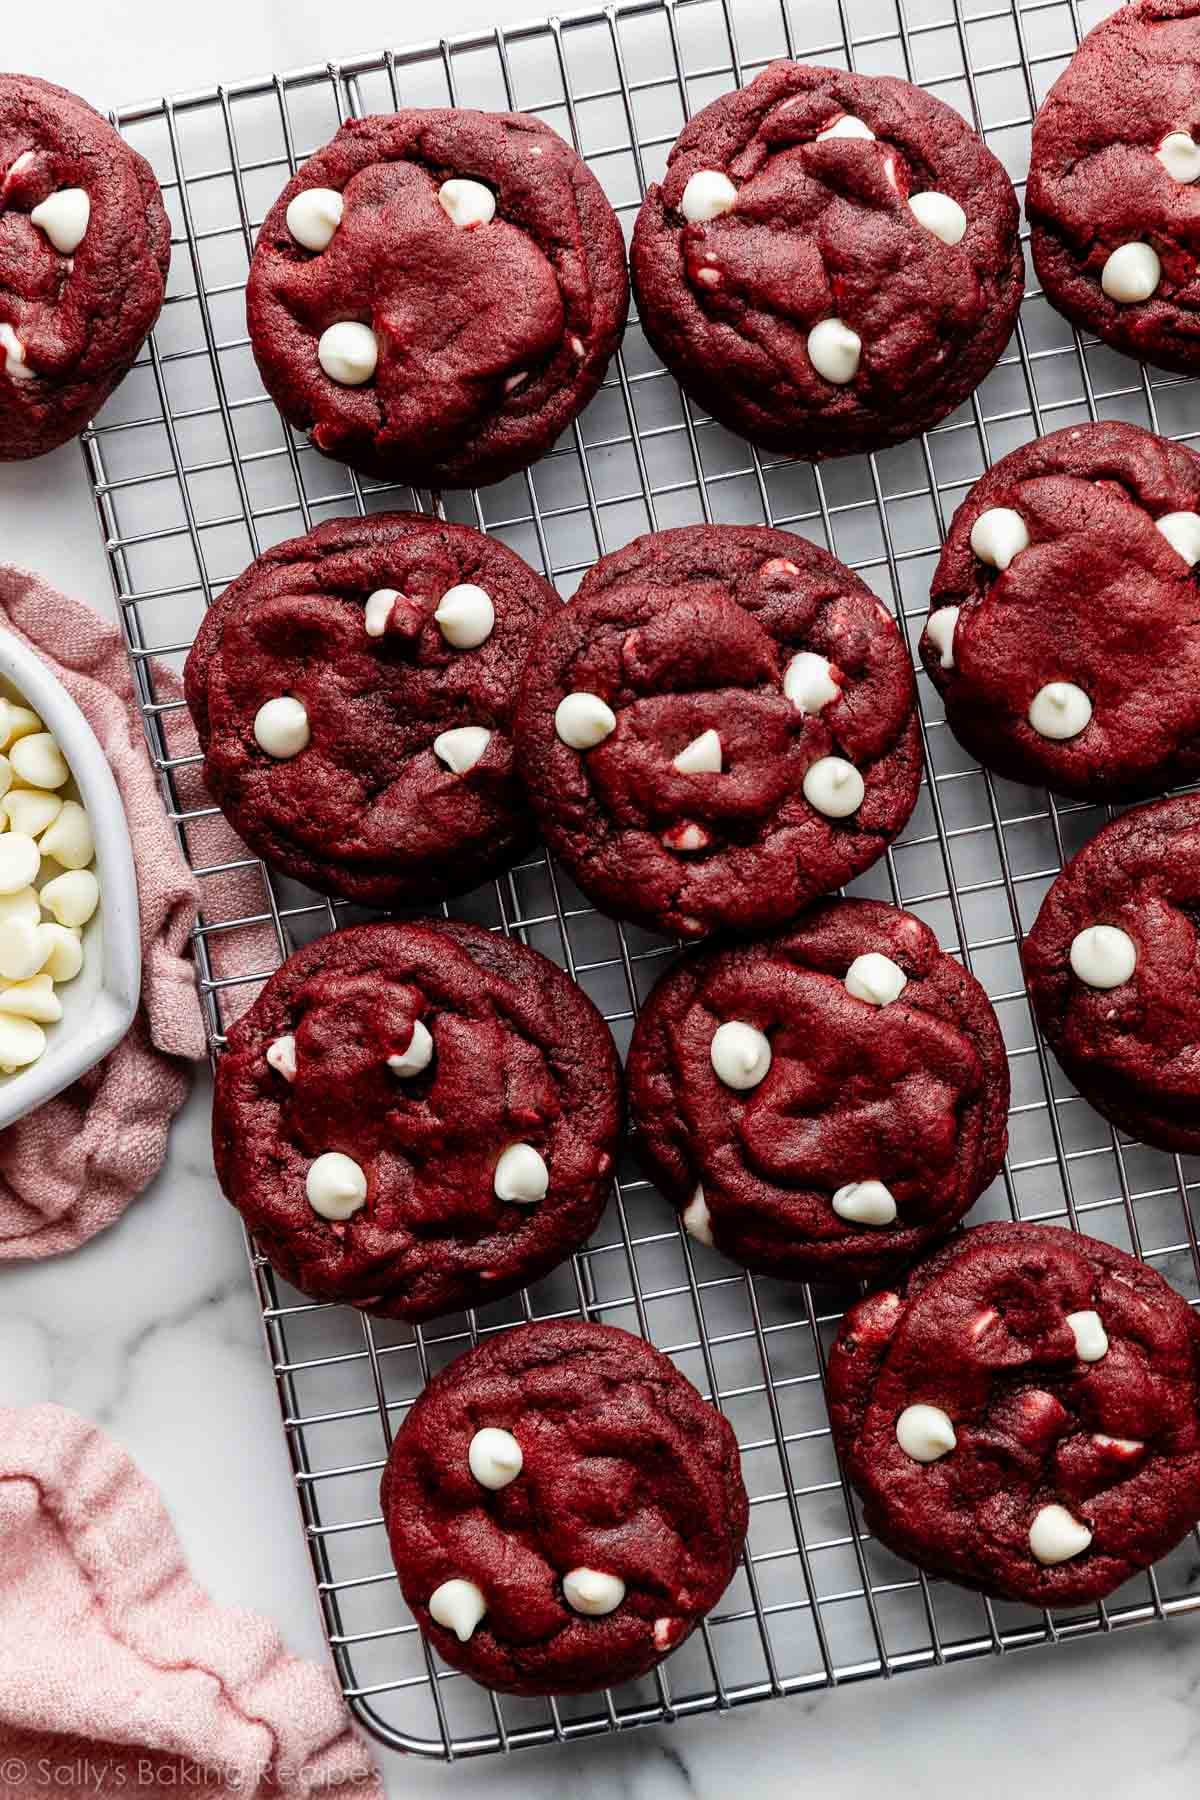
- Soft and chewy in the centers with buttery-crisp edges
- Crimson hue is festive for holidays like Valentine’s Day, Christmas, 4th of July, or if your team’s colors include red
- Simple to make
- You can use white or semi-sweet chocolate morsels, or both
- The vibrancy of red is up to you; use as much or as little coloring as you want OR skip it entirely for a light brown cookie
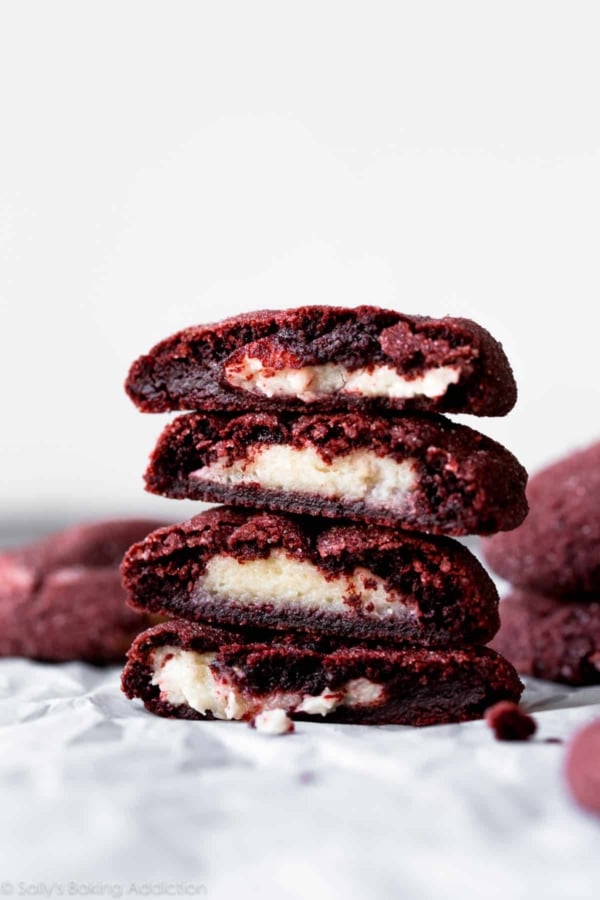
If you’ve ever tried my cream cheese-stuffed red velvet cookies or white chocolate-dipped red velvet cookies, you’re familiar with this cookie dough. Today’s red velvet chocolate chip cookies were the original red velvet cookie I developed and published, and I based the dough off of my double chocolate chip cookies dough.
Grab These Cookie Ingredients:
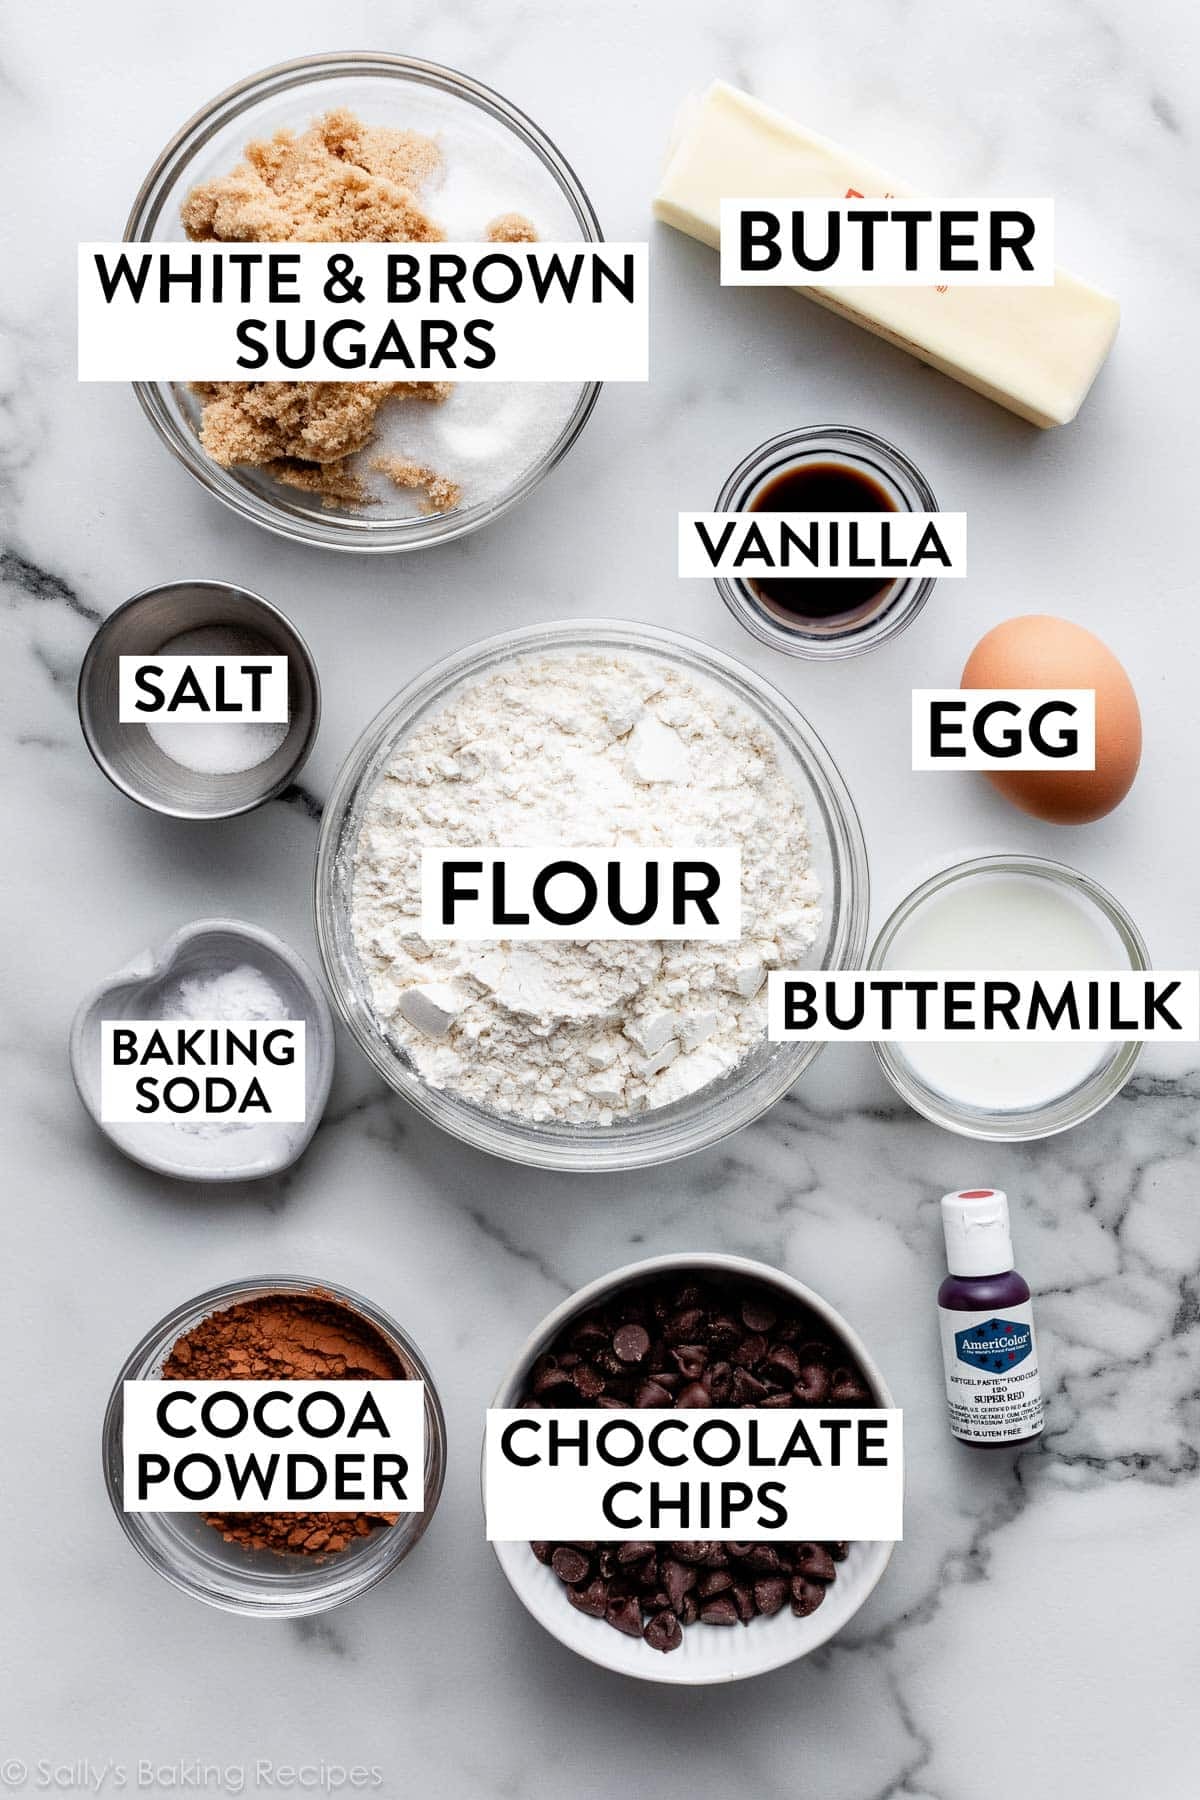
As you can see, you need some chocolate chip cookie basics including flour, egg, vanilla, brown sugar, and regular granulated sugar. A kiss of cocoa powder and a little buttermilk help move us in the flavor direction of red velvet cake. Between chocolate chips and white chocolate morsels, I think I sway more towards the white chocolate in these cookies, which is usually not the case!
Both are obviously delicious, though.
Tinting the Dough
Tinting the cookie dough red is optional. If you skip the food coloring, the cookies will be light brown.
For the pictured cookies, I use 3/4 teaspoon gel food coloring. You can control how vibrant the red color is, so use more or less depending on the color you’d like. You can find gel food coloring in craft stores, some grocery stores, or online. (I like Americolor Red Red or Super Red.) Liquid coloring is fine in a pinch, but you need more of it for the color to actually show up. If you’re looking for a natural alternative, use 2 teaspoons of beet powder. The color stands out a lot more in cookie dough than in cake batter, and you won’t taste it.
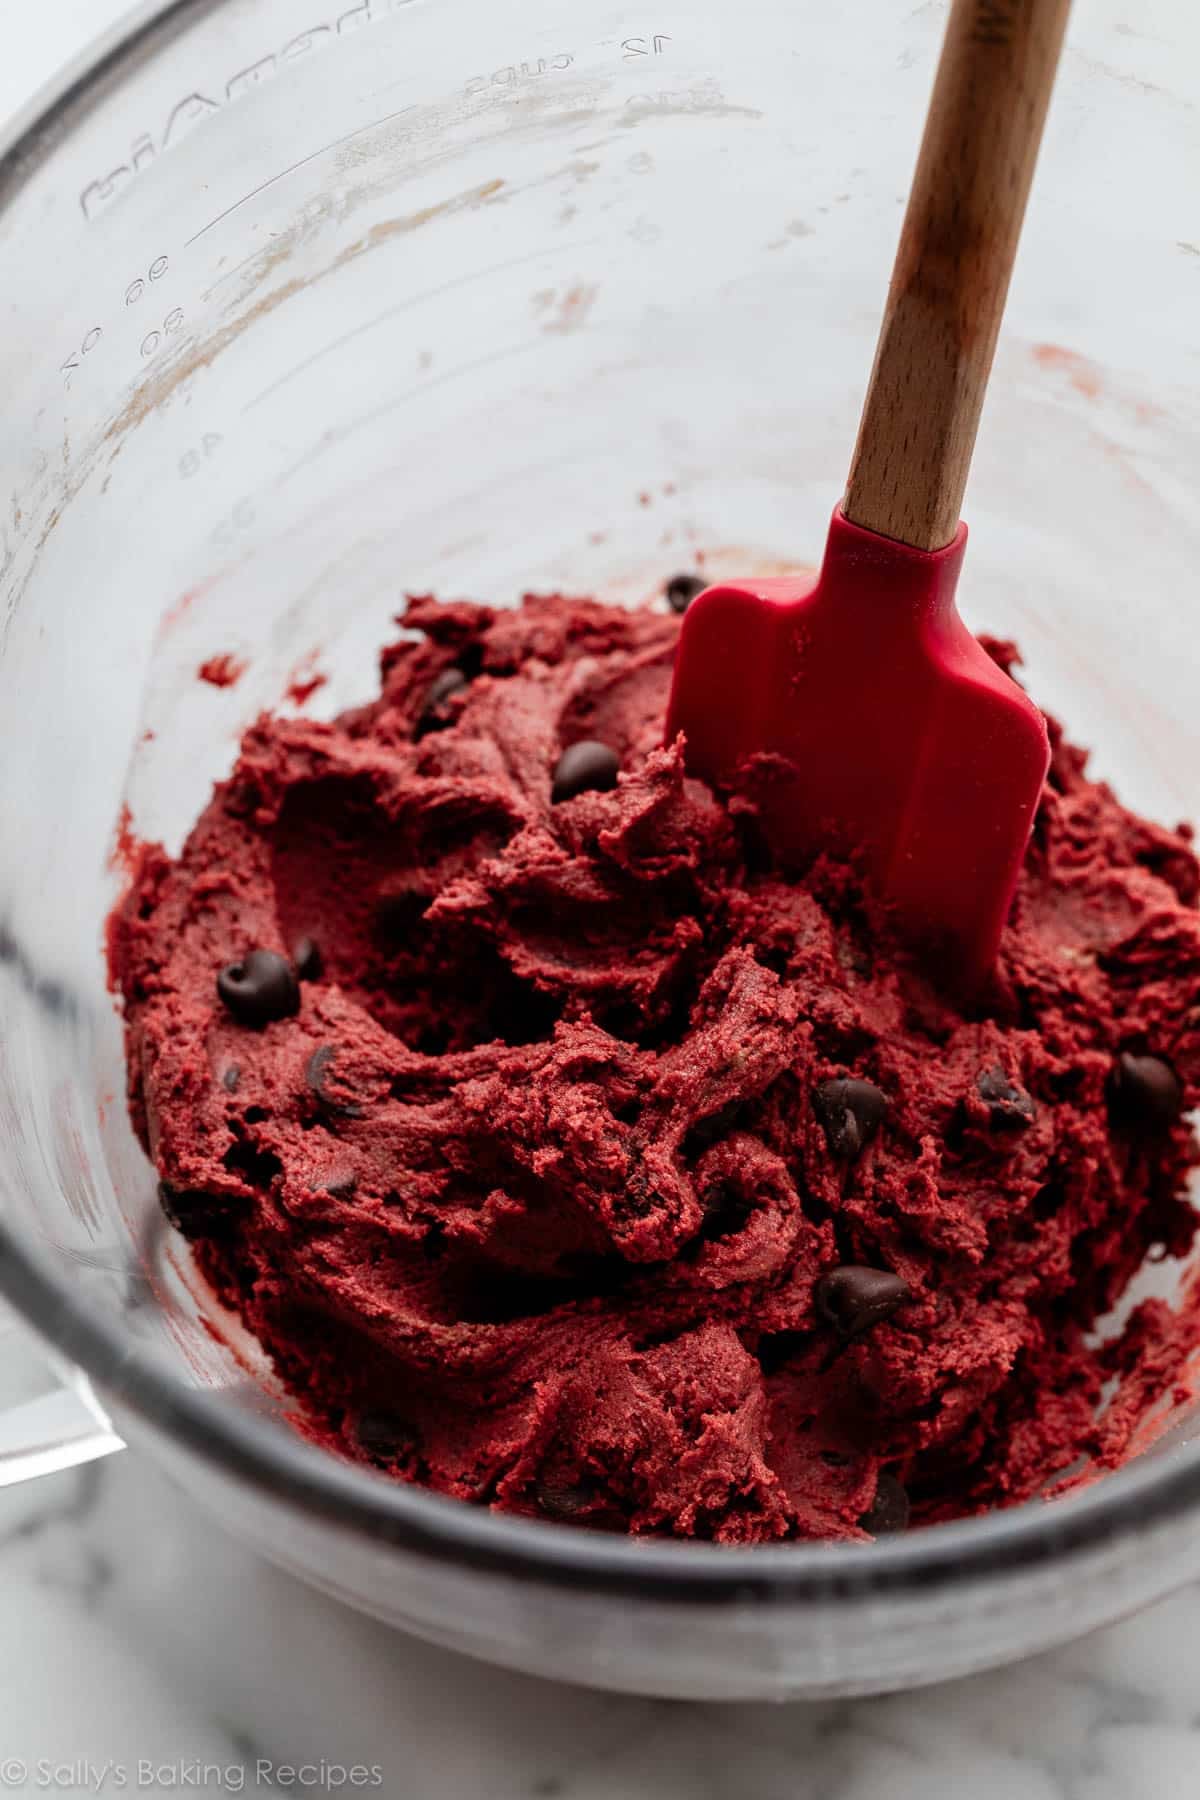
Expect a sticky cookie dough:
Chill the Cookie Dough, Briefly
Like with many cookie recipes on my website, I recommend chilling the cookie dough in the refrigerator before baking it. This is a sticky dough, and letting it firm up in the refrigerator will help your cookies hold shape and maintain wonderfully soft and chewy centers.
I usually only refrigerate the cookie dough for about 1 hour. I find the longer I chill this particular dough, the thicker the cookies will be. If your cookies aren’t spreading at all, you may have chilled the dough for too long; in that case, lightly press down on them with the back of a spoon towards the end of bake time. Easy fix.
You can use a medium cookie scoop to measure 1.5 Tablespoons of dough per cookie, or weigh the dough balls to be about 30–35g each.
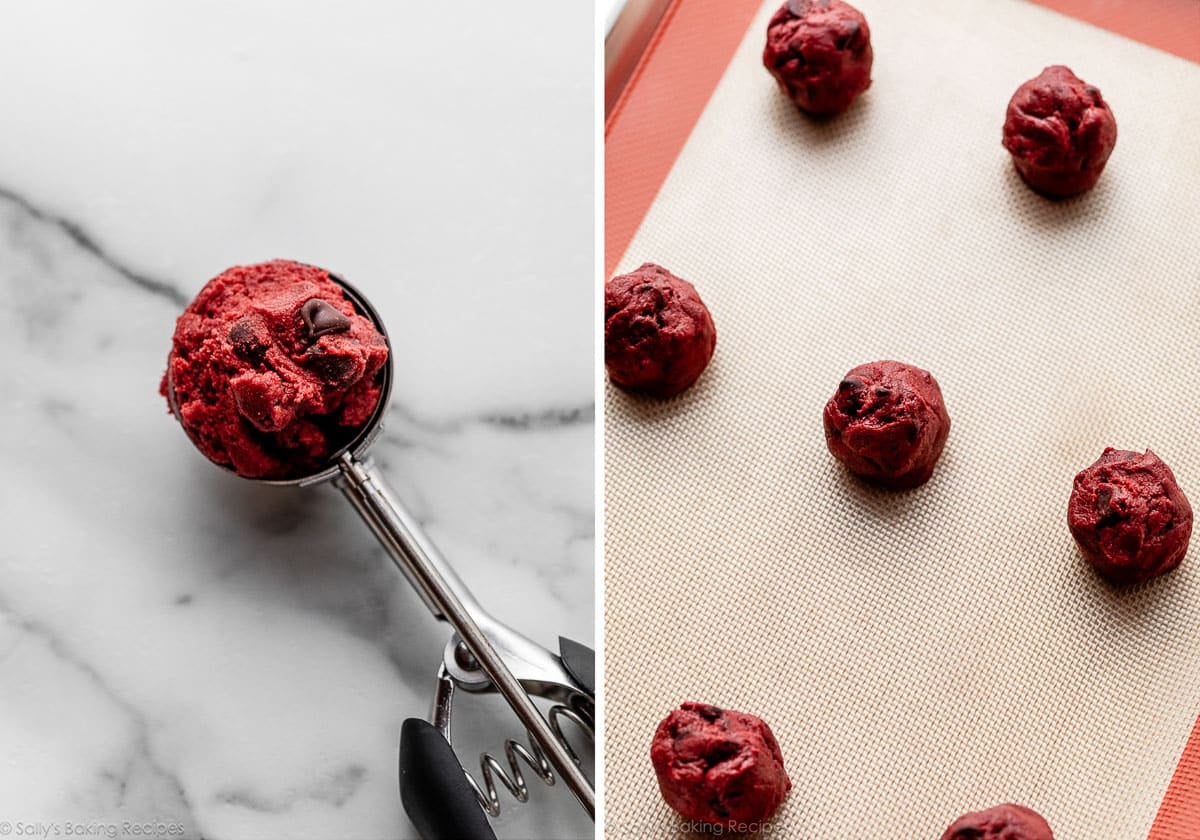
While the baked cookies are still warm, I press a few more chocolate chips into the tops. This is only for looks!
So this recipe sounds pretty easy, right? It is! Just your basic chocolate cookie recipe with a bit less cocoa, some vanilla, buttermilk, and a sprinkling of chocolate chips. A quick cookie dough chill and boom! You’ll have red velvet cookies from scratch in about 90 minutes.
Yes, absolutely. If you’d like to do that, you can keep or skip the chocolate chips in the dough. If you skip them, I recommend refrigerating the cookie dough for at least 2 hours. (They spread more without add-ins.) Roll the dough into 1.5 Tablespoon-size balls (about 30 to 35g each), and then roll each into confectioners’ sugar. 1 cup (about 120g) is enough confectioners’ sugar. Bake time is the same.

For more festive Valentine’s Day dessert recipes, try my Valentine’s day cookies, sparkle sweetheart cookies, and these Nutella-filled Valentine’s Day cupcakes!
Print
Red Velvet Chocolate Chip Cookies
- Prep Time: 1 hour, 10 minutes
- Cook Time: 12 minutes
- Total Time: 1 hour, 30 minutes
- Yield: 20 cookies
- Category: Cookies
- Method: Baking
- Cuisine: American
Description
These are soft-baked red velvet chocolate chip cookies made from scratch. Be sure to refrigerate the cookie dough for at least 1 hour, and feel free to skip the food coloring for light brown cookies.
Ingredients
- 1 and 2/3 cups (210g) all-purpose flour (spooned & leveled)
- 1/4 cup (21g) unsweetened natural cocoa powder
- 1 teaspoon baking soda
- 1/4 teaspoon salt
- 1/2 cup (8 Tbsp; 113g) unsalted butter, softened to room temperature
- 3/4 cup (150g) packed light or dark brown sugar
- 1/4 cup (50g) granulated sugar
- 1 large egg, at room temperature
- 1 Tablespoon milk (I recommend buttermilk)
- 2 teaspoons pure vanilla extract
- 3/4 teaspoon gel red food coloring (or alternative)*
- 1 cup (180g) white or semi-sweet chocolate chips (plus a few extra for tops)
Instructions
- Whisk the flour, cocoa powder, baking soda, and salt together in a medium bowl. Set aside.
- Using a hand mixer or a stand mixer fitted with paddle attachment, beat the butter, brown sugar, and granulated sugar together on medium speed until creamy, about 3 minutes. (Here’s a helpful tutorial if you need guidance on how to cream butter and sugar.) Add the egg and vanilla extract and mix on high until combined, about 1 minute. Scrape down the sides and bottom of the bowl as needed.
- Pour the dry ingredients into the wet ingredients, add the milk and food coloring, and then mix on low speed until everything is combined. The dough will be sticky. If you want a more vibrant hue, beat in more food coloring a little at a time. Add the chocolate chips and beat on low speed until just combined.
- Cover and chill the dough in the refrigerator for at least 1 hour (and up to 3 days). I recommend just 1 to 2 hours, otherwise the cookies won’t spread much. If chilling for longer than 2 hours, allow dough to sit at room temperature for at least 15 minutes before rolling and baking because the dough will be quite hard.
- Preheat oven to 350°F (177°C). Line large baking sheets with parchment paper or silicone baking mats. Set aside.
- Scoop and roll cookie dough, about 1.5 Tablespoons (30–35g) of dough each. (A medium cookie scoop is helpful here.) Arrange on the baking sheet about 3 inches apart. Bake for 11–13 minutes or until the edges appear set. Centers will look very soft. If the cookies didn’t spread, simply press down on the warm cookies with the back of a spoon to slightly flatten. If desired, lightly press a few chocolate chips into the tops of the warm cookies.
- Cool for 5 minutes on the baking sheets. Transfer to a wire rack to cool completely.
- Cover and store leftover cookies at room temperature for up to 1 week.
Notes
- Make Ahead & Freezing Instructions: You can make the cookie dough and chill it in the refrigerator for up to 3 days. (See step 4.) Baked cookies freeze well for up to 3 months. Unbaked cookie dough balls freeze well for up to 3 months. Bake frozen cookie dough balls for an extra minute, no need to thaw. They won’t spread much, so press down on the warm cookies with the back of a spoon as directed in step 6. For more information, here are my tips and tricks on how to freeze cookie dough.
- Special Tools (affiliate links): Electric Mixer (Handheld or Stand) | Baking Sheet | Silicone Baking Mat or Parchment Paper | Medium Cookie Scoop | Cooling Rack | Americolor Red Red or Super Red or Beet Powder
- Food Coloring: You can control the vibrancy of the red color. Or, if you wish, skip the red coloring altogether because it’s only for looks. I use and recommend 3/4 teaspoon of gel food coloring. You can find gel food coloring in craft stores, some grocery stores, or online. (I like Americolor Red Red or Super Red.) Liquid coloring is fine in a pinch, but you need more of it for the color to actually show up—around 1 Tablespoon. If you’re looking for a natural alternative, use 2 teaspoons of beet powder. The color stands out a lot more in cookie dough than in cake batter, and doesn’t taste like beets.
- Red Velvet Crinkle Cookies: If you’d like red velvet crinkle cookies, you can keep or skip the chocolate chips in the dough. If you skip them, I recommend refrigerating the cookie dough for at least 2 hours. (They spread more without add-ins.) Roll the dough into 1.5 Tablespoon-size balls (about 30 to 35g each), then roll each into confectioners’ sugar. 1 cup (about 120g) is enough confectioners’ sugar. Bake time is the same.
- Be sure to check out my top 5 cookie baking tips AND these are my 10 must-have cookie baking tools.


Reader Comments and Reviews
These lovely cookies turned out exactly as I’d hoped. I followed the recipe as written. Only change was white chocolate chips because its Christmas and always make Tollhouse cookies for the holidays. I only wish I could share my pics of these beauties. Thanks so much Sally, another keeper.
Hi Sally. I am obsessed with your cookie cakes, they taste amazing. Can i use this recipe to make a cookie cake?
Hi Shae, we can’t see why not!
Hello sally it is right? I just wanted to say I loved how they turned out and I love how you explained everything I just wanted to say that I kinda messed up, I mixed it too much but they still where delicious my family loved it thank you!✨☻ from: 9 yr old Emilie thanks!
Wonderful chewy yet soft texture similar to a brownie . I drizzled Sally’s Cream cheese frosting ( from red velvet cake recipe) across each cookie multiple times & they are so festive looking but more importantly delicious! Definitely a chocolate lovers cookie & great for the Christmas holidays gift baskets! Thank you for another great recipe!
This is the best cookie recipe! They are chewy, and soft! The flavor and texture are amazing. I didn’t use any food coloring and they still look and taste great!
Hi, can I use heavy cream in place of the buttermilk?
Hi Amy! It’s such a small amount that heavy cream should be OK, but you could try watering it down a bit so it’s not so thick. Enjoy!
Where did you purchase your beet powder? These look amazing! My daughter had a red velvet cookie and now wants us to make them at home. 🙂
Hi Hayley, Amazon would be a great place to look or even many grocers have it. Hope you love the cookies!
Hi Sally, Thank you for this amazing recipe! I made eggless version of it by substituting eggs with flax seeds. The cookies turned out great and my kids absolutely loved them.
Hi! Can I add a packet of chocolate pudding to this recipe?
Hi Lydia! No, we don’t recommend adding a packet of chocolate pudding – that would require additional testing. You may want to search for a pudding-specific cookie recipe if that’s what you’re looking for!
Amazing recipe!! But if you’re like me and love soft, chewy cookies then I definitely recommend baking for less time. I did mine for 7-8 mins and it comes out really puffy, but will flatten and hold it’s shape. I used white chocolate chips instead and also had to use more food coloring to get a rich red color.
Hi, Sally! Can i use brown butter in this recipe? Thank you.
Hi Sally! Is it possible to make them without a handheld/stand mixer? If so, what would be the best option?
Hi Fergus, you can certainly mix it by hand if necessary, but it will take quite a bit of arm muscle! Particularly when it comes to properly creaming the butter and sugars. We find a sturdy wooden spoon works best. Let us know how they turn out for you.
Mine didnt turn out red no matter how much food colouring I added
I love this recipe Sally! I love all your recipes. Quick question, have you ever added espresso powder to it? If so how much do you suggest
Hi Rontez, We haven’t tried it in these cookies but you certainly can. We love adding it to chocolate cookies like these brownie cookies! If you try it here, start with half of a teaspoon and adjust according to your taste. Enjoy!
Hi Jane, We haven’t tested it so can’t say exactly how much you will need, but it should work just fine!
Actually the best cookies I’ve ever made.
I think I added a little too much milk but hey, they were so good.
I’ve found using 1/4th cup more of flour makes it so it’s not sticky and immediately able to bake(for those who aren’t patient like me) overall pretty good
Absolute perfection. Soft, thick, rich cookies.
Hi Sally,
I am making these Red Velvet cookies for my niece to celebrate July 4th. She comes from Iowa.
In the recipe you have put Baking soda. Here in the UK we have Baking Powder and Bicarbonate of Soda. Could you tell me which one of these are the correct product to use please?
Many thanks
Karen from Somerset in England.
Hi Karen, Bicarbonate of Soda is the same thing as baking soda. I hope your niece loves the cookies!
I made these cookies as one of my red foods for our Juneteenth celebration this year and they were a HUGE HIT! I did add 1/4 teaspoon of Baking Powder because I saw in another recipe that it could be added to make the cookies a little more puffy but I’m sure I didn’t even need that addition because they were absolutely amazing overall (and I’m sure it had nothing to do with that 1/4 teaspoon, lol! I actually had to HIDE a few of the cookies from my family so I could have a few left over! I only got like 14 or 15 cookies instead on 18, so maybe the scooper I used was too large… but next time I’ll be sure to make two batches so they can last more than a day! Thank you for the amazing recipe!!!
I made these cookies last week and they were amazing.
Still a baby in the kitchen but I wanted to make cookies for Ma this Mother’s Day (our usual spot for cakes is closed atm, curse this quarantine). Instructions were v. easy to follow and the cookies came out delicious! Only thing everyone told me to use less of next time were the chocolate chips (not a big chocolate fan this house, unfortunately) but that’s an easy fix. Can’t wait to try another recipe!
Hi, I was just wondering about the nutrition facts. How many cookies per serving and how many calories?
Hi Alia, I’m unsure of the nutritional info of this recipe, but there are many great online calculators like this one: https://recipes.sparkpeople.com/recipe-calculator.asp
These cookies turned out beautiful and so yummy!! The whole family is hooked on them! Great recipe!
So yummy! Everyone is happy!
They have a great red velvet taste.
Hi Sally! Was wondering if i could use liquid food colouring for this recipe?
Hi Amy, You can but liquid food colors are not as bright as gel so don’t expect as vibrant of a color. But the taste will still be the same!
just make these and they are amazing treats, great change up from the usual chocolate chip cookie!!!
I love this recipe! The ingredients are so simple that I was able to have all of them in my house without going out. Even in these saddening times , the delicious taste of these cookies was able to brighten up my family and I. Easily one of the best cookies I have ever had!
Made these for my husband for valentines and they are so yummy!! Thanks for the great recipe
OMG Sally, these are absolutely delicious. My yield was ~28cookies since i baked in smaller sizes. I chilled the dough for three days,since i have been reading about the 0-24-48hrs chilled dough difference. Am not sure if it’s the longer chilling or the recipe as is…. it’s mouth watering delicious.
I made a change though, used half ap and half ww flour. And didn’t use any colour. It would be great if you can share the recipe of beet powder once.
I made these for Valentine’s Day and they are fantastic! I used white chips instead of chocolate. Moist and great flavor.
These are amazing! Made them for Valentines day in a heart shaped mold. Excellent flavor. Almost brownie-like texture.