

You only need 7 ingredients to make these lemon bars. The lemon curd filling is extra thick and creamy and sits on an irresistible buttery shortbread crust. Always bake lemon bars at a lower temperature to avoid over-baking. They’re simply the best lemon bars and are perfect for picnics, bake sales, spring brunches, baby showers, and bridal showers.
Today I’m teaching you how to make lemon bars. I love this lemon dessert recipe so much that I published it in my 1st cookbook, Sally’s Baking Addiction. These are the best lemon bars and I don’t use that statement lightly. After 1 taste, I’m confident you’ll agree. Everyone needs this recipe.
The process is pretty simple and I’m walking you through each step in the video tutorial below. Pick up some fresh citrus and let’s get baking. Spring is in the air!
Video Tutorial: Lemon Bars
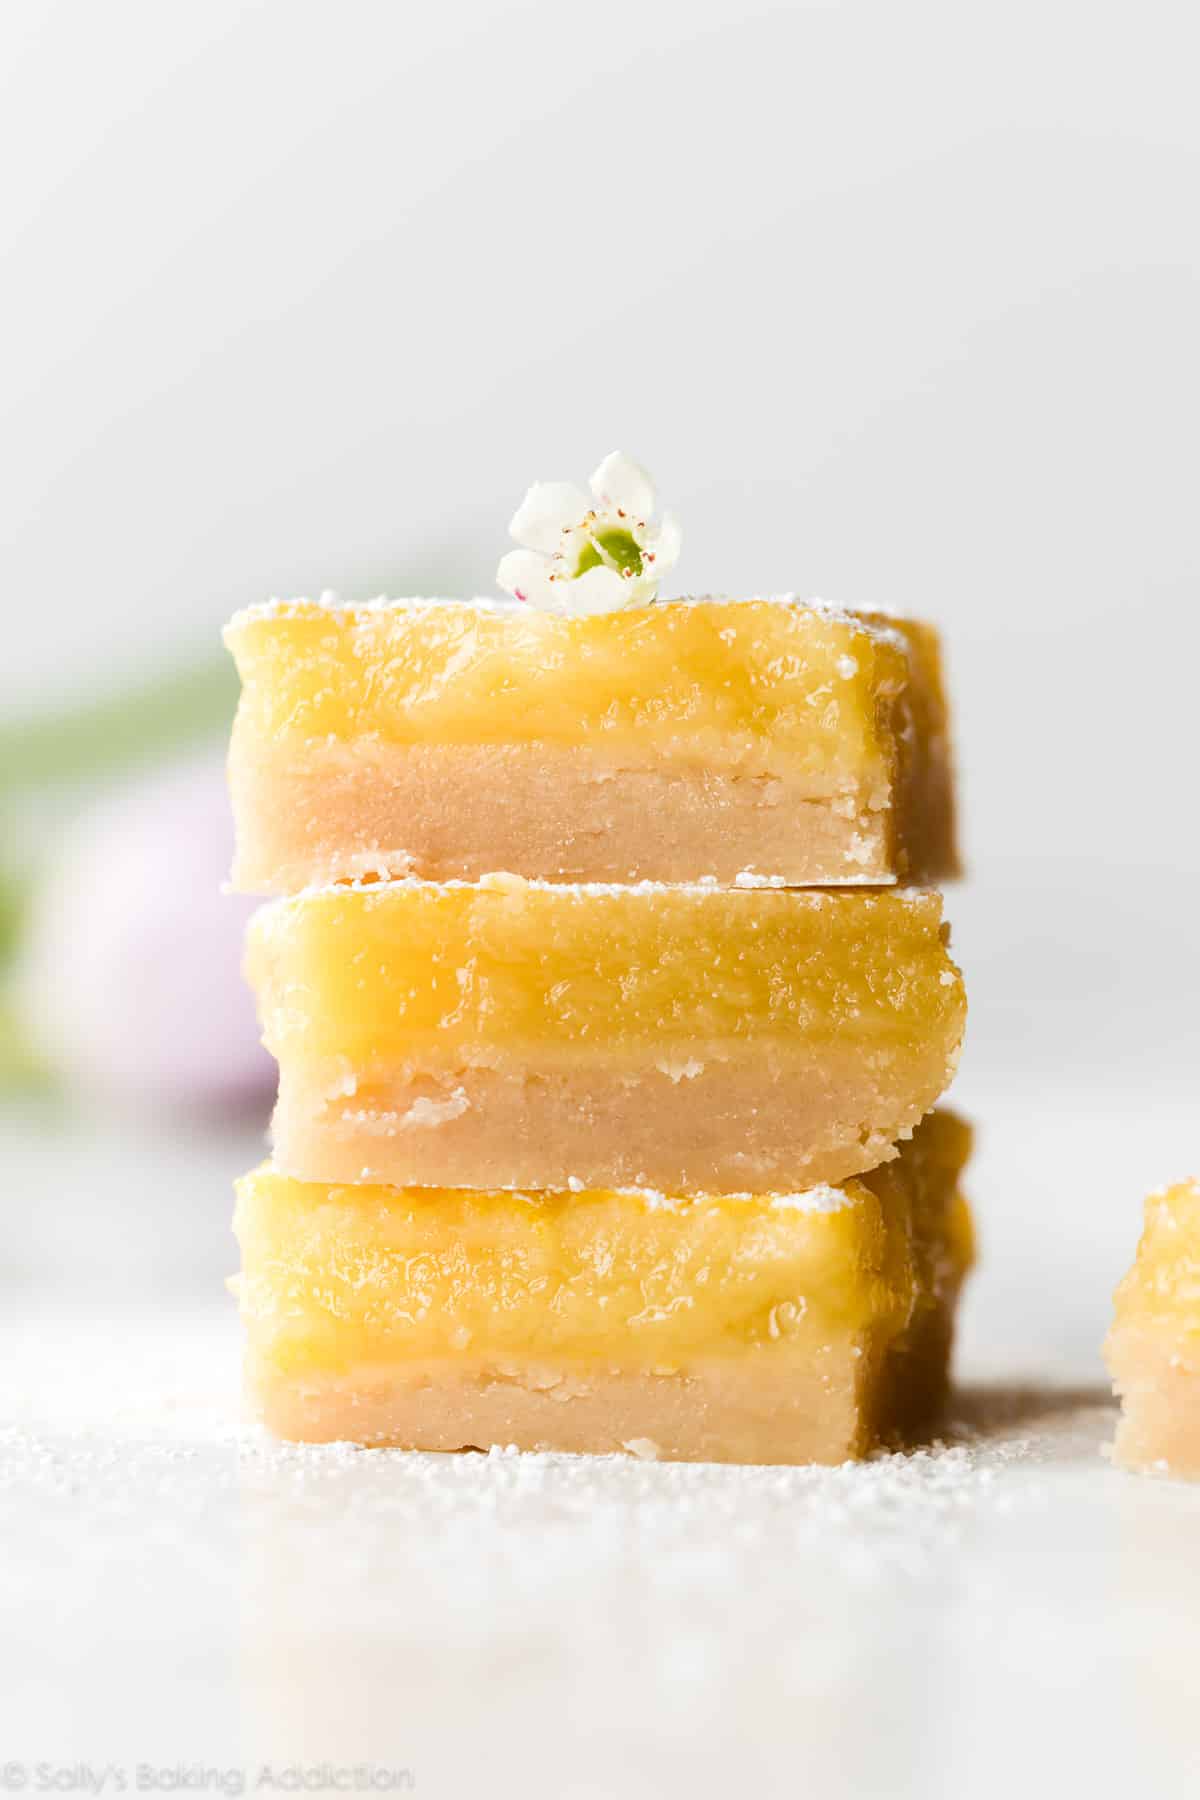
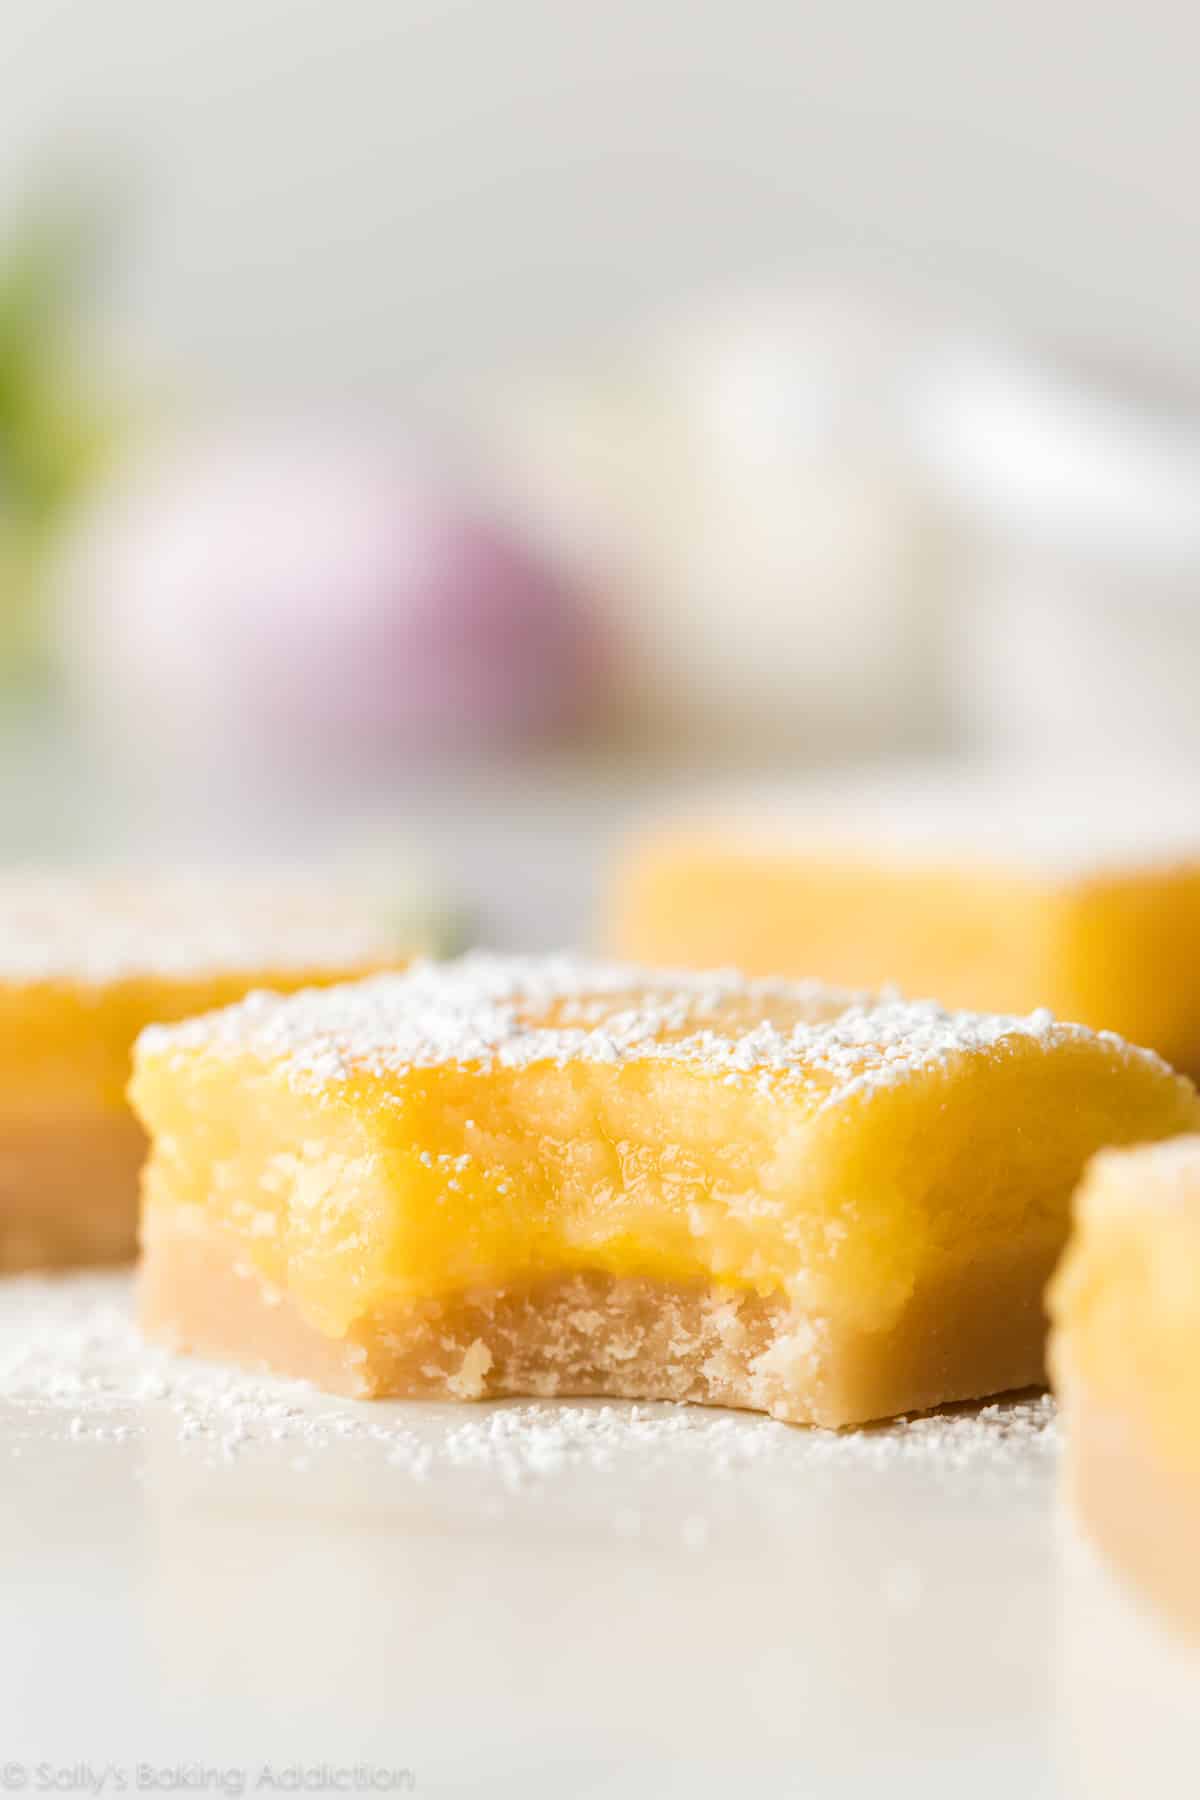
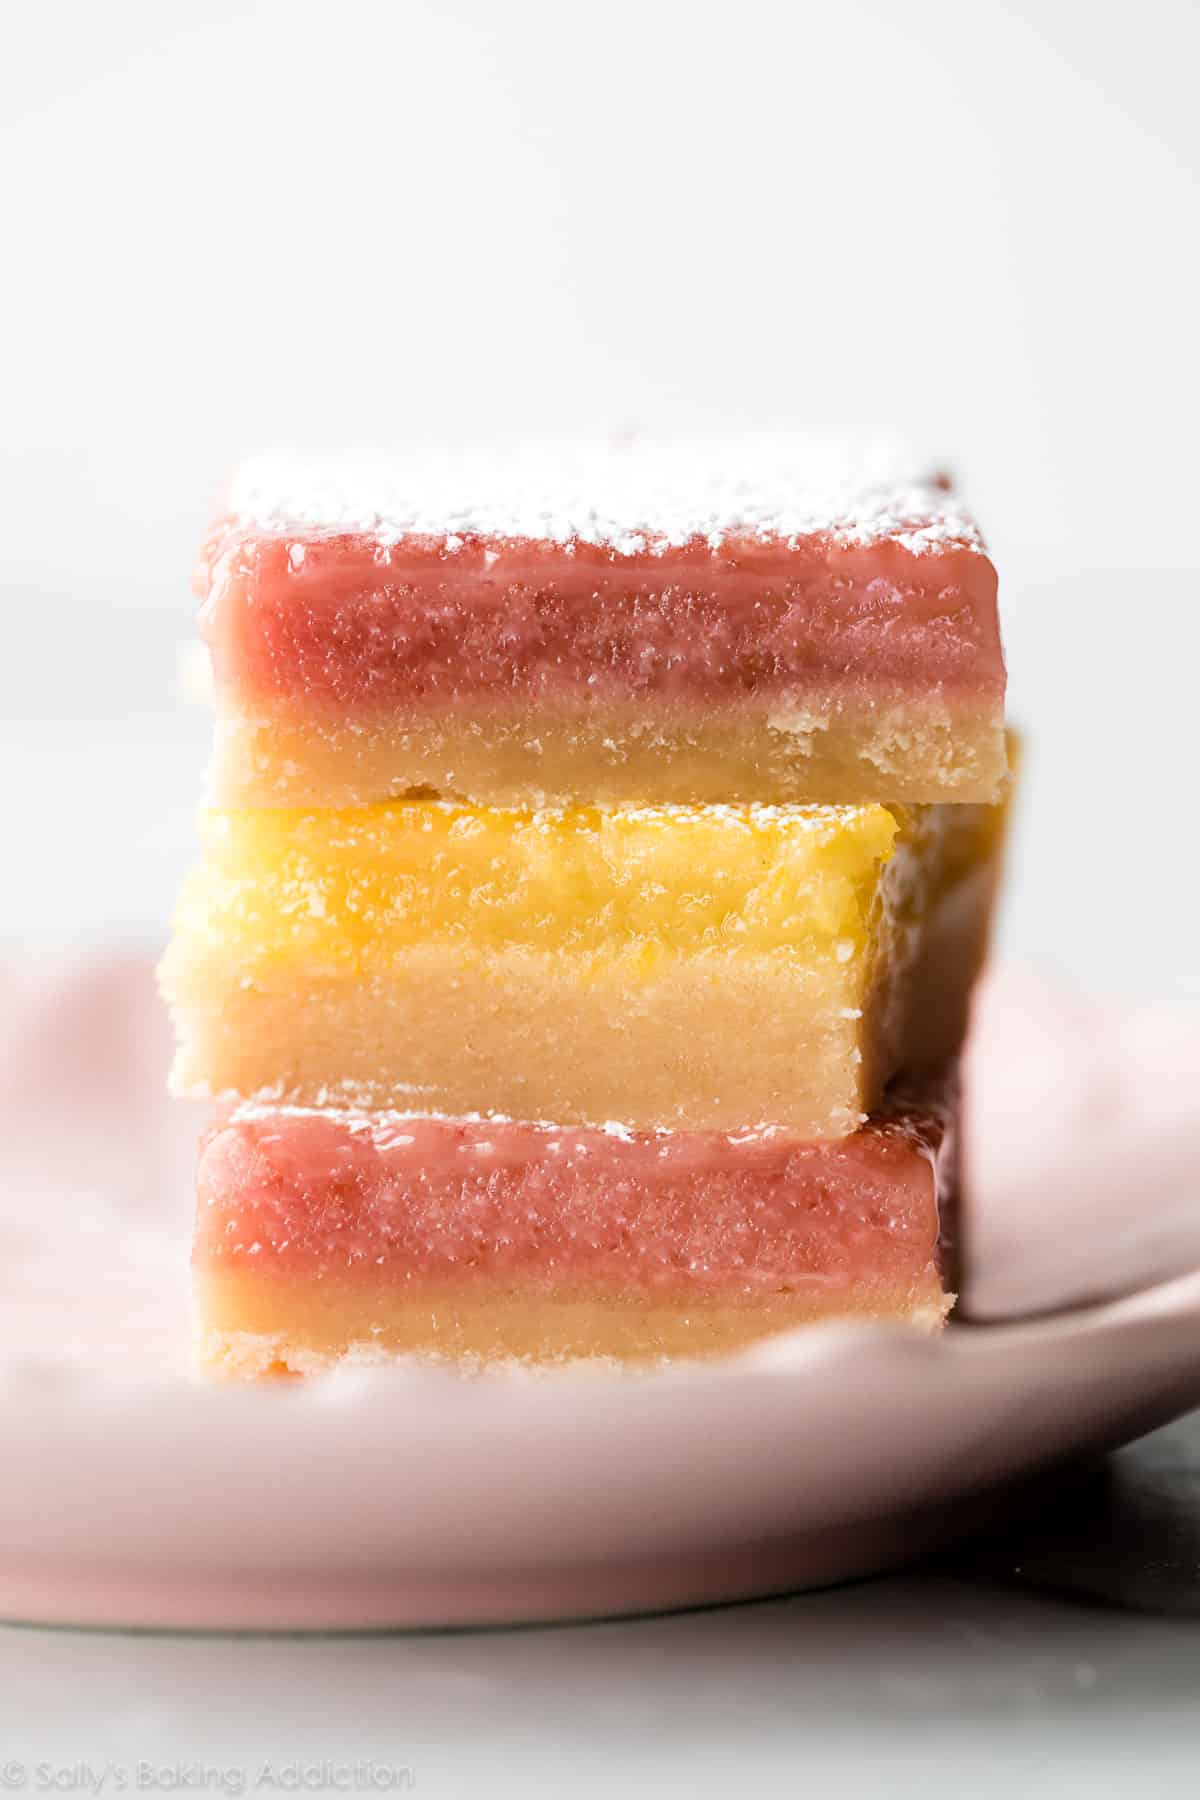
These are classic lemon bars featuring a soft butter shortbread crust and a tangy sweet lemon curd filling that’s baked to the perfect consistency. The lemon layer is thick and substantial, not thin or flimsy like most other lemon bar recipes.
Only 7 Ingredients in these Lemon Bars
- Butter: Melted butter is the base of the shortbread crust.
- Sugar: Sugar sweetens the crust and lemon curd filling layers. Not only this, it works with the eggs to set up the lemon filling. If reduced, the filling will be too wet.
- Flour: Flour is also used in both layers. Like sugar, it gives structure to the lemon filling. These days, I add slightly more flour to the shortbread crust compared to my cookbook version. You can get away with 2 cups, but an extra 2 Tablespoons really helps solidify the foundation of the lemon bars.
- Vanilla Extract: I use 2 teaspoons of vanilla extract in the shortbread crust. Not many lemon bar recipes call for vanilla extract and I promise you it’s my best kept secret.
- Salt: Without salt, the crust would be too sweet.
- Eggs: Eggs are most of the structure. Without them, you have lemon soup!
- Lemon Juice: I highly recommend using lemon juice squeezed from fresh lemons. You can also use another citrus like blood orange, grapefruit, or lime juice. For extra flavor, add some fresh zest as well.
How to Make Lemon Bars in 5 Steps
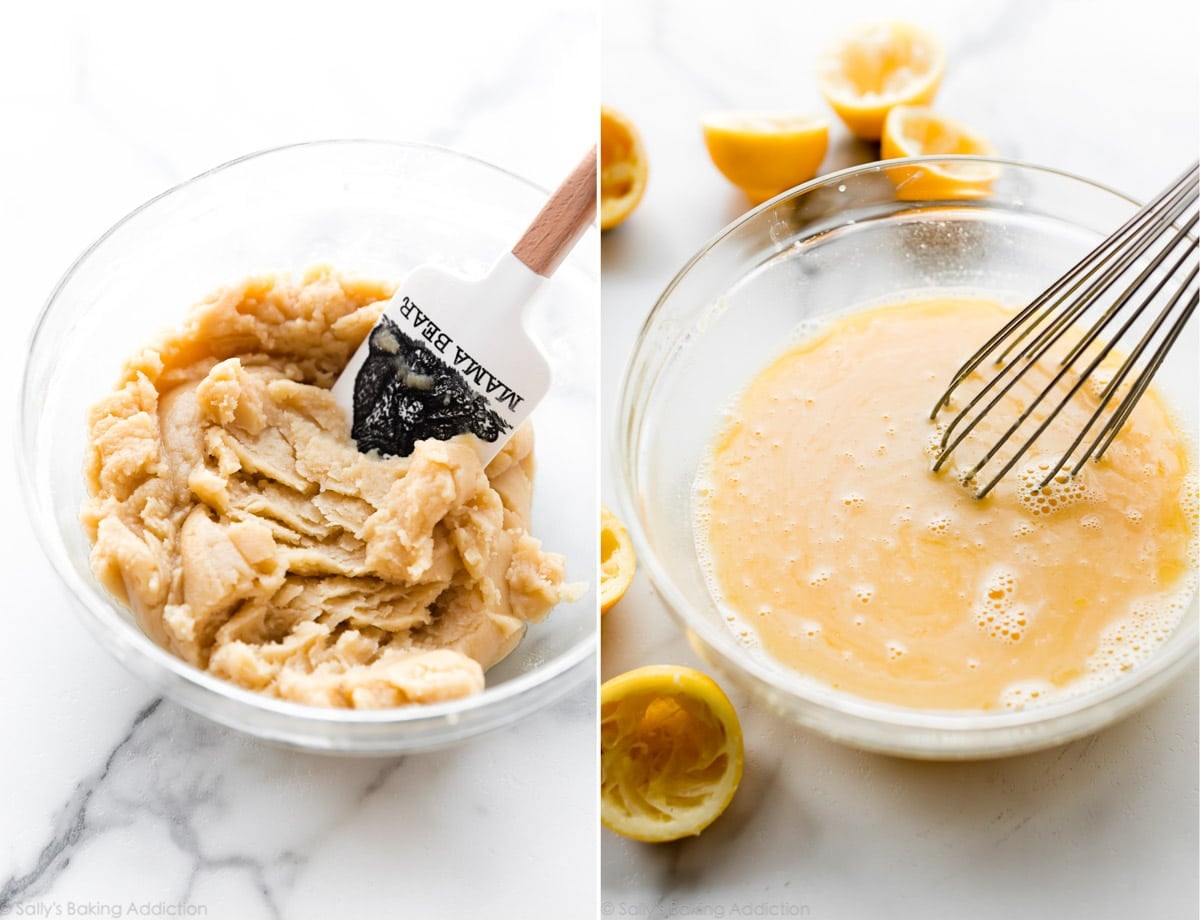
- Prepare the crust: Mix all of the shortbread crust ingredients together, then press firmly into a 9×13-inch baking pan. Interested in a smaller batch? See my recipe note.
- Pre-bake: Pre-baking the crust guarantees it will hold up under the lemon layer.
- Prepare the filling: Whisk all of the filling ingredients together. No cooking on the stove!
- Bake: Pour the filling on the warm pre-baked crust, then bake for around 20 minutes or until the center is just about set. I slightly increased the baking temperature from my cookbook version. Either temperatures work, but 325°F is preferred.
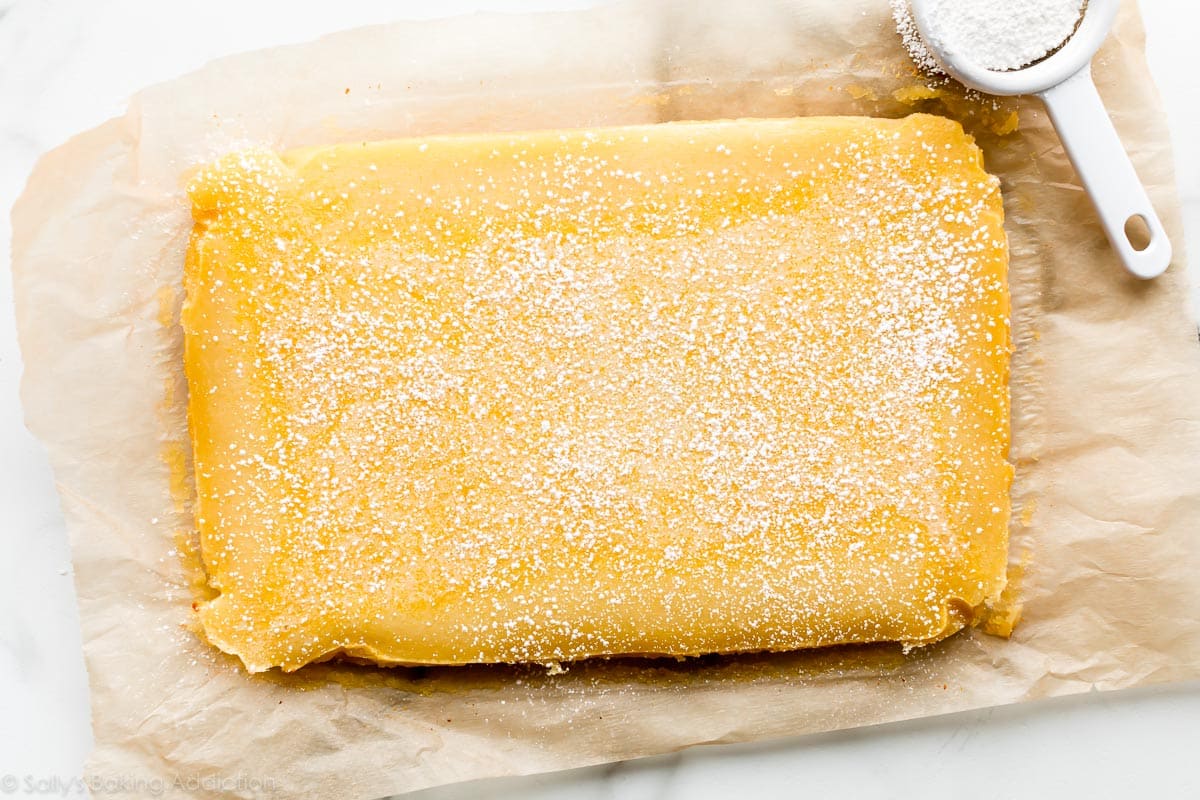
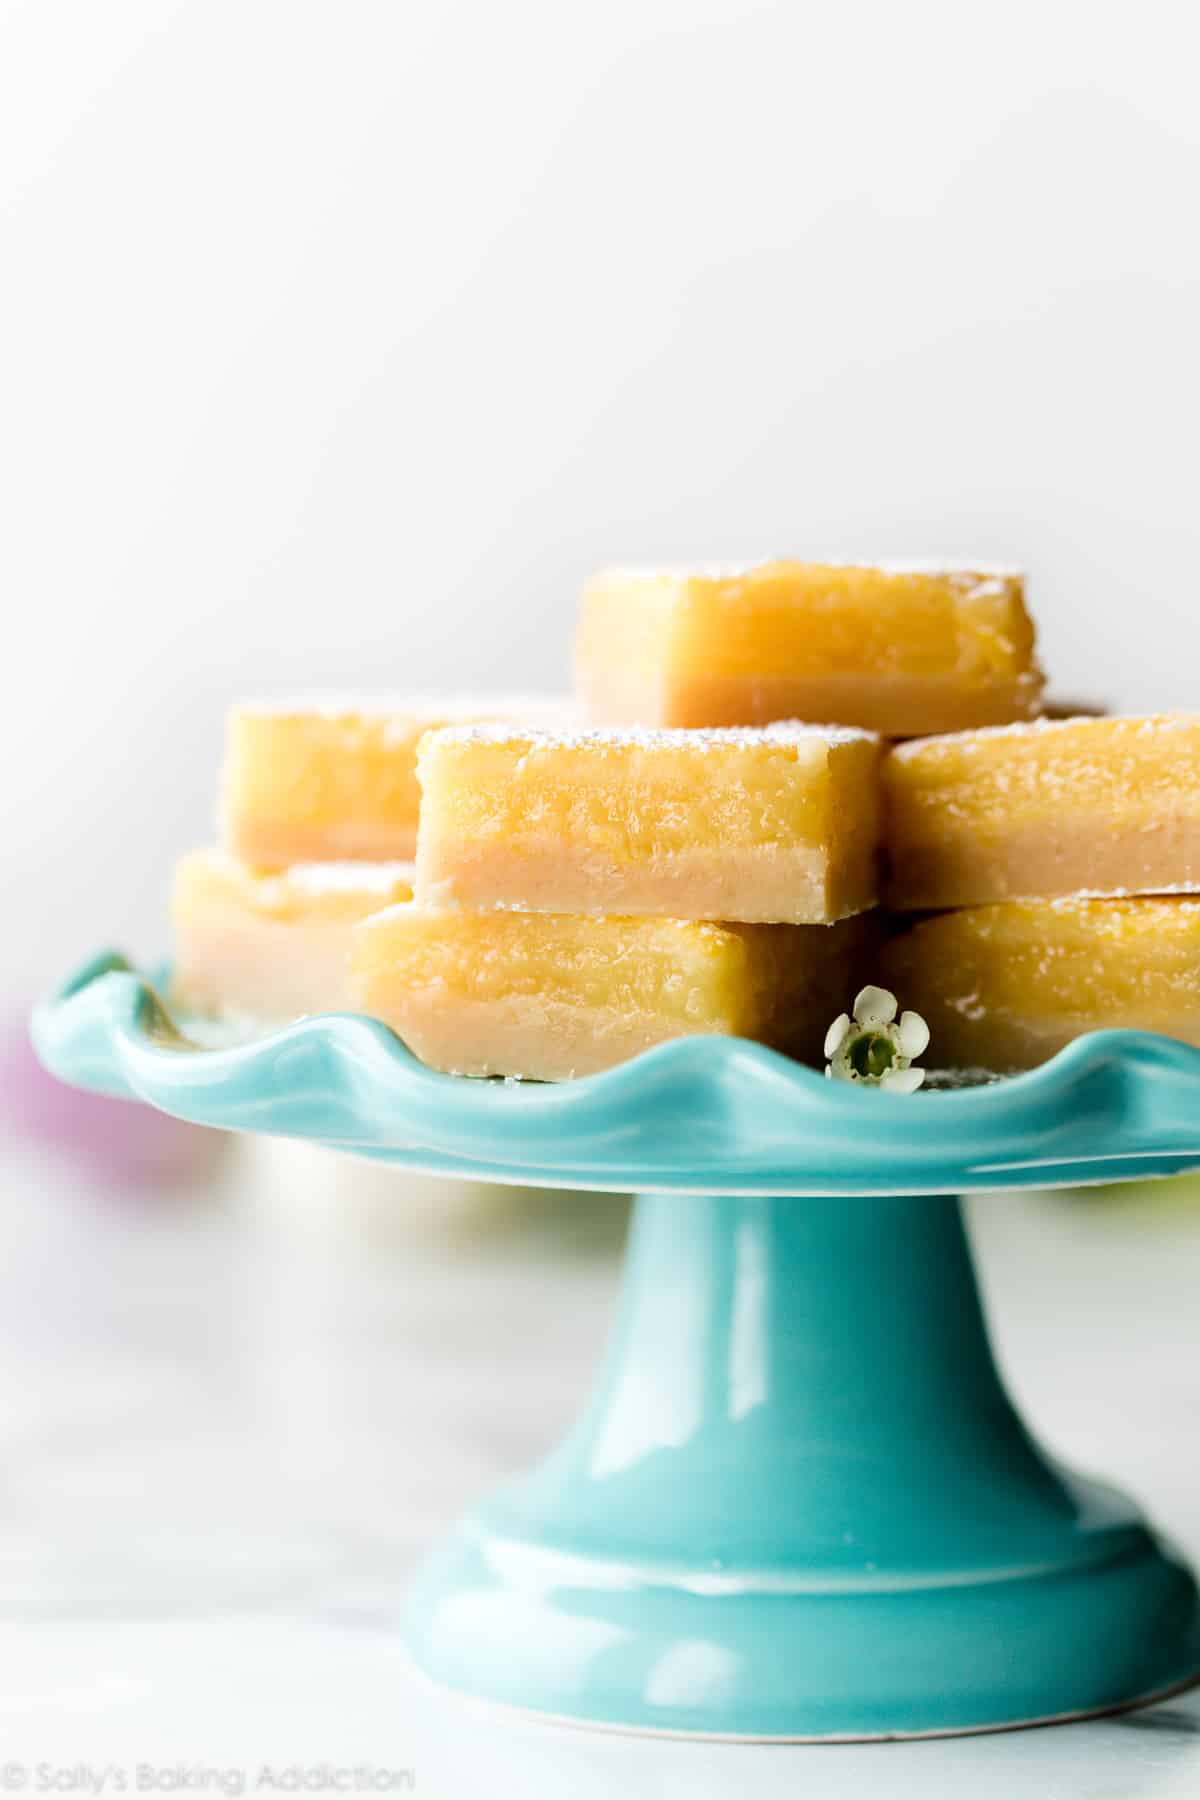
- Cool: I usually cool the lemon bars for about 1 hour at room temperature, then stick the whole pan in the refrigerator for 1-2 more hours until relatively chilled. They’re wonderful cold and with a dusting of confectioners’ sugar on top!
Prepared in only 2 bowls and a baking pan, clean up is a breeze. These lemon bars win 1st place every time because they’re the perfect balance of tangy and sweet. In fact, I made them for my friend’s baby shower last weekend and they were the first dessert to disappear. And that’s saying a lot considering the competition: homemade chewy fudgy frosted brownies and adorable mini animal cracker cookies. 🙂
2 Guaranteed Tricks to Make the Best Lemon Bars
- Use a glass pan. Ceramic is fine, but glass is best. Do not use metal. I always detect a slight metallic flavor in the lemon bars when baked in metal pans.
- Use fresh juice. Store-bought bottles are convenient, but you miss out on a lot of flavor. You will definitely taste the difference! I have a super old citrus juicer, but I recently purchased this juicer for my mom and she loves it. Highly recommended.
White Air Bubbles on Top of Baked Lemon Bars
Do you notice air bubbles, perhaps even a white layer of air bubbles, on top of your baked lemon bars? That’s completely normal. It’s the air from the eggs rising to the surface. Some batches have it, some don’t. Regardless, the lemon bars taste the same and a dusting of confectioners’ sugar covers it right up!
Blood orange bars! See my recipe note about substituting flavors.
Want to kick it up a notch? Here are my lemon meringue pie and lemon cheesecake recipes.
Craving lots of texture with your bars? You’ll love my oatmeal lemon crumble bars.
Plenty of lemon recipes to love on my site including these lemon crinkle cookies and lemon thumbprint cookies! Regardless of what you choose, lemon desserts are always a great choice when looking for springtime or Easter dessert recipes.
Print
Lemon Bars
- Prep Time: 10 minutes
- Cook Time: 40 minutes
- Total Time: 3 hours, 50 minutes
- Yield: 24 bars
- Category: Dessert
- Method: Baking
- Cuisine: American
Description
You only need 7 ingredients to make these lemon bars. The lemon curd filling is extra thick and creamy and sits on an irresistible butter shortbread crust. Always bake lemon bars at a lower temperature to avoid over-baking. See recipe notes for important tips. They’re simply the best lemon bars and are perfect for picnics, bake sales, spring brunches, baby showers, and bridal showers.
Ingredients
Shortbread Crust
- 1 cup (16 Tbsp; 226g) unsalted butter, melted
- 1/2 cup (100g) granulated sugar
- 2 teaspoons pure vanilla extract
- 1/2 teaspoon salt
- 2 cups + 2 Tablespoons (265g) all-purpose flour (spooned & leveled)
Lemon Filling
- 2 cups (400g) granulated sugar
- 6 Tablespoons (46g) all-purpose flour
- 6 large eggs
- 1 cup (240ml) fresh lemon juice (about 4 lemons)
- 2 teaspoons fresh lemon zest, optional
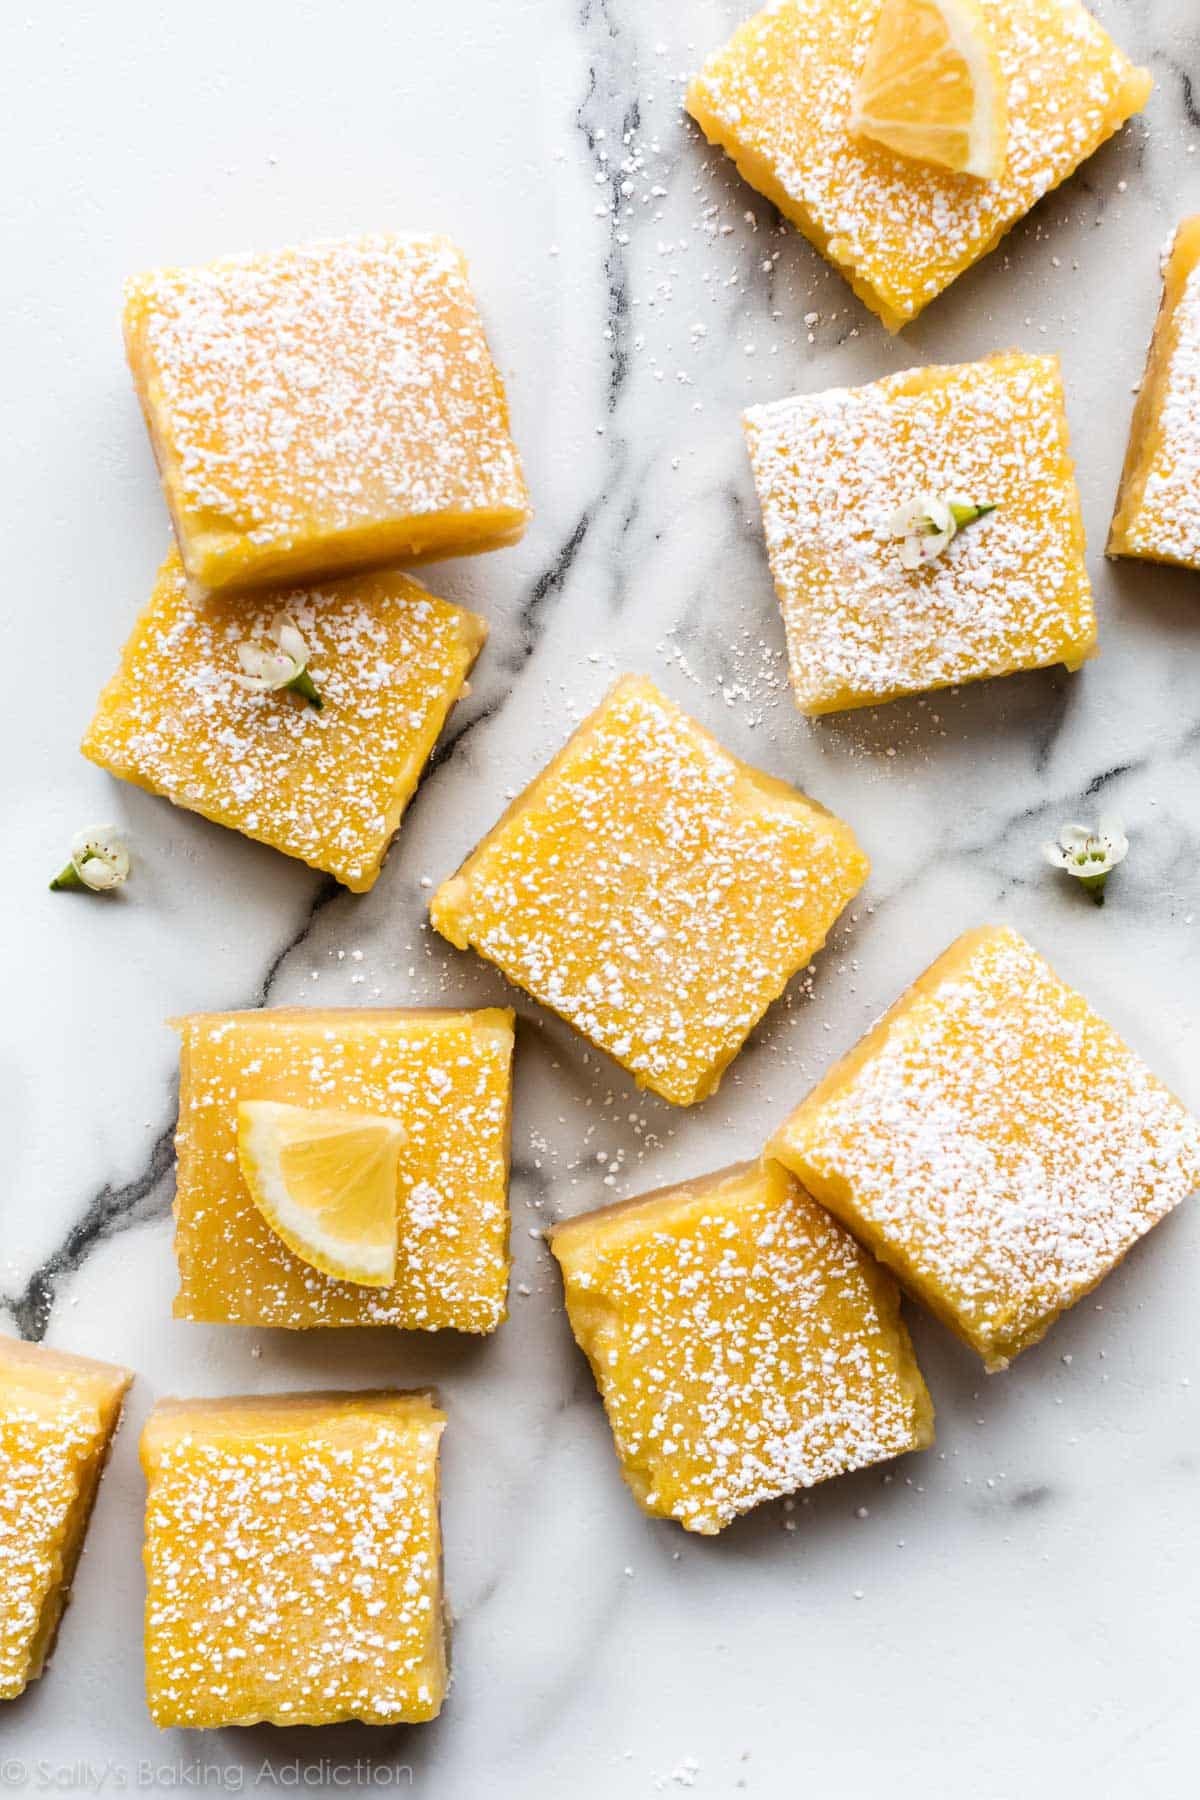
- optional: confectioners’ sugar for dusting
Instructions
- Preheat the oven to 325°F (163°C). Line the bottom and sides of a 9×13-inch glass baking pan (do not use metal) with parchment paper, leaving an overhang on the sides to lift the finished bars out (makes cutting easier!). Set aside.
- Make the crust: Mix the melted butter, sugar, vanilla extract, and salt together in a medium bowl. Add the flour and stir to completely combine. The dough will be thick. Press firmly into prepared pan, making sure the layer of crust is nice and even. Bake for 20-22 minutes or until the edges are lightly browned. Remove from the oven. Using a fork, poke holes all over the top of the warm crust (not all the way through the crust). A new step I swear by, this helps the filling stick and holds the crust in place. Set aside until step 4.
- Make the filling: Sift the sugar and flour together in a large bowl. Whisk in the eggs, then the lemon juice and lemon zest (if using) until completely combined.
- Pour filling over warm crust. Bake the bars for 22-26 minutes or until the center is relatively set and no longer jiggles. (Give the pan a light tap with an oven mitt to test.) Remove bars from the oven and cool completely at room temperature. I usually cool them for about 2 hours at room temperature, then stick in the refrigerator for 1-2 more hours until pretty chilled. I recommend serving chilled.
- Once cool, lift the parchment paper out of the pan using the overhang on the sides. Dust with confectioners’ sugar and cut into squares before serving. For neat squares, wipe the knife clean between each cut. Cover and store leftover lemon bars in the refrigerator for up to 1 week.
- Freezing Instructions: Lemon bars can be frozen for up to 3-4 months. Cut the cooled bars (without confectioners’ sugar topping) into squares, then place onto a baking sheet. Freeze for 1 hour. Individually wrap each bar in aluminum foil or plastic wrap and place into a large bag or freezer container to freeze. Thaw in the refrigerator, then dust with confectioners’ sugar before serving.
Notes
- Special Tools (affiliate links): 9×13-inch Glass Pan | Glass Mixing Bowls | Silicone Spatula | Silicone Whisk | Juicer | Fine Mesh Sieve
- Halve the Recipe: Halve each of the ingredients to yield around 12 squares in a 9-inch square baking pan. Same oven temperature. Bake the crust for 16-18 minutes and the bars for 20 minutes or until the center no longer jiggles.
- Sifting: More often than not, the flour doesn’t fully incorporate into the lemon filling unless it’s sifted with the sugar. As directed in the recipe, sift the two together before adding the eggs and lemon juice. I don’t always do this (and didn’t even do it in the video above!) but it’s preferred to avoid any flour lumps. If you have a sifter, it’s worth using. If you forget, it’s not a huge deal. Here is my favorite sifter. You use it again to dust the lemon bars with confectioners’ sugar.
- Lemon Juice: For exceptional taste, I highly recommend fresh lemon juice. Here is a wonderful inexpensive juicer if you don’t have one. Or use another fresh-squeezed citrus like grapefruit, blood orange, lime, or regular orange. You can slightly reduce the sugar if using a sweeter citrus. I recommend no less than 1 and 2/3 cup granulated sugar in the filling as it’s needed for structure.
- Room Temperature: Bringing the eggs and lemon juice to room temperature helps them mix easier into the flour and sugar. However, I never notice a taste or texture difference when using cold. Room temperature or cold, use whichever!


Reader Comments and Reviews
Made them today in a 9×13 and they turned out great!
Just curious why you don’t add lemon zest. I added the zest of one lemon and delicious! Thanks for the recipe.
Super disappointed in these. The crust is soft. The topping has a thick layer on it and has cracks. I did 325 as the recipe said. Followed all of the instructions. I should have stuck with Martha Stewart’s recipe. Two stars because the flavor is good
You obviously didn’t follow the recipe correctly. Everyone gives 5 stars. I made them many times and they are great!
I made these today and they came perfectly. The crust has just enough crunch, and the filling set up nicely but was still soft and smooth without any cracking. I added the zest from a whole lemon to kick the pucker factor up a notch. 😉 I didn’t have any parchment paper, so I greased the pan with crisco and flour. I cut them in the pan after cooling and they came out without a hitch. Here’s a picture of it https://i.imgur.com/BySPCEy.jpg
There should be a 6th star for this recipe! I am diabetic and allow myself one cheat item a month and this was it. Pains me to see the others in fridge waiting to be enjoyed. Absolutely out of this world. The vanilla and fresh squeezed juice are critically important, if you don’t do that, don’t bother.
First time making my own lemon bars. Huge hit for my daughters 17th birthday! I shared leftovers with some co-workers and one said “holy crap those are good” and wanted the reciepe or to hire me to make them some more. Best lemon bars I have every had!
These were delicious but I couldn’t get the powdered sugar to “stick”! I let them cool on the countertop for 2 hours and then put them in the fridge (without dusting). Took them out the next day to cut them and dust with sugar and almost immediately the sugar just kind of seeped in. Tried again later and same thing. Any ideas?
When my mother was alive she made the best lemon bars. She gave me the recipe but they never turned out the same…and my family would always suggest I leave the lemon bar making to Grandma. Well,she’s been gone almost four years so I set out to find a lemon bar of my own….and this recipe didn’t disappoint. I got the best review from my husband….”Not Marie’s …..but very, very good”!
This is the first time I made lemon bars, and they turned out so well! I made them for some friends and they loved them so much! I even had a friend ask for the recipe. I made these because I had a grapefruit so I subbed half of the lemon juice for grapefruit juice (in total I used 1 grapefruit and 2 lemons). No one really noticed any other flavor besides lemon, but regardless they were delicious. Thank you for this recipe!
These are amazing! I used the 9×9, so they came out thin, but I cut them into large squares. My only augmentation was to add the zest of two lemons to the shortbread crust. Delicious!
OMG! Just made these doing exactly as you said. Used my ARIZONA oranges and wowza! Never, ever had a lemon bar this delicious! I’m addicted. Thank you, thank you!!
I made them in an 8×8 pan because I don’t have a 9×9 and they turned out great!
We’re fortunate to have a fruitful a lemon tree, so I’m scouring the internet for recipes – First time making lemon bars. They’re delicious! I added the zest of the lemons to the crust, making it wonderfully fragrant while baking.
These are delicious! I’m going to make them again for a party. I just have a question about something I ran into while baking. There was a skin on top, almost like a layer or merringue on the top. Could this has happened because I whished it together too much? When I peeled the layer off the top it left the beautiful delicious lemony layer. Oh my goodness is the shortcrust perfect! This is my first time making lemon squares, came out delicious but I’m trying to avoid that hard layer issue again. Thanks so much for any advice!
Hi Suzy! That can happen if the oven is simply too hot. I recommend using an oven thermometer or reducing the oven temperature down to 300°F (149°C) and baking for a few extra minutes. I’m so glad you loved these!
My friend brought me lemons from AZ this week so I made these today! They are amaze-balls! Great recipe, followed exactly and my husband is a happy man. As always, Sally, you nailed it. Thank you.
Love these Sally! First time making lemon bars. I love chocolate! But this lemon bar is delicious! Everyone at work loves them. Thank you for always testing your recipes so they come out perfect every time!!
The taste is great. However I must have left holes in the crust before pouring in the lemon mixture. Its almost as if the crust ended up on top. Other than that it is delicious!
These are wonderful. Thank you for the thorough attention to detail in your instructions & making it so easy as a result!
Two things I added for my second batch that I felt helped:
1. I used sprouted spelt flour for the CRUST only. (used regular all purpose flour for the filling.)
2. I sifted the filling onto the warmed crust. This helped smooth out the filling/weeded out those teeny tiny leftover seeds & pulp that Ianded into my first batch. I do use an electric juicer which keeps most of this stuff out, however not all of it. I do recognize that this step may be a matter of taste!
I enjoyed experimenting with this one! Thanks again.
I’ve always been so intimidated by lemon bars but Sally you have helped me conquer my fear! They are delicious and so simple to make. My husband (who I did not make these for) even grabbed a bar and then requested the next batch to be made using grapefruits. They also look very nice and it seems like you had to do a lot of work…. but again… you don’t have to, Sally makes it simple!
Hi Sally!
Just wondering (I apologize if someone has already asked) if I could slice these and then add meringue on top and toast with a kitchen torch without changing anything? I just don’t want to ruin the curd in any way. Thanks!
Yes you can do that and it would be so pretty and delicious!
I made this recipe (my first attempt at making lemon bars) and my family LOVED it! Your video was so helpful!! Thank you!!
These live up to the hype – they are that good! I actually thought they were even better day 2!
Love the recipe. I followed it to a tee and it is great. Very simple too.
My only comment is the mention of using a glass pan because of the metallic taste left by a metal pan. This actually makes no sense when you are also saying line your pan with parchment paper. I did however use a glass pan as I like the way the cook better than my metal one but that’s me.
Other than that it I cannot find fault with this delicious recipe.
I love allllll of your recipes! With these lemon bars they came great, but my crust was harder than expected. Do you have any ideas what I may have done wrong?
Thanks!
Hi Sierra, I’m so happy you enjoyed them! Be sure that you oven is at 325 (not 350) and only bake them until the edges are VERY lightly browned (even if it’s shorter than the suggested bake time)!
Very good! They were perfectly soft and tart, I juiced 5 lemons so I’m not sure the exact amount but other than some lemon zest, I followed the recipe exactly. Best lemon bars I’ve ever tried, let alone baked.
I’m making them again tonight (4 days later), and trying with blood orange this time.
This receipe was perfect! Not too tart, not too sweet. The perfect crust to filling ratio.
They were very easy to make . The receipe is a keeper.
Thank you for sharing it with all of us.
My absolute favorite of the many tried. Still, I think that little burst of flavor from the zest might be an addition worth trying. Speaking of trying, have you tried or considered another tart ‘fruit'(rhubarb) to use in this recipe?
Hi Michael! I’ve only used this recipe with blood oranges, regular oranges, and grapefruit before. Let me know any other fruits you try!
These are yummy! Served them last night to guests & no one could eat just one!
I usually modify recipes, I compare w/ others. This recipe was about as perfect as you could get and believe me, I tried to modify. I love a tart lemon filling and this was perfect, not too tart. I used firm Meyer lemons and needed about 7-8. I added about 1/2 teas zest in filling and 1/2 teas vanilla in crust plus 1/2 teas baking powder. None of these extras were likely needed. If reader is new to making lemon bars and follows Sally’s recipe, you will end up, like I did, with a perfect result. Tip: Wait for the bars to fully chill as Sally instructs. Sally – I will never buy bakery lemon bars again, these were far superior. Also, I can envision using this recipe to make a lemon tart. Sally, your attention to detail in this recipe was spot on – thank you very much!!
I made these for Christmas for my grandma. Everyone really enjoyed them, but I may play with the recipe a bit. The shortbread bottom had a strong butter flavor and was a bit too thick. I may halve it and cut some of the butter out. It also didn’t cook as expected. At 325F, my shortbread bottom was still very white after 20 minutes. I baked it for another 5 minutes which probably just dried it out too much. The lemon filling was a bit acidic in flavor. I lightly zested 2 of the lemons and added that, and I felt it gave it a bit more of a candied lemon flavor. The filling also didn’t want to set. After cooking for an extra 10 minutes, I brought the temp up to 350F and cooked it for an additional 10 minutes before I felt it was done. I have since checked my oven with a thermometer, and it is going up to the set temperature, so my oven wasn’t cooking low. Cook time: 70 minutes
Delicious Sally!! Love the texture (perfectly set) and lemon flavor. Clear instructions appreciated. Parchment paper made it so easy. Even though I baked the crust for 22 minutes, It didn’t get to the lightly browned stage. Think I should have left it in a little longer. But bars were still delicious!:)