

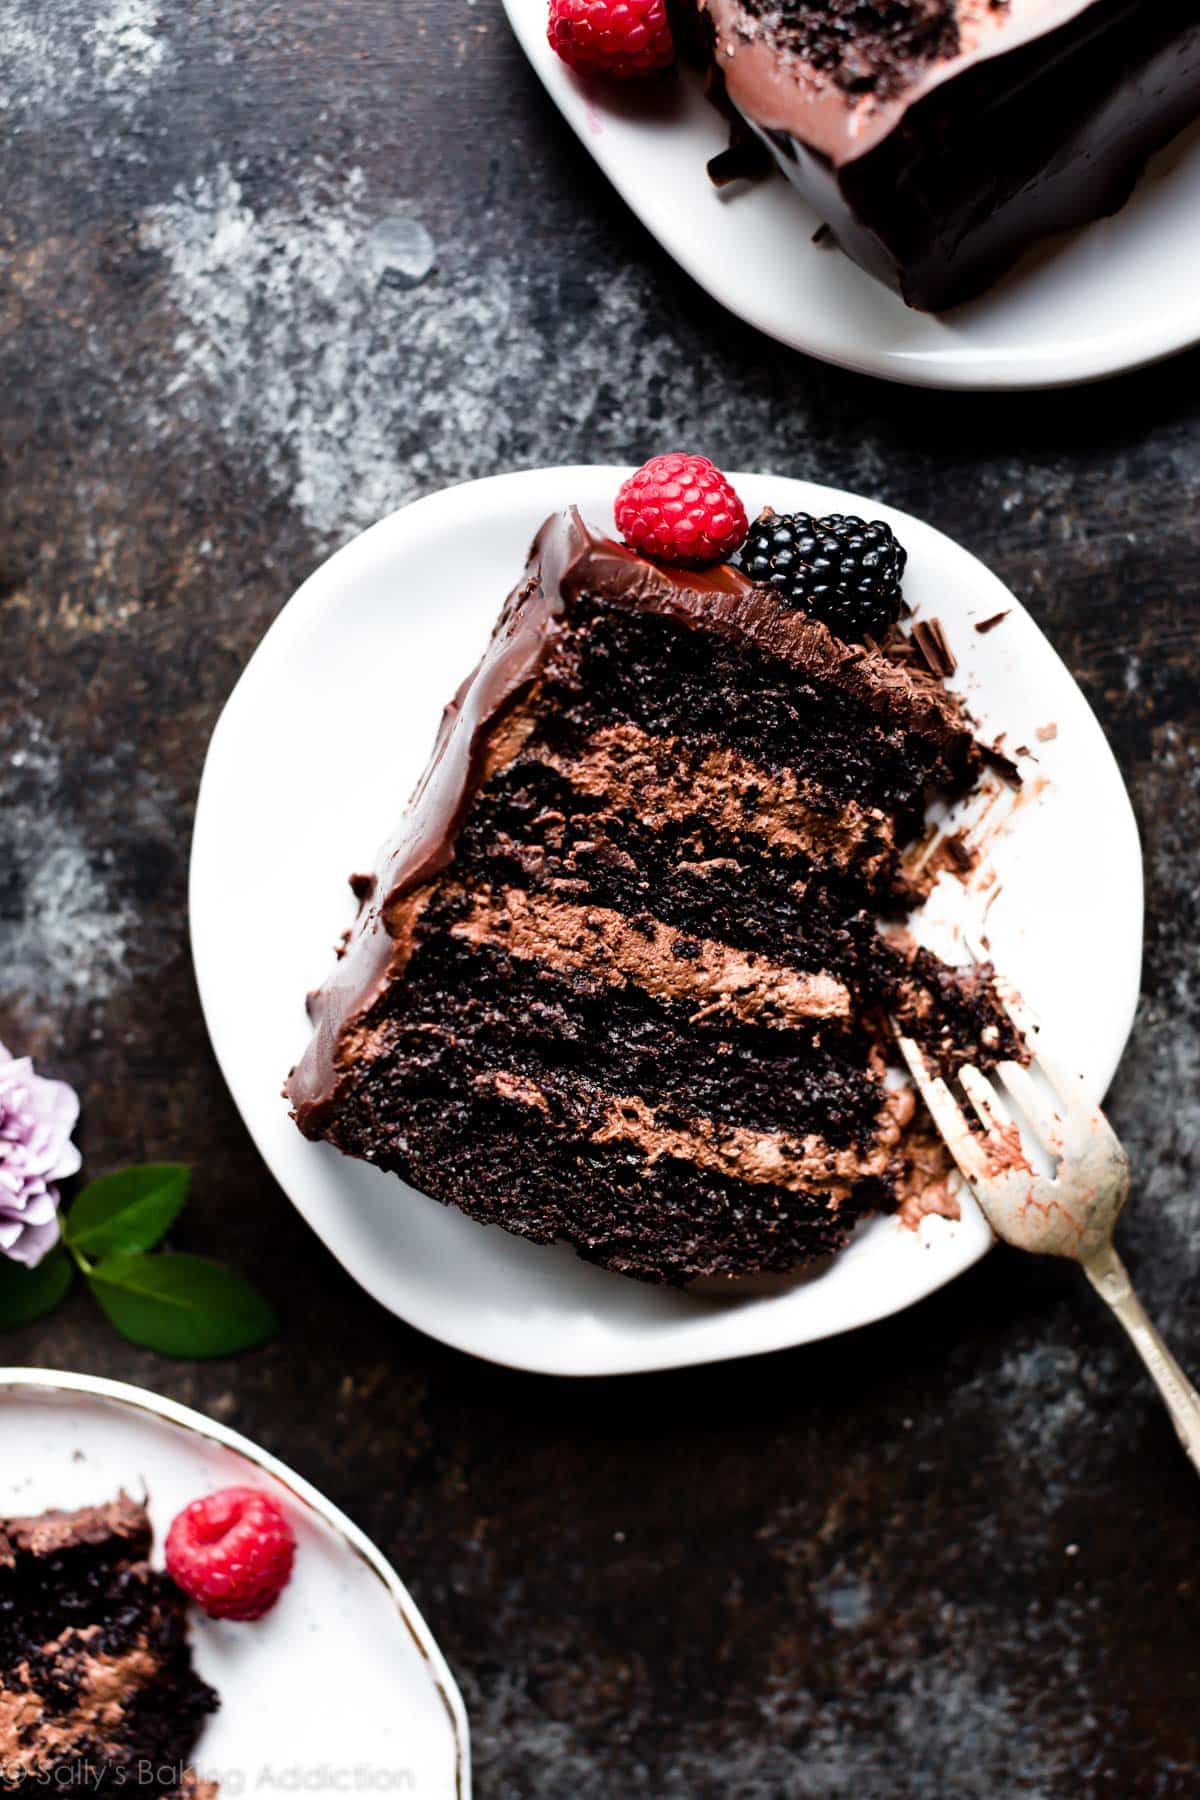
This super moist dark chocolate mousse cake combines unsweetened natural cocoa powder and dark cocoa powder for an extra rich flavor. Fill the cake with a simplified chocolate mousse and cover the whole dessert with semi-sweet chocolate ganache. If needed, you can prepare the ganache and mousse ahead of time.
Chocolate mousse is simple divinity in its own right, but when paired with chocolate cake, it’s downright decadent. And then add chocolate ganache to the mix? Have mercy.
This spectacularly rich chocolate cake is such a personal and reader favorite that I knew I had to include it in my cookbook, Sally’s Baking 101 (which has become a New York Times Best Seller!). The cakes chapter just would not have been complete without it!
It’s actually the first recipe in that chapter, and in the book it’s titled “Chocolate Ganache Cake: 2 Ways,” because I include a second filling option—peanut butter frosting instead of chocolate mousse, just like this recipe for dark chocolate peanut butter cake. Both versions of ganache-topped chocolate layer cakes have received such glowing reviews on my website, I simply couldn’t choose between them… so I found a way to include them both!
This cake basically demands a huge gathering because—trust me—you don’t want to be left alone with its temptation. It WILL call out your name each time you open the refrigerator.
Taunting you.
One reader, Judy, commented: “Don’t make this cake unless you want everyone who has a bite to request that you make it for every special occasion for the rest of time 🙂 I do four layers and follow the recipe exactly, and it has come out perfectly every time. I’ve already made at least ten of these cakes. Fabulous! ★★★★★“
One reader, Cecilia, commented: “OMG! This cake is absolutely divine! It’s a chocolate lover’s dream. The chocolate mousse is heavenly. I made it for my niece’s birthday and ended up making a four-layer cake. There were no leftovers. I don’t need any other chocolate cake recipe. This is it! Definitely the best! ★★★★★“
One reader, Brittney, commented: “This cake turned out amazing! I made it for a birthday party… and it was requested to be the new ‘party cake’! ★★★★★“
3 Parts to Dark Chocolate Mousse Cake
Let’s break down each component of this intensely rich cake:
- Dark Chocolate Cake: This is actually a variation of my tuxedo cake, which originated from my chocolate cake recipe. In recent years, I’ve found that replacing sour cream for some of the buttermilk gives the cake more structure.
- Chocolate Mousse: I researched simplified ways to make a fluffy chocolate mousse filling without the use of eggs or gelatin. This chocolate mousse filling combines real chocolate and homemade whipped cream. Or our whipped frosting would make a wonderful alternative filling if you don’t want to make the chocolate mousse!
- Chocolate Ganache: Top the whole cake with 2 ingredient semi-sweet chocolate ganache. You should be a chocolate ganache pro by now!
Video Tutorial: Chocolate Mousse Cake
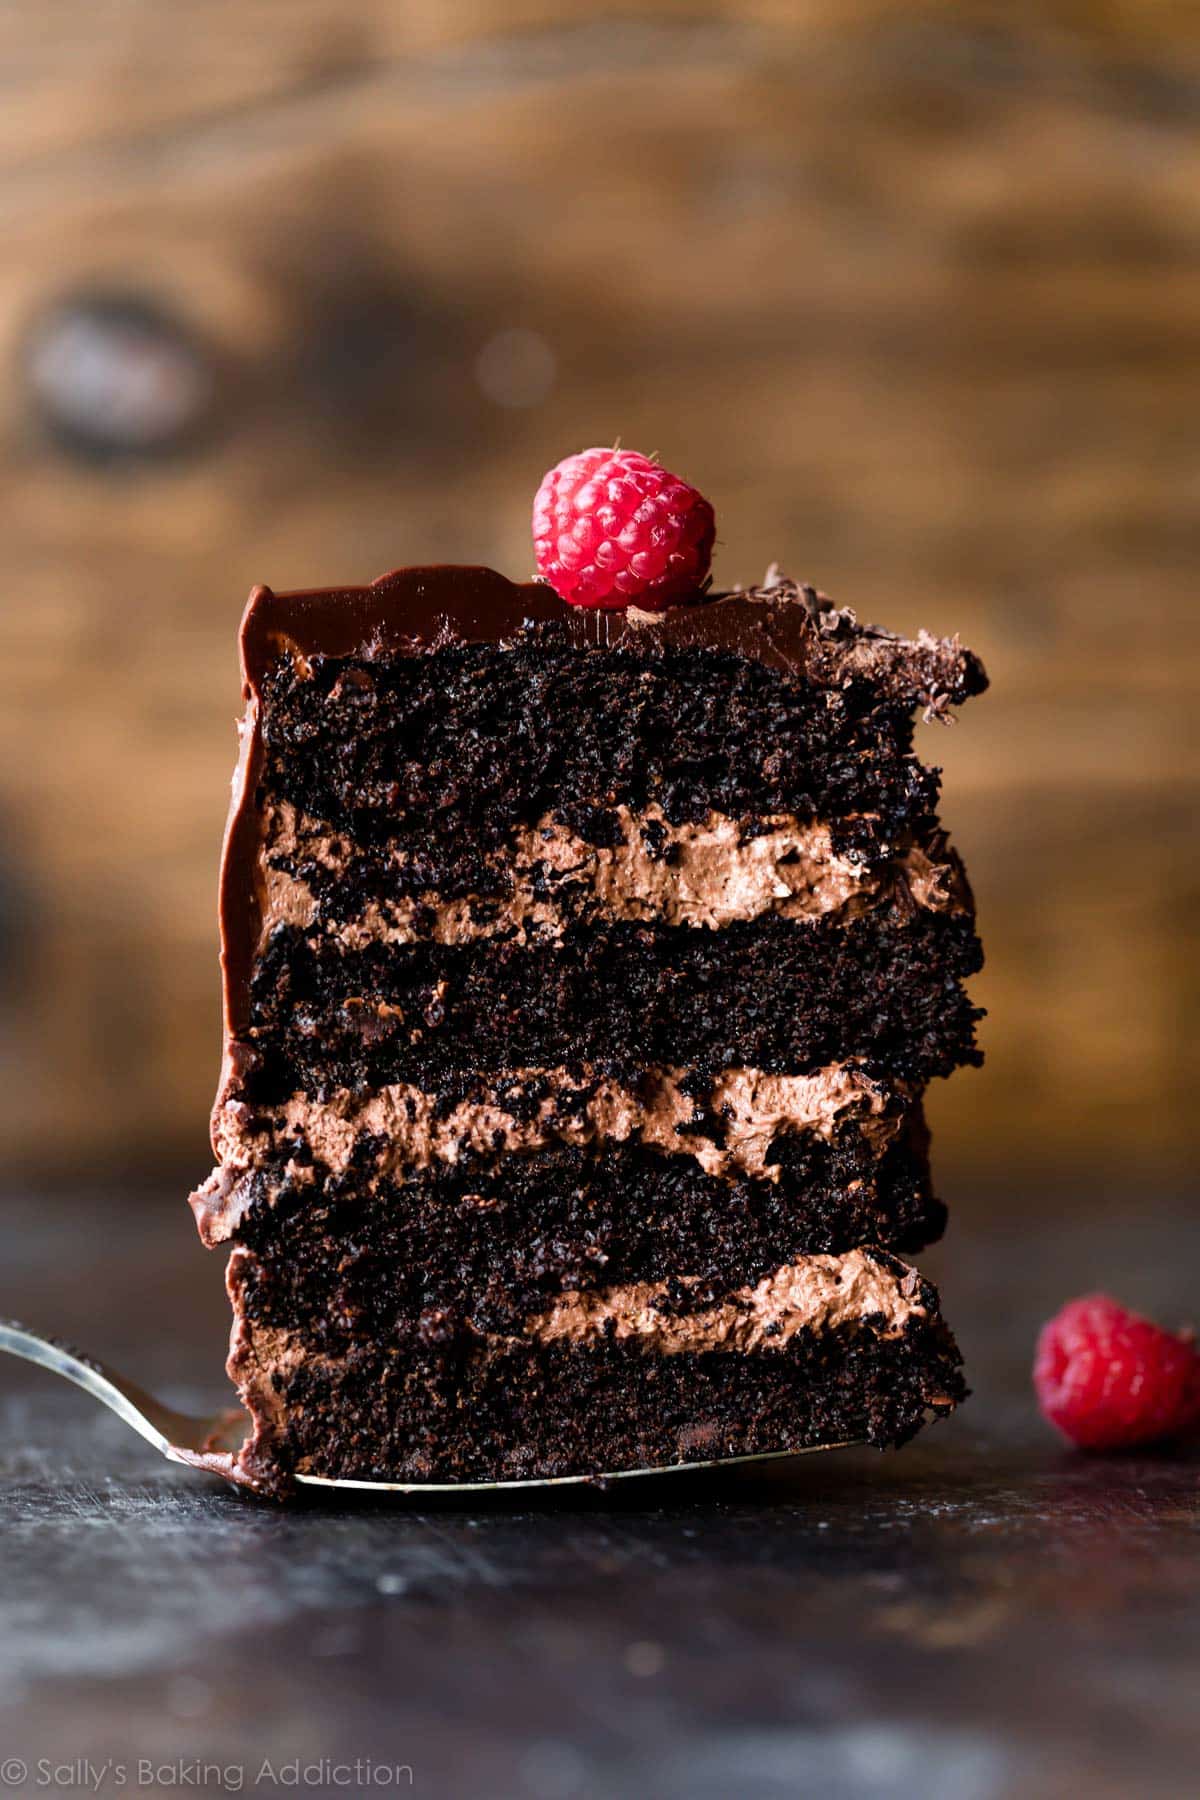
Stick-to-the-back-of-your-fork moist. This is every chocolate lover’s dream!
Dark Chocolate Cake
Use this chocolate cake as the starting point. For a sturdier, yet moister crumb, swap some sour cream in for the buttermilk and reduce the hot liquid. The acidity in both sour cream and buttermilk is a must to properly leaven this cake. (If desired, see my posts on Baking Powder vs Baking Soda and Baking with Buttermilk for more information.) This cake has a natural dark chocolate taste, but to deepen that flavor, use a mix of natural cocoa and Hershey’s Special Dark cocoa powder. A touch of espresso powder and hot coffee further enhances the chocolate flavor. The cake will not taste like coffee. Rather, the two add depth to the cake’s chocolate flavor.
- Why hot liquid? The hot liquid encourages the cocoa powder to bloom and dissolve. If you don’t drink coffee, you can use hot water.
You have options! You can make this cake into 2, 3, or 4 layers. I highly recommend 3 or 4 layers because there’s over 4 cups of chocolate mousse to spread inside. You can use 8 inch or 9 inch pans. The bake times are similar, see recipe notes.
A cup of chocolate chips adds even more chocolate flavor. I used 1 cup (180g) of mini semi-sweet chocolate chips in this pictured cake, but left them out in the video. They’re optional, but definitely worth the addition!!
You can also see this exact cake batter baked as three layers in both my chocolate peanut butter cake and chocolate raspberry cake (try one of those next!).
Simplified Chocolate Mousse
The chocolate mousse adds a creamy and light contrast to the dark chocolate layers. You need 6 ingredients:
- Hot Water
- Cocoa Powder – natural or dutch-process
- Melted Chocolate – use two 4-ounce chocolate baking bars found in the baking aisle
- Heavy Cream
- Confectioners’ Sugar
- Vanilla Extract
Whisk the hot water and cocoa powder together. Pour into melted chocolate. The hot water breaks up the chocolate, adding to the airy mousse consistency. Cocoa powder creates additional chocolate flavor. Fold this chocolate mixture into whipped cream—a combination of heavy cream, confectioners’ sugar, and vanilla extract.
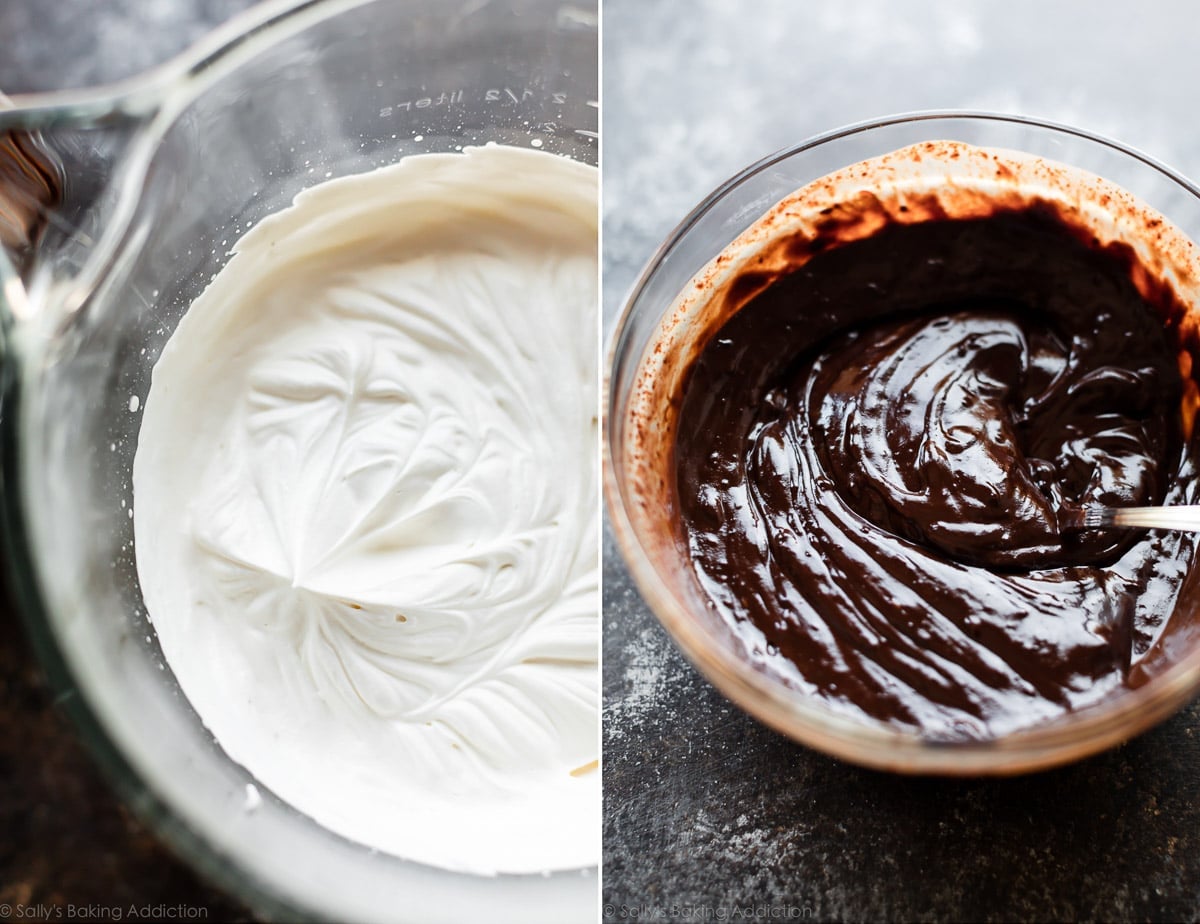
Whipped cream + our chocolate mixture. ↑
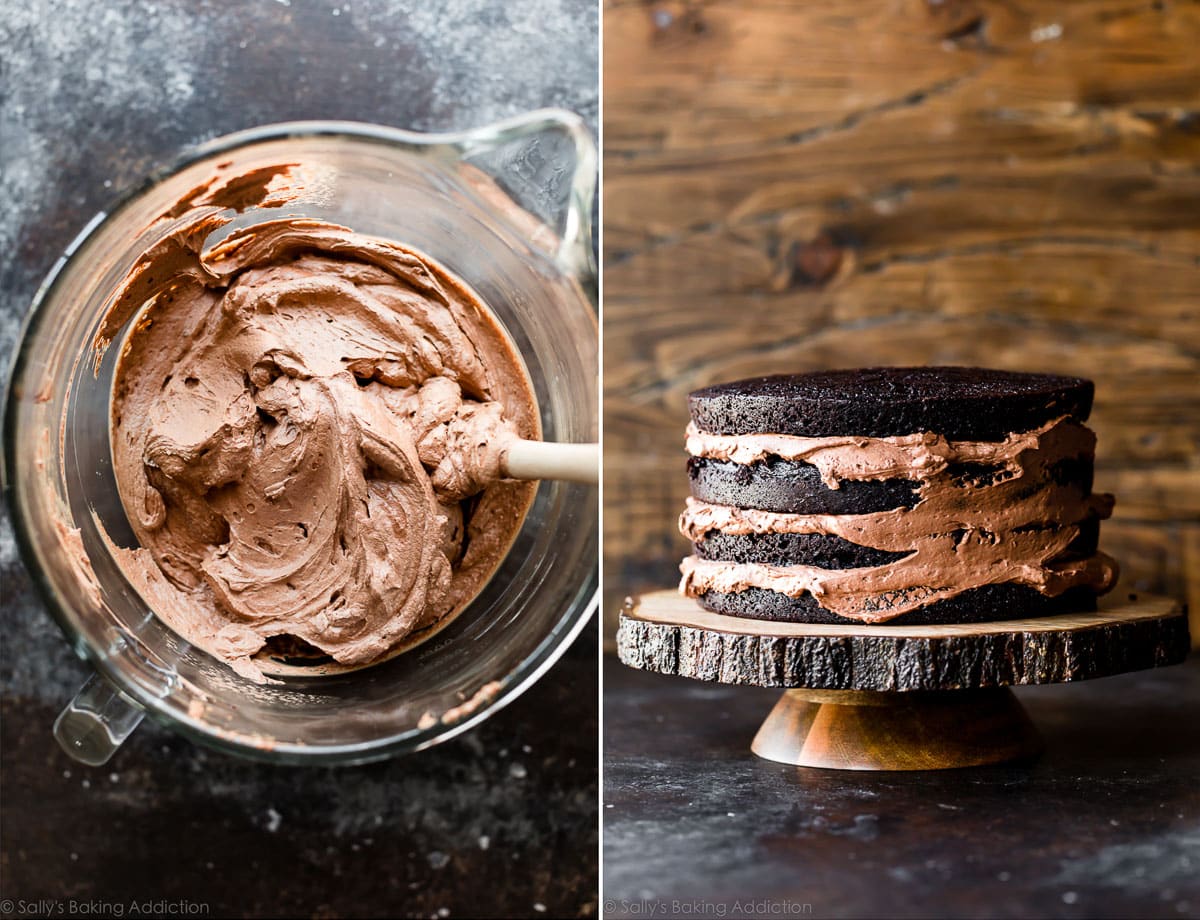
Fold them together to make our chocolate mousse filling. ↓
Baker’s Tip: The chocolate mousse must chill in the refrigerator before using, so it’s a good idea to make it ahead of time or as the chocolate cake layers are cooling. The mousse is best cold, so I actually recommend serving the cake cold. (Additionally, the cake is much easier to assemble if the mousse is cold!)
By the way, this chocolate mousse also makes for a wonderful alternate filling in homemade eclairs!
Chocolate Ganache
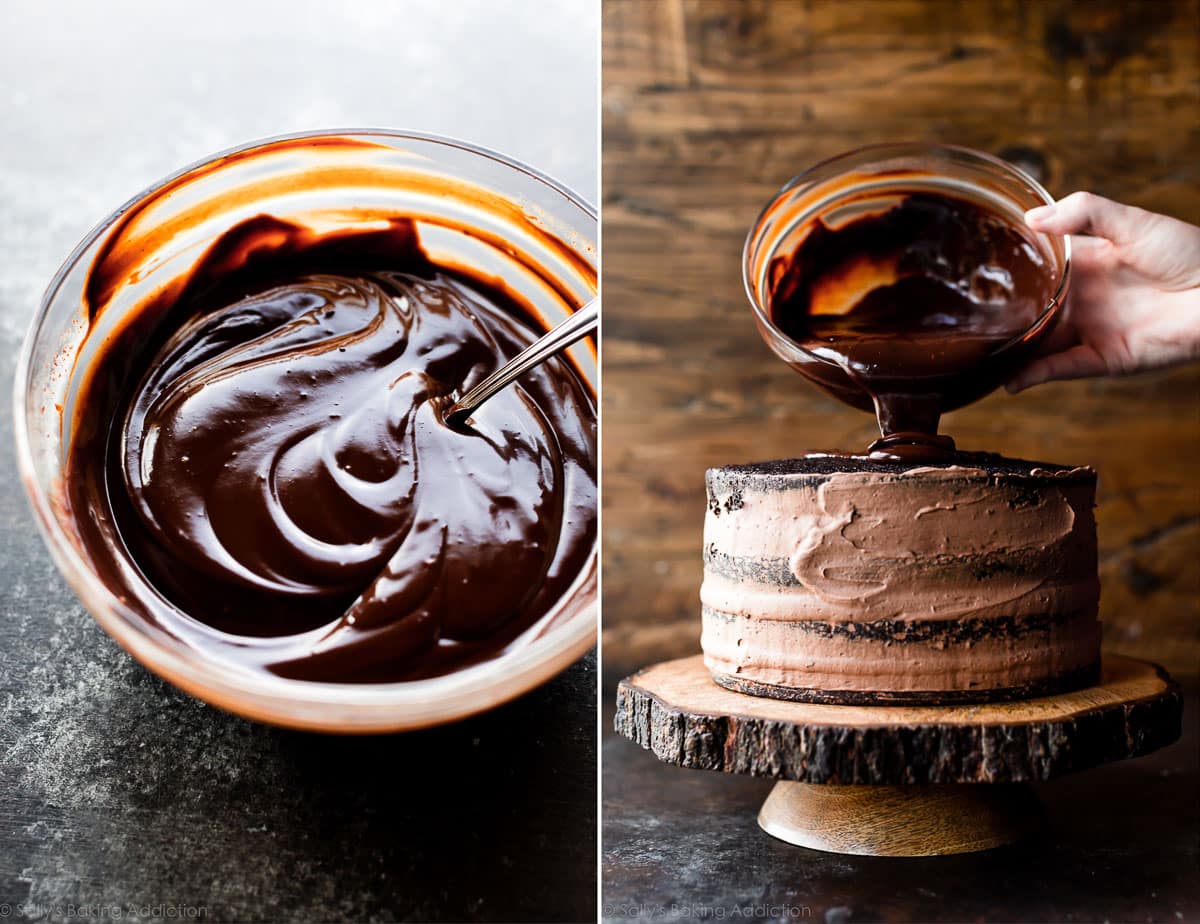
I won’t go into a lot of detail about the chocolate ganache because I have a complete chocolate ganache tutorial for you! Like the chocolate mousse, it’s imperative to use pure chocolate. Wait about 20 minutes for the ganache to thicken before pouring onto the cake.
How to Assemble & Decorate Chocolate Mousse Cake
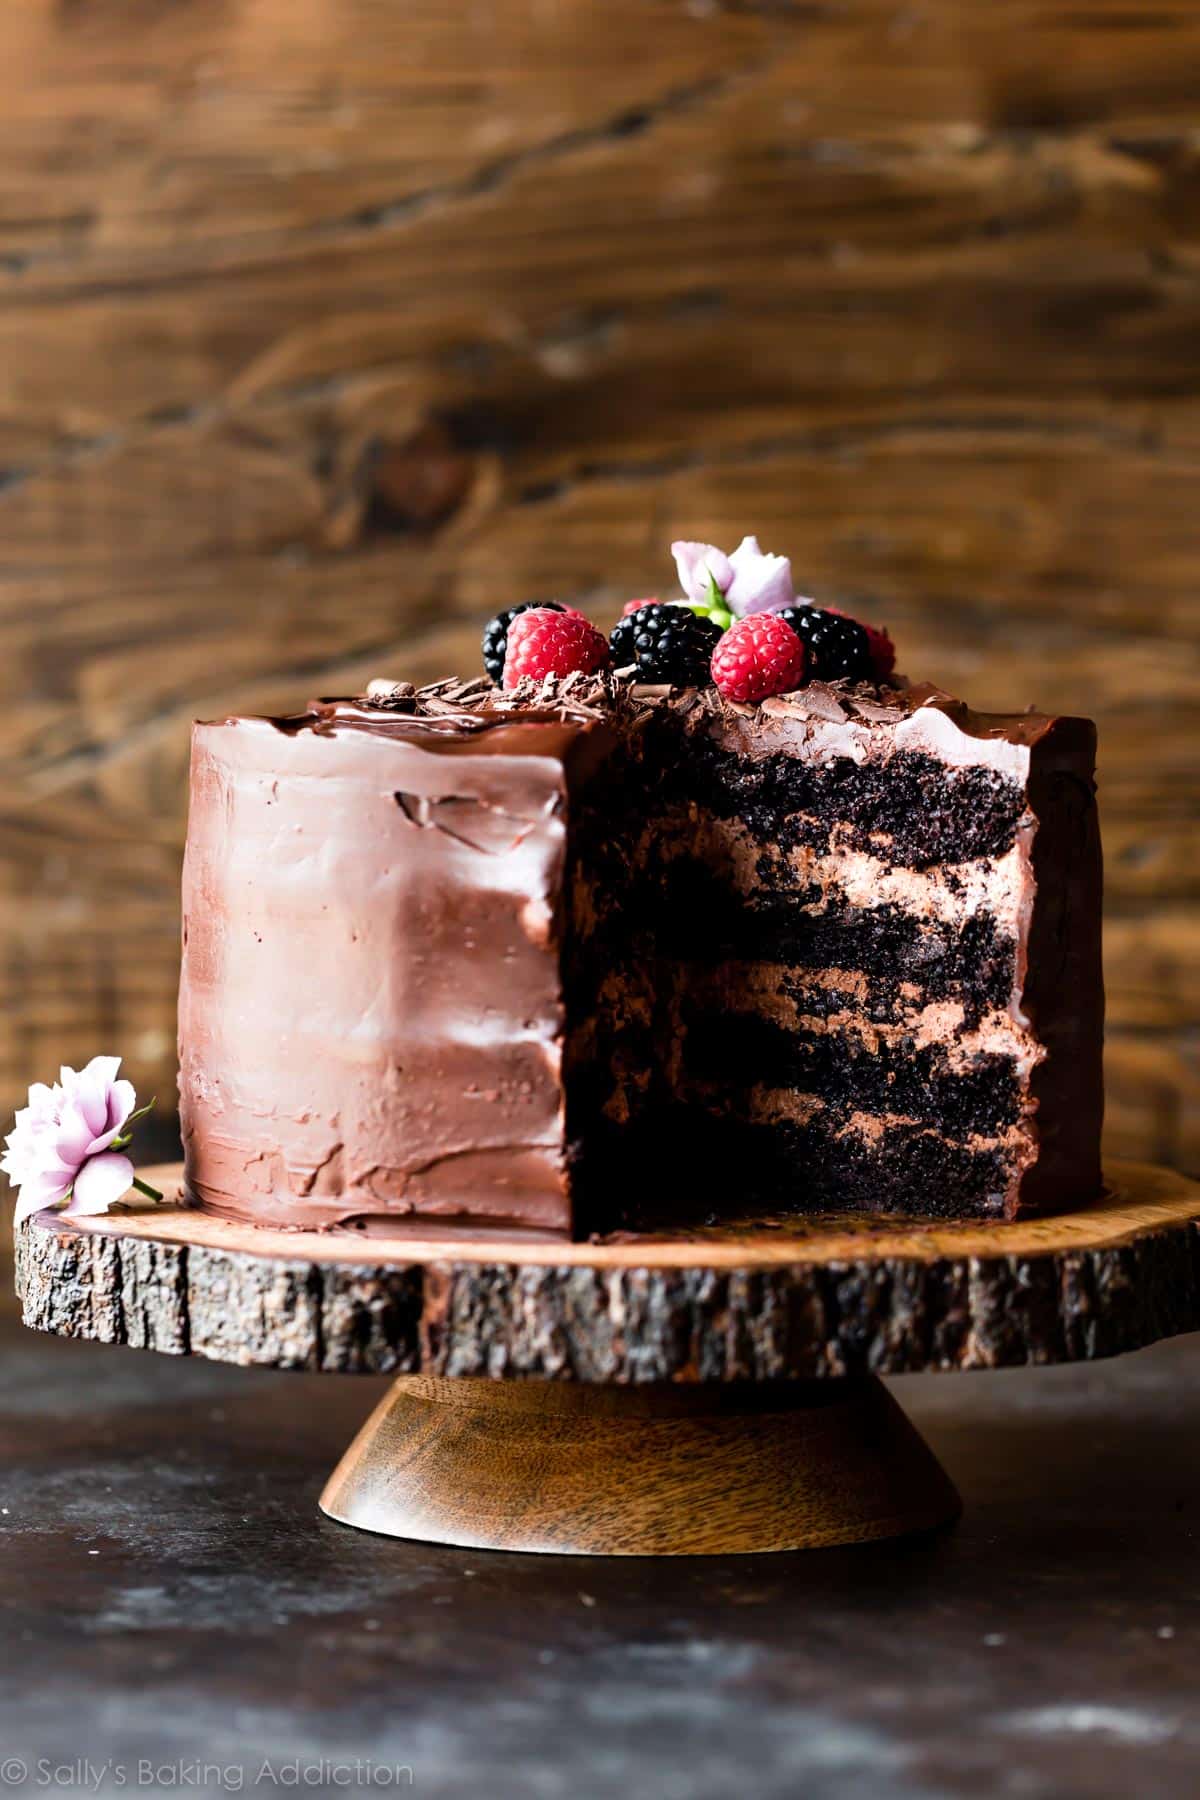
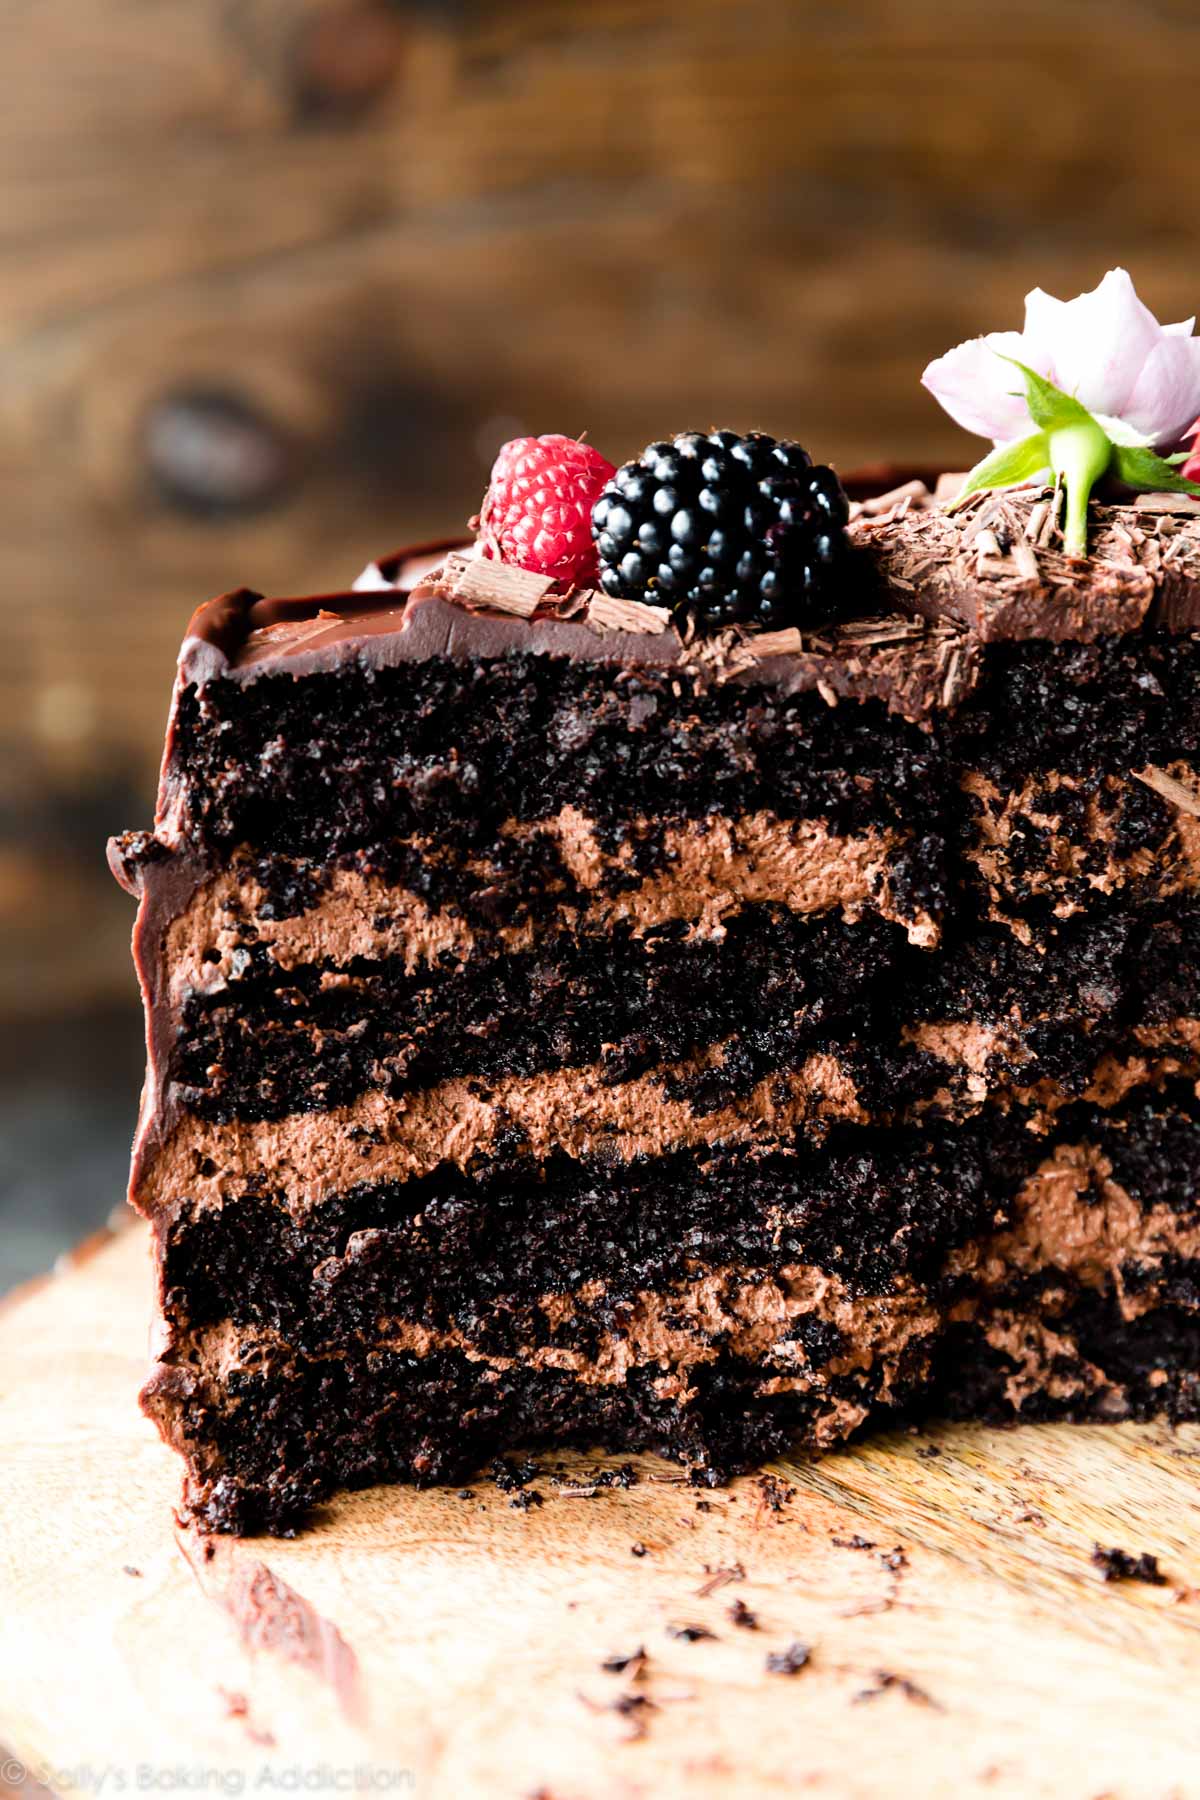
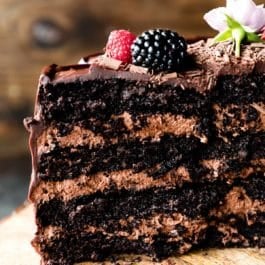
Chocolate ganache enrobes 4 cake layers and 3 mousse layers. Place bottom cake layer on your cake stand or serving plate. Using a large icing spatula, evenly cover the top with about 1.5 cups of chilled chocolate mousse. Top with 2nd cake layer and another 1.5 cups of mousse. Top with the third cake layer, then spread another 1.5 cups mousse evenly on top. (Save a large spoonful of mousse for a thin crumb coat.) Top with final 4th cake layer. Spread any remaining mousse around the sides as a crumb coat. Run a bench scraper around the cake to smooth it out. Refrigerate cake for at least 1 hour and up to 4 hours. Chocolate mousse is pretty fluffy, so the cake won’t hold its shape unless it’s properly chilled.
Pour ganache on top then run a bench scraper around the sides to smooth it out. You can serve the cake immediately or wait for the chocolate ganache to set. 🙂
What About Cupcakes?
Instead of a big cake, you can make chocolate mousse cupcakes. Use my chocolate cupcakes recipe and halve the chocolate mousse and chocolate ganache recipes below. Fill the cupcakes with chocolate mousse using my Sugar Plum Fairy Cupcakes as an example. Drizzle cooled cupcakes with ganache. Eat your heart out!
You can also use the chocolate mousse instead of pastry cream in homemade mille-feuille!
More Indulgent Chocolate Desserts
- Dark Chocolate Bread Pudding
- German Chocolate Cake
- Flourless Chocolate Cake
- Black Forest Cake
- Chocolate Lava Cakes
- Chocolate Mousse Pie
- Mint Chocolate Cake
Dark Chocolate Mousse Cake
- Prep Time: 2 hours, 30 minutes (includes chilling)
- Cook Time: 25 minutes
- Total Time: 5 hours, 55 minutes (includes cooling)
- Yield: serves 12
- Category: Cake
- Method: Baking
- Cuisine: American
Description
This super moist dark chocolate cake combines unsweetened natural cocoa powder and dark cocoa powder for an extra rich flavor. Fill the cake with a simplified chocolate mousse and cover it with semi-sweet chocolate ganache. If needed, you can prepare the ganache and mousse ahead of time (see Notes). This recipe is also in my New York Times best-selling cookbook, Sally’s Baking 101.
Ingredients
- 1 and 3/4 cups (219g) all-purpose flour (spooned & leveled)
- 1 and 3/4 cups (350g) granulated sugar
- 3/4 cup (64g) unsweetened natural cocoa powder* (see Notes)
- 2 teaspoons espresso powder (optional)*
- 2 teaspoons baking soda
- 1 teaspoon baking powder
- 1 teaspoon salt
- 3/4 cup (180g) full-fat sour cream, at room temperature
- 1/2 cup (113g/120ml) vegetable oil
- 2 large eggs, at room temperature
- 1/2 cup (120g/ml) buttermilk, at room temperature*
- 2 teaspoons pure vanilla extract
- 1/2 cup (120g/ml) hot water or black coffee*
- 1 cup (170g) semi-sweet mini chocolate chips tossed in 1 Tbsp flour (optional)
Chocolate Mousse
- 1/2 cup (120g/ml) hot water
- 1/4 cup (21g) unsweetened natural or Dutch-process cocoa powder
- 8 ounces (226g) quality semi-sweet chocolate, finely chopped*
- 2 cups (480g/ml) heavy cream, cold
- 2 Tablespoons confectioners’ sugar
- 1/2 teaspoon pure vanilla extract
Chocolate Ganache
- 8 ounces (226g) quality semi-sweet chocolate, finely chopped
- 1 cup (240g/ml) heavy cream
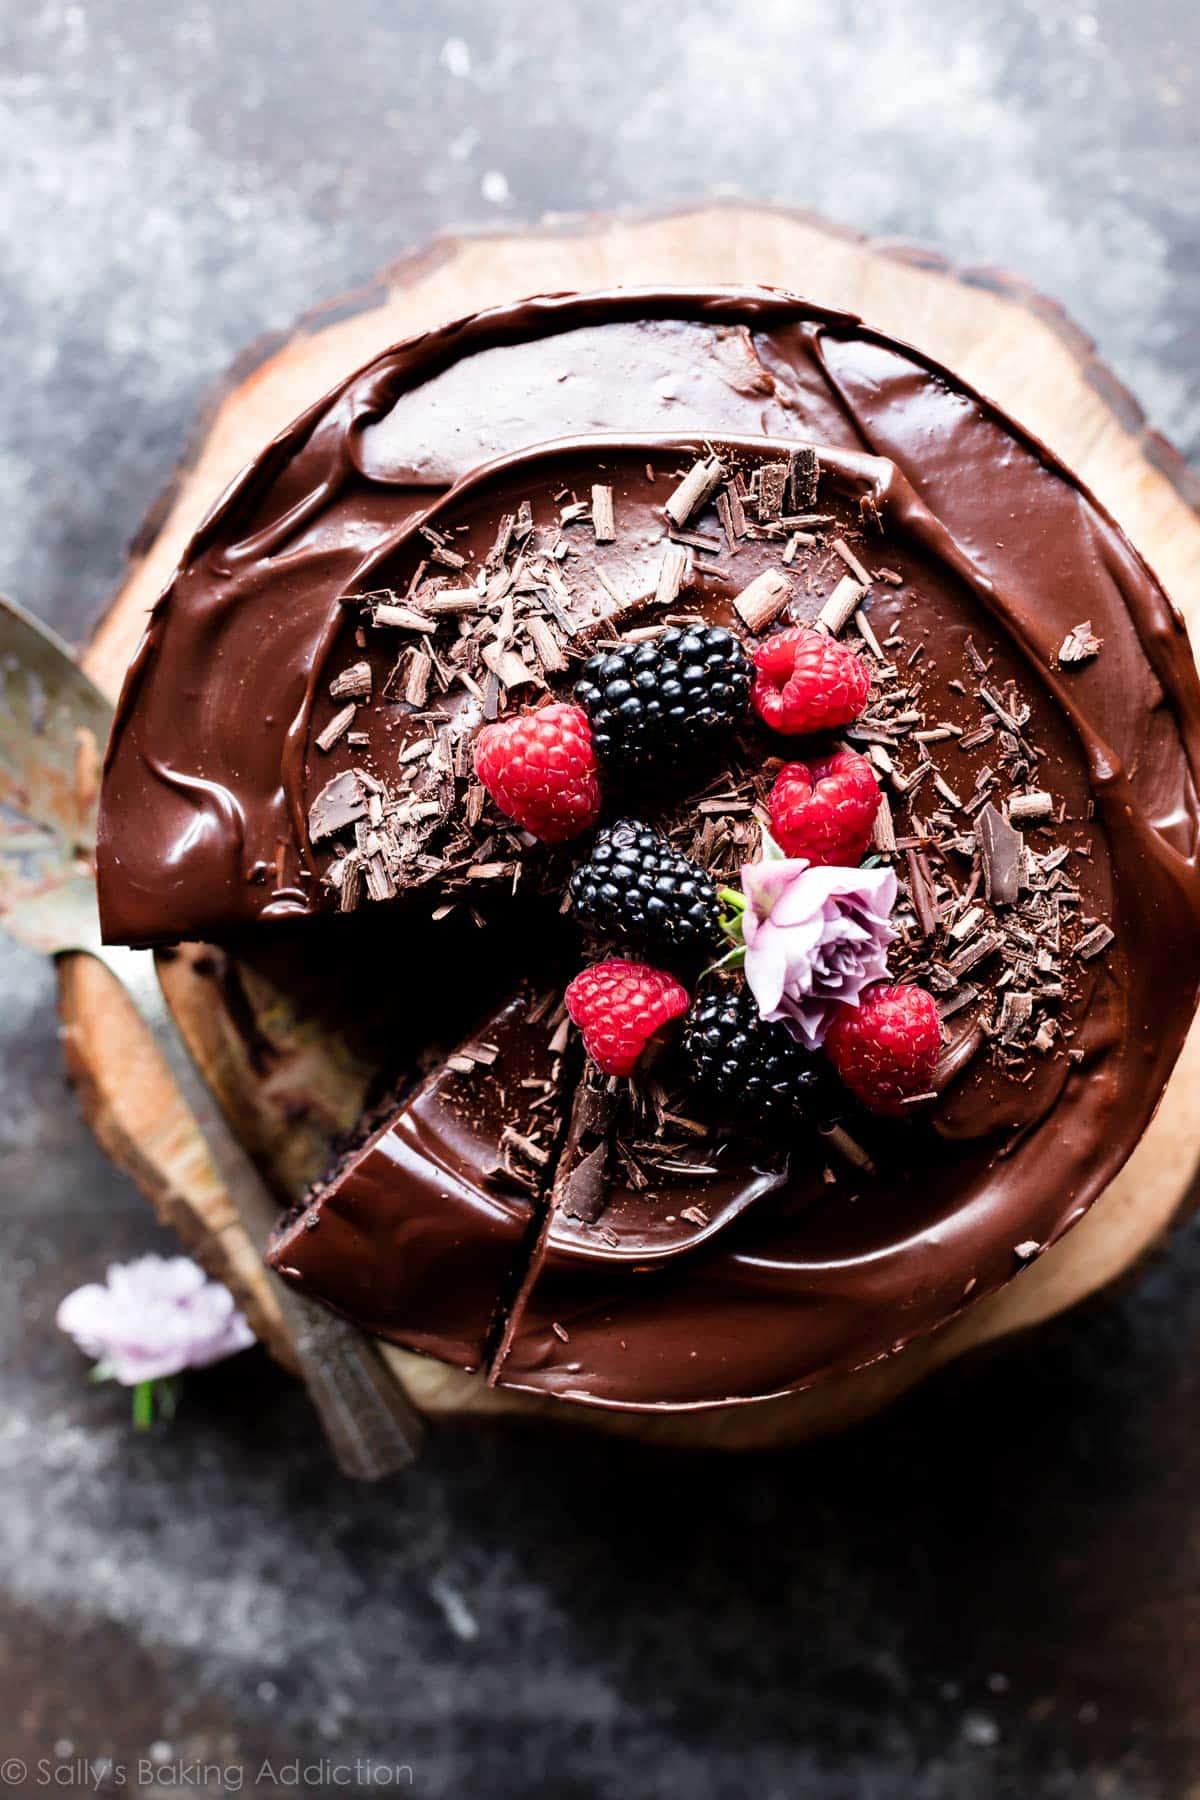
- optional, for garnish: fresh berries and/or chocolate shavings
Instructions
- Preheat the oven to 350°F (177°C). Grease four 8-inch or 9-inch cake pans, line with parchment paper rounds, then grease the parchment paper. Parchment paper helps the cakes seamlessly release from the pans. (If it’s helpful, see this parchment paper rounds for cakes video & post.)
- Make the cake: In a large bowl, whisk the flour, sugar, cocoa powder, espresso powder, baking soda, baking powder, and salt together. Set aside.
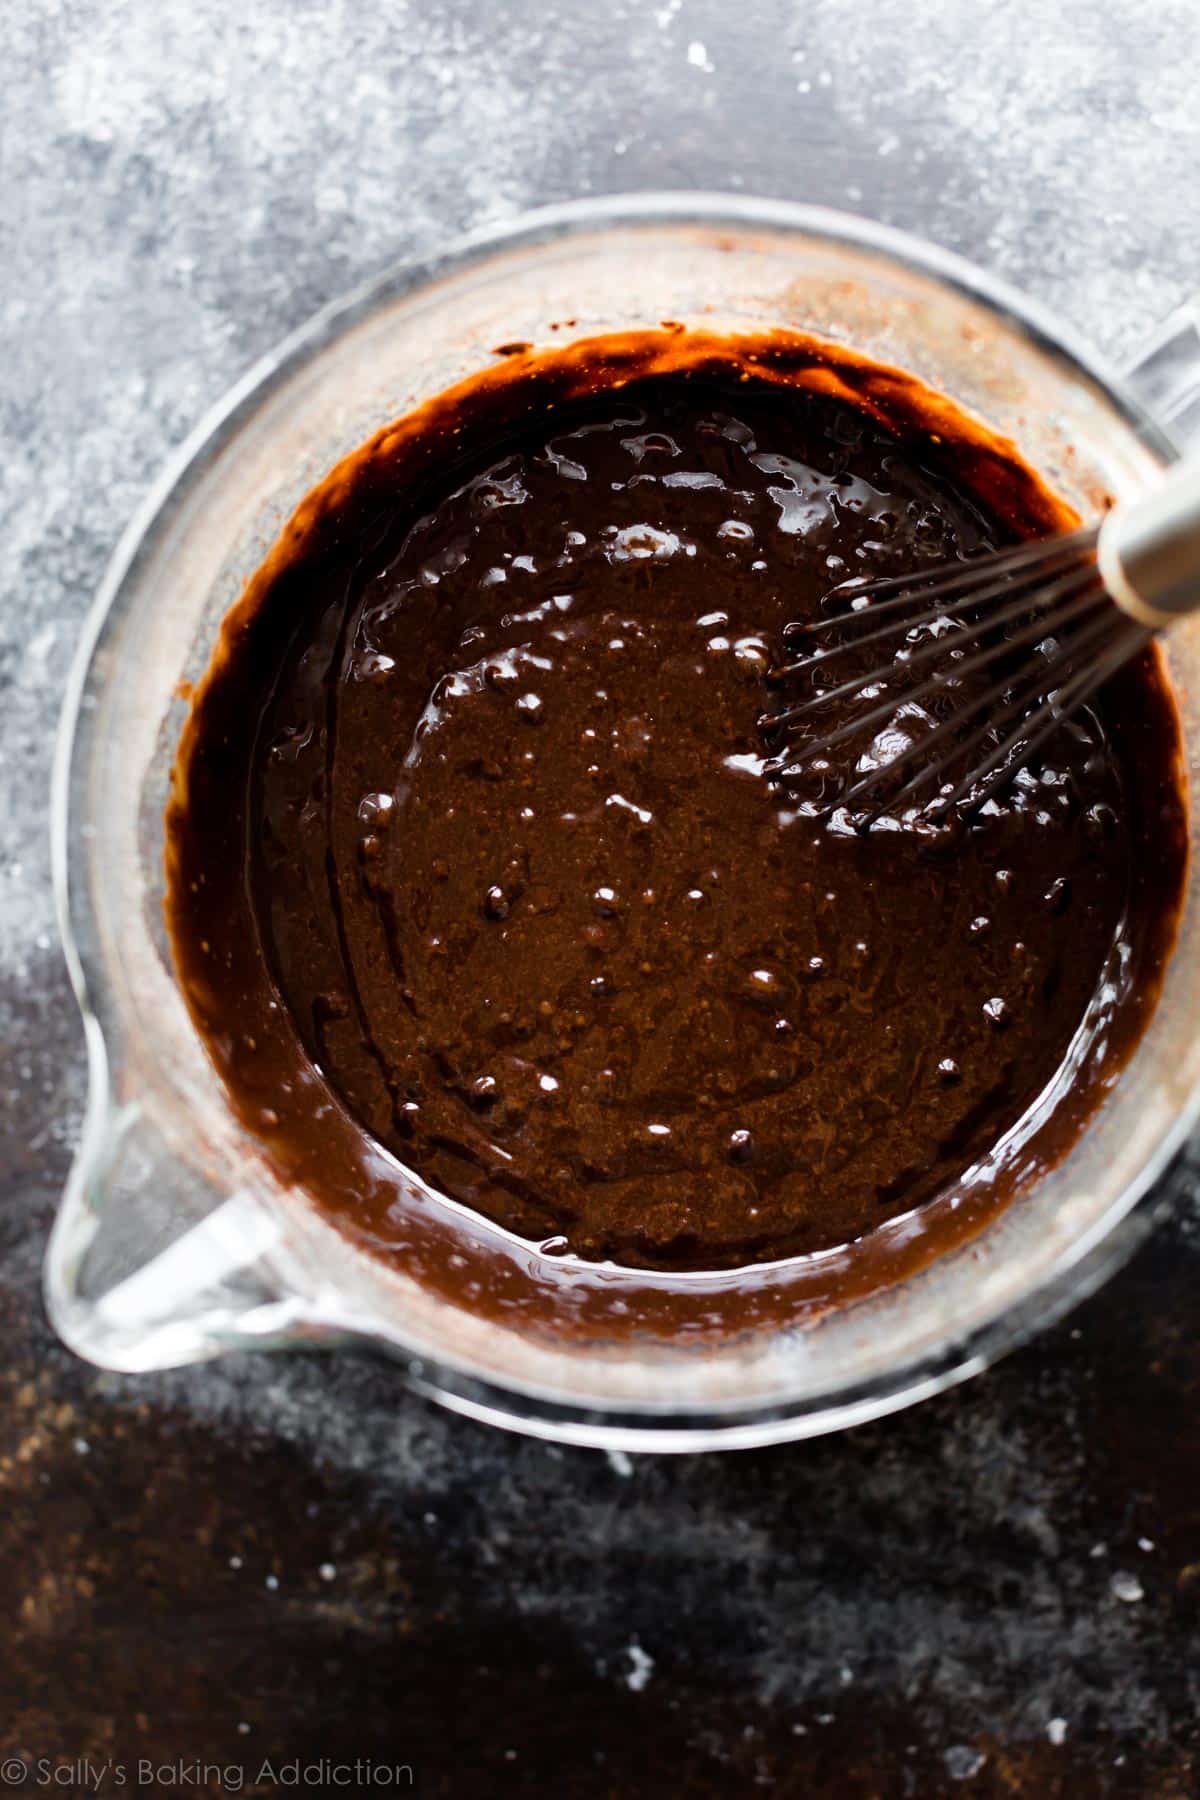
- In another large bowl using a handheld or stand mixer fitted with a whisk attachment (or you can use a whisk) mix the sour cream, oil, and eggs together on medium-high speed until combined. Add the buttermilk and vanilla and mix until combined. Pour the dry ingredients into the wet ingredients, add the hot water/coffee, and whisk or beat on low speed until combined. Fold in the floured mini chocolate chips, if using. Divide the batter evenly among the prepared pans.
- Bake for 19–23 minutes. Baking times vary, so keep an eye on yours. The cakes are done when a toothpick inserted in the center comes out clean. Cool the cakes in the pans set on a cooling rack for 1 hour. Run a knife around the edges to help loosen the sides, remove the cakes from the pans, peel off the parchment, and place on the rack to finish cooling. The cakes may slightly sink in the middle as they cool—that’s expected.
- Make the chocolate mousse: In a small bowl, whisk the hot water and cocoa powder together until smooth. Melt the chopped chocolate in a double boiler or use the microwave. If using the microwave: place the chopped chocolate in a medium heat-proof bowl. Microwave for 20-second increments, stirring after each increment until completely melted and smooth. Pour hot water/cocoa mixture into the melted chocolate and stir until thick and smooth. Set aside. In a large bowl using a handheld or stand mixer fitted with a whisk attachment, whip the heavy cream, confectioners’ sugar, and vanilla extract together on medium-high speed until medium peaks form, about 3 minutes. Medium peaks are between soft/loose peaks and stiff peaks. Pour in the chocolate mixture and gently fold together with a spatula. Do not overmix, as this could deflate it. Cover the mousse and refrigerate for at least 2 hours or up to 2 days. Makes about 4.5 cups (about 900g).
- Assemble the cake before preparing chocolate ganache: First, level the cakes (if needed): using a large serrated knife, slice a thin layer off the tops of the cakes to create a flat surface. Place 1 cake layer on your cake stand, cake turntable, or serving plate. Using a large icing spatula, evenly cover the top with about 1.5 cups (200g) of chocolate mousse. Top with the second layer, upside down, and evenly cover the top with the same amount of chocolate mousse. Top with the third cake layer, right side up, and again cover with the same amount of mousse. Top with final cake layer. Spread the remaining mousse on top and around the sides of the cake as a crumb coat. Run a bench scraper around the cake to smooth out the sides. Refrigerate for at least 1 hour and up to 4 hours. Prepare the ganache while the cake is chilling.
- Make the chocolate ganache: Place the chocolate in a medium heat-proof bowl. In a small saucepan, heat the cream over medium heat just until it begins to gently simmer. (Do not let it come to a rapid boil—that’s too hot!) Pour the warm cream over the chocolate and let it sit for 2–3 minutes to gently soften the chocolate. With a metal spoon or small spatula, slowly stir until the chocolate has melted and the mixture is smooth. The finer you chopped the chocolate, the quicker it will melt with the cream. If it’s not melting, do not microwave it. If needed, see Troubleshooting Chocolate Ganache. Refrigerate the ganache for at least 30 minutes or up to 1 hour to thicken.
- Pour/spoon the thickened ganache on the chilled cake. Smooth the top and sides with an icing spatula. Top with optional garnish such as fresh berries and/or chocolate shavings. Serve cake immediately or chill, uncovered, for up to 4–6 hours before serving. Cake can be served at room temperature or chilled.
- Cover leftover cake tightly and store in the refrigerator for up to 5 days.
Notes
- Make Ahead & Freezing Instructions: Prepare cake through step 4. Wrap the individual baked and cooled cake layers tightly and refrigerate for up to 2 days or freeze up to 3 months. Bring to room temperature, make mousse filling, then continue with step 6. You can prepare the chocolate mousse in advance. See step 5. You can also prepare the chocolate ganache ahead of time too. Refrigerate prepared ganache for up to 3 days. Bring to room temperature before spreading onto cake. You can freeze cake for up to 3 months. Thaw overnight in the refrigerator, then bring to room temperature or serve cold. See How to Freeze Cakes for more information.
- Special Tools (affiliate links): 8-inch Round Cake Pans or 9-inch Round Cake Pans | Glass Mixing Bowl | Whisk | Electric Mixer (Handheld or Stand) | Cooling Rack | Double Boiler | Cake Stand or Cake Turntable | Large Icing Spatula | Bench Scraper | Cake Carrier (for storage)
- 3-Layer Cake: You can also prepare this as a 3-layer cake. Divide batter between three 8-inch or 9-inch cake pans in step 1 and bake for 24–26 minutes or until a toothpick inserted in the center comes out clean. Use about 2 cups of chocolate mousse between each layer.
- Espresso Powder/Coffee: Espresso powder and coffee will not make the cake taste like coffee. Rather, they deepen the chocolate flavor. I highly recommend them both. You can find espresso powder in the baking aisle at many grocery stores or online. If coffee isn’t your thing, you can leave out the espresso powder and use hot water instead of the hot coffee.
- Cocoa Powder: For the best dark chocolate flavor in the cake, I recommend using a blend of unsweetened natural cocoa powder (1/4 cup; 21g) and Hershey’s “Special Dark” cocoa powder (1/2 cup; 43g). Hershey’s Special Dark is actually a mix of natural cocoa powder (an acid) and Dutch-process cocoa powder (a base) and it worked fine in this recipe. This recipe needs acidic natural cocoa powder, so do not use ALL Dutch-process cocoa powder. For best results, use 3/4 cup (64g) natural or the blend of natural/Special Dark I used. For the chocolate mousse, you can use either unsweetened natural or Dutch-process cocoa powder (or the Hershey’s Special Dark).
- Why Room Temperature? All refrigerated items should be at room temperature so the batter mixes together easily and evenly. Read more about why room-temperature ingredients are important. Instead of sour cream, you can use plain yogurt. The cake won’t taste as rich, but it’s a fine substitute.
- Buttermilk: Buttermilk is required for this recipe. You can make your own DIY buttermilk substitute if needed. Add 1 teaspoon of white vinegar or lemon juice to a liquid measuring cup. Then add enough whole milk to the same measuring cup until it reaches 1/2 cup. (In a pinch, lower-fat or nondairy milks work for this soured milk, but the cake won’t taste as moist or rich.) Stir it around and let sit for 5 minutes. The homemade “buttermilk” will be somewhat curdled and ready to use in the recipe.
- Chocolate in Mousse & Ganache: Mousse & ganache will only set if the correct chocolate is used. You can use high-quality chocolate chips if needed (I prefer Ghirardelli semi-sweet chocolate chips), but I recommend using pure chocolate baking bars. You can find them right next to the chocolate chips in the baking aisle. They are sold in 4-ounce (113g) bars. I like Baker’s or Ghirardelli brands.


Reader Comments and Reviews
I could be stupid but I made the cake as the instructions said and ended up with a disaster. The chocolate chips sunk to the bottom of the pans in the oven and melted to the bottom. This caused every single one of my cakes to rip in half when inverting as the bottom stuck to the pans completely (not burnt just adhered with the semi-melted chocolate chips). Additionally my mousse melted as I added the chocolate to the whipped cream while still hot as there was no indication as to what temp the melted chocolate should be when folded in.
This is an *elite* chocolate cake. I made a simple raspberry jam to go between and layers and it was awesome. I also mixed some mascarpone into the mouse.
I absolutely love this recipe and I’ve made this cake for my husbands birthday for the past 4 years 🙂 everytime I make it though, the ganache ends up being too runny. Any tips?
Hi Priya! Be sure that you’re using heavy cream with at least 36% fat. Anything lower and the ganache will be runnier than intended. It will also thicken as it cools, so you could wait a bit longer before using in order for it to be at a more spreadable consistency. Hope this helps!
This recipe is perfect! It’s the dark chocolate mousse cake I’ve sought for years. It’s my birthday cake every year since I discovered it, and now my daughter loves to bake it for me. Turns out perfectly nearly every time. We live in Texas and have summer birthdays, so it works best to chill the cake layers and mousse thoroughly prior to assembling the layers and again prior to topping with the ganache. The one time we were not so meticulous about chilling, we had a leaning tower of a cake! Delicious, but not so pretty!
I’ve tried this recipe as a cake a few times and it always turns out great. Super moist with an amazing chocolate flavor. I was wondering if you knew how it would work if I did this recipe as cupcakes like how many it would make total. Any information or changes would be helpful.
Hi Phill, you can certainly use this recipe for cupcakes — it will yield about 3 dozen. You can follow the bake time instructions from chocolate cupcakes as a guide.
You are my go to for the best recipes. I just made this dark chocolate mousse cake for my coworkers bday. It was simple and so very delicious. Thank you
Hi, I was just wondering if I can use Lindt bar for ganache? Also, I was planning on using only dark cocoa powder (Cacao Berry Amber Cocoa Powder Extra Brute), would that be okay? It would be great, if you could let me know. I’m baking this elaborate a cake for the first time, and it’s for my husband’s birthday, so I’m slightly worried. Thank you!
Hi Srish, any brand will work, just make sure you’re using pure chocolate baking bars (otherwise the ganache will not set properly). We do not recommend using all dark chocolate, but you could use half dark chocolate and half natural unsweetened cocoa powder. See recipe Notes for more details. Hope it’s a hit for your husband’s birthday!
I’ve made this cake at least 10 times and it’s my hands down go to chocolate cake, period. No need to try another chocolate cake recipe when you have this up your baking sleeve!
Hi Sally! I am making this cake this week for a coworker’s birthday and I only have 2 cake pans. I was going to just adjust the baking time and check the cakes regularly; do you have any other tips or do you think that will dry them out? I’m going to level and cut them after baking so I still get the 4 layers. So excited to make this cake, all of your recipes I use turn out great (and I use them a lot)!
Hi Jennifer, we fear baking the batter in just two pans will cause it to rise and bake unevenly. What we’d do is still make the cake in four layers (or three layers as detailed in the recipe Notes), baking two layers at a time and leaving the remaining batter covered with a towel at room temperature. Once the two cake layers have baked, cooled, and been removed, you can proceed with baking the remaining batter. Hope this helps and that it’s a hit!
Thank you so much for your reply! I’m glad I saw it because once I baked the first 2 I realized how much it would have risen had I done all the batter (it’s a lot of cake!). It turned out beautiful and delicious and every element got rave reviews. For anyone doing something similar, the batter did sit for about an hour before I baked the second round and it rose slightly less, but it was hardly noticeable and once assembled made no difference at all. One person said it was the fluffiest chocolate cake she had ever had, so no issues with density either. I look forward to making this cake again!
This recipe is the best Sally! I have made it several times and it never disappoints. Instead of making it a 4 layer cake, I use 3 8 inch pans. I have even doubled the recipe and used 10 inch pans. I have even taken it a step further and used this recipe to make cake balls using the cake and ganache! Everyone loves the cake truffles. They are delicious! Thank you for all your wonderful recipes
Wow, you make me out to be an excellent baker, Sally! This was a little more involved than my usual cake. The directions were excellent! I followed it exactly with one exception – I made the ganache while the cake was cooking which was way too early but just kept stirring it every now and then and it seemed to be fine. It wasn’t too heavily set that it didn’t work it just might not have been as glossy as it would have been had I followed the directions (got in a hurry). The finished product (three 9″) was absolutely delicious, moist, chocolatey – everything I was hoping for! Your notes saved the cake. I was going to use some leftover high quality chocolate bars that were not baking chocolate thinking the quality would be fine and it wouldn’t have been. Also, was prepared for the ganache not to turn out (read your tutorial) but followed the instructions carefully and success my first try! Thanks for another successful baking day!
Hi Sally! I’d like to bring this cake to a picnic, but worried if the layers will stay intact. I’m planning a 3-layer or 4-layer cake. Can you let me know your recommendations when you have a chance? Thanks so much!!
Hi MaryAnn, as long as the cake won’t be sitting out in the heat for too long, it should be fine to bring for a picnic. Bringing it cold (right from the fridge) will help, too. Hope you enjoy it!
Hi Sally! Can I use cake flour for this cake?
Hi Kim! All purpose flour is best for this cake. Chocolate cakes already have cocoa powder — which is a VERY fine dry ingredient. The combination of cake flour and cocoa powder usually results in a flimsy cake.
I love this recipe can use cream fraich
Instead of whipping cream
Hi Mary, heavy cream or heavy whipping cream with a 36% fat content is necessary for whipping into stiff peaks. Creme fraiche typically has a lower fat content, so we don’t recommend it for this recipe.
This is hands down the best chocolate cake recipe and I have always assembled on the same day as serving. I have never noticed it to be dried out even a few days. Is it ok to assemble a day ahead of serving? I am making it for a friend’s birthday and I want it to be perfect!
Hi Margaret, yes, feel free to assemble and store covered in the refrigerator a day prior. So glad you love this one!
Sally are you putting all 4 pans in at once? I want to use 4 8in pans but unsure if you do two different batches or 2 on top rack and 2 on the bottom rack.
Hi Jovanna, my oven can fit all 4 pans at once. I put them all in, two on the top and two on the bottom. When doing it this way, it’s helpful to rotate the pans halfway through baking. Though, admittedly, I have forgotten to do this many times before and the cakes are fine.
Hi, Sally + team. I was wondering about how to convert this recipe into a sheet pan format like your Funfetti Sheet Cake, which I have made half dozen times now. I love the jelly roll pan format for functions like office parties or church events (easier to transport, easier for people to help themselves – omg I can’t watch another cake being destroyed by those who want a tiny slice. . .the avalanche. . .you know what I am talking about. . .LOL.) I saw a few comments for standard 9x13x2 pans but wondering about your favorite jelly roll sheet pan size. Half the mousse and the ganache could be messy (maybe use parchment to make a collar)??
Hi Sharon, you can use our handy Cake Pan Sizes & Conversions guide to help scale the recipe as needed. Bake time will also vary, but keep a close eye on them and use a toothpick to test for doneness. Enjoy!
You ROCK Sally! I love your recipes and chose your chocolate mousse cake to enter in my local fair. I had to use a buttercream frosting because there was no refrigeration. The cake baked great. I made 3 9 inch layers. I added chocolate ganache and chocolate curls. That delicious, moist cake won FIRST place in the chocolate layer class. Then, it went up against all the other classes of cakes in that division. That yummy cake won DIVISION winner! Then, that heavenly moist cake went over to the best in show and competed against eight other division winners of all the divisions. That intensely chocolate dream cake won BEST IN SHOW!!! Thank you, Sally, for your love and care you put into every recipe!!!
Incredible! Thank you so much for sharing, Pamela. And congratulations!
This cake is a crowd pleaser for the chocolate lovers in my family! I’m obsessed with the mousse filling, especially since I don’t love buttercream frosting. More cakes with mousse filling please!
Thanks. Can I use this chocolate mousse filling and box the finished buttercream decorated cake for two days before the party? And must it be refrigerated?
Hi Maureen! The cake needs to be stored in the fridge and will begin to dry out after two days. The cake layers, mousse, and ganache can all be prepared ahead of time, then assembled on the day of serving – see recipe notes for our more details on our recommended make-ahead instructions.
This cake has the best chocolate flavor – reminds me of brownies! So rich and moist. Must be the dark cocoa powder. Thanks for another amazing recipe! It will be my go to chocolate cake now! I’ve used it as is with the mousse and ganache, and another time with cream cheese frosting which was divine!
Only cake we make for birthdays at our house. Mine does look as pretty as yours but tastes insane
I just made this recipe, made the mouse but it seems kind of runny. Not sure what I did wrong. Maybe chocolate was too warm when I added it to cream but recipe did not say to cool it first. Will it thicken in the fridge or will I have to make it over again? Can I salvage this in any way?
Hi Melissa, the mousse should thicken in the refrigerator. Did you find that it thickened nicely?
This recipe was simply the best! I followed it precisely and was rewarded w the most delicious cake ever! All party-goers were entranced! I’ve been receiving mega compliments and requests for the recipe, which I’ve been elated to share! Thank you so much! I’ll be making another this week for another b’day and the following week for another! Phew! It does take time but totally worth it!
I’ve made this twice now and it is to die for! Very rich an decadent. I don’t change anything and the directions are perfect.
My 10 y.o. daughter and I made this for her dad’s birthday and it was a hit! The cake is the perfect texture and so moist. The mousse filling was light and delicious! She styled the ganache and it looked like it came from a bakery. Everyone raves about the results. Will definitely be making this again.
Any changes in measurements for high altitude?
Hi Pam, I wish we could help, but have no experience baking at high altitude. Some readers have found this chart helpful: https://www.kingarthurflour.com/learn/high-altitude-baking.html
I made the following adjustments to the recipe for high altitude (5000 feet) and it turned out perfect. I hope this helps!
1. Flour: Add 2 tablespoons.
2. Sugar: Reduce by 1 1/2 tablespoons.
3. Baking Soda: Reduce to 1 teaspoon.
4. Baking Powder: Keep at 1 teaspoon.
5. Eggs: Increase by 1 egg
6. Temperature: Increase to 365 degrees.
7. Baking time: 16 minutes when batter is split between four 9 inch cake pans.
Hi Sally, could I put a chocolate cage around this cake? I want to make it for my niece’s graduation party as she LOVES chocolate.
Can’t see why not! Let us know if you give it a try, Donna 🙂
I actually did this recently and it turned out great! 🙂
Hi sally
You instruct in your recipe to put 480ml of heavy cream. When I baked and assembled the cake I found this to be too much .. is that measurement right as in the video .. it looks half that
Hi Irene, The recipe amounts are correct. At the 2:06 mark in the video you can see the full 2 cups (480ml) of heavy cream being used. Be sure you are using heavy cream or heavy whipping cream (nothing with a lower fat content) and whipping it long enough so that it’s not too thin.
Hi sally
Thanks for your great recipes. In your YouTube video you pour two types of coco… dark and milk (I’m guessing) but in your ingredients there is only one coco instructed to put in the cake. I didn’t put dark coco in… because I was following the recipe .
Hi Irene! The asterisk next to cocoa indicates a recipe Note. In that section, Sally notes “for the best dark chocolate flavor in the cake, I recommend using a blend of unsweetened natural cocoa powder (1/4 cup; 22g) and Hershey’s “Special Dark” cocoa powder (1/2 cup; 43g).” However if you used all natural unsweetened cocoa powder, that will work just fine too! Hope this helps.