

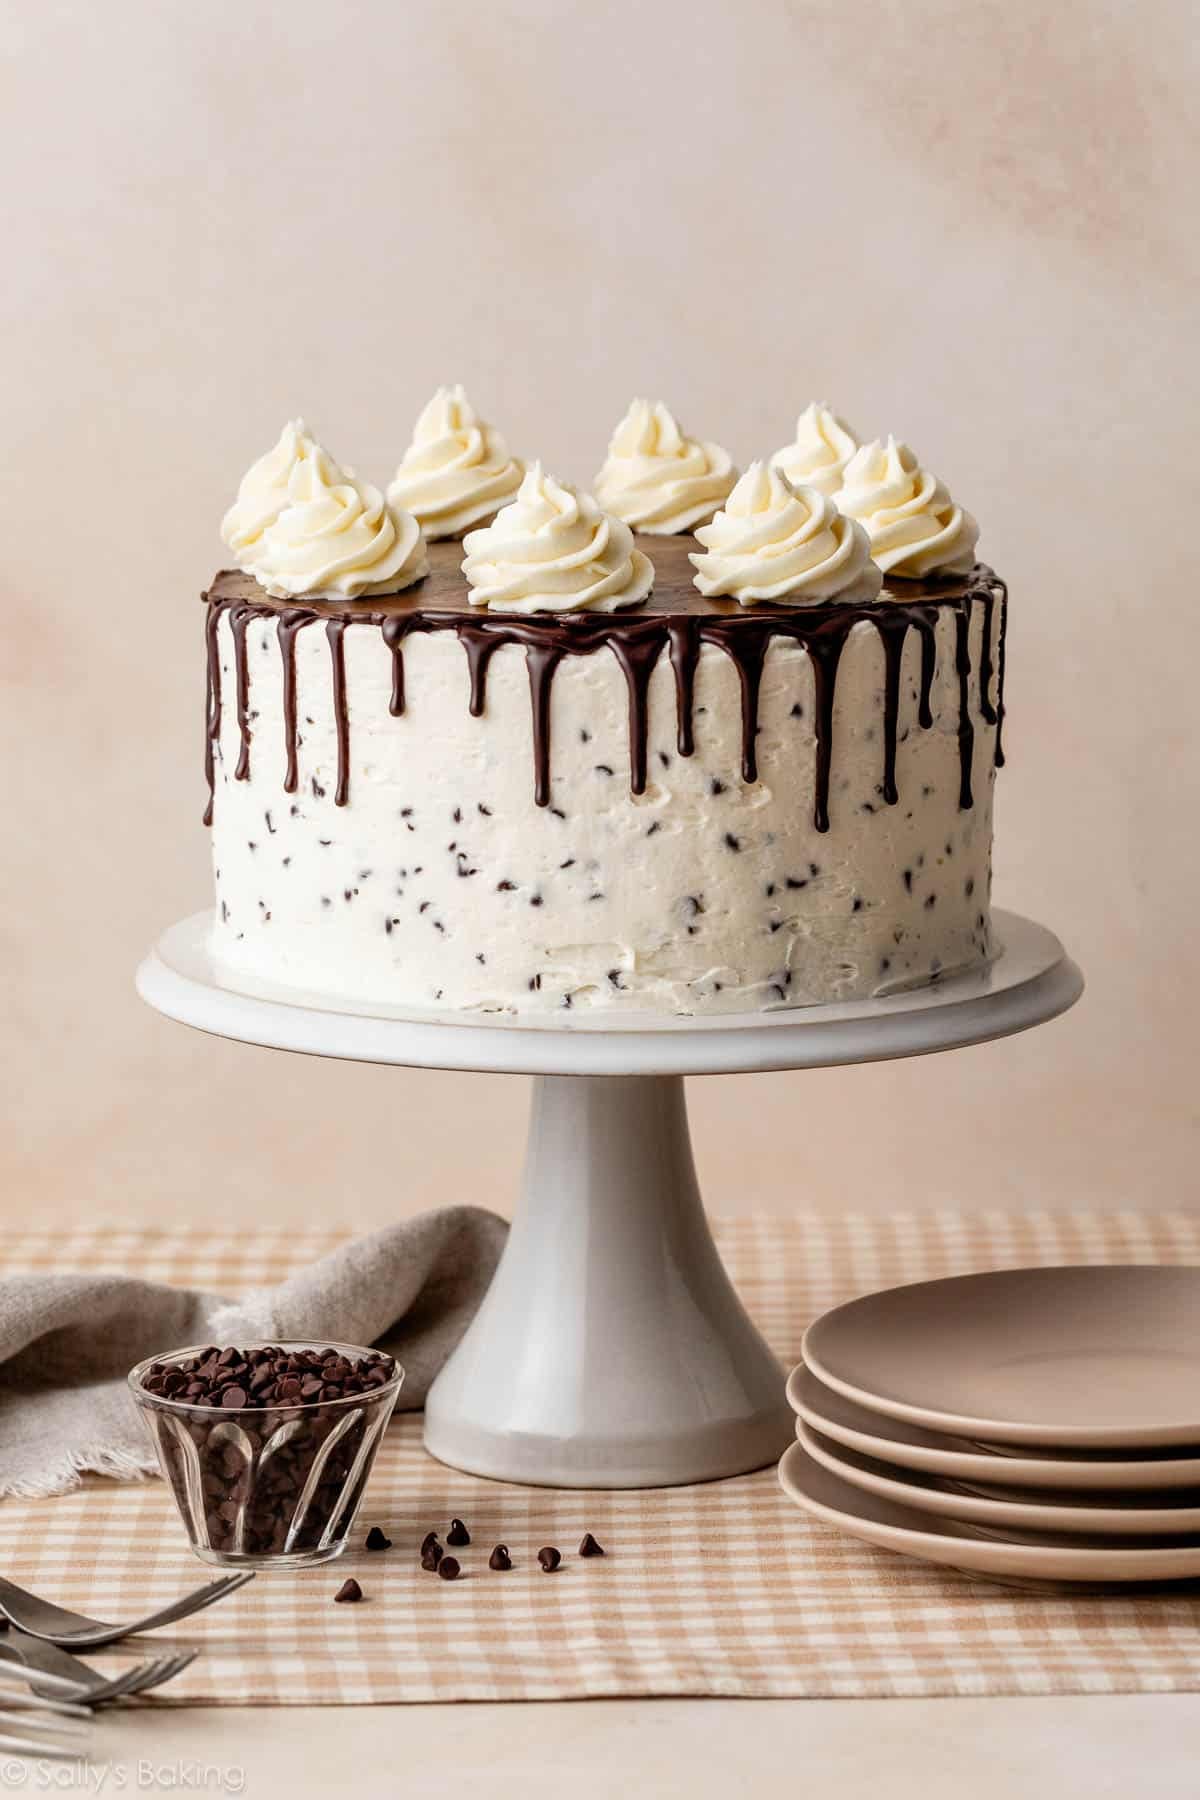
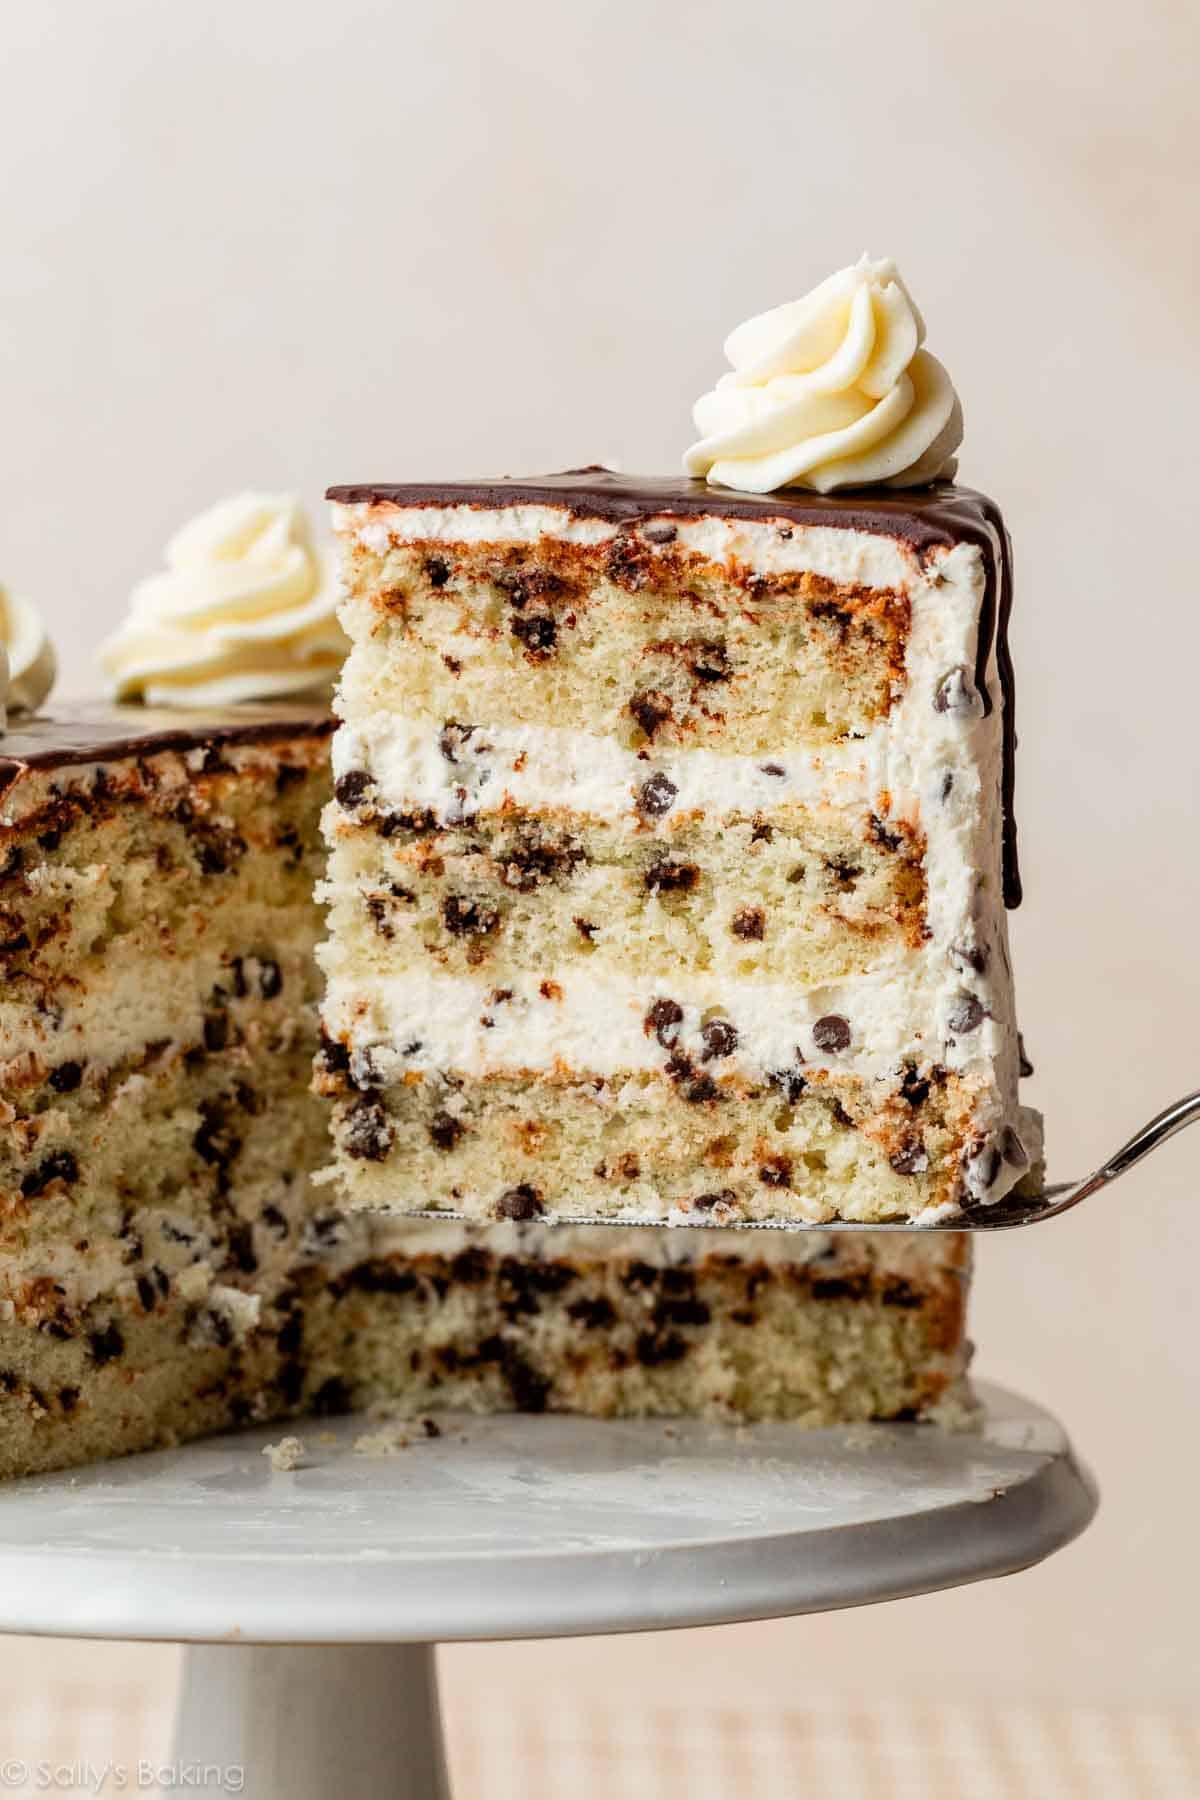
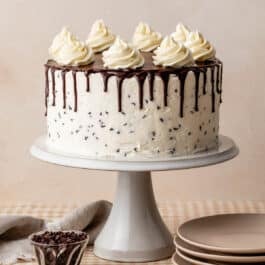
This towering chocolate chip cake combines a soft vanilla cake crumb and sweet whipped vanilla buttercream with oodles of mini chocolate chips. For a finishing touch that elevates this cake to showstopper status, top it with a chocolate ganache drip. Watch the video tutorial for a complete walk-through of the recipe and demonstration of how to do the ganache drip topping.
One reader, Traci, commented: “This cake is a triple threat! Amazing cake, decadent frosting, and ganache! Wow! So fun and easy to make! Huge hit! ★★★★★”
Another reader, Lora, commented: “Made this cake for my daughter’s birthday and it was delicious! The cake had wonderful buttery but light flavor, and the ganache layer was perfectly rich. ★★★★★”
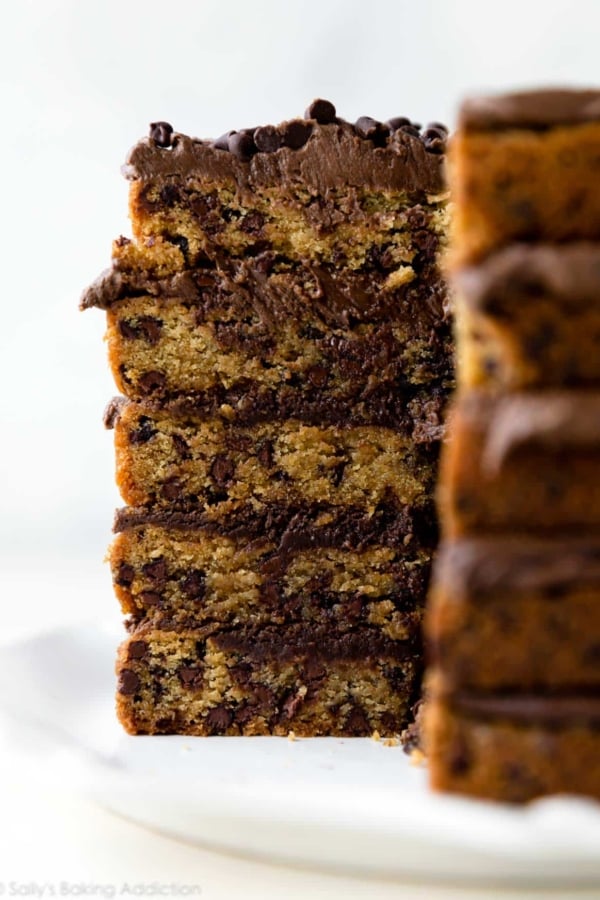
Q: How do you improve on the perfect white cake? A: Add chocolate chips! Because after all, why let the chocolate chip cookies have all the fun? Chocolate chips are great in cakes, too! (And both can be true at once: have you made this chocolate chip cookie layer cake before?)
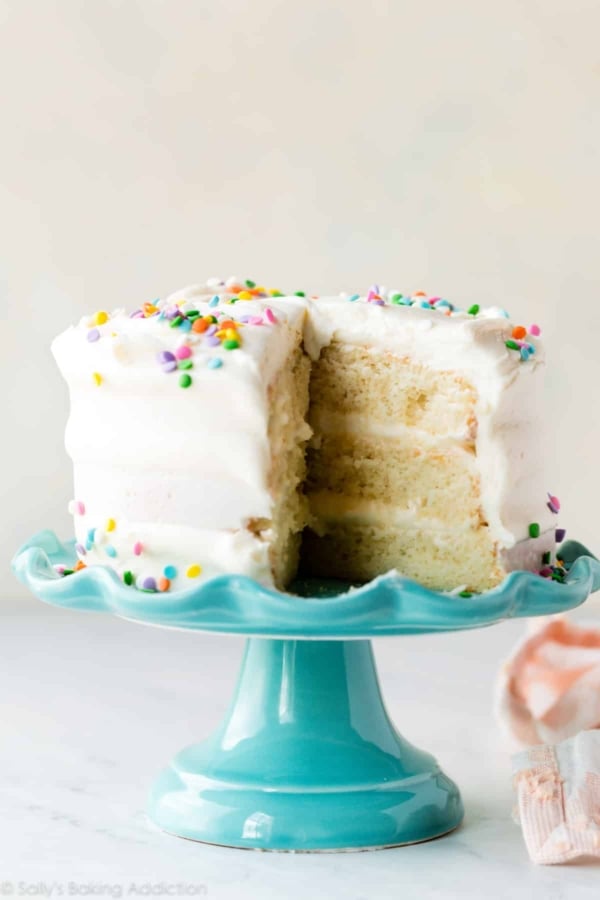
My versatile white cake was yet again my starting point for developing a new layer cake recipe. That cake is my definition of *cake perfection* and has become one of the most popular cakes on my website. I’m even including it in my upcoming cookbook. Here’s why:
- Soft & airy crumb
- Fluffy, but not eggy
- Pure sweet vanilla flavor
- Perfect base for pretty much any flavor of frosting
- Stick-to-your-fork moist & tender
- Converts easily to a quarter sheet cake
In today’s version, we’re adding chocolate chips, and portioning the batter between 3 8-inch round cake pans. You can, of course, stick with 2 9-inch round cake pans like the original version. But no matter what you do, don’t skimp on the fluffy buttercream and decadent chocolate ganache drip!

Key Ingredients for Your Chocolate Chip Cake
- Cake Flour: Cake flour is almost 30x finer than all-purpose flour. Using it is a surefire way to achieve a delicate, soft-as-silk texture. It’s sold in the baking aisle and you can use the rest of the box in any of these recipes that use cake flour, including my popular confetti cake.
- Proper Room-Temperature Butter: To achieve a good rise, properly cream the butter and sugar together. You have the crutch of baking powder and baking soda, but the cake’s crumb truly sings when that creaming process steps in. You need softened, room-temperature butter, which is actually still cool and firm to the touch. Butter that’s too cold or too warm won’t mix properly. If you’re interested in learning more, here’s a helpful video and tutorial for how to cream butter and sugar.
- Egg Whites: Do not use egg yolks. Using only egg whites ensures that the crumb is not weighed down by the fat in egg yolks. Think about it: lighter confections such as angel food cake require only the egg whites. Same is true here. Use 5 large egg whites in this cake. If you need an idea of how to use the leftover egg yolks, try making a batch of lemon curd!
- Pure Vanilla: Reach for pure vanilla extract—a full Tablespoon goes in the cake batter, and then you’ll use it to flavor the buttercream frosting, too. You’ll really taste it in this recipe, so I don’t recommend using imitation vanilla here.
- Sour Cream Instead of Egg Yolks: Sour cream is the cake’s security blanket. While it contains fat like the egg yolks would, it won’t weigh down the crumb. It adds moisture and richness, and makes for a creamy, tender texture in every bite.
- Mini Chocolate Chips: For the best texture (and the most chips in every mouthful!), use mini chocolate chips in the cake and frosting. If using regular chocolate chips, they are more prone to sinking in the cake layers.
Start by Making the Chocolate Chip Cake Layers
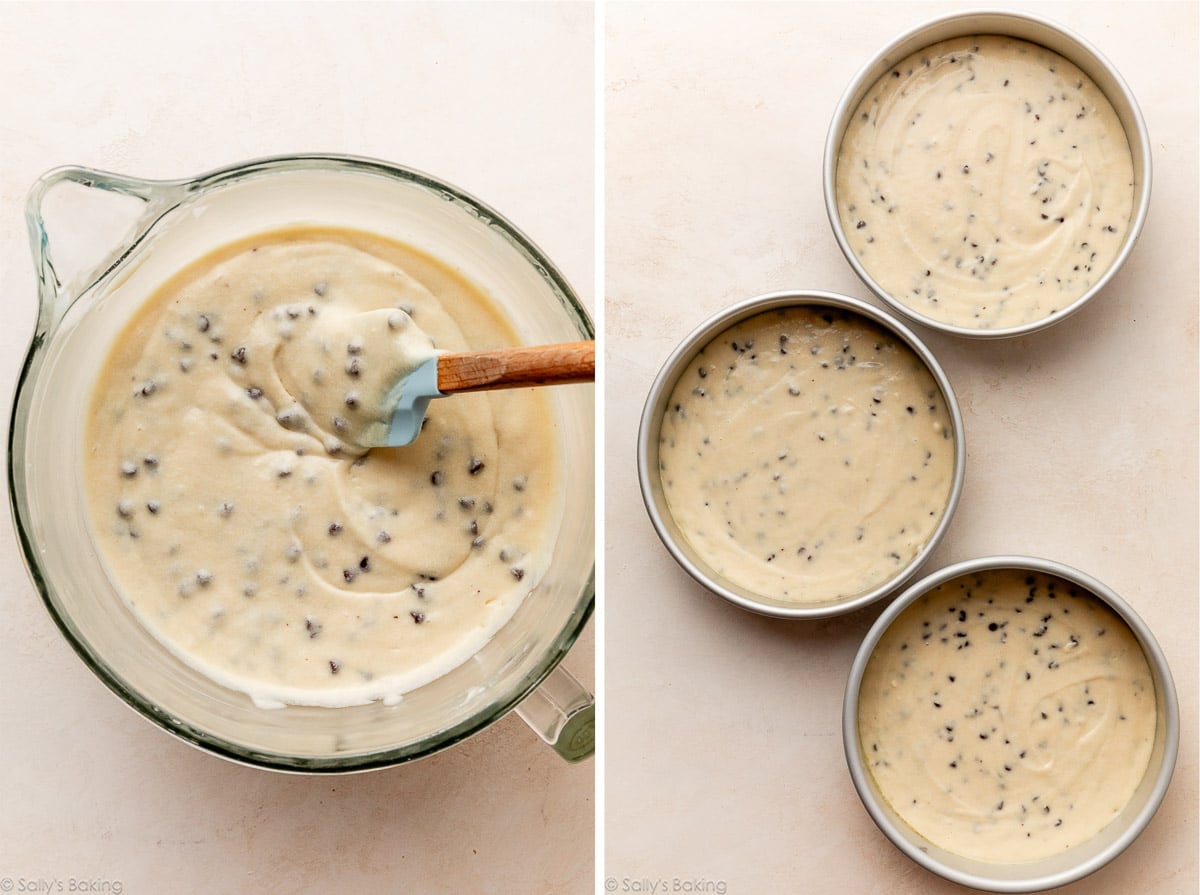
The cake batter follows a simple, familiar process. Whisk the dry ingredients together, then work on the wet ingredients. In a separate bowl, use a mixer to cream the butter and sugar together. Beat in egg whites, then the sour cream and vanilla. Pour in the dry ingredients and then with the mixer running, slowly add the milk. Finally, fold in the chocolate chips by hand or with the mixer on low speed.
Expect a creamy, slightly thick batter, and then divide between your cake pans:
Use Parchment Paper Rounds for Cakes
Lining cake pans with parchment rounds is the trick I use every single time I bake a round cake, whether I’m making a 1-layer sprinkle cake, a 9-layer Smith Island cake, or today’s recipe. Store-bought pre-cut parchment rounds are convenient, but it’s really easy to just make them yourself. You can cut the exact pan size you need, whether you’re making a 6-inch cake, an 8-inch cake, or a 9-inch cake. If you don’t make a lot of round cakes, just cut them as you need them. If you bake a lot, cut many at a time and store them with your baking pans, ready for the next time you bake.
Very lightly grease the cake pan with butter or nonstick spray. Place the parchment paper round inside, and then grease the parchment, too. Yes, you grease the pan and then also grease the parchment. This creates an ultra-nonstick environment for your cake. The cake won’t stick to the pan, and the parchment round won’t stick to the cake. For more tips on this method, see Parchment Paper Rounds for Cakes.
Once the cakes have baked and cooled, trim the tops using a cake leveler or a large serrated knife to create an even surface. A flat top ensures a sturdier and more stable layered cake. Check out this detailed how to assemble and decorate a layer cake post for helpful tips!
Whipped Chocolate Chip Buttercream
To fill and assemble today’s towering cake, I took the whipped vanilla buttercream from my vanilla sheet cake recipe and scaled it up to coat this 3-layer 8-inch chocolate chip cake. And since this is a chocolate chip cake, I couldn’t resist folding chocolate chips into it. Taste testers (and there were dozens after making about 6 of these!!!) didn’t seem to mind the extra chocolate. 😉
It’s whipped, fluffy, and positively loaded with chocolate chips:

Success Tip: If you want to save some buttercream for piping on top (like the photos and video show), set some aside before you beat in the mini chocolate chips. You wouldn’t want to try to pipe the chocolate chip buttercream because the chips could clog the piping tip.
Assemble the cooled cake layers with the frosting. I use about 1 cup of frosting between each layer—just eyeball it.
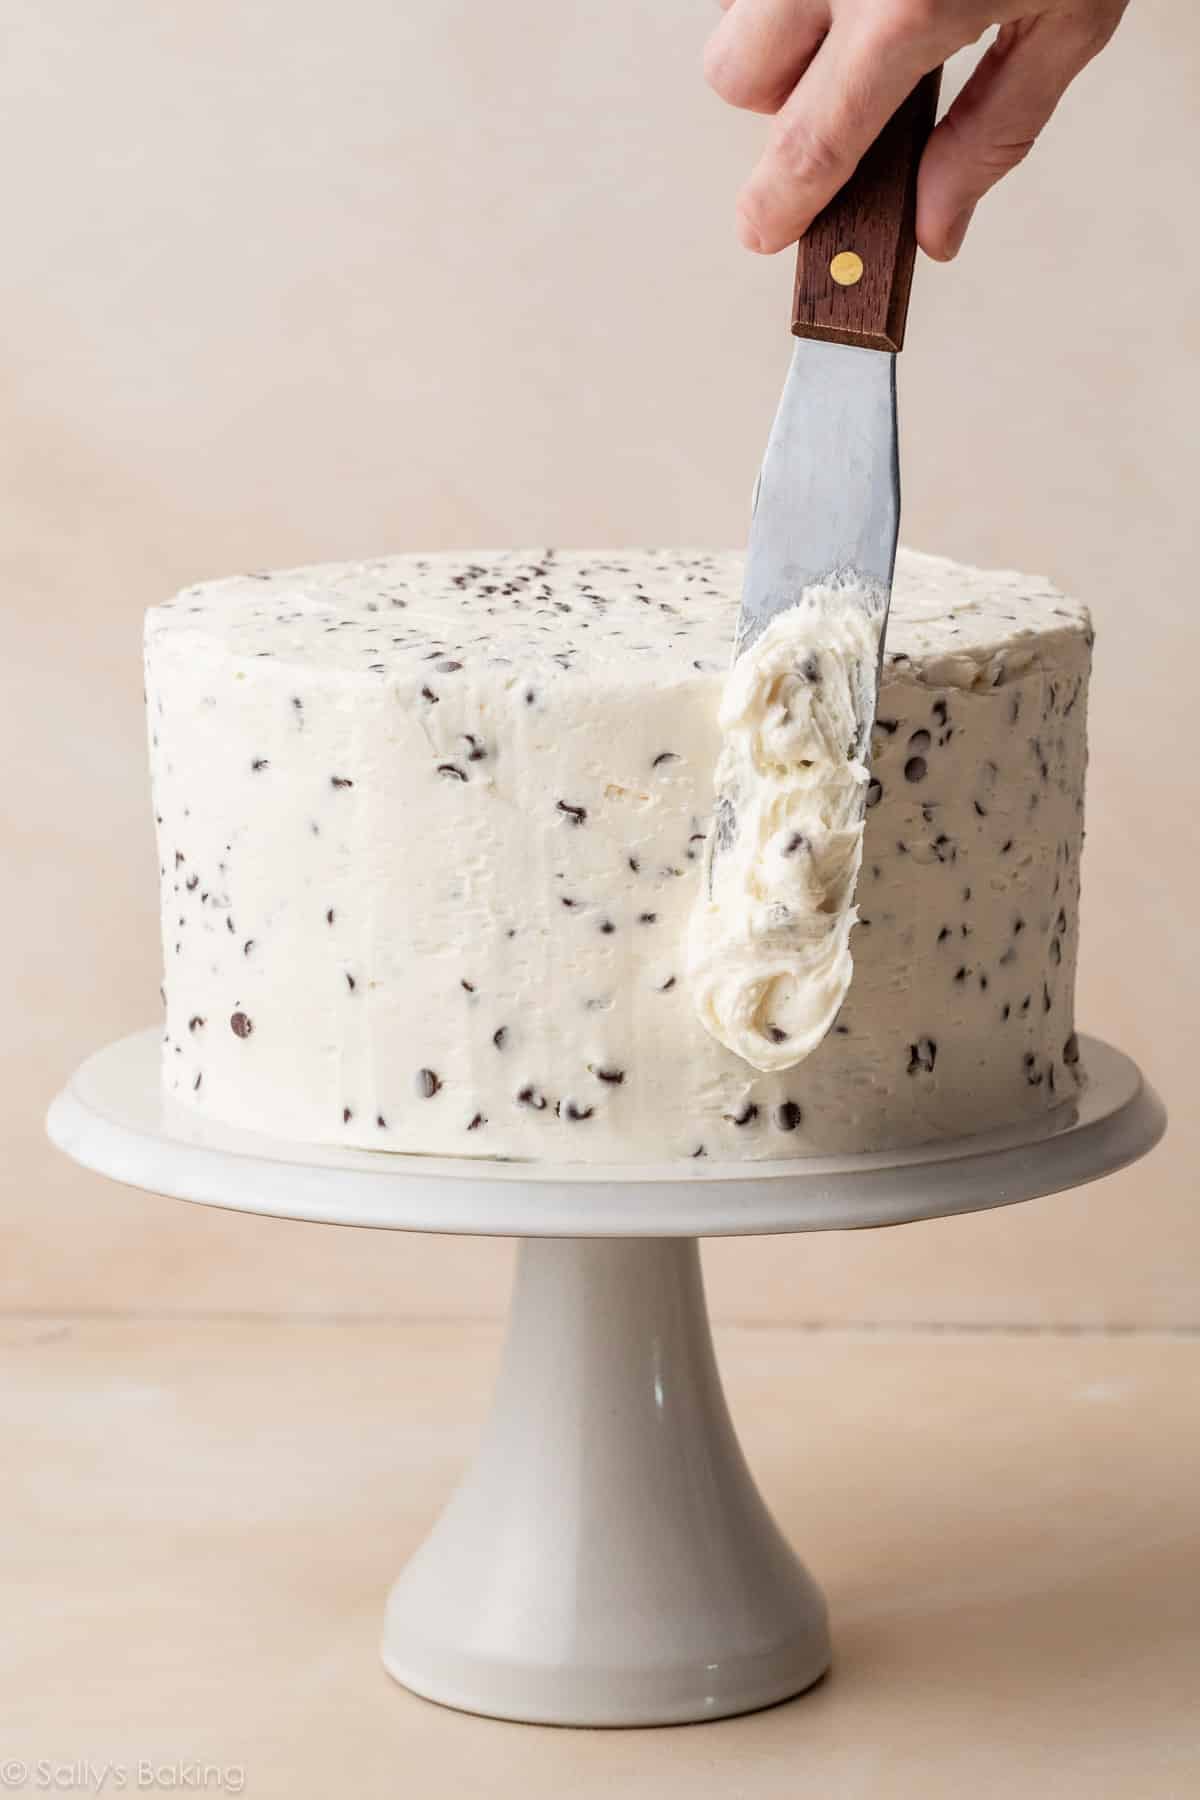
Absolutely No Need for a Crumb Coat
In most of my layer cake recipes, I recommend applying a crumb coat: a thin layer of frosting on the exterior of the cake that locks in any loose crumbs and helps stabilize the layers. However, for this chocolate chip layer cake, we’re skipping that step. Because of the lumpy chocolate chips, it would be hard to spread the frosting thin enough to make a crumb coat. The other thing we’re doing differently today is not running a bench scraper around the sides of this cake to smooth out the frosting, because it would only drag the chocolate chips around. Instead, I use a large flat icing spatula to apply the chocolate chip buttercream on the sides.
2-Ingredient Chocolate Ganache
Easily one of the most versatile toppings/fillings in the dessert world, chocolate ganache is quick and simple to make. You need a 1:1 ratio (by weight) of just two ingredients:
- Heavy Cream or Heavy Whipping Cream: Make sure the word “heavy” is in the title/on the carton. Do not use half-and-half, whole milk, or any other liquid because the ganache won’t set up properly.
- Chocolate: You can use semi-sweet chocolate (recommended) or bittersweet chocolate.
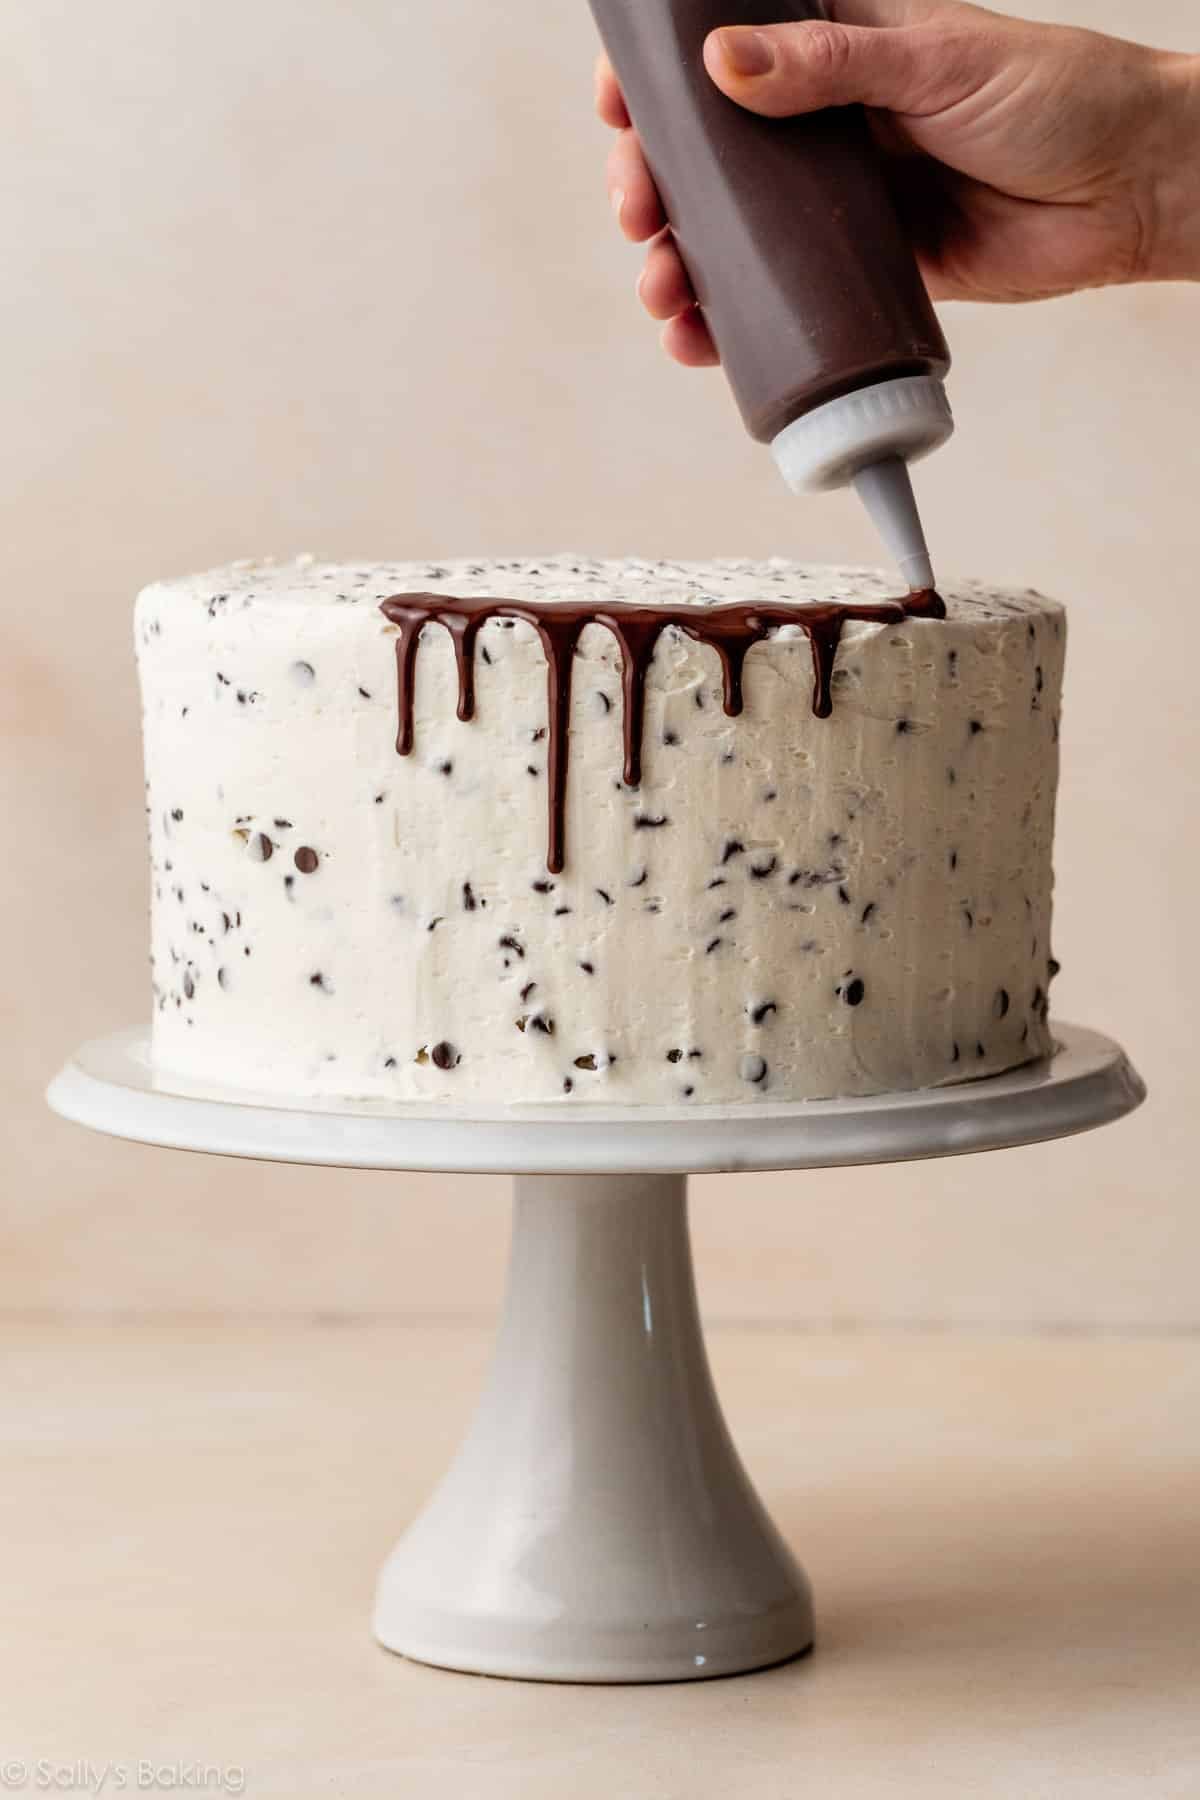
Chocolate Ganache Drip Cake Decoration How-to
Refrigerate the cake for at least 20 minutes before adding the chocolate drip. You want the frosting to be fairly cold before you top it with the warm chocolate ganache, so the chocolate begins to set as it drips down the sides of the cake.
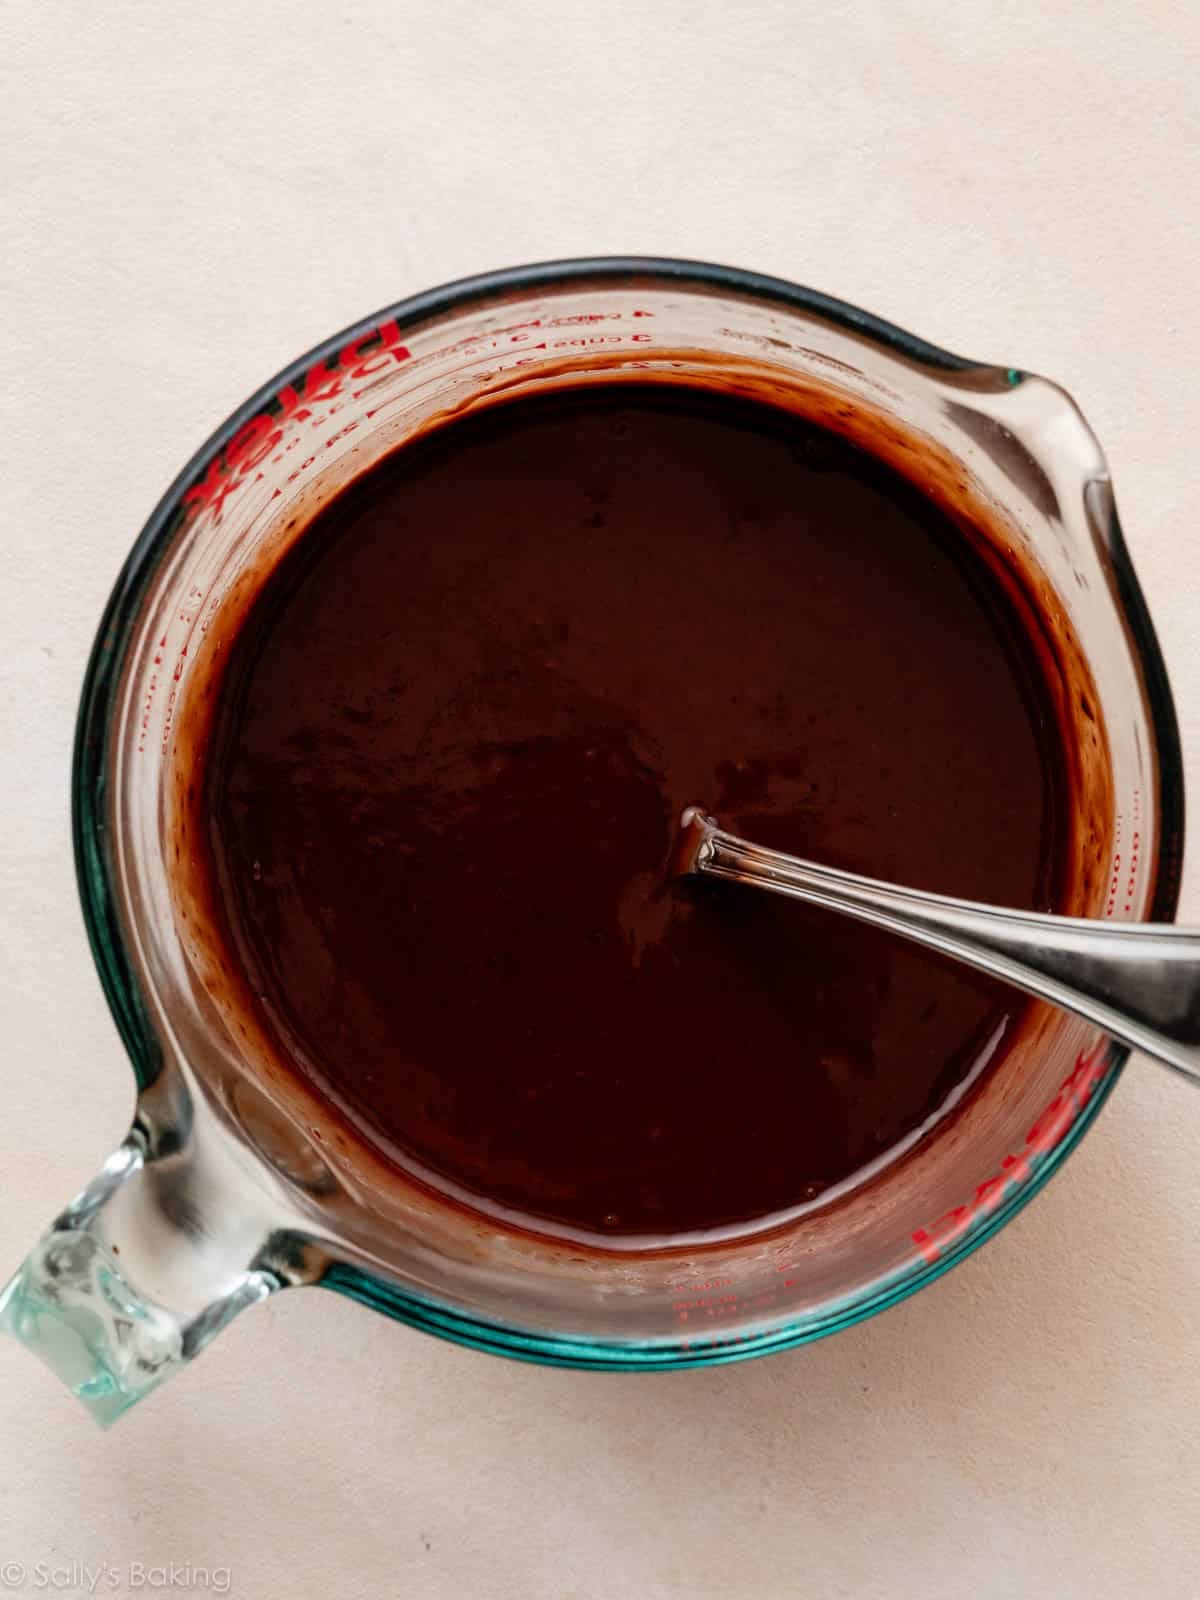
Make the chocolate ganache in a glass liquid measuring cup with a pour spout, to make it easy to transfer it into the squeeze bottle.
Go around the perimeter of the top of the cake in a zigzag motion, squeezing the bottle so the chocolate comes out and drips down the sides of the cake. Work quickly, because as the ganache cools, it begins to thicken, and we don’t want that happening in the squeeze bottle. After you’ve gone all the way around the edge, squeeze the remaining chocolate ganache on top of the cake, and use an offset spatula to smooth it out.
Refrigerate the cake again for at least 20 minutes to set the ganache before slicing.
If the chocolate ganache thickens in the squeeze bottle before you’ve finished using it all, place the bottle in large bowl/container filled with very warm water. Let it sit for 5 to 10 minutes until it thins out again.
Yes. If you don’t have a squeeze bottle, you can use a piping bag with a small round tip, or a zipped-top plastic bag with a corner snipped off. You could even just use a spoon, but it will take a bit longer.
I reserved some buttercream to pipe on top of the cake as an optional garnish (before adding the chocolate chips). I used a Wilton 1M piping tip. You can absolutely do that, or you can top with more chocolate chips, fresh berries, or crumble up the cake scraps you leveled off the top of the cake layers.
Make This as a 6-Inch Cake, 9-Inch Cake, or a Sheet Cake
This is a tall, rich cake that serves a lot of people, and I know that many bakers don’t want to make such a large cake. Instead, you can use 6-inch cake pans and make this chocolate chip layer cake as a 6-inch cake; or you can make a 9-inch 2-layer cake, or a 9×13-inch quarter sheet cake. Here are instructions for each:
- 6-Inch 3-Layer Cake: Follow all the same directions for the 6-inch vanilla cake recipe in the recipe card here, and add 3/4 cup (135g) mini chocolate chips (still tossed in a Tablespoon of flour) to the batter, and 3/4 cup mini chocolate chips to the frosting. For the ganache drip topping, decrease the amounts to 4 ounces (113g) chopped chocolate and 1/2 cup (120g/ml) heavy cream.
- 9-Inch 2-Layer Cake: Make the cake batter as instructed below, and divide between 2 greased and lined 9-inch round cake pans. Extend the bake time to 26–28 minutes. Keep the frosting and ganache amounts the same.
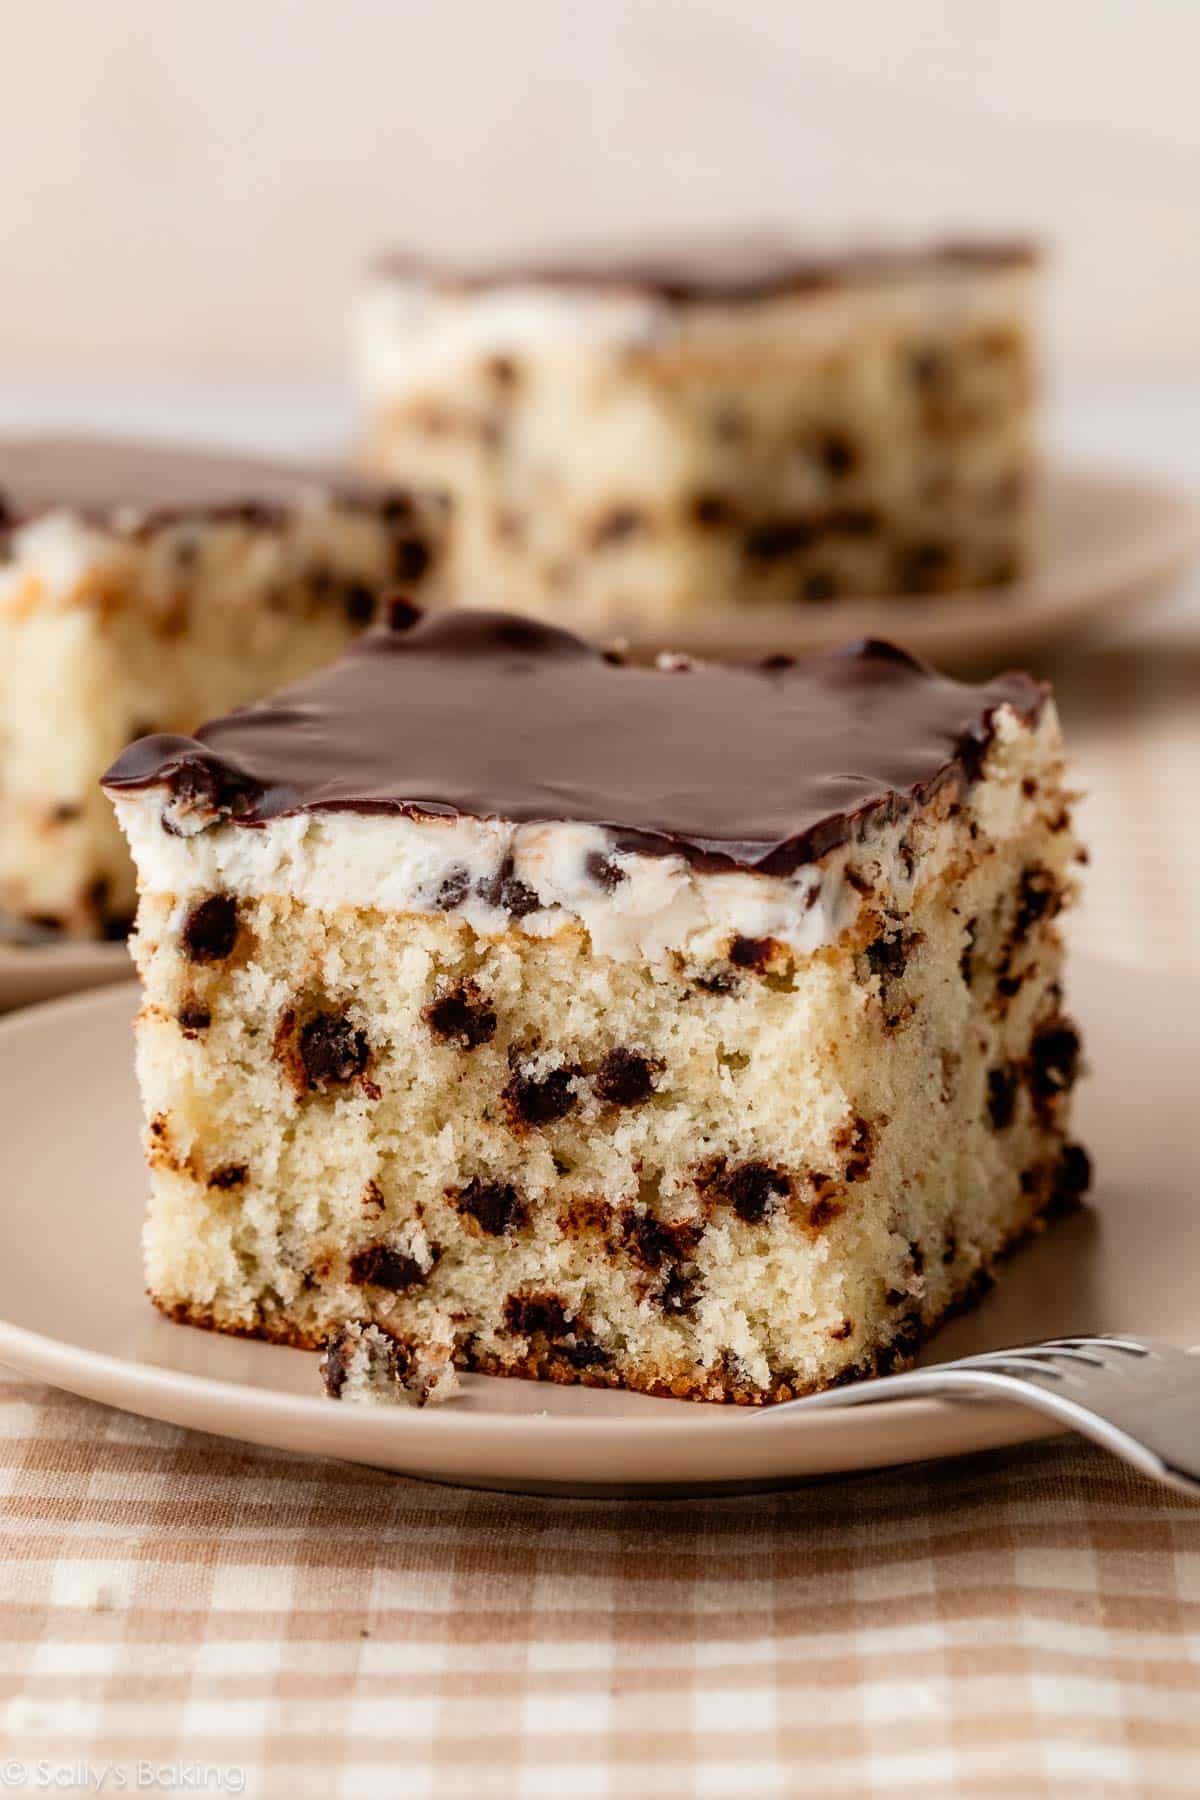
- 9×13-inch Sheet Cake: Make the cake batter as instructed below, and pour/spread it in a greased metal or glass 9×13-inch baking pan. Bake for 34–36 minutes, until a toothpick inserted in the center of the cake comes out clean. For the frosting, use the whipped vanilla buttercream amounts from this vanilla sheet cake recipe, and add 3/4 cup (135g) mini chocolate chips. For the ganache topping, you can make it as written below, or decrease the amounts to 4 ounces (113g) chopped chocolate and 1/2 cup (120g/ml) heavy cream for a thinner layer. Follow the same instructions for the ganache, including refrigerating the cake before and after topping, but instead of transferring ganache to a squeeze bottle, simply pour and spread it evenly over the frosting.
Here’s the sheet cake version:
Chocolate Chip Cake with Ganache Drip
- Prep Time: 1 hour
- Cook Time: 26 minutes
- Total Time: 5 hours (includes cooling & chilling)
- Yield: serves 12-16
- Category: Cake
- Method: Baking
- Cuisine: American
Description
This towering chocolate chip layer cake combines a soft vanilla cake crumb and sweet whipped vanilla buttercream with oodles of mini chocolate chips. For a finishing touch that elevates this cake to showstopper status, top it with a chocolate ganache drip. Watch the video tutorial for a complete walk-through of the recipe and demonstration of how to do the ganache drip topping. For other size cakes using this recipe, see Notes below.
Ingredients
Cake
- 2 and 1/2 cups (285g) cake flour (spooned & leveled)
- 2 teaspoons baking powder
- 1/2 teaspoon baking soda
- 1 teaspoon salt
- 3/4 cup (12 Tbsp; 170g) unsalted butter, softened to room temperature
- 1 and 3/4 cups (350g) granulated sugar
- 5 large egg whites, at room temperature
- 1/2 cup (120g) sour cream, at room temperature
- 1 Tablespoon pure vanilla extract (yes, Tbsp!)
- 1 cup (240ml) whole milk, at room temperature
- 1 and 1/4 cups (225g) mini chocolate chips tossed in 1 Tablespoon cake flour
Whipped Chocolate Chip Buttercream
- 1 and 1/2 cups (340g) unsalted butter, softened to room temperature
- 5 and 1/2 cups (650g) confectioners’ sugar
- 1/3 cup (80ml) heavy cream (can be cold or room temperature)
- 1 and 1/2 teaspoons pure vanilla extract
- 1/8 teaspoon salt
- 1 cup (180g) mini chocolate chips
Chocolate Ganache
- 6 ounces (170g) semi-sweet chocolate, finely chopped
- 3/4 cup (6 ounces or 170–180g/ml) heavy cream
Instructions
- Preheat oven to 350°F (177°C). Grease three 8-inch round cake pans, line with parchment paper rounds, then grease the parchment paper. Parchment paper helps the cakes seamlessly release from the pans. (If it’s helpful, see this parchment paper rounds for cakes video & post.)
- Make the cake: Whisk the cake flour, baking powder, baking soda, and salt together. Set aside.
- Using a handheld or stand mixer fitted with a paddle attachment, beat the butter and sugar together on high speed until combined and creamy, about 3 minutes. Scrape down the sides of the bowl with a silicone spatula as needed. (Here’s a helpful tutorial if you need guidance on how to cream butter and sugar.) Add the egg whites. Beat on high speed until combined, about 2 minutes. Then beat in the sour cream and vanilla extract, again on high speed, until the mixture comes together. Scrape down the sides as needed. Add the dry ingredients and turn the mixer on low speed. With the mixer running on low, slowly pour in the milk until combined. Do not overmix. You may need to whisk it all by hand to make sure there are no lumps or dry pockets at the bottom of the bowl. The batter will be slightly thick. Fold in the mini chocolate chips.
- Pour batter evenly into cake pans. Weigh them to ensure accuracy, if desired. Bake for 24–26 minutes or until the cakes are baked through. To test for doneness, insert a toothpick into the center of the cake. If it comes out clean, it’s done. Or you can lightly poke the top of the cake with your finger. If it bounces back, it’s done.
- Allow cakes to cool in the pans set on a cooling rack for 1 hour, then remove them from the pans and let the cakes finish cooling directly on the rack. The cakes must be completely cool before frosting and assembling.
- Make the buttercream: (Note that if you want to pipe plain buttercream on top of the cake like in the photos and video, set around 3/4 cup (about 180g) aside before adding the chocolate chips.) In a large bowl using a handheld mixer or stand mixer fitted with a paddle attachment, beat the butter on medium to medium-high speed until smooth and creamy, about 2 minutes. Add confectioners’ sugar, heavy cream, vanilla extract, and salt. Start the mixer on low speed, then gradually increase to high speed and beat until whipped and fluffy, about 4 minutes. Fold in the mini chocolate chips, either by hand with a spatula, or you can beat them in on low speed until they’re evenly dispersed throughout the frosting.
- Assemble and decorate: Using a large serrated knife, slice a thin layer off the tops of the cakes to create a flat surface. Discard the scraps, or you can save them to crumble on top of the finished cake. Place 1 cake layer on your cake stand, cake turntable, or serving plate. Evenly cover the top with about 1 cup of frosting. Top with 2nd cake layer, upside down, and evenly cover the top with another 1 cup of frosting. Top with the third cake layer, either right side up or upside down. Spread the remaining frosting all over the top and sides. I use and recommend a large, straight icing spatula to apply the frosting.
- Refrigerate the cake for at least 20 minutes, or up to 8 hours. The frosting must be cold when you add the chocolate drip on top.
- Make the chocolate ganache: Place chopped chocolate in a medium heat-proof bowl with a pour spout (I use a 2-cup glass liquid measuring cup). Heat the cream in a small saucepan over medium heat until it begins to gently simmer. (Do not let it come to a rapid boil—that’s too hot!) Pour over chocolate, then let it sit for 2–3 minutes to gently soften the chocolate. With a metal spoon or small rubber spatula, very slowly stir until chocolate has melted and mixture is smooth. The finer you chopped the chocolate, the quicker it will melt with the cream. If it’s not melting, do not microwave it. If needed, see Troubleshooting Chocolate Ganache. Once ganache mixture is smooth, transfer it into a squeeze bottle.
- Chocolate ganache drip: Remove the cake from the refrigerator. Working in a zigzag motion, gently squeeze the warm ganache around the edge of the cake, turning the cake as you go. See video tutorial below as a visual. The ganache should drip down the sides and set as it does. When you’ve gone around the whole cake, squeeze remaining ganache on top of the cake, and smooth it into an even layer with an offset spatula. Feel free to garnish with fresh berries, chocolate chips, or leftover cake crumbles from leveling the tops of the cakes. Chill, uncovered, for at least 20 minutes, or up to 6 hours before slicing and serving. Once the ganache has chilled, if you set aside buttercream in step 6, you can pipe it on. I used Wilton 1M piping tip.
- Cake can be served at room temperature or chilled. I prefer it at room temperature. Cover leftover cake tightly and store in the refrigerator for up to 5 days. I like using a cake carrier for storing and transporting.
Notes
- Make Ahead & Freezing Instructions: The cake layers can be baked, cooled, and covered tightly at room temperature overnight. Likewise, the frosting can be prepared and then covered and refrigerated overnight. Bring the frosting to room temperature when ready to assemble the following day. Frosted cake can be frozen up to 2 months if you have room in the freezer. Thaw overnight in the refrigerator and bring to room temperature before serving.
- Special Tools (affiliate links): 8-inch Cake Pans or 6-inch Cake Pans or 9-inch Cake Pans | Glass Mixing Bowls | Whisk | Electric Mixer (Handheld or Stand) | Silicone Spatula | Cooling Rack | Offset Spatula | Straight Icing Spatula | Glass Liquid Measuring Cup | Small Saucepan | Squeeze Bottle | Round Cake Carrier (for storage)
- Cake Flour: If you can’t find cake flour, here is a DIY homemade cake flour substitute you can use instead.
- Carton Egg Whites: You can use carton egg whites. The carton should give measurements for substituting for fresh egg whites.
- Milk, Sour Cream, Substituting Buttermilk: Whole milk and sour cream are strongly recommended for the best taste and texture. A full-fat plain yogurt would work instead, though the cake may not be as light. Same goes for a lower-fat milk. If you want to use buttermilk, the best way to do so is to have it replace both the sour cream AND milk in this recipe. Use 1 and 1/2 cups of buttermilk, then leave out the sour cream and whole milk.
- If Using Regular Chocolate Chips: If you use regular chocolate chips instead of mini chocolate chips, they are more likely to sink in the cake layers, even after tossing in flour. I have better success using mini chocolate chips.
- Chocolate: Ganache will only set if the correct chocolate is used. You can use high-quality chocolate chips if needed (I prefer Ghirardelli or Guittard semi-sweet chocolate chips), but I recommend using chocolate baking bars, in either semi-sweet or bittersweet. You can find them right next to the chocolate chips in the baking aisle. They are usually sold in 4-ounce (113g) bars. I like Baker’s or Ghirardelli brands.
- 3-Layer 6-Inch Cake Instructions: You can use 6-inch cake pans and make this chocolate chip layer cake as a 6-inch cake. Follow all the same directions for the 6-inch vanilla cake recipe in the recipe card here, and add 3/4 cup (135g) mini chocolate chips (still tossed in a Tablespoon of flour) to the batter, and 3/4 cup mini chocolate chips to the frosting. For the ganache drip topping, decrease the amounts to 4 ounces (113g) chopped chocolate and 1/2 cup (120g/ml) heavy cream.
- 2-Layer 9-Inch Cake Instructions: Make the cake batter as instructed above, and divide between 2 greased and lined 9-inch round cake pans. Extend the bake time to 26–28 minutes. Keep the frosting and ganache amounts the same.
- 9×13-Inch Quarter Sheet Cake Instructions: Make the cake batter as instructed above, but pour/spread it in a greased metal or glass 9×13-inch baking pan. Bake for 34–36 minutes, until a toothpick inserted in the center of the cake comes out clean. For the frosting, use the whipped vanilla buttercream ingredient amounts from this vanilla sheet cake recipe, and add 3/4 cup (135g) mini chocolate chips. For the ganache topping, you can keep the amount as is for a thicker layer, or decrease to 4 ounces (113g) chopped chocolate and 1/2 cup (120g/ml) heavy cream for a thinner layer. Follow the same instructions for the ganache, including refrigerating the cake before and after topping, but instead of transferring ganache to a squeeze bottle, simply pour and spread it evenly over the frosting.
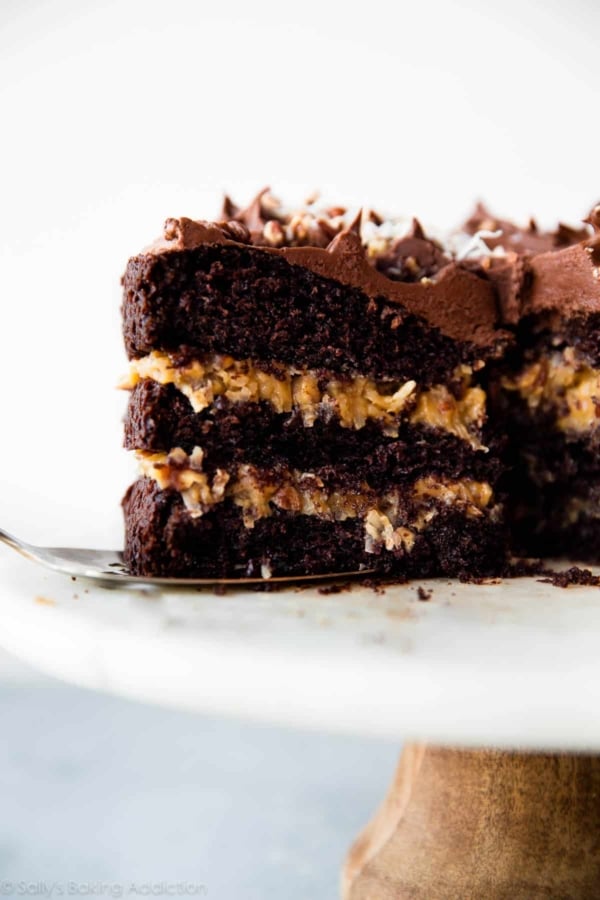
- Chocolate Frosting Alternative: This cake also tastes amazing with chocolate frosting instead. Follow the frosting recipe from my triple chocolate layer cake recipe. It’s enough for today’s 3-layer cake. Feel free to fold in chocolate chips!


Reader Comments and Reviews
We loved the cake. I deducted one star as we found the frosting to be extremely sweet. Most of us scraped it off.
Although there were a lot of steps to this recipe, it was a fun to make. My cake decorating needs practice (both dripping the ganache and piping the icing), but overall I was happy with the results. The cake texture seemed a tad bit dense, but other than that I really enjoyed the flavors. I’ll definitely be using the mini-chocolate chip buttercream again.
A lot of steps, cake was a little dense but still delicious.
I made the 2 layer 9 inch cake version, and even though I forgot to set the oven timer at first so it was slightly overbaked (oops!), the flavour was still really good. I do agree with several of the other reviewers though that next time I would try it with an icing that isn’t as sweet. Loved the ganache on top though!
It has been so long since I have made a layer cake and this recipe was so easy to follow and it turned out delicious! I will definitely keep this in the rotation!
This was so much fun to bake! This cake is delicious and not as rich as one might expect given all the chocolate. Great balance. Next time I make it, I will do 2/3 the amount of ganache and 1.5 times the amount of frosting. Also, I found that sprinkling the floured chocolate chips on top of the batter once it’s in the pan (not mixing it in like the recipe says) helps prevent them from sinking.
This is a delicious cake! I let my daughter decide what she wanted for her birthday cake after seeing the challenge recipe options and she went with this one! I ran out of powdered sugar (first time that’s ever happened, haha) so I had to process some granulated sugar and it still wasn’t powdered – so it added a bit of a graininess to the buttercream. It was still absolutely delicious and my girl loved it! Very rice cake, but you wouldn’t expect it by looking at it. Recommend!
Baking Challenge
Directions were easy to follow. Delicious cake!
This cake is a triple threat! Amazing cake, decadent frosting, and ganache! Wow! So fun and easy to make! Huge hit!
This icing on the cake was a bit tricky with all the chocolate chips, but super yummy!
I’m not normally a huge vanilla cake fan, but I made it for the challenge and was impressed! The chocolate chips definitely add a bit of extra flavor and texture that elevates it beyond just a plain vanilla cake with vanilla frosting. The ganache was tasty too and I have extra to use for something else! It was a pretty easy recipe to follow and the only change I made was adding a bit of extra salt to both the cake and the frosting because that’s just my flavor preference. Overall, I think it was still a bit too sweet to be something I’d make again and again, but definitely a fun one to try out!
can you make this recipe into cupcakes
Hi Linda, yes, we’re sure you could, but we haven’t yet tested it so are unsure of the exact bake time and exactly how many cupcakes it will make. To go by the cupcakes instructions from our vanilla cake recipe: Fill cupcake liners 2/3 full. Bake at 350°F (177°C) for 19-21 minutes. Yields about 3 dozen.
Love how easy this was and it turned out pretty and delicious!
My family really enjoyed this cake!
A bit too sweet for me but friends seemed to enjoy it. I made two small two layer cakes but I think this would have been better as a sheet cake instead.
This was such a fun cake to make!! And delicious, of course!
Delish!!
So soft and delicious! The ganache is such a nice touch, it adds to the elegance of this cake !
This cake was very yummy and the recipe is so thorough. I found the cake a *bit* dry although that may have been my fault. I generally find buttercream frosting too sweet, but that’s my own preference. My kids sure loved this cake! I loved the ganache drip.
Absolutely delicious! Not to rich and not as time consuming as I expected. This is a crowd pleaser for sure
I lived making this. I totally forgot to add the buttercream decor on top. Can’t wait to dig in to it
This was just okay. Everyone who tried it here said the icing would have been much better without the chocolate chips, and I found that there was way too much ganache.
I may try this again, leaving the chips out of the icing and making the smaller amount of ganache per the instructions for the 6 inch cake.
Recipe instructions are very detailed and easy to follow. Cake turned out beautiful and delicious!
I absolutely love chocolate chips, so I had to try this recipe. It was pretty simple to bake, and my family really enjoyed it.
The directions were easy to follow and the cake was delicious!
This chocolate chip cake was really fun to make. A real chocolate chip lover’s delight! The yummy chocolate ganache topping just adds to this amazing dessert. I can’t wait to make it again.
This cake was easy to make. It is very light and I like the idea that it freezes well
For the most part I loved this cake. Layer cakes have always been my nemesis. I loved how this cake tastes and it wasn’t too hard to make. The one thing I did not like was the ganache over the top. Next time I would just do the drip and more icing swirls on top.
This was fun cake to make a decorate. It came together easily and turned out to be very tasty. I had an issue decorating since the chocolate chips make the icing difficult to make smooth. And the whole cake is a bit sweet. But my family really enjoyed it.