

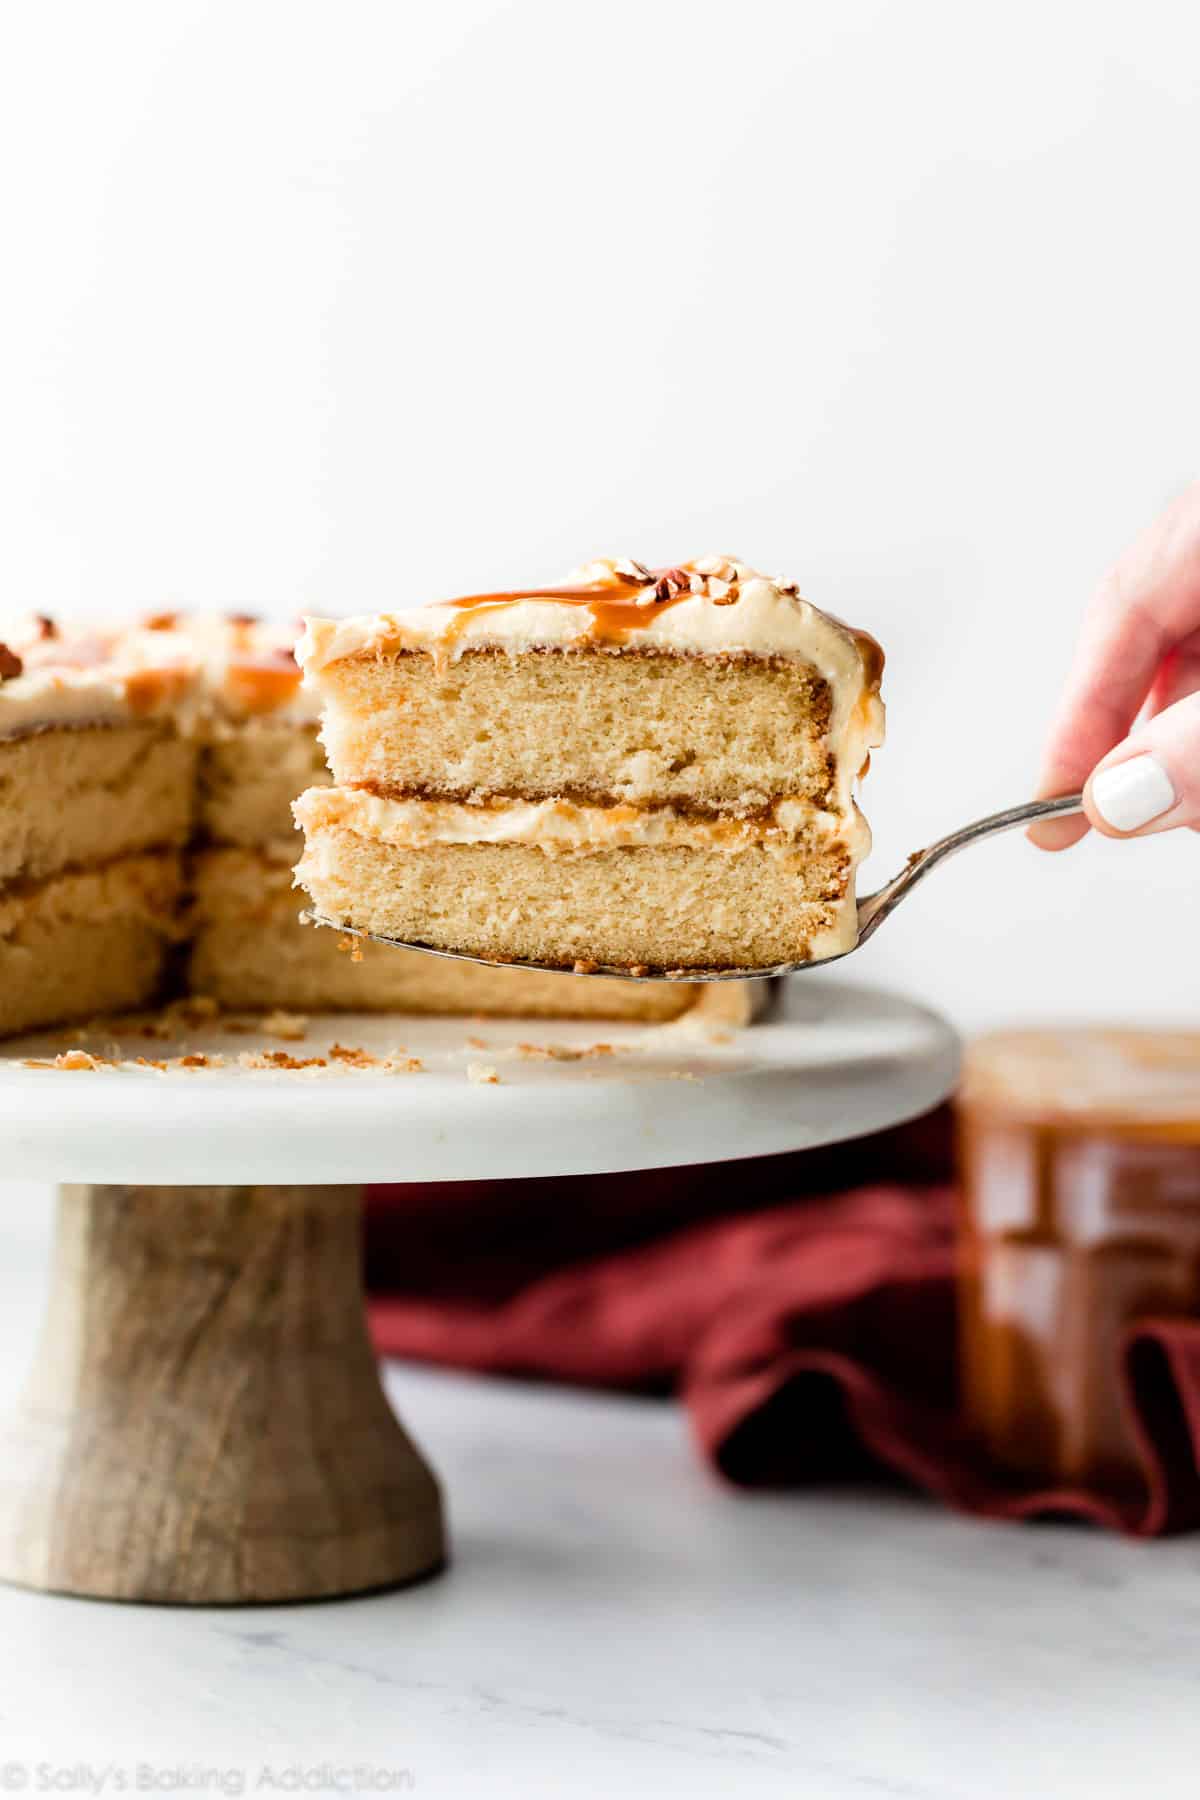
This unique and absolutely divine burnt sugar caramel cake gets its flavor from burnt sugar syrup. Cook sugar until caramelized, then add boiling water. We’ll use the syrup in both the cake and frosting. Add salted caramel for extra flavor and toasted pecans for a lovely garnish. It’s soft, buttery, and totally worth every minute of prep time.

It’s been a year in the making. I’m proud to finally share my version of caramel cake, a new cake recipe inspired by a favorite that my mother-in-law enjoyed when she was younger.
What is Burnt Sugar Caramel Cake?
This burnt sugar caramel cake is a wonderfully sweet and buttery cake flavored with homemade burnt sugar syrup. The syrup combines caramelized sugar and water, a mixture you cook on the stove until it’s dark amber in color. The cake does not taste burnt, bitter, or charred. Rather, it tastes like caramel and caramelized sugar, the same topping used for creme brûlée! We’ll flavor the frosting with burnt sugar syrup as well. Inside the cake and frosting, the syrup tastes like caramel. In my experience, this is the only from-scratch caramel flavored addition that (1) provides flavor and (2) doesn’t ruin the cake’s texture.
Behind the Recipe
This is not the exact recipe that my mother-in-law used to enjoy. Sadly, she was unable to find her original. She tried a few online recipes for burnt sugar cake, but none of them lived up to her memories. I researched a few recipes and after testing them myself, I was pretty disappointed at the dense texture and lack of flavor. I tried adding brown sugar and more vanilla for extra flavor, but nothing proved successful. So I turned to my white cake recipe, a cake that’s consistently soft and flavorful. My white cake is the starting point for strawberry cake, espresso chocolate chip cake, cookies & cream cake, pistachio cake, and coconut cake because it’s ALWAYS a winner.
My MIL said it’s the only burnt sugar cake most resembling what she enjoyed growing up!
How to Make Burnt Sugar Caramel Cake
- Make Burnt Sugar Syrup: After cooking it, cool the syrup before using in the recipe. Use half in the cake batter and half in the burnt sugar frosting.
- Prepare Cake Batter: Since we’re adding a liquid (the sugar syrup), reduce the sugar and milk in my white cake recipe. We’ll also leave out 1 egg white to really ensure that this cake isn’t too wet. Cake flour promises a soft crumb, egg whites (no yolks) promise a fluffy crumb, and sour cream promises a moist crumb. For best results, do not make any ingredient substitutions.
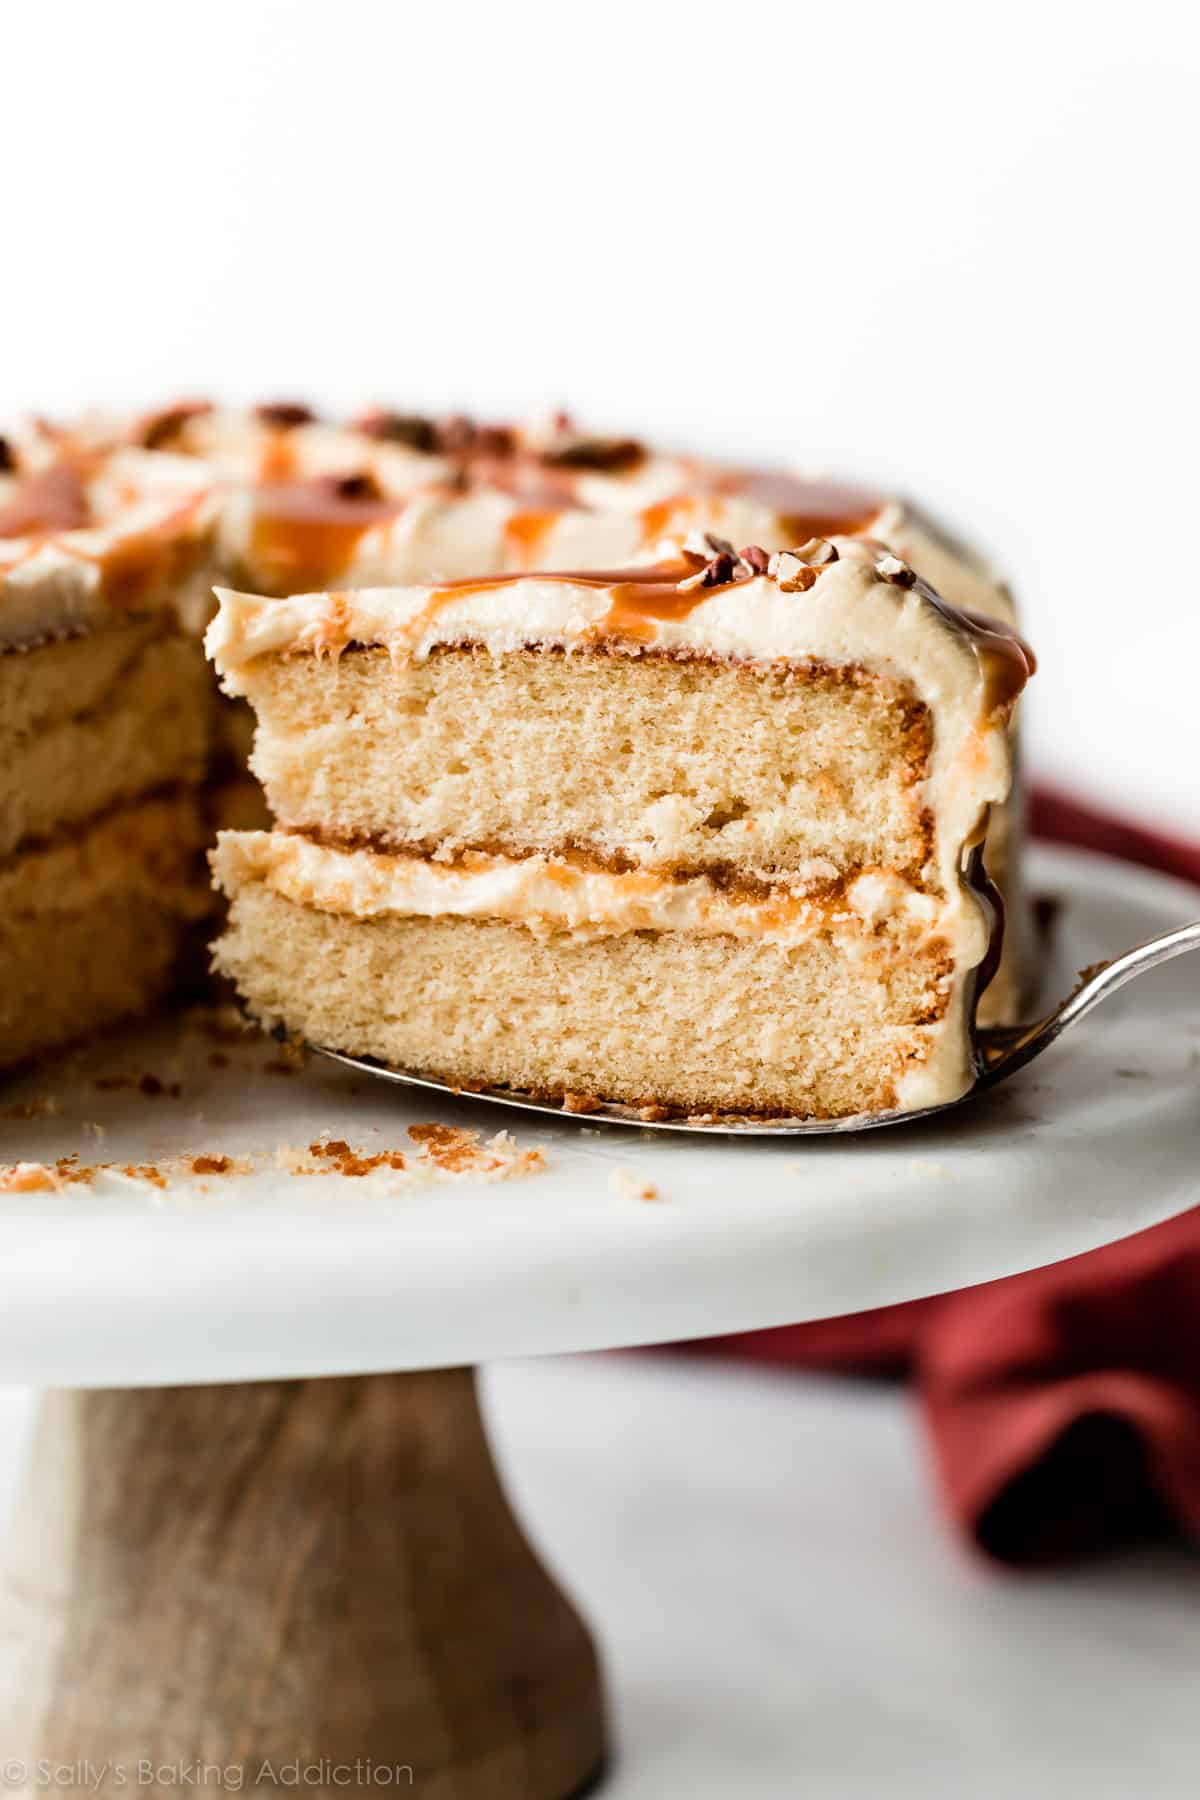
- Bake the Cakes: As a result of the burnt sugar syrup cooking, the cakes develop a golden crust around the edges. For a 3 layer or 9×13 inch cake, see recipe notes.
- Prepare Salted Caramel: To boost the caramel flavor in this cake, I highly recommend filling and garnishing the cake with my 4 ingredient salted caramel. You can even prepare the salted caramel a few days ahead of time.
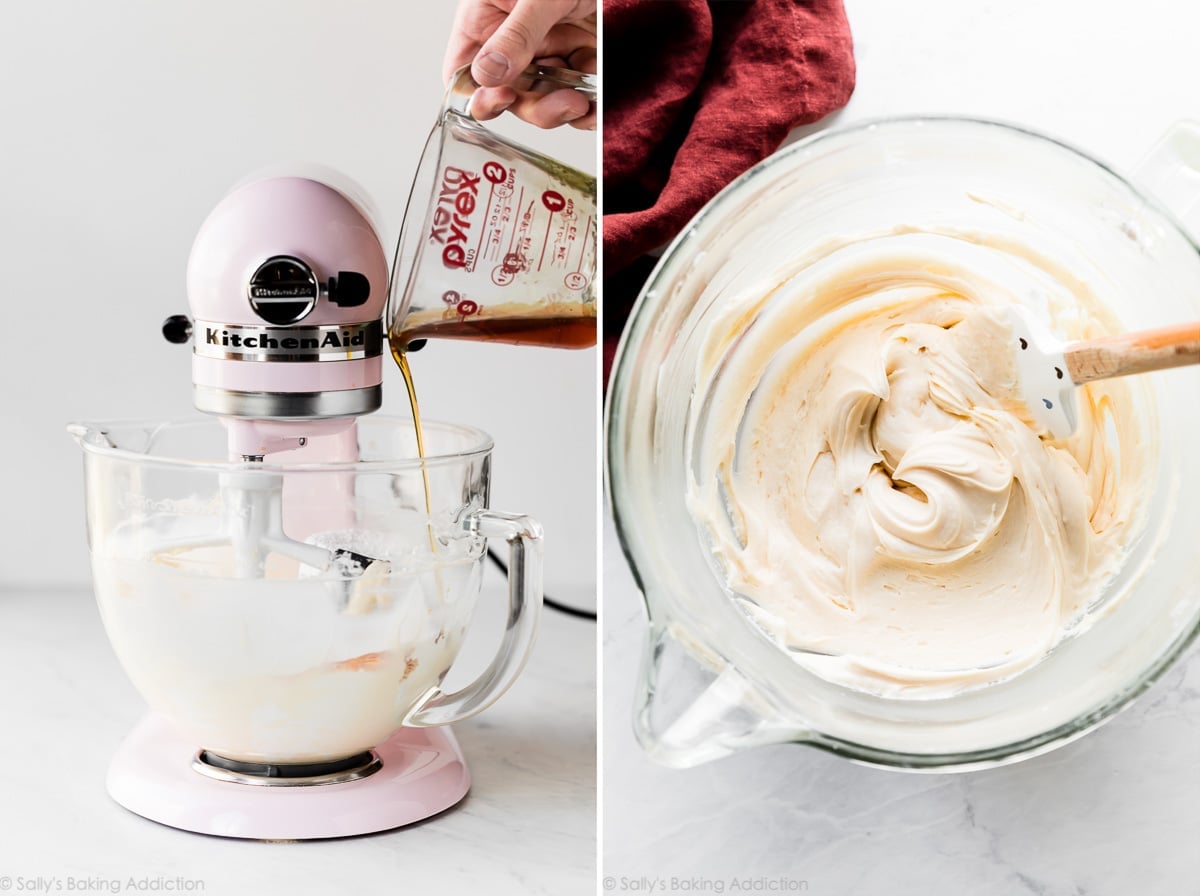
- Make the Frosting: The burnt sugar frosting is just like my vanilla buttercream, but we’ll add burnt sugar syrup for flavor. To complement the flavor, use extra salt. If you love salty sweet, this is the frosting for you!
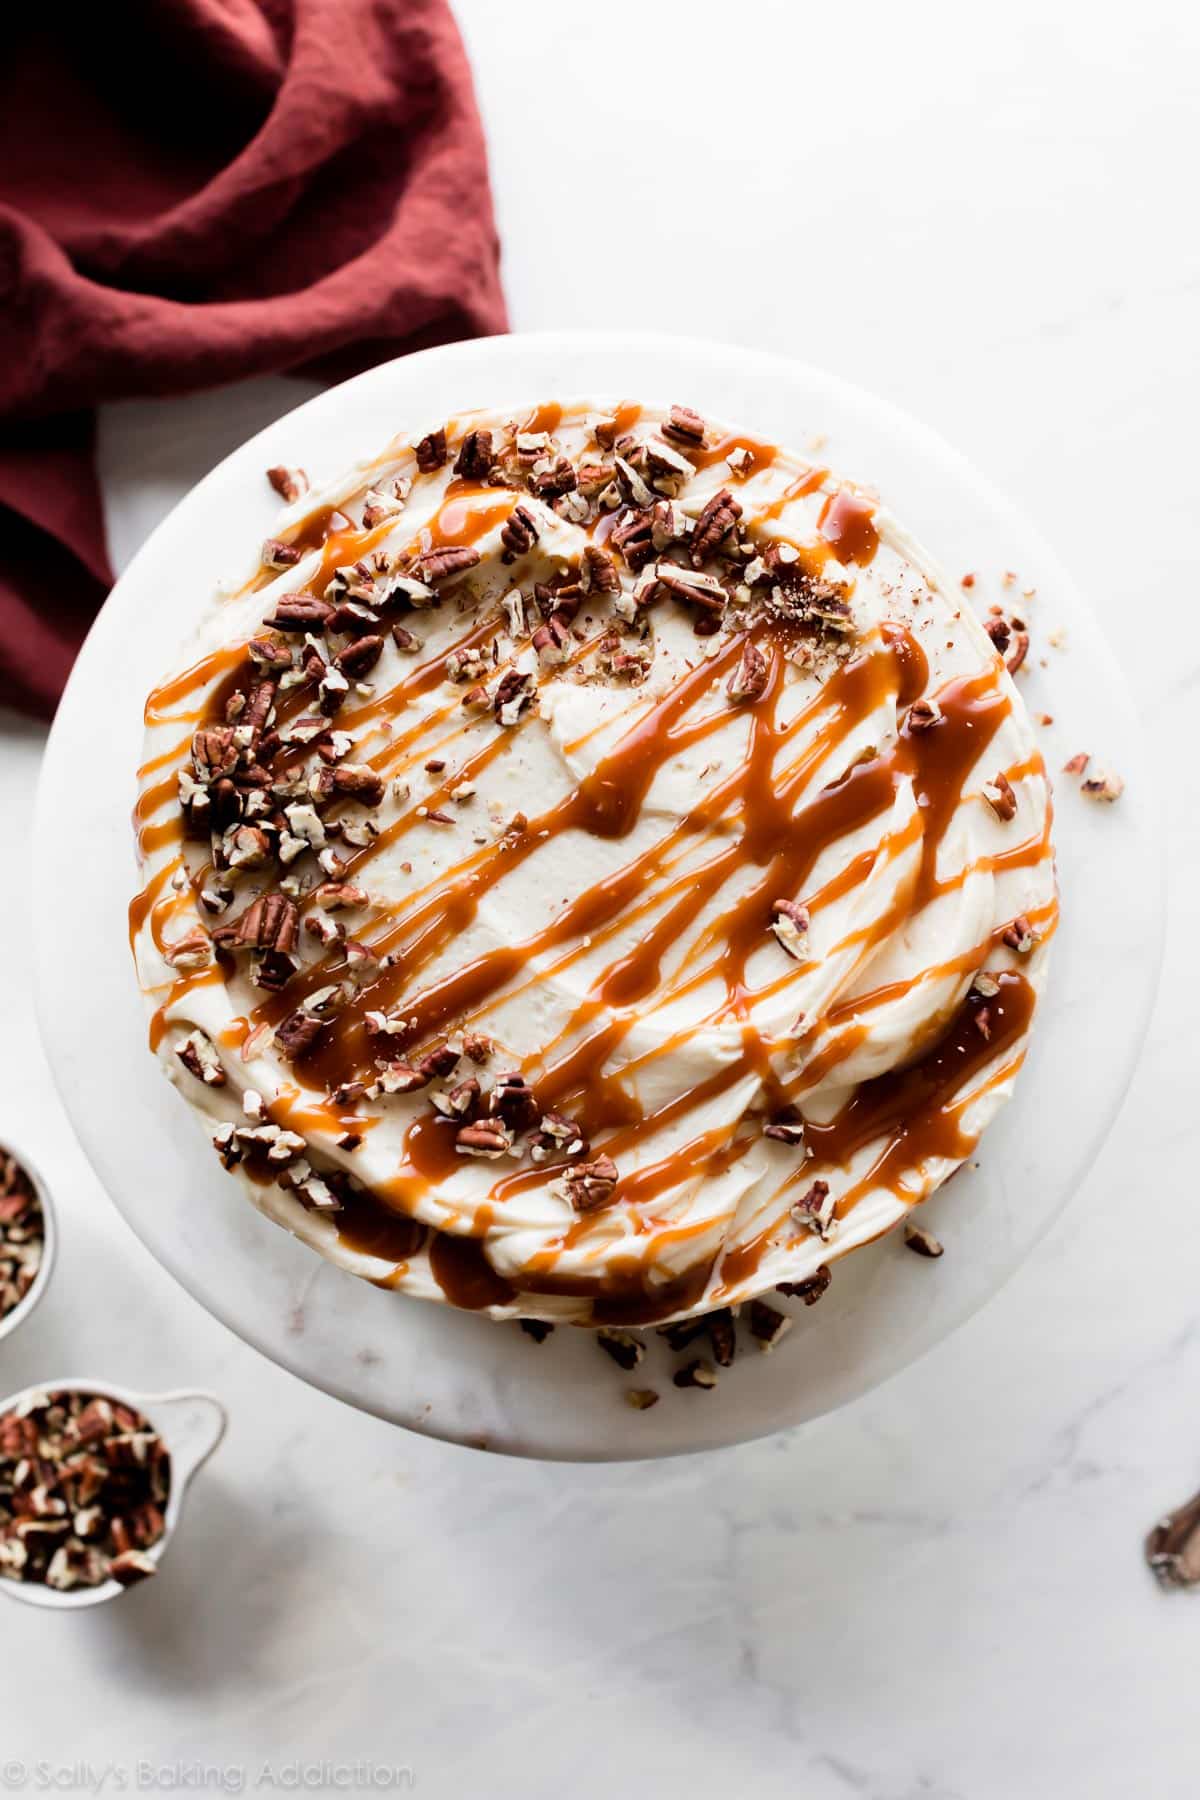
- Assemble & Frost the Cake: 2 layer cakes are pretty easy to decorate. For a little garnish, I love topping the cake with toasted pecans. See recipe note for instruction.
Video Tutorial: Burnt Sugar Caramel Cake
Prepare the Burnt Sugar Syrup First
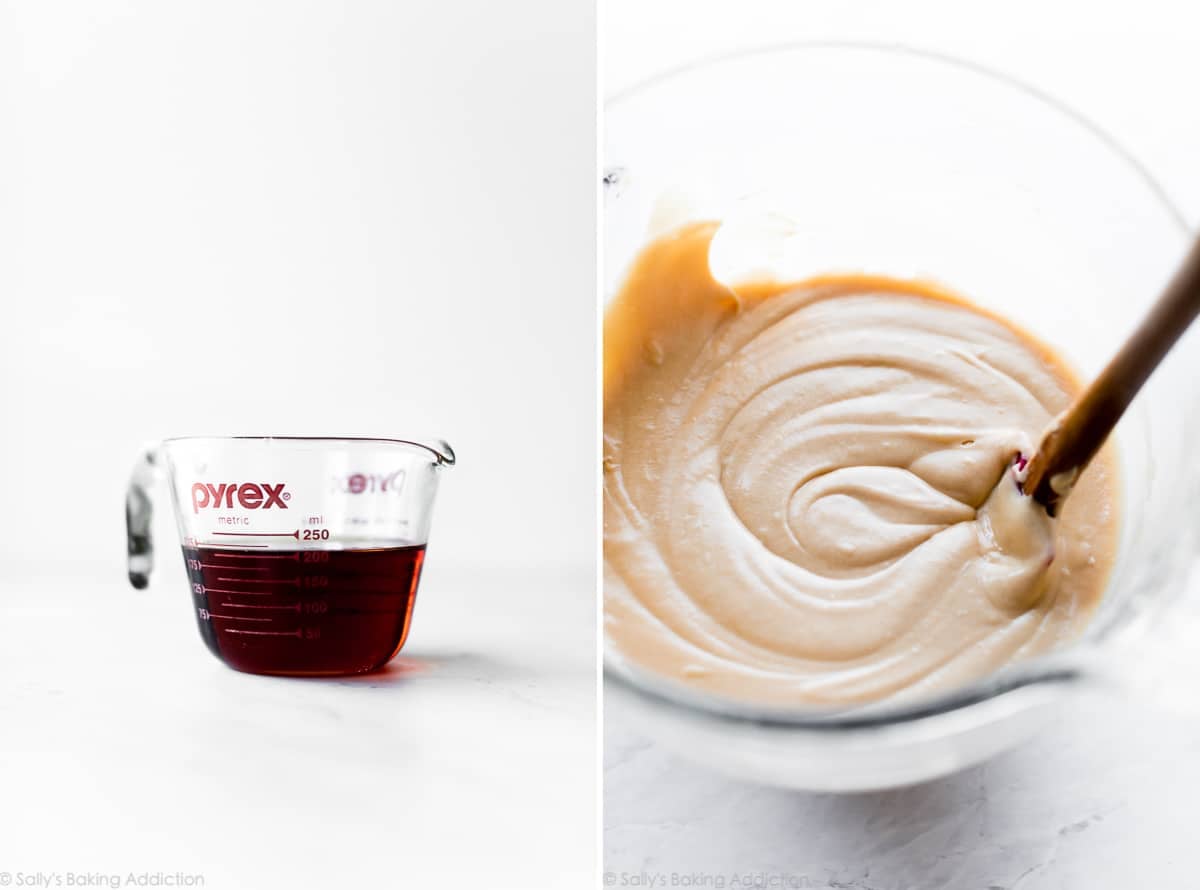
The most important step in this cake recipe is preparing the burnt sugar syrup. You need a sturdy 3 quart pan to ensure the cooking sugar doesn’t crystalize. (This pan is great quality for its price.) Cook 1 cup granulated sugar over medium heat, stirring constantly with a wooden spoon. Wooden spoons do not conduct heat and are ideal for candy-making. After chipping a few of my old wooden spoons, I just bought this set and LOVE them!
After about 5 minutes, the sugar begins to melt. If you notice any clumps, try to break them up with your spoon. So far in the process, this is the same exact way we start salted caramel. Once there are no lumps and the sugar is golden brown, about 8-10 minutes total, very slowly drizzle in 3/4 cup of boiling water. Have boiling water at the ready for this step because in the world of candy-making, timing and temperature are key. Wear an oven mitt because the water will rapidly sizzle and steam.
You don’t need a candy thermometer for this, but you can use it if you have one.
After you add all of the water, cook the syrup for an extra 3 minutes over low heat then cool the syrup completely. It will thicken as it cools. Once cool, you can use it in the cake batter and frosting. The cake batter is light beige and smells incredible. Steal a taste!
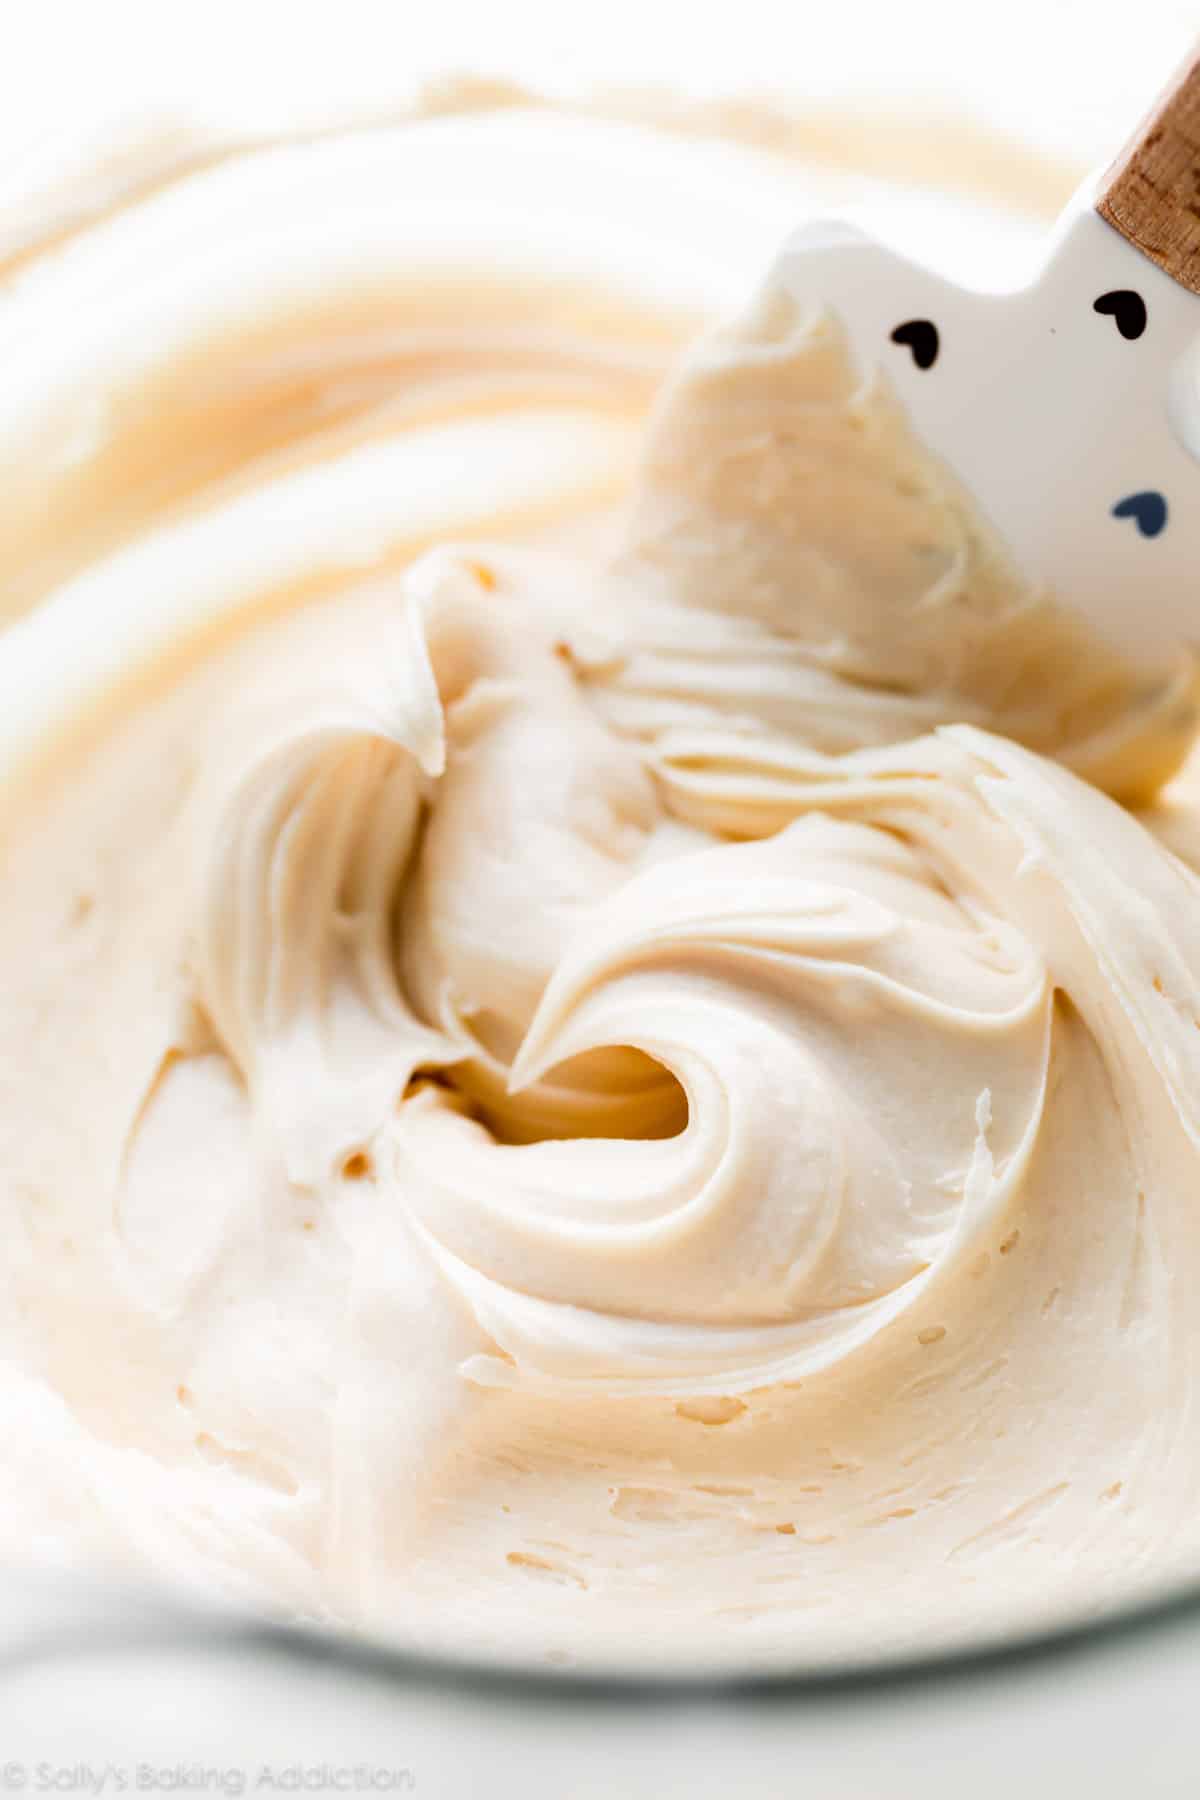
Buttercream
Same goes for the burnt sugar frosting—make sure you steal a few tastes! You need:
- Unsalted Butter: Make sure you’re using room temperature butter.
- Confectioners’ Sugar
- Burnt Sugar Syrup
- Milk
- Vanilla Extract
- Salt
I love this salty sweet frosting. It’s similar to my salted caramel frosting, but has a much creamier consistency. The burnt sugar cake and burnt sugar frosting are definitely worthwhile on their own, but this entire cake is greater than the sum of its parts. Together, they’re the perfect match.
Don’t Forget the Salted Caramel!
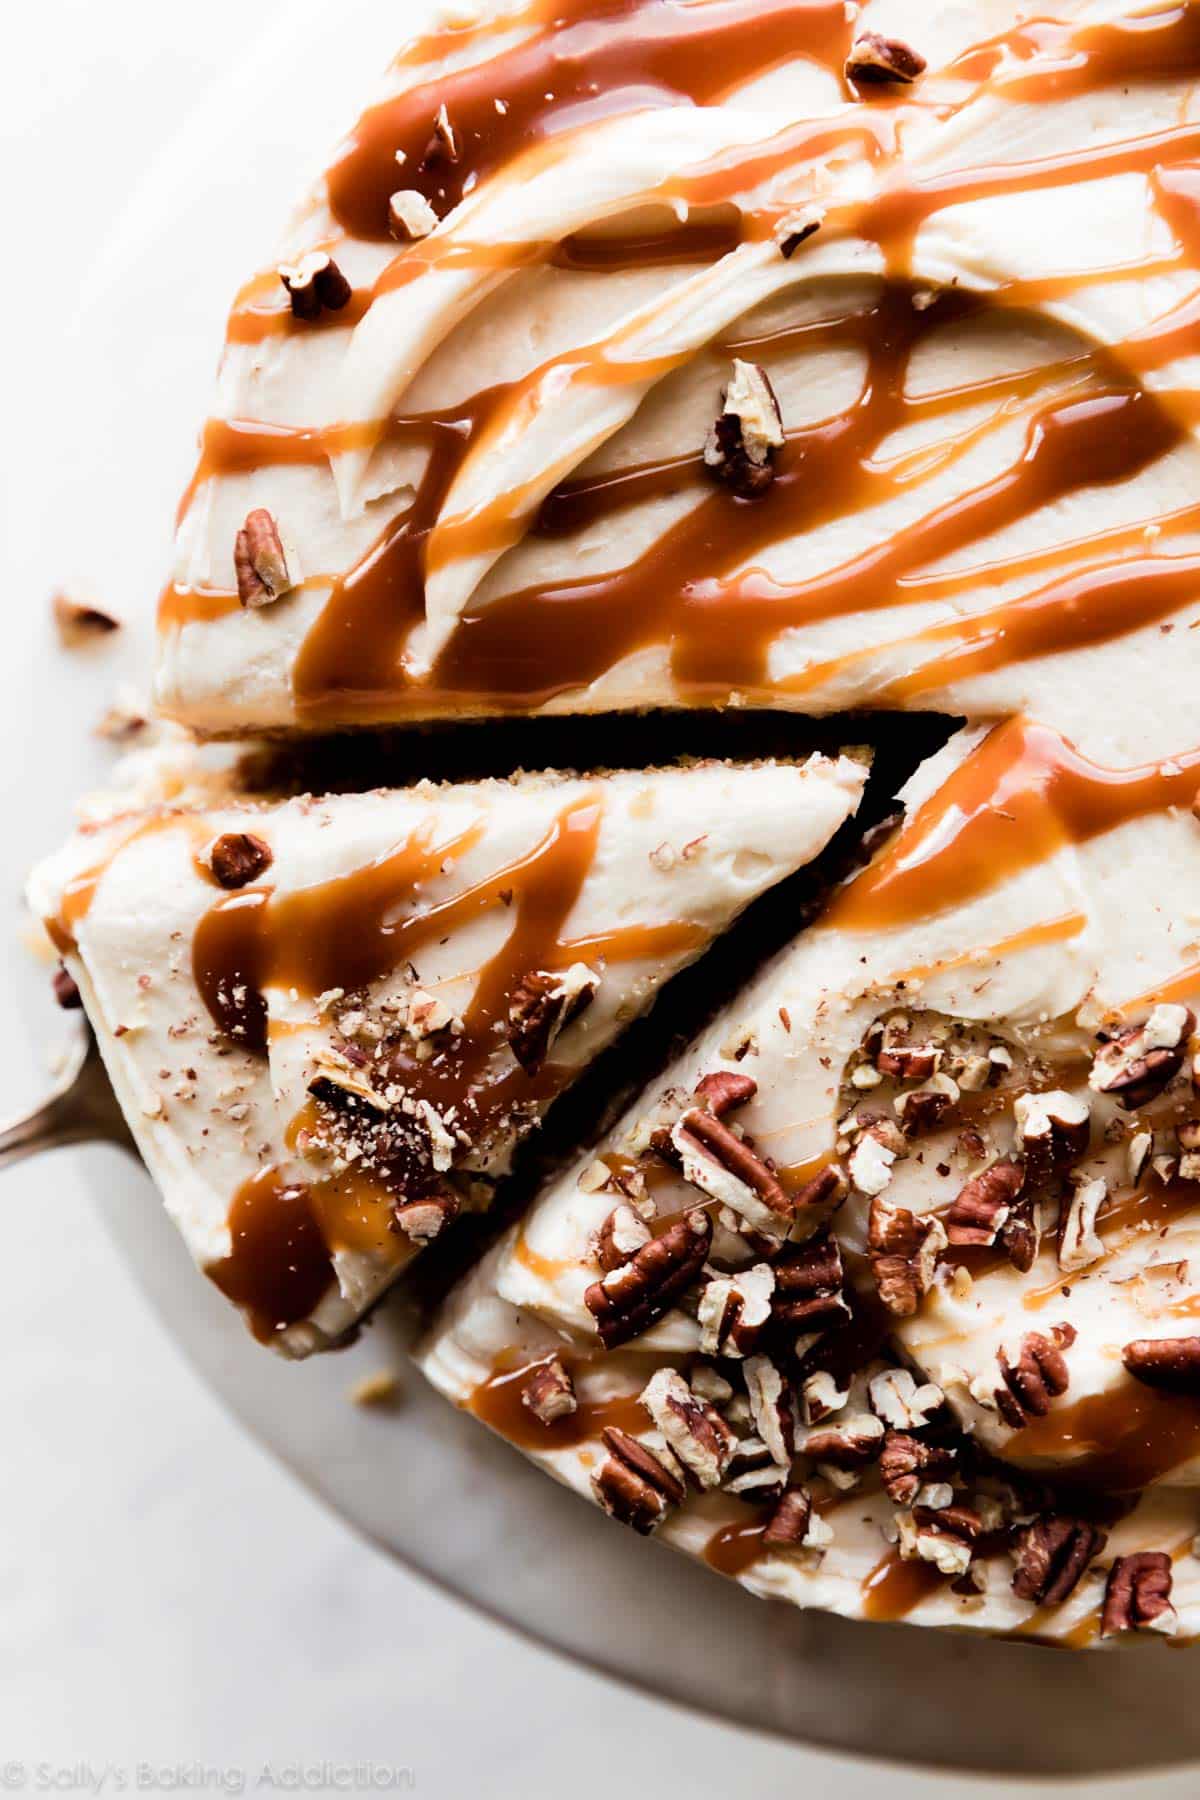
This burnt sugar caramel cake wouldn’t be as impressive without salted caramel. Drizzle salted caramel in between the cakes and on top. If the salted caramel is too warm, however, it will melt the frosting. See my recipe instructions below.
Toasted nuts add a flavorful and textural flair!
3 Success Tips
Leaving you with 3 success tips so you can enjoy this old-fashioned favorite:
- Watch the video tutorial and read the recipe in full before beginning. Follow the recipe closely and make no ingredient substitutions. I tested several different options and nothing lived up to the careful recipe below.
- Since it must be cool, I recommend preparing the burnt sugar syrup 1 day ahead of time.
- Don’t leave out the salted caramel.
Beginner Baker? Let Me Help:
- How to Prevent a Dry or Dense Cake
- Top 10 Cake Baking Tips
- How to Freeze Cake
- Homemade Cake Flour Substitute
- Here’s What Room Temperature Butter Means
And if you are looking for more cozy fall flavors, here is a list of 30+ fall cake ideas.
Print
Burnt Sugar Cake
- Prep Time: 1 hour
- Cook Time: 24 minutes
- Total Time: 4 hours, 30 minutes
- Yield: serves 10-12
- Category: Dessert
- Method: Baking
- Cuisine: American
Description
The trick to burnt sugar cake is to use burnt sugar syrup as its main flavor. Make sure you prepare the burnt sugar syrup ahead of time so that it can properly cool and thicken. While you’re at it, prepare the salted caramel ahead of time too.
Ingredients
Burnt Sugar Syrup
- 1 cup (200g) granulated sugar
- 3/4 cup (180ml) boiling water
Cake
- 2 and 1/2 cups (285g) cake flour (spooned & leveled)
- 2 teaspoons baking powder
- 1/2 teaspoon baking soda
- 1 teaspoon salt
- 3/4 cup (12 Tbsp; 170g) unsalted butter, softened to room temperature
- 1 cup (200g) granulated sugar
- 1/2 cup (120ml) cooled burnt sugar syrup
- 4 egg whites, at room temperature
- 1/2 cup (120g) sour cream, at room temperature
- 2 teaspoons pure vanilla extract
- 1/2 cup (120ml) whole milk, at room temperature
Burnt Sugar Frosting
- 1 cup (16 Tbsp; 226g) unsalted butter, softened to room temperature
- 4 cups (480g) confectioners’ sugar
- 1/2 cup (120ml) cooled burnt sugar syrup
- 1 teaspoon pure vanilla extract
- 2 Tablespoons (30ml) whole milk or heavy cream
- 1/4 teaspoon salt
For Assembly
- Homemade Salted Caramel, cooled
- 1/2 cup (50g) chopped pecans*
Instructions
- For best success, read the recipe in full and watch the video tutorial in the post above before starting.
- Prepare the burnt sugar syrup first so it has time to cool. Make sure you have boiling water at the ready. For the burnt sugar syrup, place sugar in a medium saucepan over medium heat. Best to use a 3 quart heavy-bottomed quality saucepan. Stirring constantly with a wooden spoon, cook until the sugar has completely melted and is amber brown, about 8-10 minutes. If the sugar is clumpy, break up the lumps with your wooden spoon. A candy thermometer is not necessary, but if you’re using one, the sugar temperature should reach about 300°F (149°C) when it’s ready. Turn the heat to low and very carefully and slowly drizzle in the boiling water, a little at a time. Stir after each addition and stand back, as the mixture will rapidly sizzle and bubble. After all of the boiling water is stirred in, stir and cook the sugar syrup for 3 more minutes on low. Turn off the heat and let it cool completely, overnight preferred. It’s imperative that the sugar syrup is completely cool. You will have about 1 cup of syrup.
- Preheat oven to 350°F (177°C). Grease two 9-inch cake pans, line with parchment paper rounds, then grease the parchment paper. Parchment paper helps the cakes seamlessly release from the pans. (If it’s helpful, see this parchment paper rounds for cakes video & post.)
- Whisk the cake flour, baking powder, baking soda, and salt together. Set aside.
- Using a handheld or stand mixer fitted with a whisk attachment, beat the butter and sugar together on high speed until creamed, about 2 minutes. Scrape down the sides and up the bottom of the bowl with a rubber spatula as needed. With the mixer running on medium speed, pour in 1/2 cup of the cooled burnt sugar syrup. Beat until combined. Scrape down the sides and up the bottom of the bowl as needed. Beat in the egg whites, sour cream, and vanilla extract. With the mixer on low speed, add the dry ingredients just until combined. With the mixer still running on low, slowly pour in the milk until combined. Do not over-mix. The batter will be slightly thick.
- Pour batter evenly into prepared cake pans. Bake for 23-25 minutes or until the cakes are baked through. As a result of the burnt sugar syrup cooking inside the cake batter, the cakes brown nicely on top and on the sides. To test for doneness, insert a toothpick into the center of the cake. If it comes out clean, it is done. Allow cakes to cool completely in the pans set on a wire rack.
- As the cakes cool, I suggest making the salted caramel. The salted caramel adds necessary flavor. We’ll use it as a filling and garnish. When ready to use in step 9, make sure the salted caramel isn’t too hot anymore. If it’s too hot, it will melt the frosting. If it’s too cool, it won’t drizzle. Let it cool for at least 30 minutes before using. If you prepared the salted caramel ahead of time and it became too cool or too thick, microwave it for 5-10 seconds or JUST until it’s drizzle-able again. (It won’t be too hot at this point.) You can also toast the pecans during this time, too. See recipe note.
- Make the frosting: In a large bowl using a handheld mixer or stand mixer fitted with a paddle attachment, beat the butter on medium speed until creamy, about 1-2 minutes. Add confectioners’ sugar, remaining 1/2 cup of cooled burnt sugar syrup, vanilla extract, milk/cream, and salt. Beat on low speed for 30 seconds, then increase to high speed and beat until completely combined, about 2 minutes. Add more confectioners’ sugar if frosting is too thin or more milk/cream if frosting is too thick. Taste. Add more salt if desired. (I usually use 1/2 teaspoon of salt total. I like this frosting salty/sweet.)
- Assemble and frost: First, using a large serrated knife or cake leveler, slice a thin layer off the tops of the cakes to create a flat surface. Discard (or crumble over ice cream!). If you have any leftover burnt sugar syrup, drizzle over leveled cakes. I usually don’t have any leftover, but this is a great place to use any last drops if you have some. Place 1 cake layer on your cake stand, cake turntable, or serving plate. Using a large icing spatula, evenly cover the top with frosting. Drizzle 1/4 cup (73g) of salted caramel on top of the frosting. Top with 2nd cake layer. Refrigerate the cake for at least 30-45 minutes before finishing the frosting and garnish. The caramel inside the cake must “set.” After chilling in the refrigerator, spread the remaining frosting all over the top and sides. Run a bench scraper around the cake to smooth out the sides, if desired. Garnish with toasted pecans and more salted caramel. Slice and serve.
- Cover leftover cake tightly and store in the refrigerator for up to 5 days.
Notes
- Make Ahead & Freezing Instructions: Prepare burnt sugar syrup up to 3 days ahead of time. Cover and store at room temperature until ready to use. Prepare the salted caramel up to 1 week ahead of time. Cover and store in the refrigerator until ready to use. You can prepare the cake layers ahead of time too. Wrap the individual baked and cooled cake layers tightly and refrigerate for up to 2 days or freeze up to 3 months. (See How to Freeze Cake for instructions.) Bring cake layers to room temperature, then continue with step 7. Frosted cake freezes well, up to 3 months. Thaw overnight in the refrigerator, then bring to room temperature before garnishing with caramel and pecans and serving.
- Special Tools (affiliate links): Heavy-Bottomed Saucepan | Wooden Spoon | Candy Thermometer (optional) | 9-inch Round Cake Pans | Glass Mixing Bowl | Whisk | Electric Mixer (Handheld or Stand) | Rubber Spatula | Cooling Rack | Cake Turntable | Large Icing Spatula | Bench Scraper | Cake Carrier (for storage)
- 3 Layer Cake or 9×13-Inch Cake: You can also prepare this cake as a 3 layer cake or 9×13-inch sheet cake, but the texture tastes best at the thickness of a 2 layer cake. I highly recommend sticking to a 2 layer cake. For a 3 layer cake, though, divide batter between three 8-inch or 9-inch cake pans in step 3 and bake for 20-22 minutes or until a toothpick inserted in the center comes out clean. For a 9×13-inch cake, pour the batter into a greased and lightly floured 9×13-inch pan and bake for 40 minutes or until a toothpick inserted in the center comes out clean. Top with a thick layer of frosting and drizzle salted caramel all over the top.
- Cupcakes: Recipe yields 30-36 cupcakes. Fill cupcake liners 2/3 full with batter. Bake for 20-22 minutes or until a toothpick inserted in the center comes out clean.
- Egg Whites: Egg whites (no yolks) are KEY to the cake’s fluffy texture. Here are recipes using leftover egg yolks.
- Why Room Temperature? All refrigerated items should be at room temperature so the batter mixes together easily and evenly. Read here for more information. Instead of sour cream, you can use plain yogurt. The cake won’t taste as rich, but it’s a fine substitute.
- Salted Caramel: No matter which size cake you make, or if you make cupcakes, you’ll have salted caramel leftover. Here are 50 ways to use salted caramel if you need inspiration for the leftovers. I don’t recommend halving the salted caramel recipe—make the whole recipe (1 cup).
- Toasted Pecans: Toasting the pecans is optional, but adds incredible flavor to the garnish. To toast, preheat the oven to 300°F (149°C). Spread chopped pecans onto a parchment paper or silicone baking mat lined baking sheet. Toast until slightly darkened, about 5-7 minutes. Cool before using as garnish.


Reader Comments and Reviews
Hi Sally,
I just baked this recipe, and my cakes turned out cracked. My measurements were all accurate, and my oven was at 170C with fan (I have a small oven that can barely fit 2 cake pans).
Is your baking temperature directions for convection or conventional oven?
If temperature was not the reason, what do you think it might be? Maybe too much leavener?
Thank you!
Hi Minsela, I’m sorry to hear your cakes turned out cracked! I recommend baking at 160C with fan. All of our recipes use conventional oven temperatures, not convection/fan. So anytime you see 350F/177C, try baking at 160C fan. Hope it turns out better next time!
I made this cake and thouvht I diligently followed the directions. I believe my ingredients were room temperature, and the re-read the directions three times. I cannot figure out why my cake did not rise. The flavor was great. But it had texture of cement. I am not kidding. I have made so many of your recipes for cakes and cookies and they always turn out perfectly. And heavenly. I am so puzzled. I want to figure this out and make it again. The frosting was divine with the carmel syrup. Any ideas?
Hi Laura, we’re happy to help troubleshoot. Were your baking powder and baking soda fresh? We find they can start to lose their effectiveness after about 3 months or so, even if not technically expired. Be sure, too, not to overmix the batter. Over mixing can over develop the gluten and lead to dry and dense cakes. Finally, be sure to spoon and level (or use a kitchen scale) your flour to ensure it isn’t over measured, which can dry out the cake. Thanks so much for giving this one a try, and we hope these tips help for next time!
I am trying to print this recipe, and there is a huge space between the 1 cup of granulated sugar and boiling water in the burnt sugar section. Then again under “For Assembly” a huge blank space and then it says: “Homemade Salted Caramel, cooled 1/2 cup (50 g) chopped pecans”. Then there is a huge space after #4 and #8 in the Notes section. I just want to make sure I am not missing anything.
Hi Carrie, does the printed out recipe match the recipe online? When testing it, it doesn’t seem like anything is missing but my team and I can certainly look into the large space issue.
Would this cake taste well with your salted caramel frosting recipe?
Yes, definitely!
I was looking for a different cake recipe for my birthday and this looked good. Since I wanted to bring some to work and some to class I went with the cupcake option. I got 24. I injected a little of the salted caramel sauce into the center of each one when they came out of the oven and once cooled I frosted them, sprinkled the toasted pecans, and drizzled with more salted caramel sauce. These are possible the best cupcakes I’ve ever had! When I make the recipe again I’ll definitely make cupcakes again since I can’t cut a cake into 24 slices (easily) and the cupcakes were the perfect portion size. Highly recommend!!
Made this for my father-in-law’s birthday and it was fantastic! Great results. Great flavour combo. Definitely a keeper.
Have a surprise birthday party coming up for my hubby, so I will make it again.
Sally’s recipes have never failed me.
The burnt sugar syrup hardened for me at room temperature. I waited about one hour and it was hard as a rock. I put it in the microwave just barely enough to melt (it wasn’t even completely melted), but it still ruined the sugar and butter. Not sure the cake will turn out (in the oven now). What should I have done/can I do about this the next time around?
Hi Andie! Sounds like your sugar syrup cooked for too long. Did you use a candy thermometer? Using one will guarantee the sugar syrup doesn’t cook for too long and get too hard next time. Thank you for giving this recipe a try!
Hi, I want to make a number cake with this recipe and bake two 12 x 18 inch pans. Would doubling the recipe be enough?
Hi Ally, this batter is enough for a 9 x 13 pan. Doubling this recipe would not be enough for two 12 x 18 pans. You may find this post about cake pan sizes and conversions helpful.
Hi! I love burnt sugar flavors and I am a huge fan of your white cake. I was wondering if you had any ideas for using this as a base flavor for some kind of banana or apple cake (or perhaps a spiced pear cake?). Of course I could just make the frosting with one of these flavors and layer the fruit in the middle, but it would be great to make a cake that was somewhere between this cake and banana bread. Let me know if you think this would be worth the effort (vs. just using brown sugar to get the rich flavor) or if adding the fruit ingredients would create too much moisture. Thanks!
Hi Quinn! I love the burnt sugar flavor too! I think it would taste fantastic with other flavors, particularly banana. If you want to try something, (and I have not tested this, it would be what I would try first though) how about replacing the sour cream in this recipe with mashed banana? Or make this banana cake and reduce the buttermilk down to 1 cup (240ml) and add 1/2 cup of the burnt sugar syrup.
I want to use the burnt sugar syrup in other recipes. How long will it keep in an air-tight container?
Hi Jamie! Burnt sugar syrup can be stored up to 3 days – cover and store at room temperature until ready to use.
i saw in your comments not to make substitutions and I wont; but i’m curious if in your testing you tried using caramel sauce instead of the burnt sugar syrup…? was it not as caramelly? did it change the texture? i cant afford to just try it so i wondered if you had. Thanks much.
Hi Beth, The burnt sugar syrup is thinner than the caramel sauce and won’t weight down the crumb of the cake. For the best texture, we recommend sticking to the syrup in the cake batter.
The recipe sounds great, but sour cream is really hard to found in my country. Does anyone know with what I could replace it ? Perhaps heavy cream ?
Hi Amandine, Instead of sour cream, you can use plain yogurt. The cake won’t taste as rich, but it’s a fine substitute.
Hi Amandine, you can replace the sour cream with the same amount of full fat yogurt (regular or Greek). Hope you enjoy this cake!
Delicious cake . I used paddle attachment on my kitchen aid and still end up with little holes in my cake . Any thoughts ?
Hi Lee! Holes in baked cakes are usually a result of over mixing. For next time, mix the batter until just combined. Glad you enjoyed this one!
Hi, do you think this cake will be sturdy enough if I added a 9inch cheesecake in the middle? I wanted to make a 3 layer cake except a whole cheesecake as one of the layers.
That shouldn’t be a problem.
This may sound like a weird question but what exactly should the burnt sugar syrup taste like? I made mine and the colour is right (as per your pictures and video) but it doesn’t taste great at all. I’m scared that the bitterness will carry through into the cake and frosting! Thanks
Hi Sage, is the burnt taste bitter and off-putting? Burnt sugar should taste deeply caramelized, but not bitter.
Exactly this looks wonderful and I’m about to make it. I’ve made the burnt sugar syrup but wondered if I could use Golden Syrup instead next time?
Hi Margaret, we haven’t tested golden syrup, but let us know if you do!
Hi Sally can I substitute cake flour with all purpose flour?
Hi Kivindhi, if you can’t get your hands on cake flour, use this cake flour substitute. I suggest doing this 3x, then remove 1/2 cup since you need 2 and 1/2 cups in this recipe.
Hey Sally! This looks delicious! I was wondering though if I could stick the burnt sugar syrup in the fridge to speed up the cooling process? Thanks
Hi Anna! It’s best to cool the syrup slowly and evenly at room temperature.
My cake came out very moist and maybe too wet. How can I fix this?
Hi Hannah, sounds like your cakes could have been under-baked. An easy fix for next time!
What can I use in place of the burnt sugar syrup if I did not get a whole cup? A good portion is stuck on the sides of my pan and on my spoon. I only got three quarters cup.
Hi Jessica, you can use the 1/2 cup in the cake batter and for the frosting, use what you have left and then add a little more milk or heavy cream. Add an extra splash of vanilla extract for more flavor, if desired.
Hello, Can I substitute the whole milk for buttermilk?
Hi Hilary, The best way to use buttermilk is to have it replace both the sour cream AND milk in this recipe. Use 1 cup of buttermilk, then leave out the sour cream and whole milk.
Hi would it be possible to scale down this recipe to make a 2 layered 4 inch cake? If so, how much should i scale it down by? Thanks!
Hi Marissa, here is everything you need to know about cake pan sizes and conversions. It might be easiest to halve the recipe, fill your cake pans 2/3 full, and then use any extra batter for a few cupcakes. Enjoy!
I haven’t made this yet so I can’t leave a review but I’m wondering if the finished cake would require refrigeration because of the sour cream content?
Hi Gen, Yes, cover the cake tightly and store in the refrigerator for up to 5 days.
My mother’s favorite cake, and requested flavor for her birthday every year as far back as I can remember, was burnt sugar cake. She was a SAHM and did 99% of the cooking and baking, but my father was the resident candy maker at Christmas, and he made her bd cake every year. Seeing that your MIL couldn’t find the recipe she recalled eating, I thought perhaps she might find it if the recipe dated from the late 50’s/early 60’s. My parents married in ’61, and her recipe would have come from the Betty Crocker Cookbook most recently published before that. Off the top of my head, I can’t recall the year it was published. But it was a wedding gift and what she used most often all her life. I wish I could just give you the recipe but her cookbook is falling apart and I left it boxed up after taking it home following her funeral, and don’t have quick access to it. I hope you or she can find it to try it out!
This is a very good cake. It tastes just like a caramel cake. It is moist and favorable
This is a fantastic cake recipe. The texture and flavour of the cake can stand on its own. Thank you Sally for demystifing homemade caramel. Has anyone tried this with chocolate icing instead of vanilla?
thank you
Laurel
Love this cake, it is so delicious!! I was curious though, do you have any ideas on how to use the burnt sugar syrup in other treats? I made extra and didn’t want to waste it. Thank you!
Hi Carrie, besides using it in other cakes or cupcakes, I haven’t really tested it! Isn’t it tasty? I imagine you could add it to a quick bread as well if you adjust other wet ingredients.
Has quickly become my favorite cake
This tasted absolutely awesome. From the moment I was making the syrup, I *knew* this was going to be great. My issue however is with the cake texture. I don’t know if I’m doing something wrong, but it seems like the sides seem to be harder. They were almost crusty, rather than the softer texture I’m used to with cake. Is that because of the syrup?
Can i add veg shortening in the buttercream to stand hot weather?
You could certainly replace some of the butter in the buttercream with shortening for a more stable frosting that would withstand humidity/warm weather.