

With crisp edges, thick centers, and room for lots of decorating icing, I know you’ll love these soft cut-out sugar cookies. Use your favorite cookie cutters and try my classic royal icing.
Originally published on my website in 2014, this recipe is a massive fan favorite. You’ll also find the recipe in my New York Times best-selling cookbook, Sally’s Baking 101.

This is my flagship recipe for cut-out sugar cookies. I’ve made them at least 38577 times (imagine all the butter), so I figured it’s time to share new recipe tips, a video tutorial, and more helpful information.
Why You’ll Love These Sugar Cookies
- Soft, thick centers with slightly crisp edges
- Irresistible buttery vanilla flavor
- Leave plain or flavor with extras like maple, cinnamon, and more
- Hold their shape
- Flat surface for decorating
- Stay soft for days
- Freeze beautifully
Sugar Cookies Video Tutorial

Overview: How to Make Sugar Cookies with Icing
- Make cookie dough. You only need 7 or 8 ingredients. With so few ingredients, it’s important that you follow the recipe closely. Creamed butter and sugar provide the base of the cookie dough. Flour and egg give the cookies structure, and vanilla extract adds flavor. I almost always add a touch of almond extract for additional flavor and highly recommend that you try it too! Baking powder adds lift, and salt balances the sweet. So many *little ingredients* doing *big jobs* to create a perfect cookie. By the way, I also have a recipe for chocolate sugar cookies!
- Divide in two pieces. Smaller sections of dough are easier to roll out.
- Roll out cookie dough. Roll it out to 1/4 inch thick. If you have difficulty rolling out dough evenly, try this adjustable rolling pin. Speaking from experience—it’s incredibly handy!
- Chill rolled-out cookie dough. Without chilling, these cookie cutter sugar cookies won’t hold their shapes. Chill the rolled-out cookie dough for at least 2 hours or up to 2 days.
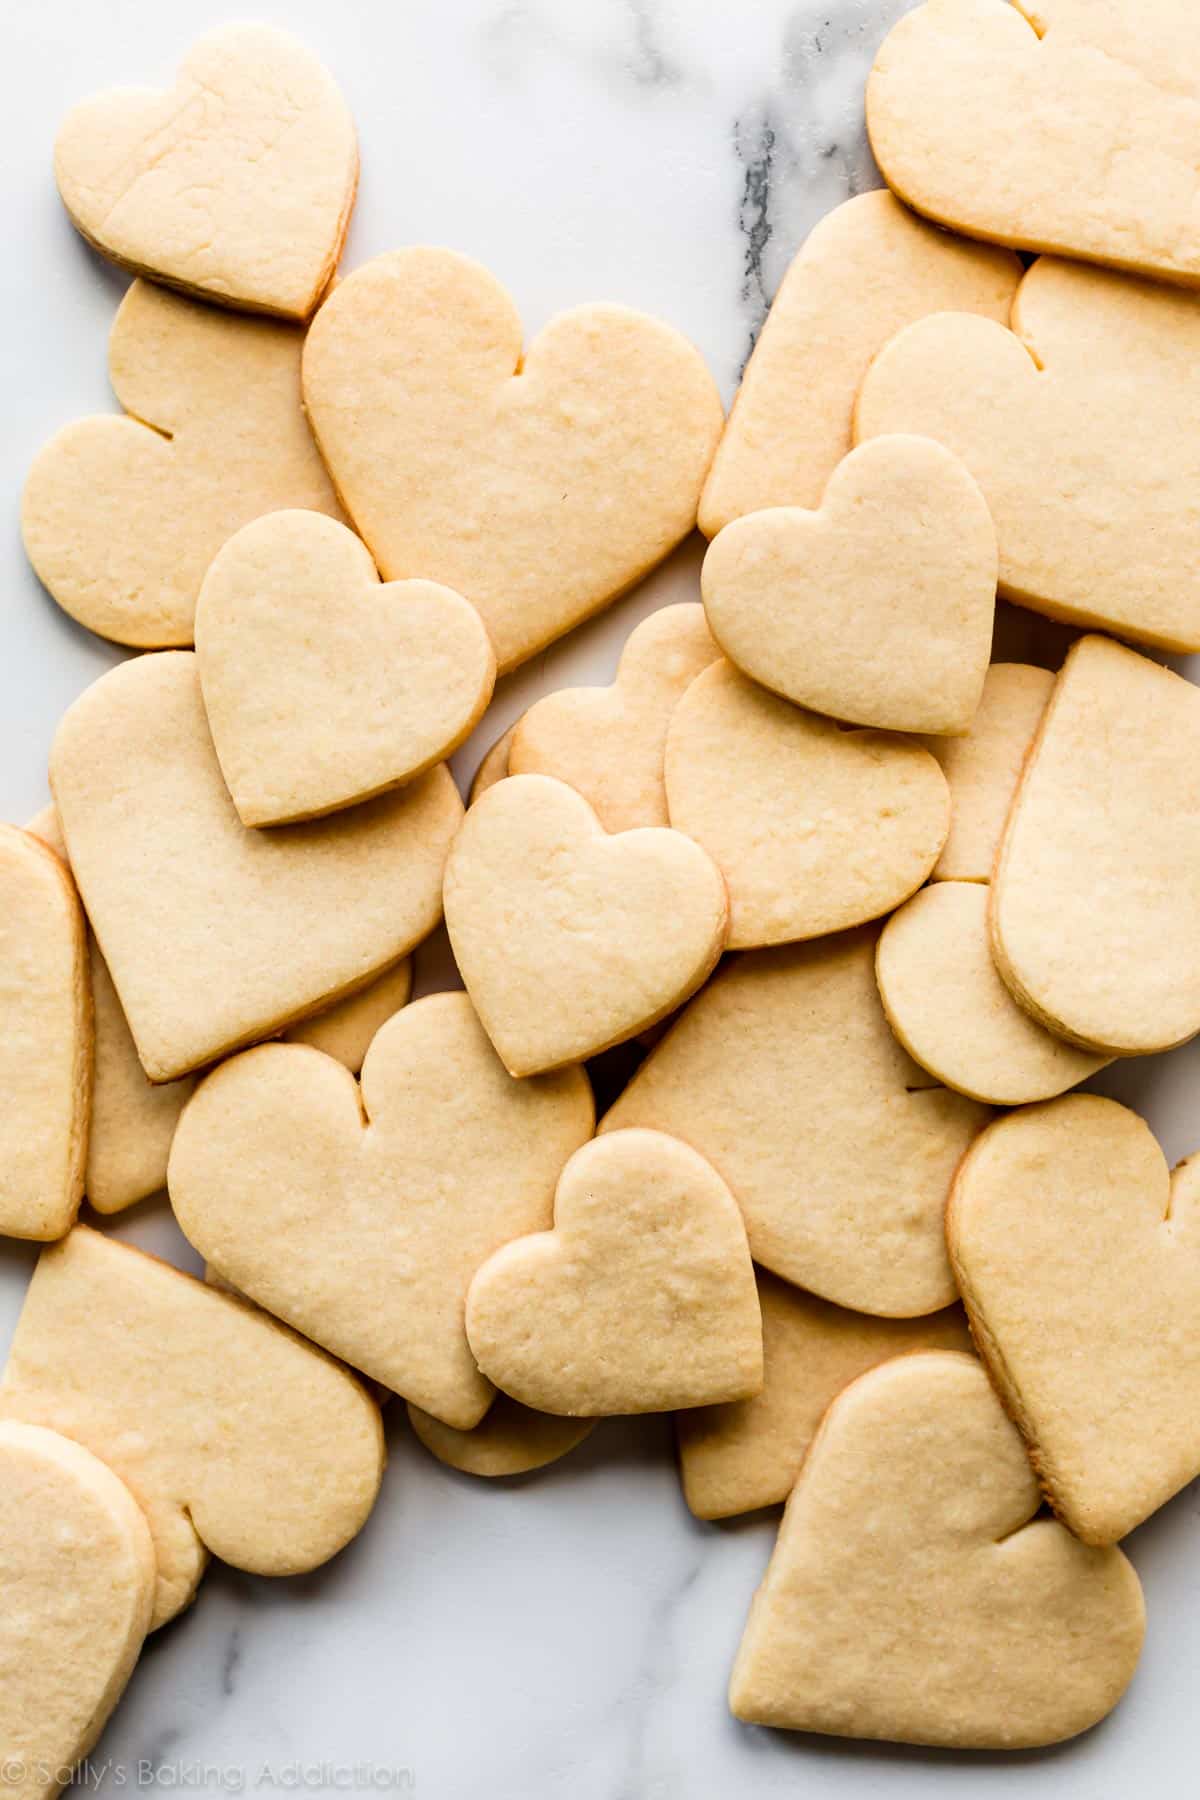
- Cut into shapes. If you need suggestions for cookie cutters, I love Ann Clark brand. (Not sponsored, just a genuine fan!) Some of my favorites include this heart set, dog bone, snowflake, snowman, leaf, and a pumpkin. I also use and recommend these heart cookie cutters.
- Bake & cool. Depending on size, the cookies take about 11–12 minutes.
- Decorate. See my suggested icings below. I also have a tutorial on how to decorate sugar cookies with even more helpful decorating tips.
Have a little flour nearby when you’re rolling out the cookie dough. Keep your work surface, hands, and rolling pin lightly floured. This is a relatively soft dough.

The Trick Is the Order of Steps
Notice how I roll out the dough BEFORE chilling it in the refrigerator? That’s my trick and you can see me doing it in the video tutorial in this post.
Let me explain why I do this. Just like when you’re making chocolate chip cookies, to prevent the cookies from over-spreading, the cookie dough must chill in the refrigerator. Roll out the dough right after you prepare it, then chill the rolled-out dough. (At this point the dough is too soft to cut into shapes.) If you chill the cookie dough and then try to roll it out, it will be too cold and difficult to work with.
I also divide the dough in half before rolling it out, and highly recommend you do the same. Smaller sections of dough are simply more manageable.
Another trick! Roll out the cookie dough directly on a silicone baking mat or parchment paper so you can easily transfer it to the refrigerator. (Parchment paper will slide around on your counter, so I always place a piece of parchment paper on top of a silicone baking mat to roll the dough without slippage.)
Pick up the sheet of parchment with the rolled-out dough on top, transfer it to a baking sheet, and place it in the refrigerator. You don’t need to make room for two baking sheets in your refrigerator—simply stack the pieces of rolled-out dough on top of each other, with the parchment paper in between.
How Thick Do I Roll Sugar Cookies?
These sugar cookies remain soft because they’re rolled out pretty thick. Roll out the cookie dough to about 1/4 inch thick or just under 1/4 inch thick. Yes, this is on the thicker side and yes, this produces extra thick and soft cookies. If rolling out cookie dough doesn’t sound appealing, try my drop sugar cookies instead.
Sugar Cookie Icing
I have 3 sugar cookie icing recipes, and you can choose whichever works best for you.
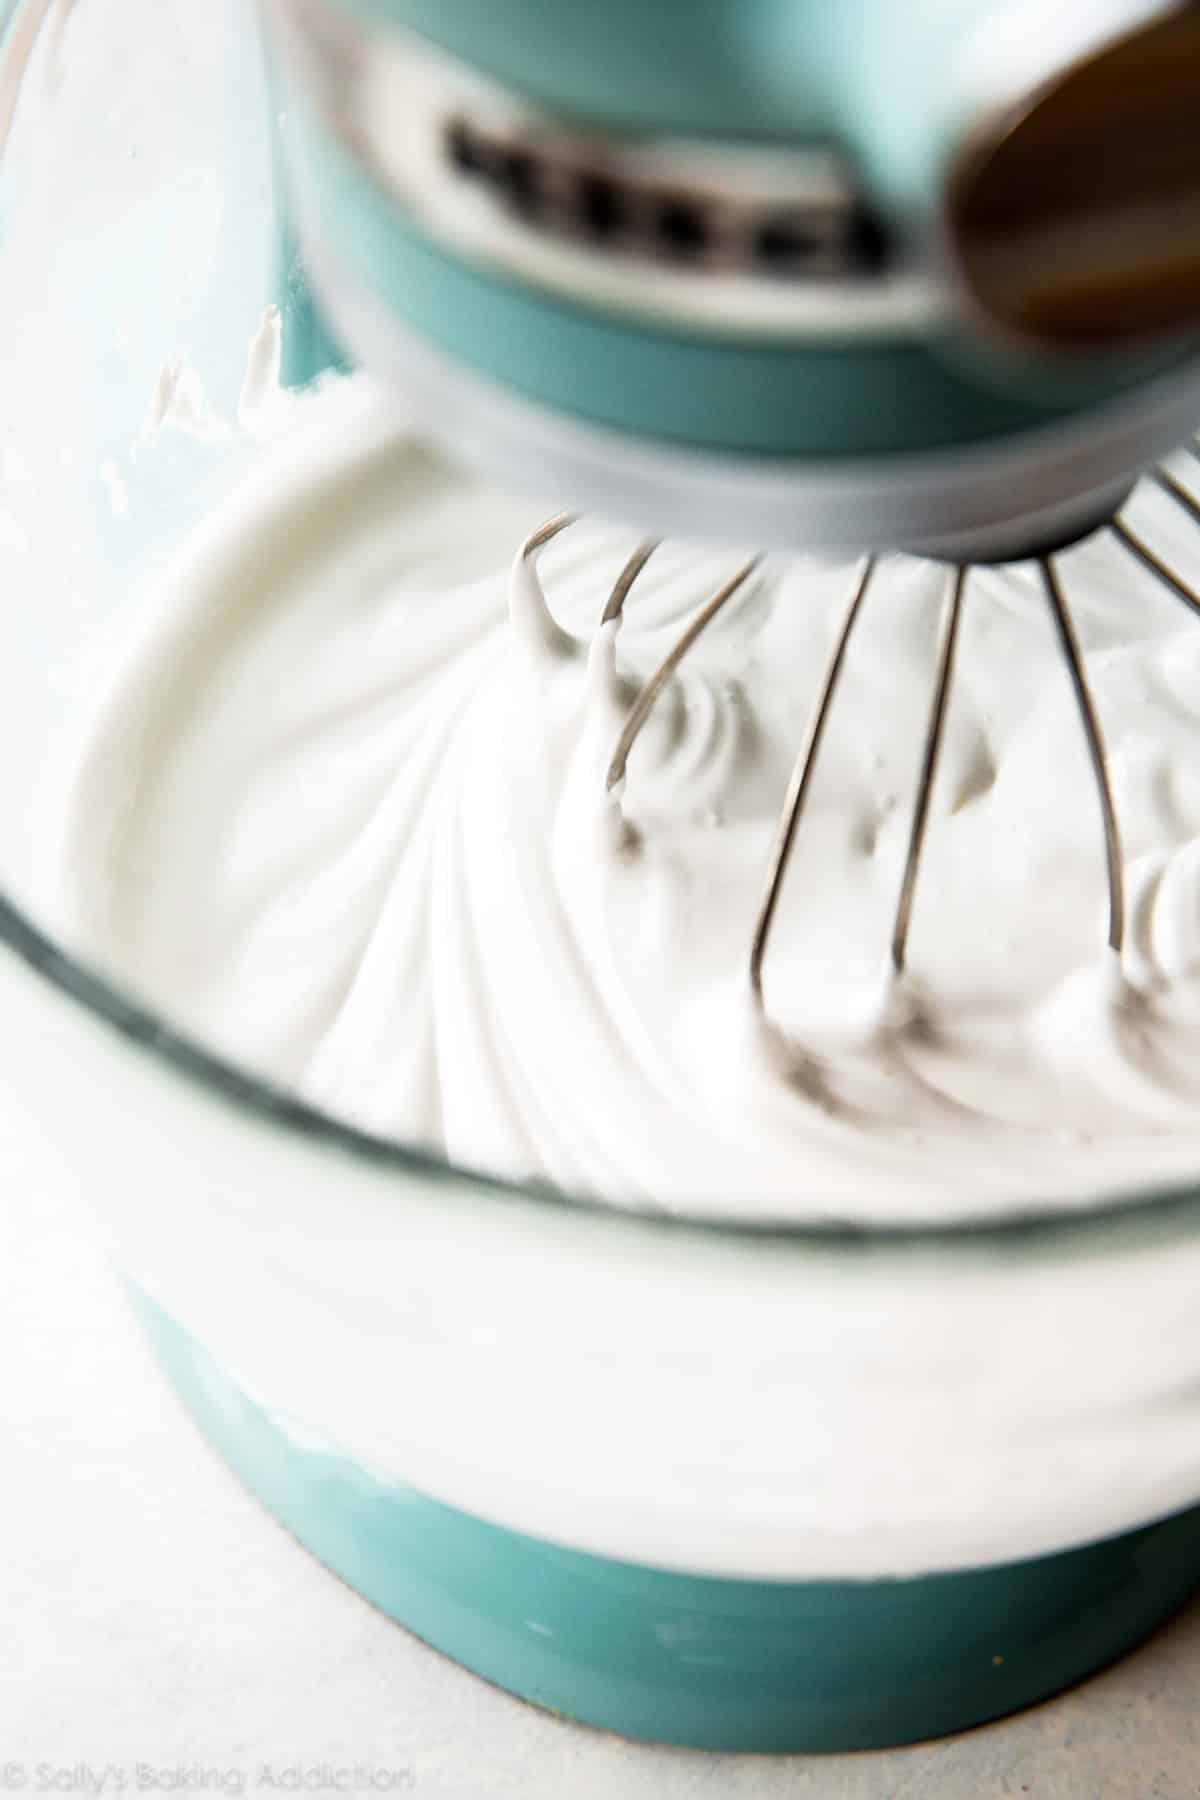
- Favorite Royal Icing: This royal icing is my preferred sugar cookie icing because it’s easy to use, dries within a couple of hours, and doesn’t taste like hardened cement. (It’s on the softer side!) I make it with meringue powder. Meringue powder takes the place of raw egg whites, which is found in traditional royal icing recipes. It eliminates the need for fresh eggs, but still provides the same consistency. You can find meringue powder in some baking aisles, most craft stores with a baking section, and online. The 8-ounce tub always lasts me a good while. The trickiest part is landing on the perfect royal icing consistency, but I provide a video in the royal icing recipe to help you.
- Easy Cookie Icing: This easy cookie icing is ideal for beginners. It’s easier to make than royal icing because you don’t need an electric mixer and the consistency won’t really make or break the outcome. However, it doesn’t provide the same sharp detail that royal icing decorations do. It also takes a good 24 hours to dry.
- Buttercream: This cookie decorating buttercream is also excellent for beginners. You can tint it any color you like, flavor it, and spread it on with a knife or use piping tips. It soft-sets after a few hours, meaning you can carefully stack the cookies for storage.
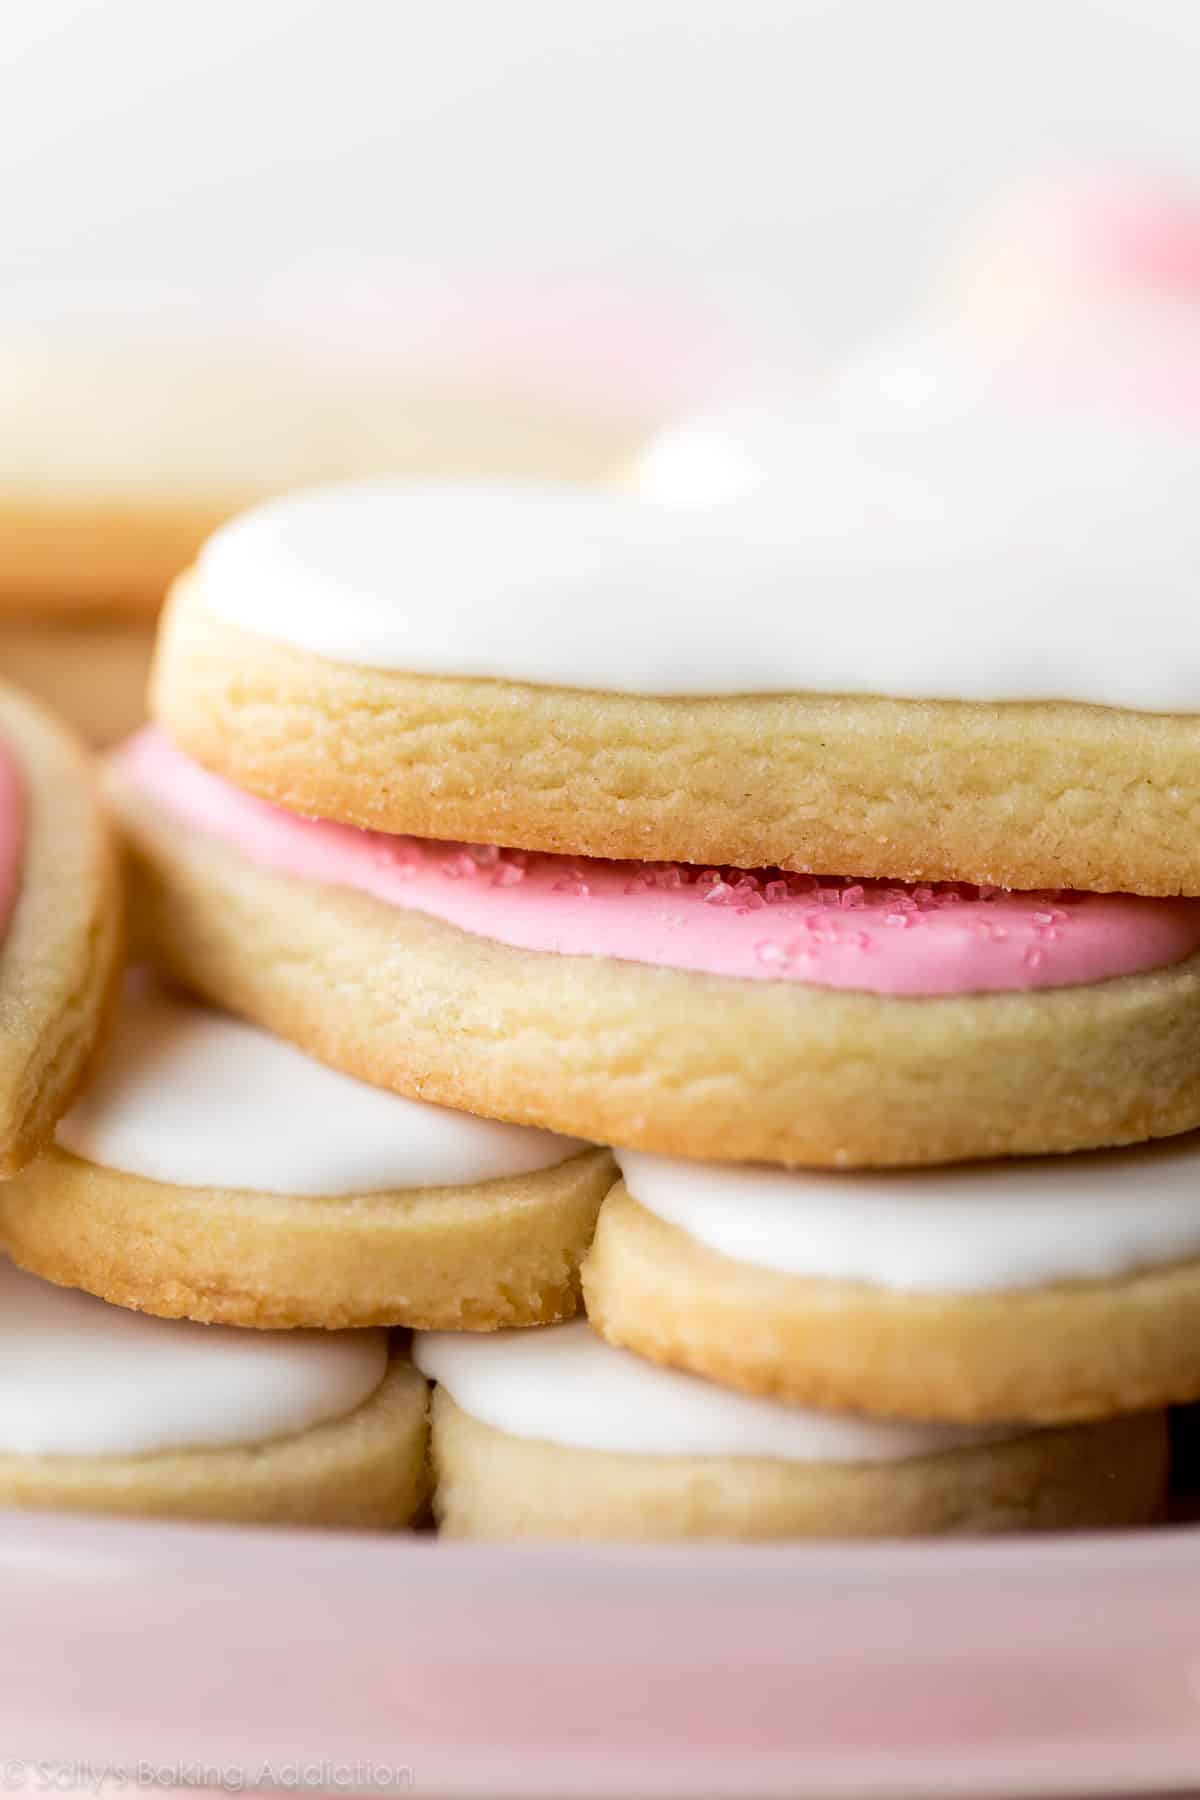
The pictured heart-shaped cookies are decorated with my royal icing using Wilton piping tip #4. If you’re not into piping tips, you can simply dunk the tops of the cookies into the icing, like we do with these mini animal cracker cookies. 🙂
Sugar Cookie Tips & Tools
Before I leave you with the recipe, let me suggest some useful sugar cookie tools. These are the exact products I use and trust in my own kitchen:
- Electric Mixer (Handheld or Stand Mixer)
- Baking Sheets
- Silicone Baking Mats or Parchment Sheets
- Rolling Pin or this Adjustable Rolling Pin
- Food Coloring: Liquid food coloring can alter the consistency of the icing, so I recommend gel food coloring. For the pictured cookies, I used a few drops of dusty rose and 1 drop of sky blue. This Americolor Soft Gel Paste Color Kit is great to have if you do a lot of decorating and want to have a variety of colors on hand.
- Piping Tips/Squeeze Bottle: If you’re using royal icing, I recommend Wilton piping tip #4 for outlining and flooding. This is a wonderful basic piping tip to have in your collection. If you’re using my easy glaze icing, I recommend using a squeeze bottle.
- Piping Bag: If you’re using royal icing and a piping tip, you need a disposable piping bag or reusable piping bag.
- Couplers: Couplers are handy if you have multiple colors of icing and only 1 tip, and need to move the tip to the other bags of icing.
- Cookie Cutters: I like this heart-shaped cookie cutter, but you can use any shape you desire!
For even more recommendations, see this complete list of my favorite cookie decorating supplies.


Here’s What You Can Do With This Dough
- Christmas Sugar Cookies
- Striped Fudge Cookie Sandwiches
- Snowman Cookies
- Cinnamon Roll Cookies
- Stained Glass Window Cookies
- Valentine’s Day Cookies
- Maple Cinnamon Cut-Out Cookies
- St. Patrick’s Day Cookies
- Easter Cookies
- Fireworks Cookies
And if you’re craving sugar cookies with a little extra tang, try my cream cheese cut-out cookies with Nutella glaze.
Print
Soft Cut-Out Sugar Cookies
- Prep Time: 40 minutes
- Cook Time: 12 minutes
- Total Time: 3 hours (including chilling)
- Yield: 24 3-4 inch cookies
- Category: Cookies
- Method: Baking
- Cuisine: American
Description
With crisp edges, thick centers, and room for lots of decorating icing, I know you’ll love these soft sugar cookies as much as I do. The number of cookies this recipe yields depends on the size of the cookie cutter you use. If you’d like to make dozens of cookies for a large crowd, double the recipe. This recipe is also in my New York Times best-selling cookbook, Sally’s Baking 101.
Ingredients
- 2 and 1/4 cups (281g) all-purpose flour (spooned & leveled), plus more as needed for rolling and work surface
- 1/2 teaspoon baking powder
- 1/4 teaspoon salt
- 3/4 cup (12 Tbsp; 170g) unsalted butter, softened to room temperature
- 3/4 cup (150g) granulated sugar
- 1 large egg, at room temperature
- 2 teaspoons pure vanilla extract
- 1/4 teaspoon almond extract (optional, but makes the flavor outstanding)*
For Decorating
- Royal Icing, Easy Glaze Icing, or Cookie Buttercream (royal icing is pictured)
- Assorted sprinkles
Instructions
- In a medium bowl, whisk the flour, baking powder, and salt together. Set aside.
- In a large bowl using a handheld or a stand mixer fitted with a paddle attachment, beat the butter and sugar together on high speed until the mixture is light and creamy, about 3 minutes. Add the egg, vanilla, and almond extract (if using) and beat on high speed until combined, about 1 minute. Scrape down the sides and bottom of the bowl and beat again as needed to combine. Add the dry ingredients to the wet ingredients and mix on low speed until combined. The dough should be soft. If it seems too soft and sticky for rolling, beat in 1 more Tablespoon of flour.
- Divide the dough in half. Place each portion on a piece of lightly floured parchment paper or a lightly floured silicone baking mat. With a lightly floured rolling pin, roll the dough to about 1/4-inch thickness. Use a bit more flour if the dough seems too sticky. The rolled-out dough can be any shape, as long as it is evenly 1/4 inch thick.
- Lightly dust one of the rolled-out dough portions with flour. (This prevents sticking.) Place the second rolled-out dough portion, still on the parchment paper, on top of the first. Cover the dough tightly and refrigerate it for at least 2 hours and up to 2 days.
- Preheat the oven to 350°F (177°C). Line large baking sheets with parchment paper or silicone baking mats.
- Carefully remove the top piece of dough from the refrigerator. If it’s sticking to the bottom, run your hand under it to help remove it. Using a cookie cutter, cut the dough into shapes. Gather the scraps, reroll, and continue cutting until all the dough is used. (Note: It doesn’t seem like a lot of dough, but you get a lot of cookies from the dough scraps you reroll.) Repeat with the second piece of dough. Arrange the cookies 3 inches apart on the prepared baking sheets.
- Bake for 11–12 minutes or until the edges of the cookies are very lightly browned and set. If your oven has hot spots, rotate the baking sheets halfway through bake time. Allow the cookies to cool on the baking sheet for 5 minutes, then transfer to a cooling rack to cool completely before decorating.
- Decorate the cooled cookies with royal icing, easy cookie icing, or cookie decorating buttercream. Feel free to tint any of the icings with gel food coloring. See post above for recommended decorating tools. No need to cover the decorated cookies as you wait for the icing to set. If it’s helpful, decorate the cookies directly on a baking sheet so you can place the entire baking sheet in the refrigerator to help speed up the icing setting.
- Enjoy cookies right away or wait until the icing sets to serve them. Once the icing has set, these cookies are great for gifting or shipping. Store plain or iced cookies covered tightly at room temperature for up to 5 days. For longer storage, cover and refrigerate for up to 10 days. If decorated with cookie buttercream, cover and store decorated cookies at room temperature for up to 1 day, or in the refrigerator for up to 5 days.
Notes
- Freezing Instructions: Plain or decorated sugar cookies freeze well for up to 3 months. Wait for the icing to set completely before layering between sheets of parchment paper in a freezer-safe container. To thaw, thaw in the refrigerator or at room temperature. You can also freeze the cookie dough (before rolling it out) for up to 3 months. Prepare the dough through step 2, divide in half, flatten each half into a disc (like we do with pie crust), wrap each disc in plastic wrap, place both wrapped discs in a freezer-safe container, and freeze. Thaw the wrapped discs in the refrigerator overnight, then bring to room temperature for about 1 hour. Roll out the dough as directed in step 4, then chill the rolled-out dough in the refrigerator for 1 hour before cutting into shapes and baking.
- Special Tools (affiliate links): Electric Mixer (Handheld or Stand Mixer) | Baking Sheets | Silicone Baking Mats or Parchment Paper | Wooden Rolling Pin or Adjustable Rolling Pin | Heart-Shaped Cookie Cutter | Americolor Soft Gel Paste Color Kit | Piping Bags (Disposable or Reusable) | Couplers | Wilton Tip #4 | Squeeze Bottle
- Room Temperature: Room-temperature butter is essential. If the dough is too sticky, your butter may have been too soft. Room-temperature butter is actually cool to the touch. Room-temperature egg is preferred so that it mixes quickly and evenly into the cookie dough.
- Flavors: I love flavoring this cookie dough with 1/4 teaspoon almond extract as listed in the ingredients above. For more flavor, use 1/2 teaspoon. Instead of the almond extract, try using 1 teaspoon of maple extract, coconut extract, lemon extract, or peppermint extract. Or add 1 teaspoon pumpkin pie spice or ground cinnamon. If using lemon extract, you can also add 1 Tablespoon lemon zest.
- Icing: Use royal icing, easy cookie icing, or cookie decorating buttercream. See post above to read about the differences.
- Can I Double the Recipe? Yes. Double all of the ingredients and divide the dough into 3 or 4 portions in step 3.
- Be sure to check out my top 5 cookie baking tips AND these are my 10 must-have cookie baking tools.


Reader Comments and Reviews
This is the best sugar cookie recipe! I never add the almond extract, but they turn out amazing every time. People always comment on how flavorful and perfect they are. Sally’s recipes are so detailed, and almost all of my “famous” dessert recipes come from her collection. Highly recommend!
The best cookies ever
Hi Sally! I made this recipe and they look great, but mine definitely got a pit “puffy” (did not spread, but got puffy). Yours look so nice and flat. What advice would you have to prevent that? Thank you! Loved the video.
Hi Lori, we’re so glad you enjoyed the cookies! Make sure you are rolling your cookie dough out and then chilling it. It’s important for the dough to be very cold when going into the oven so that it holds its shape and doesn’t puff up. You can even pop the cutout dough back into the refrigerator for a few minutes before baking to chill them further. Hope this helps for next time!
I may have missed it – but what temperature don you cook these cookies at for 12 minutes?
Hi Andrea, see step 6: “Preheat oven to 350°F (177°C).”
Could i double the vanilla in stead of using almomd extract? need to keep these nut free
Absolutely.
I finally found the cutout sugar cookie recipe I’ve been looking for. I’ve tried so many, and this is it! They come together easily, and the flavor and texture is perfect. Thank you!
AMAZING!!!!!!!!!!!!!!!!!!!!!!!!!!!!!!!!!!!!!!!!!!!!!!!!!!!!!!!!!!!!!
These really are the best sugar cookies!
Thank you sooooooooooo much for publishing your delicious recipes!!!!!
Is there a way to make half of this recipe, how do you half the egg amount?
Hi Mary, the best and most accurate way to halve an egg is to crack it, beat it together, measure the amount, the use half.
Hi. If I want to make it custom and stamp a name, when would be the best time to do that with the icing? Thanks!
Hi Jeannie, are you looking to stamp on top of the icing? If so, we’d recommend waiting until the icing is completely dry.
I have 2 questions.
1: Can I cut the cookies, THEN cool them? I feel like handling the chilled dough too much would make them too warm, and they will spread.
2: Should I sift the flour before measuring? Or does it not affect the final product too much?
Hi Amelia, the dough will be quite soft before chilling, so we’d recommend chilling, cutting, and then placing the shaped cookies back in the refrigerator for a bit to help cool them down again. No need to sift the flour here. Hope you enjoy the cookies!
I have made these many times! If i wanted to frost these with buttercream, what volume of buttercream would I need per batch (roughly)
Hi Kristy, one batch of our vanilla buttercream will be enough for these cookies.
I have made these cookies several times and they are absolutely delicious! Everyone loves them! The addition of the almond extract makes them even better!
How do I keep cookies from spreading ?
Hi Jessica, we’re happy to help troubleshoot. Make sure you’re starting with room temperature butter – it’s much cooler than most think and can have a big impact on cookies spreading. The best tip is to make sure your dough is cold going in the oven. If it’s getting warm while cutting out the shapes, just place your cut out cookies back in the refrigerator before baking. Also, if your oven has hot spots, rotate your cookie sheet about half way through bake time to promote more even baking. Hope these tips help for next time!
Took a shortcut and poured the batter into a pie dish instead of cutting out cookies individually, then extended the baking time to about thirty minutes to make up for the change. Still came out great. Versatile recipe.
Please can you specify if this is fan forced or conventional oven?! Going to try tomorrow for my daughter’s little party!!!
Hi Sam, We use and recommend a conventional oven for all of our recipes. If you use convection settings (fan-forced) for baking, the general rule is to lower your temperature by 25°F. Additionally, keep in mind that due to increased airflow in convection ovens, recipes usually take less time to bake.
I just made these and I am delighted with the way they turned out. I had decided in the ‘70’s that rolling out and cutting cookies was too fussy; I have never owned cookie cutters. Well, I recently got inspired to give this a try since I have more time to spare. Tomorrow I will be making my first ever batch of royal icing; wish me luck. Thank you Sally; I have been depending on your recipes for years now.
This is the 4th time that I have used this recipe. Can not say enough on how perfect these sugar cookies are. Doing 350 for a large event and this has become my go to recipe for sugar cookies. Thank you
I made checkerboard cookies with this and halved the recipe, everything listed was stuff I had at home, and they turned out great! Big fan of these cookies, they were super easy and fun to make, and I now have a jar of cookies in my kitchen 🙂
Excellent. Easy to make the dough and the dough was easy to work with and the cookies kept their shape really well. I think I just found my go-to recipe!
Everything was absolutely perfect with this recipe! The cookies are INCREDIBLE- soft and chewy, yet firm enough to hold the icing. They also have a nice crunch on the edges. The royal icing came together beautifully and dried with a little shine. This will be my new go-to recipe!
I am making these sugar cookies for my daughter’s wedding! She lives on a mountain, and we will be baking at 9,500 feet up! Should I modify amount of flour and anything else? Thanks!
Hi Brenda, I wish we could help, but have no experience baking at high altitude. Some readers have found this chart helpful: https://www.kingarthurflour.com/learn/high-altitude-baking.htm
My kitchen is at 10,100 feet. (Yikes.) I used Sally’s recipe and the only ingredient I changed was the butter. I reduced from 3/4 Cup to 1/2 cup plus 2 Tablespoons. I was prepared for my first batch to be disappointing, but they turned out perfect! Try your first batch, make notes and if needed, try again, reducing the amount of butter. I hope I helped.
This recipe is my go-to sugar cookie recipe for holidays! The whole family loves them!!!
I’m very excited to use this recipe during an English baking camp with my middle school students! How feasible would this recipe be to make without a handheld or stand mixer? Our school kitchen is only equipped with one stand mixer, so I’d like for my students to make everything using a whisk/spatula.
Hi Jamie, using a spatula is possible, but it will take quite a bit of arm muscle to cream the butter and sugar!
It’s the best recipe ever
I love this recipe and it is definitely my go-to, I’m glad I found it!!
I am wanting to make a few sandwich cookies but am wanting them thinner than the 1/4″, would I be able to roll out to 1/8″ and would they still turn out? How long would you recommend the thinner cookies to bake to still be soft?
Hi Jenny, you can definitely make thinner cookies, but we’re unsure of the bake time needed. You do risk them cracking at that thickness, and they won’t be as soft.
how many calories in the whole batch?
Hi Sophia, we don’t usually include nutrition information as it can vary between different brands of the same ingredients. Plus, many recipes have ingredient substitutions or optional ingredients listed. However, there are many handy online calculators where you can plug in and customize your exact ingredients/brands. Readers have found this one especially helpful: https://www.verywellfit.com/recipe-nutrition-analyzer-4157076
These came out great, as do all of your recipes. But I am challenged when it comes time to store them. Almost all of your recipes include instructions to ‘STORE IN AIRTIGHT CONTAINER.” I’ve got some old Tupperware and a few other plastic bowls with lids. But nothing is quite right for keeping cookies fresh. Can you recommend a storage product that will keep all of your fantastic recipes fresh as the day I baked them?
Hi Mary Lou, Sally has a big set of these glass storage containers in many different sizes. They work great for storing pretty much everything, and are freezer safe, as well. Hope this helps!
these sugar cookies are cool!!!
we did these sugar cookies with no icing.
keap all the hard work!!!
First time making cookies and they came out fantastic! I made them for my daughter’s 3rd birthday and I’m very glad to choose this recipe.