

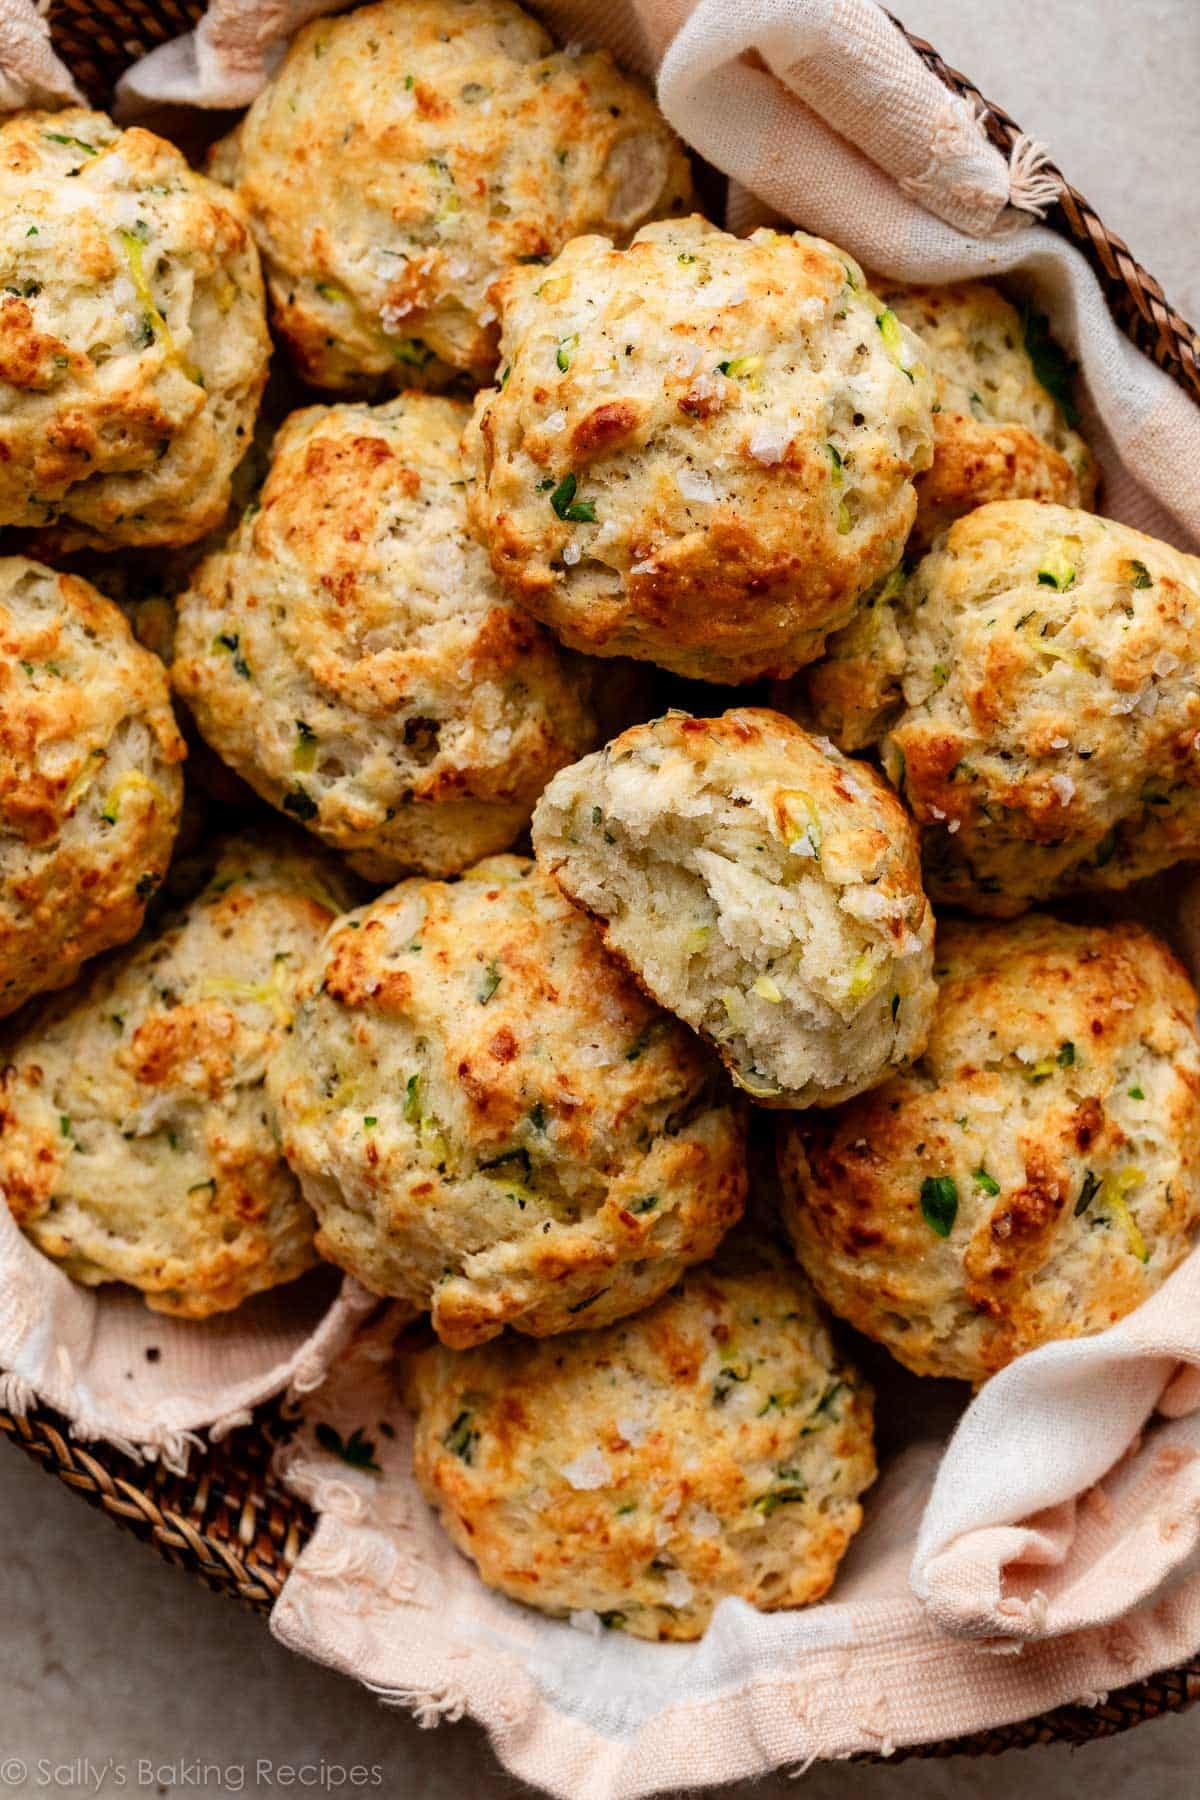
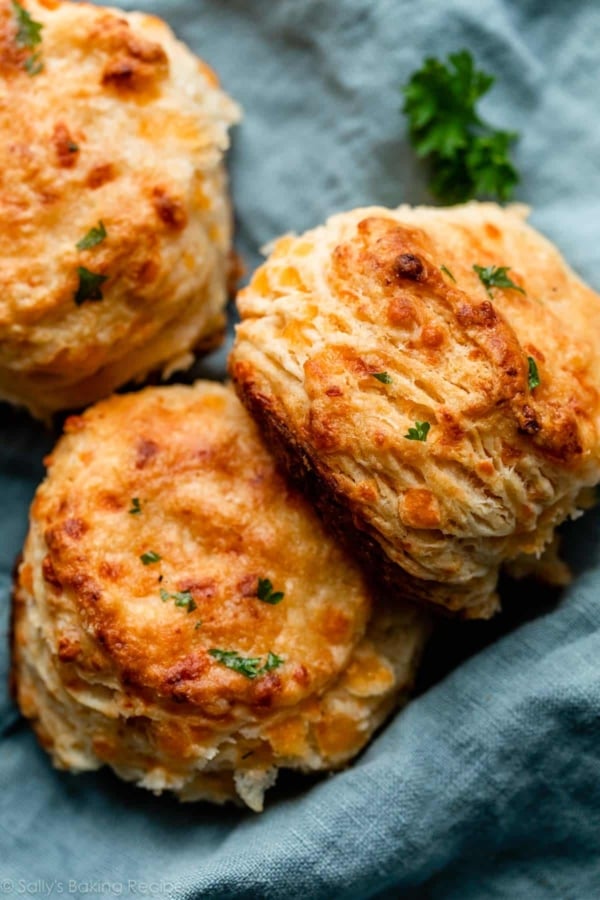
These are my tender yet flaky zucchini biscuits, made drop-style in about 40 minutes without a mixer, rolling pin, or biscuit cutter. Savory flavors like parmesan cheese, fresh basil, parsley, and garlic infuse every buttery bite. And when they’re combined with garden zucchini and tangy buttermilk, it’s nearly impossible to resist a second helping. Good thing this recipe makes a dozen!
One reader, Rachel, commented: “Oh my goodness, these are wonderful! So flaky and soft! A lovely way to enjoy zucchini and herbs fresh from the garden. Will definitely make these again! ★★★★★“
After one bite of my first successful batch of zucchini biscuits, I knew I struck recipe gold.
I’m not sure why it took me so long to incorporate one of my favorite summer ingredients into biscuits, but I’m glad I never have to go another day without the option to make something so scrumptiously delicious. 😉 And you don’t, either.
Endless Reasons to Love These Zucchini Biscuits
- Tender and soft with flaky interior and crisp-crumbly edges
- Recipe highlights garden-fresh flavors (basil, parsley, zucchini)
- Easy breezy parmesan cheesy!
- Feel free to add different flavors like dill, crushed red pepper flakes, bacon, thyme, chives, lemon zest, etc.
- No rolling pin, no biscuit cutter needed
- Can easily be doubled
- Egg-free and nut-free
- Biscuits freeze beautifully
- Versatile—enjoy as a side dish for dinner, fill with sandwich fixings for lunch, serve with eggs for breakfast

Squeeze Moisture Out of the Zucchini
If you learn one thing from these headnotes, it’s this: extract some liquid from your zucchini before using in the biscuit dough.
You see, zucchini is a very wet ingredient, which is why it’s so lovely in baked goods like zucchini bread (and apple zucchini bread!) and zucchini cake… flavorless moisture! In other dishes where you’re not looking for extra moisture, it can negatively affect the outcome. To combat this:
- Shred the zucchini: If you’re looking for a tool for this, I own and love this box grater because it’s easy to use, grates quickly, and has held up well with regular use. (See many of my recommended baking tools here.) A box grater is handy because you’ll need it to freshly grate the parmesan cheese, too.
- Drain for 10 minutes: Lightly sprinkle the shredded zucchini with salt, place into a paper towel- or clean dish towel-lined colander or bowl, cover, and let sit for 10 minutes. Give it a squeeze, and then use in the biscuit dough. You’ll find the volume of zucchini reduced by more than half!
This step is crucial and something I do when I make zucchini fritters, too. Use the time the zucchini is draining to prep your other ingredients and start the dough.

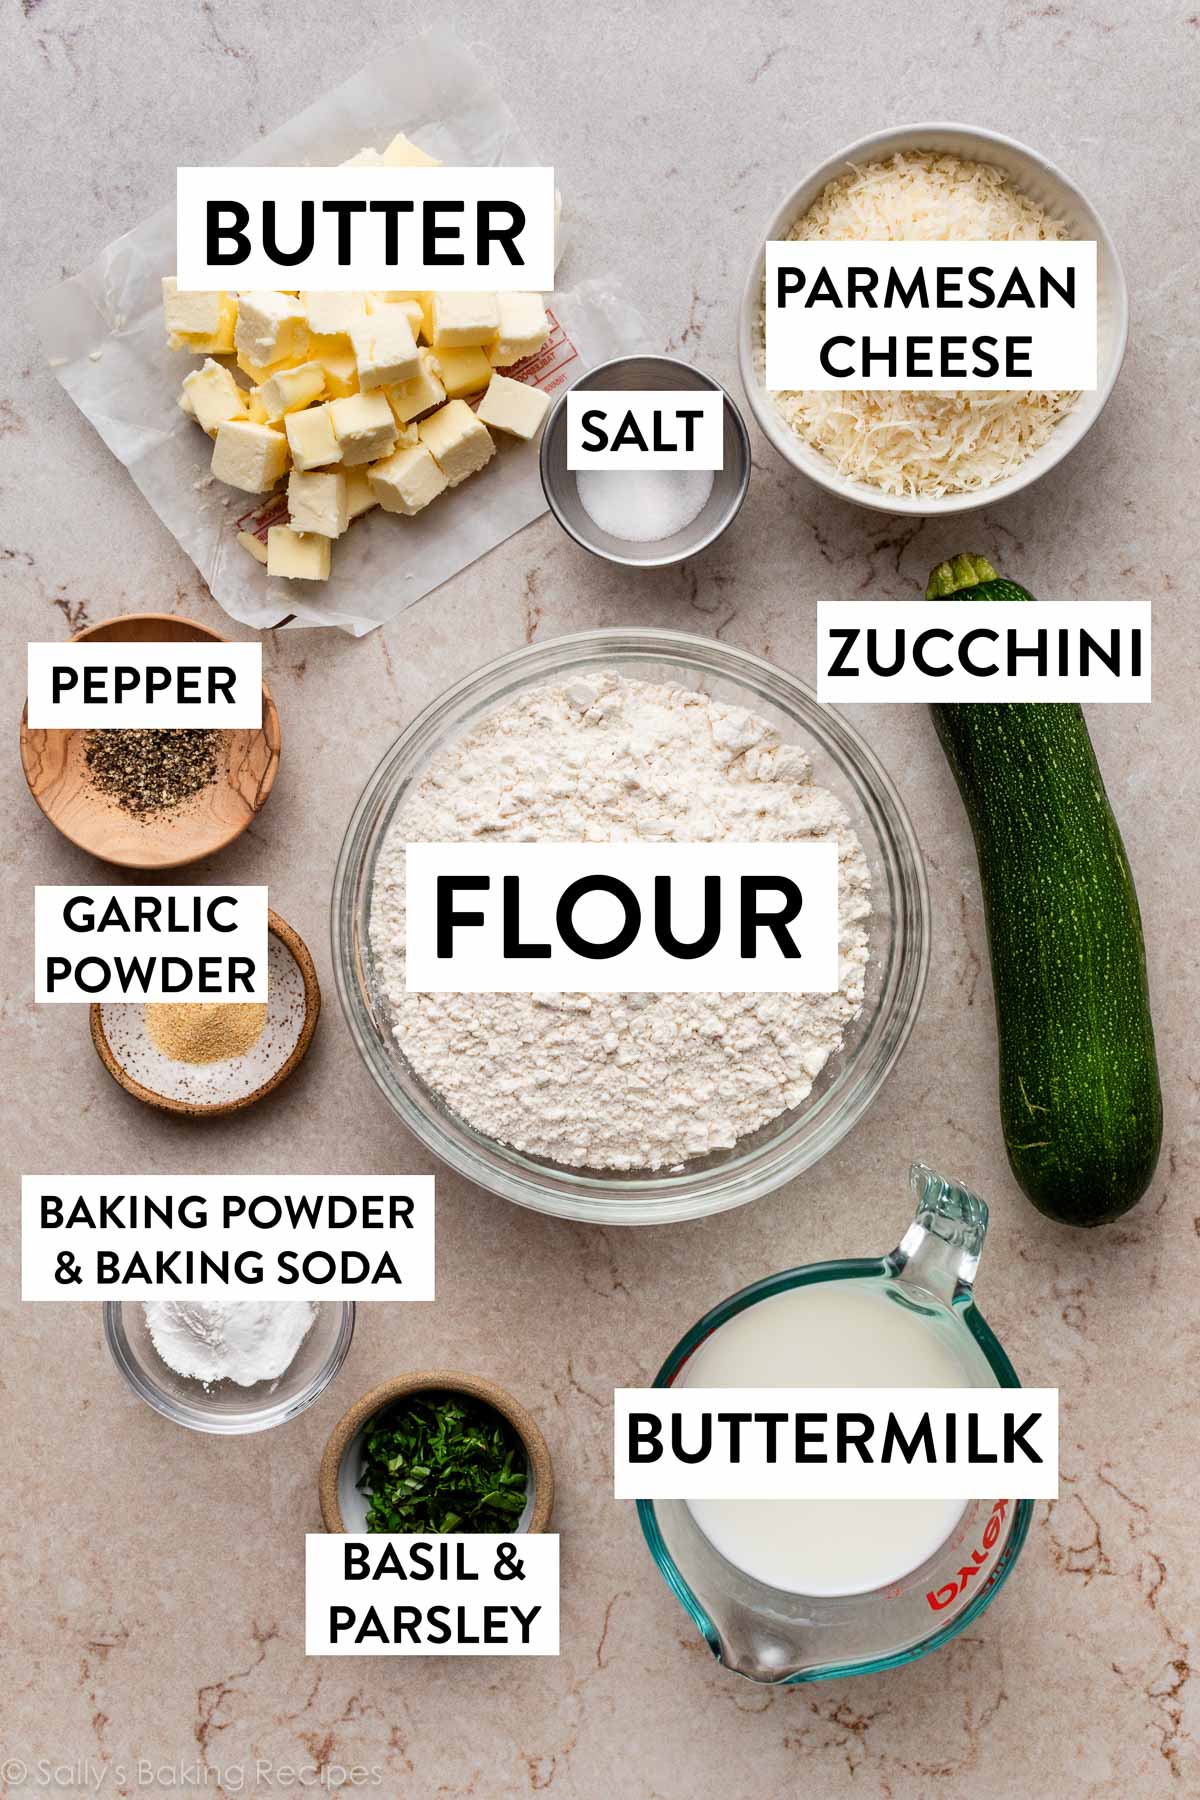
Other Ingredients You Need
Each ingredient has a specific job, so I don’t recommend leaving any out. However, feel free to substitute with my suggestions. Here’s a brief rundown so you understand the importance of each:
- Flour: I used my buttermilk biscuits recipe as the starting point, so both recipes use the same amount of flour. I have not tried these with gluten-free flour, so let me know if you do!
- Baking Powder & Baking Soda: These aren’t layered biscuits—they’re drop biscuits—so you don’t have to be as concerned about building height. Therefore, I reduced the baking powder. I also use baking soda to help the biscuits develop a nice golden-brown crust.
- Salt, Pepper, & Garlic Powder: Some salt helps extract liquid from the zucchini in step 1, and the remainder goes into the dry ingredients with the pepper and garlic powder. Feel free to increase to 1 teaspoon garlic powder for more flavor, or use 2 cloves minced garlic.
- Parmesan Cheese: I prefer parmesan for its salty, nutty, and robust flavor. Feel free to swap for cheddar cheese (like my cheddar biscuits), pecorino romano, pepper jack, smoked gouda, asiago (like my asiago-crusted skillet bread), or a combo of these.
- Cold Butter: Make sure the butter is cubed and very cold. The colder the butter, the more flakes in the biscuits and the less they’ll spread (a good thing!).
- Herbs: I suggest basil and parsley, but feel free to swap/add dill, chives, thyme, etc.
- Cold Buttermilk: For exceptionally tangy flavor. This recipe uses 1 cup of buttermilk, so you can absolutely use a buttermilk substitute here if needed.
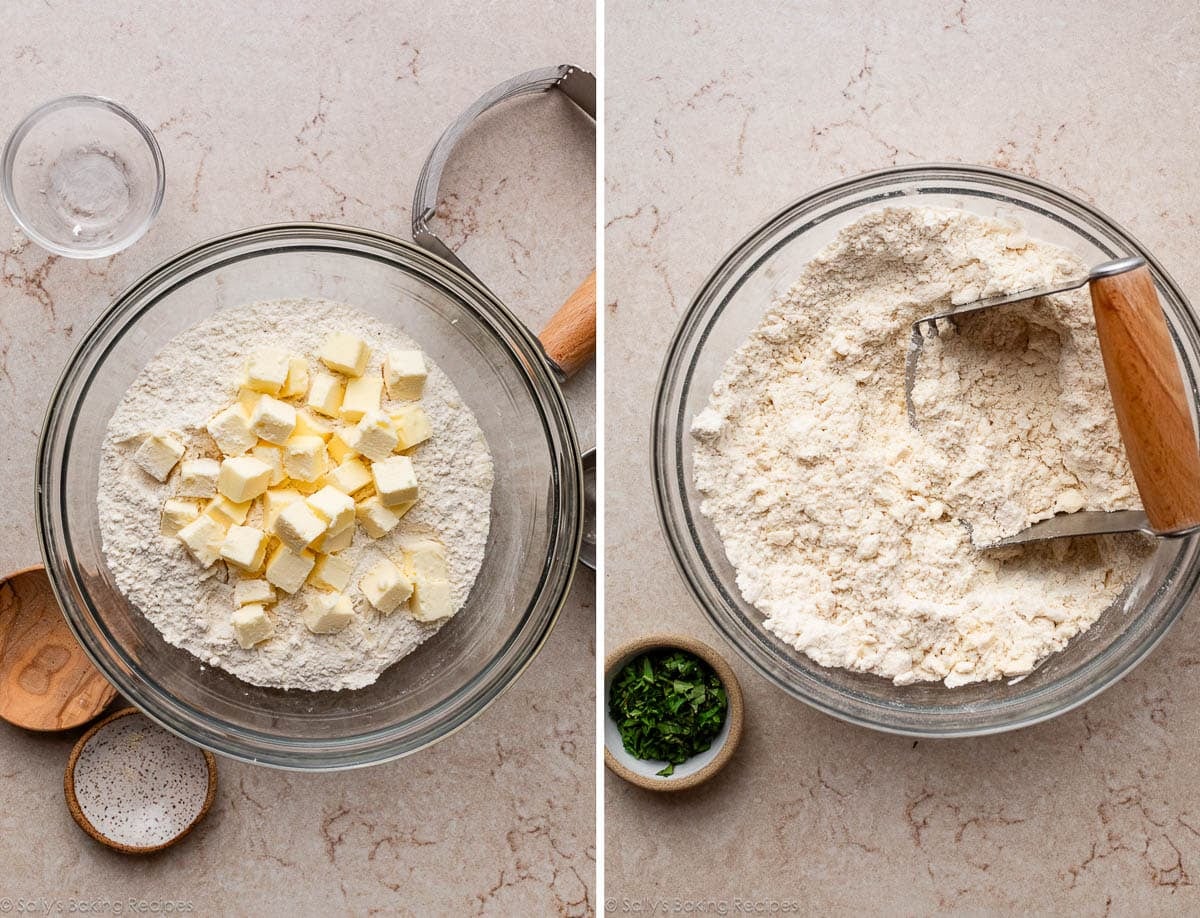
Making Zucchini Biscuits: Step-by-Step Photos
Cut the cold butter into the dry ingredients with a pastry cutter. If you don’t have a pastry cutter, you can use two forks or a food processor. You’re looking for coarse crumbles with pea-sized chunks of flour-coated butter:
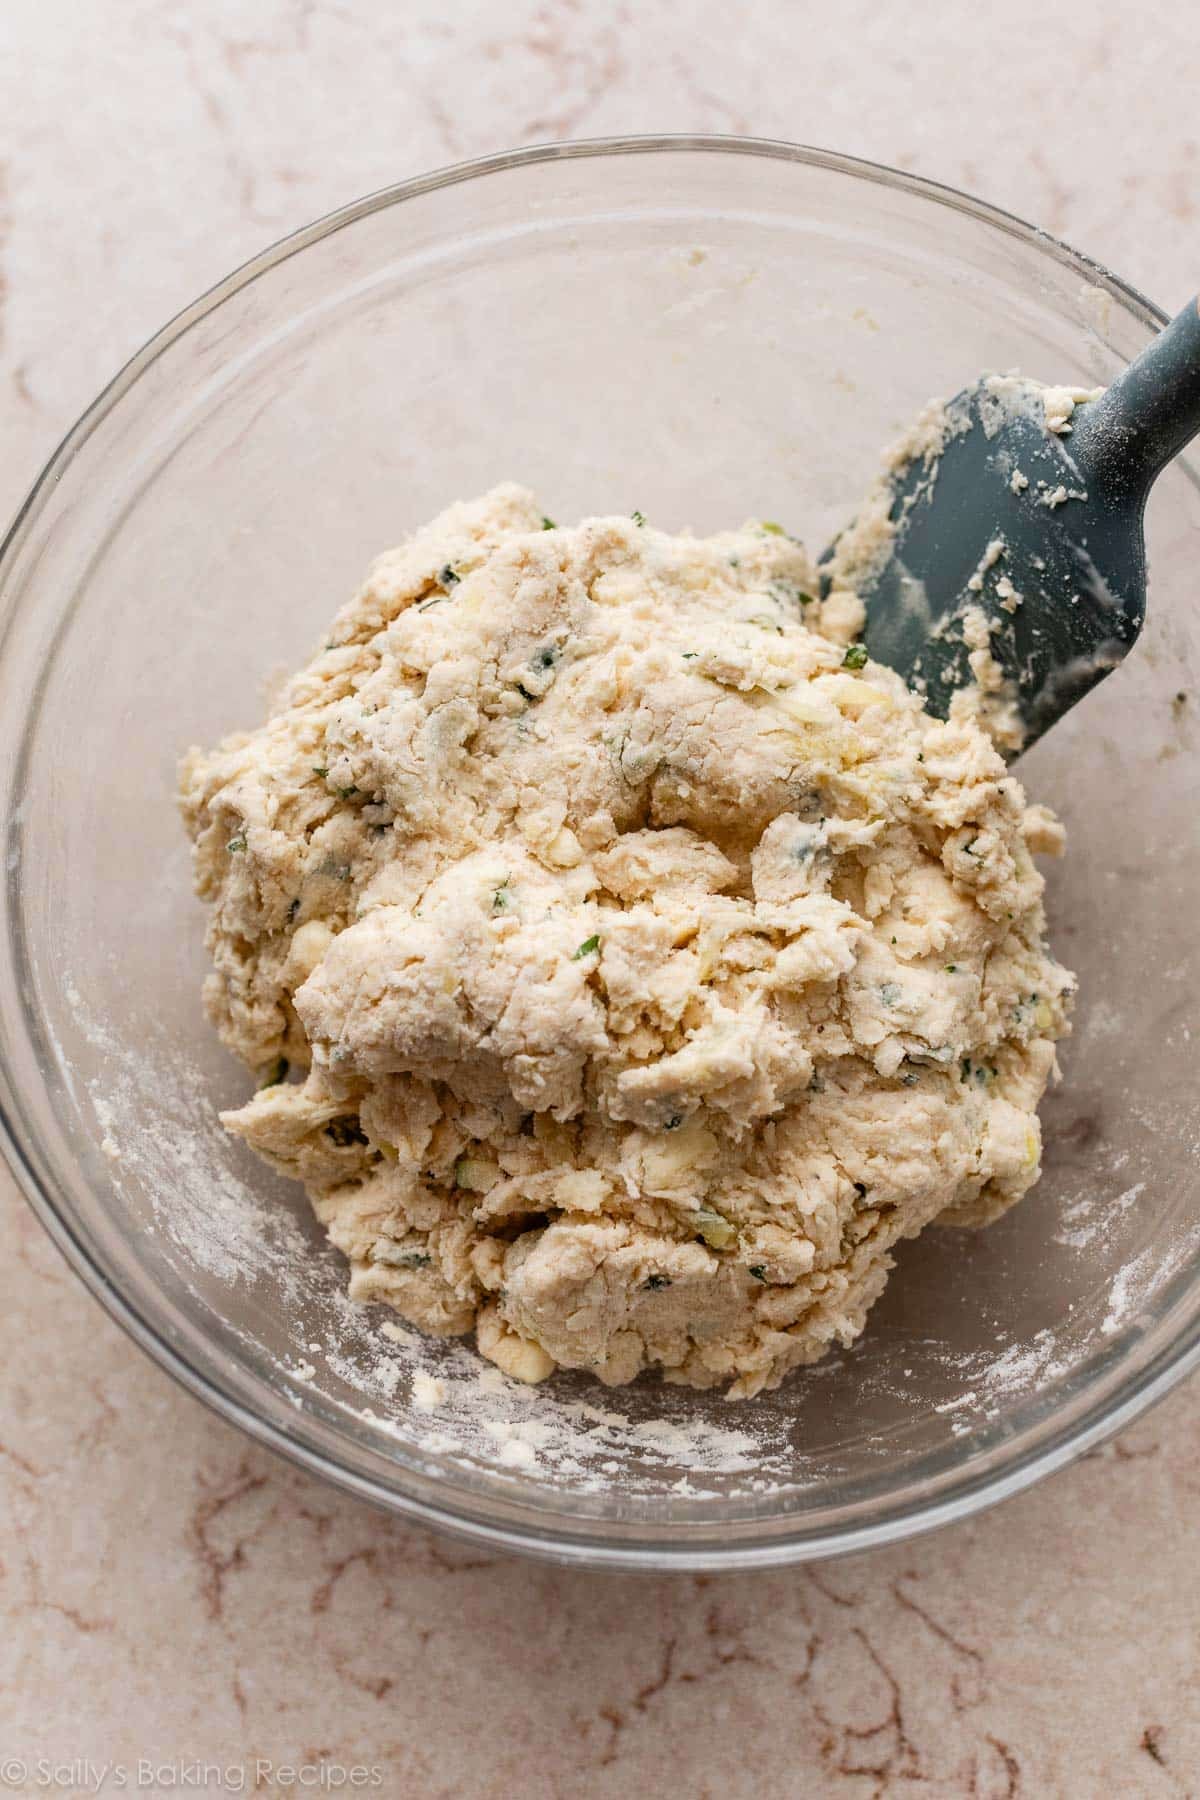
Add the herbs and drained/squeezed zucchini. Because so much moisture has been removed from the zucchini, you’ll only have about 1/2 cup for the dough. Add the buttermilk:
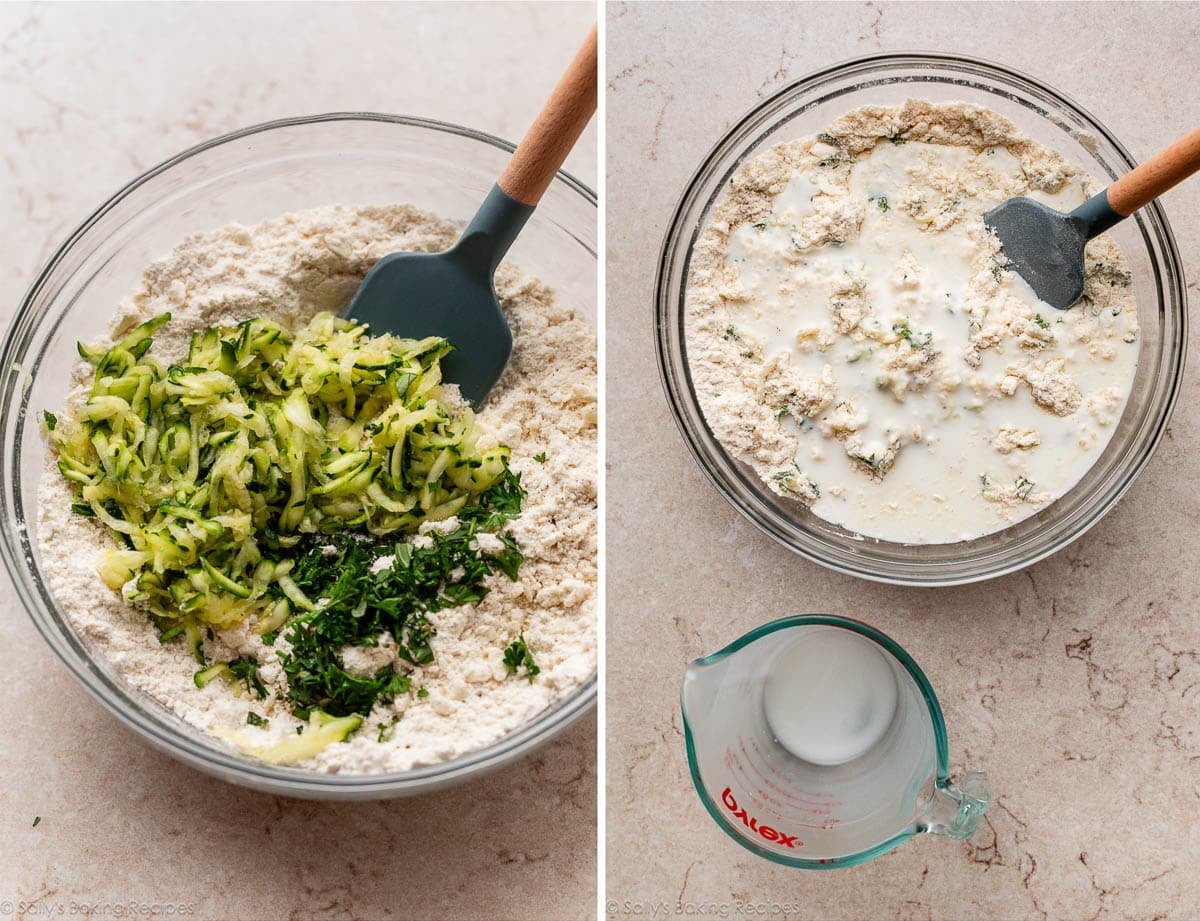
Mix to combine into a shaggy, crumbly dough:
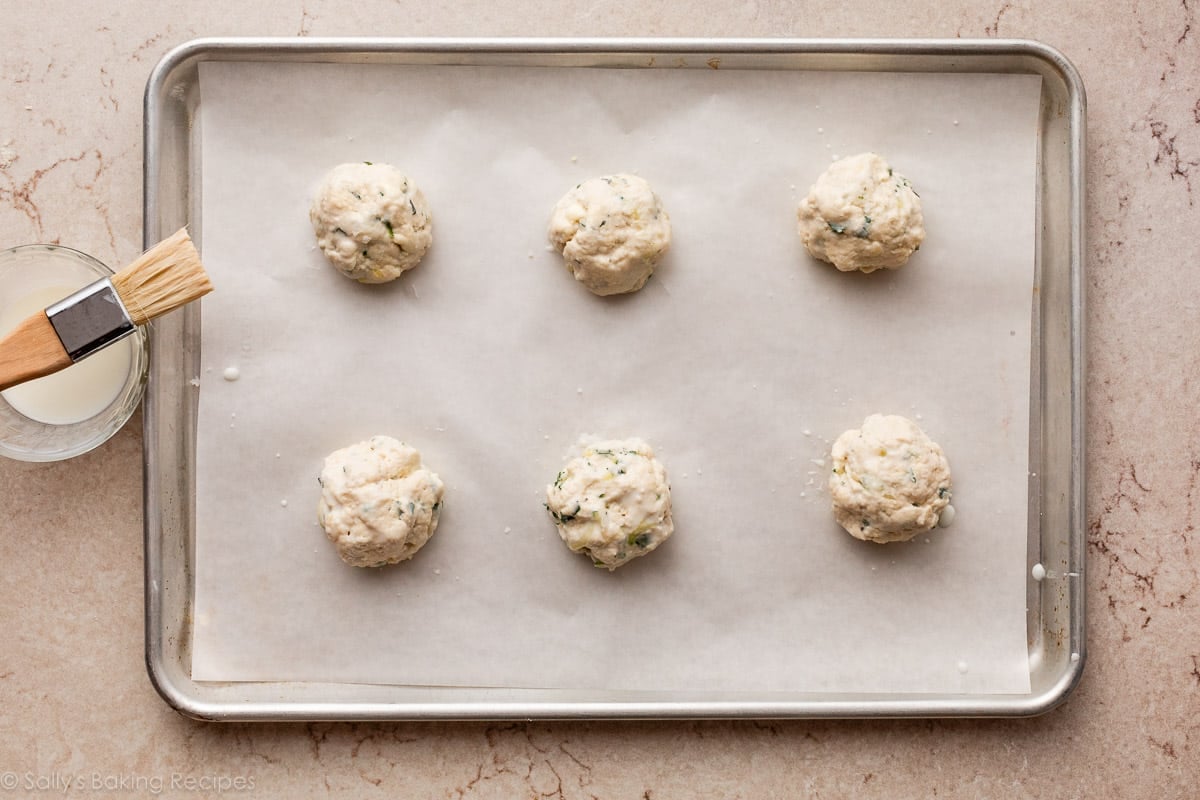
Divide dough into 12 equal portions, about 4 Tablespoons of dough each, or about 65 grams each. Shape into a ball as best you can, but don’t overthink it. There’s no folding, layering, or rolling pin needed! Place on lined baking sheets, then brush with buttermilk. Feel free to sprinkle with flaky sea salt, if desired:
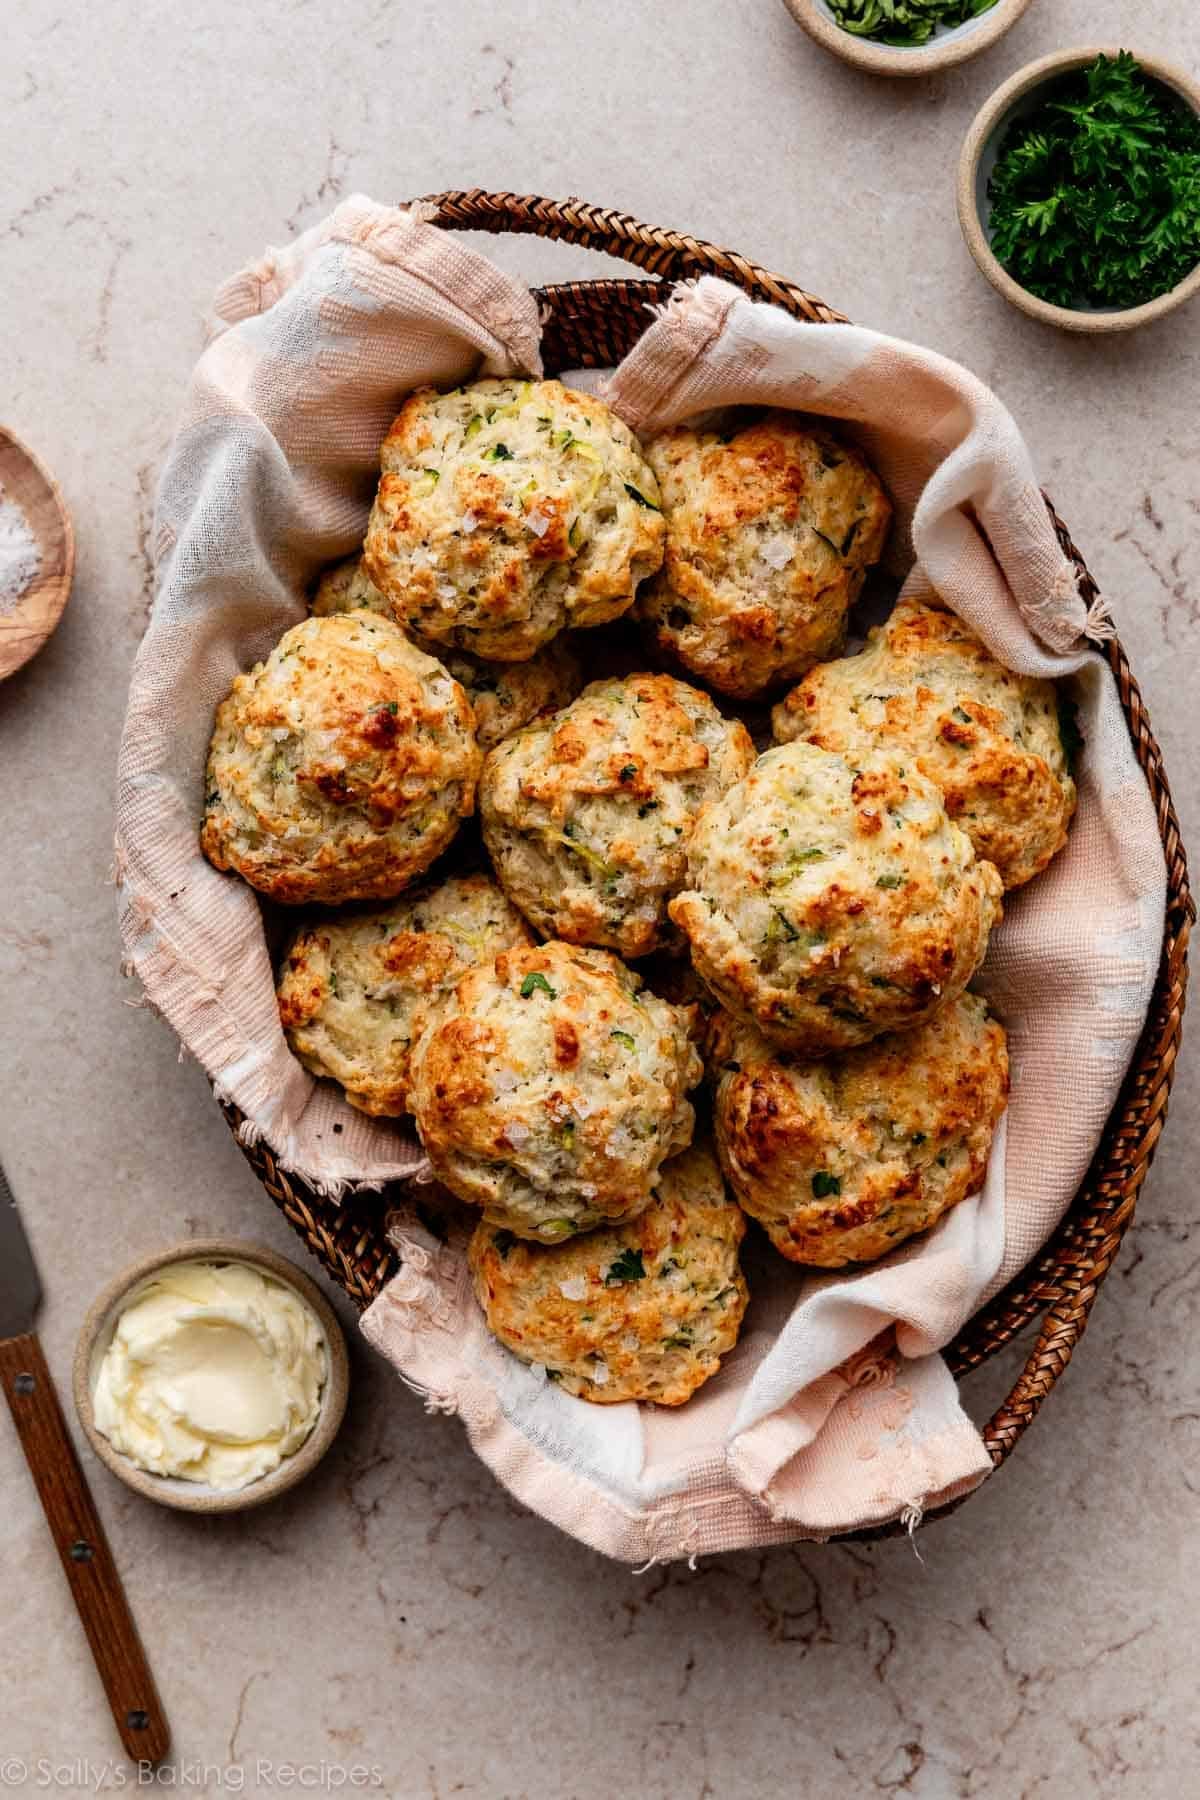
The biscuits take only about 20 minutes to bake:
Feel free to swap for another hard or medium-hard cheese you can shred like cheddar, pecorino romano, pepper jack, smoked gouda, asiago, or a combo of any of these. I would avoid super-soft cheeses. Feta cheese would likely be OK!
Absolutely. In fact, that’s how I first tested the recipe. Gently shape into balls as the recipe instructs below, then arrange in a greased 10-inch cast iron skillet (or any 10-inch oven-safe skillet). See recipe Notes for suggested bake time.
Absolutely; use the same amount. You’ll still want to drain/squeeze out the moisture as the recipe instructs below.
Yes! Send your taste buds on a journey (LOL) and feel free to swap out the herbs, or leave them in, and use some fresh dill or thyme, a couple Tablespoons of chopped chives, a few slices of cooked bacon (chopped), a sprinkle of red pepper flakes, or the zest of a lemon. Be sure to comment below if you try anything else. I plan to make these a lot and love to play around with new flavors.

Zucchini Biscuits (Parmesan Herb)
- Prep Time: 20 minutes
- Cook Time: 20 minutes
- Total Time: 40 minutes
- Yield: 12 biscuits
- Category: Bread
- Method: Baking
- Cuisine: American
Description
These zucchini drop biscuits are filled with vibrant flavors like basil, parsley, parmesan, garlic, and black pepper, and they’re ready in just 40 minutes. Be sure to drain and wring out moisture from the shredded zucchini as instructed in step 2. See recipe Notes for more flavor ideas and freezing instructions.
Ingredients
- 1 and 1/4 cups (150g) shredded zucchini
- 1 teaspoon salt, divided
- 2 and 1/2 cups (313g) all-purpose flour (spooned & leveled), plus more as needed
- 2 teaspoons baking powder
- 1/2 teaspoon baking soda
- 3/4 teaspoon garlic powder (or 2 cloves minced garlic)
- 1/4 teaspoon freshly ground black pepper
- 3/4 cup (60g) freshly grated parmesan cheese
- 1/2 cup (8 Tbsp; 113g) unsalted butter, cold & cubed
- 2 Tablespoons chopped fresh basil (or 1 and 1/2 teaspoons dried)
- 1 Tablespoon chopped fresh parsley (or 1 teaspoon dried)
- 1 cup (240ml) buttermilk*, cold, plus 2 Tablespoons for brushing on top
- optional, for topping: flaky sea salt
Instructions
- Preheat oven to 425°F (218°C). Line two large baking sheets with parchment paper or silicone baking mats. Set aside.
- Drain the zucchini: Line a colander or large bowl with a few paper towels or a clean, thin kitchen towel. (You can also use cheesecloth for this step.) Place the shredded zucchini inside. Add 1/2 teaspoon salt, and gently mix together. Top with another paper towel and press down so the towels begin absorbing some liquid. Let sit for 10 minutes. Lift everything up using the bottom towel and, over the sink, wring/squeeze out as much liquid as you can. The goal is to remove as much moisture from the zucchini as possible. Give your hands a break if needed, then return to squeezing out more liquid. You will be amazed how much liquid you wring out! You’ll have about 1/2 cup of shredded zucchini to use in the dough. A little more or less is fine.
- Make the biscuits: Place the flour, remaining 1/2 teaspoon salt, baking powder, baking soda, garlic powder, pepper, and parmesan cheese together in a large bowl or in a large food processor. Whisk or pulse until combined. Add the cubed butter and cut into the dry ingredients with a pastry cutter or 2 forks, or by pulsing several times in the processor. Cut/pulse until coarse crumbs form. Do not over-mix. If you used a food processor, pour the mixture into a large bowl.
- Fold in the basil, parsley, and zucchini. Make a well in the center of the mixture. Pour 1 cup (240ml) buttermilk on top. Fold everything together with a large spoon or spatula until it comes together in one shaggy-looking ball. Avoid overworking the dough as best you can. Add a sprinkle of flour if dough seems too wet.
- Divide the dough into 12 equal portions, about 4 Tablespoons of dough each. If you want to be precise, each should weigh about 65 grams. Shape into a ball as best you can and arrange 6 biscuits on each prepared baking sheet. Brush each evenly with remaining buttermilk. If desired, sprinkle each lightly with flaky sea salt.
- Bake for 19–21 minutes or until the tops are golden brown. For a more accurate test, the biscuits are done when an instant-read thermometer inserted into the center registers 195–200°F (90–93°C).
- Remove from the oven and enjoy warm. Cover leftovers tightly and store at room temperature or in the refrigerator for up to 5 days.
Notes
- Make Ahead & Freezing Instructions: Baked biscuits freeze well for up to 3 months. Thaw at room temperature or in the refrigerator, then warm up to your liking before serving. You can also freeze the biscuit dough. Prepare the dough in steps 2 through 4. Wrap tightly in plastic wrap (plastic wrap is best for freshness), place in a freezer-safe container or zip-top bag, and freeze for up to 3 months. Thaw overnight in the refrigerator, then continue with step 5. Also, after step 4, you can wrap the dough in plastic wrap and refrigerate for up to 2 days before continuing with step 5.
- Special Tools (affiliate links): Box Grater | Colander | Glass Mixing Bowls | Whisk | Pastry Cutter or Food Processor | Baking Sheet | Silicone Baking Mat or Parchment Paper | Pastry Brush | Flaky Sea Salt
- Can I Bake These in a Cast Iron Skillet? Absolutely. In fact, that’s how I first tested the recipe. Gently shape into balls as the recipe instructs, then arrange in a greased 10-inch cast iron skillet (or any 10-inch oven-safe skillet). The bake time is closer to 23–24 minutes.
- Can I Use Yellow Squash Instead of Zucchini? Absolutely; use the same amount. You’ll still want to drain/squeeze out the moisture as the recipe instructs.
- Other Cheeses: I prefer parmesan for its salty, nutty, and robust flavor. Feel free to swap for another hard or medium-hard cheese you can shred such as cheddar, pecorino romano, pepper jack, smoked gouda, asiago, or a combo of any of these totaling 3/4 cup. I would avoid super-soft cheeses like goat cheese. Feta cheese would likely be OK!
- Cold Ingredients in Dough: Make sure the butter and buttermilk are SUPER cold. Cold ingredients, as well as chilling, help the crust keep its shape.
- Buttermilk: Buttermilk adds unbelievable flavor and texture to this dough. If you don’t have buttermilk, use this DIY buttermilk substitute instead. Add 2 teaspoons of fresh lemon juice or white vinegar to a liquid measuring cup. Then add enough cold whole milk until it reaches 1 cup (240ml). Stir together and let it sit for 5 minutes before using in the recipe.
- Other Flavor Ideas: Feel free to swap out the basil and parsley, or leave them in, and use some fresh dill or thyme, a couple Tablespoons of chopped chives, a few slices of cooked bacon (chopped), a sprinkle of red pepper flakes, or the zest of a lemon. Have fun with different flavors.


Reader Comments and Reviews
These were a hit with my family, they didn’t taste the zucchini at all. Love the addition of herbs and the parmasean.
I used Bob’s Red Mill 1 to 1 gluten free flour. I don’t know how they could have been any better. I was also out of fresh herbs so I used herb de Provence as my herb choice.
My girlfriend described it as “something you’d get at a restaurant” which is awesome.
Can you use a grater to mix in the butter? I used forks and it took a while, wondering if this would be a easier way. I’ve never grated butter before so no idea how that would work.
Hi Nathan! Glad the biscuits were enjoyed. A grater isn’t a mixing tool, but you could likely freeze the butter, grate it in, and then use your hands to mix it in until coarse crumbs form.
This is a good recipe. I did add ham cut up small. I will make these again.
I baked a double batch of these last week. I wrapped them individually and froze them. I have been reheating them in the toaster oven for 11 minutes at 370 convection and they come out perfect!
Not good honestly, way too bland and i normally like sallys recipes
Best biscuits I’ve ever made! Still tastes great cold the next day!
I happened upon a bag of organic zucchini in the clearance for 99 cents. I made a double batch and I am sure glad that I did. I added a teaspoon of crushed red Chile and that is the only variation from the recipe I made. Absolutely delicious. Thank you for another well thought out recipe.
I made this tonight! So delicious! I’m going to spread balckberry jam on one in the morning with my coffee!
I forgot to leave a star rating! I thought they could have slightly more flavor.
Super easy and delicious biscuits! A great way to use all of that extra zucchini we have around!
I initially thought this was a big weird, to put zucchini in biscuits. However, they turned out super good. They were easy to make a very flavorful.
My family loved these biscuits and they were easy to make, even with DIY buttermilk. I used basil and thyme and that flavor combo worked well.
These were delicious! Excited to make them again.
Fantastic recipe and SO simple! My daughter is not adventurous at all and at not one but FIVE while I wasn’t paying attention! So glad I doubled the recipe! Definitely a keeper.
I like these a lot. The recipe is very well written and easy to follow and the biscuits are delicious. If I’m having a biscuit, I’d prefer a standard buttermilk biscuit, but I will definitely keep this recipe to use again in the future. It’s nice to have some variation on where to use all of my fresh zucchini and basil!
How are her recipes so consistent?? Served this with some dishes featuring veggies straight from our farmer’s market. It complimented them perfectly. Tender. Delicious. Just perfect
So glad to hear this, Debbie!
These were a big hit!
Wonderful!! These came together so quickly!! They are perfect with Sally’s Chicken Noodle soup. Will make again for sure!
These were SO delicious! I used my food processor to bring the dough together. Will 100% make again.
These were a hit with the family! Easy to make (used food processor) and tasty. They did brown quickly in my oven so next time I’d watch closer and shorten the bake time.
These turned out great! Instructions were spot-on as always.
Wow!! These were phenomenal! My family all really enjoyed these and they were relatively easy to make!! Thanks Sally for another great recipe
These were fast and easy to make and so yummy! Will be pairing with Sally’s chicken noodle soup and making breakfast sandwiches with them.
I’m usually scared of making biscuits, but this recipe was super easy to follow! Next time, I’d love to try it with cheddar and chives instead of parmesan and basil/parsley. One note is my biscuits were bordering on too brown right at 19 minutes, so I recommend keeping a very close eyes on them!
Devoured immediately
Fabulous recipe! Next time I think I’ll increase the garlic powder a bit, and include the flaked sea salt on top.
Easy to follow, delicious, and fluffy!
I loved the texture. These are big biscuits. I’ll add a little extra salt next time. No other changes. Great recipe! Thanks
Follow-up! These just came out of the oven, and oh my, they are yummy! Biscuits usually aren’t my thing, because I find them dry and bland. Not these! These are tender, and full of flavor! I’ve already enjoyed two!