

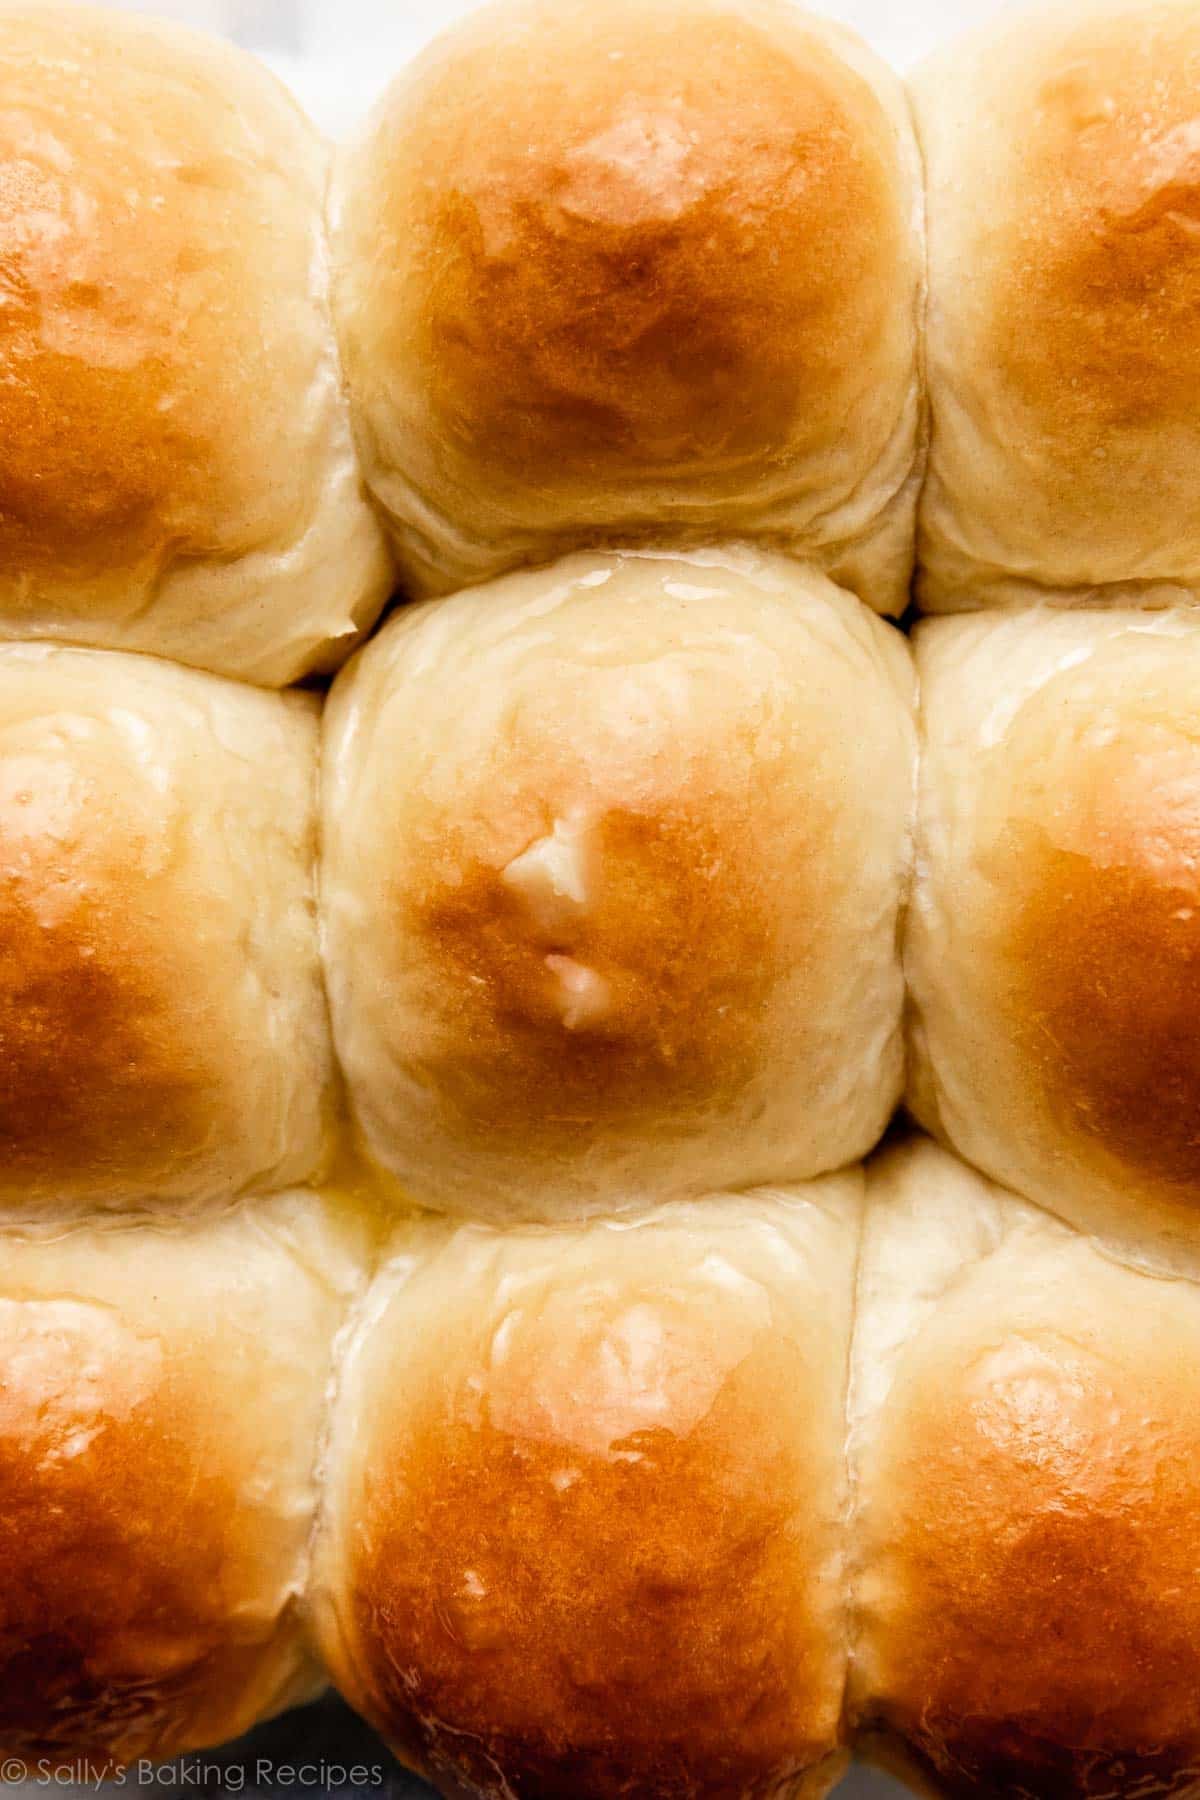
You only need 7 ingredients to make these yeasted honey butter rolls. Fluffy, flaky, soft, and buttery, with a dose of honeyed sweetness, these fresh rolls are in another league than anything store-bought. If you’re a bread beginner, reference my Baking with Yeast Guide for answers to common yeast FAQs.
This recipe is brought to you in partnership with Red Star Yeast.
I originally published this recipe in 2015 and have since added new photos and more helpful success tips. I also made a few small changes to the recipe which are reflected in the printable recipe below.
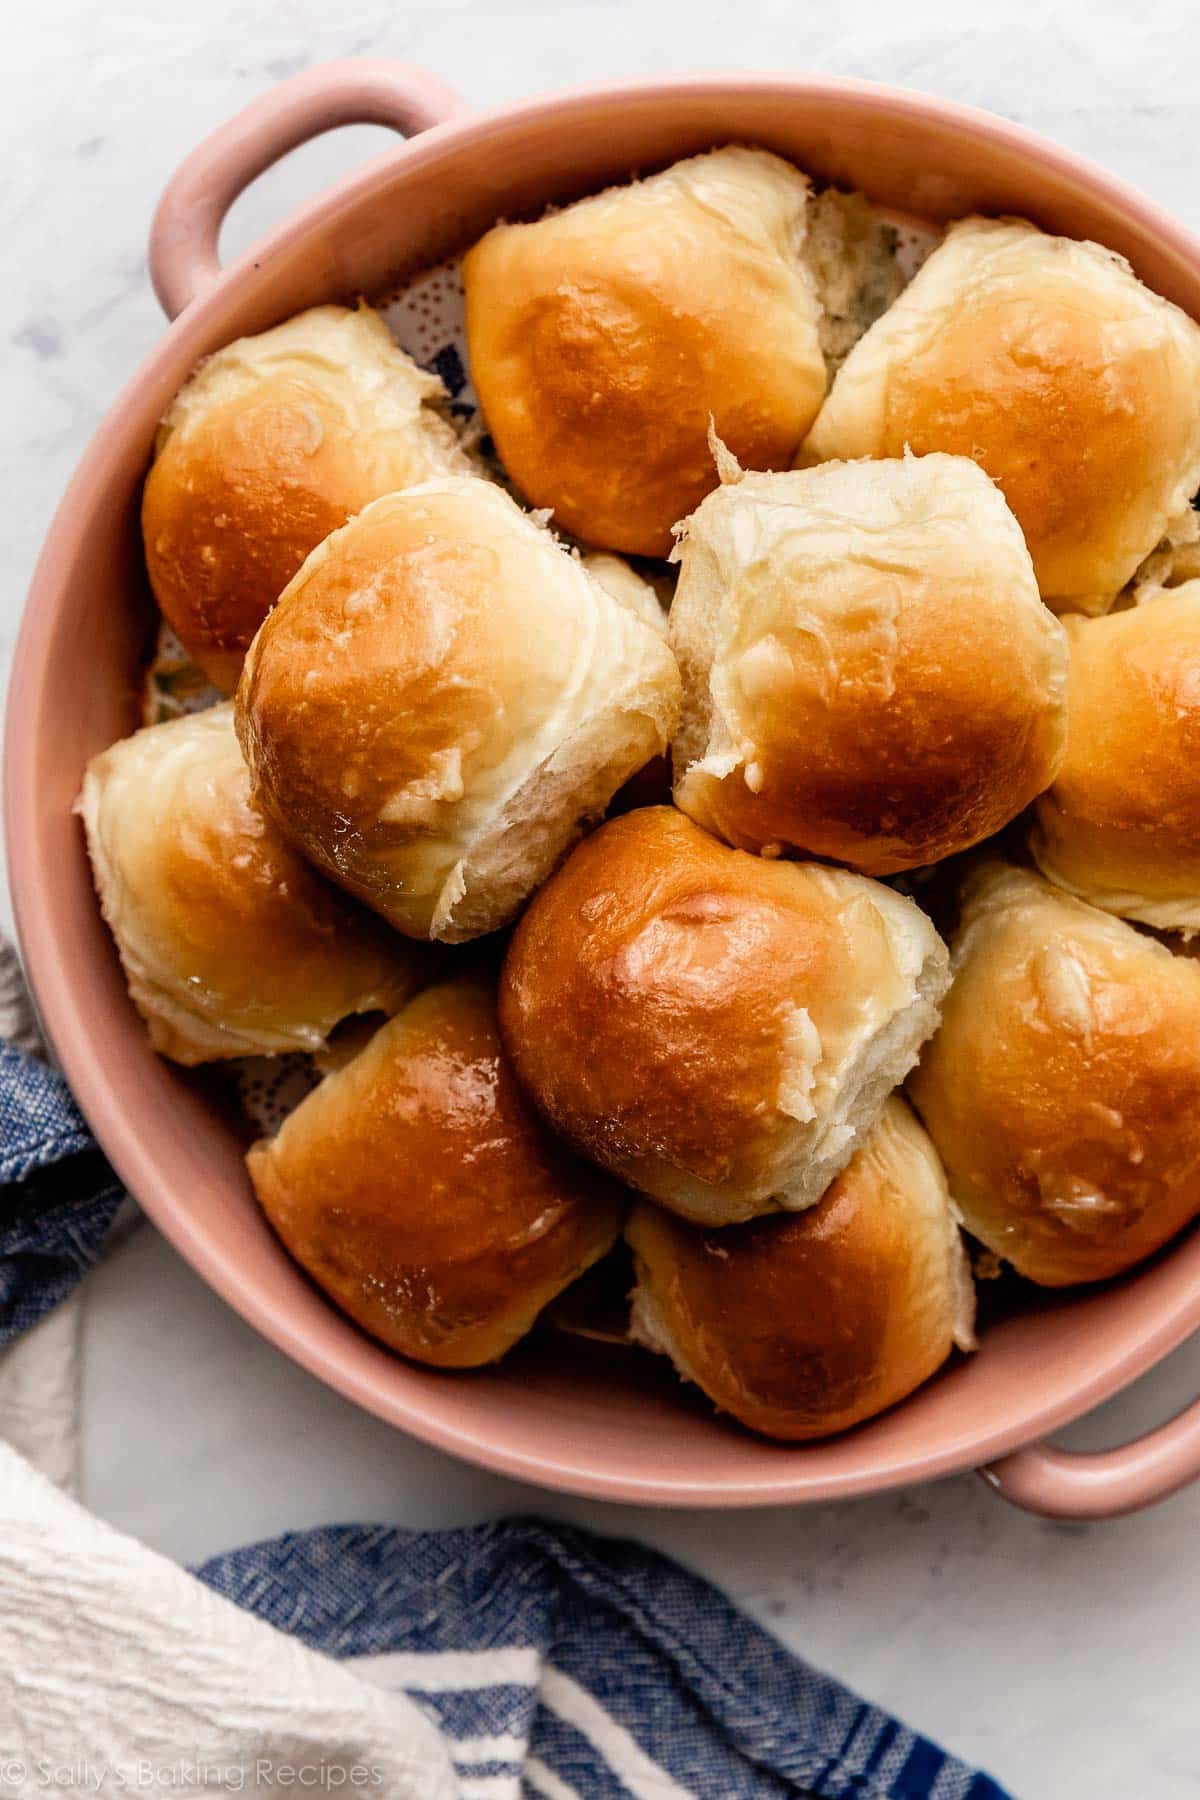
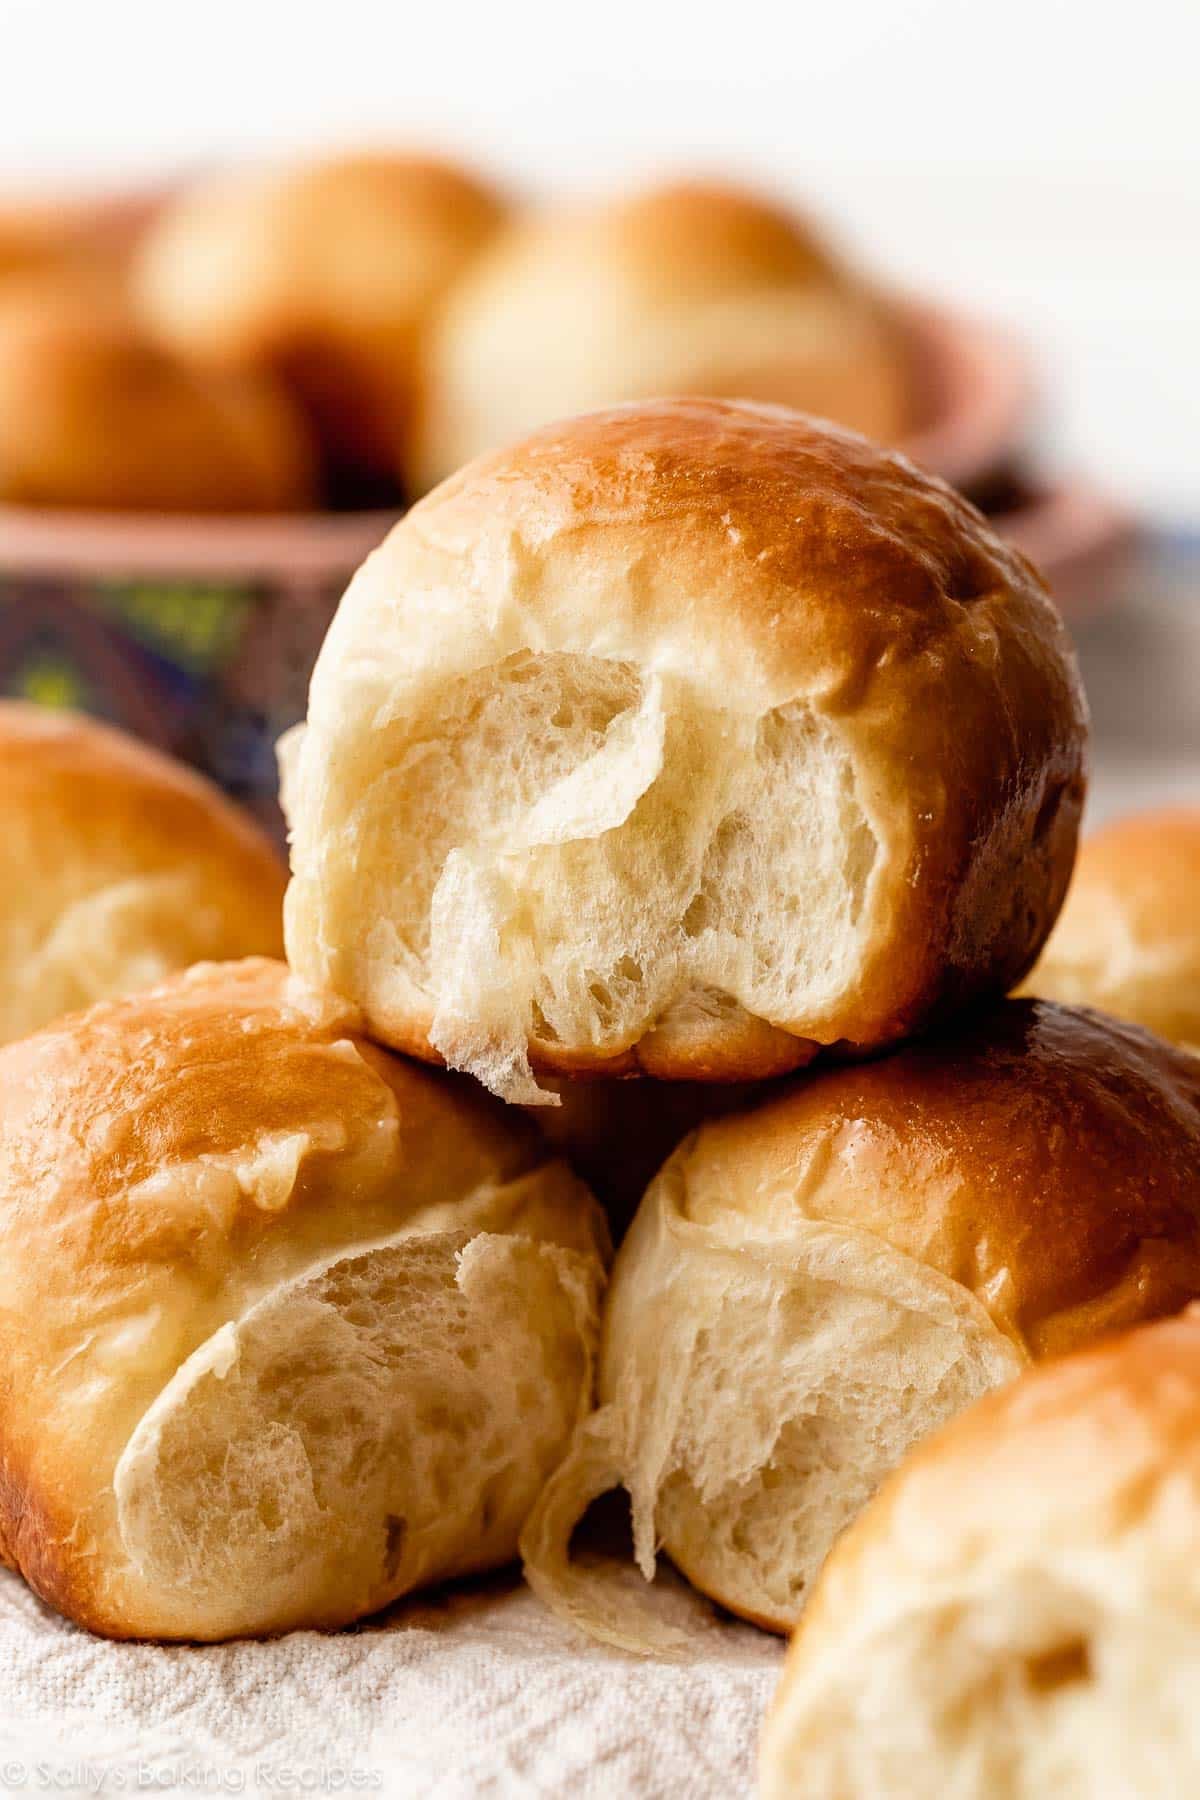
These soft, flaky, golden honey butter rolls might just be my very favorite rolls to make. I mean, I love my classic dinner rolls, but with the addition of honey, both in the rolls and on top? These rolls are the bee’s knees!
One reader, Mia, commented: “What an amazing recipe! I haven’t even made bread much before. Yet this turned out so successfully. Will definitely be making it on the regular…★★★★★“
I’ve made a few small changes to this recipe over the years. The recipe used to include granulated sugar, for proofing the yeast, but you can actually just use a teaspoon of honey for this! (Convenient, since you’re already using honey in the dough.) I’ve also extended the kneading time to 8–10 minutes, so they’re extra soft. If you’ve made these garlicky homemade breadsticks before, the kneading instructions are exactly the same.
This is an old-fashioned, made-with-love dinner roll recipe, with honey butter going in and on the rolls.
Ingredients You Need for This Rich Dough
Unfortunately, this dough doesn’t come with a winning lottery ticket (though we could call the honey liquid gold!). Rather, “rich” correlates with the amount of fat in the dough. Here’s the difference:
- Rich dough: The softer the bread, the more fat in the dough. For example, this dough includes whole milk, butter, and egg. Recipes like my easy cinnamon rolls, raspberry sweet rolls, pizza pull-apart rolls, sweet potato dinner rolls, and brown butter sage dinner rolls all start with a rich dough.
- Lean dough: The crustier and chewier the bread, the less fat in the dough. Recipes like chewy homemade bagels and soft pretzels, pizza dough, focaccia, and artisan bread all use a lean dough.
You need 7 ingredients total:
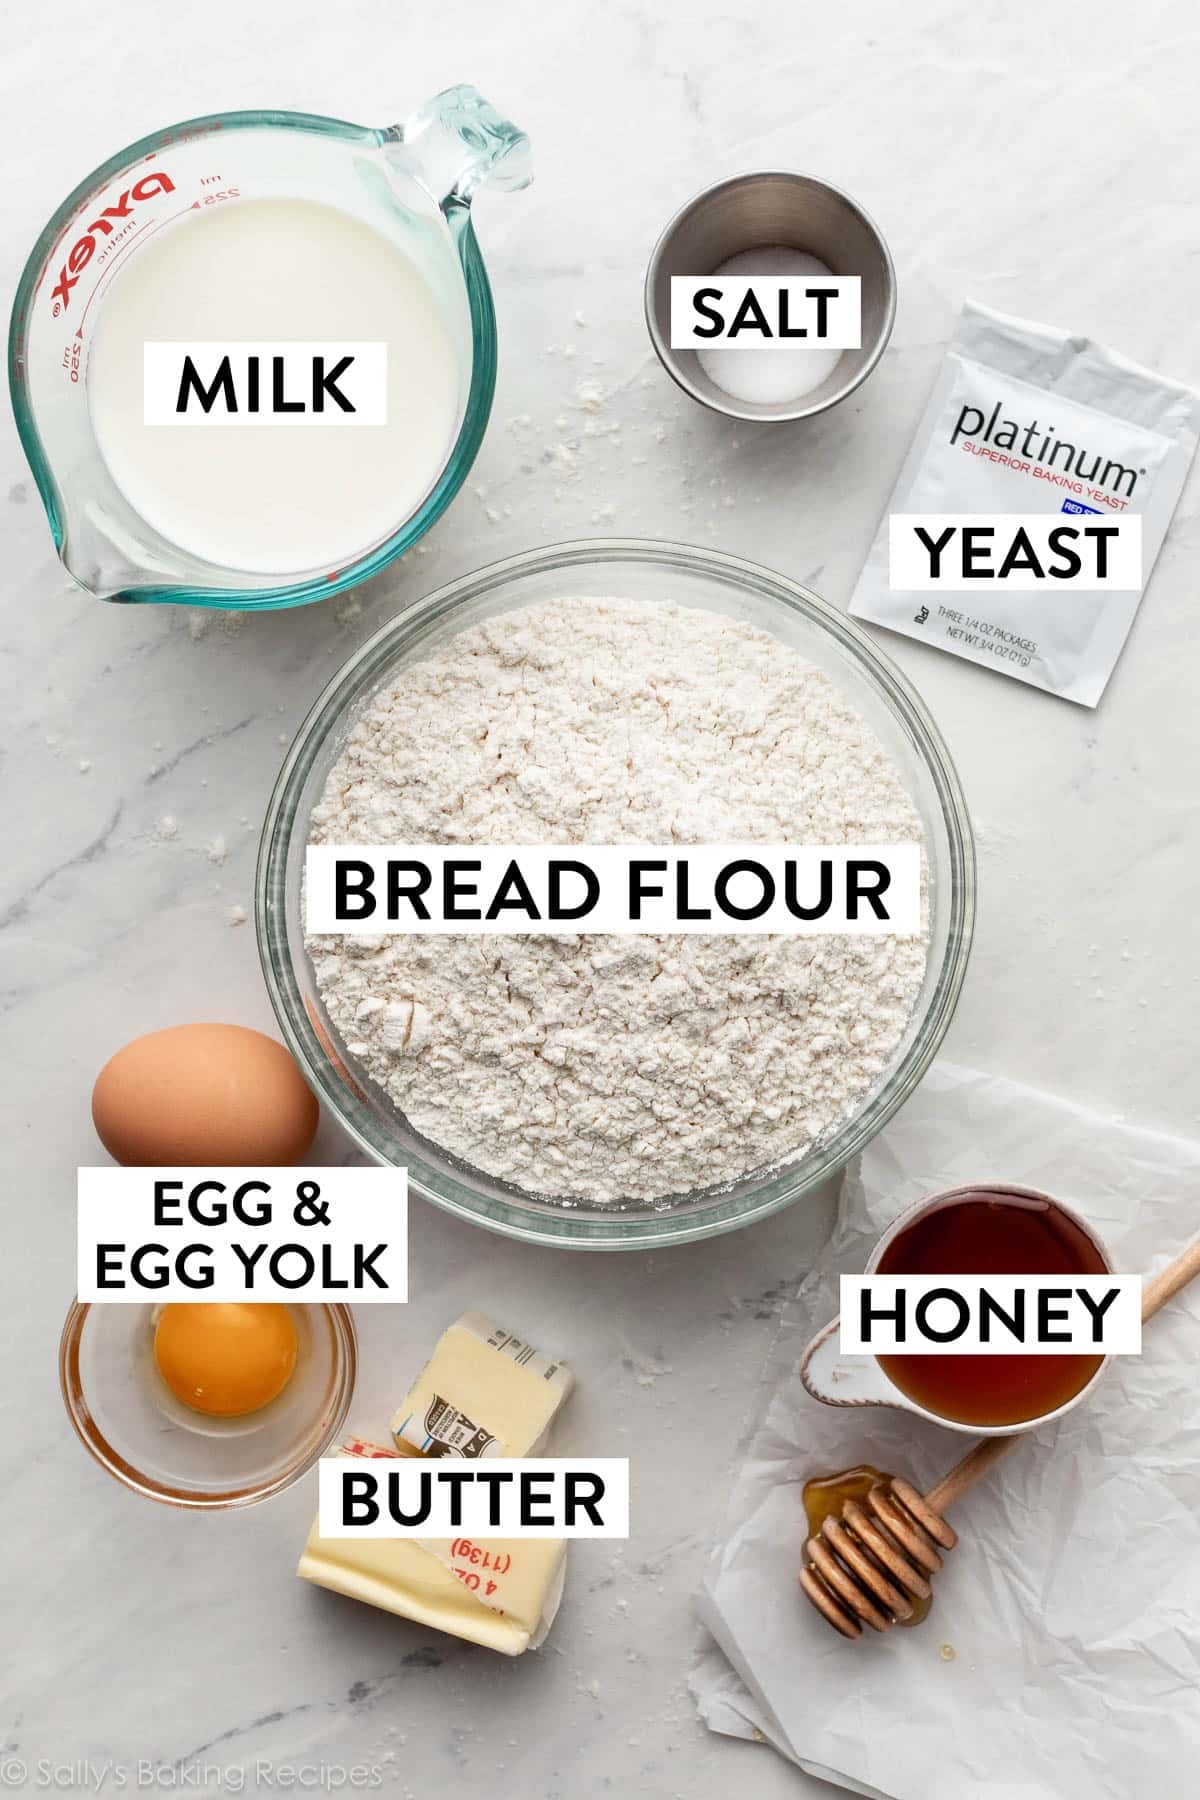
- Milk: Liquid activates the yeast. For the best rolls, use whole milk. Nondairy or low-fat milks work too, but whole milk produces phenomenal flavor and texture.
- Yeast: You can use active dry yeast or instant yeast. If using active dry yeast, the rise times will be a little longer. I recommend Platinum Yeast from Red Star, which is an instant yeast blended with natural dough improvers.
- Honey: The honey feeds the yeast, increases its activity, and tenderizes the dough. Plus it provides that distinctive sweetness these rolls are made for!
- Egg: 1 egg provides structure and flavor, and that extra egg yolk adds richness and makes the rolls supremely soft. Don’t skip it.
- Butter: Butter in the dough promises a flavorful, soft honey butter roll. And is there anything better than slathering honey butter on top of the warm rolls?
- Salt: You can’t make flavorful bread without salt!
- Flour: You can use all-purpose flour or bread flour in this recipe. All-purpose flour is convenient for most, but bread flour produces chewier rolls. There are no other changes to the recipe if you use bread flour. I use bread flour in my honey butter rolls because it contains more gluten than all-purpose. Extra gluten helps make finished rolls extra chewy and, um, more bread-like. Technical terms here.
Making rolls from scratch may sound intimidating and time-consuming, but most of that time is hands-off. If you’re new to baking bread, reference my Baking with Yeast Guide.
One reader, Erin, commented: “This is my go-to recipe for dinner rolls. They are delicious! I make them all the time for family gatherings and they are always a hit. Before I came across Sally’s blog, I never had the confidence to try and make bread of any kind. Because of her detailed instructions and photos, I am now fully confident in my ability to make not only rolls, but tons of other recipes as well. ★★★★★“
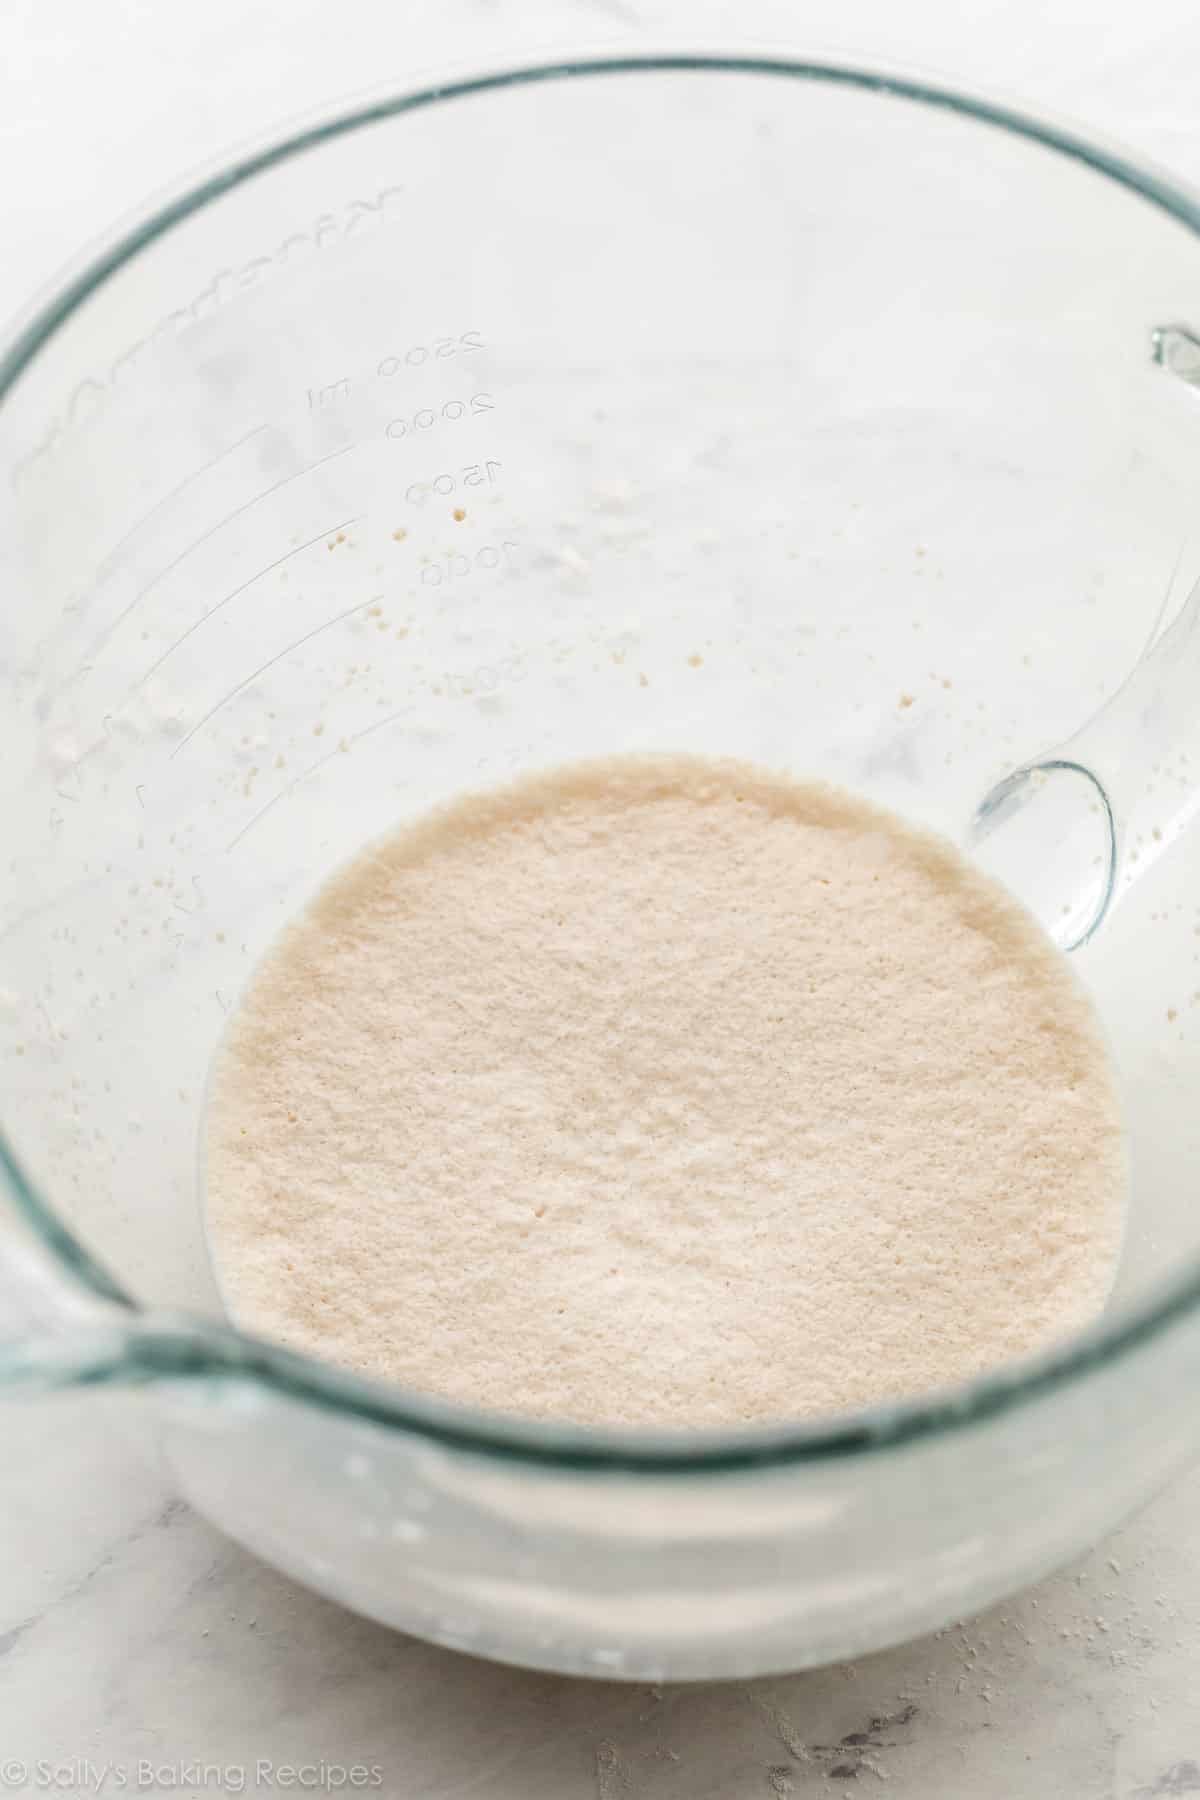
The 1st step is to proof your yeast, a step I take even if I’m using instant yeast. All you do is mix the yeast with the warm liquid (milk), and a little sugar (honey). Cover and let it sit for 5–10 minutes until foamy and frothy on top. This proves your yeast is active and ready to get to work:
Now you’ll add the rest of the dough ingredients. The process is really easy, and kneading is an important step.
Honey Butter Rolls: Kneading the Dough Is Key
Kneading dough is a common step in bread baking, and this particular dough definitely benefits from a long kneading step (about 8–10 minutes) to help ensure the honey butter rolls stay soft. You can knead dough with your hands or in a stand mixer. A stand mixer obviously makes the job hands-off, but if you don’t have one, kneading is a great stress reliever. 😉
The dough should feel slightly tacky, but not overly sticky. On a lightly floured work surface, using the heels of your hands, stretch and fold the dough with gentle motion. If you’d like a visual of how to knead the dough by hand, you can watch the full video tutorial in my post on how to knead dough.
Kneading the dough serves a couple purposes. First, it incorporates air into the dough, which helps keep the rolls nice and soft. It also encourages the proteins in the flour and moisture in the dough to link together, forming a strong gluten network, which is essential for retaining the gas produced by the yeast. Gluten is what makes bread deliciously chewy.
You know your kneaded dough is ready to rise when it stretches without immediately tearing. After kneading, the dough will be soft and supple, and a windowpane test is always helpful. You can poke the dough with your finger, too. If it slowly bounces back, it’s ready to rise.
After kneading, tear off a small (roughly golfball-size) piece of dough and gently stretch it out until it’s thin enough for light to pass through it. Hold it up to a window or light. Does light pass through the stretched dough without the dough tearing first? If so, your dough has been kneaded long enough and is ready to rise. If not, keep kneading.
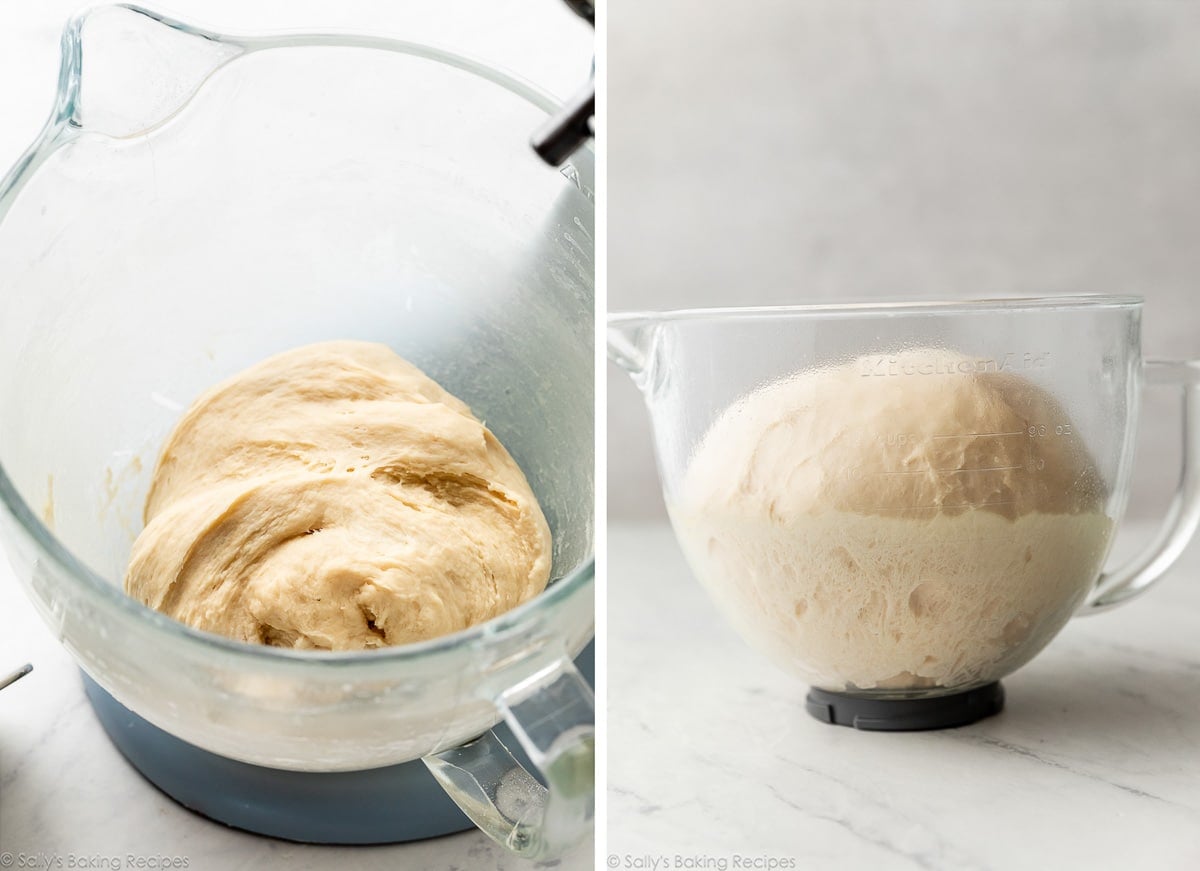
Pictured on the left below is the dough after kneading. It’s smooth and stretchy, and ready to rise. Place the dough in a large greased bowl, turn the dough to coat it in the oil, and then cover it and set it aside. It will double in size in about 1–2 hours, pictured on the right.
Shaping the Rolls
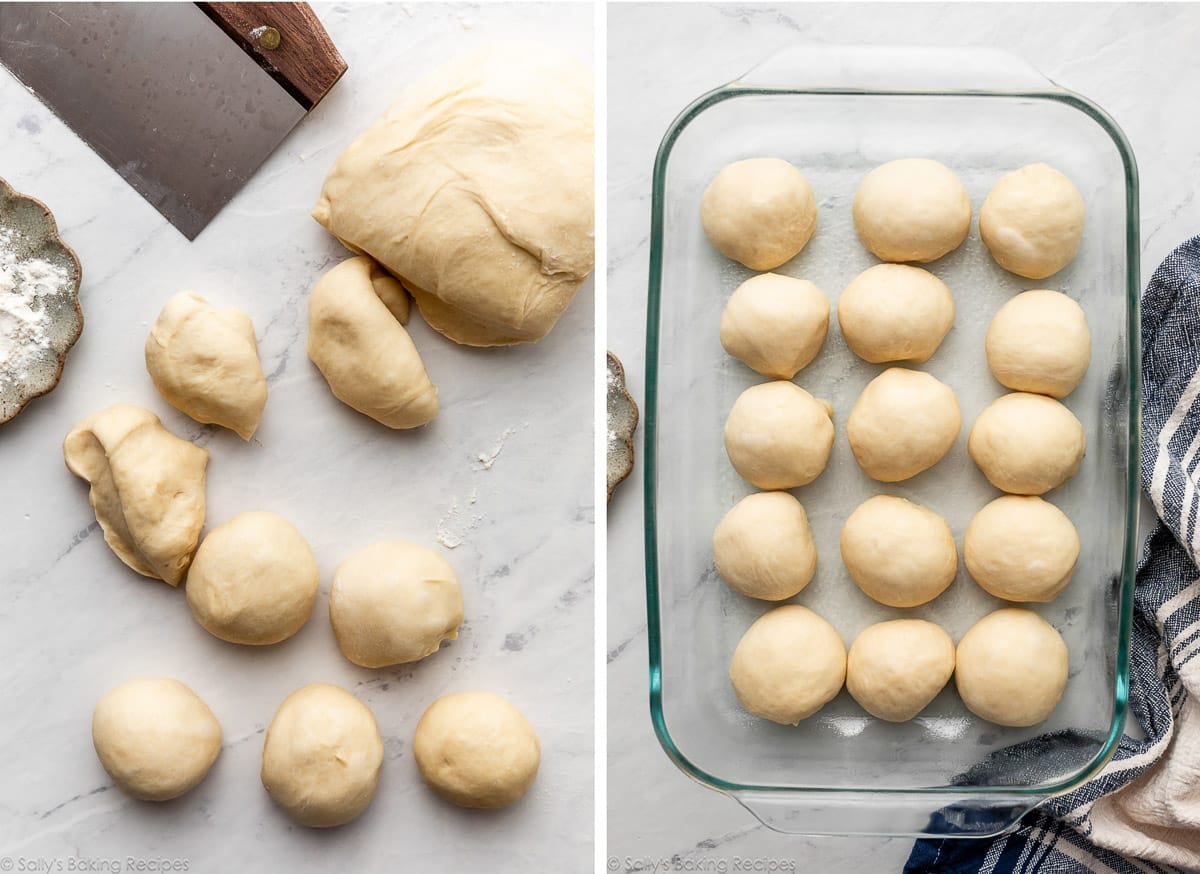
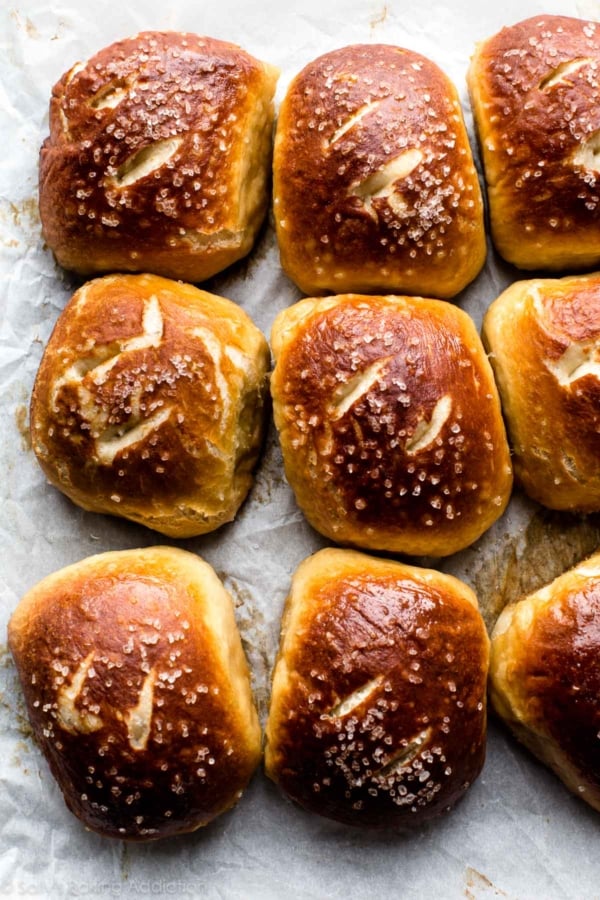
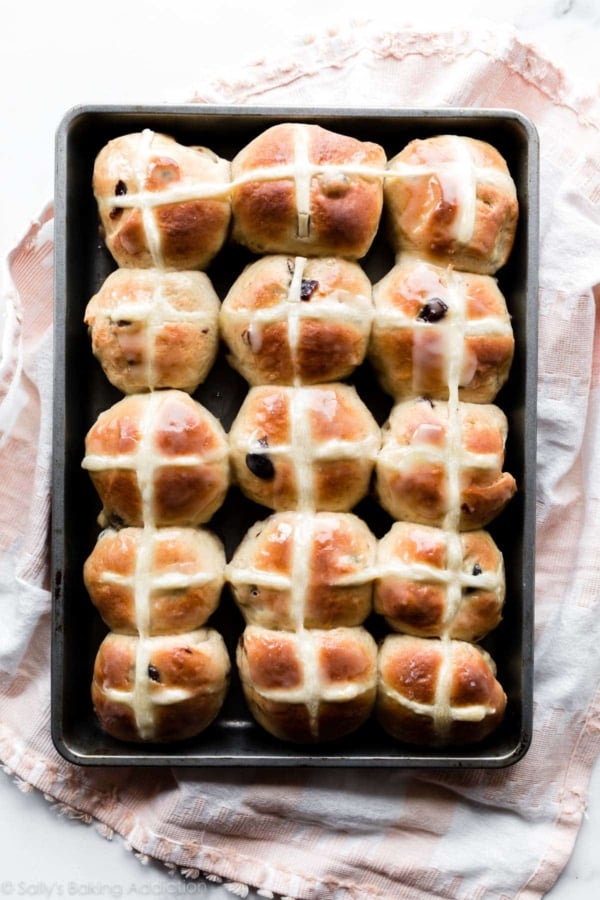
Punch down the risen dough to release the air, and then divide the dough into 15 pieces, roughly equal in size (about 2 ounces/60g each, but they don’t have to be exact!). Take a piece and stretch the top of the dough while pinching and sealing the bottom. Make sure the rolls are smooth on top and sealed on the bottom. I shape hot cross buns the same exact way.
Arrange them in a greased baking pan, loosely cover, and let the shaped rolls rise for another hour before baking.
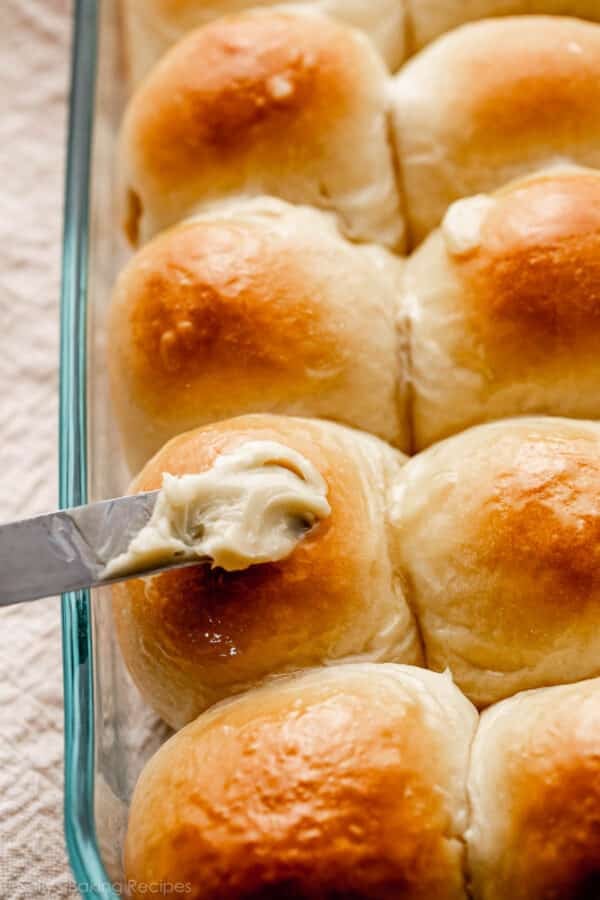
I didn’t snap a picture of the rolls after rising, but they puff up quite a bit. Then, bake until golden brown.
Honey Butter Topping
Spreading on a sweet and creamy honey butter is the perfect finishing touch to the warm honey butter rolls. You need 2 ingredients for the honey butter topping. Can you guess what they are? LOL.
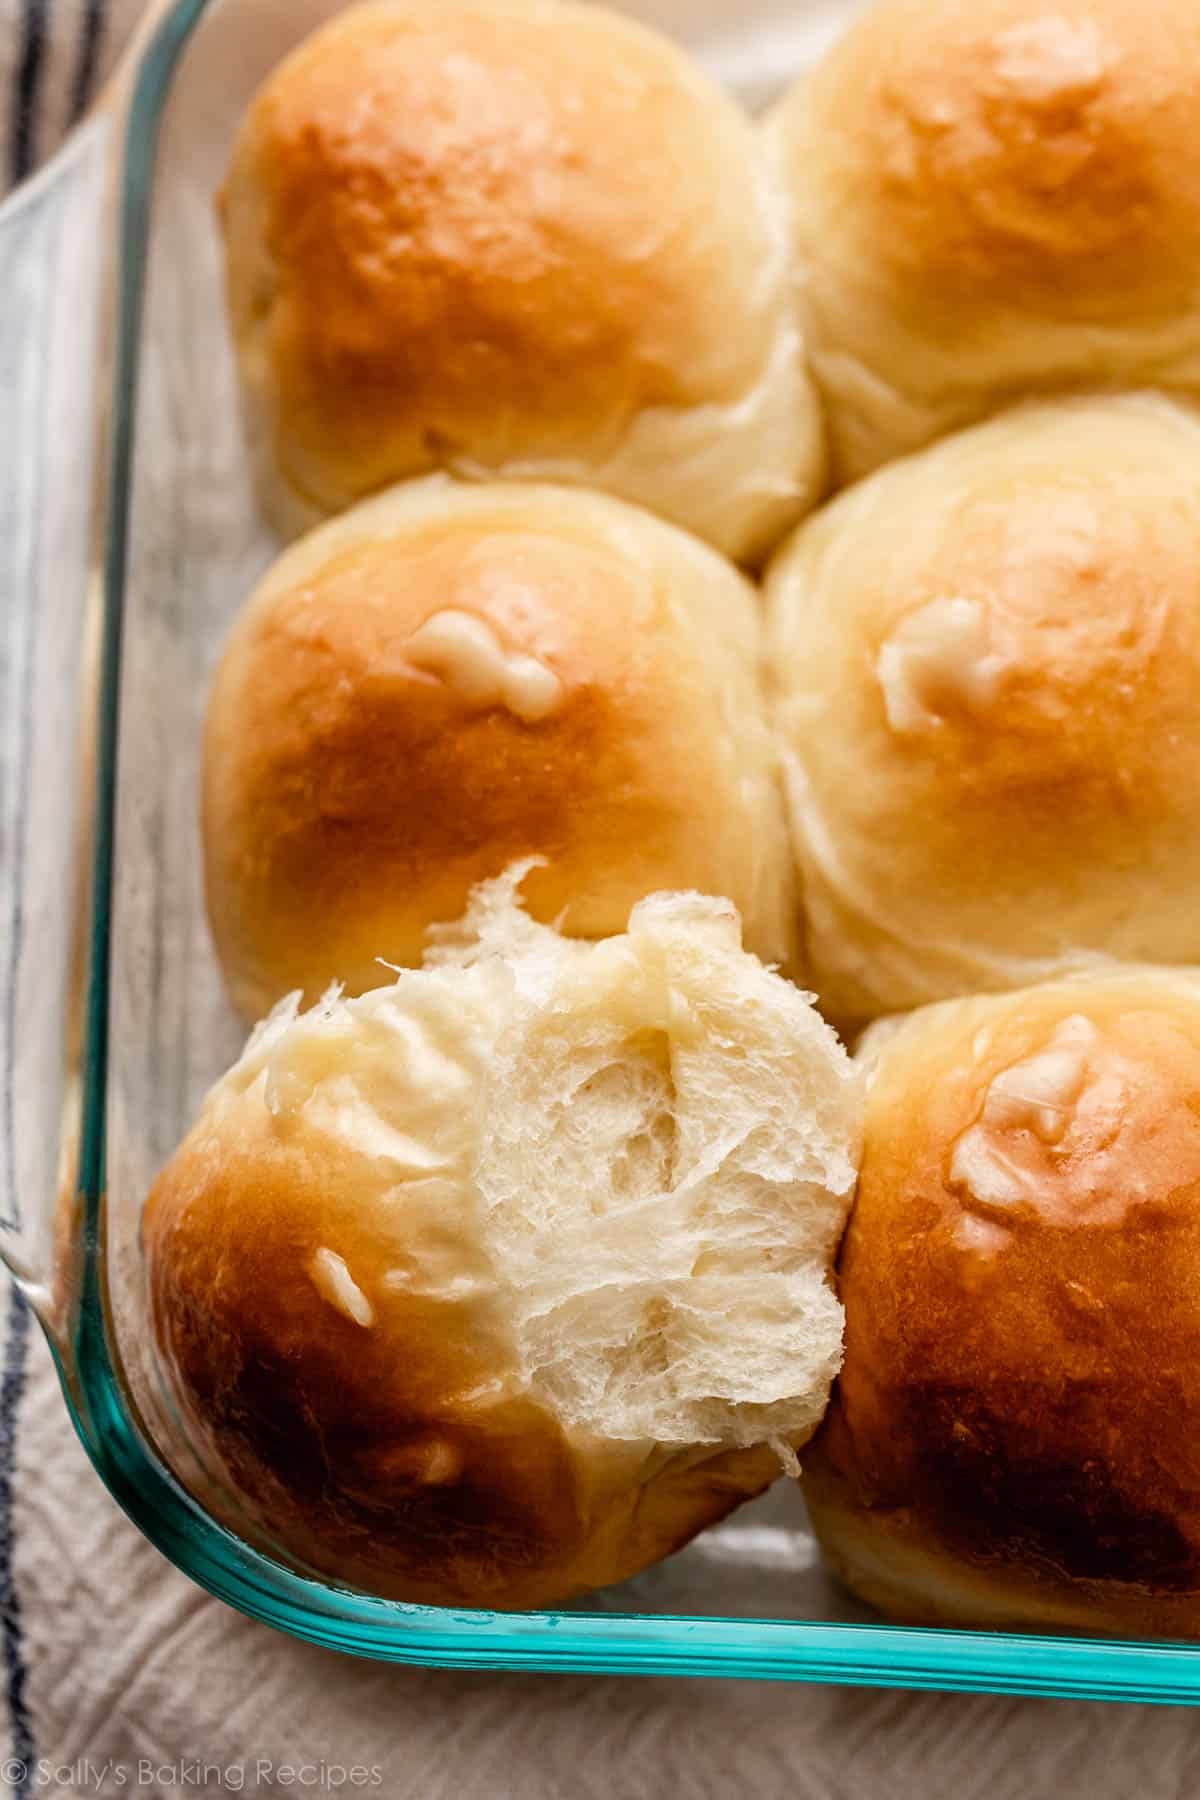
Make sure your butter is super soft, so you can easily mix it with the honey. I just use a fork to do this, but you could use an electric mixer if you’d prefer. As soon as they’re out of the oven, spread the honey butter on top of the warm rolls. (Just use a knife, or an icing spatula also works great for this.)
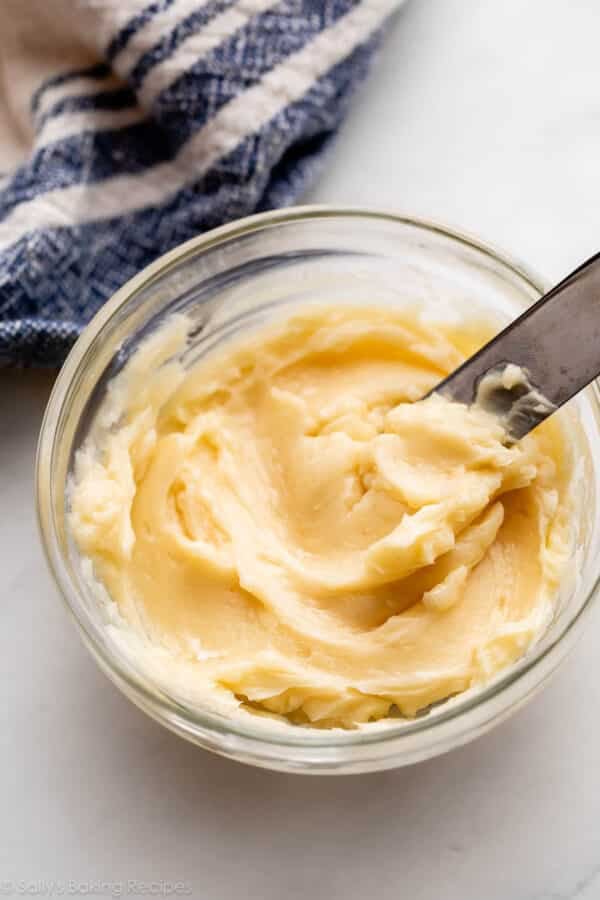
You’ll have extra honey butter to serve alongside the rolls.
How Are These Different?
My popular soft dinner rolls are flaky, soft, and buttery. And so are today’s honeyed version. But today’s recipe produces slightly sweeter and richer-tasting rolls, sort of like those “Hawaiian rolls” you can purchase at the store. They’re a real treat!
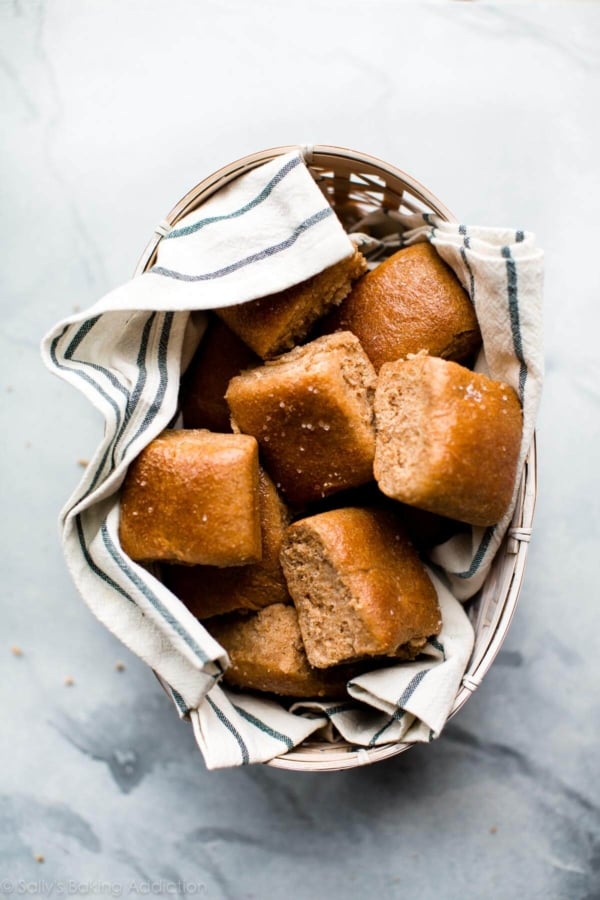
Whole wheat version: Try my honey whole wheat dinner rolls.
The make-ahead/overnight option detailed in the Notes below is especially helpful if you want fresh-baked honey butter rolls for a big holiday meal, such as Easter brunch or Thanksgiving dinner. Or, you know, Tuesday. 😉
Print
Honey Butter Rolls
- Prep Time: 3 hours, 25 minutes
- Cook Time: 22 minutes
- Total Time: 3 hours, 45 minutes
- Yield: 15 rolls
- Category: Bread
- Method: Baking
- Cuisine: American
Description
You need just 7 ingredients to make these extra soft and flaky honey butter rolls. See recipe Notes for freezing and overnight instructions. You can also reference my Baking with Yeast Guide for answers to common yeast FAQs.
Ingredients
- 1 cup (240ml) whole milk, warmed to about 110°F (43°C)
- 2 and 1/4 teaspoons (7g) Platinum Yeast from Red Star instant yeast or active dry yeast (1 standard packet)
- 1/4 cup (85g) + 1 teaspoon honey, divided
- 1 large egg + 1 egg yolk
- 1/4 cup (4 Tbsp; 56g) unsalted butter, melted and slightly cooled
- 3 and 1/2 cups (455g) bread flour (spooned & leveled)
- 1 teaspoon salt
Topping
- 1/4 cup (4 Tbsp; 56g) unsalted butter, very soft
- 2 Tablespoons (42g) honey
Instructions
- Prepare the dough: Whisk the warm milk, yeast, and 1 teaspoon honey together in the bowl of your stand mixer. Loosely cover and allow to sit for 5–10 minutes until foamy and frothy on top. *If you do not own a stand mixer, you can do this in a large mixing bowl and in the next step, mix the dough together with a large wooden spoon/silicone spatula. It will take a bit of arm muscle. A hand mixer works, but the sticky dough repeatedly gets stuck in the beaters. Mixing by hand with a wooden spoon or silicone spatula is a better choice.*
- With the stand mixer running on low speed with the dough hook attachment, add the remaining honey, egg, egg yolk, melted butter, 3 cups (about 390g) of flour, and salt. Mix on low speed for 1 minute, then add remaining 1/2 cup of flour. Mix on low speed for 1 minute as it all combines. The dough should be thick, yet soft, and just slightly sticky. It should pull away from the sides of the bowl as it mixes. When it does, it is ready to knead. If, however, the dough is too sticky to handle, mix in more flour, 1 Tablespoon at a time. Make sure you do not add too much extra flour; you want a soft, slightly sticky dough.
- Knead the dough: Keep the dough in the mixer and beat for an additional 8-10 full minutes, or knead by hand on a lightly floured surface for 8-10 full minutes. (If you’re new to bread-baking, my How to Knead Dough video tutorial can help here.) If the dough becomes too sticky during the kneading process, sprinkle 1 teaspoon of flour at a time on the dough or on the work surface/in the bowl to make a soft, slightly tacky dough. Do not add more flour than you need because you do not want a dry dough. After kneading, the dough should still feel a little soft. Poke it with your finger—if it slowly bounces back, your dough is ready to rise. You can also do a “windowpane test” to see if your dough has been kneaded long enough: tear off a small (roughly golfball-size) piece of dough and gently stretch it out until it’s thin enough for light to pass through it. Hold it up to a window or light. Does light pass through the stretched dough without the dough tearing first? If so, your dough has been kneaded long enough and is ready to rise. If not, keep kneading until it passes the windowpane test.
- 1st rise: Lightly grease a large bowl with oil or nonstick spray. Place the dough in the bowl, turning it to coat all sides in the oil. Cover the bowl with aluminum foil, plastic wrap, or a clean kitchen towel. Allow the dough to rise in a relatively warm environment for 1–2 hours or until double in size. (For a tiny reduction in rise time, see my answer to Where Should Dough Rise? in my Baking With Yeast Guide.)
- Grease a 9×13-inch baking pan or two 9-inch square or round baking pans. You can also bake the rolls in a cast iron skillet or on a lined baking sheet.*
- Shape the rolls: When the dough is ready, punch it down to release the air. Divide the dough into 15 pieces, roughly 2 ounces or 60g each. (Just eyeball it—doesn’t have to be perfect!) A bench scraper is always helpful for cutting dough. Shape each piece into a smooth ball. Arrange in prepared baking pan.
- 2nd rise: Loosely cover with plastic wrap and allow to rise until doubled in size and puffy, about 1 hour.
- Preheat oven to 350°F (177°C). Bake the rolls for 20–25 minutes or until golden brown on top, rotating the pan halfway through. If you notice the tops browning too quickly, loosely tent the pan with aluminum foil.
- Make the honey butter topping: While the rolls bake, mix the topping ingredients together to make a creamy honey butter. Remove the rolls from the oven when they are done and spread a generous amount of honey butter onto each warm roll. Serve with any remaining honey butter.
- Cover leftovers and keep in the refrigerator for up to 1 week or freeze for up to 3 months, then thaw overnight in the refrigerator. Warm up in a 300°F (149°C) oven for 10 minutes.
Notes
- Freezing Dough Instructions: Prepare recipe through step 6. Place shaped rolls in a greased baking pan, cover tightly, and freeze for up to 3 months. Once frozen, the dough balls won’t stick together anymore and you can place them in a freezer bag if needed. On the day you serve them, arrange the dough balls in a greased baking pan, cover tightly, then let them thaw and rise for about 4–5 hours. Bake as directed. You can also freeze the baked dinner rolls. Allow them to cool completely, then freeze for up to 3 months. Thaw in the refrigerator or at room temperature, then reheat as desired. If reheating the whole pan, lightly cover and reheat in a 300°F (149°C) oven for about 10 minutes or until warm.
- Overnight Dough Instructions: Prepare the recipe through step 6. Cover the shaped rolls tightly and refrigerate for up to about 15 hours. At least 3 hours before you need them the next day, remove the rolls from the refrigerator, keep covered, and allow to rise on the counter for about 1–2 hours before baking. Alternatively, you can let the dough have its 1st rise in the refrigerator overnight. Cover the dough tightly and place in the refrigerator for up to about 15 hours. Remove from the refrigerator and allow the dough to fully rise for 2 more hours. Continue with step 5.
- Special Tools (affiliate links): Stand Mixer (or Glass Mixing Bowl with Silicone Spatula / Wooden Spoon) | 9×13-inch Glass Baking Pan, 2 9-inch Round Baking Pans, 2 9-inch Square Baking Pans, Cast Iron Skillet, or Baking Sheet | Bench Scraper
- Baking Pan: I prefer baking the rolls in a glass 9×13-inch baking pan because I find they brown a little too quickly in a metal pan. But as long as you bake the rolls on a lower oven rack and keep your eye on them, any pan is great. You can also bake these rolls in a large cast iron skillet, in two 9-inch round or square baking pans, or on a lined baking sheet. Bake time remains the same.
- Milk: Whole milk or even buttermilk are ideal for the best, richest flavor and texture. Keeping that in mind, feel free to substitute with a lower-fat or nondairy milk.
- Yeast: Platinum Yeast from Red Star is an instant yeast. You can use Red Star Yeast active dry yeast instead. Rise times will be slightly longer using active dry yeast. Reference my Baking with Yeast Guide for answers to common yeast FAQs.
- Flour: For extra chewy rolls, I like to use bread flour. You can use all-purpose flour or bread flour. All-purpose flour is convenient for most, but bread flour produces a chewier texture. The rolls are still soft and fluffy no matter which you use. Either flour is fine and there are no other changes to the recipe if you use one or the other.
- Can I Use Whole Wheat Flour? I don’t recommend it for this recipe, but you can replace up to 1 cup (about 120–130g) of flour with whole wheat flour. Expect a denser roll. Or try my honey whole wheat dinner rolls recipe instead.


Reader Comments and Reviews
Such a wonderful recipe. Friend’s & family love the roll. It’s a keeper
This recipe is amazing!!! This is only the 3rd recipe I’ve baked with yeast & they turned out beautifully the first time. Your thorough descriptions make your recipes so easy to follow.
When I make these next time, I think I’ll make the rolls half the size to make 24 rolls. Would you recommend any adjustments in the time or temperature baked?
We’re unsure of bake time for smaller rolls – it will be similar, but slightly shorter. Keep an eye on them!
Can I make the recipe and have rolls ready to bake. But refrigerate overnight and bake the next day right before serving ?
See recipe Notes for overnight instructions!
Quick note to say that these rolls turned out perfectly…..like all Sally’s recipes that I’ve tried. Thanks for posting!
Forgot rating!
Enjoyed this recipe as is but I’m wondering if I can reduce the milk by half and add pineapple juice?
Hi Yoli, we’re so glad to hear it! We haven’t tested it, but you can certainly give it a try. The rolls may not be as soft and tender without all the milk, but let us know if you do give it a try.
(forgot to add rating) 🙂
I loved these! I took away 50 grams of flour & 50 grams of milk and added 100 grams of sourdough starter discard. I also added 20 grams more honey. These will be a new staple in my house, thanks for this great recipe!!
I live in southern Mississippi so we have a good deal of above average humidity. I know not to bake on those days. My dilemma is my kitchen never seems warm enough for anything to rise. Any suggestions??
Hi Kat, have you tried our warm oven trick? You can read all about it in our Baking with Yeast Guide. If your kitchen runs cool, that should help create an optimal environment for rising. Hope this helps!
These honey butter rolls are the best! Best rolls ever! You do a great job with recipes. I plan on baking more of your recipes.
Do you think putting all the ingredients in a bread machine on the dough cycle would work?
Hi Sissy! We haven’t tested this dough in a bread machine, but let us know if you do.
Yes it does. I just did it two days ago and they were fantastic!
This recipe is perfection!!! I followed all the instructions and notes to do the overnight rolls. They came out light golden brown after 25 minutes. Everyone raved about them! They were soooooo soft. The extra honey butter was also amazing served with the rolls. I think everyone ate 3! I doubled the recipe into two 9×13 pans.
Great recipe!
We combined the whole recipe into one big rectangular half sheet pizza crust and cooked it on 375 for 30 minutes. Delicious and soft!
This was my first time making enriched dough, so I was a little intimidated. Your directions are perfectly detailed and they came out amazing. I will be making these often!
Can I bake these in a Dutch oven?
Hi Mallory, we haven’t tested it, but that *could* work well in place of the 2, 9-inch round pans. You may need to bake in batches (depending on the size of your Dutch oven), and we’d bake without the cover on. Let us know how it goes for you!
My sister and I have made these rolls many times and they are always delicious – however, both of us thought they were a bit bland. When I made them this time I increased the salt to 1 3/4 tsp and they were perfect! Not bland and we could taste the slight sweetness from the honey even better.
1 love these rolls and so does my family, it has become a staple now, I bring these rolls to any and all events. Per my families request. The one thing I do different is add an extra 15ml of honey. But this recipe is 10 out of 10. I can almost make these blind folded because I’ve made so much this year.
I wish you had a hard cover cookbook of just bread recipe’s. When I want to make a new bread I come here first and look to see what you’ve got, but I find it’s easier to make one from a book instead of online.
OMG! These are a winner! I quadrupled the recipe for our family holiday extravaganza.
These rolls were so easy to make and turned out perfect! Soft, slightly sweet, and so delicious. I don’t know why I didn’t make them earlier, but I will definitely make them again.
Everyone is requesting these rolls! Since they bake beautifully in glass pans, could I put the uncooked rolls in a disposable pan, and set that in glass pan of comparable size. I am concerned about baking in only disposables. Thank you so much.
Hi Dianna! We haven’t tested that particular method, but let us know if you do!
Do you think evaporated milk could be substituted for whole milk?
We recommend sticking with whole milk, Emma!
I have been a bread baker since I was 14 yrs old and learned in Home Economics. I’ve used many recipes through the years but this recipe is my favorite of all time! They turn out perfect every time and my family and friends rave about them. I make them for every Holiday and everyone loves them. They are big, light, airy, buttery, and just a little bit sweet. They are the perfect roll! Five stars!!!!!
I love this recipe! I didnt have milk or buttermilk so i used evaporated milk. The rolls turnd out super good and everbody loved them!
I love this recipe. I was wondering about doubling it? Can I just double all the ingredients. Also can you make this into a loaf of bread
Hi Krystal, for absolutely best taste and texture (and so you don’t waste your time!), we highly recommend making 2 separate batches. This can be made as a loaf, but it may not be pretty because this is such a soft dough. It would fit in a 9×5-inch loaf pan if you decide to try it.
Hi, I have a question about printing. For a while now whenever I want to print a recipe I try to uncheck the image so I don’t have to print that but the image still prints anyway. Any ideas?
Hi Dorci, thank you so much for letting us know! We haven’t seen that happen or had any other reports of it, so aren’t sure what could be causing that for your computer, but we will check on it.
Thank you for checking. Still having the issue, and I have LOTS of recipe I want to print!
Hi Dorci, the tech team is looking into it. Does the image disappear when you uncheck it? Or is it still there? It disappears when we test it, and then it does not print.
It’s fixed! Thank you so much. Right, before the image wasn’t even disappearing. But it’s working now. Thank you again.
I made this recipe for Thanksgiving and it was a huge hit!! Everyone loved them. They were soft and squishy and slightly sweet. I added some flaky sea salt to the top, heaven! The recipe is detailed and easy to follow, which is a huge plus. Thank you, Sally! I will definitely make these again.
I triple checked measurements and had to add a lot of additional flour( over 1/4 cup). I’m not too new to bread but am still learning; so was curious why this happened. I used a stand mixer and followed instructions. I did run out of bread flour so about half was APF.
Hi Kim! There are a lot of variables that go into the consistency of dough, even down to the weather and humidity in the air. There’s nothing wrong with adding just a little more flour to bring the dough into a less sticky and knead-able consistency.
This is one of my favorites!! I made them for Thanksgiving this year but did a egg/dairy free version and substituted milk for oat milk, butter for coconut oil, and applesauce for the eggs and it was AMAZING
Hey, there! These are ALWAYS a hit, but I am doing the overnight instructions for the first time. Do they need to sit out for 5 hours or about 3 hours total before baking the next day? It says to remove 3 hours before you need them and then to let them rise 1-2 hours. Wasn’t sure if those are consecutive or if it’s only about 3 hours total.
Hi Bekah! At least 3 hours before you need them, total, to account for the rising and baking time.
I am making these rolls for the first time for Easter. I want to do the overnight prep but they would be in refrigerator for about 20 hours before removing to counter for final rise and bake. Will that work? The rolls are for dinner so if I stick to 15 hour max I’d have to remove them from frig at 8 am.
Hi Linda, the dough may rise too much if refrigerated for longer than 15 hours.
If the second rise is longer than 1 hour (2-3 hours) is that OK? Or would it impact the rolls?
Hi Mardi, we don’t recommend extending the rise time. That could cause the dough to over-proof and then collapse when baking. For other make ahead options, see recipe Notes.