

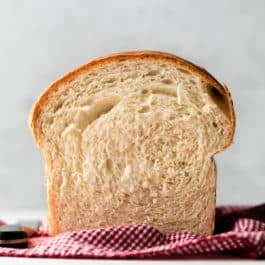
With step-by-step pictures, a full video tutorial, and plenty of helpful tips, learn how to make simple white sandwich bread using a few baking ingredients like flour, water, yeast, salt, and milk. Bread flour promises a super soft interior with an extra chewy crust. This recipe yields 1 loaf, so it’s perfect if you only have 1 loaf pan.
If you’re new to working with yeast, reference my Baking with Yeast Guide for answers to common yeast FAQs. This recipe is brought to you in partnership with Red Star Yeast.
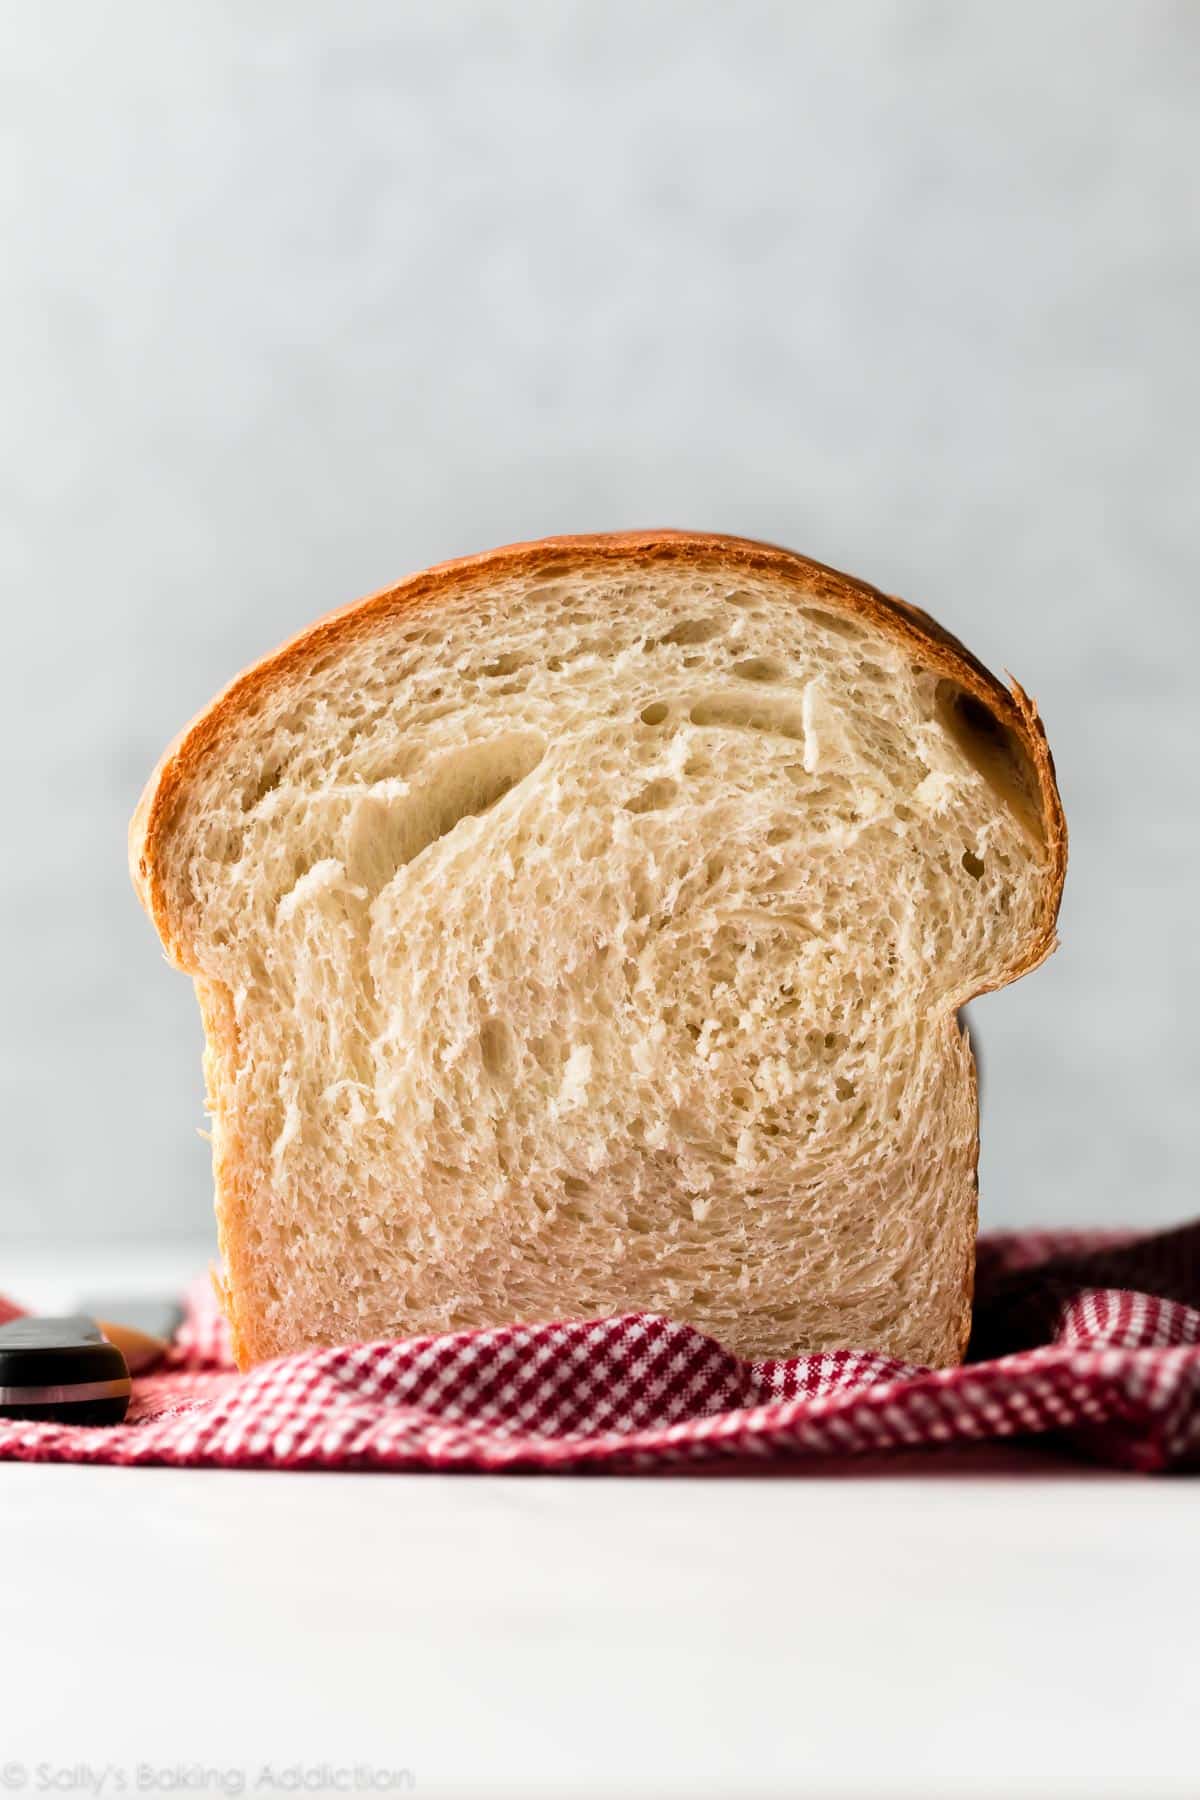
Let’s make homemade sandwich bread. This is a basic staple in any bread baker’s repertoire, but it’s also a recipe that shouldn’t be overlooked. There’s nothing on earth quite like homemade bread and my recipe is loaf perfection—rising tall, tasting buttery-soft, and making the most epic sandwiches. It’s truthfully the best homemade bread I’ve ever tasted and it all comes from just 7 ingredients. And if you’re nervous to bake with yeast, I guarantee you will finally feel confident with this no-fuss recipe.
This Sandwich Bread Is:
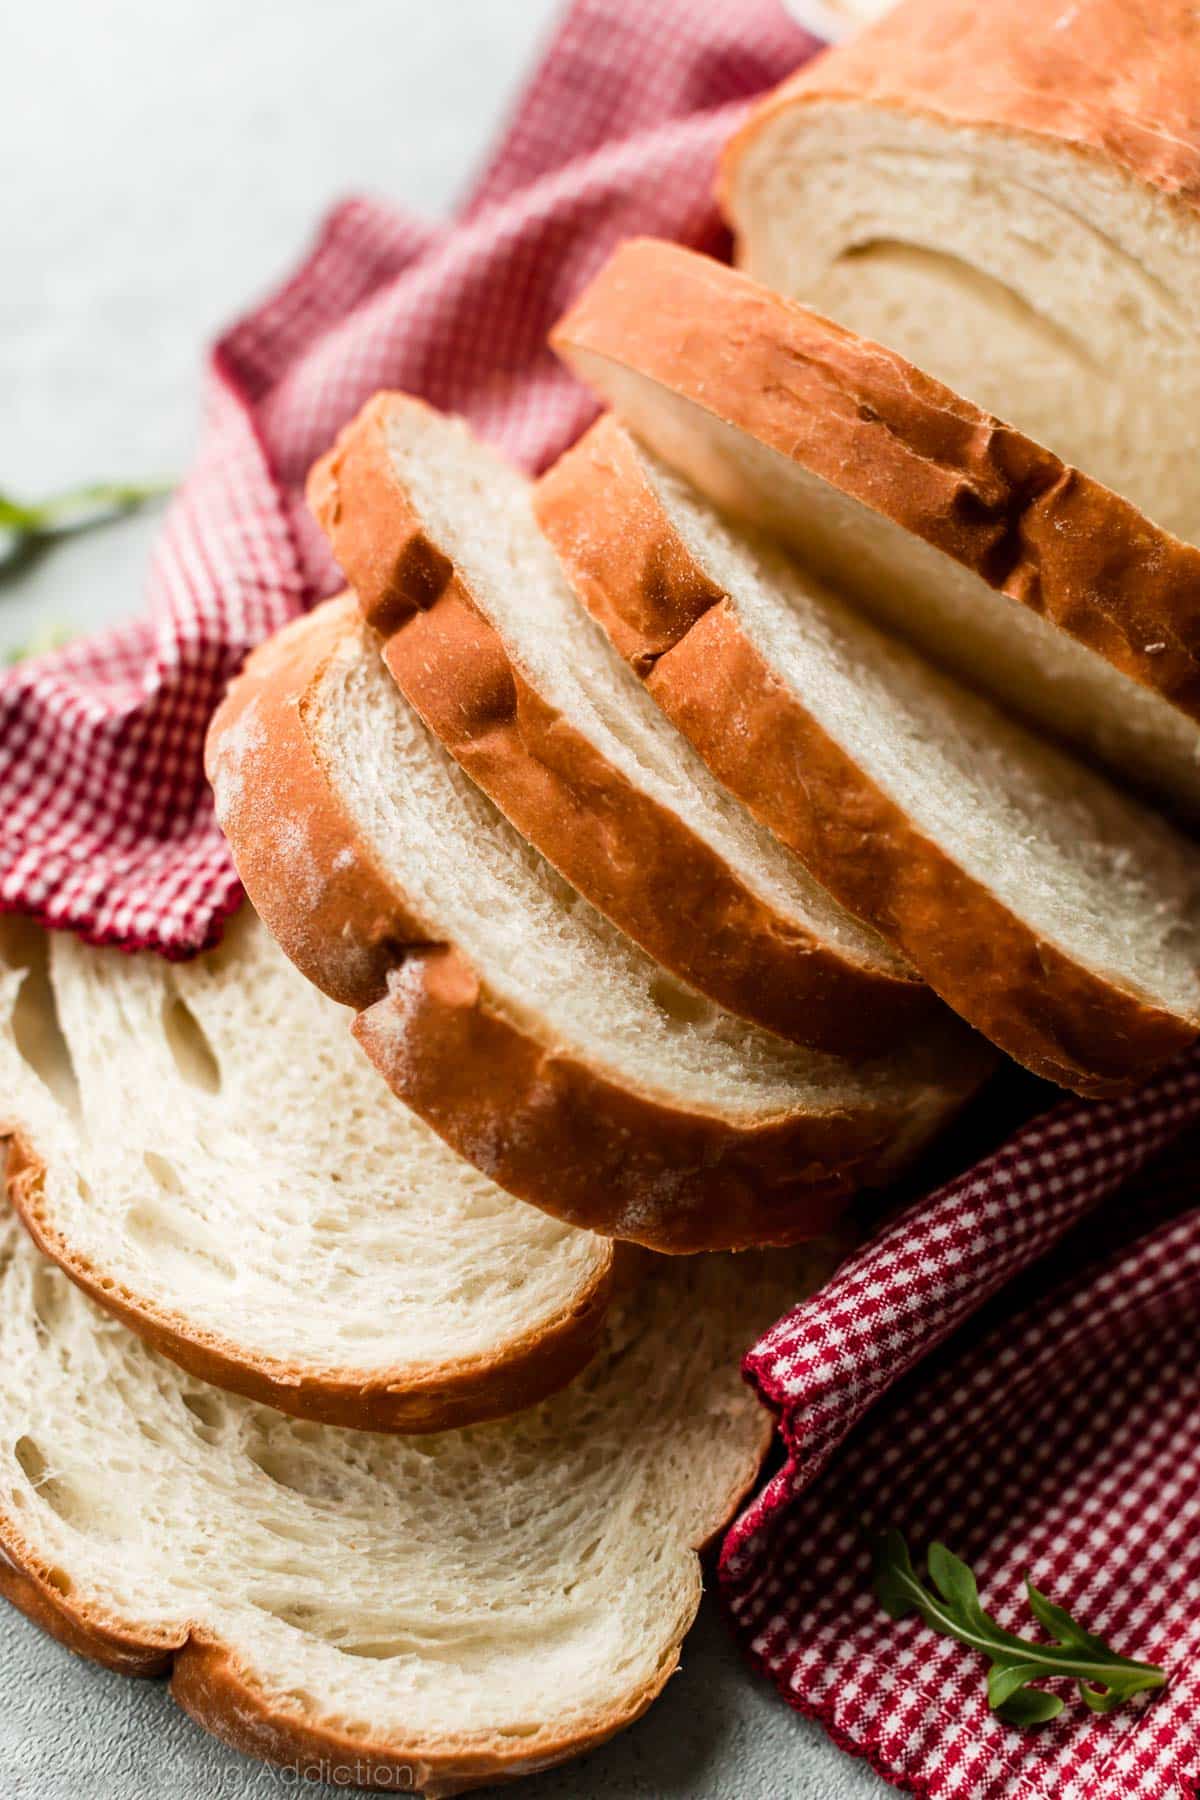
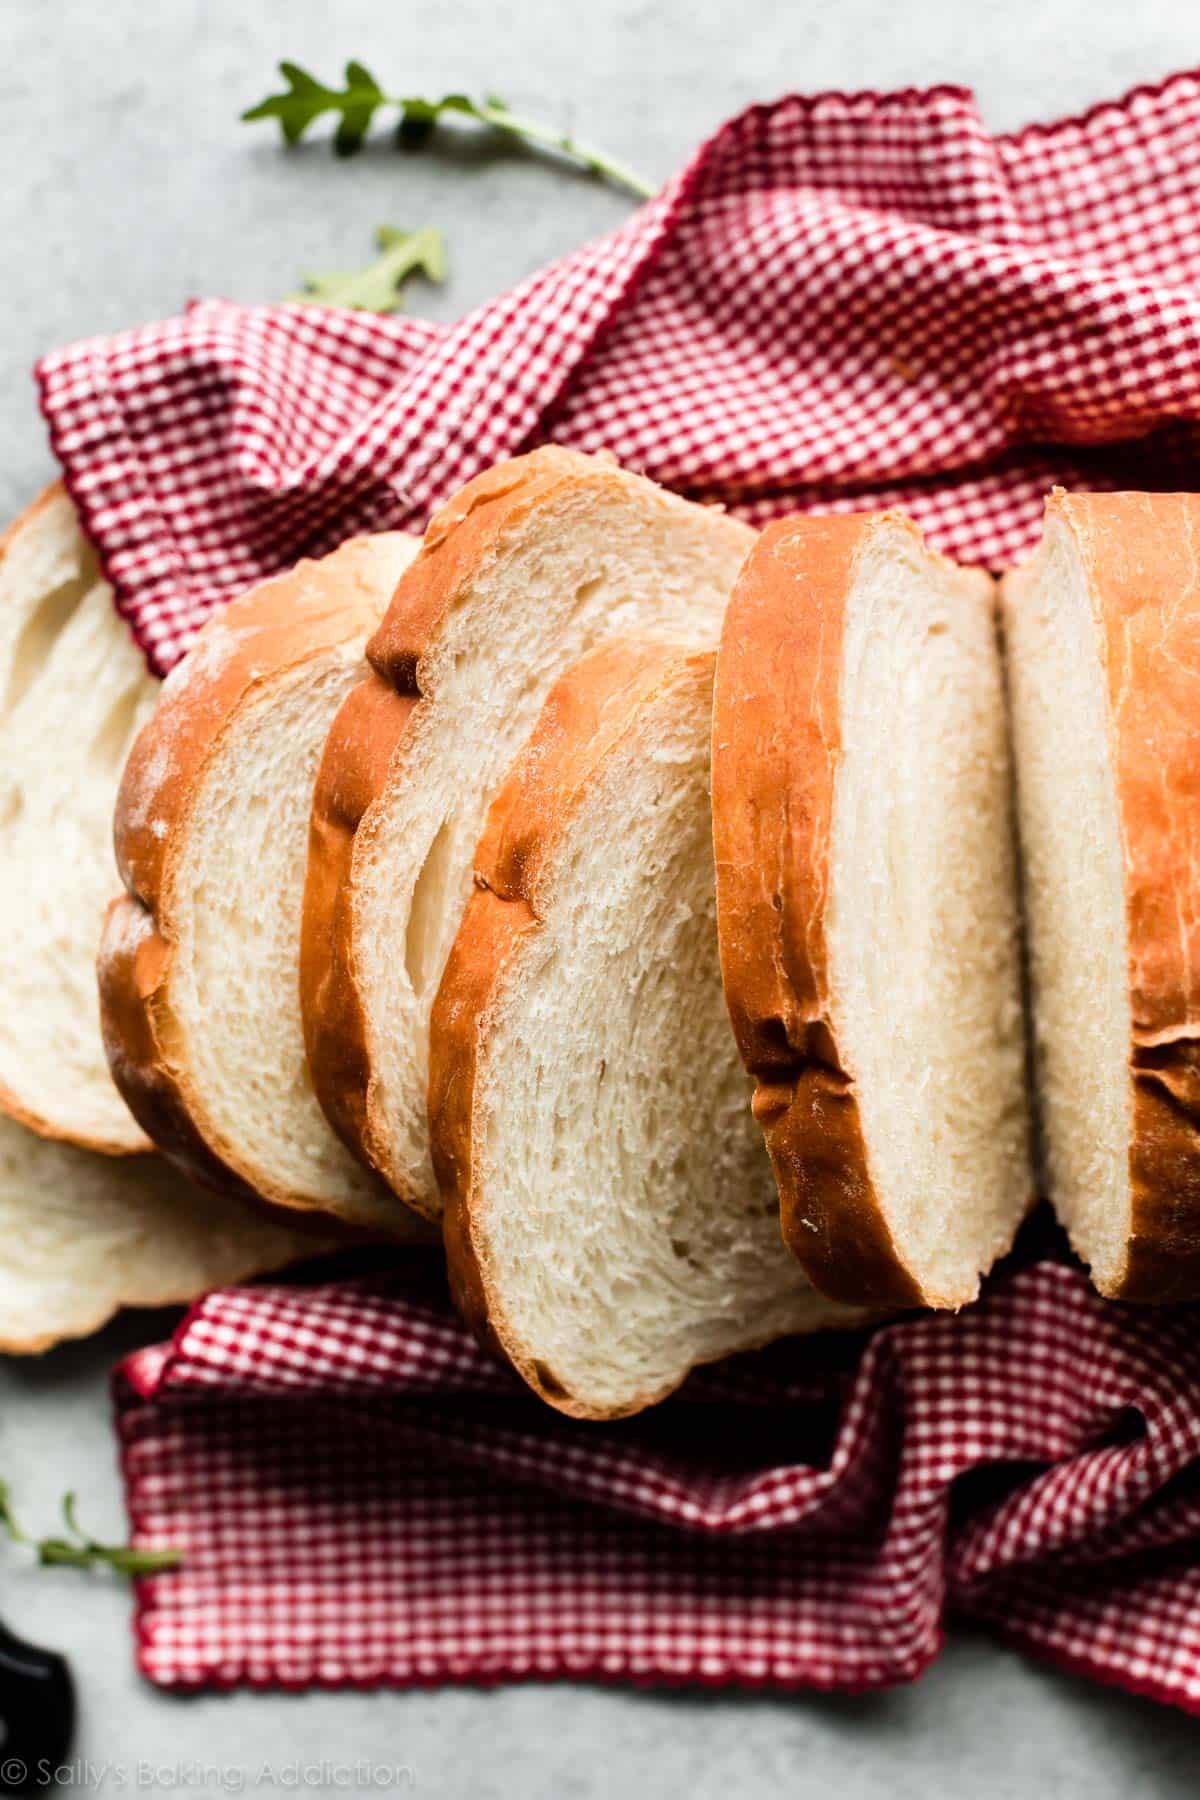
- Soft white bread with an extra chewy exterior
- Crisp right out of the oven!
- Made from 7 easy ingredients
- Golden brown with a super impressive rise
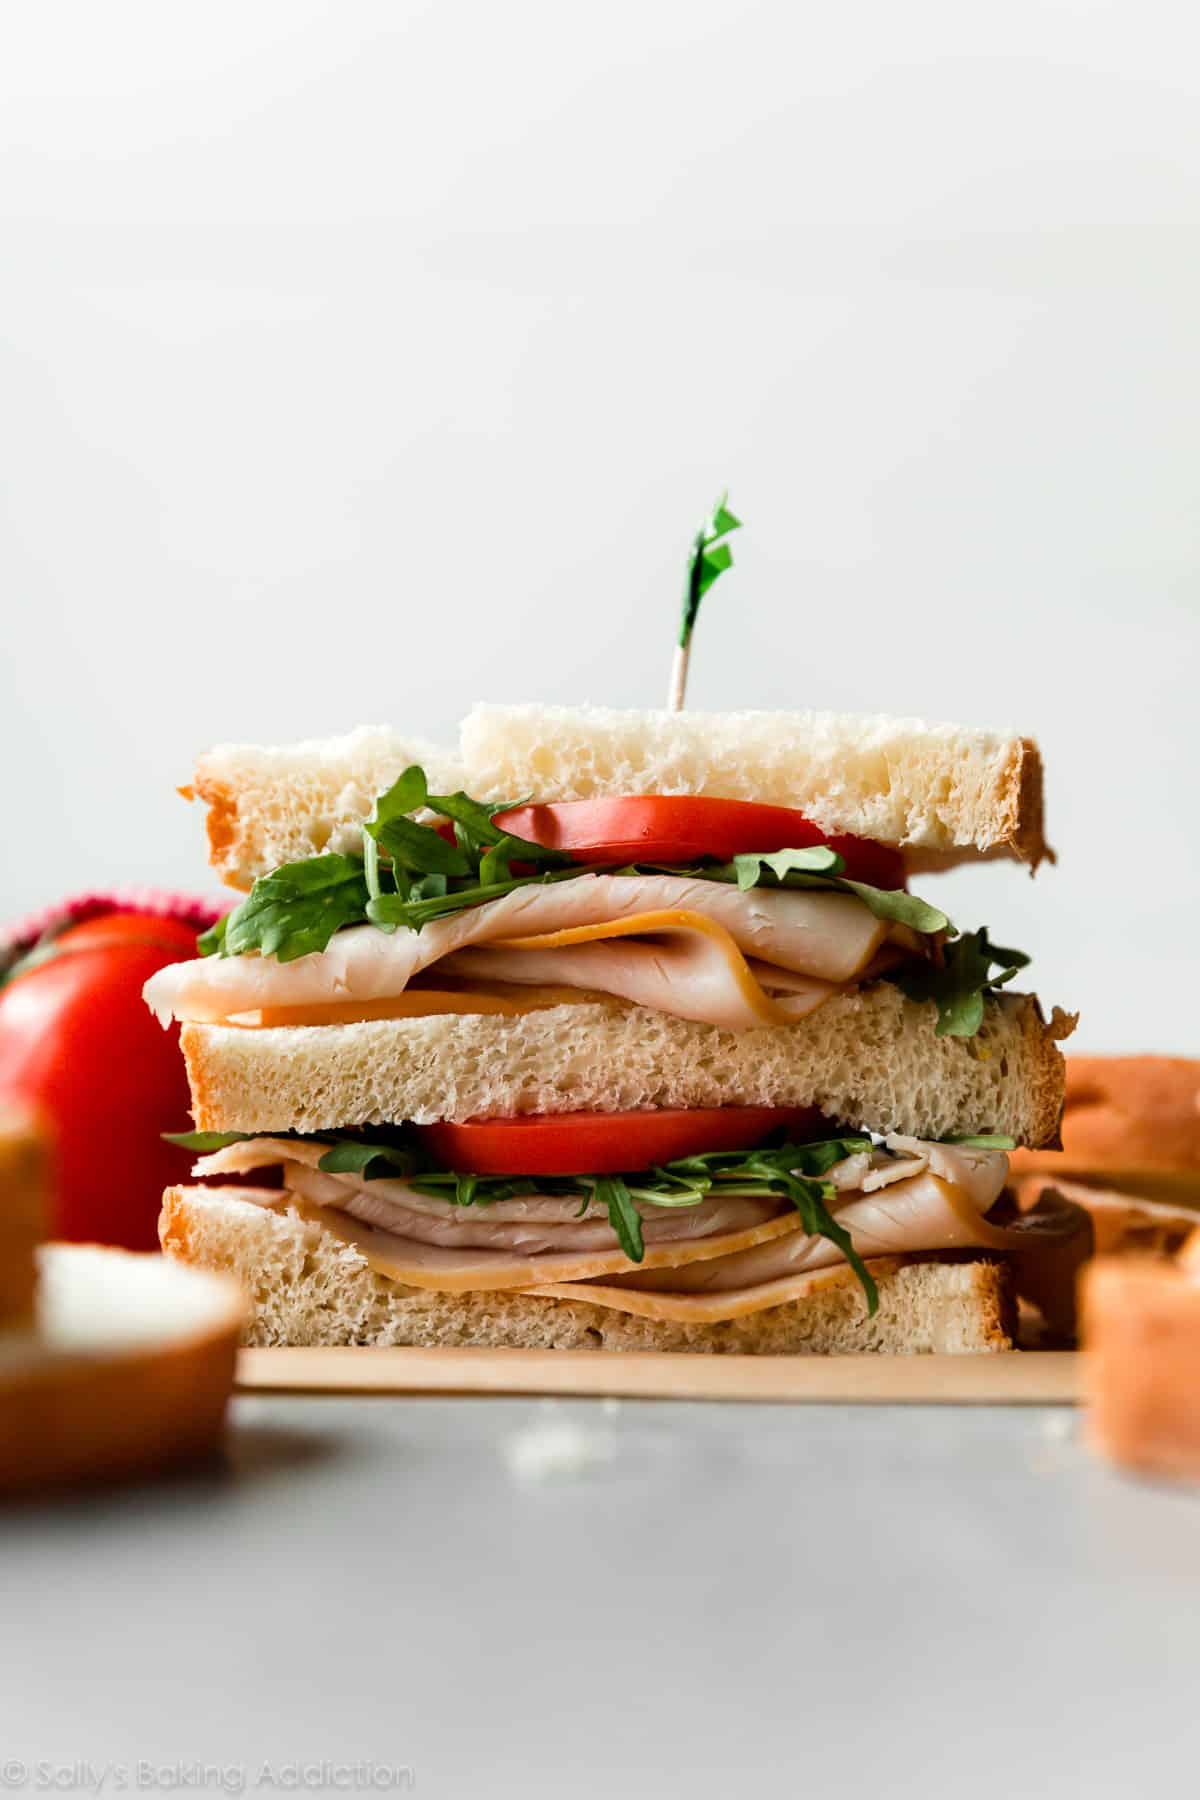
- Extraordinary on its own or as the base of a sandwich
- Simple to make
- Easy to make ahead or freeze
Looking for a no yeast alternative? Here’s my no yeast bread.
Just 1 Loaf of Bread
Besides the simplicity of the process, you’ll appreciate that this sandwich bread recipe yields just 1 loaf. You don’t need a crazy amount of flour, multiple loaf pans, and you’re not left with 2-3 leftover loaves on your hands. (Which wouldn’t necessarily be a bad thing.) Just 1 loaf to prepare, rise, shape, and bake—convenient, approachable, and straightforward. My recipes for multigrain bread, homemade cinnamon swirl bread, and honey oat bread both produce just 1 loaf as well.
Overview: How to Make Sandwich Bread
- Make the dough. Continue below to learn more about this dough recipe.
- Knead the dough. Reference my How to Knead Dough video tutorial for extra help with this step.
- Cover the dough and let it rise. The dough rises in about 1-2 hours in a relatively warm environment.
- Punch down the dough to release the air.
- Shape the dough into a large rectangle, then roll it into loaf.
- Let the loaf rise for about 1 hour.
- Bake for 30-34 minutes until golden brown.
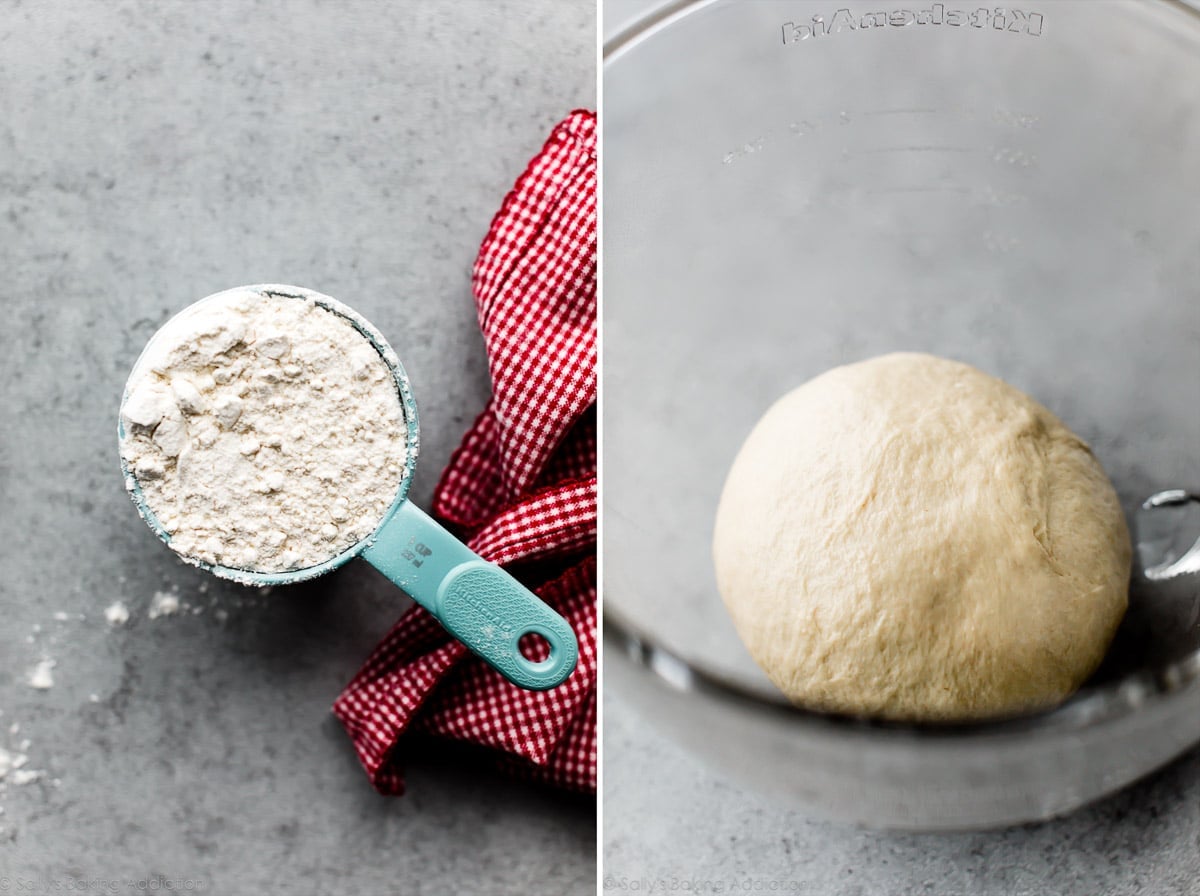
As shown in the video tutorial below, the dough comes together with a mixer. You can use a paddle attachment or a dough hook. You can also make the dough by hand, but it requires a bit of arm muscle. After the dough comes together in the mixing bowl, it’s time to knead. You can continue beating the dough with the mixer for this step or you can knead the dough by hand. If you’re new to bread baking, my how to knead dough post and video can help with this step.
Sandwich Bread Ingredients
You need 7 ingredients—practically the same as my homemade cinnamon swirl bread but less sugar. Likewise, they’re basically the same ingredients as my soft dinner rolls too, but in order to bake a bread that rises tall and has legitimate structure, we’ll leave out some of the fat. Swap some of the milk for water and leave out the egg.
- Water: Liquid activates yeast. I use mostly water in this dough because we need a bread that has structure. Using all milk, like I do for my dinner rolls, would yield a flimsy bread without much texture.
- Milk: To make a soft bread, you need fat in the dough so make sure 1/4 cup of the liquid is milk. Low fat milk works too, but whole milk produces phenomenal texture.
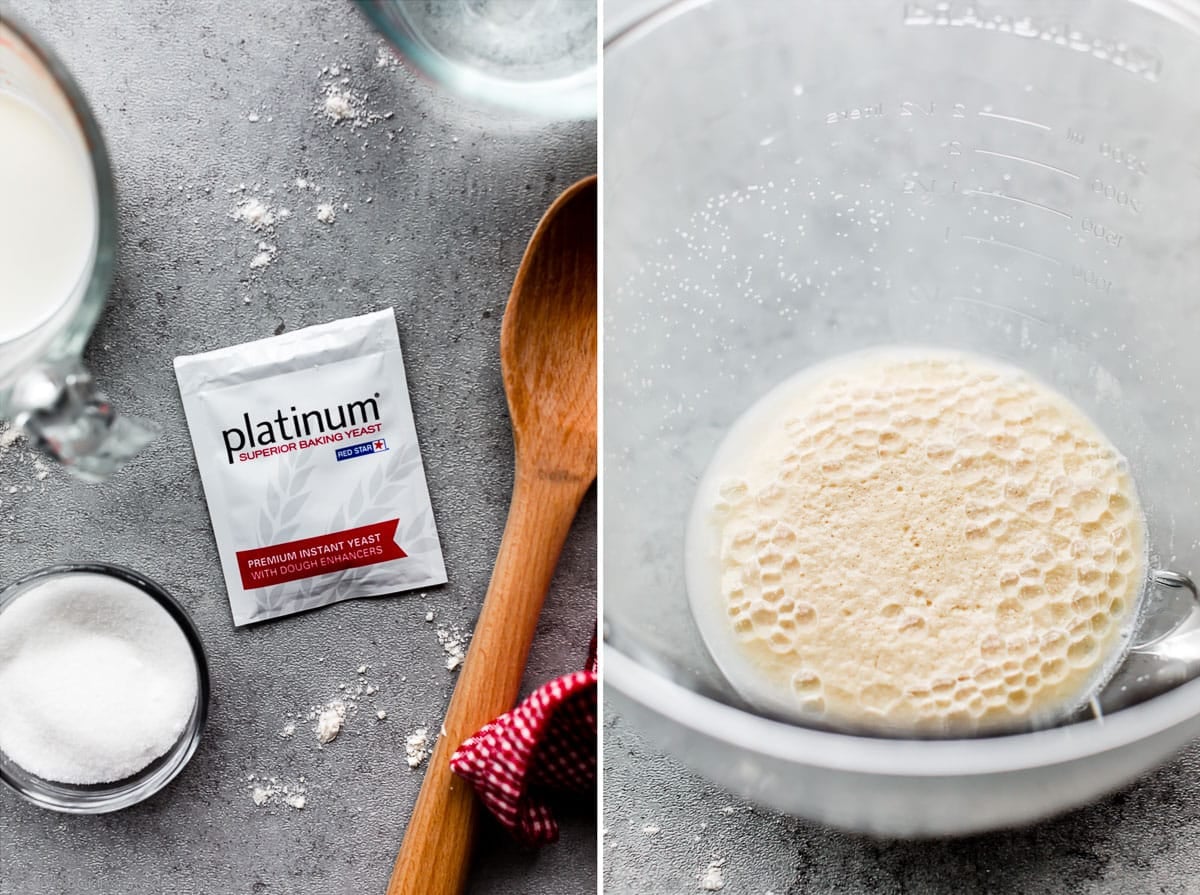
- Yeast: You can use active dry yeast or instant yeast. If using active dry, the rise times will be a bit longer. I recommend Platinum Yeast from Red Star, which is an instant yeast blended with natural dough improvers. It’s my go-to for all bread.
- Sugar: Sugar feeds the yeast, increases its activity, and tenderizes the dough.
- Butter: Butter promises a flavorful loaf. I tested this recipe with melted butter, softened butter, and even olive oil. We liked the loaf made with softened butter the best because it had pronounced buttery flavor and a softer (yet still sturdy) interior.
- Salt: You can’t make flavorful bread without salt!
- Flour: You can use all-purpose flour or bread flour. All-purpose flour is convenient for most, but bread flour produces a chewier crust. There are no other changes to the recipe if you use bread flour. For best taste, I highly recommend bread flour. It’s what I always use when I make artisan bread. If you wish to use whole wheat flour, follow my recipe for whole wheat bread instead.
After you make and knead the dough, let it rise. Then, punch it down to release the air:

Roll it out into an 8×15-inch rectangle:
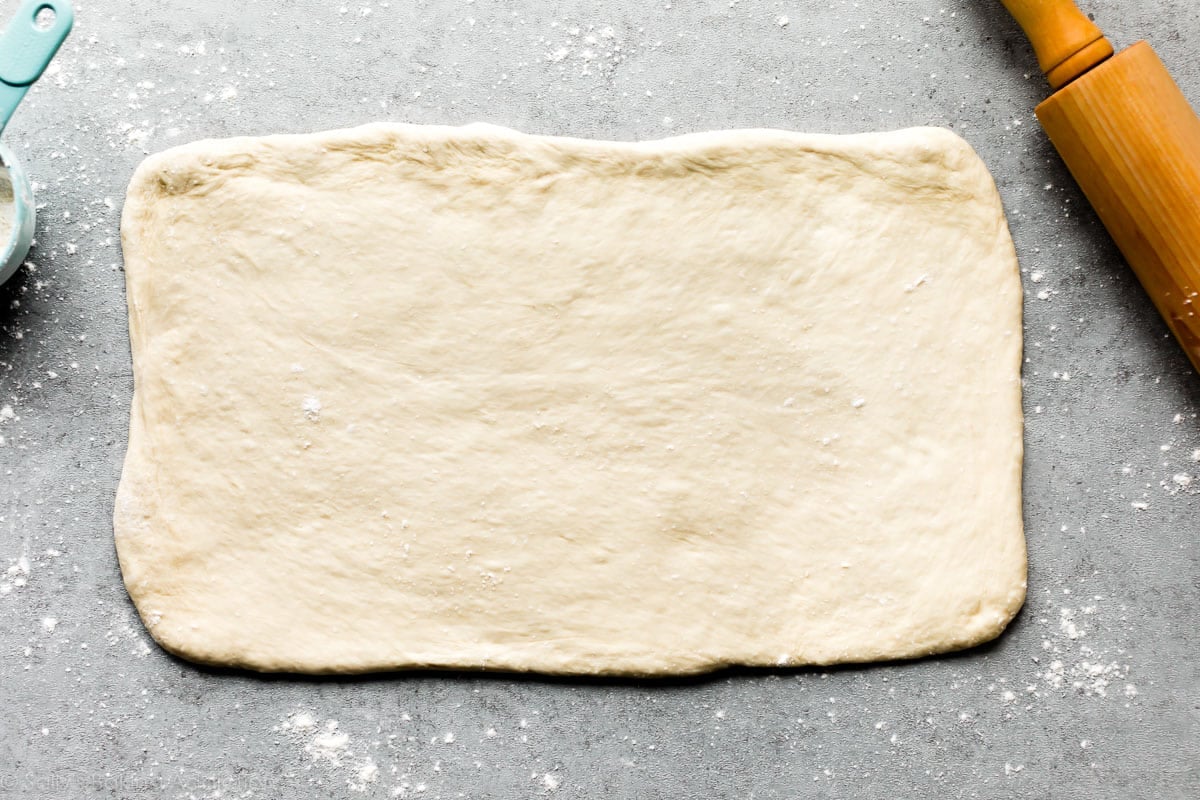
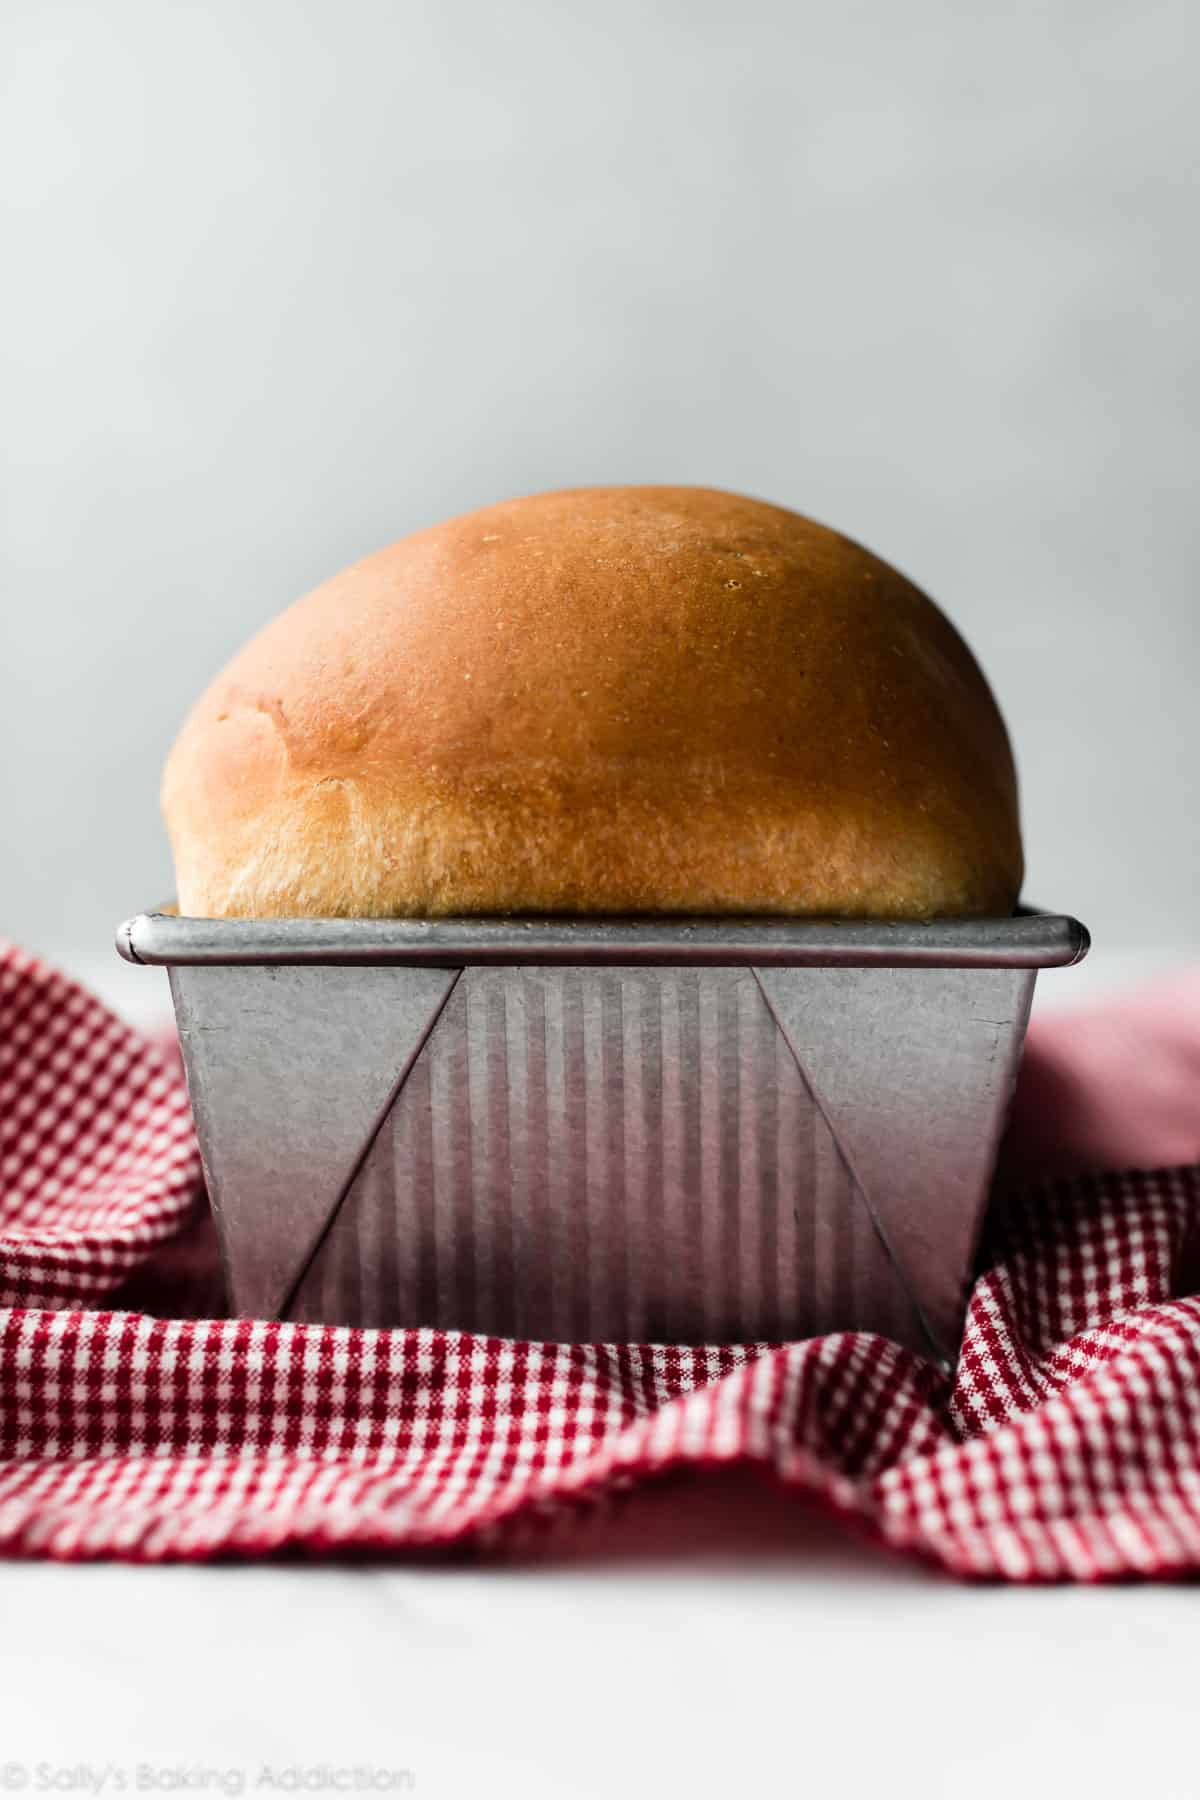
Roll it up tightly starting with the 8-inch side, so you have an 8-inch roll to fit into your 9×5-inch loaf pan. (Unlike cinnamon rolls where you roll up the dough starting with the larger side.) Let it rise until it’s 1 heaping inch above the rim of the pan:

Bake until golden brown, about 30-34 minutes.
Uses for Homemade Sandwich Bread
- Any sandwich. Like the Ross Geller’s Turkey Moist-Maker Sandwich 🙂
- BLT or grilled cheese
- Avocado toast or bacon & egg sandwiches
- Soup dipper
- Make croutons
- French toast or Blueberry French Toast Casserole
- Or in savory recipes like Breakfast Casserole and Sausage & Herb Stuffing
But our favorite way is simply warm toast with regular butter or honey butter & jam. Honestly, toast made from mass-produced bread doesn’t even compare. You can actually taste the soft and buttery toasty crumbs here. Or make an easy turkey sandwich—store-bought bread can’t make a sandwich taste as PERFECT as this.
I understand there’s a major convenience with store-bought bread and I’m not asking you to only make homemade bread for the rest of you life, but try it at least once. It takes a few hours one afternoon and most of the work is hands-off while the dough rises. Fresh-baked sandwich bread smells incredible, tastes even better, and I’m confident there’s no better baked good than this perfect loaf. You won’t regret trying this.
More Easy Bread Recipes
- Focaccia
- Multigrain Bread
- Artisan Bread
- Cheesy Breadsticks
- Pizza Crust
- Homemade Soft Pretzels
- Bread Bowls
- Homemade Breadsticks
- Olive Bread
- Cranberry Nut No-Knead Bread
Sandwich Bread
- Prep Time: 3 hours, 20 minutes
- Cook Time: 32 minutes
- Total Time: 4 hours
- Yield: 1 loaf
- Category: Bread
- Method: Baking
- Cuisine: American
Description
You only need 7 ingredients to make this simple sandwich bread. Soft and buttery with a chewy/crisp crust, this fresh loaf of bread will quickly become a staple in your kitchen. See recipe notes for freezing and overnight instructions. You can also reference my Baking with Yeast Guide for answers to common yeast FAQs.
Ingredients
- 1 cup (240ml) water, warmed to about 110°F (43°C)
- 1/4 cup (60ml) whole milk, warmed to about 110°F (43°C)
- 2 and 1/4 teaspoons (7g) Platinum Yeast from Red Star instant yeast (1 standard packet)
- 2 Tablespoons (25g) granulated sugar
- 4 Tablespoons (1/4 cup; 56g) unsalted butter, softened to room temperature
- 1 and 1/2 teaspoons salt
- 3 and 1/3 cups (about 420–430g) all-purpose flour or bread flour (spooned & leveled), plus more as needed
Instructions
- Prepare the dough: Whisk the warm water, warm milk, yeast, and sugar together in the bowl of your stand mixer fitted with a dough hook attachment. Cover and allow to sit for 5 minutes.
- Add the butter, salt, and 1 cup flour. Beat on low speed for 30 seconds, scrape down the sides of the bowl with a silicone spatula, then add another cup of flour. Beat on medium speed until relatively incorporated (there may still be chunks of butter). Add the remaining flour and beat on medium speed until the dough comes together and pulls away from the sides of the bowl, about 2 minutes. *If you do not own a mixer, you can mix this dough with a large wooden spoon or silicone spatula. It will take a bit of arm muscle!*
- Knead the dough: Keep the dough in the mixer and beat for an additional 5–8 full minutes, or knead by hand on a lightly floured surface for 5–8 full minutes. (If you’re new to bread-baking, my How to Knead Dough video tutorial can help here.) If the dough becomes too sticky during the kneading process, sprinkle 1 teaspoon of flour at a time on the dough or on the work surface/in the bowl to make a soft, slightly tacky dough. Do not add more flour than you need; you do not want a dry dough. After kneading, the dough should still feel a little soft. Poke it with your finger—if it slowly bounces back, your dough is ready to rise. You can also do a “windowpane test” to see if your dough has been kneaded long enough: tear off a small (roughly golfball-size) piece of dough and gently stretch it out until it’s thin enough for light to pass through it. Hold it up to a window or light. Does light pass through the stretched dough without the dough tearing first? If so, your dough has been kneaded long enough and is ready to rise. If not, keep kneading.
- 1st Rise: Lightly grease a large bowl with olive oil or nonstick spray. Place the dough in the bowl, turning it to coat all sides in the oil. Cover the bowl and allow the dough to rise in a relatively warm environment for 1-2 hours or until double in size. (I always let it rise on the counter. Takes about 2 hours. For a tiny reduction in rise time, see my answer to Where Should Dough Rise? in my Baking with Yeast Guide.)
- Grease a 9×5-inch loaf pan.
- Shape the bread: When the dough is ready, punch it down to release the air. Lightly flour a work surface, your hands, and a rolling pin. Roll the dough out into a large rectangle, about 8×15 inches. It does not have to be perfect—in fact, it will probably be rounded on the edges. That’s ok! Roll it up into an 8 inch log and place in the prepared loaf pan.
- 2nd Rise: Cover shaped loaf with aluminum foil, plastic wrap, or a clean kitchen towel. Allow to rise until it’s about 1 inch above the top of the loaf pan, about 1 hour. (See video and photo above for a visual.)
- Adjust oven rack to a lower position and preheat oven to 350°F (177°C). (It’s best to bake the bread towards the bottom of the oven so the top doesn’t burn.)
- Bake the bread: Bake for 32-36 minutes or until golden brown on top. If you notice the top browning too quickly, loosely tent the pan with aluminum foil. (I usually add aluminum foil over the loaf around the 20 minute mark.) To test for doneness, if you gently tap on the loaf, it should sound hollow. For a more accurate test, the bread is done when an instant-read thermometer reads the center of the loaf as 195–200°F (90–93°C).
- Remove from the oven and allow bread to cool for a few minutes in the pan on a cooling rack before removing the bread from the pan and slicing. Feel free to let it cool completely before slicing, too.
- Cover leftover bread tightly and store at room temperature for 6 days or in the refrigerator for up to 10 days.
Notes
- Freezing Instructions: Prepare recipe through step 6. Place shaped loaf in a greased 9×5-inch loaf pan or disposable loaf pan, cover tightly, and freeze for up to 3 months. On the day you serve it, let the loaf thaw and rise for about 4-5 hours at room temperature. Bake as directed. You can also freeze the baked bread loaf. Allow the bread to cool completely, then freeze for up to 3 months. Thaw in the refrigerator or at room temperature, then reheat as desired.
- Overnight Instructions: Prepare the recipe through step 6. Cover the shaped bread tightly and refrigerate for up to about 15 hours. At least 3 hours before you need the bread the next day, remove from the refrigerator, keep covered, and allow to rise on the counter for about 1-2 hours before baking. Alternatively, you can let the dough have its 1st rise in the refrigerator overnight. Cover the dough tightly and place in the refrigerator for up to 12 hours. Remove from the refrigerator and allow the dough to fully rise for 2 more hours. Continue with step 5.
- Special Tools (affiliate links): Electric Stand Mixer or Large Glass Mixing Bowl with Wooden Spoon / Silicone Spatula | 9×5-inch Loaf Pan | Rolling Pin
- Yeast: Platinum Yeast from Red Star is an instant yeast. Any instant yeast works. You can use active dry yeast instead. Rise times will be slightly longer using active dry yeast. Reference my Baking with Yeast Guide for answers to common yeast FAQs.
- Flour: You can use all-purpose flour or bread flour. All-purpose flour is convenient for most, but bread flour produces a chewier loaf of bread and I highly recommend it. The bread is still soft no matter which you use. Either flour is fine and there are no other changes to the recipe if you use one or the other. I don’t recommend whole wheat flour because it doesn’t have the same baking properties as white flour or bread flour (the gluten levels are different). If you wish to use whole wheat flour, try my recipe for whole wheat bread instead.
- Doubling this recipe: For best results, I recommend making two separate batches of dough. However, if you want to double the recipe all in 1 mixing bowl, double all of the ingredients except for the yeast and butter. Use 3 and 1/4 teaspoons yeast and 6 Tablespoons of butter.
- Bread Machine Questions: I don’t own a bread machine so I have not tested it, but some readers in the comments section have had success.
- Adapted from Homemade Cinnamon Swirl Bread


Reader Comments and Reviews
How many slices does this make?
Hi Margot, they depends on how thick you slice your bread – this yields one 9×5 inch loaf.
Finally found a loaf my husband approves! Light, fluffy and easy to make. Thanks for the great recipes!
How would you cut this recipe in half to fit a 4x4x4 loaf pan? I want to make it but we don’t go through bread fast enough for a full loaf. Could I do the whole recipe and freeze half? I only have 1 loaf pan though.
Hi Li, this recipe makes one 9×5 inch loaf. We would make the full recipe and freeze the second half for later!
Hi there I was wondering if I could make this bread with 2% milk instead of whole, I have some milk I need to get rid of 🙂
Definitely.
Could this recipe be made into hamburger buns or hotdog buns? It seems pretty versaltile.
Hi Rebecca, yes, it can! This recipe for bread bowls works well for hamburger and hot dog buns, too.
Hi! I’ve been using this recipe for months and love it. I just was curious if I could do all water instead of milk and water? The milk I have in the fridge is spoiled (despite the date on it ) and I wanted to go ahead and make some until I can get to the store.
Hi Lexie, yes you can use all water if absolutely needed. You’ll lose a bit of flavor and the texture may not be as soft, but it won’t be too noticeable. (The butter helps!)
I have been looking for a good sandwhich bread recipe so we can stop buying store bread. This was phenomenal and so easy. I did use my bread machine to mix and get the dough to rise. I added the water, pinch of sugar, yeast and milk to ignite the yeast. Then add that and all the ingredients to the bread machine. I cooked in the oven in a loaf pan.. This recipe is perfect as is, no changed needed. Thanks for sharing this!
Such a great recipe, discovered it a few weeks ago and it’s on repeat multiple times a week now! A few days ago I tried using it for a bacon and cheese loaf and it was SO delicious. I fried and cooled chopped bacon, and when I rolled it out I added bacon and some grated cheese and then carried on as usual. It took longer to rise on the second rise and it probably didn’t rise quite as high, but it came out, in my husband’s words, ‘divine’. I have another one on the go as I type
My bread proofed well for the 1st and 2nd. While baking it collapsed in the middle and I had a big hole on one side. What did I do wrong?
Hi Mimi, how long did your bread rise? It sounds like it may have been over-proofed, which can cause the bread to deflate and collapse when placed in the oven. For that second rise in the pan, be sure to let it rise only until it’s about 1 inch over the pan. Hope this helps for next time!
I was so afraid to make bread. I watched the videos a couple of times and followed all the steps. I found out I really enjoy kneading bread! My first attempt rose beautifully and had a nice texture but it tasted really “yeasty”, I discovered that I had put the first proof in too warm of a location so I tried again and it was perfect. It’s the perfect bread to accompany a bowl of chili or soup.
Sally really makes it simple!
Okay not going to lie I was so worried I messed something up with this bread because my dough still seemed so sticky compared to other recipes I’ve tried before but the finished product was incredible! My family loved it including my picky kids thank you!
I’ve made this recipe every week for the month of March as my own little challenge and it’s been a hit! For the second rise, can it be left to sit out for multiple hours before baking? Or does it need to go in the oven once it gets to 1” above the pan? I don’t want to refrigerate it because I want to bake as soon as I get back, but I also don’t want to leave it too long and waste.
Hi Bianca, we do not recommend letting it sit out for a longer second rise, as the dough could over-proof and then collapse while baking. See recipe Notes for a few different make ahead options. We’re glad you’re enjoying this recipe!
I absolutely LOVE this recipe. I make it weekly for my family.
I want to make some buns, could I use this recipe to do that? Instead of putting it in the loaf pan for the final rise, could I divide it into bun shape and let them do their final rise and bake them that way?
Hi Victoria, yes, it can! This recipe for bread bowls works well for hamburger buns, too.
What a loaf of bread! Came out great. I did use 2 cups bread flour and 1 1/3 cup whole wheat flour because I like the taste better. I did use a glass 9×5 loaf pan and baked it at 350 degrees to reach 200 degrees on my thermometer, it took 40 minutes. I also coved it after 20 minutes. One thing though, I tried to make a bread dough in my kitchenaid stand mixer and knead the dough on a medium speed like this recipe suggest for several minutes but some black dust-like stuff started to come out on the dough hook where it was connected. I called kitchenaid and they said don’t go over speed 2 for heavy dough. I took there advise and it worked out just fine. I will keep this recipe for sure. Thanks.
Thank you so much for your comments! I tried using the kitchenaid mixer on 6 for medium speed as it said in the directions and my machine was dancing all over the counter! Thankfully I didnt have the black dust as you did. I hope they will change that in the directions.
I cannot hand knead as arthritis makes it difficult.
Again I so appreciate it
Lynne
Amazing. Can always depend on Sally’s recipes! I’d been putting off making a loaf of sandwich bread for the longest time, but finally caved and went straight here to find a reliable recipe because I knew it wouldn’t be overwhelming and it would turn out great, and it did! Just ate a piece straight out of the oven with some butter and can’t wait to use it over the course of the next few days! Will be my go-to!
I used buttermilk and it turned out fantastic! ☺️
Thank you! I was just wondering if buttermilk would work with this!
The best bread I’ve ever made!
Very tasty. First try. Baked in glass about 38 minutes. Took internal temp in three places and in all three were done according to your recipe. I find the inside of loaf to be too soft. Only way it would make a sandwich with all fixins’ would be to toast first. Any suggestions?
Hi Kathy, this bread is intended to be quite soft. Did you slice it while still warm? If you wait until the loaf has cooled completely, the dough will be a bit more “sturdy” for sandwiches. Toasting is also an excellent option!
Love this bread! The recipe is so easy. I won’t be buying frozen bread dough again. Do you have nutrition content?
Hi M.G, We don’t usually include nutrition information as it can vary between different brands of the same ingredients. Plus, many recipes have ingredient substitutions or optional ingredients listed. However, there are many handy online calculators where you can plug in and customize your exact ingredients/brands. Readers have found this one especially helpful: https://www.verywellfit.com/recipe-nutrition-analyzer-4157076
I’ve made this bread multiple times and always comes out perfect! My question is have you tried using dry milk powder in addition to the other ingredients?
We haven’t tested it, Chip! Glad you enjoy this bread recipe.
I am curious if I can use a glass 9×5 pan for this recipe?
Hi Beth, baking in a glass pan may take just a few minutes longer. Enjoy!
I tried this recipe and it did not work out for me , dense in the middle , I have failed so many times at making bread …I just don’t know what I’m doing wrong.
Hi Beth, was the dough overkneaded by chance? Or was your flour overmeasured (here’s more on how to properly measure baking ingredients)? Either can cause bread to bake up a bit more dense like you mentioned. Both easy fixes for next time!
Can I make this in a bread machine? Love this recipe. Tried others and didn’t like the results as much but the two rises are a lot for me so I’d like to be able to program my machine and let my bread machine do the work.
Hi Sarah, a few readers have reported back with success using a bread machine with some of our bread recipes (this one included). We do not have one, so we have not tested it. We’d love to know how it goes for you!
Really delicious recipe! Have made twice now, and both times I have had to add about 1/4-1/3 cup extra flour. The recipe rises so beautifully, and the recipe is really easy to follow. Thanks for a great recipe!
How many carbs does this recipe have? My son has type 1 diabetes and I made it today but I don’t know how to figure out how many carbs are in it.
Hi Taylor, We don’t usually include nutrition information as it can vary between different brands of the same ingredients. Plus, many recipes have ingredient substitutions or optional ingredients listed. However, there are many handy online calculators where you can plug in and customize your exact ingredients/brands. Readers have found this one especially helpful: https://www.verywellfit.com/recipe-nutrition-analyzer-4157076
First time bread loaf baker! Fantastic recipe! I will make this again but will reduce the salt… would that affect the outcome do you think? It just tasted saltier than I’m used to in white bread.
I literally tossed everything into my bread machine (I did not warm the water or milk) and it is the most incredible bread ever. I am going to have to make another loaf tomorrow because I don’t think this first one is going to make it to daylight. It’s incredibly soft (I even struggled spreading soft butter on it ) And I personally used Kirkland’s unbleached all purpose flour. Perfect perfect!
Just curious, my weights are figuring different than yours and I have a brand new scale too. For example, I measured with a cup the flour and weighed it at the same time, but I got to 3 cups and it exceeded the grams you have listed for the 3c 1/3 c measurements. Same for all the other ingredients. I thought my old scale was off so I bought a new one and it’s still giving me different results than yours. Sometimes my bread comes out super crumbly and I’m trying to find the right measurements to go by, I’m used to using my scale for my sourdough starter and recipe with that but wondering if I should just nix the scale for this recipe? Any thoughts? I just want to be sure I’m getting the best bread out of your recipe I can 🙂
Thank you!! (also, THANK YOU for all your recipes, I love your website and all it offers!!!!)
Hi Brittany! We’re happy to help. We test all of our recipes multiple times using both metric weights and cups (since that’s standard where we live). While spooning and leveling our flour does get us 125 grams per cup, we always say that “A cup isn’t always a cup, but a gram or ounce is always a gram or ounce!” Basically, when in doubt go by the weight!
I live in a desert now and I have a lot better results with recipes ingredients. Then I ever did when I lived in The Pacific Northwest. I think measurements are sometimes not going to work the same and an area that’s filled with damp/moisture vs an area that’s dry. Then there are seasons. I think it’s a really good thing to get the feel and look of a successful bread dough.
Came back to my early failures. I realize that I was adding way too much flour during kneading. Sometimes I was rushing the needing process, but often I was adding so much flour that it affected the results. I also think an instant thermometer is a great thing to have because you can make sure that your bread is cooked all the way through. In my earlier years, I could end up with just slightly undercooked bread because I just didn’t judge well. My thermometer is a great judge.
I’ve had really good results with this recipe.
Lexi, you said your spoon and leveled cup is 125g when I spoon and leveled my cup, it was 156g! That’s a big difference I don’t understand how it can be that different :/ But I’m making another loaf now, so I’ll go with your advice and not use my cup measurement and instead focus on the scale numbers. *fingers crossed* 🙂
I had the same issue tonight, I made 2 batches. My 1st one i attempted to follow weight (metric) and my dough was on the dry side. My 2nd batch I followed the imperial way, dough felt beautiful. It’s in the oven now, and smells wonderful!
I love this recipe! I love having a bowl of premier protein cereal with a slice of toast with butter and raspberry jam for breakfast which I have 4-5 days a week.
2 questions about the recipe. First, from what I read, 1 cup of flour weighs 120 grams. So wouldn’t 3 – 3 1/3 cups of flour weigh between 360-400 grams rather than the 420-430 you have listed? Also, can Almond flour be swapped for bread or all purpose flour to reduce the carbs?
Hi Marsha, we test all of our recipes multiple times using both metric weights and cups (since that’s standard where we live). Spooning and leveling our flour does get us 125 grams per cup, so the measurements here are accurate for our testing. We do not recommend almond flour; it has very different baking properties than all-purpose flour and isn’t always a 1:1 swap.
I make a double batch of this bread every week. I eat a vegan diet, so I substitute vegan butter and almond milk and it turns out perfectly . The best bread recipe I have found.
I am wanting to use a 13” long bread pan. Do you think a double batch would work for this size pan or what would you recommend?
Hi Jo, we’re unsure how to adapt the recipe for a 13 inch pan without testing it. A double batch would likely be too much dough.
Excellent recipe! Can you substitute the milk for buttermilk?
Can I substitute maple syrup for the sugar? Thank you.
Hi Kate, the same amount of honey should work. Let us know if you give it a try!