

Use this in-depth tutorial to learn how to make a from-scratch puff pastry dough variation. The homemade dough comes together using a “rough puff” method where you carefully work butter into your dry ingredients and then fold and flatten the dough many times to create countless flaky layers. Unlike the breakfast pastries dough, this dough does not require any yeast and unlike croissants and traditional puff pastry, this dough does not require laminating with a layer of butter. Rather, the layers and crisp flakiness come from the particular mixing and folding methods.
One reader, Aimee, commented: “I have always wanted to try puff pastry. I always felt it was so ‘daunting.’ This recipe was so easy and my first ever puff pastry came out FANTASTIC! I do come to this site for new ideas. Thank you so much! ★★★★★“
Using this simplified method and a handful of basic ingredients, you’ll be amazed that you can make puff pastry from scratch within just a few hours. Whenever I make and bake this dough, I’m still stunned with the outcome! You’ll enjoy using this dough wherever you use a single pie crust or store-bought puff pastry.
This recipe is such a fan favorite, that it deserved a spot in print! You’ll also find this recipe in my cookbook, Sally’s Baking 101.
Next you’ll find some details, step-by-step photos, plus there’s a video tutorial in the recipe if that’s helpful too. All of this will help set you up for success when it’s your turn to try it!
What Is Rough Puff Pastry?
Rough puff pastry is also known as quick pastry and become really popular with professionals and home bakers because you get bakery-style puff pastry without precise shaping and laminating butter with dough. Cookbook author and chef Claire Saffitz has a wonderful recipe for it. The trick is to work large pieces of cold butter into dry ingredients and hydrate it all with ice cold water (as if you were making pie crust). Sometimes bakers grate butter into the mix or use a food processor. There’s lots of ways to make rough puff pastry.
With this recipe, I stick with cold cubes of butter and use my hands to rub the butter into the flour mixture. Your hands are your best tool and method here because it’s nearly impossible to over-mix the dough this way. If the dough is over-mixed and you break down the butter too much, you’ll lose layers.
- Can I use a food processor, pastry cutter, or other mixer? I do not recommend it. These tools slice down the butter too much and you’ll lose a lot of flaky layers. I tried and it’s not worth it because the result is closer to a greasy pie dough than a layered puff pastry. (Still good, but not the goal here.)
Rough Puff Pastry Details
- Taste: Buttery, hardly sweetened, a little salty.
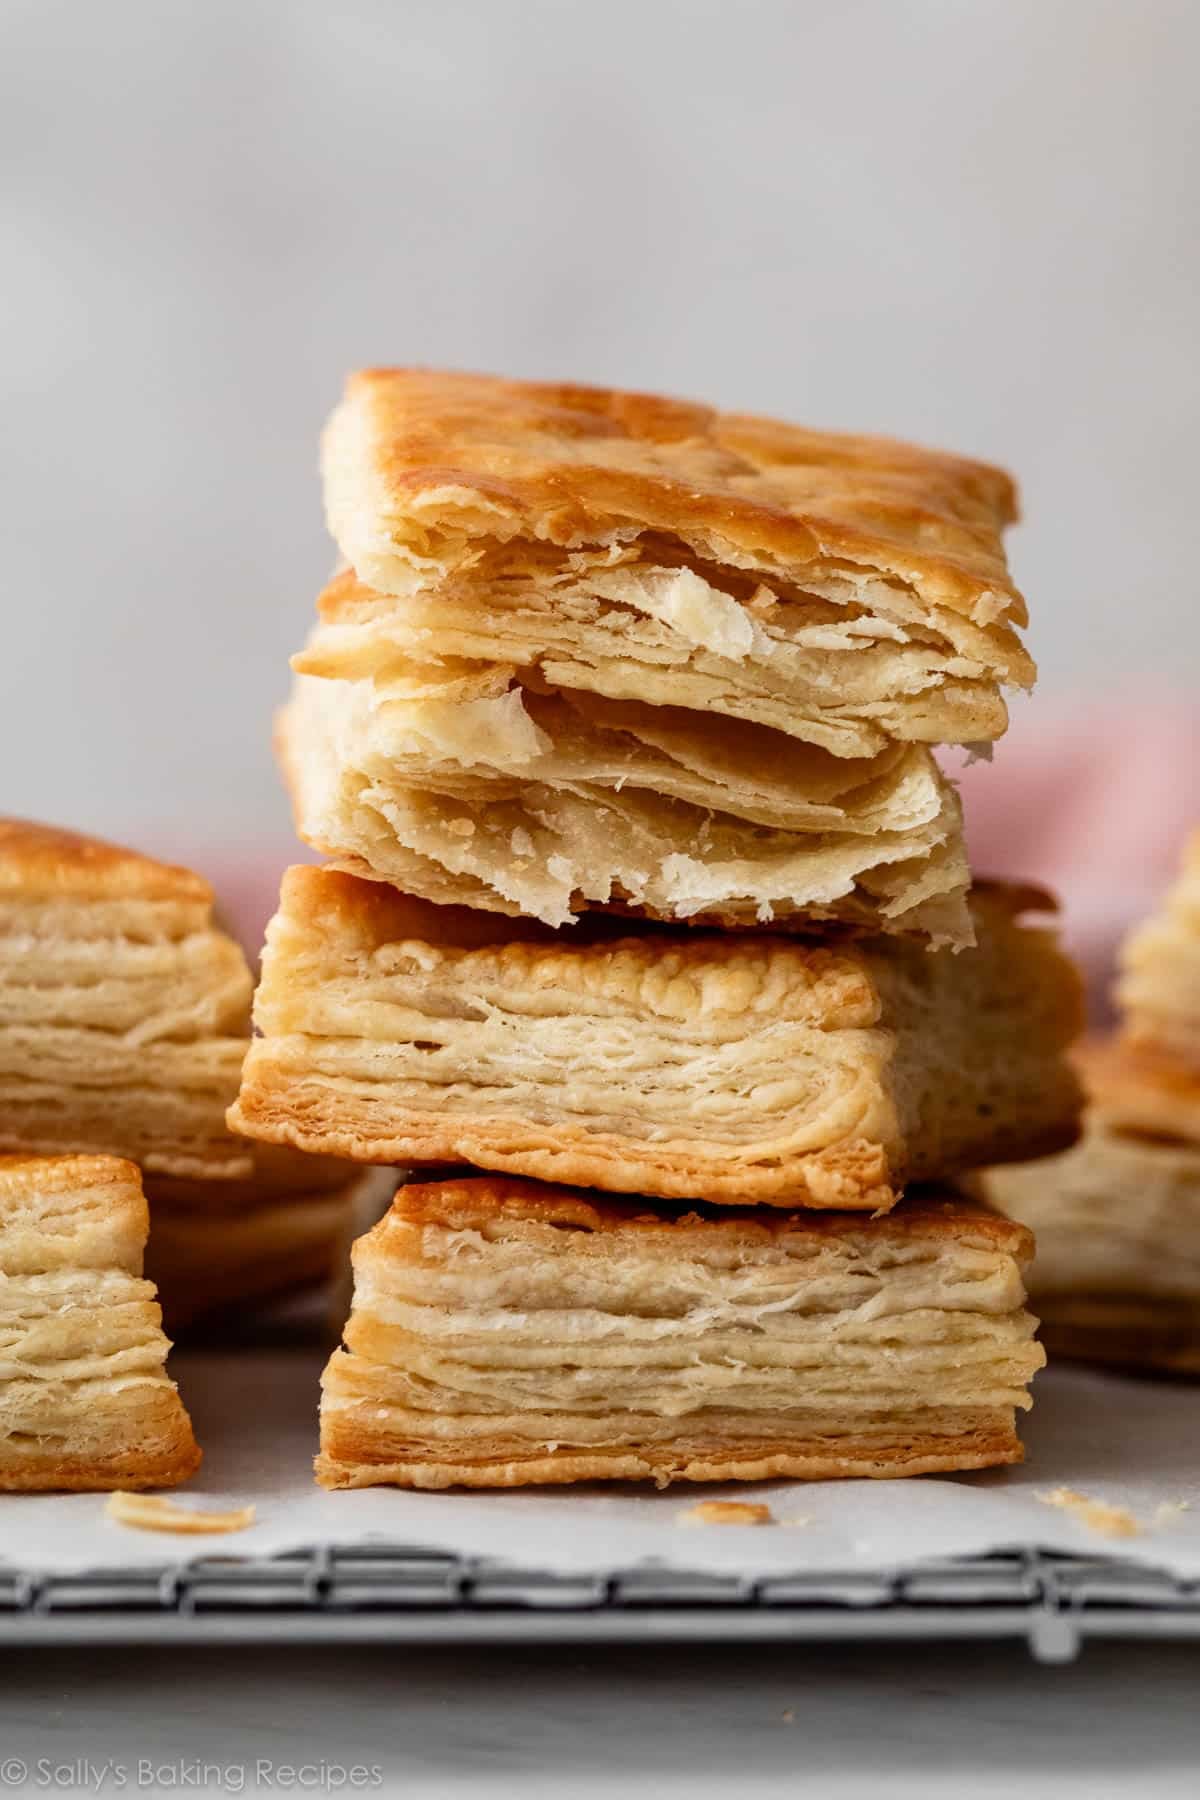
- Texture: Ahh, the best part. Each bite has oodles of crispy, crackly layers of light and buttery pastry. This pastry is one of the FLAKIEST doughs I’ve ever worked with and comes close to croissants territory. (But made in a fraction of the time!)
- Ease: I categorize this as an intermediate baking recipe. While it’s not nearly as involved as homemade croissants or homemade cruffins, it’s certainly not as easy as using store-bought frozen puff pastry. You need to flatten and fold the dough 6x, but there’s no chilling between each time so the recipe moves quicker than traditional homemade puff pastry.
- Time: The dough requires 2 separate refrigeration steps, but the 2nd one is only 15 minutes. You can easily make this dough in a few hours or over the course of 2 days. I always appreciate make-ahead dough where you have plenty of options in terms of timing. You can also freeze the dough, too.
How Is This Different From Pie Crust and Yeasted Pastry Dough?
Pie crust, while buttery and flaky, is not nearly as light, doughy, and crisp as this shortcut puff pastry. Yeasted pastry dough, such as something we can use for croissants, croissant bread, or a blueberry cream cheese pastry braid, contain yeast. This recipe simply relies on big chunks of cold butter (lots of it) and folding.
Just 5 Ingredients in the Rough Puff Dough
This shortcut pastry dough comes together with flour, sugar, salt, cold butter, and cold water.
- Why do the butter and water have to be cold? It’s important for the butter to stay cold so it doesn’t melt and soak up all the flour. We want the butter to stay solidified as we roll, shape, fold, and flatten this dough because if it melts before baking, you lose all the flakes. Game over. You see, when the butter melts in the oven, it creates steam and that steam separates the dough into multiple flaky layers. Cold butter is what makes cheddar biscuits and scones flakey too!
Rolling & Folding
Step by step photos of this process are below the recipe.
After you prepare the dough and chill it in the refrigerator for at least 2 hours (1st refrigeration), you will begin rolling it out with a rolling pin and folding it like a business letter, rolling it out again, folding again, and so on. You will roll + fold it a total of 6 times before refrigerating again for at least 15 minutes (2nd refrigeration).
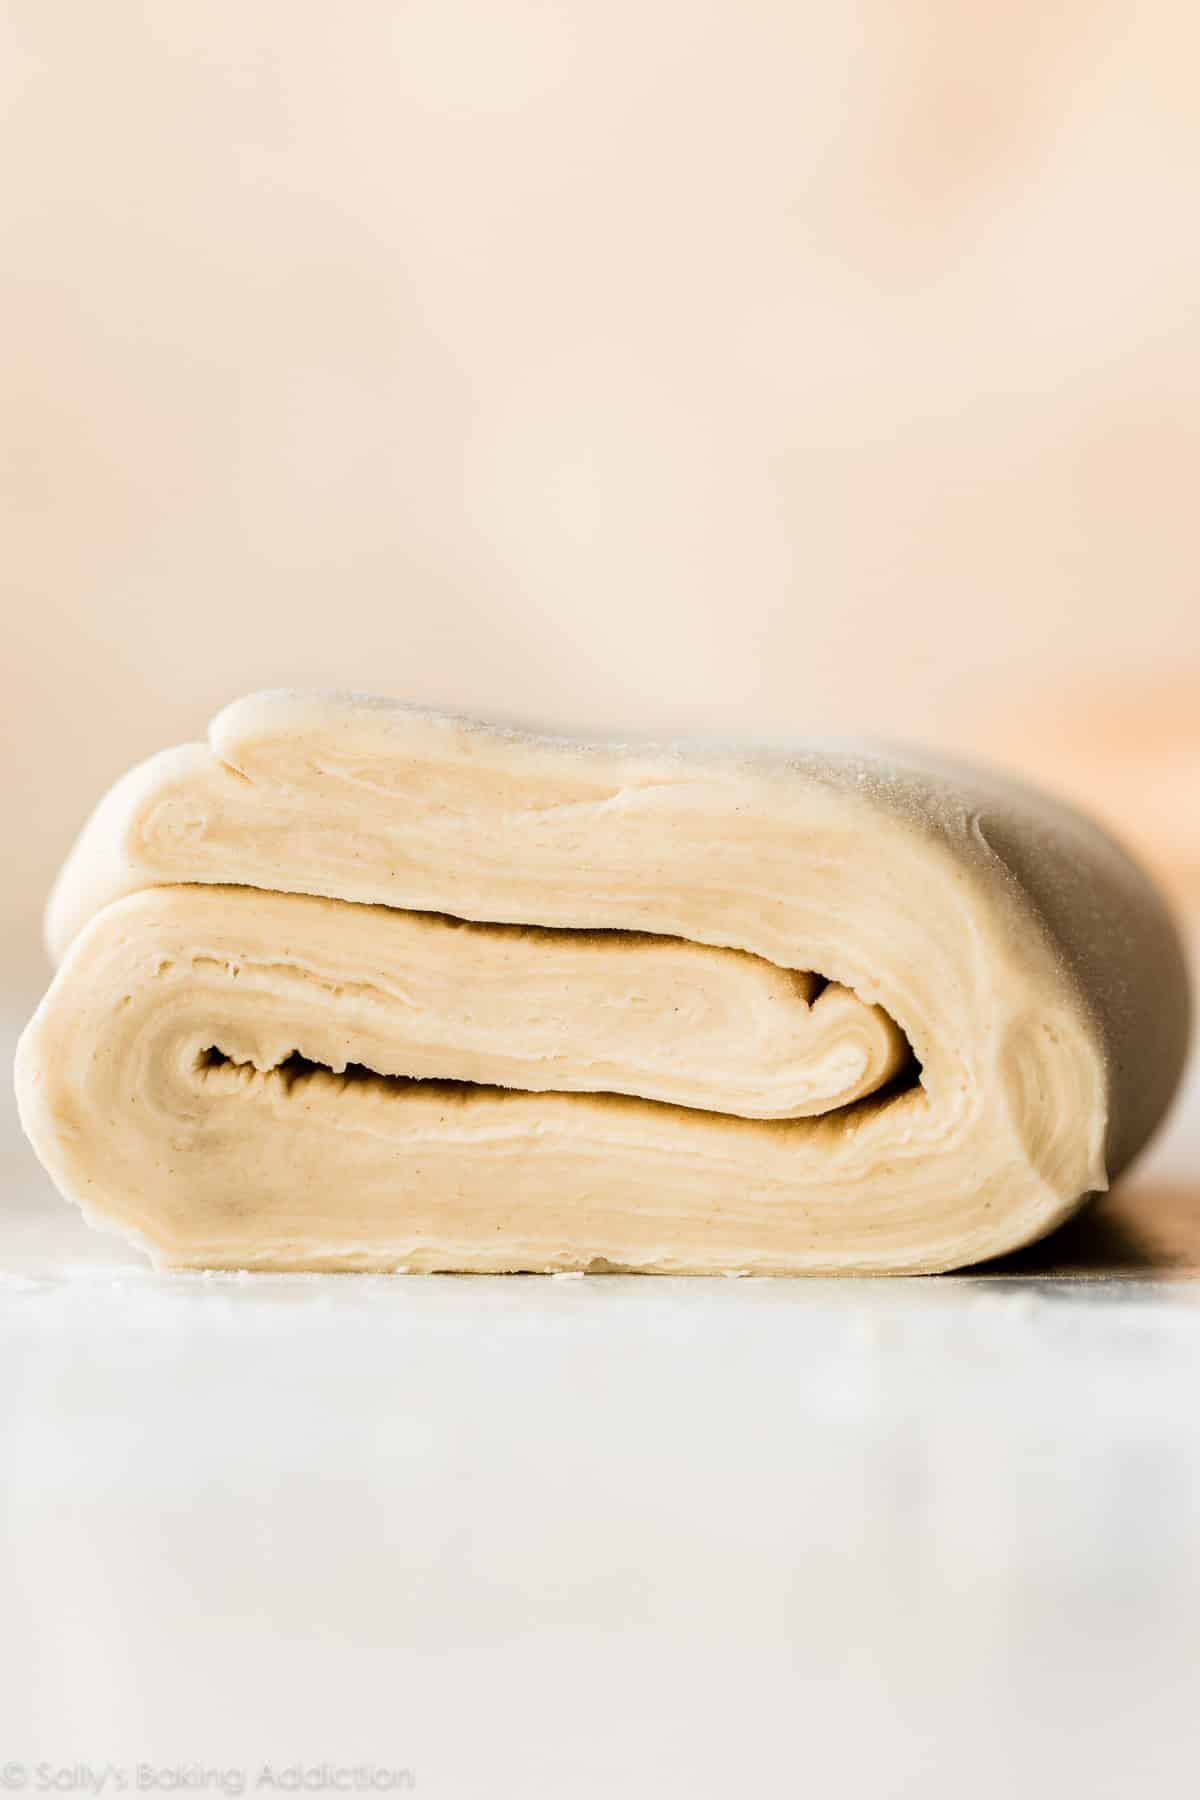
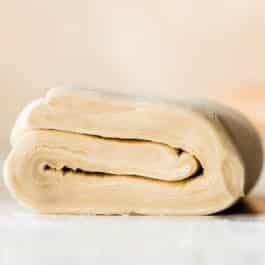
The photo below shows what the center of your dough looks like after all the rolling and folding. *Note that I sliced a sliver off the end so I could show you this!
Uses for This Rough Puff Dough
After the 2nd refrigeration, you can use this dough for:
- Honey Pear Tart
- Cinnamon Spice Palmiers
- Any recipe calling for 1 box (1 pound; 2 sheets) store-bought puff pastry
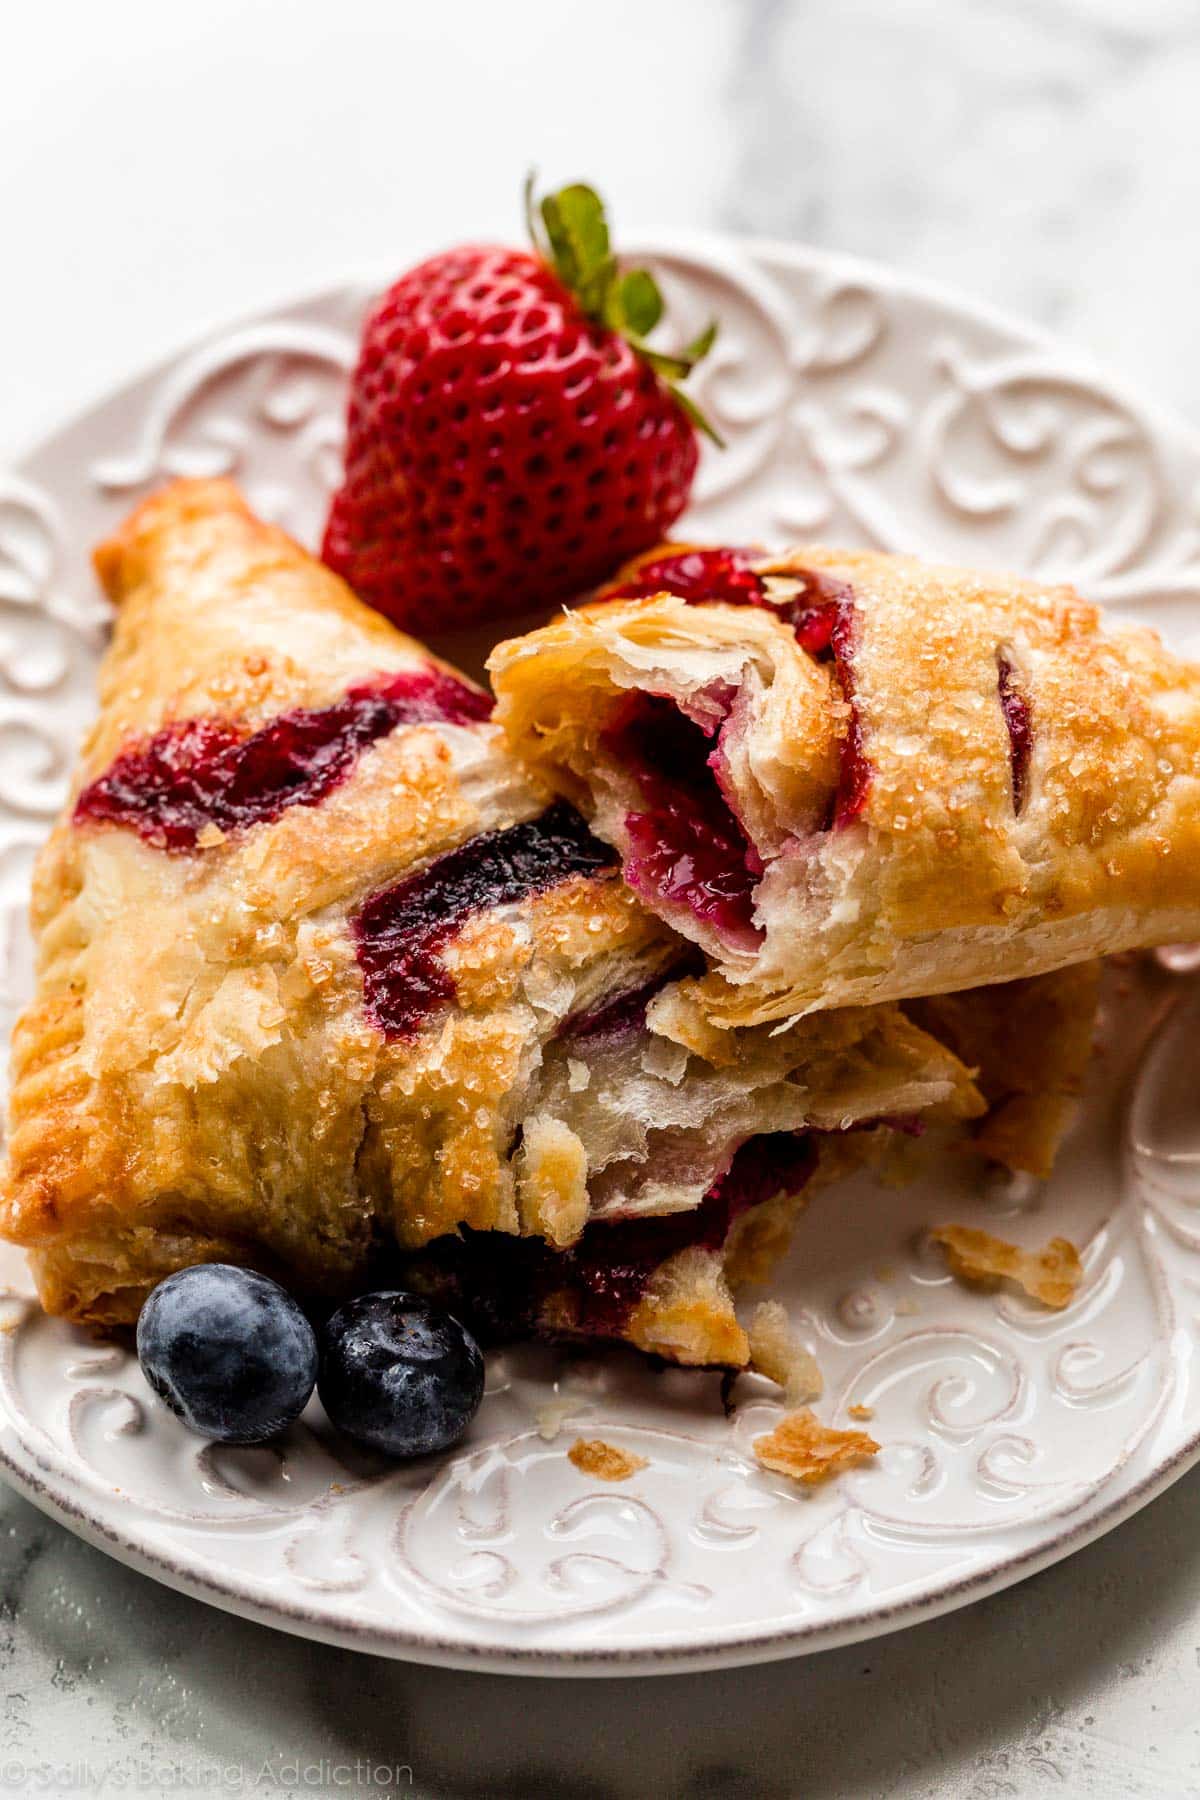
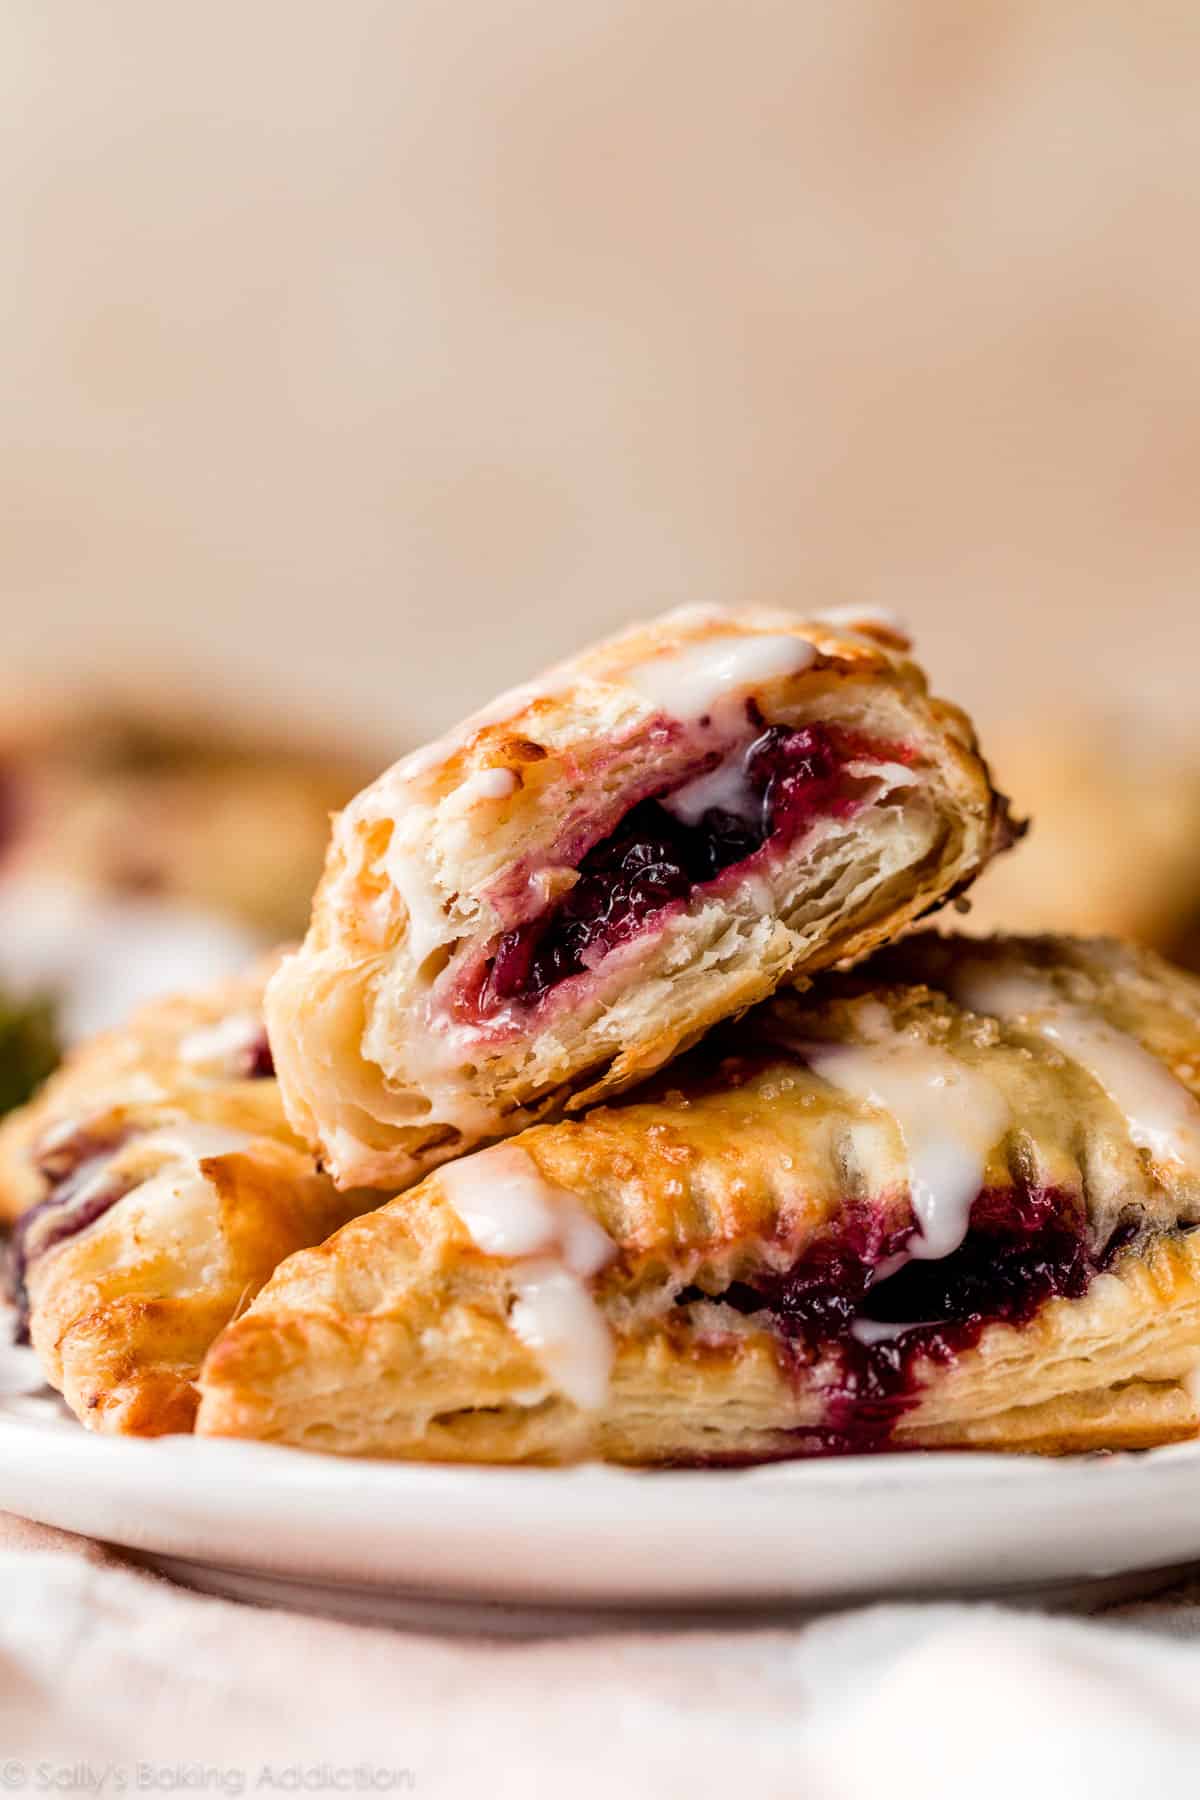
- Berry Turnovers (pictured above and below)
- Cranberry Brie Puff Pastry Tarts
- Caramel Apple Turnovers
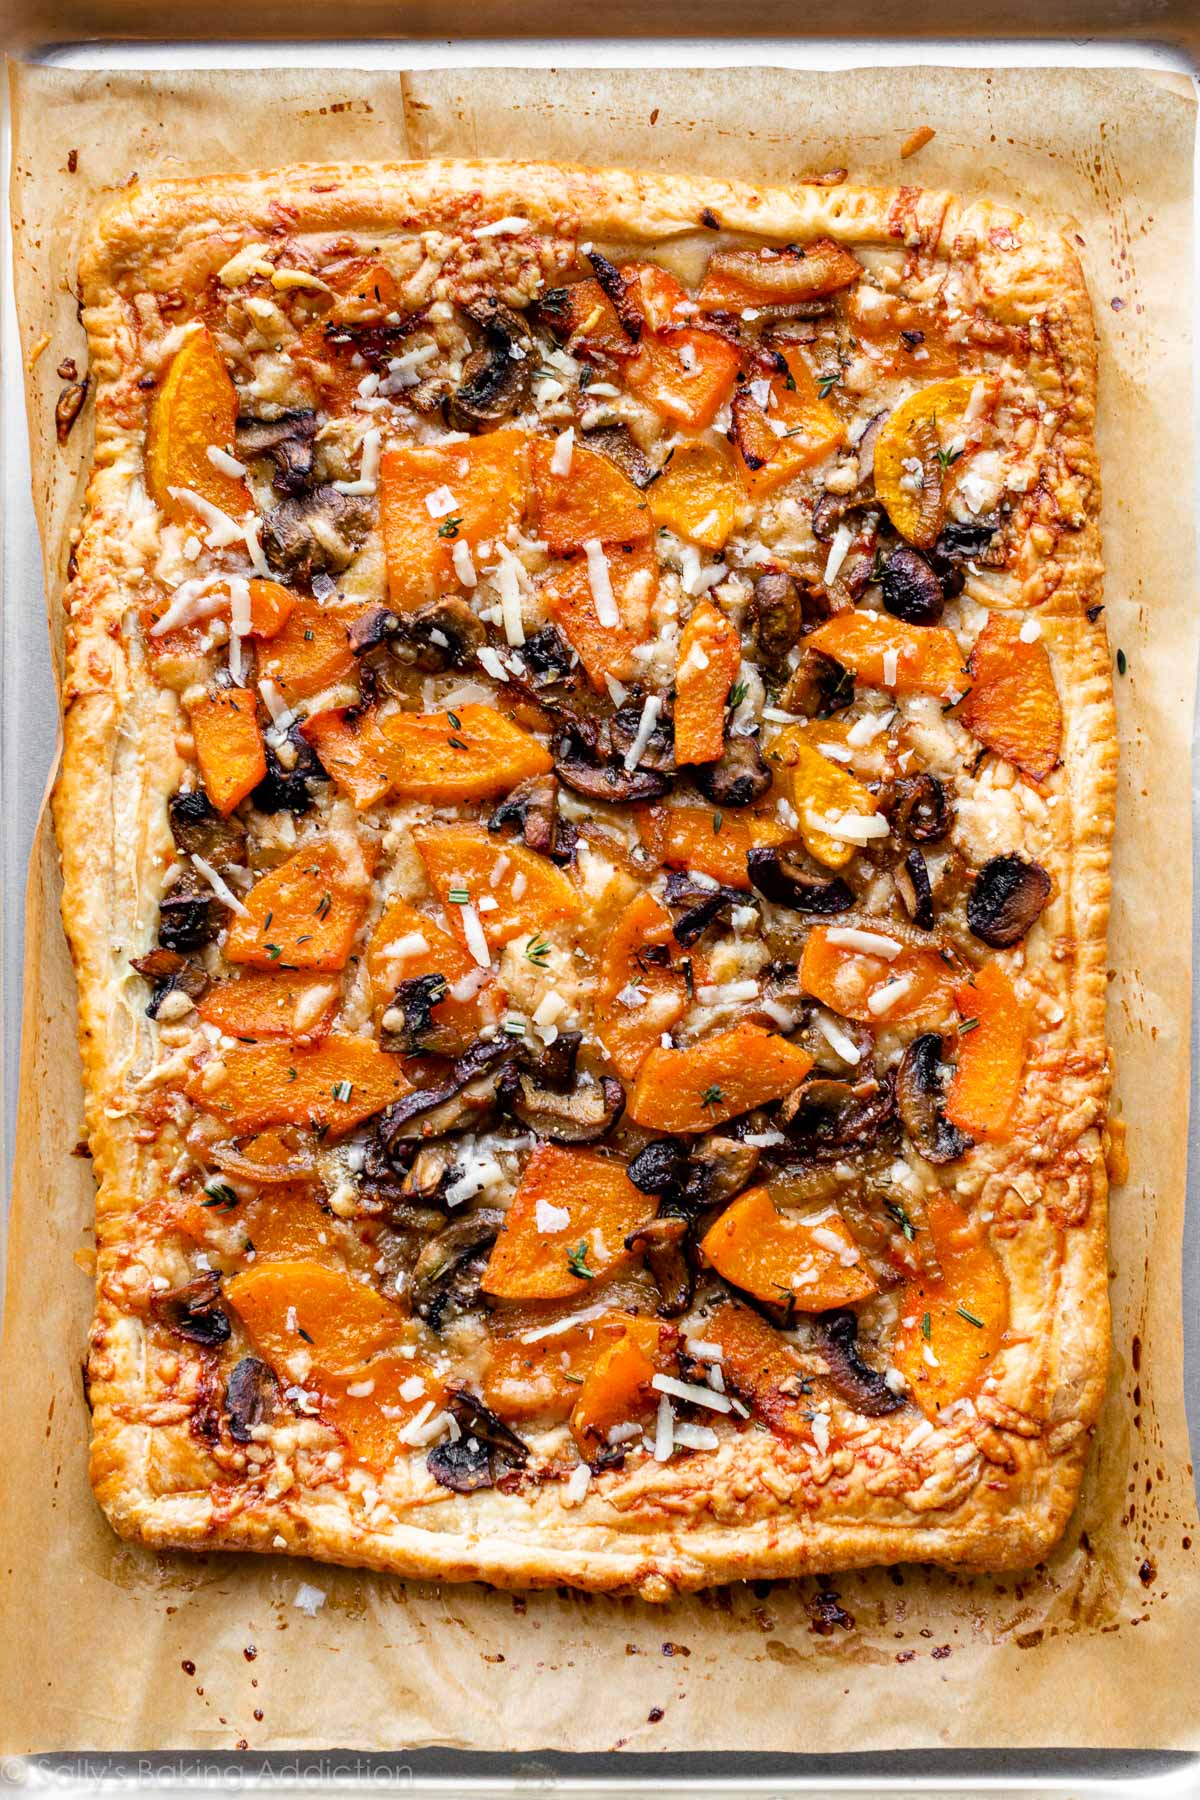
- Butternut Squash & Mushroom Tart
- Mushroom Puff Pastry Tarts
- Mille-feuille
To use as pie crust: You can use this pastry dough as pie crust in a recipe that calls for a single crust 9-inch pie. Roll dough out into a 12-inch circle before fitting into your 9-inch pie. Though all pie recipes are different, it would definitely be best to blind bake this dough with pie weights before adding a filling. Choose pie recipes that already call for blind baking and have a thicker filling. This would be excellent as the crust for quiche.
Handmade Puff Pastry (Rough Puff Method)
- Prep Time: 3 hours
- Cook Time: 0 minutes
- Total Time: 3 hours
- Yield: about 1 lb. (454g) dough
- Category: Baking
- Method: Folding
- Cuisine: American
Description
Use this in-depth tutorial to learn how to make a from-scratch puff pastry dough variation. The homemade dough comes together using a “rough puff” method where you carefully work butter into your dry ingredients and then fold and flatten the dough many times to create countless flaky layers. Make sure you start with very cold butter. This recipe is also in my cookbook, Sally’s Baking 101.
Ingredients
- 1 and 1/3 cups (167g) all-purpose flour (spooned & leveled), plus more as needed
- 1 teaspoon granulated sugar
- 1/2 teaspoon salt
- 3/4 cup (12 Tbsp; 170g) unsalted butter, very cold and cubed
- 6–8 Tablespoons (90–120g/ml) ice-cold water
Instructions
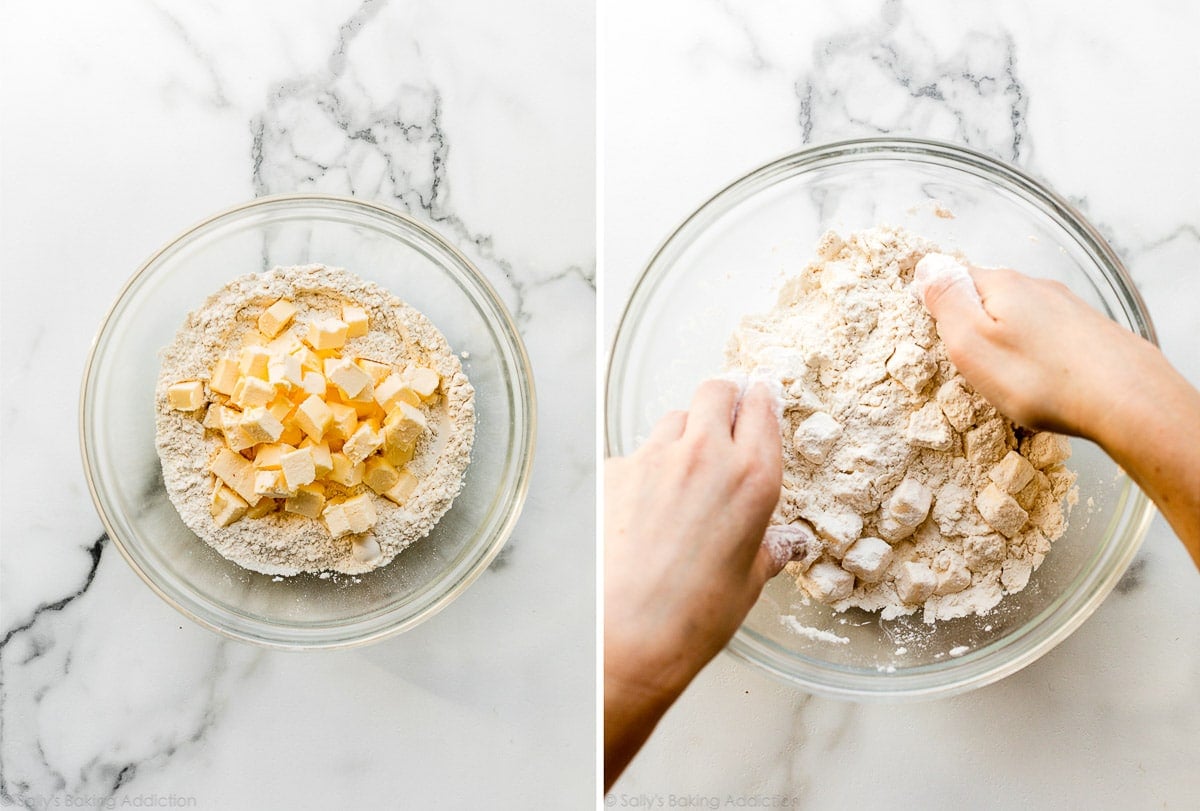
- Make the dough: In a large bowl, whisk the flour, sugar, and salt together. Place the cold and cubed butter on top. Gently toss the flour and butter together with your hands, and then briefly rub the butter into the flour to begin combining them, as you can see in the video tutorial. You do not want to break down the butter too much in this step. I do not recommend a food processor, pastry cutter, or mixer for this step because it will break down the butter too much.
- At this point, the butter is still in large cubes/chunks. Begin adding the ice-cold water, 1 Tablespoon (15g/ml) at a time, using your hands to toss the mixture together after each addition. (I usually start with 2 Tablespoons of water before I begin tossing together.) You can use a spatula or spoon for tossing, but I really do recommend your hands so you get a good feel of the dough. As the dough begins to hydrate after about 4 Tablespoons of water, you can start lightly squeezing or clumping the dough together with your hands to help bring it together. Mixture will still be very shaggy, as you can see in the video and photos. If your dough feels sticky and wet before adding 6 Tablespoons of water, mix in 1 Tablespoon of flour (your butter was likely too warm—you can continue with the recipe, but the dough may not be as flaky).
- Pour the shaggy clump of dough out onto a lightly floured work surface. There should still be large chunks of butter at this point. With lightly floured hands, begin patting the dough down until it’s 3/4–1 inch thick, about a 5×8-inch rectangle. Fold the dough into thirds as if you were folding a business letter. Use your hands to gently flatten and smooth out any cracks in your dough. Wrap it tightly in plastic wrap or parchment paper, or place into an airtight container.
- 1st refrigeration: Refrigerate the dough for at least 2 hours and up to 24 hours.
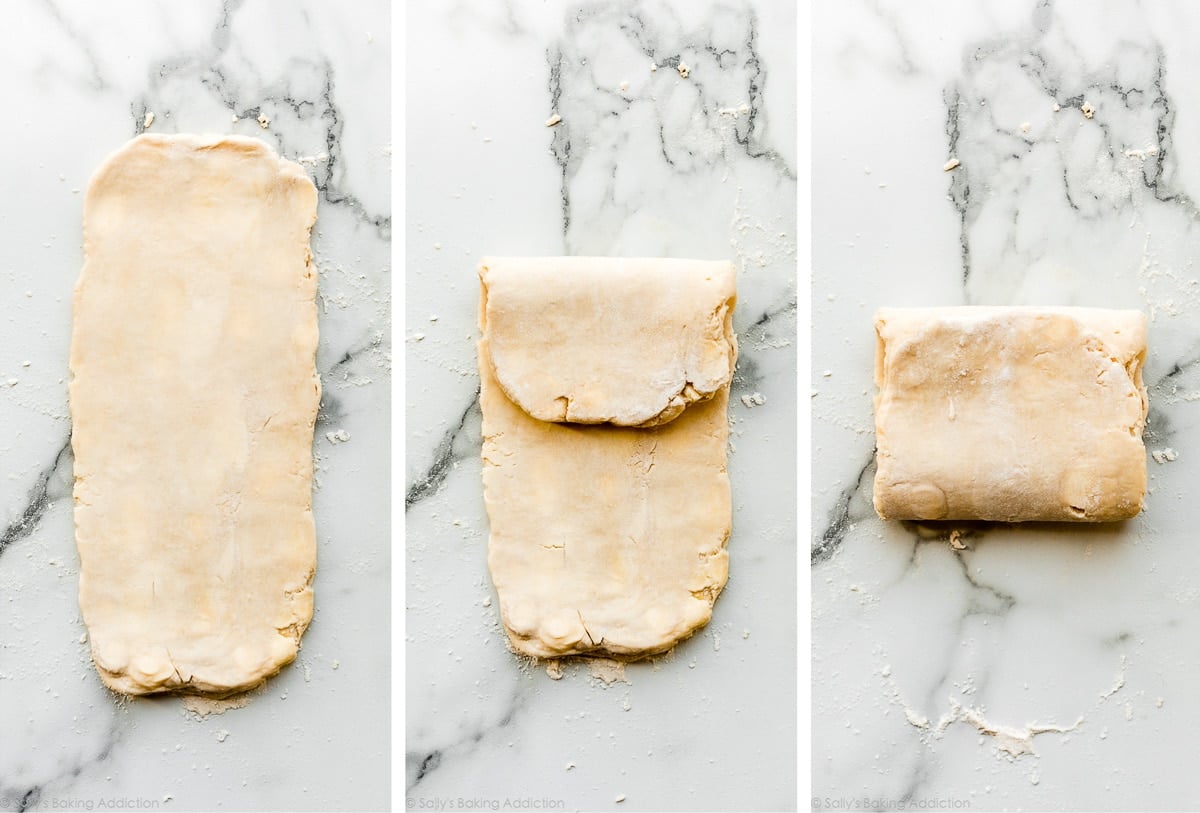
- Roll & Fold: Take the dough out of the refrigerator to begin the “rolling and folding” process. If the dough chilled for longer than about 3 hours, it’s likely very stiff, so let it rest for about 5 minutes before you begin rolling. Lightly flour a work surface. The dough gets sticky, so make sure you have more flour nearby as you roll and fold. Using lightly floured hands, gently flatten the dough into a small square. Using a rolling pin, roll the dough into a rectangle that’s 1/2 inch thick, about 6×12 inches. The exact dimensions are not important, but the thickness is. As you roll, it’s best to flip the dough over once or twice to make sure it’s not sticking to your work surface. Lightly flour your work surface as needed. Fold the rectangle into thirds as if it were a business letter. (See photos and video tutorial.) Turn it 90 degrees and roll it out into a 1/2-inch-thick rectangle again. Fold into thirds again. Turn it 90 degrees. You’ll repeat rolling and folding 4 more times for a total of 6 times.
- 2nd Refrigeration: Wrap the dough tightly and refrigerate for at least 15 minutes and up to 24 hours before using in your recipe. You can also freeze the dough at this point. See Notes.
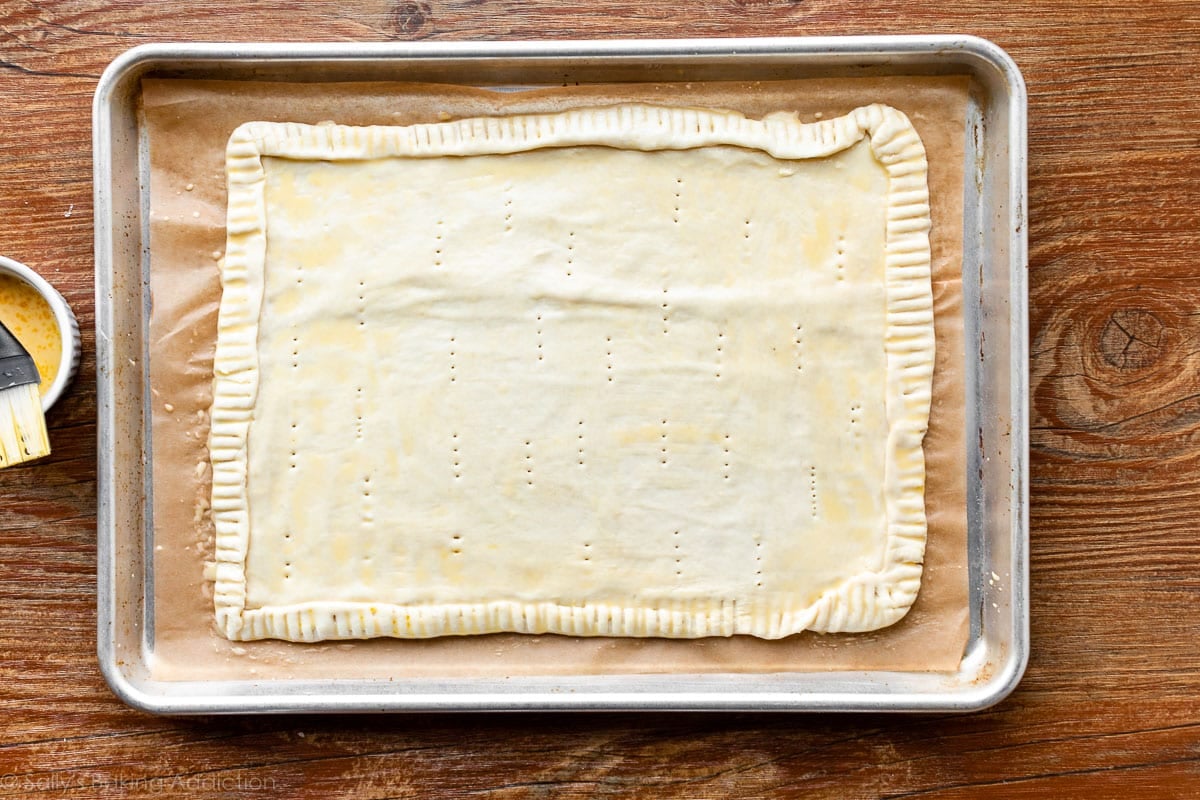
- Use wherever you would use frozen store-bought puff pastry. To bake plain, roll pastry dough into a 10×16-inch rectangle and place on a lined baking sheet. Brush all over with egg wash (1 large egg whisked with 1 Tbsp milk), and bake at 400°F (204°C) until golden brown and puffy, about 25–28 minutes.
Notes
- Make Ahead & Freezing Instructions: Prepare as instructed in steps 1–3. At this point the dough can be refrigerated up to 24 hours (see step 4). You can also prepare the dough through step 5. At this point the dough can be refrigerated for up to another 24 hours (see step 6). During or after this second chilling time, you could also freeze the dough for up to 1 month. (I don’t recommend freezing the dough before the rolling and folding step.) Thaw overnight in the refrigerator before using in a recipe that calls for 1 lb. puff pastry dough (or 1 store-bought package with 2 sheets puff pastry).
Step-by-Step Photos
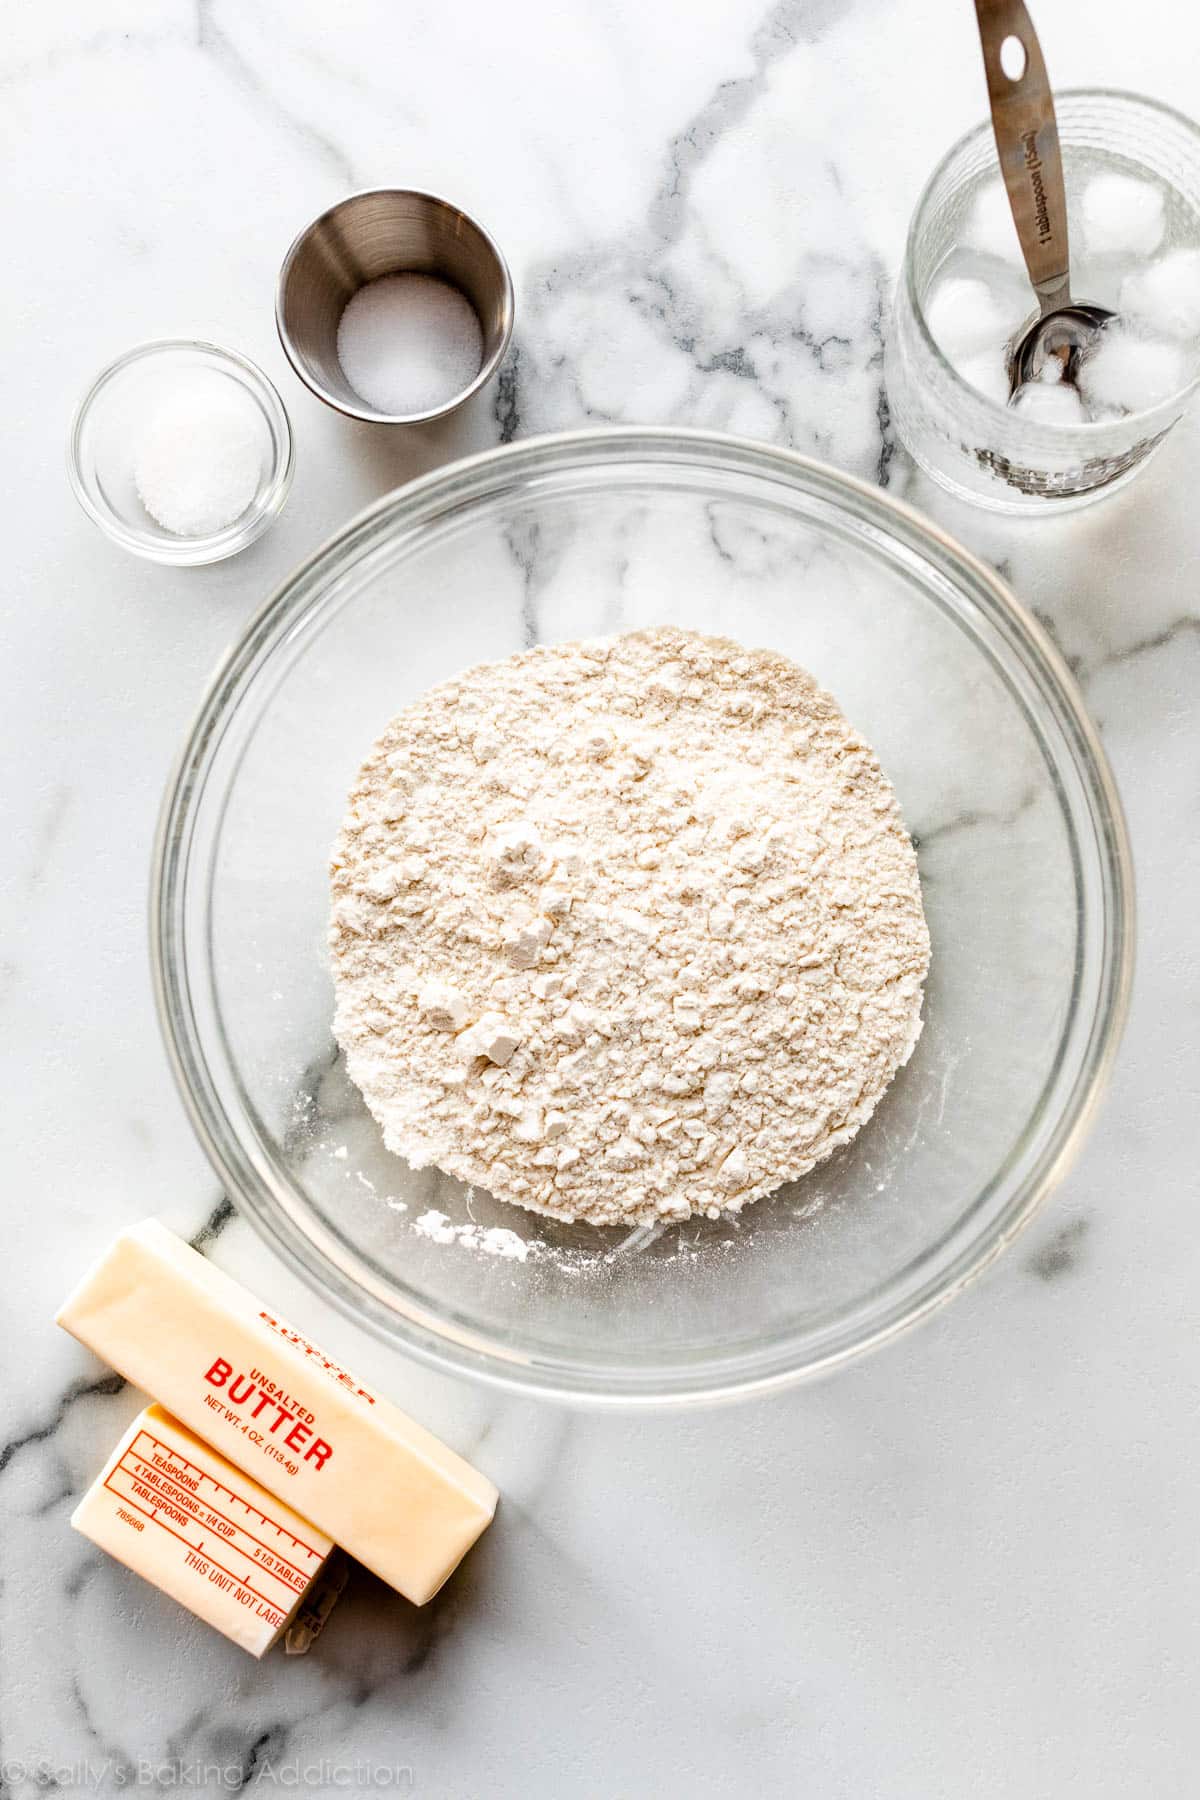
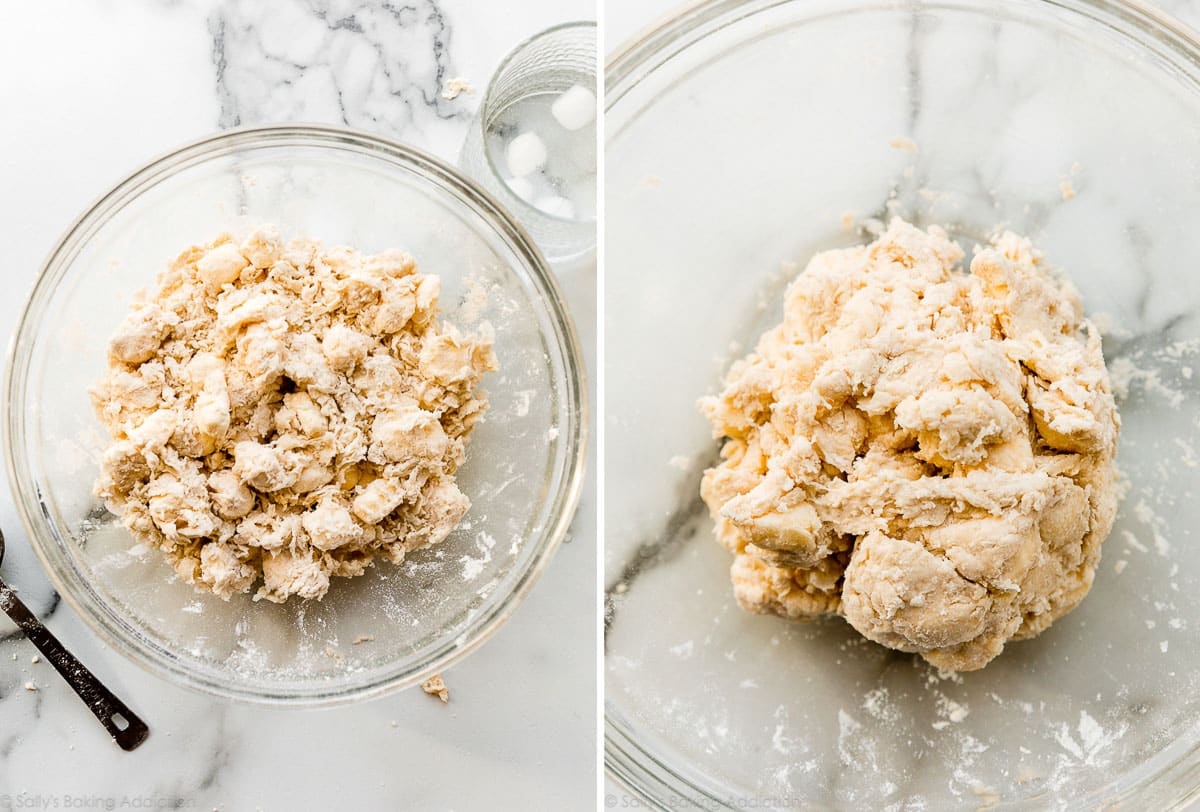
The following photos show the bowl of dry ingredients with the cold and cubed butter on top. In the right photo, you can see me gently tossing the flour and butter together. In this step, I’m briefly/barely rubbing the butter into the flour to start combining them. This step is only possible if the butter is very cold because if the butter is warm, you’ll end up with paste.
At this point, as you can see in the photo on the left below, the butter is still in large cubes/chunks. That’s great! Now let’s add the ice-cold water 1 Tablespoon at a time, using our hands to toss it all together. (Note that I usually start with 2 Tablespoons of water before I begin tossing together.) You can use a spatula or spoon for tossing, but I really do recommend your hands so you get a good feel of the dough.
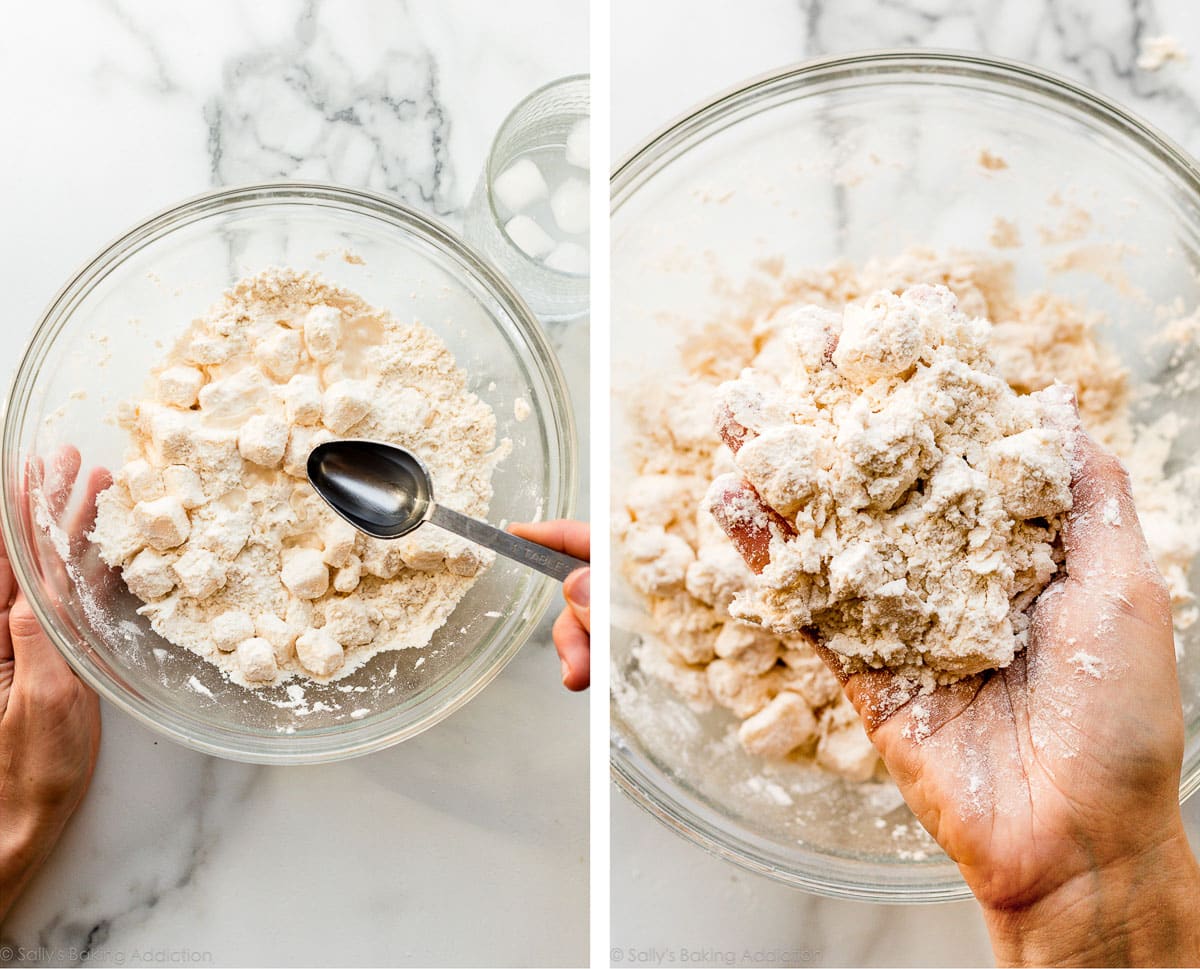
Photo below left: Continue adding the ice cold water and tossing the mixture together after each has been added. As the dough begins to hydrate after about 4 Tablespoons of water, you can start lightly squeezing or clumping the dough together with your hands to help bring it together. Mixture will still be very shaggy, as you can see.
See the photo below on the right? You only need 6–8 Tablespoons of ice-cold water to get to this point. Do not add any more or any less. If your dough reaches this point before adding 6 Tablespoons of water, your butter was likely too warm. You can continue with the recipe with less water, but the dough will not be as flaky.
Pour the shaggy clump of dough out onto a lightly floured work surface, as you can see in the photo on the left below. There will still be large chunks of butter. Begin patting it down with your hands until it’s about 3/4–1 inch thick, about a 5×8-inch rectangle:
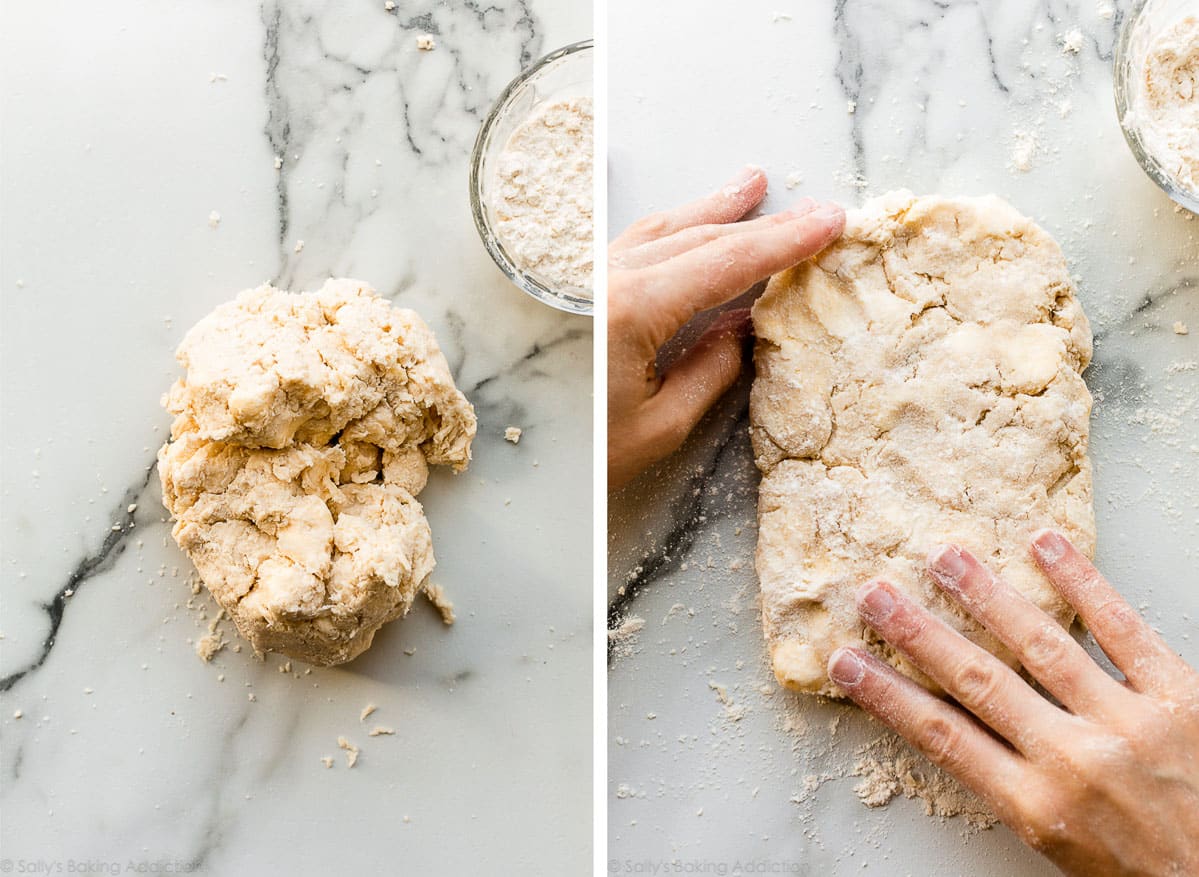
As shown in the photos below, fold the dough into thirds as if you were folding a business letter. This is exactly how we fold biscuits dough, too!
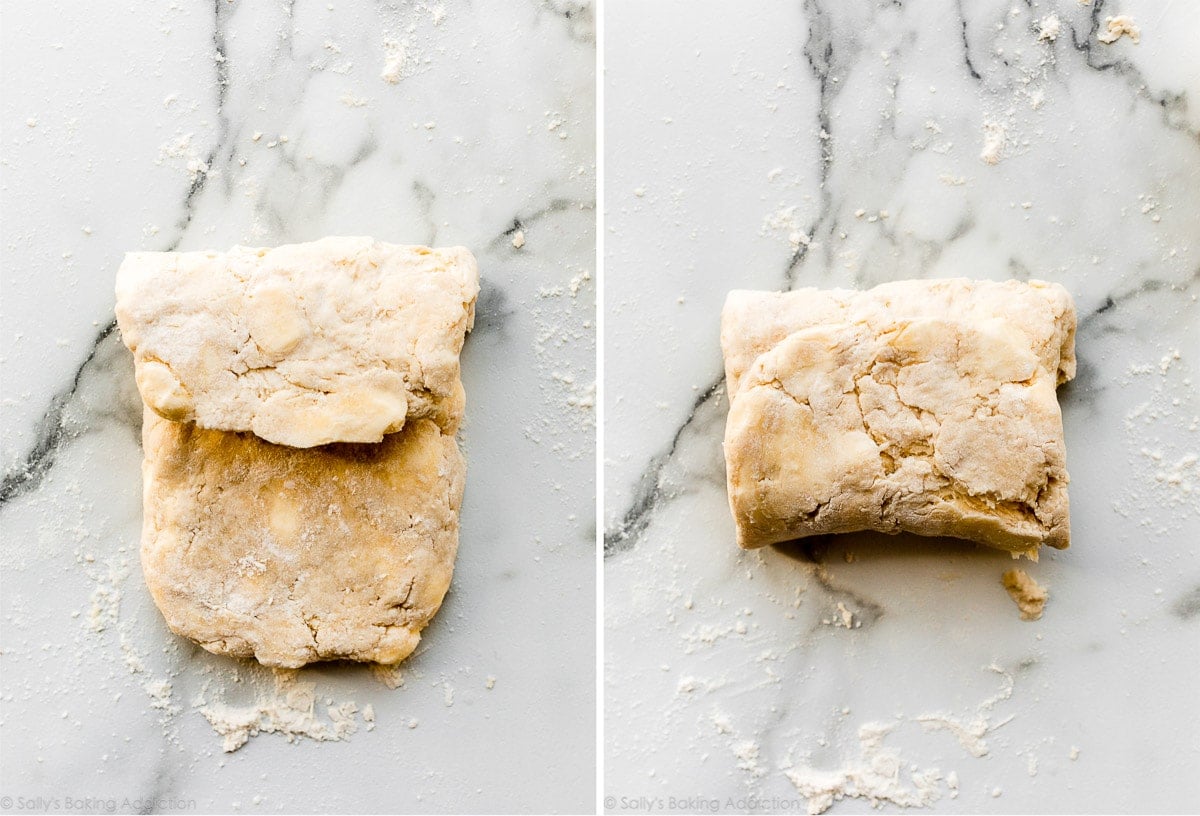
1st refrigeration: Now use your hands to gently flatten and smooth out any cracks in your dough “business letter” then wrap it in plastic wrap, aluminum foil, parchment paper, or place in a sealed container, and refrigerate for at least 2 hours and up to 24 hours.
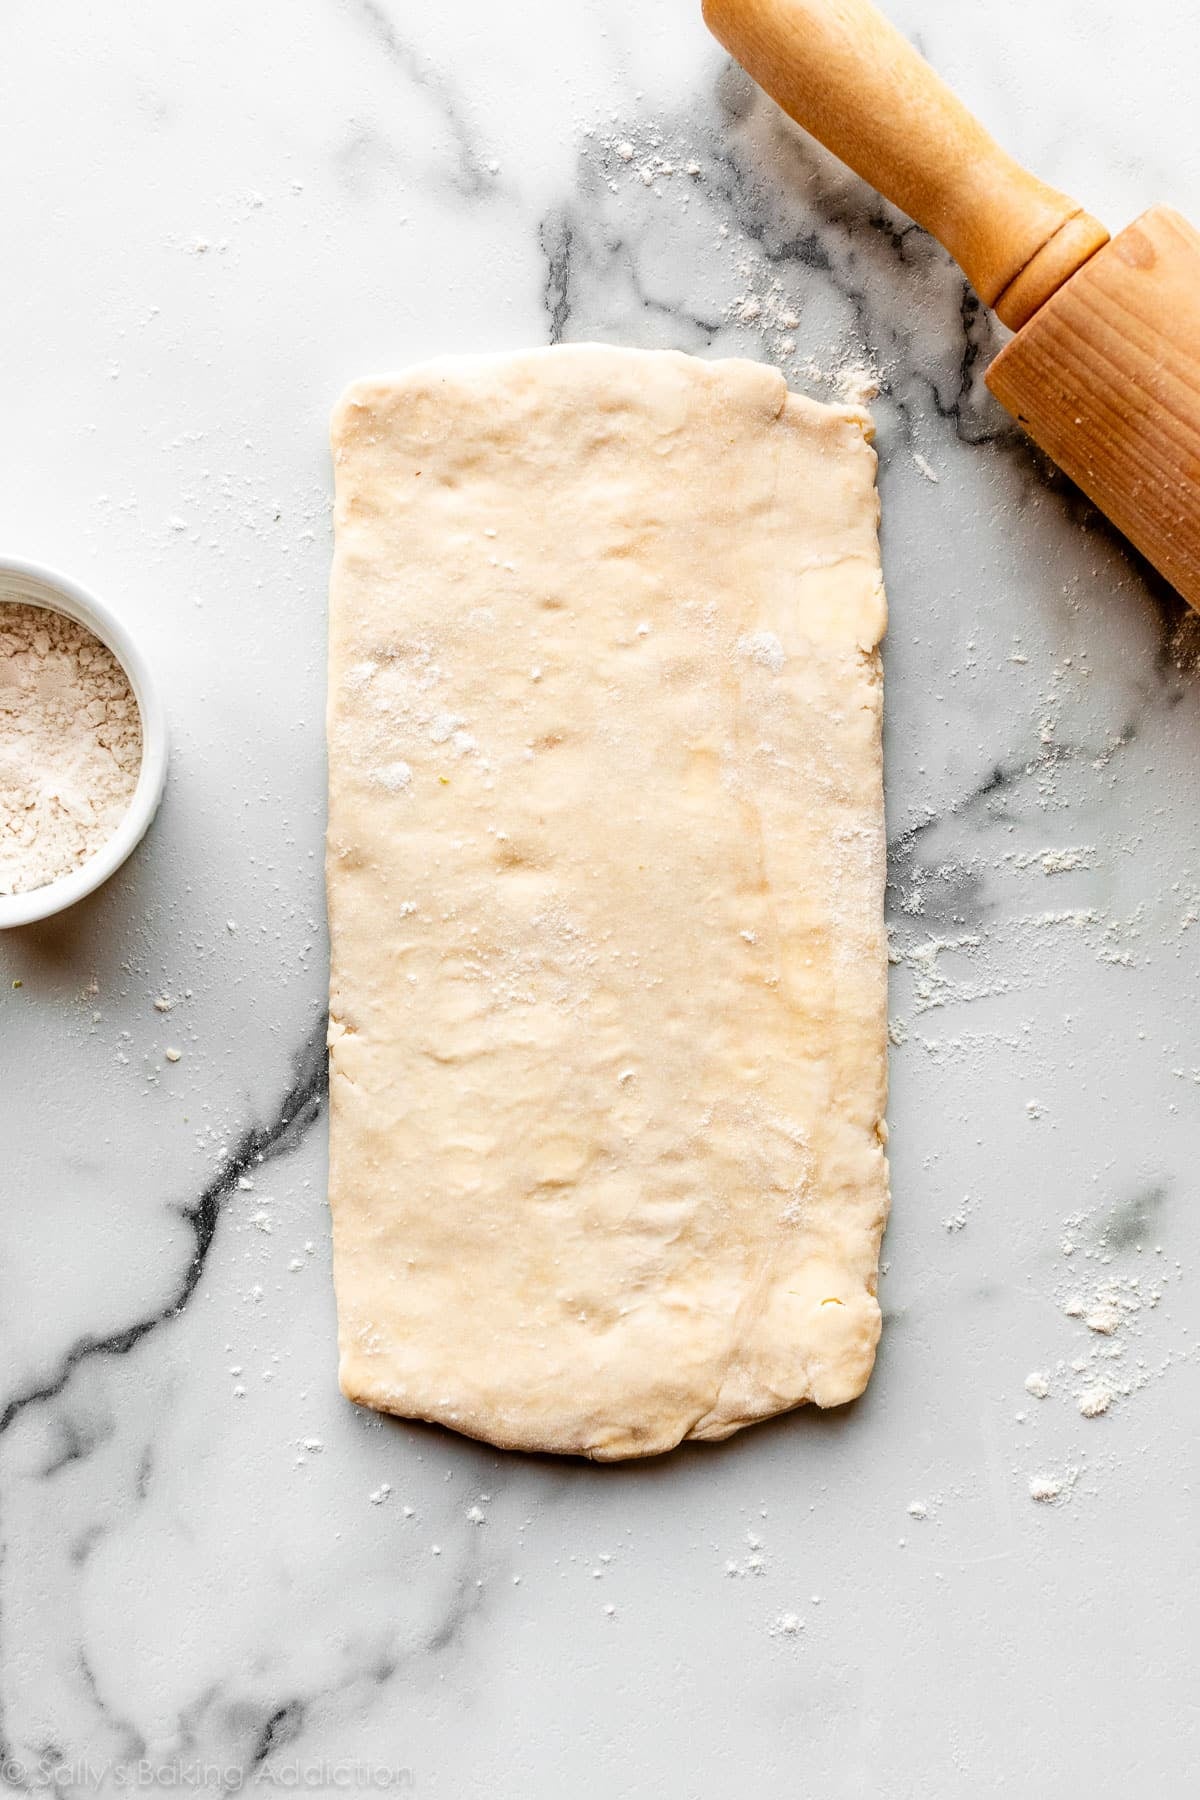
Now it’s time for the rolling pin. Remove dough from the refrigerator and begin rolling out.
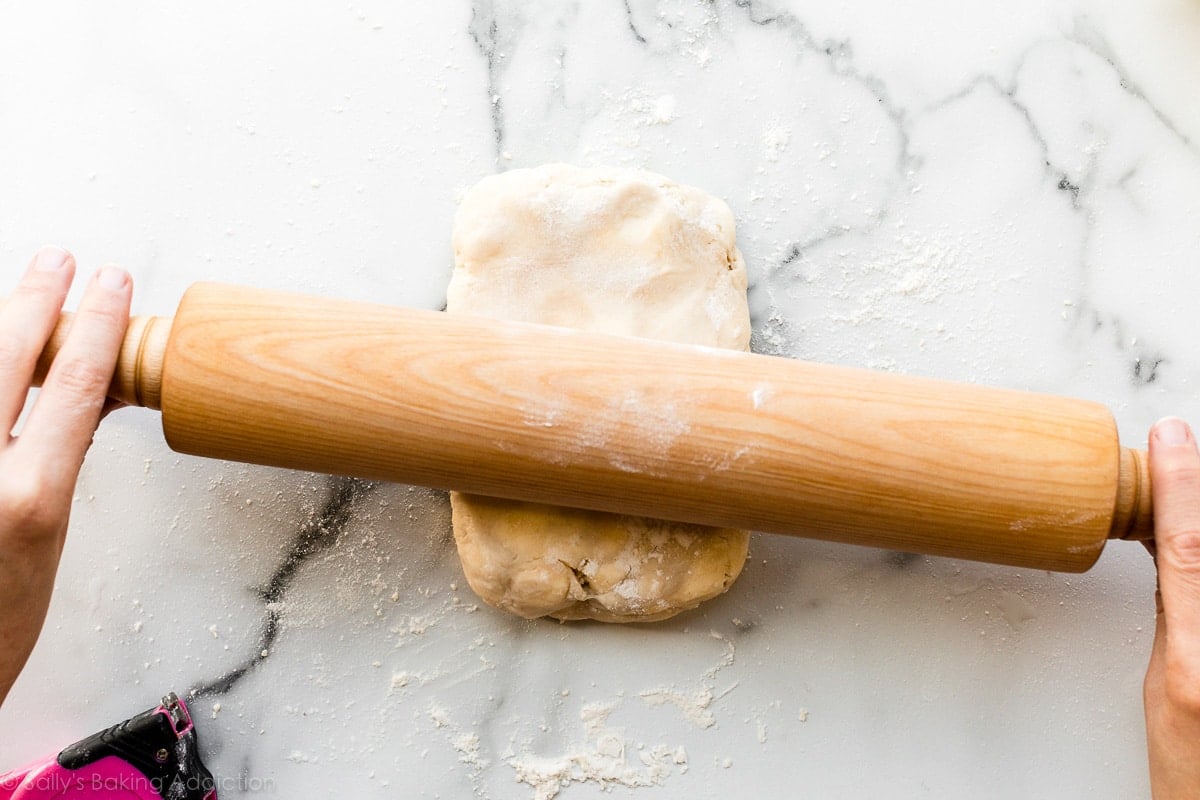
You’re going for a thickness of 1/2 inch, so the rectangle should be about 6 x 12 inches. The exact dimensions are not important, but the thickness is. Fold the rectangle into thirds like a business letter:
Turn it 90 degrees, then grab your rolling pin again:
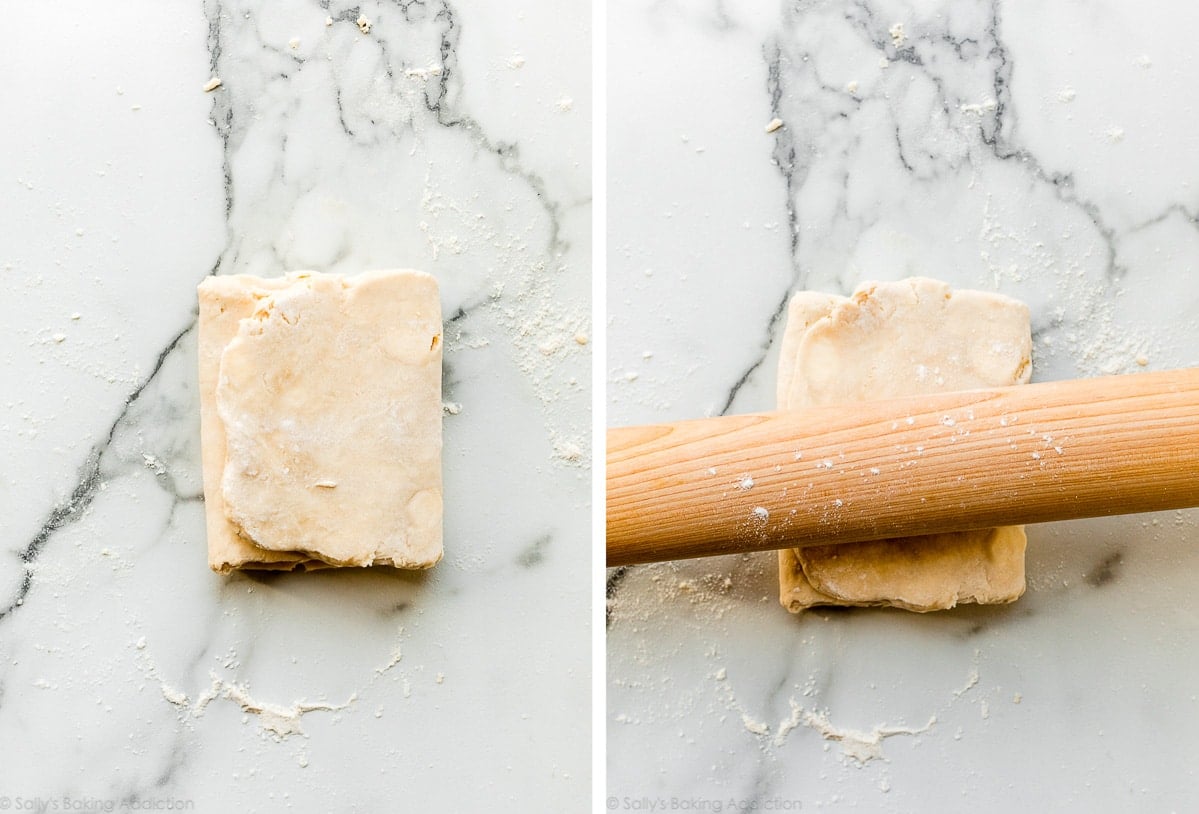
Repeat this 5 more times, for a total of 6 rolling out + folding sessions.
Success Tip: If the dough “business letter” is so thick or impossible to roll out, cover it with a clean kitchen towel and let it rest for 5 minutes before trying again. The butter just needs to slightly soften. Lightly flour your work surface whenever necessary.
After the 6th time, you may not be able to see visible chunks of butter anymore. (If you do, that’s fine. If you don’t, that’s also fine.)
2nd refrigeration: Fold the dough into a business letter, wrap tightly, and then chill for at least 15 minutes and up to 24 hours. Now you can use it in your recipe such as homemade palmiers or this butternut squash and mushroom tart.


Reader Comments and Reviews
I am considering the addition of sour cream to this recipe to replace some of the water volume as it can make an extra tender pastry. Do you have a suggestion for quantity/weight for this receipt?
Hi Katie, it’s hard to say without testing it ourselves, and we haven’t experimented with adding sour cream. Let us know if you do try anything.
Hi. Thank u for the recipe. I may have made a mistake. The dough became crumbly after baking- more biscuity than pastry. Pls let me know what could have gone wrong
Hi Candida, we’re happy to help troubleshoot. How did you measure your flour? Be sure to spoon and level (or use a kitchen scale) to ensure the flour isn’t over measured, which can cause pastry to become dry and crumbly. An easy fix for next time!
I truly can’t thank you enough for this! In the past I have had various struggles with wet, dense pastry but this was truly perfect – so flaky! I used it to make a feta & tomato tart and it made a beautiful summer dinner centrepiece. Thank you again!
Thank you so much for sharing this recipe, along with photographs of the dough-making process! I’ve used this recipe 4 times now, and every time the pastry has turned out flakey, buttery, and delicious. I was intimidated by the process of making any kind of puff pastry, but your instructions made it easy and fun! Thanks again and keep up the excellent work ❤️
Definitely the best pastry I have made possibly one of the best pastries I have ever had.
I’ve made this recipe many times and I’m confident using it. I have a big ask. I want to make something called the New York Roll. Pieces are rolled up inside pastry rings. After baking and cooling they’re injected with pastry cream, dipped in ganache and then nuts.
It’s usually made with croissant dough. Ever so grateful for your thoughts.
Hi Linda, we haven’t tested anything like that, but let us know if you do any experimenting! You might also find this Croissant Loaf helpful for recreating that type of bake.
Thank you for the advice. I did decide to use a croissant dough instead of puff pastry. My NY Rolls came out fantastic. After cutting the dough into strips and rolling up into coils, I baked them inside 4″ pastry rings. After cooling, I piped pastry cream into the centers through the sides, then dipped them in melted chocolate and rolled them in either chopped pistachios or sprinkles.
https://photos.app.goo.gl/yVbcPf4qbq3eZU9A6
Hi Sally! So happy I found your website! I’ve very interested in making a gluten-free pastry. Do you think using a high quality gluten-free flour like King Arthur’s would work for this recipe?
Hi Kathi, we’re glad you found us! We have not tested it so we can’t be certain of the results. Let us know if you give it a try and which flour you use.
Not sure what happened but my dough was very tough and took forever to roll out which meant it got too warm and the butter leaked or in baking. I’ve followed other rough puff recipes and full lamination without this problem. I also only got 8, very small turn overs from one recipe which didn’t seem like very many given the size of the tart you made.
My first ever puff pastry; made a wonderful crust for a dark chocolate cream pie. Since it came out perfectly, I will be using the recipe again.
Thanks you!! I went to roll out the puff pastry for your apple turnover recipe, and realized I only had phyllo sheets! Luckily, I had all the ingredients for this, but I was super nervous because I tend to mess up recipes, and this one looked impossible. But your instructions and video were so easy to follow! I’ve baked before, and my hubby always says they’re good, but not grandma-level, and that I need to go visit her for a week. Haha! Anyway, after making your dough and turnovers, he didn’t believe I made them—he was certain I bought the dough! So yeah, THANK YOU!!!♡♡
Hello, I used this dough to make turnovers and it’s amazing!! I have a question though regarding filling, I’m struggling to keep the filling in the turnovers when it’s comes to folding the dough after you place the filling. No matter how much I add, it spills over when I fold them. Even if I place it in the middle or at a corner. No matter if it’s thick or thinner. The filling always runs out! I feel like I have to like wrestle the turnovers to keep the stuff from gushing and I always have to wipe the edges with a towel. Please please help, it’s frustrating!
Hi Becca, we’d love to help you figure this out. What filling are you using? We think what would help is making the squares of pastry bigger so there is more room for the filling. Hope this helps!
Thanks to have you online,i am learning from you and baking is becoming a part of my life, thanks to you Sally. My name is Barron Kabiya Mwape from Zambia. God bless you.
Would these work as a pastie for a meat pie?
Can’t see why not, our pie dough would also be a good contender. Let us know if you try! Love pasties.
Hey just wondered if I could use this to make danishes or if the breakfast pastry would be better?
Hi Kayla, the recipes and methods are similar, but the breakfast pastries recipe uses yeast to yield slightly puffier pastries. Feel free to use either.
I have made several recipes of rough puff pastry and this is far and away the best and easiest of the lot. Flakey, buttery and delicious. This will be my go-to recipe from now on. Wow!
I was only able to nail this first try due to your excellent instructions! Seeing those flaky layers made me feel so proud!
Hello! A question please! Would I proceed with the same above recipe if i want ro make a “galette des rois”?
Hi Angela, while I’ve never tested it myself, I can’t see why not!
hello! I’m a big big fan I think your stuff looks delish!
I used this for a “Galette des rois” and it was awesome.. Highly recommend!
I made creamhorns with the recipe I had before but if I remember correctly, it had three times the butter and twice the flour, they were so flakey and tinder I had to be very careful when taking them off the forms or they would crush.
I am wanting to make puff pastry caramel pecan rolls, would this rough puff work for that? The recipe calls for store bought puff pastry.
Hi Claire, that should work just fine, let us know if you try!
Couldn’t find puffy pastry in stores! This was pretty easy and turned out well for a samosa “pie” I was making (https://foodess.com/samosa-pie/#wprm-recipe-container-4616) Just omitted the sugar.
I was so nervous when I tried this. It came out great! I’m proud of myself. Thank you!
The rough puff pastry came out perfectly, followed the recipe exactly. Used the pastry for a Pork Wellington and it had crispy layers of buttery goodness!
I used this recipe on top of pot pie. It was amazing, thank you!
Went to 5 different stores yesterday looking for a frozen puff pastry for a baked Brie recipe, searched your database, and sighed in relief. On Bake Off they make rough puff sound like a nightmare but this came out for me like an easy peasy dream. Worlds of thanks for your endless deliverance of perfect baked goods via perfectly worded instructions, every time. Happy holidays!
Sally’s is my go to for all recipes that I need, cannot wait to try this!
Can’t wait to make this! Your instructions are so clear!!
Greetings from Vancouver Island! Can I use this recipe to make sausage rolls? Should I omit the sugar? Thanks!!
Hi Candace, we haven’t made sausage rolls specifically, but this should work for it! It’s a very small amount of sugar, so you likely won’t notice a difference with or without it.
Hi Sally, I used the homemade pie crust recipe to make a banana cream pie and it turned out great, but I wanted more flakiness in my crust. Have you tried using this for a banana cream pie? Also, how do you start with the dough to get it to a 12-inch circle? Is it ok to pat the dough into a disc to roll into a circle or will I lose some of the flakiness?
Hi Pedro, we haven’t tried using this puff pastry for a banana cream pie, so are unsure of the result. If you decide to try it, please let us know how it goes!
Have you tried making puff pastry with lard instead of butter? I have copious amounts of lard in my freezer and wondering if I can use that instead of butter?
Hi Aviva, we haven’t tried it. Some readers have reported success using lard in place of shortening in recipes, but we haven’t tested it in place of butter in this recipe. Let us know how it turns out if you give it a try!