

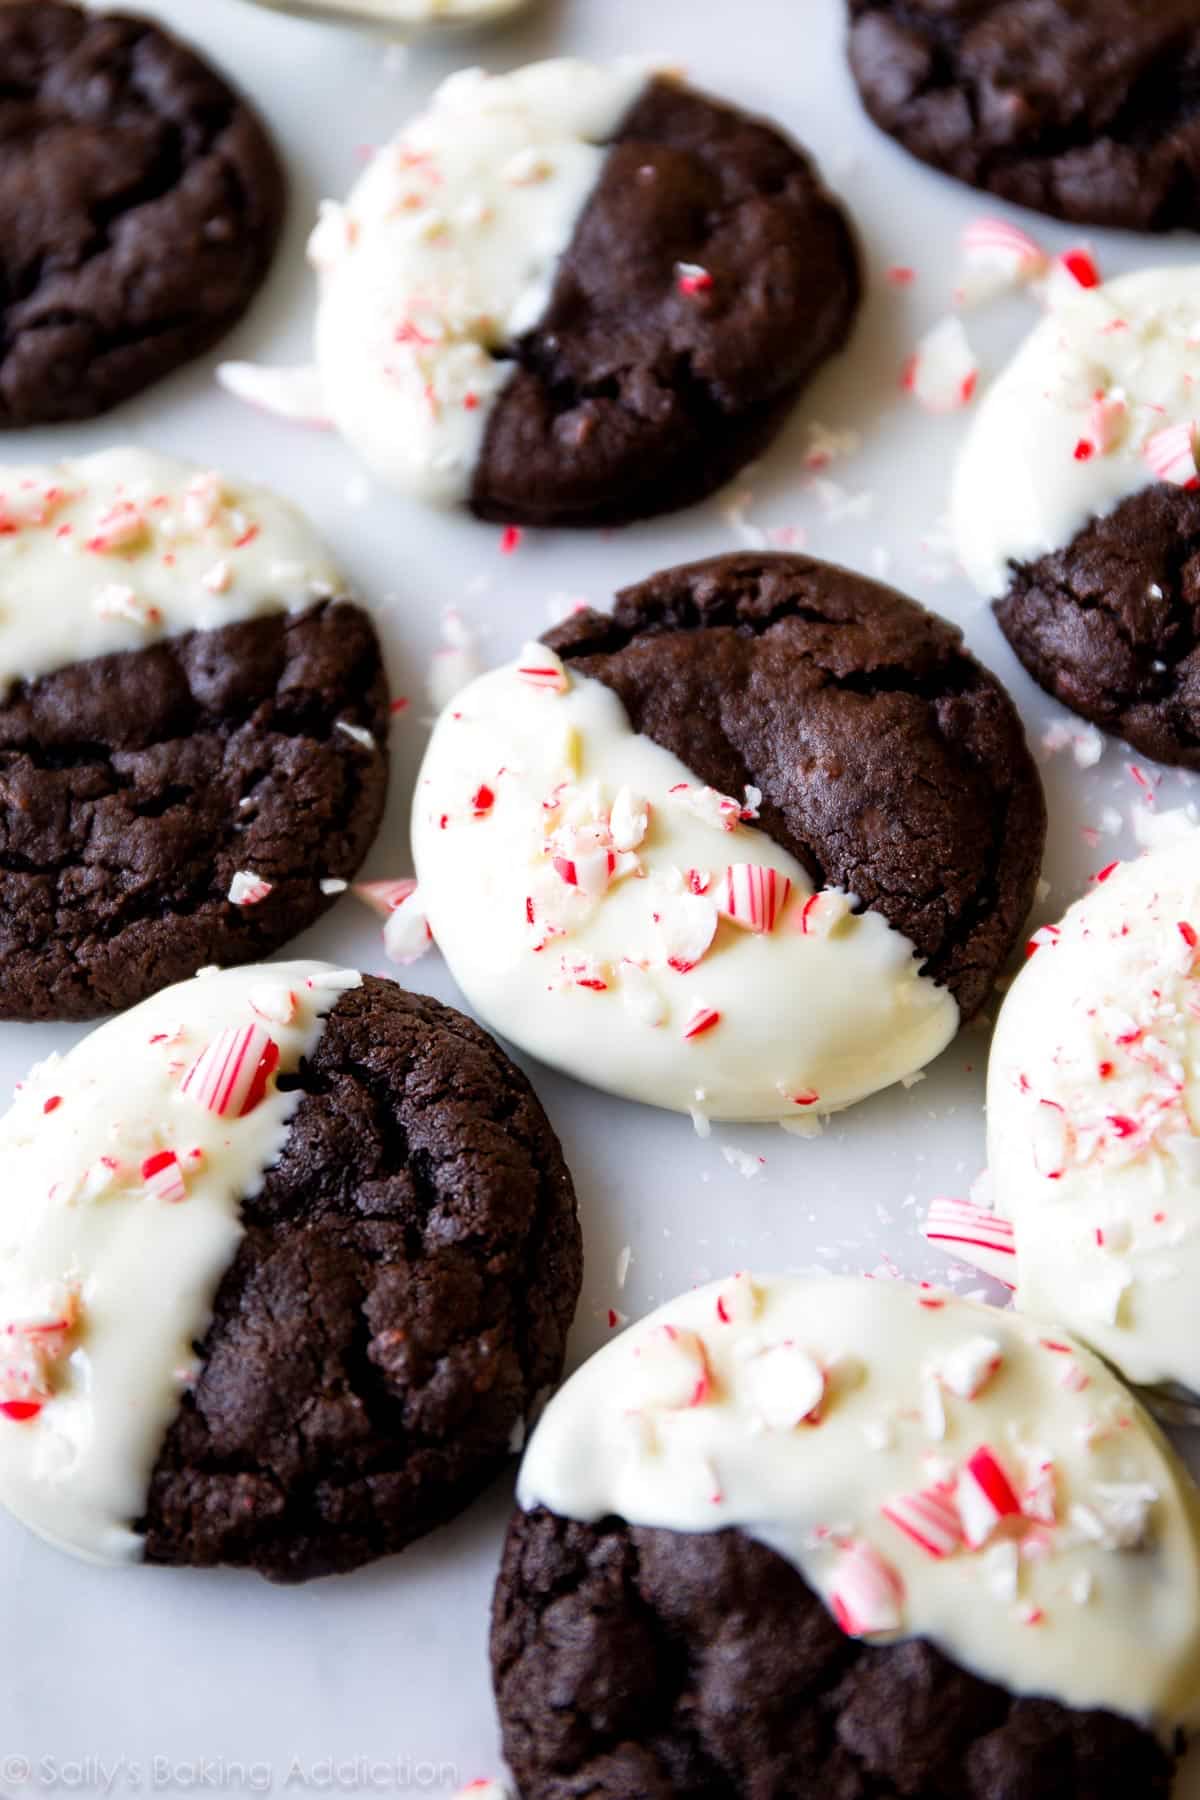
These peppermint mocha cookies are soft-baked with a generous dunk in white chocolate and sprinkle of candy cane crunch. They taste like brownies and are always the first to disappear at a cookie exchange!
Like chocolate crinkle cookies and mocha cheesecake brownies combined, these soft-baked cookies have been dubbed “the best thing to happen to Christmas cookies.” And that’s a direct quote from a taste tester!
Peppermint mocha cookies are soul-warming and pepperminty and I guarantee you’ll love them even more than your peppermint mocha beverage. 🙂
Pair with eggnog oatmeal cream pies, stamped chocolate espresso cookies, and gingerbread latte cookies for a tray of holiday drink-inspired cookies!
These Peppermint Mocha Cookies Taste Like Brownies
If you closed your eyes and took a bite of these peppermint mocha cookies, you’d be surprised to find a cookie instead of a brownie in your hand. These cookies taste just like fudgy brownies! We can thank my basic chocolate cookie dough for that, a go-to base I use when making double chocolate chip cookies, chocolate frosted cookies, and chocolate crinkle cookies too. There’s a reason my team and I turn to this cookie dough often (and why so many readers love it as well)… it WORKS! The magical dough creates rich, thick, and chewy chocolate cookies that stay soft for days. We’re talking soft cookies even on day 7.
(If in the very strange event that your chocolate cookies last that long. Who are you?)
How to Make Peppermint Mocha Cookies
The full printable recipe is below, but let’s walk through the recipe so you understand each step before you get started.
- Cream the wet ingredients together. As detailed in the recipe below, cream the butter and sugars together before adding the egg, vanilla, and peppermint extract.
- Mix the dry ingredients together. This includes the flour, cocoa powder, baking soda, espresso powder, and salt.
- Combine both and add the chocolate chips. The dough will be very thick and sticky.
- Chill the cookie dough. Refrigerate for at least 3 hours.
- Roll cookie dough into balls. Use about 1.5 Tablespoons of dough per ball. A medium cookie scoop is helpful for this!
- Bake. Let the cookies cool completely.
- Melt the white chocolate.
- Dip each cookie halfway into the white chocolate. Place each cookie onto a parchment or silicone baking mat-lined baking sheet. Sprinkle crushed candy canes on top of the chocolate. Repeat this process with the rest of the cookies.
- Refrigerate the cookies to set the chocolate.

Secret Ingredient: Espresso Powder
Espresso powder gives the cookies their unbelievable mocha flavor. I use just two teaspoons and the flavor is unreal. If you can’t find espresso powder in stores, you can use instant coffee instead. You’d need a little more instant coffee since it isn’t as strong or rich as espresso powder. I find espresso powder at my regular grocery store in the coffee aisle, but you can also find it online. I don’t recommend using ground coffee because it’s not as flavorful as espresso powder or instant coffee, both of which have super concentrated flavor.
Peppermint extract is another power player here. Always be careful when using peppermint extract! It’s very potent—a little goes a very long way. And just like when you make peppermint snowball cookies, make sure you are using peppermint extract, not mint extract. The latter tastes like spearmint toothpaste. It’s not good.
Everything You’ll Love About Peppermint Mocha Cookies
As if you need more reasons to bake these cookies:
- They’re super chocolatey and taste like brownies. Sometimes I add mini chocolate chips to the cookie dough for extreme chocolate flavor.
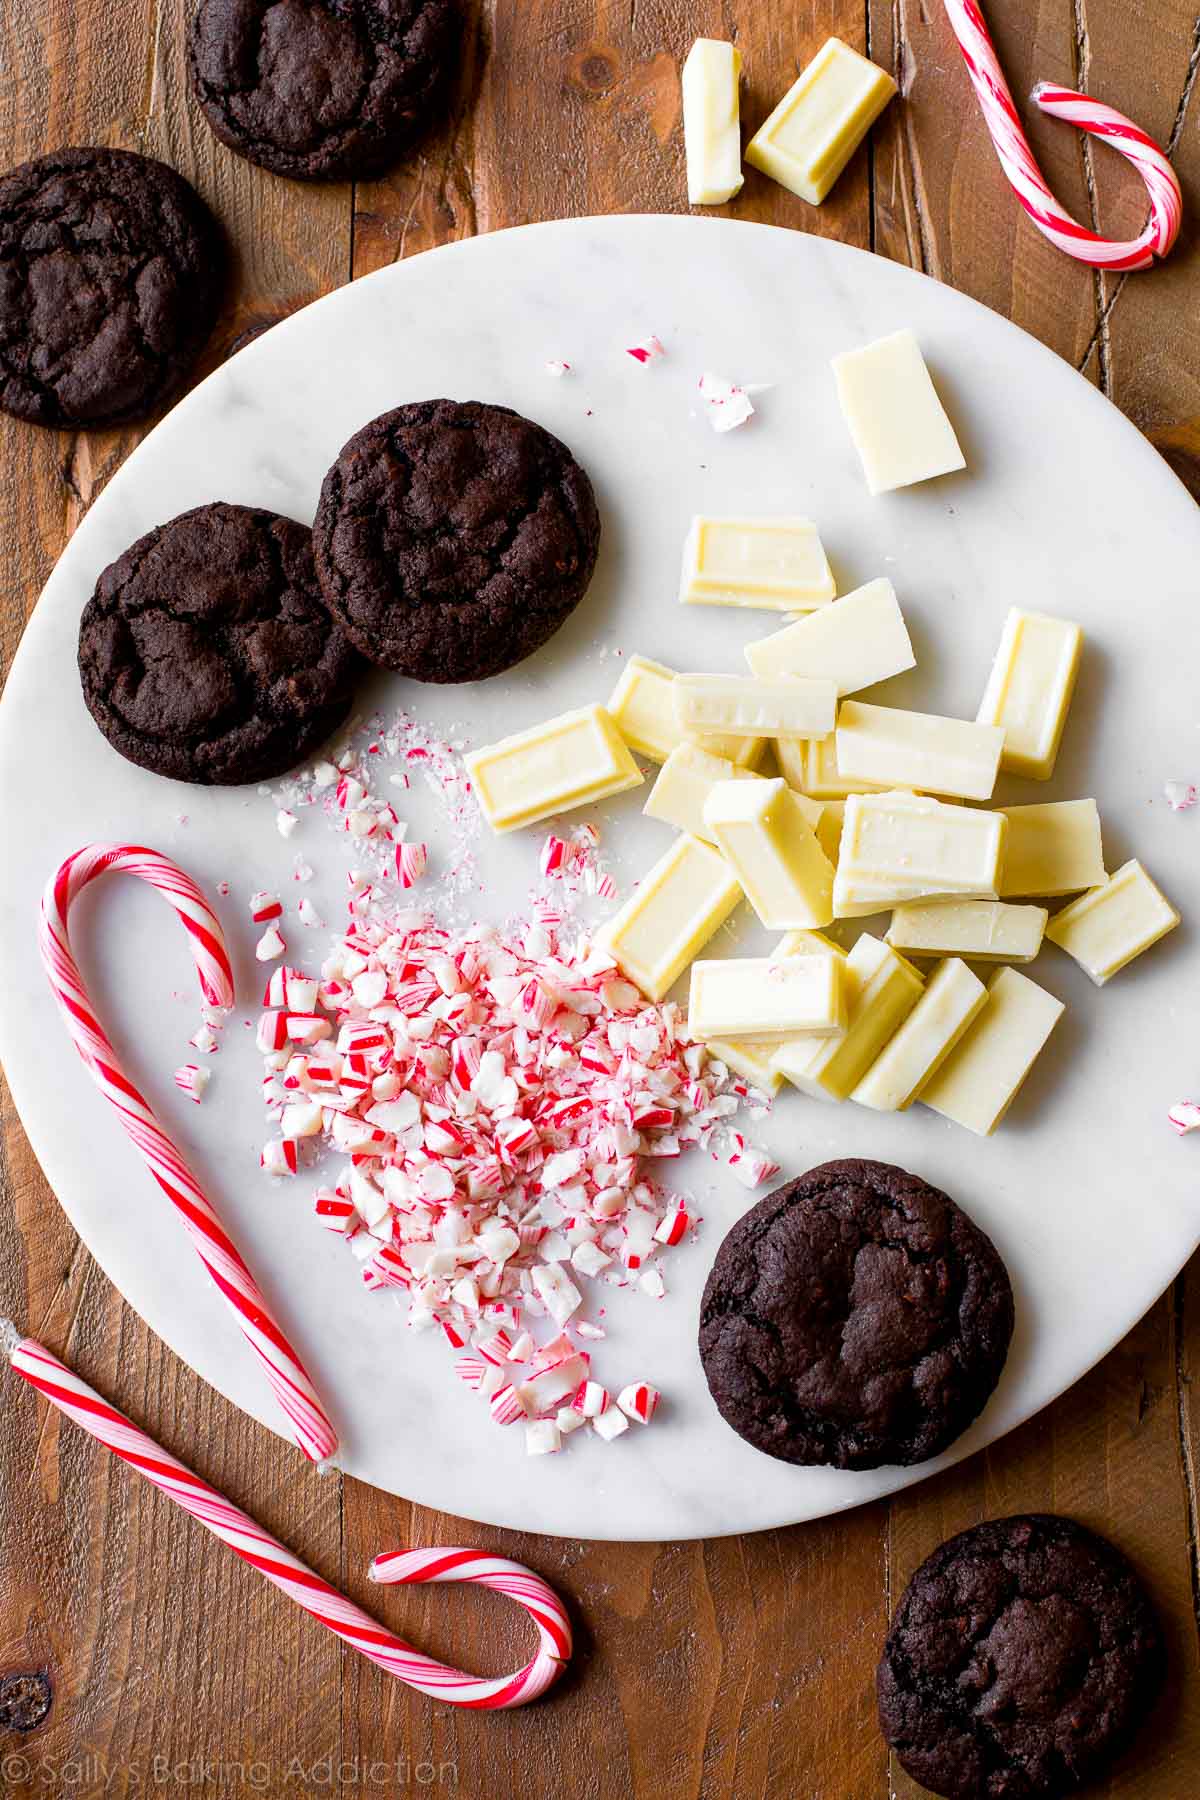
- You’ll love the combination of white chocolate + regular chocolate.
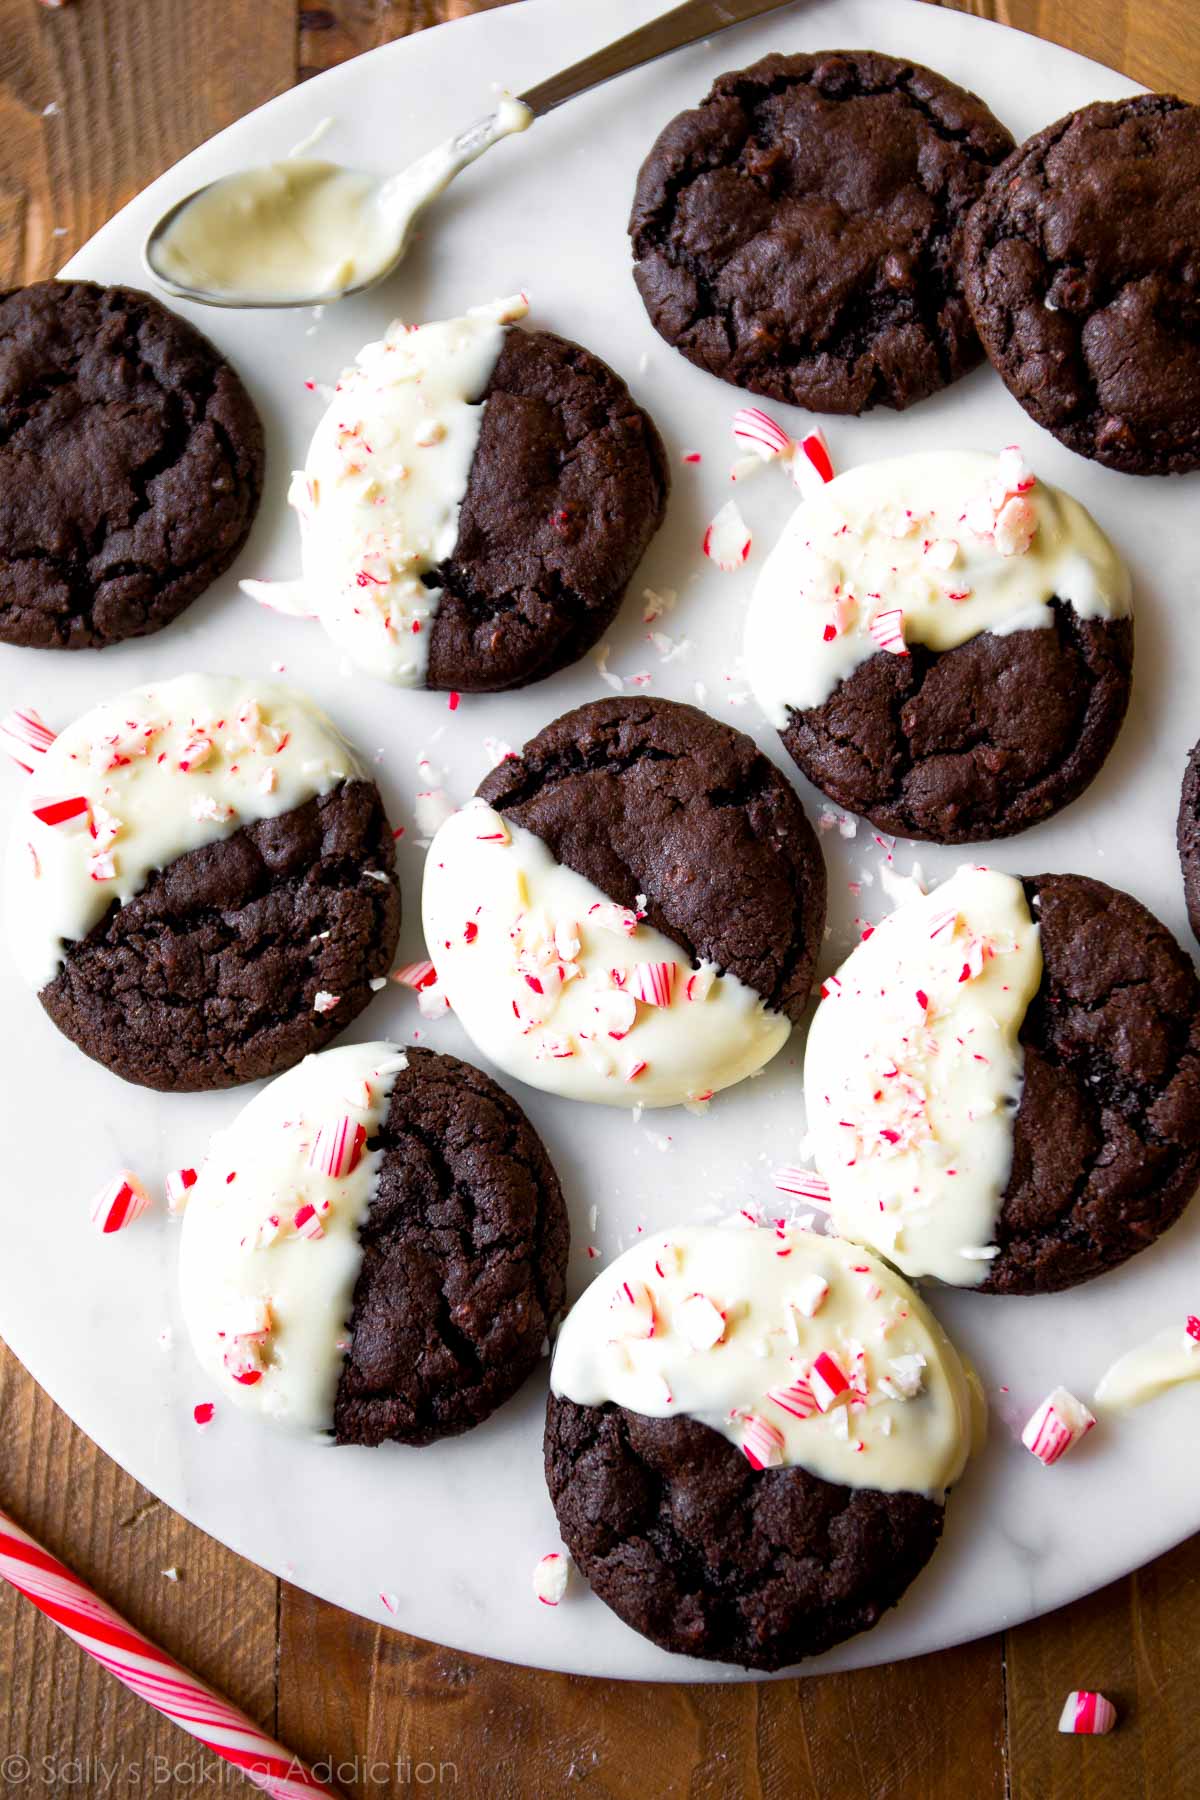
- They’re totally festive and stand out on holiday cookie trays.
- The bites with the white chocolate and candy cane crush are the best. The candy canes add a soft crunch—perfect if you love texture like me!
- Peppermint + mocha = perfection. (It’s a winning combo in these peppermint mocha cupcakes, too!)
Whenever I go to a cookie exchange I always make these cookies; they’re really unique and everyone goes wild for them! They add beautiful variety on a platter next to sugar cookies, peanut butter blossoms, and spritz cookies. Or if you prefer frosting on top of your cookies, you’ll love these peppermint frosted chocolate cookies.
And if you need even more holiday baking inspiration, here are 75+ Christmas cookies with all my best success guides & tips.


Peppermint Mocha Cookies
- Prep Time: 3 hours, 30 minutes
- Cook Time: 11 minutes
- Total Time: 4 hours, 30 minutes (includes setting)
- Yield: 20-22 cookies
- Category: Cookies
- Method: Baking
- Cuisine: American
Description
These peppermint mocha cookies will be the star of your holiday cookie tray and cookie exchanges! The candy cane crunch and white chocolate put them over the top!
Ingredients
- 1/2 cup (8 Tbsp; 113g) unsalted butter, softened to room temperature
- 1/2 cup (100g) granulated sugar
- 1/2 cup (100g) packed light or dark brown sugar
- 1 large egg, at room temperature
- 1 teaspoon pure vanilla extract
- 1 teaspoon peppermint extract
- 1 cup (125g) all-purpose flour (spooned & leveled)
- 1/2 cup + 2 Tablespoons (51g) unsweetened natural cocoa powder
- 1 teaspoon baking soda
- 2 teaspoons espresso powder or 1 Tablespoon instant coffee granules
- 1/8 teaspoon salt
- 1 cup (180g) mini or regular size semi-sweet chocolate chips
- 8 ounces white chocolate, coarsely chopped
- 3 large candy canes, crushed
Instructions
- In a large bowl using a handheld or stand mixer fitted with a paddle attachment, beat the butter, granulated sugar, and brown sugar together on medium high speed until fluffy and light in color, about 2-3 minutes. Add the egg, vanilla extract, and peppermint extract, and then beat on high speed until combined. Scrape down the sides and bottom of the bowl as needed.
- In a separate bowl, whisk the flour, cocoa powder, baking soda, espresso powder, and salt together until combined. With the mixer running on low speed, slowly pour into the wet ingredients. Beat on low until combined and then beat in the chocolate chips. The cookie dough will be thick and very sticky. Cover dough tightly and chill in the refrigerator for at least 3 hours and up to 3 days. Chilling is mandatory for this sticky cookie dough.
- Remove cookie dough from the refrigerator and allow to sit at room temperature for 10 minutes. If the cookie dough chilled longer than 3 hours, let it sit at room temperature for about 20 minutes. This makes the chilled cookie dough easier to scoop and roll.
- Preheat oven to 350°F (177°C). Line large baking sheets with parchment paper or silicone baking mats. (Always recommended for cookies.) Set aside.
- Scoop and roll dough, 1.5 Tablespoons of dough each, into balls. A medium cookie scoop is helpful for this step. To ensure a thicker cookie, make the balls taller than they are wide (almost like a cylinder or column). Arrange 2-3 inches apart on the baking sheets. The cookie dough is certainly sticky, so wipe your hands clean after every few balls of dough you shape.
- Bake the cookies for 11-12 minutes or until the edges appear set and the centers still look soft. Tip: If they aren’t really spreading by minute 9, remove them from the oven and lightly bang the baking sheet on the counter 2-3x. This helps initiate that spread. Return to the oven to continue baking.
- Cool cookies for 5 minutes on the baking sheet, and then transfer to a cooling rack to cool completely. The cookies will slightly deflate as they cool.
- Melt the chopped white chocolate in a double boiler or use the microwave. For the microwave, place the white chocolate in a medium heat-proof bowl. Melt in 15 second increments, stirring after each increment until completely melted and smooth. Dip each completely cooled cookie halfway into the white chocolate and place onto a parchment or silicone baking mat-lined baking sheet. Sprinkle crushed candy canes on top of the chocolate. Repeat with the rest of the cooled cookies. Place the baking sheet into the refrigerator to help the chocolate set, about 1 hour.
Notes
- Make Ahead & Freezing Instructions: Cookies stay fresh covered at room temperature or in the refrigerator for up to 1 week. Baked cookies (without white chocolate and candy cane) freeze well for up to three months. Decorate after they thaw. Cookie dough balls freeze well for up to three months. Bake from frozen, no need to thaw—just add an extra minute or two to the bake time. Read my tips and tricks on how to freeze cookie dough.
- Special Tools (affiliate links): Electric Mixer (Handheld or Stand) | Glass Mixing Bowl | Whisk | Baking Sheets | Silicone Baking Mats or Parchment Paper | Medium Cookie Scoop | Cooling Rack | Double Boiler (optional for melting chocolate)
- Chill Cookie Dough: Make sure you chill the cookie dough for at least 3 hours. Chilling helps the flavors develop, prevent spreading, and makes the otherwise sticky cookie dough easy to handle.
- Larger Batch: The recipe is easy to double in 1 mixing bowl without overwhelming your mixer. Simply double all of the ingredients. Dough chill time remains the same.


Reader Comments and Reviews
I’m wanting to make these for friends/family this holiday season, but I am no fan of peppermint! Would it be okay adding more vanilla instead of peppermint, or will that not turn out?? Thanks!
That’s completely fine– or you can just leave out the peppermint completely. There is enough vanilla already 🙂
Hey, I followed the directions and ingredients to the letter and they spread and became incredibly thin instead of needing flattening out. Where did I go wrong?
The exact same thing happened to me! When they came out of the oven they were a nice full cookie like the picture, but as they cooled they became extremely thin with lumpy chocolate chips! Still taste delicious, but Sally – what could have caused this spreading? Butter too warm when making the dough? Help!!
Make sure you’re chilling the cookie dough for at least 3 hours. Too warm butter OR over-creamed butter/sugar could very well be the reason. Make sure the butter is soft, but not overly warm. About 1 hour at room temperature (from the fridge) is enough. Also, you can try adding 2 Tbsp of flour to the cookie dough. This will help soak up some of the liquid in the cookie dough, which is the reason it’s spreading too much!
Amazing cookies! Only adjustments I made (1) didn’t add the instant coffee; didn’t have any, (2) didnt bother dunking the cooled cookie in white chocolate/peppermint pieces however, (3) instead of adding chocolate chips to the mix I added Andes mint baking pieces. OMG I am trying my hardest not to eat them all same night of baking ’em!
I’ve made these cookies three times in the last month (first time I left them naked; I just wanted to test the cookie base to made sure it really stayed soft before making them for a bake sale. Happy to report that unlike most chocolate cookie recipes which quickly dry out, these remained soft for 3+ days). The next two times I dipped them in white chocolate and added the crushed candy canes. They turned out beautifully and were a success at the bake sale. The only thing I changed in the recipe was leaving out the espresso because the bake sale was aimed at young families who probably didn’t want their kids to enjoy a caffeine buzz in addition to a sugar high ;).
I’ve also had good results from the Salted Peanut Nutella Puppy Chow from this site.
The proceeds from the church bake sale are providing Christmas stockings for children in families in our area who are having a tough year, so I appreciate your contribution of solid, well-tested recipes! 🙂
SALLY, YOU DEVIL! I made two batches of these this holiday season and they were a crackerjack WHIZZBANG! Everybody loved them. In my first batch, I found the coffee note a bit strong (I used 1 TBSP instant granules) but they were still quite edible and delicious. On the second batch I reduced the coffee to 1.5 teaspoons and this pleased me greatly.
A totally indulgent cookie with a PERFECT BALANCE of chocolate to peppermint. Don’t hesitate to make this one! Thanks, Sally!
One of the best cookies I’ve ever made! Thank you for this amazing recipe!!!
Just made these today after them being on my “to bake” list for a couple weeks. They came out great and everyone loves them! They are the perfect Christmas cookies. Thanks Sally!
I made these today and followed the recipe exactly but my cookies never flattened they just tuned out to be tiny. Any reason why that would happen? I’m still excited to taste them!
Hi Grace! You can try gently pressing them down midway through baking. Remove them from the oven, use a spoon to flatten them out a bit, and return to the oven. Sometimes that’s what I do. I find that happens when the dough is TOO cold and won’t spread.
Hi Sally! I bought Ferrara instant espresso coffee because I could not find anything that just said “espresso powder.” Should I stick to one tablespoon or the 2 teaspoon option? Thanks!
For that, I would use 2 teaspoons 🙂
These turned out great for me and were so deliciously decadent! The espresso just brings out the chocolate flavor and the mint was just right. You have some great recipes!
I want to make these this weekend, but I’m not sure where to find espresso powder. Where do you get yours? Will the recipe be effected without it? And do you prefer light or dark brown sugar in this recipe? I have both and wasn’t sure which to use. Thanks, Sally!
Hi Beth, You can use either light or dark brown sugar. I can find espresso powder in my regular grocery store with the coffees. If you can’t find it you can sub 1 Tablespoon instant coffee granules.
These were the favorite of my Christmas party! They looked so beautiful and tasted so delicious!
I made these last night and they are delicious! But next time I make them, I will omit the peppermint extract. I can’t really taste the mocha flavour as it is totally overpowered by the peppermint. I think the dash of candy canes are enough! Otherwise beautiful cookies.
I made just the basic cookies, without the white chocolate and candy cane sprinkle, because I could not get them out of my head; they were so delicious, and I think they may be the best cookie I have ever made! I will absolutely make these again, maybe even with the “extras” next time!
Thank you!
I made these last year and can’t wait to make them again this year. I think these are my favorite cookies of all time!
What’s the easiest and best way to crush the candy canes?
A large zipped-top bag and a rolling pin!
I know this sounds crazy, but would it be possible to make these without the coffee? I am one of the few strange people that doesn’t drink or like it but the chocolate/peppermint combo sounds amazing!
It’s July and I’m still craving these cookies! I made them for a cookie exchange last December while 9+ months pregnant. Everyone loved them! Then my son was born Christmas morning, and I didn’t get the chance to bake them again over the holidays. Yesterday I was in the baking mood and these were my top choice! I used half Special Dark cocoa powder and they are SPECTACULAR. This recipe is perfect, Sally!
I think these cookies can be all year round super favourites (especially for those who love chocolate-mint duet). I made even larger ball that suggested. They spread well. Delicious!!!
These cookies are an instant Christmas classic! Faaantastic
I made these today for a holiday treat and they turned out perfectly! A big hit!
these are AMAZING! My son and I made them for teacher gifts this year. Moist, sinfully rich and gorgeous presentation. Highly recommend them to anyone – remember to make at least two recipes as they disappear fast!
I just made these cookies yesterday as well as the hazelnut dipped in chocolate. What a beautiful cookie!!! AND they tasted absolutely amazing! I could not find peppermint anywhere in my hometown as the supermarket had a 2 for 1 sale during the holidays. I am glad I searched high and low to find it because these cookies made my dessert party!!! 🙂 Thank you- I have been wanting to make your cookies forever and they were excellent!
I made these for the teachers at my daughter’s school. They taste amazon! For some reason they didn’t flaten as much as yours pictured, so I had to help them a little with the spatula. I tried baking them a bit longer but was afraid they would burn. Any suggestions?
Jodi, did you spoon and level the flour? Or scoop it? Perhaps too much flour into the cookie dough, which prevents spreading.
These cookies are fantastic! I made two batches of them for a holiday party last night and they were the first dessert to go. And I had multiple friends ask me where I got the recipe. They are so soft! I’ll be making them again next weekend for a work event. Thanks for sharing Sally!!
I made these yesterday as an early Christmas gift. They were so good fresh out of the oven.. but they are even better today!! And they looked just like the picture. Fantastic recipe! If anyone is undecided about trying these- make them!! I will absolutely make these every year. Thank you so much!
These turned out so pretty, just as pictured. I haven’t tried the finished product yet, but the dough sure was tasty! Great recipe.
These look amazing! Do you have a recommendation for white chocolate that melts well? Last time I think I used white chocolate chips and that didn’t go so well I’m definitely gonna try these cookies though!
Bakers or Ghirardelli bars. Both sold in the baking aisle near the chocolate chips. Do not use chocolate chips when dipping. They’re unbelievably hard to work with.
Sigh. I don’t know how I always manage to do something wrong. I was very excited to make these cookies today, I measured all of my ingredients perfectly, chilled the dough for 3 hours.. but that seemed not to be enough?! My hands looked like I was playing in mud. I’m assuming my cookies didn’t turn out like yours because the dough was still too sticky and most of the batter stayed globbed in the center. Maybe my fridge wasn’t cold enough? Could it be I put it on top of another container in the fridge? Thanks, Sally.
The dough definitely could be chilled longer. Try chilling it overnight. And maybe baking the cookies an extra minute or two. Do you have any dough left? You can chill it longer, if so!
When making these ahead would you bake, freeze and decorate when thawed or can you freeze fully decorated? Thanks Sally:)
I do not recommend freezing with the white chocolate/candy cane. Especially because they just won’t look at nice when thawed out to serve. Best way to do it is to prepare the cookie dough and freeze the cookie dough balls as instructed in the make ahead tip. OR you can freeze the baked cookies, thaw in the fridge, then decorate.