

Another fresh and exciting recipe for you!
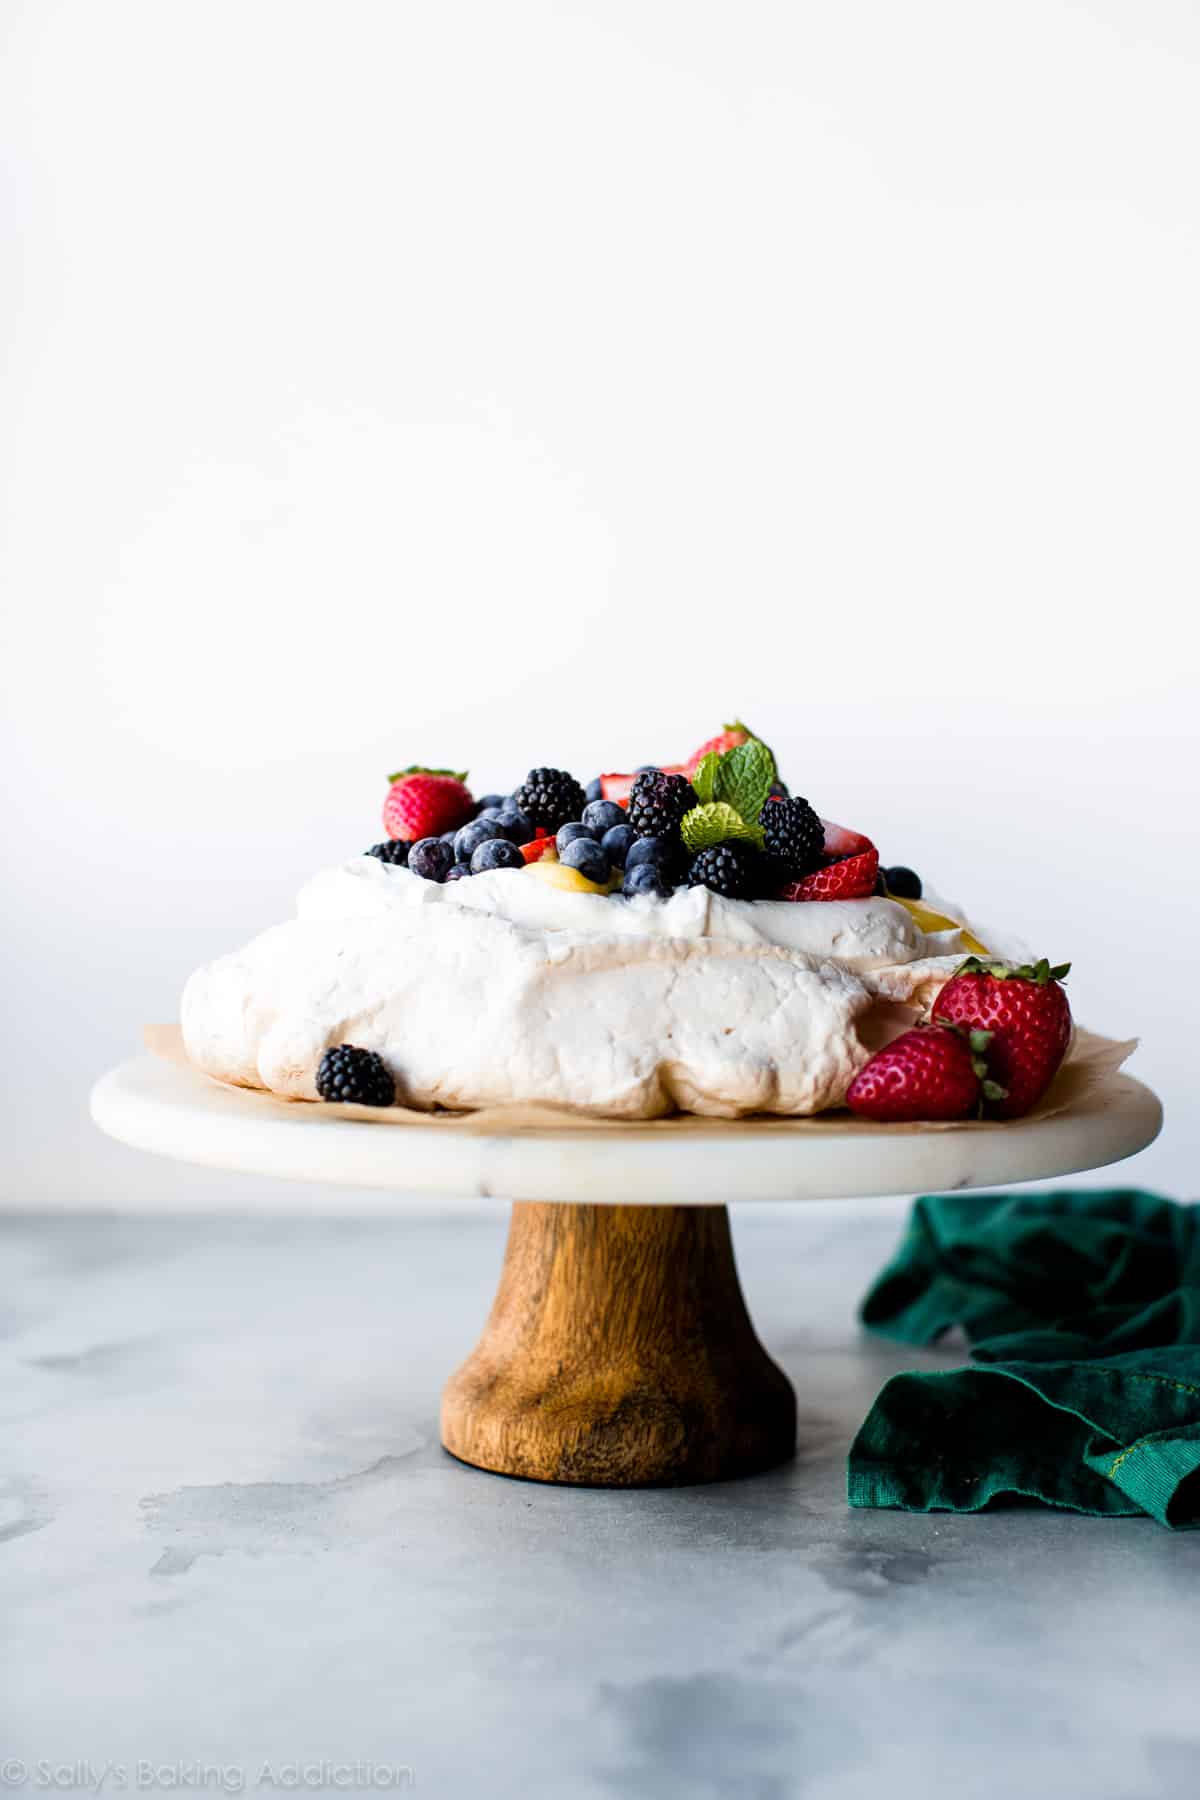
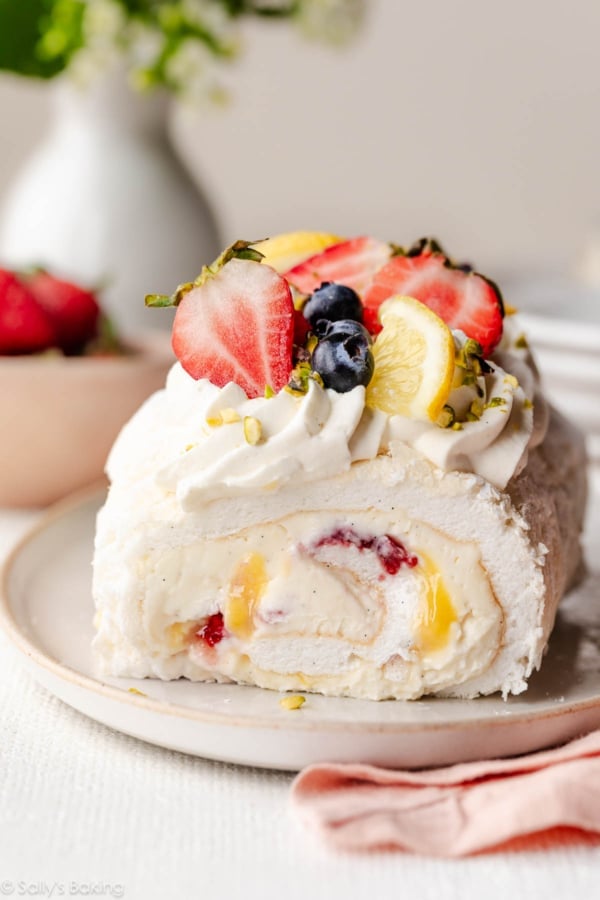
What is pavlova? Pavlova is a dessert popular in New Zealand and Australia. It’s not as common here in the states, but I hope to help change that! A texture lover’s dream come true, pavlova is made from egg whites that are slowly baked in a relatively cool oven. The egg whites take on a chewy-crisp texture on top, a soft marshmallow texture inside, and a crunchy crisp texture around the edges. That’s three completely different textures in one single bite. The crunchy edges are just like meringue cookies.
Pavlova loves to be dressed up with assorted toppings, mainly fresh whipped cream and piles of fresh fruit. Naturally gluten free, pavlova is light, sweet, and screams warm weather favorite. Happy spring, my friends, we’re making PAVLOVA!!
Video Tutorial: How to Make Pavlova
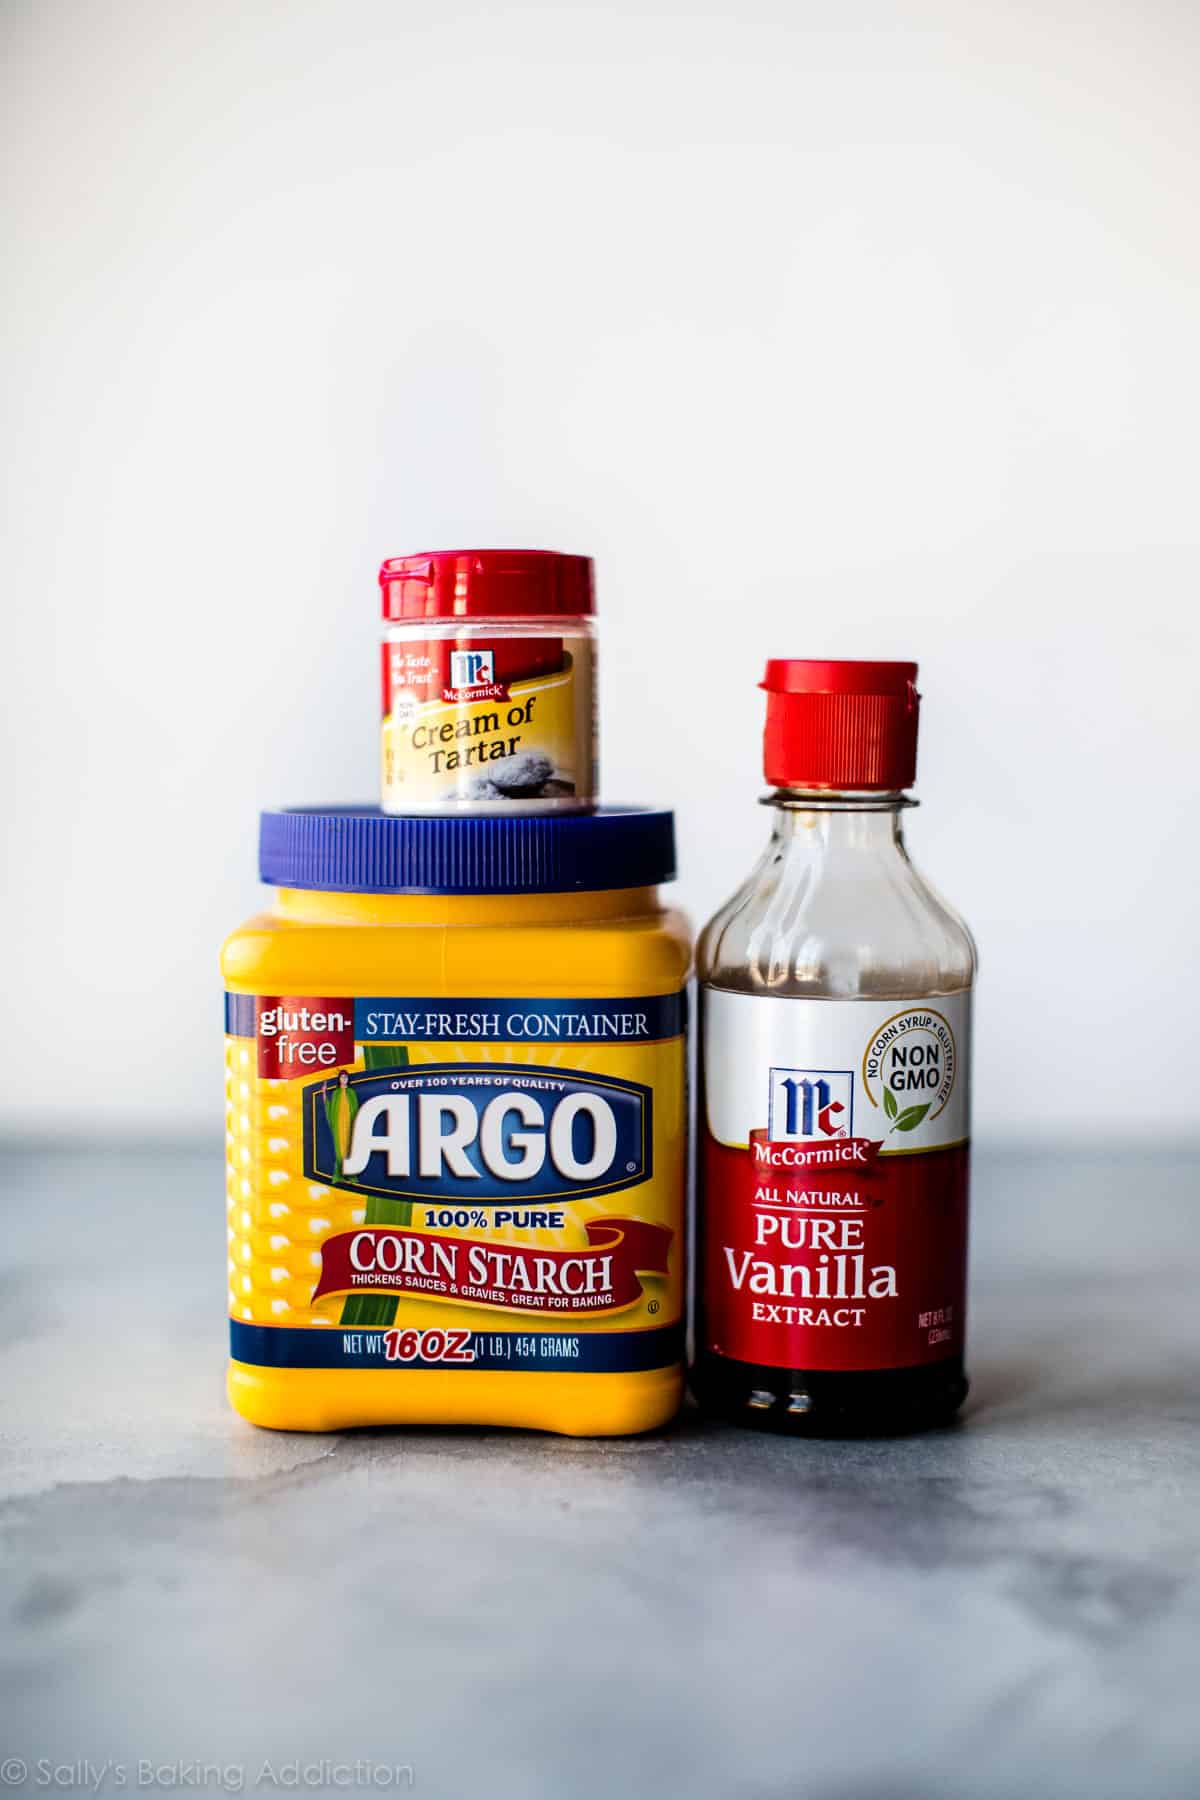
To obtain the unique pavlova texture, you must adhere to an exact recipe. While it’s fun to play around with ingredients, pavlova is not the time to stray from what’s listed. It’s picky, but picky doesn’t mean difficult. In fact, you only need 5 ingredients to make pavlova and I bet you have each in your kitchen right now:
- Egg whites
- Sugar
- An acid such as cream of tartar or vinegar
- Cornstarch
- Vanilla extract
Let me explain why these ingredients are used.
Pavlova Ingredients
- Egg whites – beaten into stiff peaks, egg whites are the base and volume of pavlova.
- Sugar – in addition to sweetening the dessert, sugar stabilizes the egg whites by holding them together both in the oven and as the whole pavlova cools. Without sugar, the protein molecules (science!) in egg whites will collapse. Additionally, sugar helps achieve the delightfully crisp texture. (Sugar is so much more than a sweetener in our baked goods.) Speaking of sugar, make sure that you use superfine or caster sugar. Just pulse sugar a few times in a food processor to reduce the size of the crystals.
- Acid – you can use 1/2 teaspoon of cream of tartar or 1 teaspoon white, apple cider vinegar, or even lemon juice. The pavlova will NOT taste like vinegar, I promise. The acid helps the egg whites hold onto air and, like the sugar, helps prevent the egg whites from collapsing. I tested with both and I actually prefer cream of tartar. I found that my pavlova spread a bit more when I used liquid acid.
- Cornstarch – I tested pav with and without cornstarch. I found that the center was fluffier and more marshmallow-y with cornstarch. Then I tested with 1 teaspoon cornstarch and 2 teaspoons cornstarch. I found it was a little chalky tasting with 2 teaspoons. I’m sticking to 1 teaspoon.
- Vanilla extract – purely for flavor!
(Not sponsored by any of these companies, but here’s exactly what I use.)
Ingredients are simple and method is effortless. There’s plenty of downtime when making pavlova. All you really have to do is watch it beat in your stand mixer then check on it in your oven. Kick your feet up!
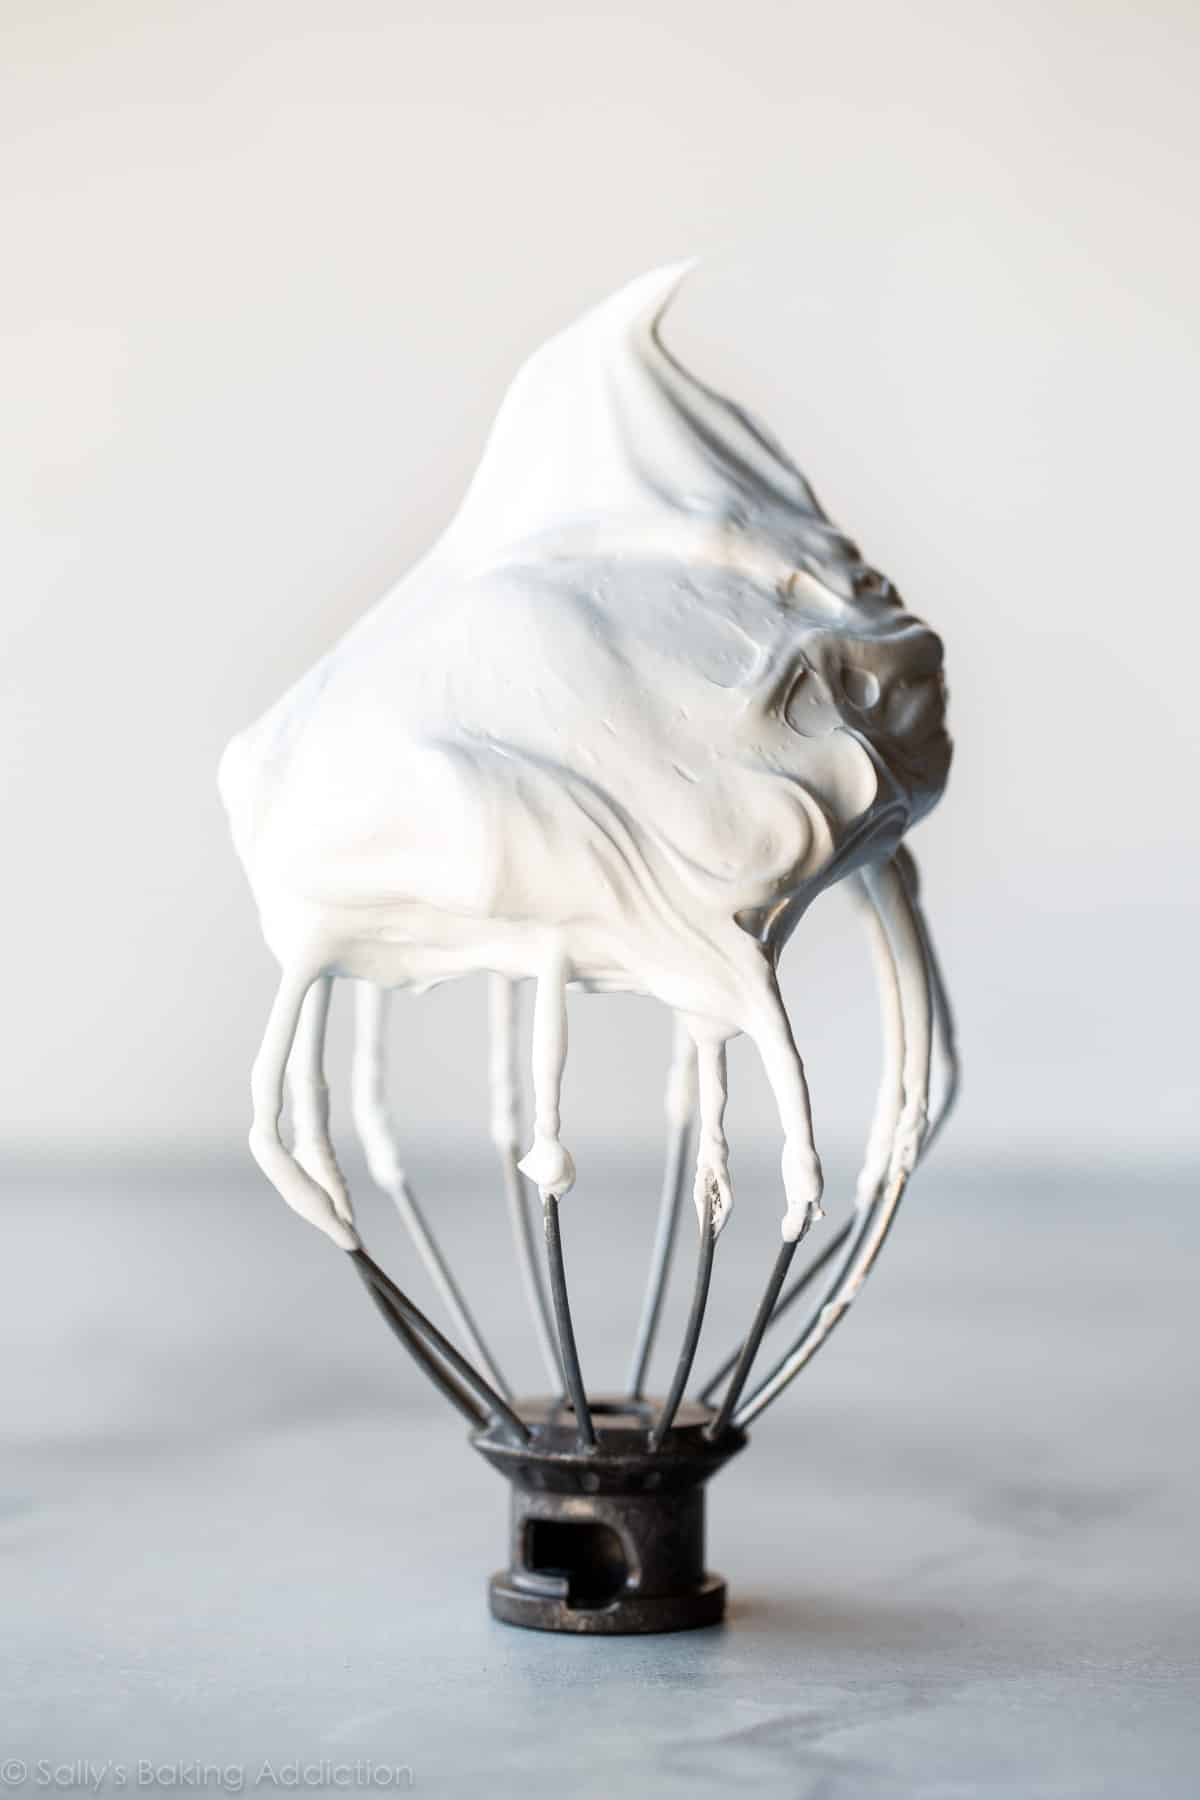
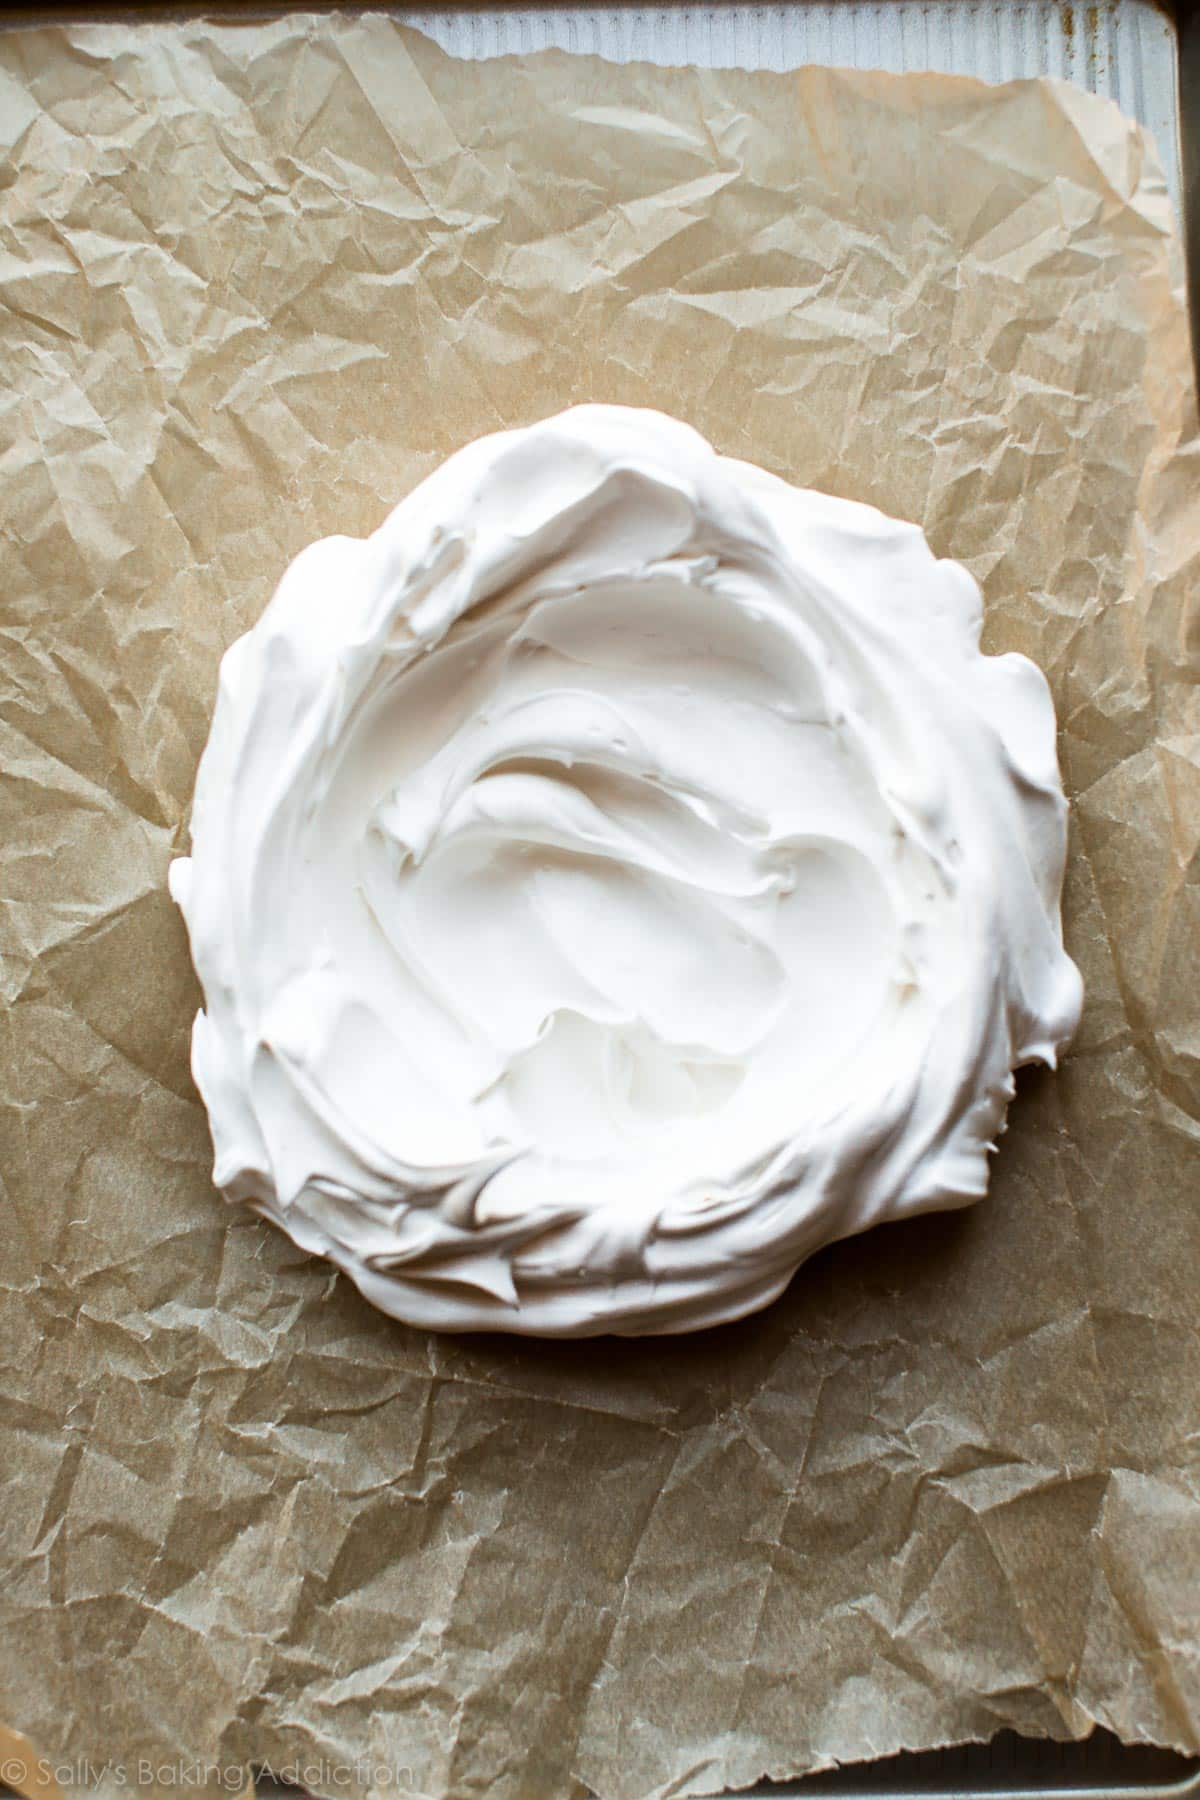
Just like our chocolate swirled meringue cookies and the meringue on our lemon meringue pie, whip the egg whites into super stiff peaks. Stiff enough that you can hold the whisk over your head and feel confident that the whipped egg whites won’t drop. 😉 Then you’ll spread the pavlova mixture onto your lined baking pan. You can use parchment paper or a silicone baking mat. Do not grease the baking pan—use a nonstick surface instead. Spread it into a circle, about 8-9 inches in diameter. You can eyeball it or trace one with a pencil. I just eyeball it. Like I did in the lemon meringue pie video, use the back of a spoon to create decorative peaks. Make sure the edges are tall and you have a nice dip in the center. That’s where we’ll pile our whipped cream and fruit!
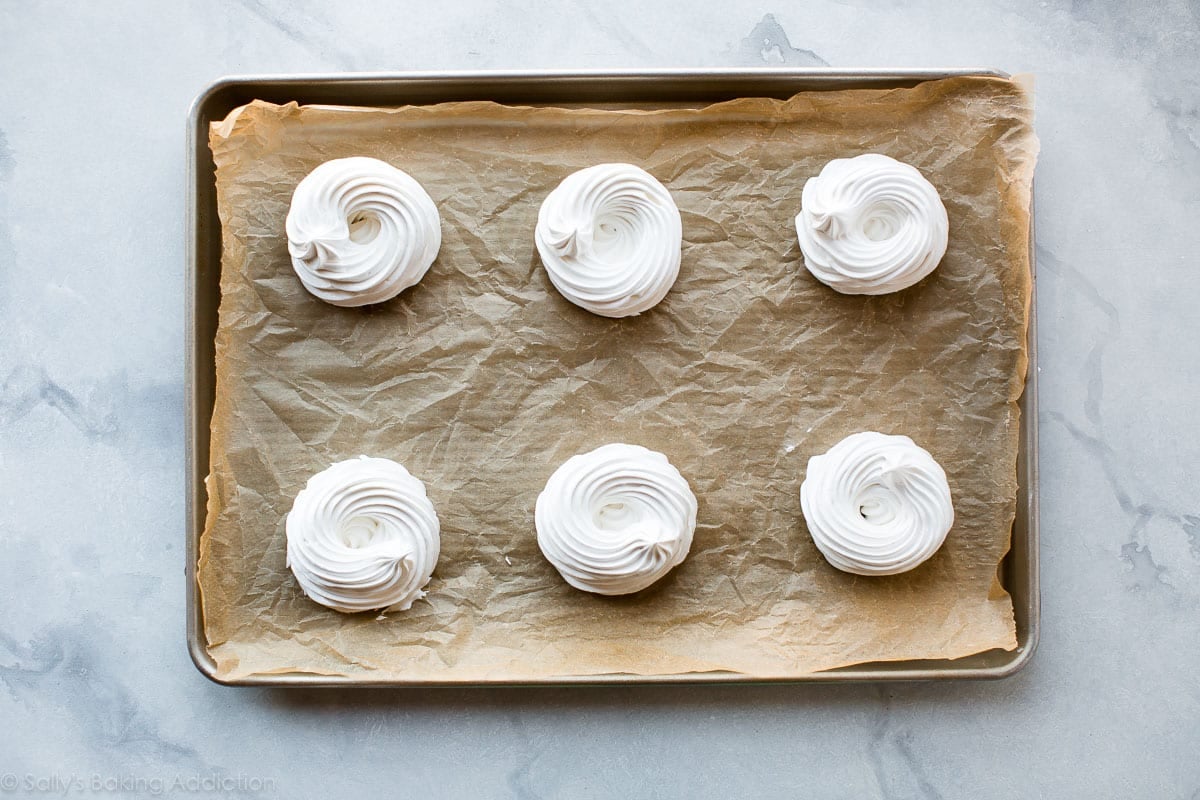
Alternatively, you can make mini pavlovas. Here I piped the mixture into 6 mini pavlovas using Ateco 849. A piping tip isn’t necessary—you can just spoon it on. Again, make sure you leave a dip in the center to hold the toppings.
A relatively cooler oven is imperative for properly cooking your pavlova, but let’s start the pavlova at 350°F (177°C) then reduce it down to 200°F (93°C). I do this to help “set” the outer crust quickly. This trick helps reduce spread.
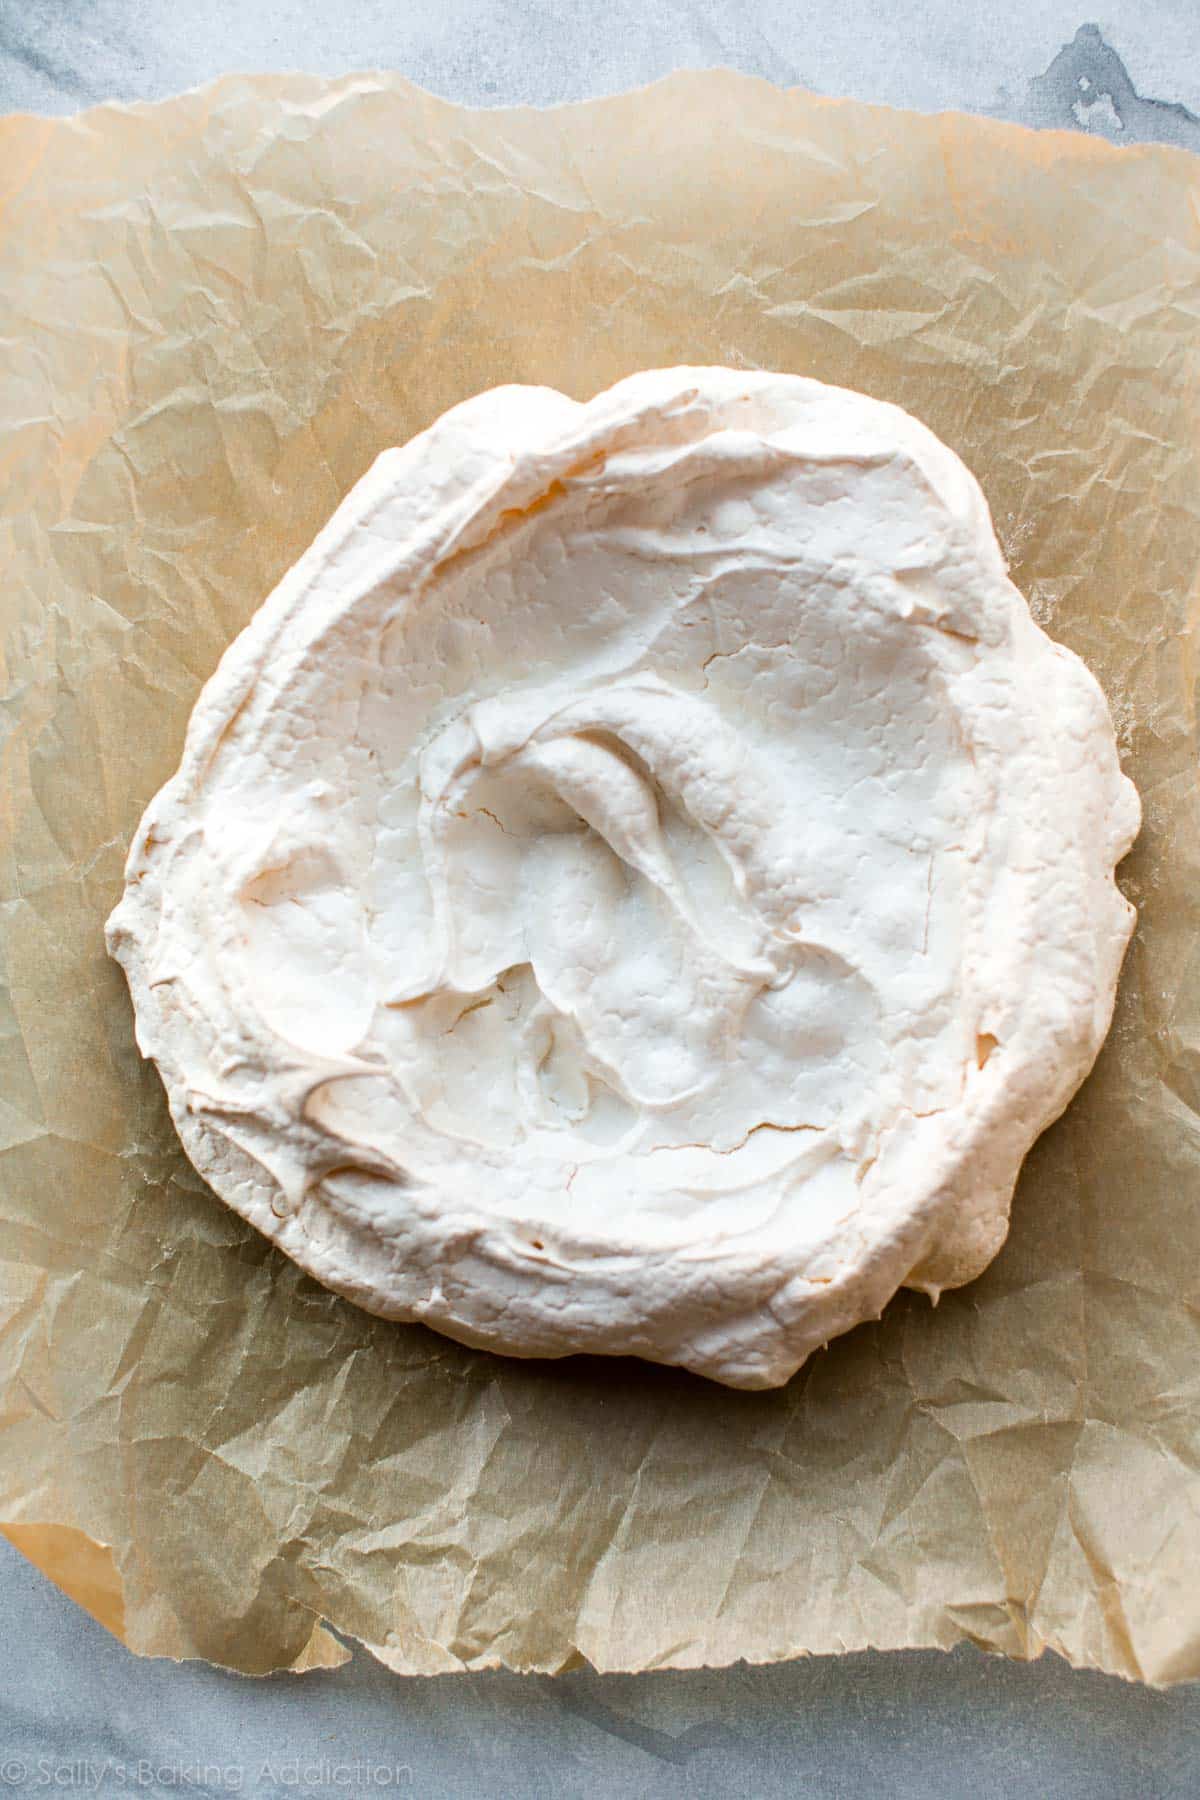
A properly cooked pav is pale in color. Cracks and bumps are par for the course, but the pavlova shouldn’t completely deflate. Especially if you follow the precise measurements and instructions in the recipe. You can help avoid too many cracks by cooling the pavlova in the oven. The sudden change of temperature (inside the oven to outside the oven) shocks the pavlova, so it’s best to cool inside the cooling oven.
Make sense?
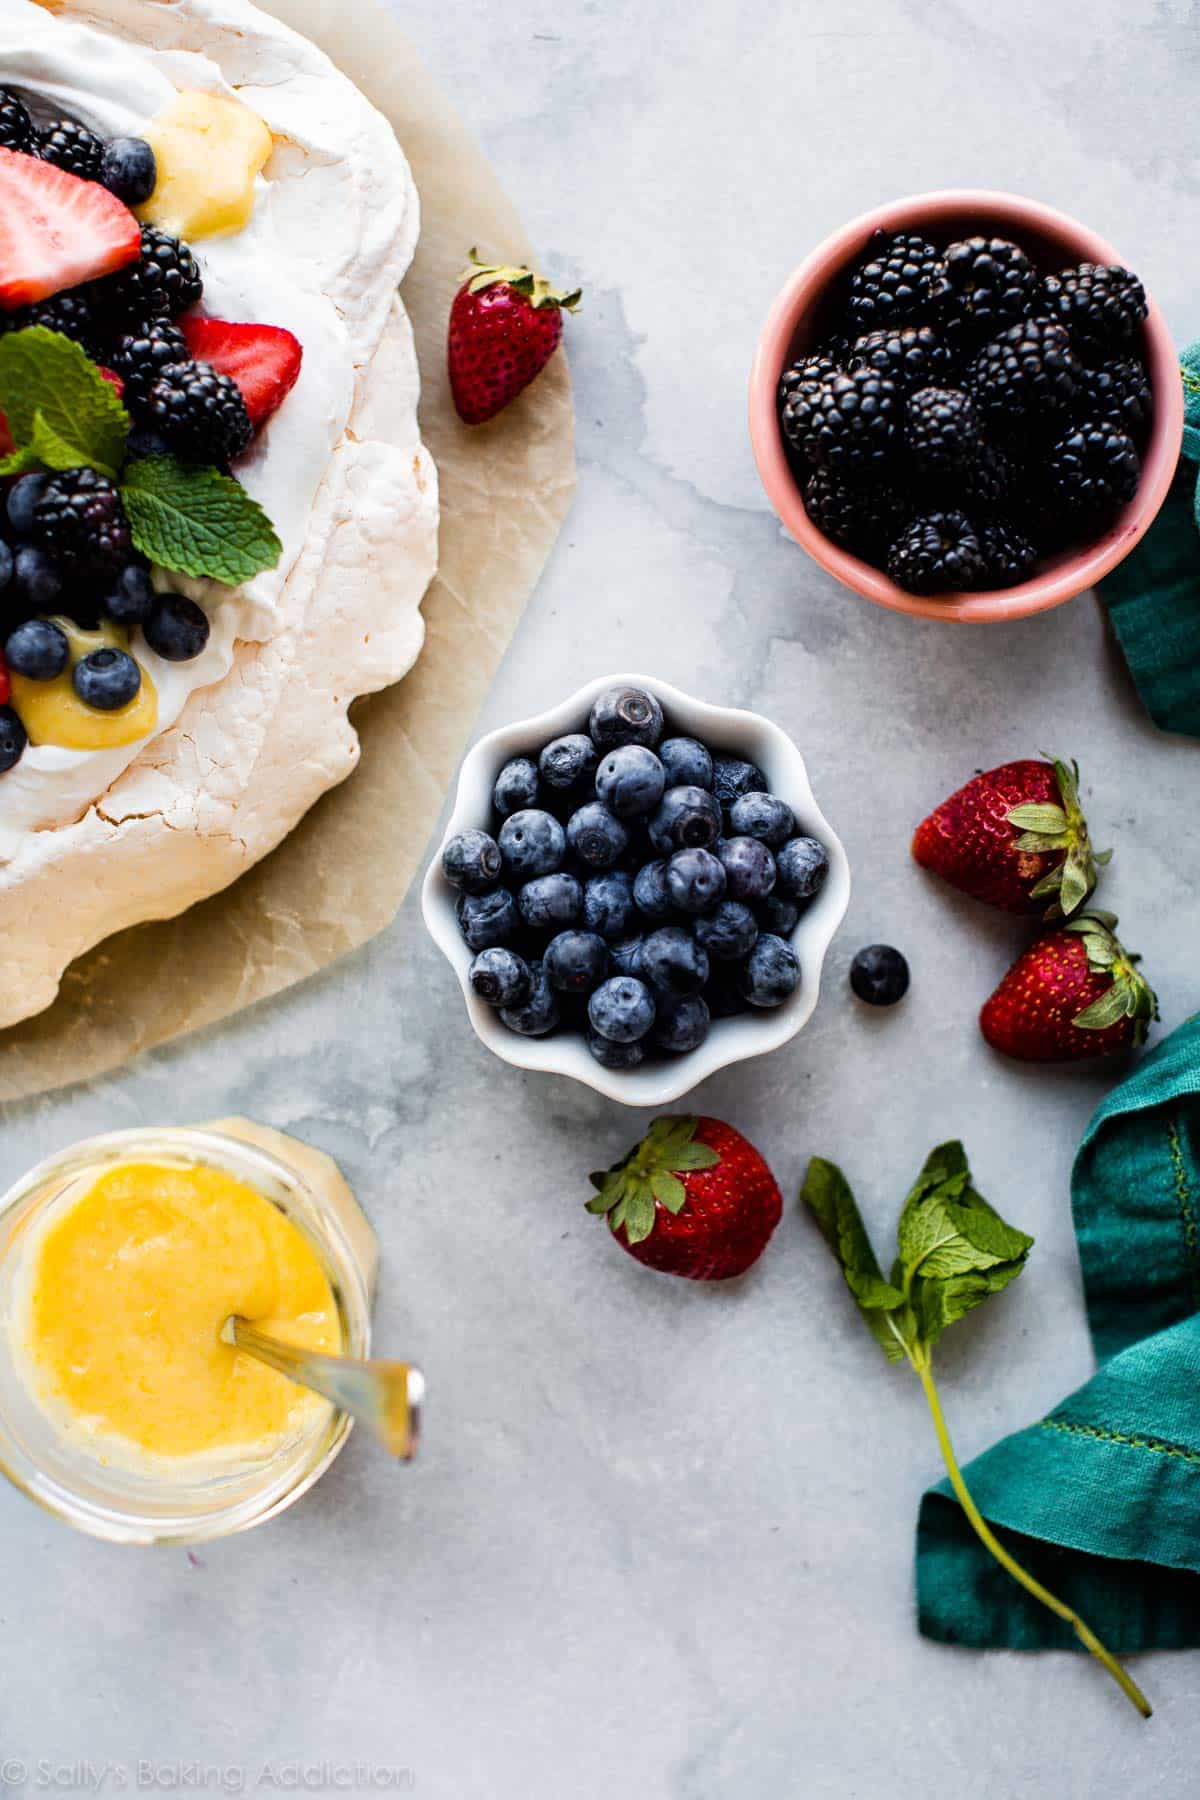
You can top your pavlova or mini pavlovas any which way, but here are some of my topping suggestions:
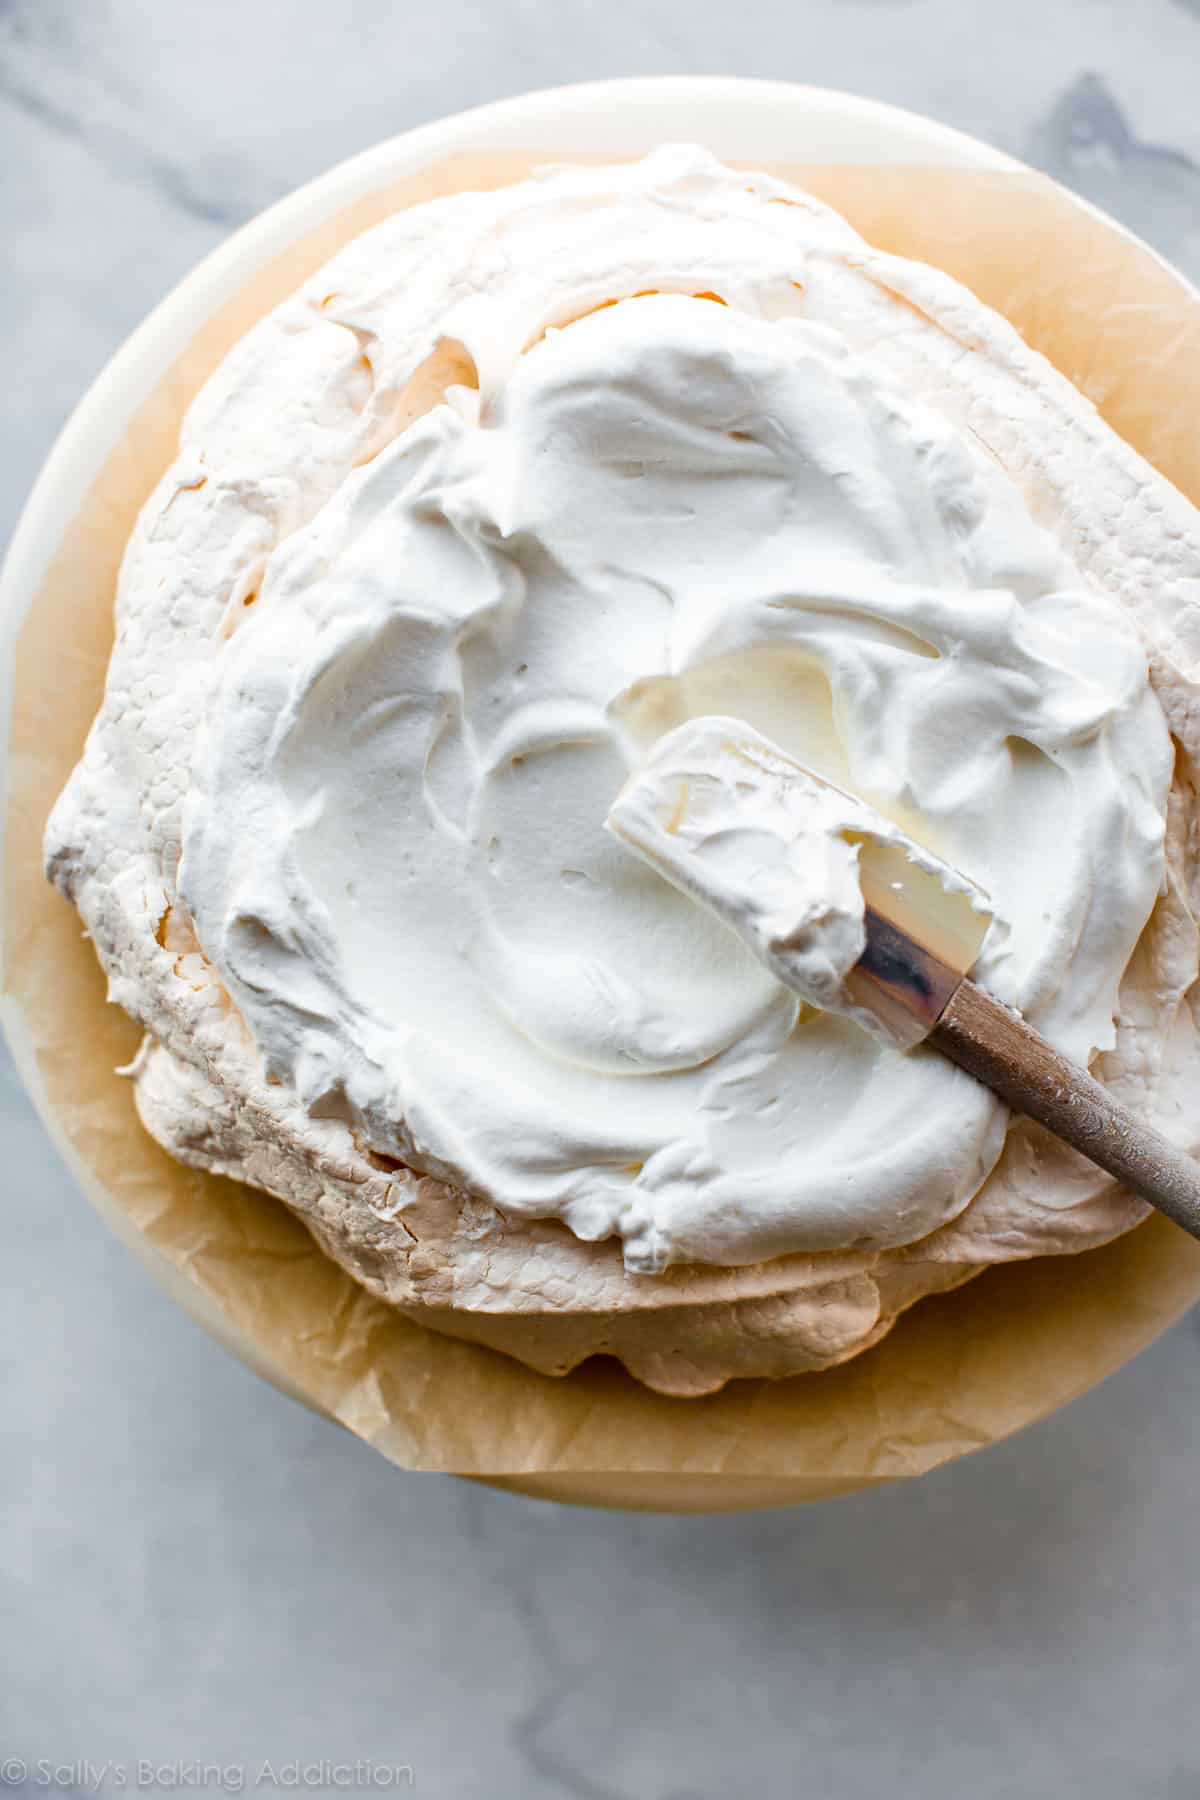
- Whipped cream is essential. You can get a little creative and flavor your whipped cream.
- Homemade lemon curd. You’ll have exactly 4 egg yolks left over anyway!
- A lot of fresh berries… enough to make a fruit pizza jealous!
- Edible florals and herbs
- Strawberry sauce, raspberry sauce, or blueberry sauce
- Chocolate shavings
- Seasonal fruits like mango, kiwi, passionfruit, blood oranges
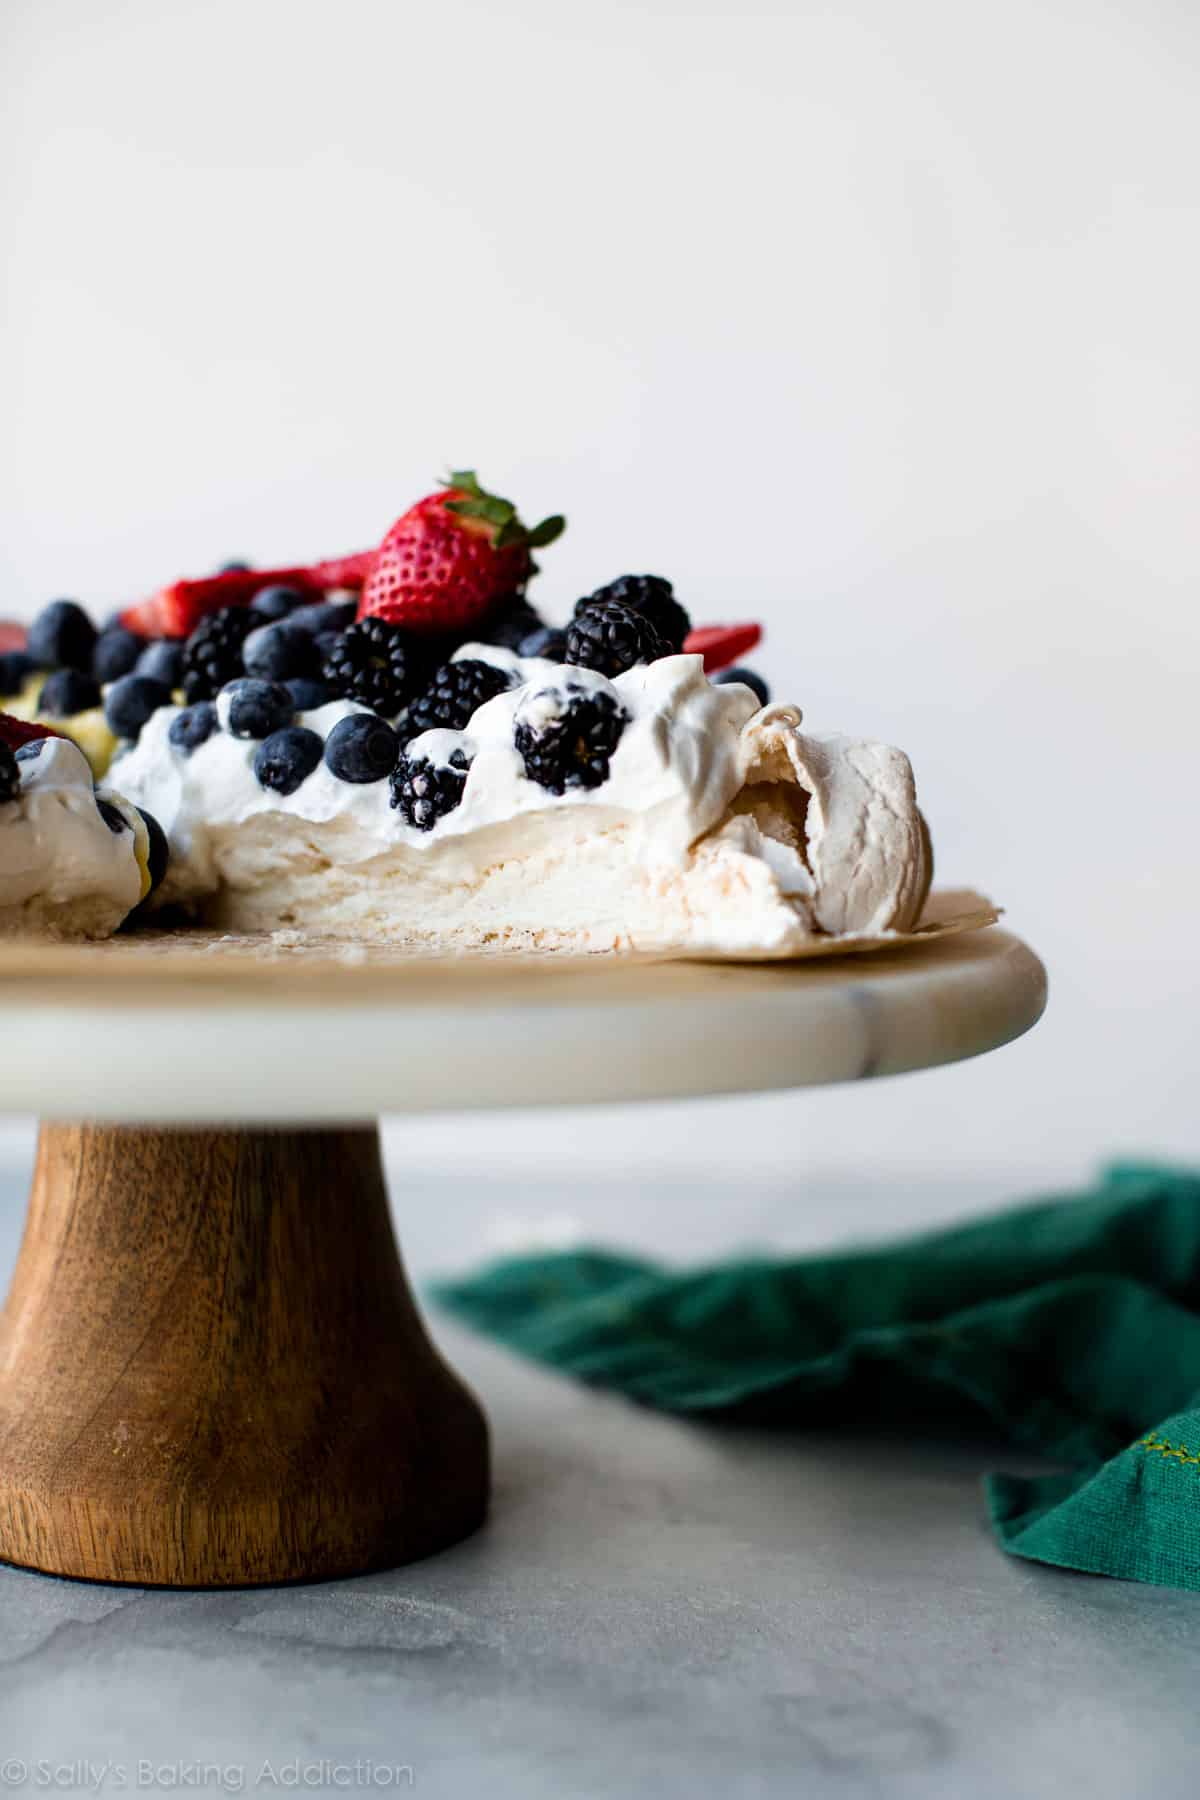
No need to get artistic, just pile it all on top into a massive pavlova mountain.
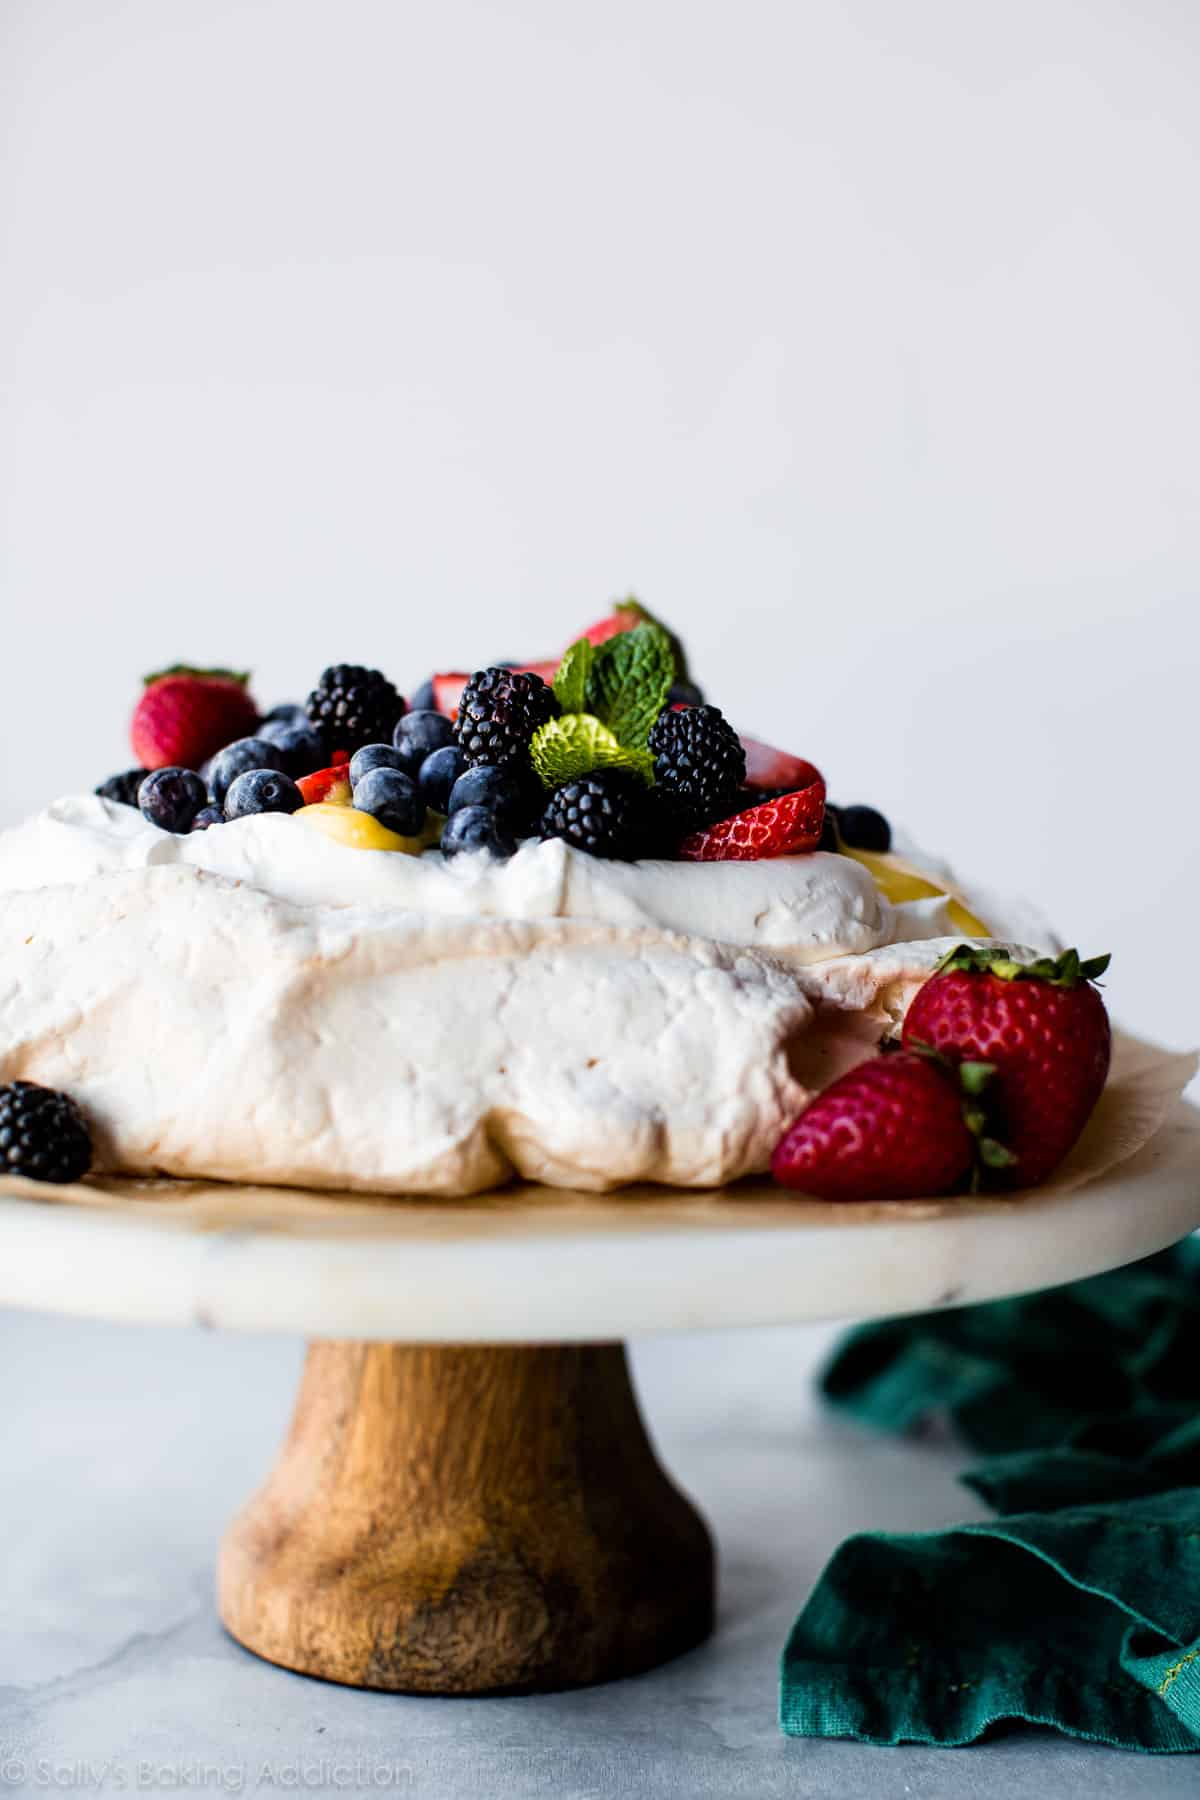
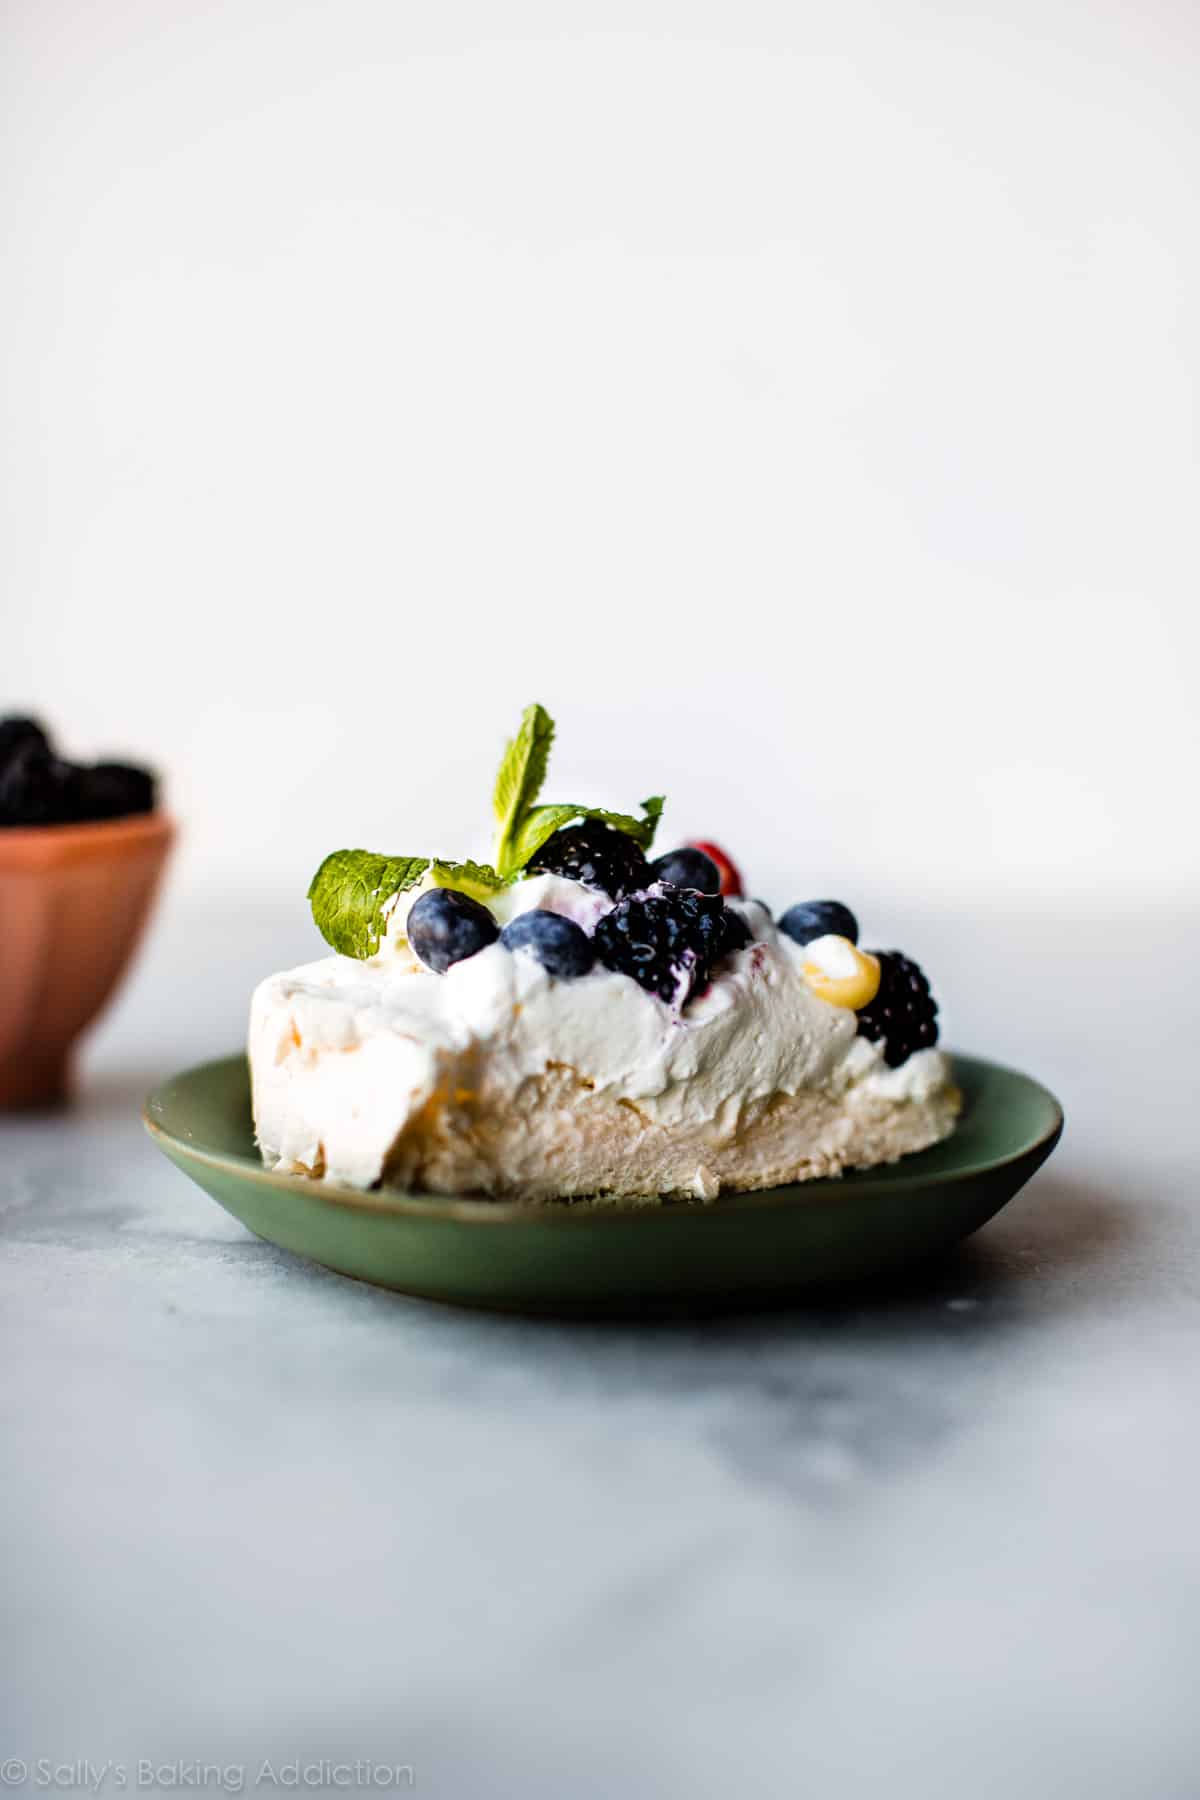
Things are bound to get a little messy when slicing, but if you cooked the pavlova long enough so that the bottom is crisp and the edges are set, it will hold a pie slice shape. This big thing serves about 8-10 people!
If you’re still on the fence about trying pavlova, might I remind you that the center tastes like marshmallows.
Have fun!
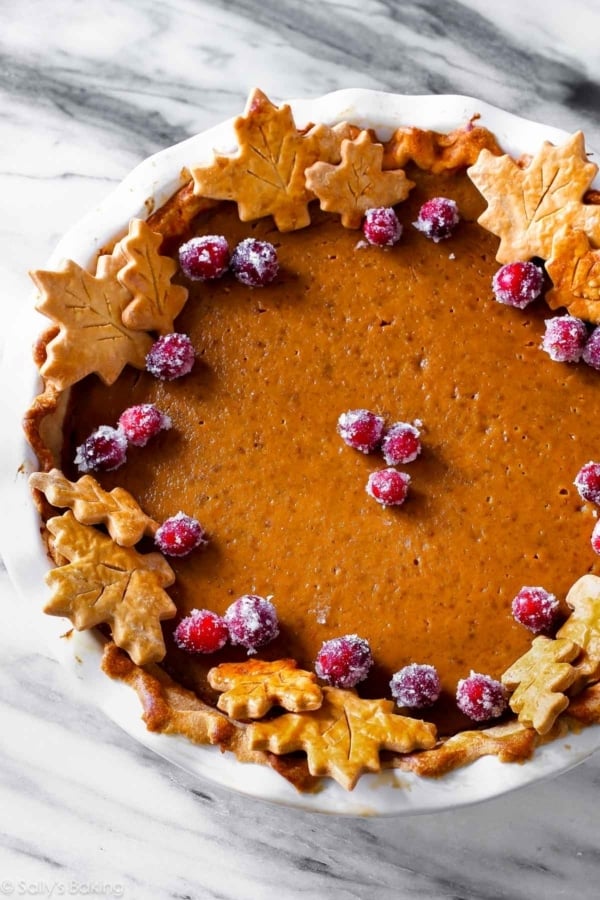
For more gluten-free baking inspiration, here are 40 gluten-free dessert recipes that are always a hit, including cranberry frangipane tart and flourless chocolate cake.
Print
Pavlova
- Prep Time: 20 minutes
- Cook Time: 90 minutes
- Total Time: 4 hours
- Yield: serves 8-10
- Category: Dessert
- Method: Baking
- Cuisine: New Zealand
Description
Pavlova is crisp on the edges, chewy on top, and marshmallow soft and creamy in the centers. Pile high with lemon curd, whipped cream, and fresh fruit to make a delicious, naturally gluten-free dessert!
Ingredients
- 4 large egg whites (use the yolks for lemon curd!)*
- 1 cup (200g) superfine sugar*
- 1 teaspoon pure vanilla extract
- 1/2 teaspoon cream of tartar*
- 1 teaspoon cornstarch
Toppings
- Homemade whipped cream, fresh fruit, strawberry topping, lemon curd, or any desired topping (see post for suggestions)
Instructions
- Preheat the oven to 350°F (177°C). Line a large baking sheet with parchment paper or a silicone baking mat. (Preliminary note: you will quickly reduce the oven to 200°F (93°C) in step 4.)
- With a handheld mixer or a stand mixer fitted with a whisk attachment, beat the egg whites on medium-high speed until soft peaks form, about 5 minutes. Add the sugar in 2 additions, beating for 30 seconds between. Once all of the sugar has been added, turn the mixer up to high speed and continue beating until glossy stiff peaks form, about 2 minutes. The peaks should be stiff enough that you can hold the whisk upright and the peaks won’t move. Add the vanilla extract and beat for 1 more minute. The peaks should still be very stiff. If not, keep on mixing on high speed. Using a rubber spatula, fold in the cream of tartar and cornstarch.
- Spread the pavlova mixture into an 8-9-inch circle (see note for mini size). You can make decorative peaks with the back of a large spoon if desired. Make sure the edges are relatively tall and there is a nice dip in the center.
- Place pavlova in the oven. As soon as you close the oven door, reduce heat to 200°F (93°C). The pavlova will stay in the oven as it cools down to 200°F (93°C). Bake until the pavlova is firm and dry, about 90 minutes total. Rotate the baking sheet if you notice some spots browning. Try to limit how many times you open the oven as the cool air will interrupt the baking.
- Turn the oven off and let the pavlova cool inside the oven. Once the pavlova is cool, you can store it covered at room temperature for up to 2 days. Or serve right away.
- Once cool, top the pavlova with whipped cream and assorted toppings. Slice and serve.
Notes
- Make Ahead Instructions: See step 5 for making the pavlova in advance. Pavlova is best enjoyed right after it’s garnished. It doesn’t freeze well.
- Special Tools (affiliate links): Electric Mixer (Handheld or Stand) | Baking Sheet | Silicone Baking Mat or Parchment Paper | Marble Cake Stand or Serving Platter
- Egg Whites: (1) Room temperature egg whites whip faster than cold egg whites. And (2) room temperature egg whites whip into a greater volume than cold egg whites. So make sure your egg whites are at room temperature before beginning.
- Sugar: Superfine sugar dissolves easier into egg whites. To avoid tasting sugar granules, pulse 1 cup granulated sugar a few times in a food processor. You now have superfine sugar to use in the recipe.
- Acid: You can use 1/2 teaspoon of cream of tartar or 1 teaspoon of white vinegar, apple cider vinegar, or lemon juice.
- Mini Pavlovas: Divide pavlova mixture up into individual portions instead of spreading into one large 8-9-inch circle. In the photos, I piped the mixture into 6 mini pavlovas using Ateco 849. A piping tip isn’t necessary—you can just spoon it on. Make sure you leave a dip in the center to hold the toppings. Bake time depends on size, see step 4 for what to look for. If making 6 mini pavlovas like I did, bake for 35-40 minutes at 200°F (93°C). Start them in a 350°F (177°C) oven, like I do in this written recipe.
- Pavlova base from reader Laurel. Thanks, Laurel!


Reader Comments and Reviews
It’s the first time I’ve made pavlovas. Awesome! Perfect recipe. Very clear instructions. Fantastic result. Thanks Sally from Spain.
I also find carton egg whites are much harder to whip if not impossible!
I made a single batch once before and it came out amazing! Not usually a fan of lemon, but even loved the lemon curd. 🙂
We’re having a large group tomorrow — has anyone ever doubled this recipe? How would it need to be adjusted?
Thanks in advance!
Hi Elle! For best taste and texture (and best success!) we highly recommend making two batters/two batches instead of doubling all at once.
I’ve been making pavlova for quite some time, it’s my youngest son’s favorite dessert so I make I every year on his birthday. :)…while I do get an assortment of berries, one of our favorites is strawberries but this year wouldn’t you know, there are no strawberries to be found. *Disappointed*…anyway, I just wanted to add another little tip if I could. When beating the sugar and egg whites I test to make sure the sugar is fully incorporated by rubbing a little bit of the merengue between 2 fingers till you can’t feel the sugar granuals :)…Enjoy the pavlova…
Fantastic! I made the minis topped w/coconut cream pie filling, whipped cream & sprinkled the tops with crushed vanilla wafer cookies! The pavlova had a slight crunch on the outside, perfect mash mellow texture on inside! No cracking!! They lasted several days just fine in an air tight container so we could add the toppings & enjoy all week! Another yummy & detailed recipe from Sally!! Thank you!!
(I remember when I was a little girl, my mother used to make individual pavlovas and top them with whipped cream and strawberries for her bridge parties.) Alas, I am now type 2 diabetic. My question is can I use a sugar substitute like Stevia or Splenda? I have made meringue cookies for myself and my late father with Splenda, which turned out fine, as long as the weather was dry.
Hi Pamela! We’d love to help but we are not trained in baking with sugar substitutes. For best taste and texture (and so you don’t waste your time trying to adapt this recipe since it may not work properly), it may be more useful to find a pavlova recipe that is specifically formulated for sugar substitutes. Thank you!
Hi, Sally what size circle (in inches) is your mini pavlovas? I’ve made the full-size pavlova before and it’s delicious. I want to try making the mini ones this weekend. Thank you.
Hi Sankavi! We didn’t measure the mini pavlovas, but would guess they would be close to 4 inches in diameter.
Sounds like a good recipe.
I’ve made this recipe before I don’t remember how they cooked up but when finished they were delicious. I’m making mini ones right now and they’ve been in for 70+ minutes and still very soft to the touch. Not dry or frim at all. Any recommendations?
Hi , I made this recipe to the exact directions and left it in the oven to cool as directed. It was very chewy and stuck to my teeth. Any reasons for this??
Hi Judith! The middle of the pavlova should have a fluffy, chewy meringue center. It’s a wonderful contrast to the crunchy exterior. If you prefer a less chewy meringue, you can bake it a bit longer next time. Thank you for giving this recipe a try – hope you enjoyed it!
Just had my first go. Never turned from stark white- baked for probably 1hr 45 mins. A bit more crumbly on the outside than I would have preferred but turned out beautiful. I piped raspberry and strawberry freezer jam around the outside, put the attached lemon curd filling In the center, then topped that with circles of raspberries and blueberries. Had guests put a dollop of cream on top of that. Show stopper for sure. Another win from this site. So far, all recipes have been hits.
Can I make this & put the toppings on a few hours ahead? I would love to bring to a family party
Hi Chelsea! Pavlova is best enjoyed right after it’s garnished – we recommend bringing your toppings separately and assembling before serving. Hope it’s a hit!
This was such a delicious dessert! My whole family loved it. Thank you!
I always have egg whites lying around. Not literally but I do a lot of cooking that calls for egg yolks. I make gelato and fruit curds and stuff like this. I end up freezing my egg whites in quantities of four whites to a small plastic container. I have a lot of those containers and I save them up because when I have enough, I’ll make swiss buttercream and THESE pavlovas. The only difference between fresh egg whites and the defrosted egg whites is that it does take a little bit longer to whip the defrosted ones up. No taste difference, doesn’t spread, identical. I will also add different flavorings. Vanilla bean paste for the tiny flecks, almond extract, or coconut extract. I have lemon extract but it’s oil based and will deflate your whites. Citrus juices add acid to stabilize your whites but may not impart enough flavor to make a difference. Look, I use to work as a personal chef before this Pandemic shut the world down. I’ve had time to experiment.
P.S. Yes, my last name is REALLY Cook.
I was wondering if you could put in lemon or lime juice into the pavlova or the whipped cream?
This recipe is amazing and I have made it on several occasions. I always make a simple homemade whipped cream to top with heavy whipping cream, fresh lime juice, vanilla, and a tiny bit of confectioners sugar.
Hi Sally,
I love this recipe and always use it and the pavlova turns out perfect!
I would like to make a bigger size Pavlova, a size to serve up to 12 people. What are the right adjustments on the recipe and the baking?
Hi Nis, For best taste and texture (and best success!) we highly recommend making two batters/two batches instead of doubling all at once.
Thank you! Can I bake 2 pavlovas at once in the oven?
Hi Nis, if you have room in the oven, that should be fine!
So good. Like eating a cloud.
One thing, it doesn’t say at what speed to mix the meringue at first, before you add the cream of tartar etc. I did high speed since later it says “continue beating at high speed,” but 5 minutes is way too long at high speed. I had to toss my first attempt, it had been years since I last attempted meringue so I wasn’t clear on what “soft peaks” looks like and just trusted the 5 minutes. Ended up overwhipping it and losing my peaks altogether, turned into goop that would never get into stiff peaks no matter how long I whipped. Second attempt, got soft peaks after less than 2 minutes (had googled what that actually looks like). Then it turned out amazingly delicious.
I topped it with lemon curd, fresh berries and a generous helping of whipped cream. Had never had a pavlova before but now it might just be my favourite dessert EVER. 🙂
About how long does it take for the oven to cool once you turn it off?
Hi Becku, All ovens are a little different but we let it cool in the oven for about an hour.
This is the first time im making this and im excited!!! Ive been baking for about 7 months now and Sally is my number one lady. I especially love the notes and tips. I’ve made coconut cake and chocolate cake and chocolate mousse and several other recipes. Your the only website that explains in a way a beginner gets it. I’ll let you know how mine come out.
I’ve made meringues in the past, and have not had great success. This recipe is fool-proof. The only change I made was using vanilla bean paste instead of regular vanilla. I piped 10 – 5-inch meringue nests, and had enough left over for about 2 dozen meringue puffs. I pre-heated at 350, and then as soon as I placed them in the oven, dialed temp down to 200. I baked for about 50 minutes, then let them sit in the oven for about 3 hours. No problems removing them from parchment paper. Absolute perfection. I’m serving the nests for Easter dessert tomorrow – filled with vanilla bean whipped cream, lemon curd (highly recommend Sally’s recipe above)and fresh berries. Kids have already devoured the meringue puffs. Thanks so much for a fantastic recipe. It’s going right into my recipe binder for future use!
Hello Everyone! I am a twelve year old amateur baker and I thought these were lovely! I got eight miniature pavlovas out of this recipe and thought they were delicious. For my fellow Passover observers, I highly recommend these as a Passover dessert because they are not risen or leavened and have no flour. I had some trouble removing mine from the parchment and decided to make them for a few more minutes after reading some comments. I also had some difficulty whipping my edges to stiff peaks but solved this problem by simply whipping them for longer (as stated in the recipe). In conclusion, I love this recipe and highly suggest it!
Sooo good. I’ve made this many times where I’ve halved the recipe.
Baking time is reduced to about 25-30 min, rotating pan halfway.
Great recipe
Oh YUM! Used raspberries and blueberries. Definitely will make again,
I made this with coconut whipped cream, lemon curd, peaches and blackberries. OMG. This will be a new favorite, I’m sure of it. Beautiful sweetness, bright from the curd, juicy from the fruit, and the coconut cream was very intensely coconut but it tied everything together.
Thanks for an amazing recipe. I followed your directions and it was perfect. I topped it with the lemon curd and a few fresh blueberries. That lemon curd!! Wow!! I could literally sit and eat the entire bowl.
Do you think it will work to halve the recipe?
Hi Emily! You can halve the recipe. We’re unsure of the exact bake time. It’s done when it feels firm and dry.
Can we use liquid egg whites in a carton?
Hi Mara, we don’t see any problems using room temperature carton egg whites. Let us know how the pavlova turns out!
Made this using liquid egg whites, started out fine, but didn’t make stiff peaks. I ended up adding two regular egg white and it stiffen up with extra whipping time.
So fun and delicious! I topped it with the lemon curd from this site and it was a heavenly!
Recipe is very clear and looked great, but was a sticky mess to get off the silicone mat. I followed the recipe exactly and did not try to remove from mat before cool…what happened??
Hi Carole, sounds like it was simply under baked. We always suggest using an in-oven thermometer for the most consistent baking results!
I have made pavlova many many times over the years. It is very impacted by the ambient temperature and you simply can’t make it on hot or humid weather. It will be a sticky mess regardless of following the directions. Cool dry days are best
Easy to follow recipe and it turned out perfectly. I’ve always bought pre-made pavlova bases from the shop, never again!
This is a classic Christmas dessert here in Australia. I sometimes make a vanilla bean custard with the leftover egg yolks, and serve with fresh berries and drizzled melted white and dark chocolate!
I made this recipe a few times. Throughout the process, everything looked great. However, while following instructions exactly as written, I was not able to achieve a chewy texture in the center. The outside looked perfect, but inside was pretty airy and a little moist still. Based on the comments, this seems like the recipe to use. Could it be my oven or something that requires tweaking?