

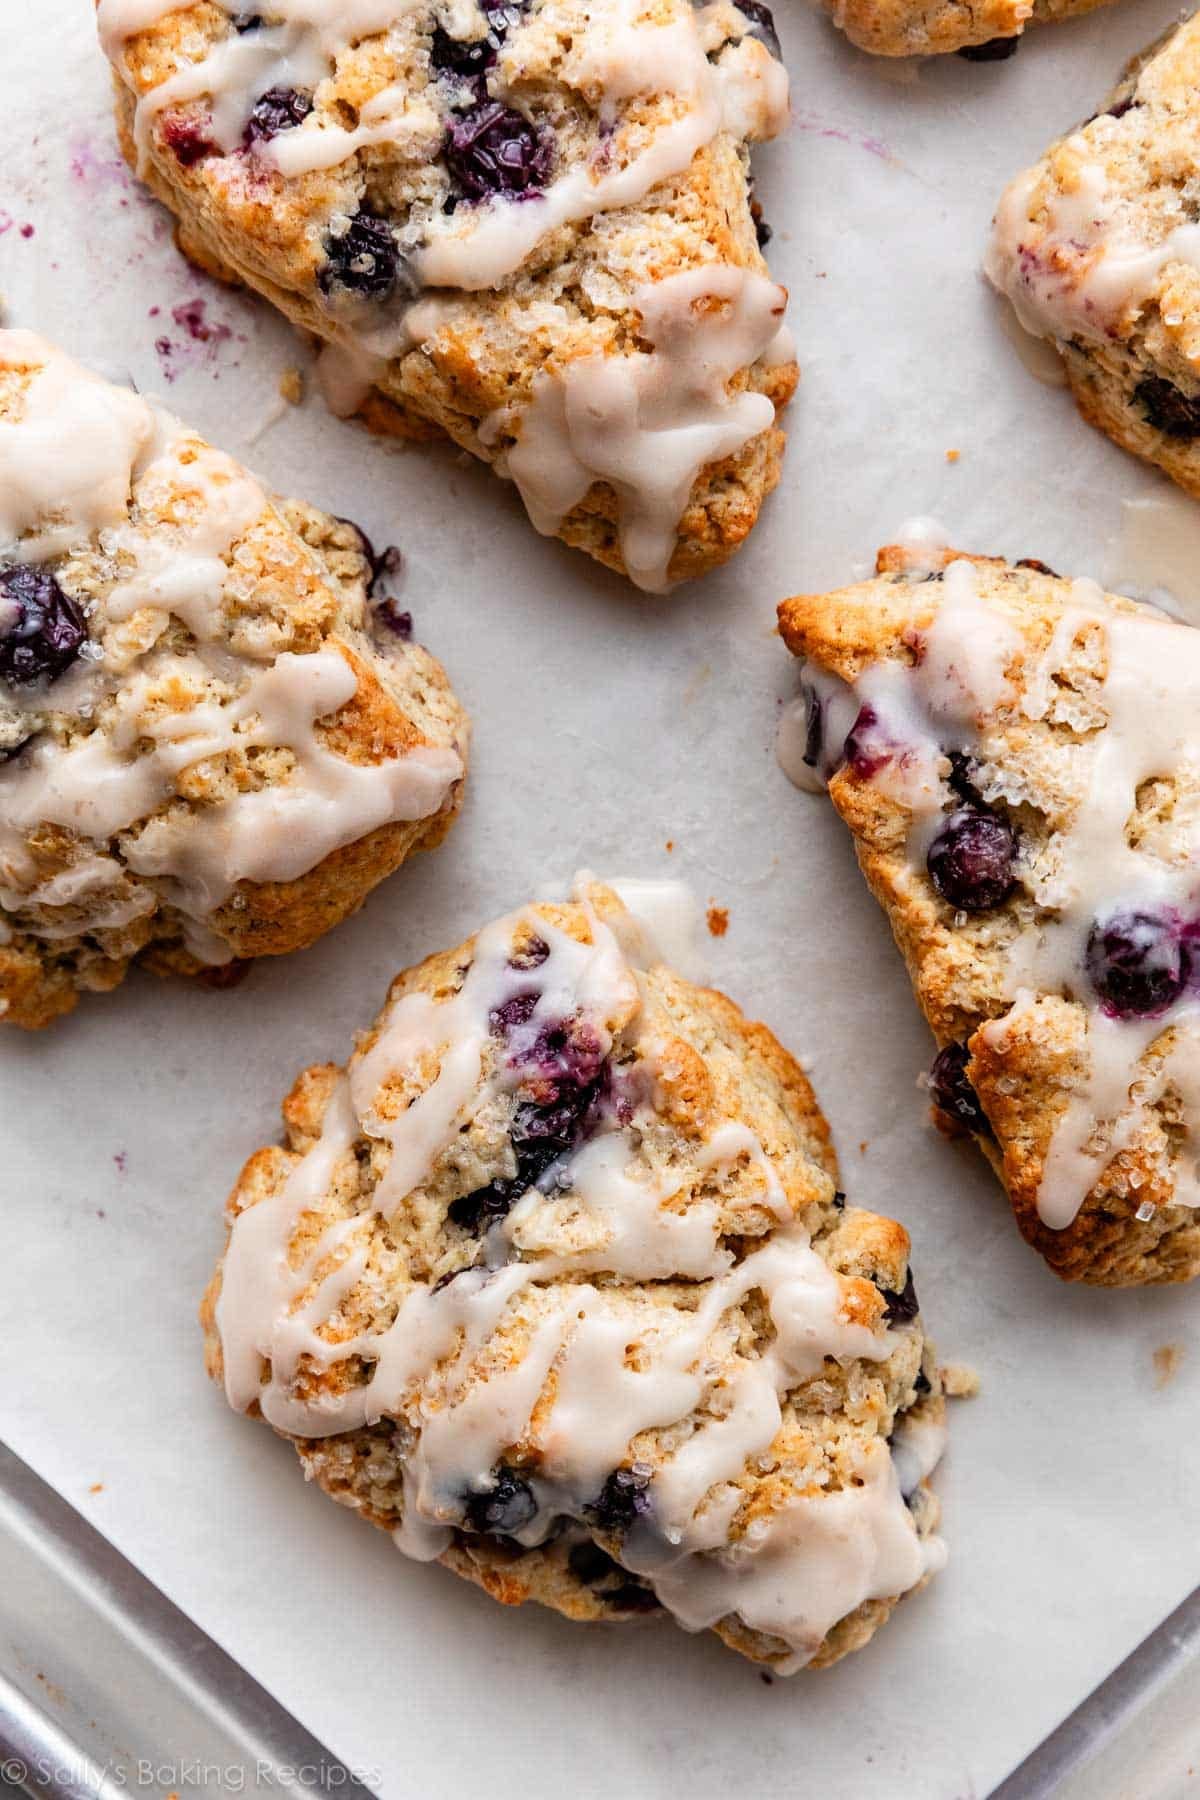
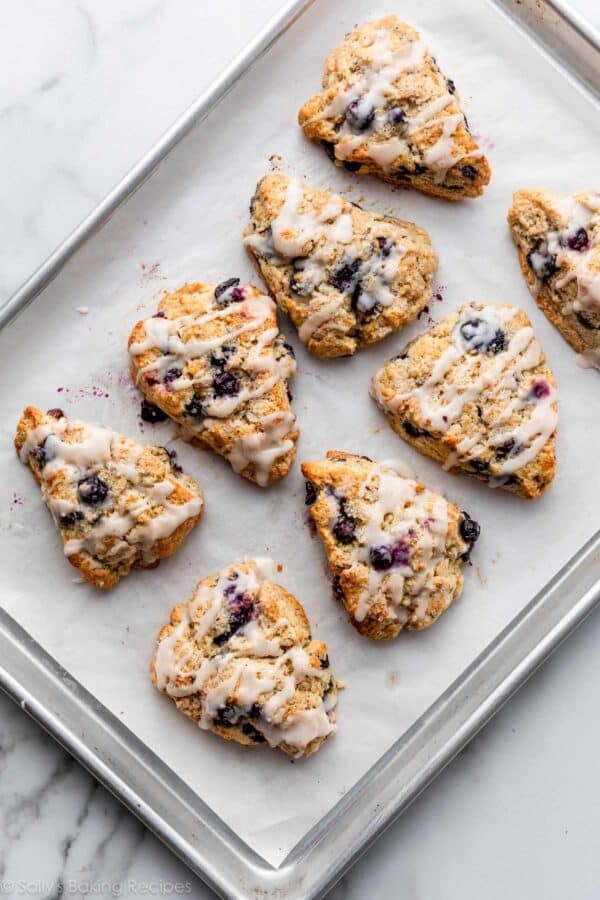
These better-than-the-bakery blueberry scones are bursting with juicy blueberries. They’re buttery and moist with crisp, crumbly edges and soft, flaky centers. Crunchy coarse sugar and creamy vanilla icing are the perfect finishing touches!
I originally published this recipe in 2014 and have since added new photos and a video tutorial.
Scones. You either love them or hate them. I used to fall in the latter category, passing on them in favor of muffins or quick breads. Scones can taste pretty dry, comparable to lackluster triangles of cardboard. No, thanks.
But my opinion on scones took a total 180 a few years ago when I attended a cooking event in the Panera Bread test kitchen. Turns out that I’ve been eating all the wrong scones because when done right, these sweet treats tiptoe into a world of pastry perfection.
Since then, I mastered chocolate chip scones, apple cinnamon scones, ham & cheese scones, cinnamon scones, lavender scones, and strawberry lemon scones. I use the same master scone recipe for each flavor, a formula promising the BEST scone texture. By the way, I wrote an entire post devoted to my favorite base scones recipe. Today we’re making blueberry scones, which is definitely my favorite scone flavor.
There’s no denying these are the best blueberry scones on the planet. Strong statement, right? Trust me.
One reader, Rich, commented: “Sally, I would like to say thank you! These pastries were awesome. I was expecting a dry and pale flavor that I usually get from scones. These blueberry scones absolutely melted in our mouths. I can’t say enough about the recipe. One word for these—AWESOME! I am going to try more of your recipes, and I’m sure I won’t be disappointed. ★★★★★“
These Blueberry Scones Have:
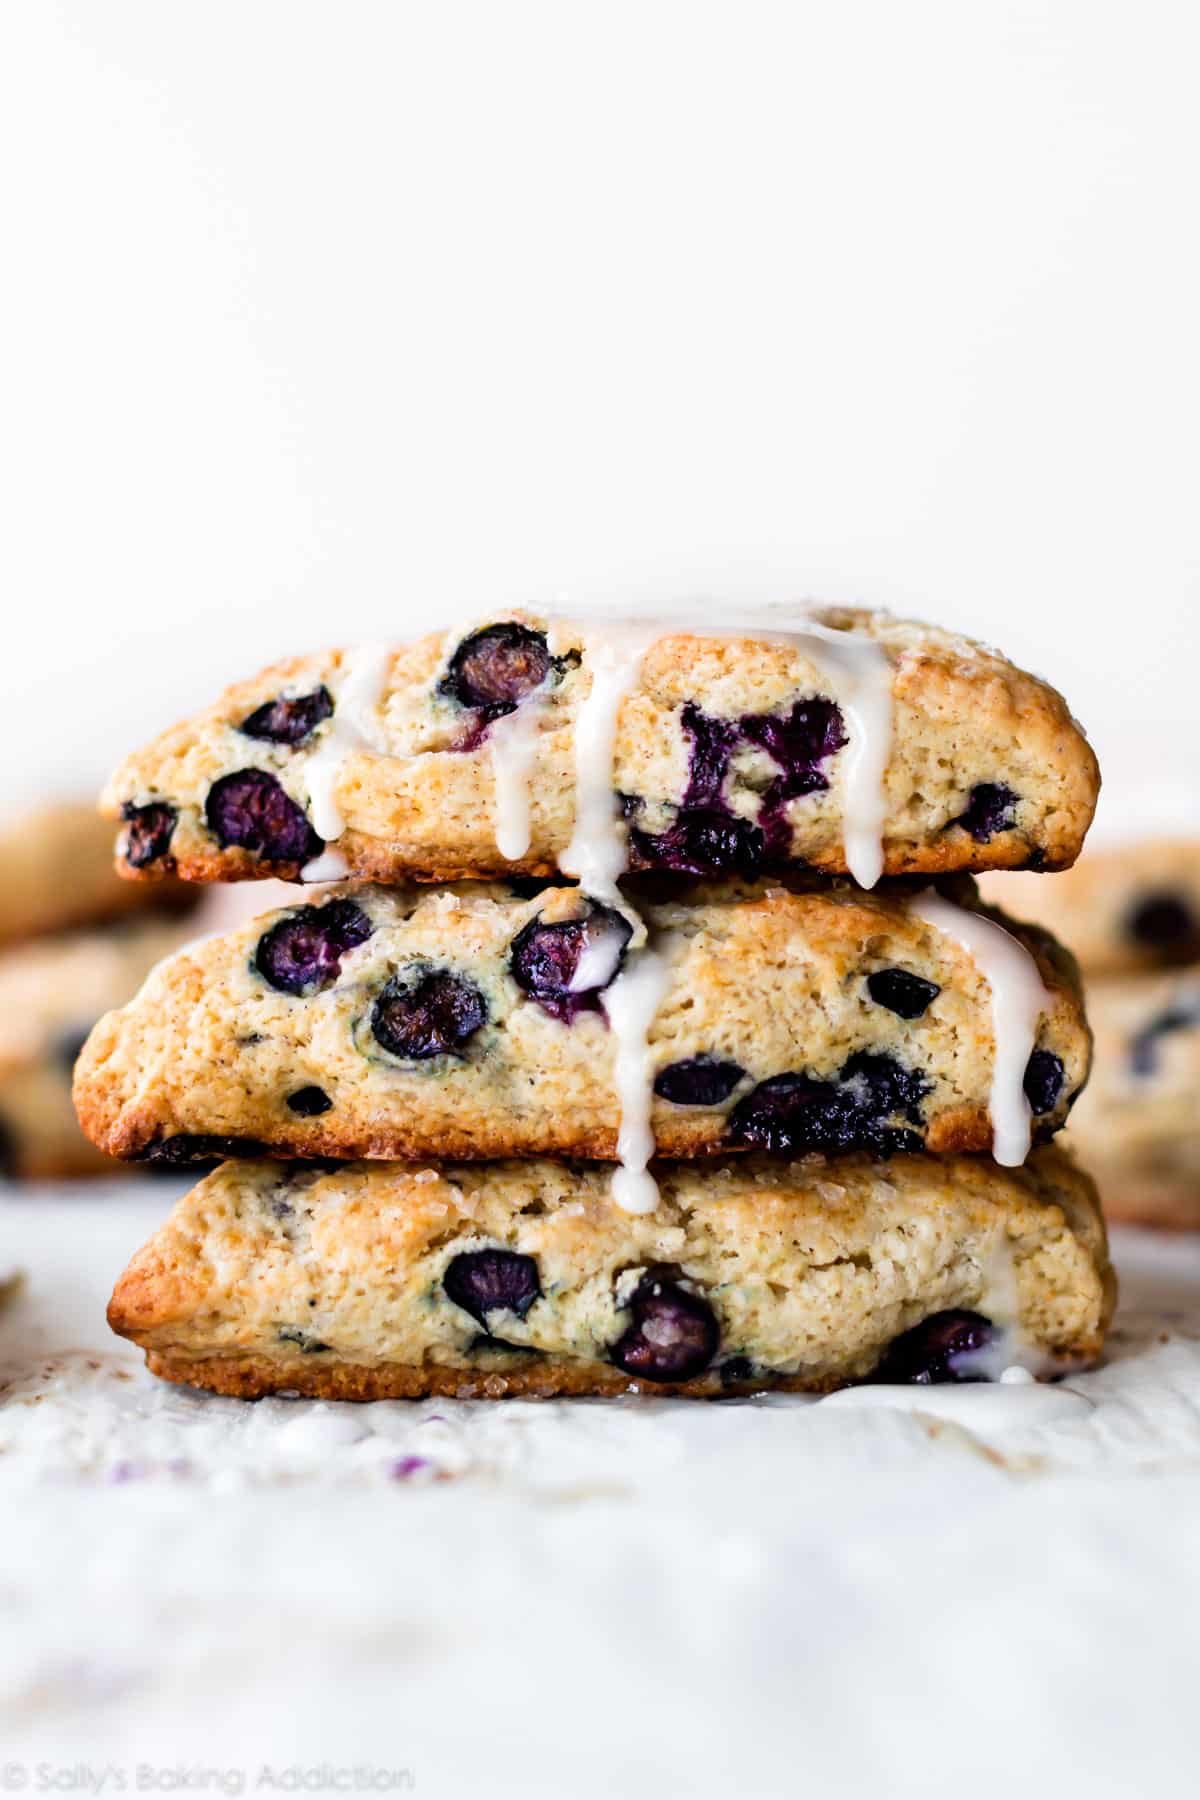
- Crisp, crumbly edges
- Soft, moist centers
- Crunchy golden brown exterior
- Buttery rich flavor
- An overflow of blueberries
- Mega vanilla icing drizzles
Let’s make them!
Blueberry Scone Ingredients
Nothing but basic ingredients coming together to produce something extraordinary. 🙂
- Flour: 2 cups of all-purpose flour is my standard amount, but set extra aside for the work surface and your hands.
- Sugar: I stick with around 1/2 cup of sugar for this scone dough. Feel free to slightly decrease, but keep in mind that the scone flavor and texture will slightly change.
- Baking Powder: Adds lift.
- Salt, Cinnamon, & Vanilla Extract: Add flavor.
- Cold Butter: Besides flour, cold butter is the main ingredient in blueberry scones. It adds flavor, flakiness, crisp edges, and rise. More on butter below!
- Heavy Cream: For the best-tasting pastries, use a thick liquid such as heavy cream. Buttermilk works too! For a nondairy option, try using full-fat canned coconut milk. Avoid thinner liquids such as milk or almond milk—you’ll be headed down a one-way street to dry, bland, and flat scones.
- Egg: Adds flavor, lift, and structure.
- Blueberries: For best results, use fresh blueberries. If you must use frozen, do not thaw.
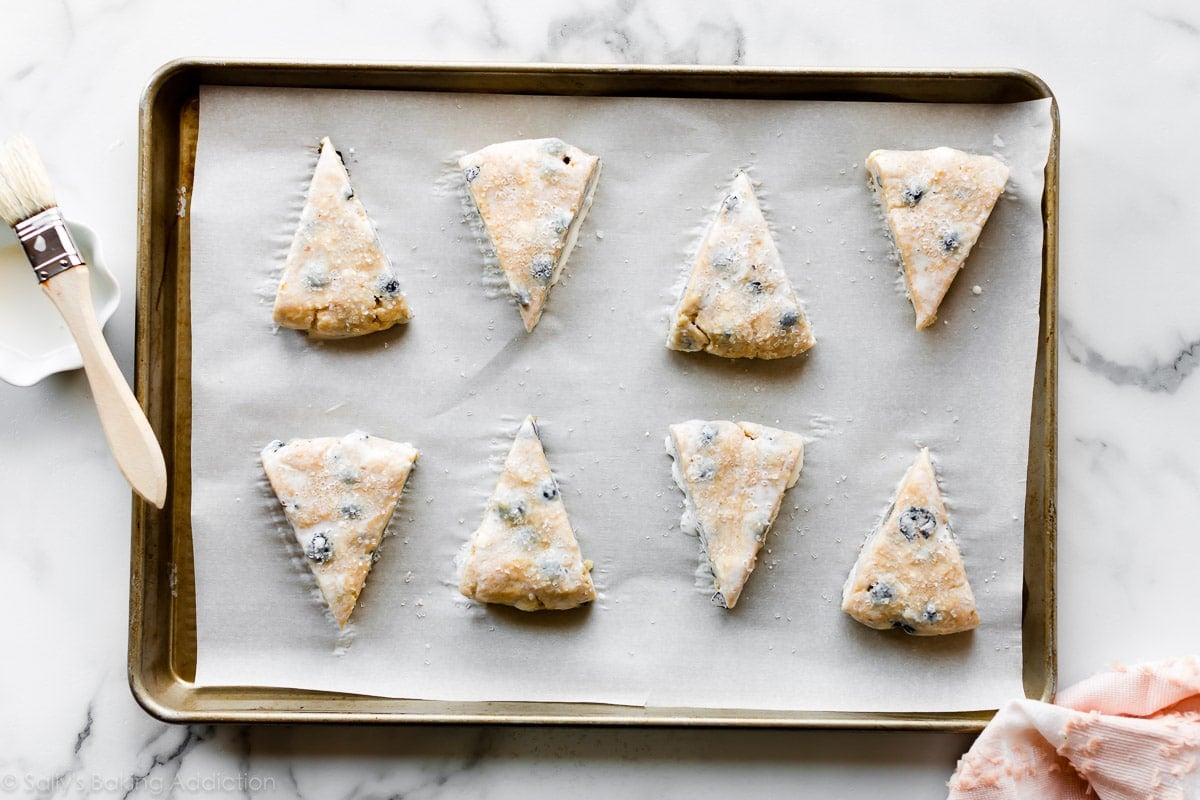
Before baking, brush the scones with heavy cream and sprinkle with coarse sugar. These extras add a bakery-style crunch and beautiful golden sheen. Highly recommended!
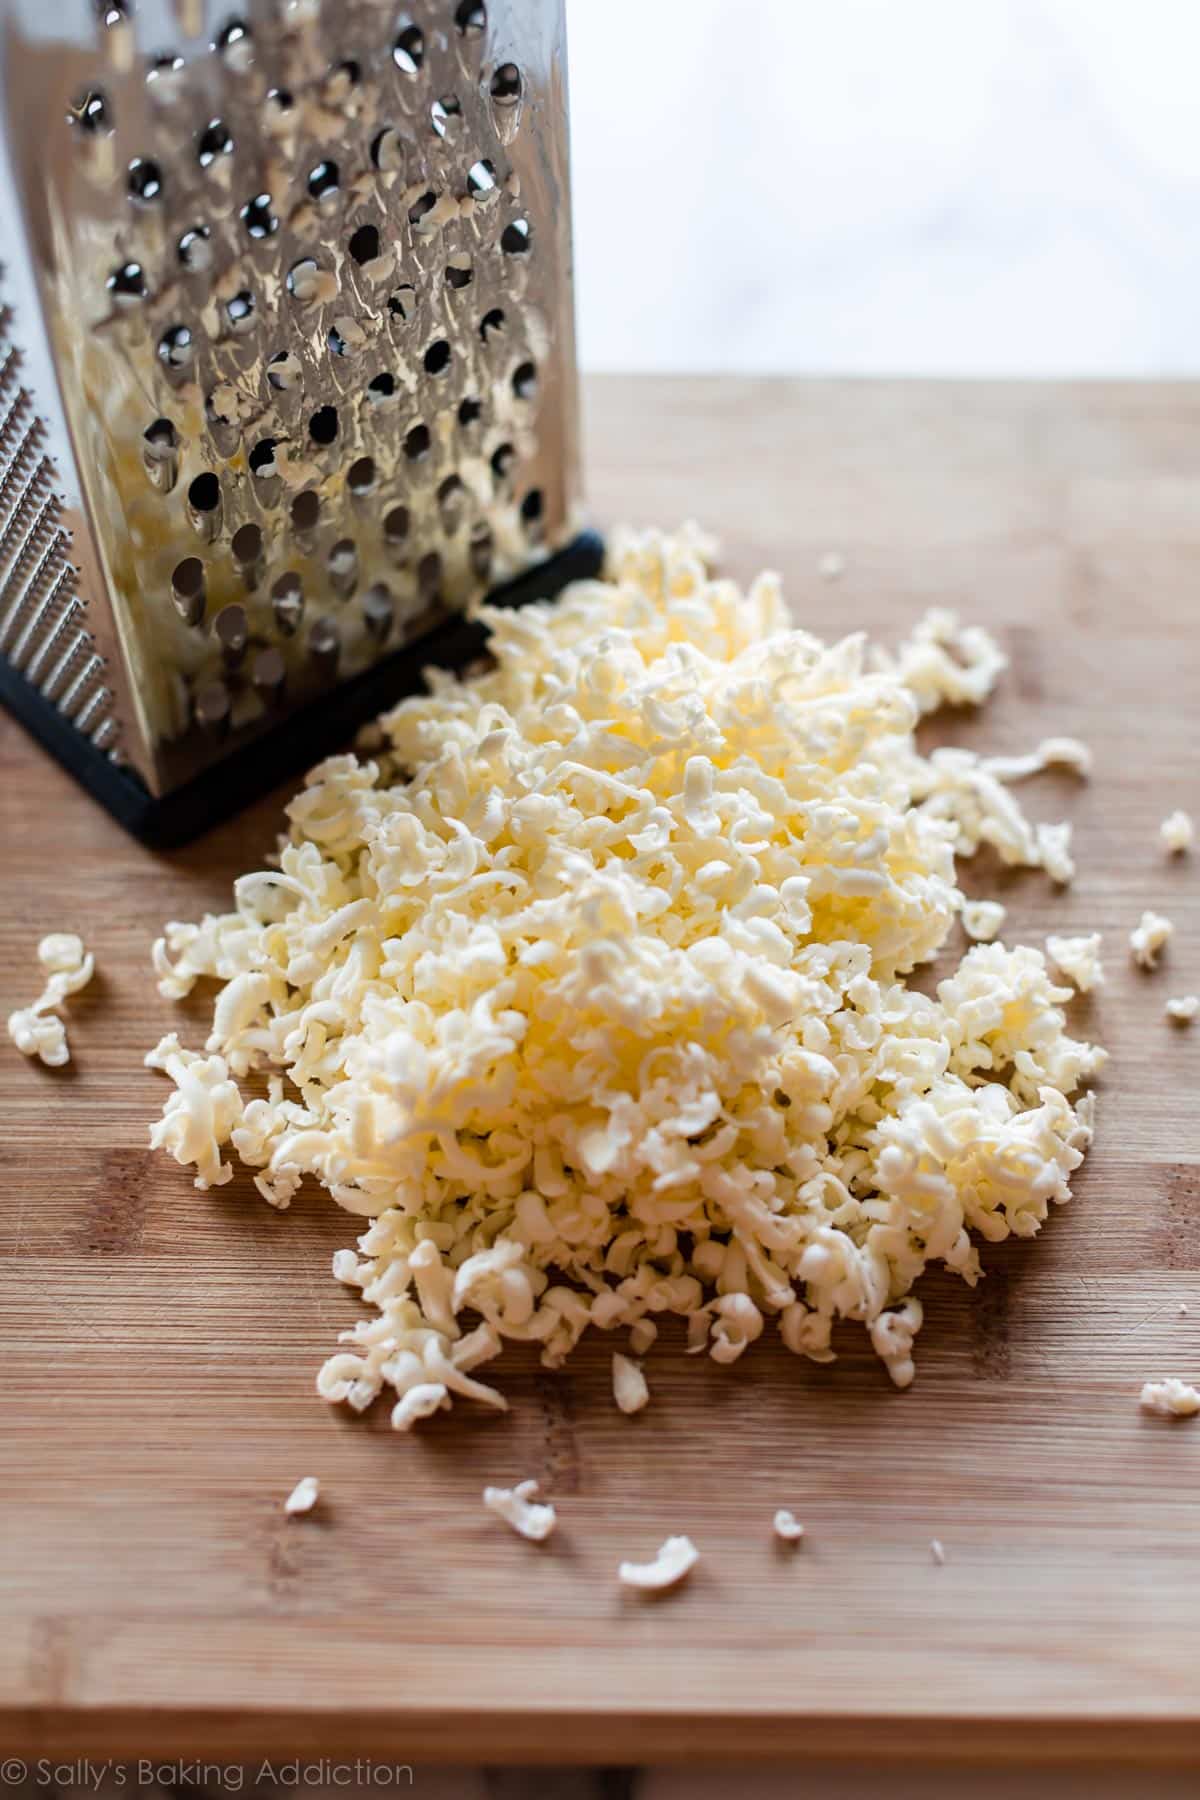
Frozen Grated Butter
Frozen grated butter is key to blueberry scone success.
Like with pie crust, work the cold butter into the dry ingredients. The cold butter coats the flour. When the butter/flour crumbs melt as the scones bake, they release steam and pockets of air. These pockets add a flaky center, while keeping the edges crumbly, crunchy, and crisp. Refrigerated butter might melt in the dough as you work with it, but frozen butter will hold out until the oven. And the finer the pieces of cold butter, the less the scones spread and the quicker the butter mixes into the dry ingredients. Remember, you don’t want to over-work scone dough.
I recommend grating the frozen butter with a box grater.
How to Make Blueberry Scones
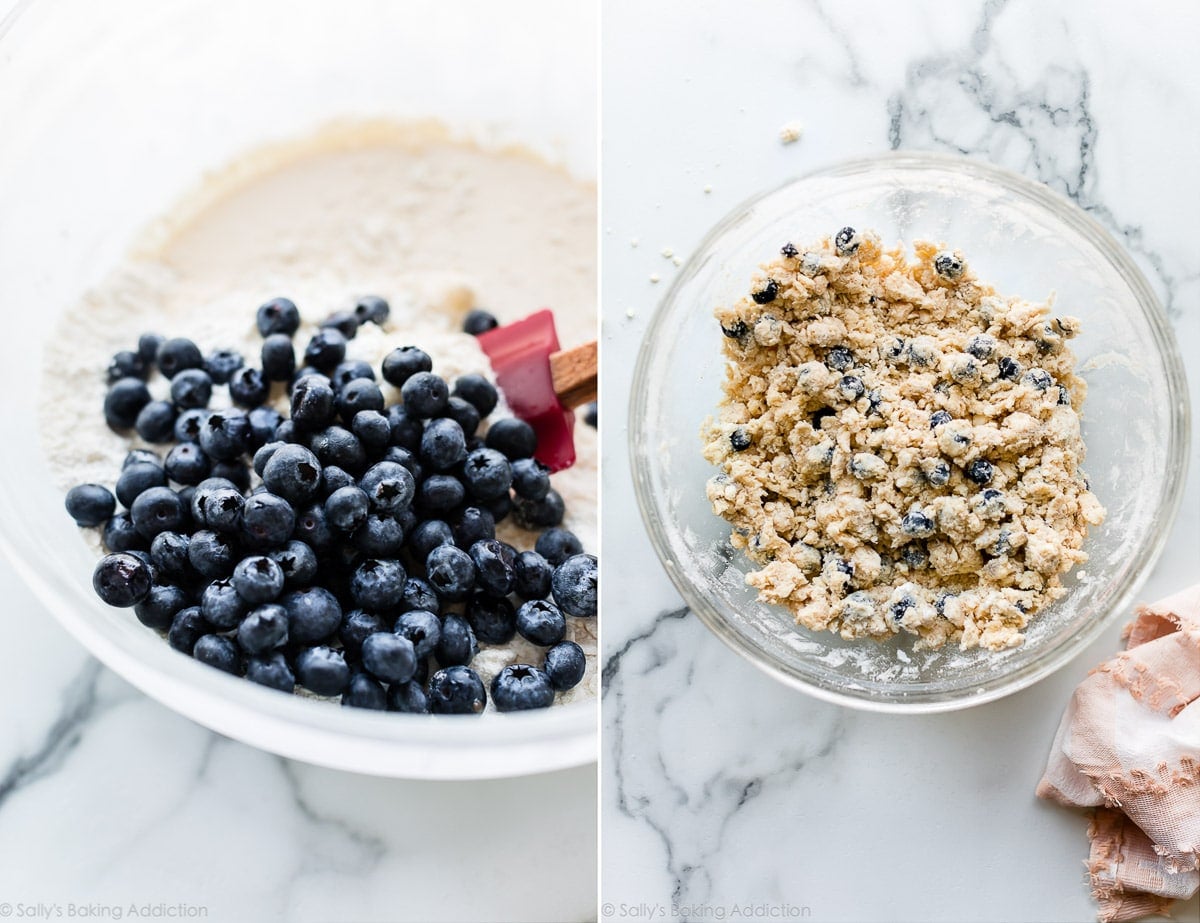
Blueberry scones are a quick and easy breakfast pastry recipe. Since there’s no yeast, they go from the mixing bowl to the oven relatively quickly. First, mix the dry ingredients together. You need flour, sugar, baking powder, salt, and cinnamon. Second, cut cold butter into the dry ingredients. You can use a pastry cutter, 2 forks, or your hands. A food processor works too, but it often overworks the scone dough. To avoid overly dense scones, work the dough as little as possible.
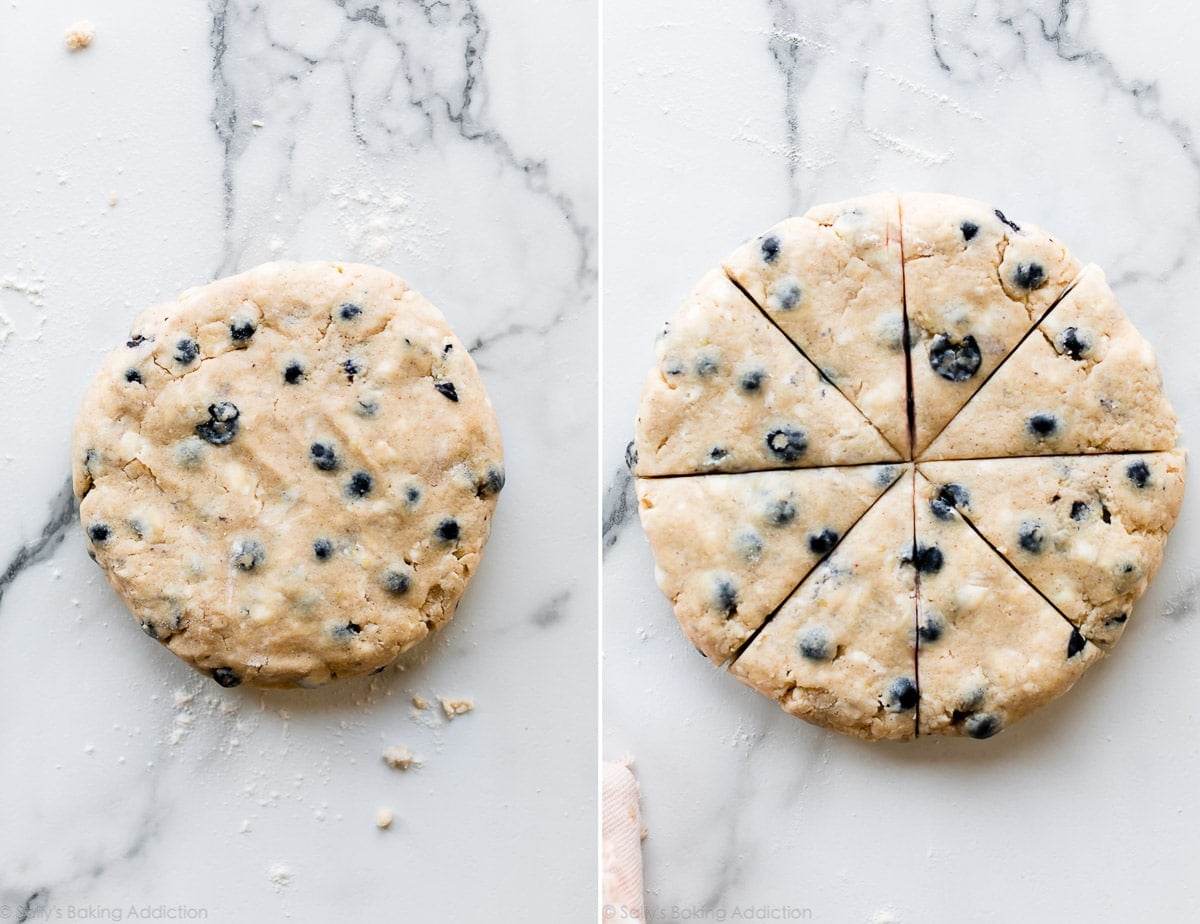
Next, whisk the wet ingredients together. You need heavy cream, 1 egg, and vanilla extract. Pour the wet ingredients into the dry ingredients, add the blueberries, then gently mix together. Form the dough into a disc on the counter, then cut into 8 wedges.
One of my tricks: To obtain a flaky center and a crumbly exterior, scone dough must remain cold. Cold dough won’t over-spread, either. Therefore, I highly recommend you chill the shaped scones for at least 15 minutes prior to baking. You can even refrigerate overnight for a quick breakfast in the morning.
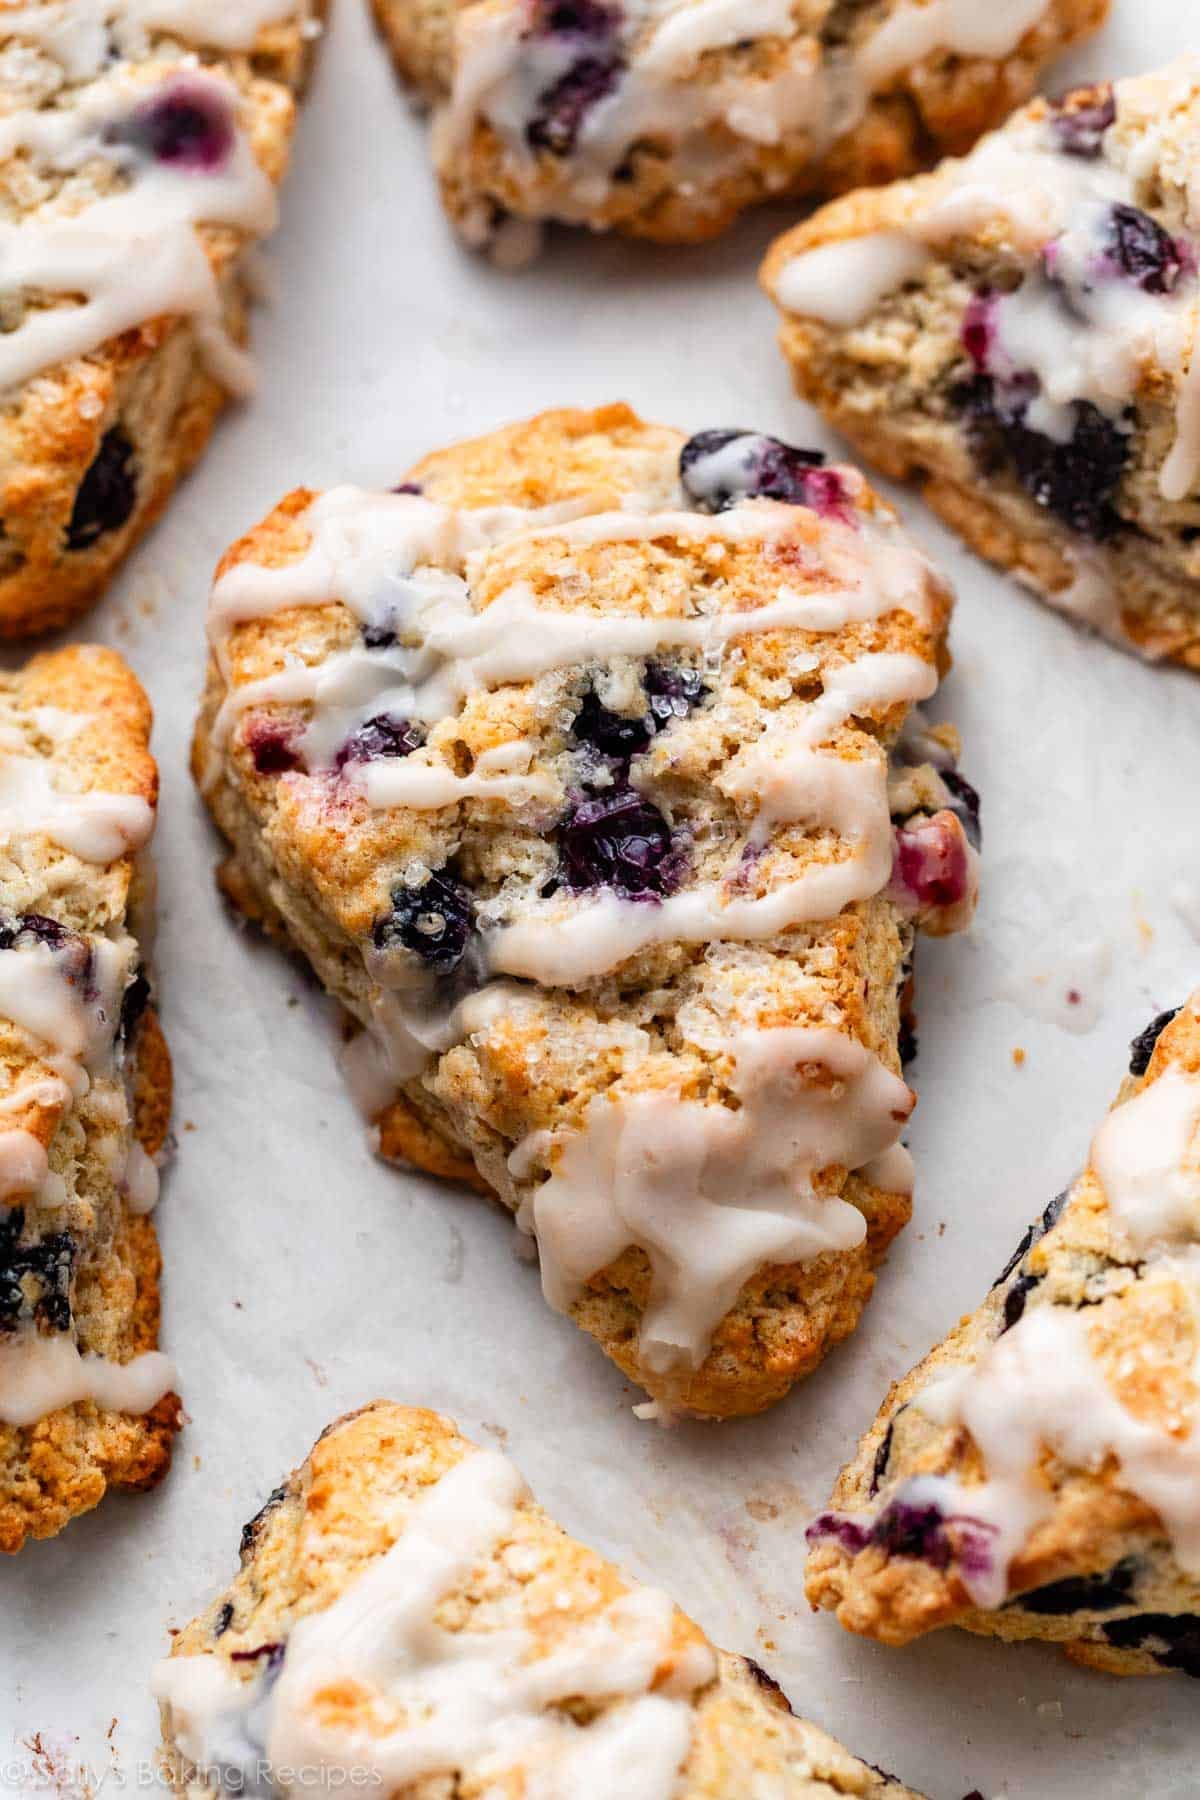
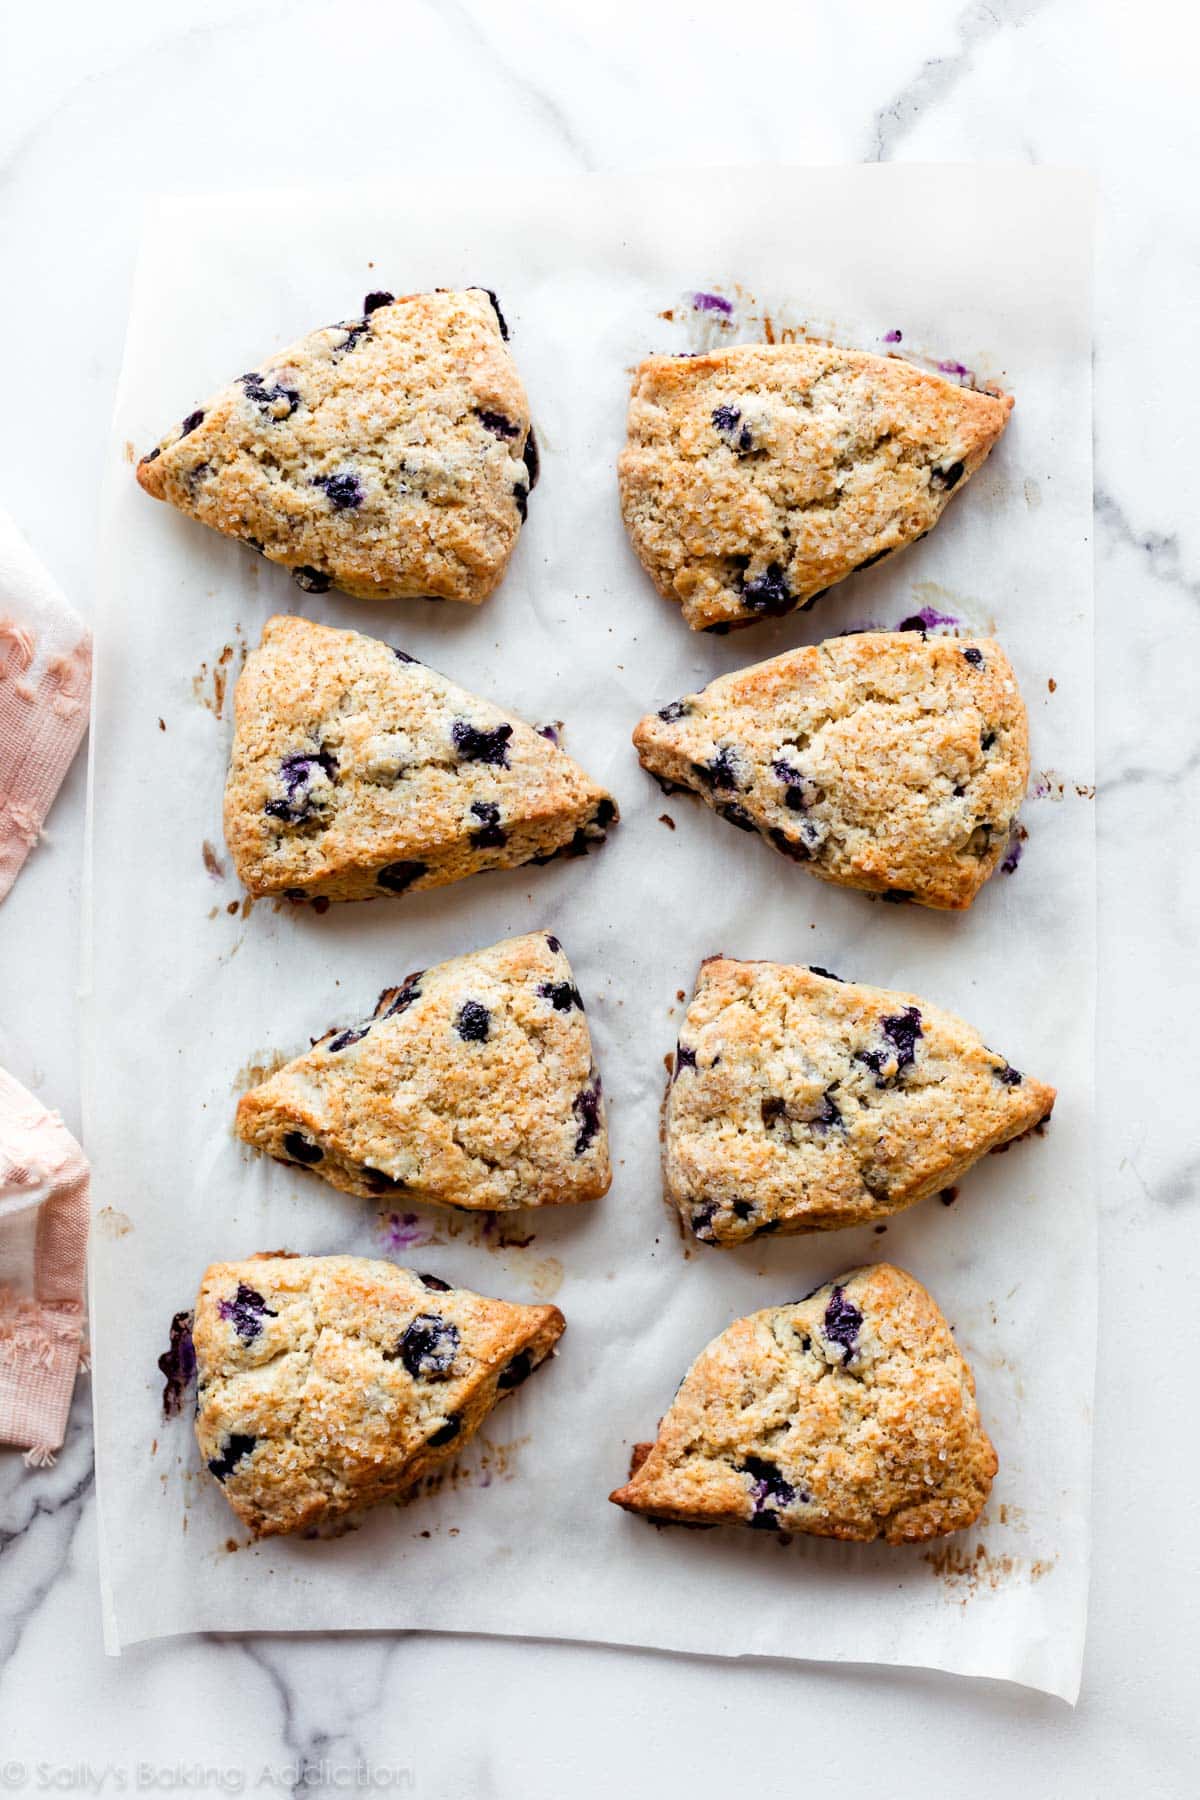
After that, bake the scones until golden brown.
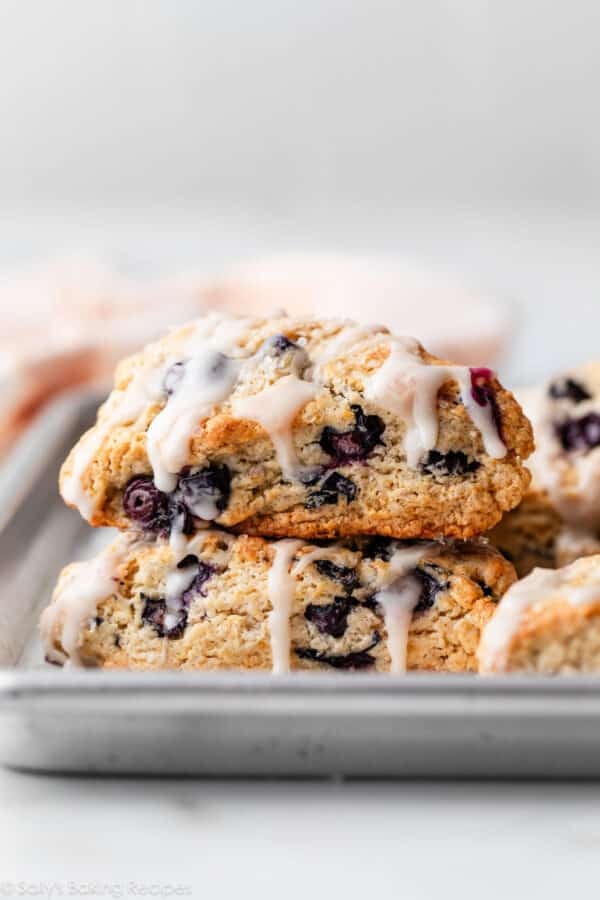
The scones are fantastic warm out of the oven, but taste even better with a drizzle of vanilla icing on top. The icing is totally optional, but you should never pass up the chance to accessorize! It seeps down into the cracks and crevices, adding even more sweet flavor. A dusting of confectioners’ sugar or pat of homemade honey butter is tasty, too!
More Essential Breakfast Recipes
Print
My Favorite Blueberry Scones
- Prep Time: 30 minutes
- Cook Time: 25 minutes
- Total Time: 1 hour
- Yield: 8 large scones
- Category: Breakfast
- Method: Baking
- Cuisine: American
Description
These better-than-the-bakery blueberry scones are bursting with juicy blueberries. They’re buttery and moist with crisp, crumbly edges and soft, flaky centers. Read through the recipe before beginning. You can skip the chilling for 15 minutes prior to baking, but I highly recommend it to prevent the scones from over-spreading.
Ingredients
- 2 cups (250g) all-purpose flour (spooned & leveled), plus more for hands and work surface
- 1/2 cup (100g) granulated sugar
- 2 and 1/2 teaspoons baking powder
- 1 teaspoon ground cinnamon
- 1/2 teaspoon salt
- 1/2 cup (8 Tbsp; 113g) unsalted butter, frozen
- 1/2 cup (120ml) heavy cream (plus 2 Tbsp for brushing)
- 1 large egg
- 1 and 1/2 teaspoons pure vanilla extract
- 1 heaping cup (140g) fresh blueberries
- for topping: coarse sugar and vanilla icing
Instructions
- Whisk flour, sugar, baking powder, cinnamon, and salt together in a large bowl. Grate the frozen butter using a box grater. Add it to the flour mixture and combine with a pastry cutter, 2 forks, or your fingers until the mixture comes together in pea-sized crumbs. See video for a closer look at the texture. Place in the refrigerator or freezer as you mix the wet ingredients together.
- Whisk 1/2 cup heavy cream, the egg, and vanilla extract together in a small bowl. Drizzle over the flour mixture, add the blueberries, then mix together until everything appears moistened.
- Pour onto the counter and, with floured hands, work the dough into a ball as best you can. Dough will be sticky. If it’s too sticky, add a little more flour. If it seems too dry, add 1–2 more Tablespoons heavy cream. Press into an 8-inch disc and, with a sharp knife or bench scraper, cut into 8 wedges.
- Brush scones with remaining heavy cream and, for extra crunch, sprinkle with coarse sugar. (You can do this before or after refrigerating in the next step.)
- Place scones on a plate or lined baking sheet (if your fridge has space!) and refrigerate for at least 15 minutes.
- Meanwhile, preheat oven to 400°F (204°C).
- Line a large baking sheet with parchment paper or silicone baking mat. After refrigerating, arrange scones 2–3 inches apart on the prepared baking sheet.
- Bake for 22–25 minutes or until golden brown around the edges and lightly browned on top. Remove from the oven and cool for a few minutes before topping with vanilla icing.
- Leftover iced or un-iced scones keep well at room temperature for up to 2 days or in the refrigerator for up to 5 days.
Notes
- Freeze Before Baking: Freeze scone dough wedges on a plate or baking sheet for 1 hour. Once relatively frozen, you can layer them in a freezer-friendly bag or container. Bake from frozen, adding a few minutes to the bake time. Or thaw in the refrigerator overnight, then bake as directed.
- Freeze After Baking: Freeze the baked and cooled scones before topping with icing. I usually freeze in a freezer-friendly bag or container. To thaw, leave out on the counter for a few hours or overnight in the refrigerator. Warm in the microwave for 30 seconds or on a baking sheet in a 300°F (149°C) oven for 10 minutes.
- Overnight Instructions: Prepare scones through step 4. Cover and refrigerate overnight. Continue with the recipe the following day.
- Special Tools (affiliate links): Glass Mixing Bowls | Box Grater | Pastry Cutter | Whisk | Silicone Spatula | Bench Scraper | Baking Sheet | Silicone Baking Mat or Parchment Paper | Pastry Brush
- Blueberries: For best results, use fresh blueberries. If you must use frozen, do not thaw.
- Over-spreading: Start with very cold scone dough. Expect some spread, but if the scones are over-spreading as they bake, remove from the oven and use a spatula to press back into shape, then return to the oven to finish baking.


Reader Comments and Reviews
Do I need to change the baking time if I cut the scones into smaller shapes? We like our scones smaller. Thank you, looking forward to making these!
Yes, Mini scones will bake for 18-20 minutes. You can follow this recipe but follow the shaping and baking instructions for mini scones in my Funfetti Chip Scones recipe.
These scones are amazing! I made them the other day for my mom’s birthday. I didn’t use the icing because she doesn’t like desserts that are too sweet. Thank you so much for this delicious recipe!
Can you use gluten free flour? Is so, would you adjust anything? thank you.
Hi Janet! I don’t usually bake with gluten free flour so I’m unsure. Let me know if you test anything!
So easy to make and tastes absolutely amazing!! I added pure maple syrup to the batter and it was the perfect substitute for the icing. I will definitely make these again! You have the best recipes!
Hi Sally,
Thank you for this recipe! My roommates and I really enjoyed them, and for the first time, I was super happy with how the scones tasted! Out of curiosity, I prefer a less cake-like scone but one that’s more dense. Do you have any tips for how to get more of that consistency? Additionally, do you ever use self-rising flour? Is it important for these to stick to all-purpose flour? Thank you!!
Hi Mary! For a denser scone, try replacing the heavy cream with sour cream. I don’t recommend self rising flour here– use all-purpose in this recipe.
I have made these three times and this is the best recipe ever! Great flavor and texture, easy enough that even I can make them! Thank you!
I just made these for breakfast and they were a huge hit!!! I couldn’t chill them as long as I wanted but I didn’t care if they didn’t keep their shape. Their flavor was great and it was such an easy recipe. Thank you, I will definitely put this recipe in my book.
I’m a scone convert, thank you. They came out phenomenal. I’d like to adapt the recipe to savory applications but am not sure how to change the sugar & salt amounts to suit. Might you have a suggestion?
I’m thrilled you are enjoying scones now, Brie! I recommend reading my Master Scone Recipe and there are many helpful tips in the post about making savory flavors.
First time making scones and they turned out perfectly! I didn’t have any heavy cream on hand so I substituted whole milk kefir instead (have a kefir pancake recipe so I assumed this would work here too, and it did.) Maybe they would have been sweeter with cream but I just put a simple lemon glaze on them. So soft and flaky inside. Thanks for the recipe and tips!
Made these today and they were amazing ! As someone who bakes once in a blue moon – this was an incredibly easy recipe to follow and the result was delicious.
Highly recommend making these!!
This recipe looks fantastic, but I do not have any heavy cream. Could I mix together equal parts butter and milk as a substitute? What about half and half?
Half-and-half works in a pinch!
I must’ve watched your video about ten times! My blueberry scones were tasty and on point. Crunchy edges just the way I like them. The only thing that didn’t turn out right was that they didn’t stay in the triangle shape! A few did have the nice shape.
I will definitely make these again. Aloha!
Was craving scones, made blueberry ones today and loved them. My 11-yr old daughter made chocolate chips ones, loved them so much too (she didn’t want to share). Loved the grated butter tip!!
So easy, will make a batch for brunch when we can finally get together!
I am in my home and 85 years old, and my family has forbidden me to leave my home because of this Coronavirus So I decided to make your Blueberry Scones, and Iam so happy I don’t have to share them (shame on me) becaue they are amazing. I am sending your recipe to my granddaughter who lives in Ireland, and your recipe is excellent. In fact I am eating them for lunch!!!!. I just put in 2 loaves of Irish Soda Bread, and I promised my family I wouldn’t have them for dinner. Thanks for the scone recipe, it is a winner. Better than the scones I had in Ireland!!! Love your website
Made these this morning. Simple to make and absolutely delicious! Thanks for the great recipe.
The flavor is excellent, but the scone’s texture is more like a muffin. How do I get the hard exterior that I think distinguishes a scone?
Hi Richard! A couple tips: avoid over-working the dough or over-working the frozen butter into the dry ingredients. The more flour coated pieces of butter in the shaped scones, the flakier the texture. Brush the scones with heavy cream before baking, which helps develop that crisp exterior. You can also try raising the oven temperature in the beginning of the bake time, then reducing it down. A hot burst of air could help crisp up the edges.
Happy Easter Sally! Making these blueberry scones with our daughters 10 &6. These are a MUST for any family morning celebration. So fun, easy and delicious! People who are not scone lovers fall in LOVE with these and give the meaning of scones a whole new appreciation. My girls have their own cookbooks I created for them for Christmas and these are in their top 5. Thank you for your talent and sharing the love of baking with us.
PS- We just found out about it and we Can’t wait to join the Baking Challenge this month!
Not an avid baker at all and these were so fun! Used gluten free flour and it was delicious!! Thanks for this!!
Hello. Made these for the first time with fresh blueberries; However, I only had a small jar of coconut creme on hand. It took a bit of delicate mixing with my hands to get a nice dough, but the tips and tricks REALLY helped a lot. They turned out fabulous. Will make again for sure. Thanks so much!
Hi Sally,
These scones were so easy to make and tasted delicious. I followed very closely about the frozen butter and chilling the dough before baking, but when I baked them they completely lost shape and went flat. Any tips for preventing that?
Hi Elle, Start with very cold scone dough, I recommend chilling the shaped scones for at least 15 minutes in the refrigerator before baking. In fact, you can even refrigerate overnight for a quick breakfast in the morning!. Expect some spread, but if the scones are over-spreading as they bake, remove from the oven and press back into its triangle shape (or whatever shape) using a rubber spatula.
Hi Sally,
Is it ok to double this recipe or would you recommend just making two batches?
Thanks!
Hi Terri, for best taste and texture, I recommend making separate batches of dough instead of doubling.
The recipe was so easy to follow along to and the video was perfect! I’ve always considered myself a great cook but not baker. Your recipe was perfect step by step instructions. The end result blew my mind how great it tasted! 10 out of 10 from my family plus the cinnamon was a perfect combination with the blueberries. Thank you for a great recipe!
Hi Sally..love your recipes! I wanted to do raspberry and white chocolate chip scones . Is there anything I should do differently with the base recipe? Thanks!
I wouldn’t change a thing, except use white chocolate chips and raspberries in place of blueberries. Enjoy them!
I’ve made these before and they are amazing! Would like to make again, but only have almond or coconut milk, no heavy cream. Will either of those work just as well?
Thanks
Either will work, but the scones won’t taste quite as rich.
Hi, could I use almond butter instead of dairy butter and get similar results?
No, almond or any nut butter isn’t a substitute for the cold and cubed butter. Try any of my recipes calling for almond butter.
Hi Sally!
Scones are delicious! What is the best way to store your scones so they retain their soft in the inside crunch on the outside? I recently botched some cookies that became too hard for not storing them correctly. SOS!
Thank you!
Katie
I just finished baking these scones and they are delicious! My family loves them. I noticed that they are super moist. Do you have anything that could help this issue? Thank you for the recipe!!
The blueberry scones were delicious-even with mistakes! I didn’t realize I’d forgotten the sugar until I had dumped in the cream & blueberries. At that point I added the sugar. Even though the berries were frozen all that stirring was not good for them. Then I needed more cream, oops, added too much. Not wanting to waste all the ingredients I formed, cut. refrigerated then baked. They were ugly but tasted great. Will definitely try again.
OMG!! These are the tastiest, mouth-watering and delicious scones I have ever tasted. I made them this afternoon and my 93 year old mother told me that they brought back memories of her sharing English tea and scones with her grandmother! Thank you so much and I love your tip of grating frozen butter.
Hi Sally!
Thanks for the recipe. I noticed my dough was VERY sticky and I ended up alot of flour. How much flour are you adding at the end? Thanks again for a great recipe! They’re currently baking, so I’m excited to see how they turn out!
Hi Yen, The dough is very sticky! I usually just add enough to coat my work surface and hands so I can shape it at the end (you can watch this in the video above). I hope you enjoy them!