

This homemade soft multigrain bread is prepared with multigrain hot cereal mix, such as 5 grain, 7 grain or 10 grain cereal. Whole or quick oats are an excellent option, too. It’s soft and fluffy like regular white sandwich bread, but has a hearty and satisfying flavor. Either instant or active-dry yeast work and you can even turn this dough into multigrain rolls.
Learn to bake homemade bread. I’ve noticed that’s a common baking goal at the start of each year. Today I’m sharing a new homemade bread recipe, one I’ve been perfecting for months. Using my regular white sandwich bread as the starting point for this new variation, I finally mastered a multigrain bread that’s both soft and sturdy. If you love homemade bread and crave added texture, you’ll enjoy this multigrain loaf. Bonus: You can use this dough for homemade rolls, too!
One reader, Nancy, commented: “I make this recipe all the time. It’s my go-to sandwich bread. In fact, I have a loaf proofing right now on this rare rainy day. Super easy, so it’s a perfect bread for a beginner. Also a blank canvas for whatever you want to add. I bump up the protein and fiber with flax and chia. Give it a try. You won’t regret it. ★★★★★”
Soft Multigrain Bread Details
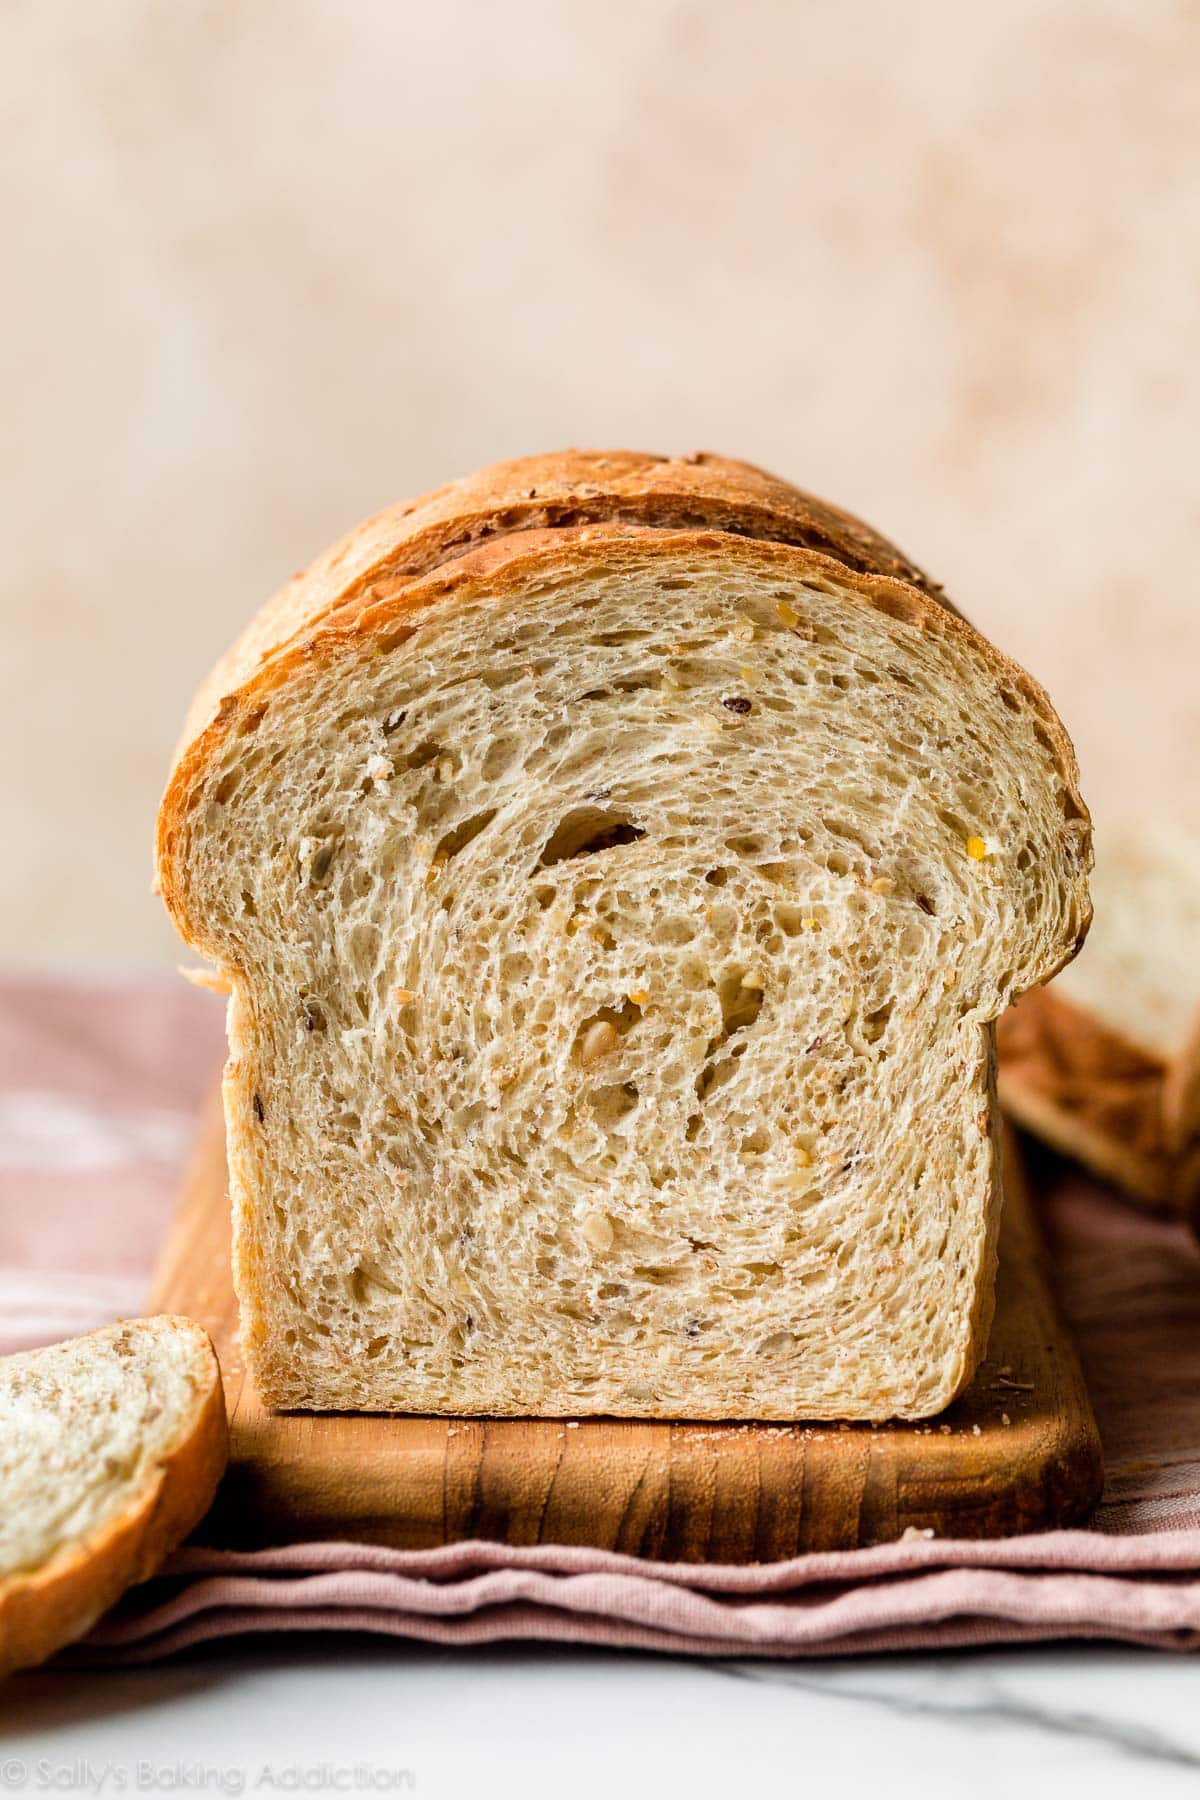
- Flavor: Slightly nutty with an earthy, satisfying flavor similar to whole wheat bread. A little brown sugar adds mild sweetness.
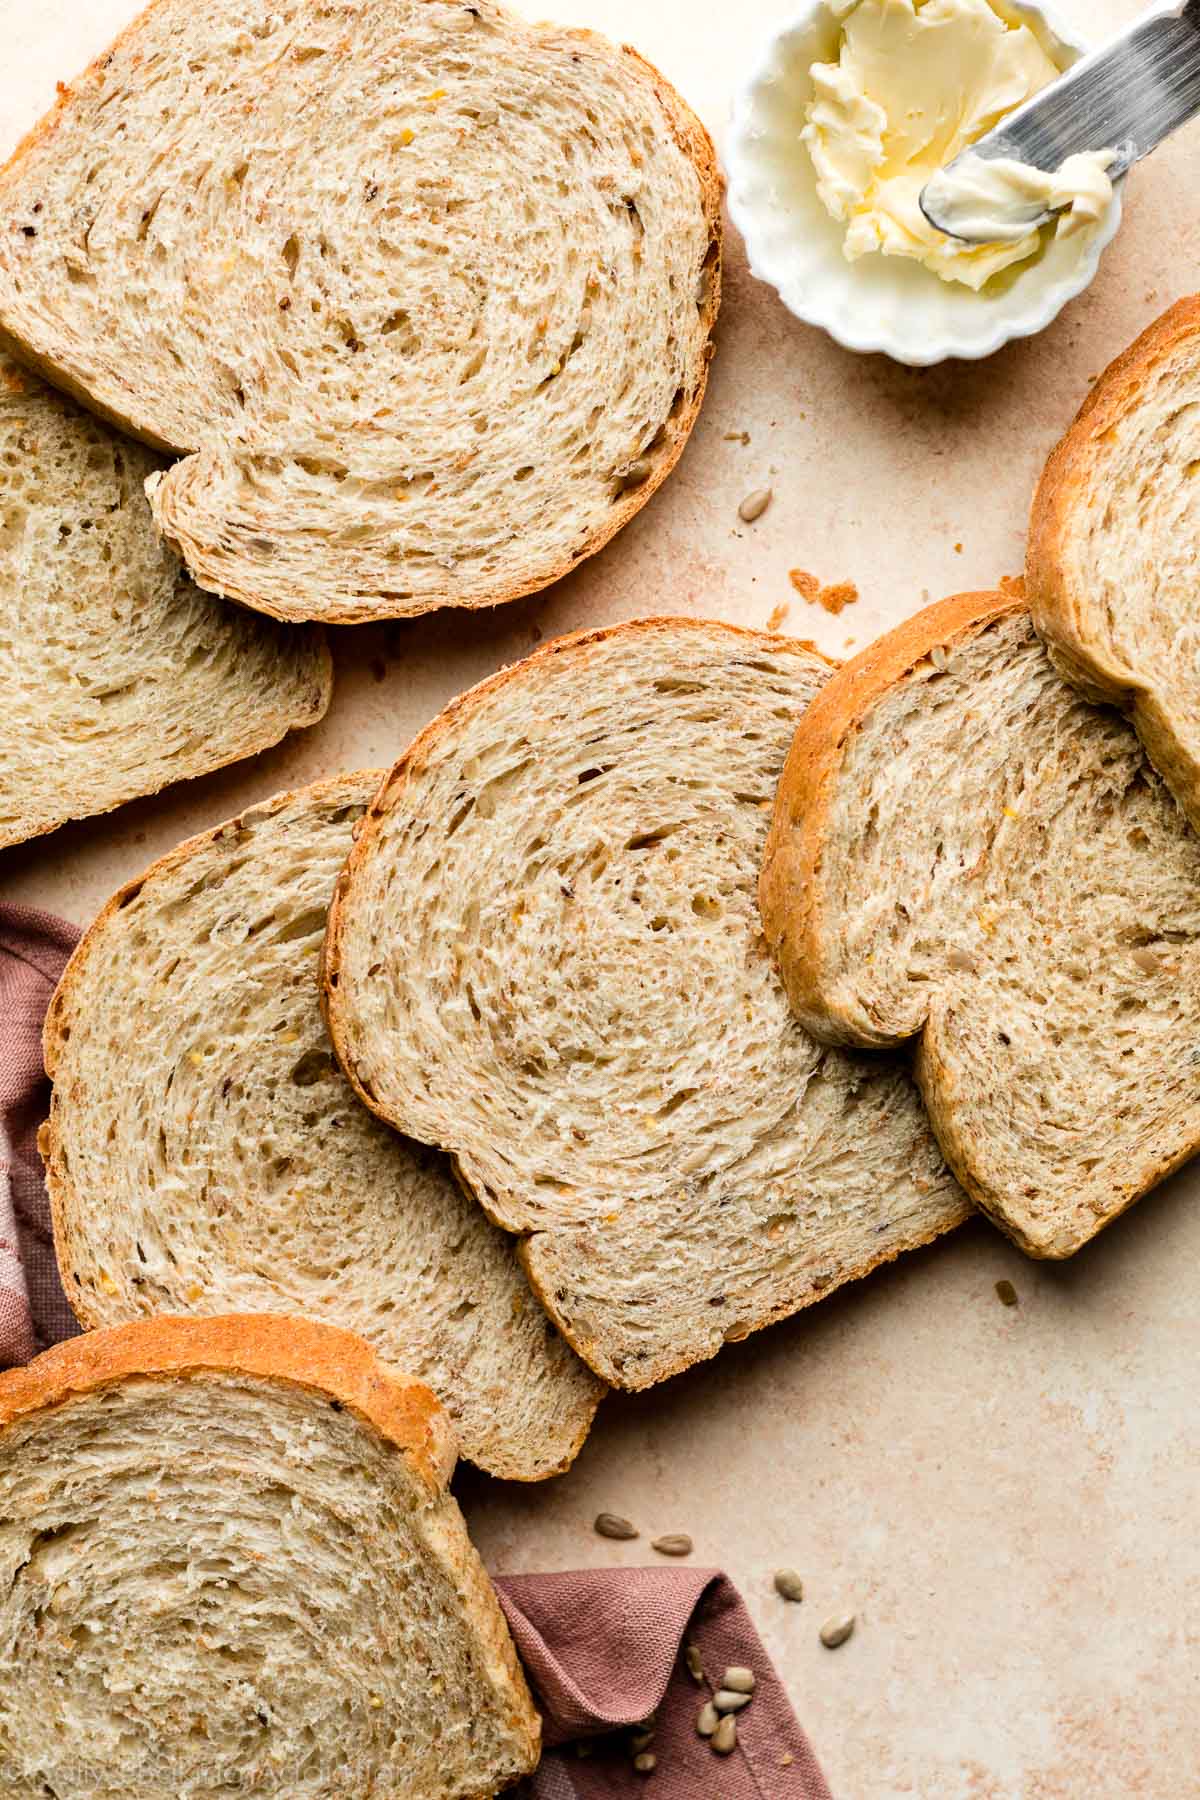
- Texture: This wholesome bread is wonderfully soft without being flimsy. It’s great for sandwiches, but perfectly satisfying plain or with a spread of butter.
- Ease: I categorize this as an intermediate baking recipe. The dough requires an extra step in the very beginning—soaking those grains in water. If you read the directions before starting, you’ll be set for success. Take your time and if you’re new to baking with yeast, review my Baking with Yeast Guide and How to Knead Dough posts first. Lots of helpful information there.
- Time: Between preparing the dough, both rises, and baking, set aside at least 4-5 hours to complete this recipe. But keep in mind that most of the time is hands off as the dough rises. You can even get started on the dough the night before.
If you love wholesome, hearty homemade bread like this, you’ll enjoy no knead honey oat bread and no knead seeded oat bread recipes too.
Video Tutorial: How to Make Soft Multigrain Bread
We need a careful blend & ratio of ingredients to produce a grain loaf that (1) rises tall, (2) maintains a soft fluffy texture, and (3) has legitimate structure for sturdy slices. The ingredients are practically the same as this sandwich bread, but we’re skipping the milk, using hot boiling water, adding grain cereal mix and seeds, slightly reducing the butter, and swapping regular sugar for brown sugar. Took lots of tweaking to perfect.
Key Ingredients You Need & Why
- Multigrain Hot Cereal Mix or Oats: If you read anything in this post, have it be this. This recipe starts with multigrain cereal, such as 5 grain, 7 grain or 10 grain cereal. You can also use whole or quick oats, but I do not recommend steel cut. There are many variations of hot cereal available in grocery stores—a multigrain version may include rye, barley, oats, whole wheat, and/or more. Honestly any grain cereal you mix with hot water works assuming there’s no flavors or sugars added (for example, don’t use brown sugar cinnamon oatmeal mix). If you can’t find any multigrain hot cereals at the store, you can purchase online—or just use plain oats. I really like this 7 grain + flax seed hot cereal. Multigrain baby cereal works too.
- Boiling Water: Just as you would make the hot cereal to eat, mix it with hot water. Use 1 and 3/4 cups (420ml) boiling water, then let the mixture cool until a digital thermometer reads about 110°F (43°C). This usually takes 20 minutes. If it’s too hot, the heat will kill the yeast.
- Brown Sugar: Sugar feeds the yeast, increases its activity, and tenderizes the dough. You can use regular white granulated sugar, but brown sugar was especially tasty in this loaf.
- Butter: To make a soft bread, you need fat in the dough. Butter promises a soft and flavorful loaf. 3 Tablespoons is plenty.
- Flour: If you have both bread flour and all-purpose flour on hand, I recommend using bread flour. All-purpose flour definitely works, but you get a sturdier and more bread-like texture from bread flour. I love using whole wheat flour when I can, but this dough is not fit for all whole wheat flour. In my recipe testing, I found that similar to homemade English muffins, replacing up to 1 cup of the bread/all-purpose flour with whole wheat flour worked just fine. The bread was a bit denser, but had great flavor. I usually make it with 3 cups of bread flour and 1/3 cup whole wheat flour. If you wish to use all whole wheat flour, follow my recipe for whole wheat bread instead.
Add-In Options
Add-ins are completely optional, but I encourage seeds and/or nuts for a little texture. I usually use sunflower seeds. Other options include chopped pecans or walnuts, pepitas, raisins, dried cranberries, or a blend of these. You could also throw in smaller seeds such as chia, flax, or sesame. See recipe note below before starting.
Step-by-Step Photos
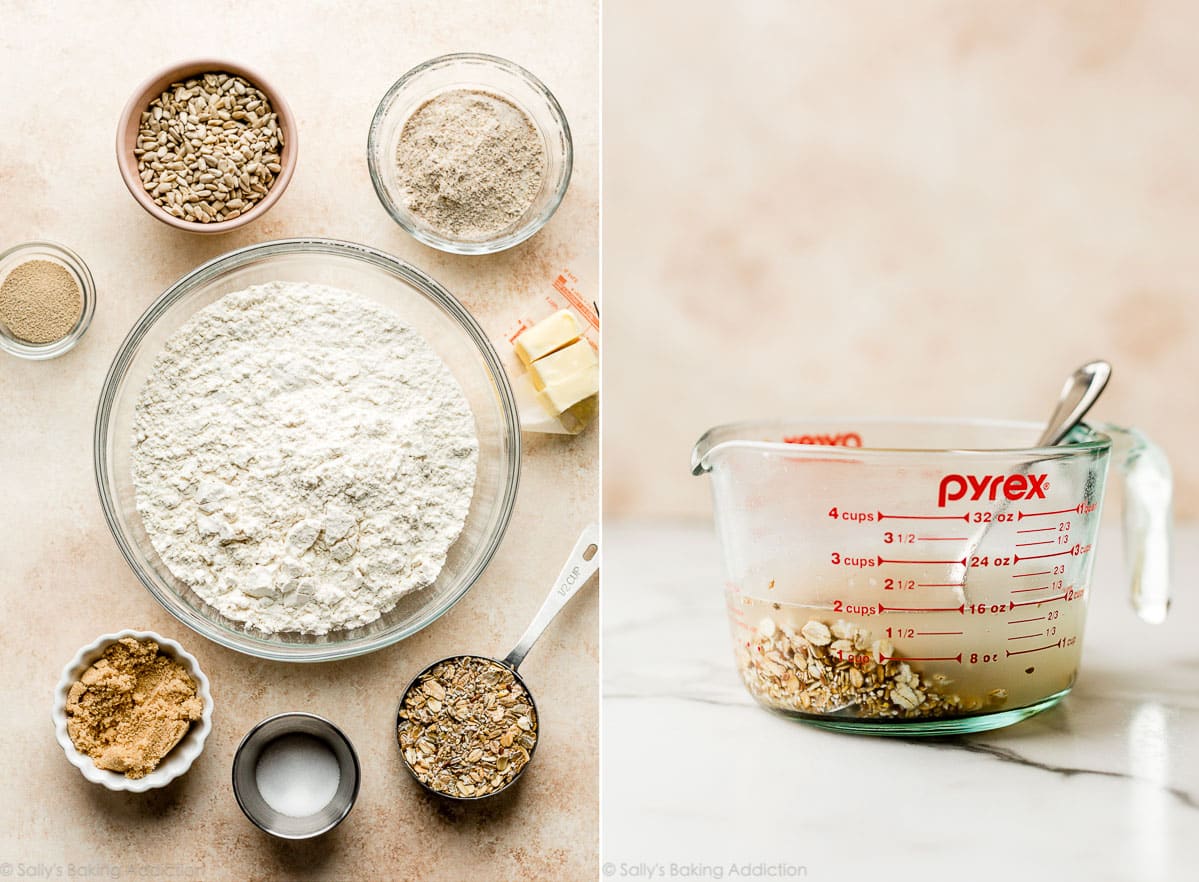
Soak the grain cereal in the boiling water, as pictured above.
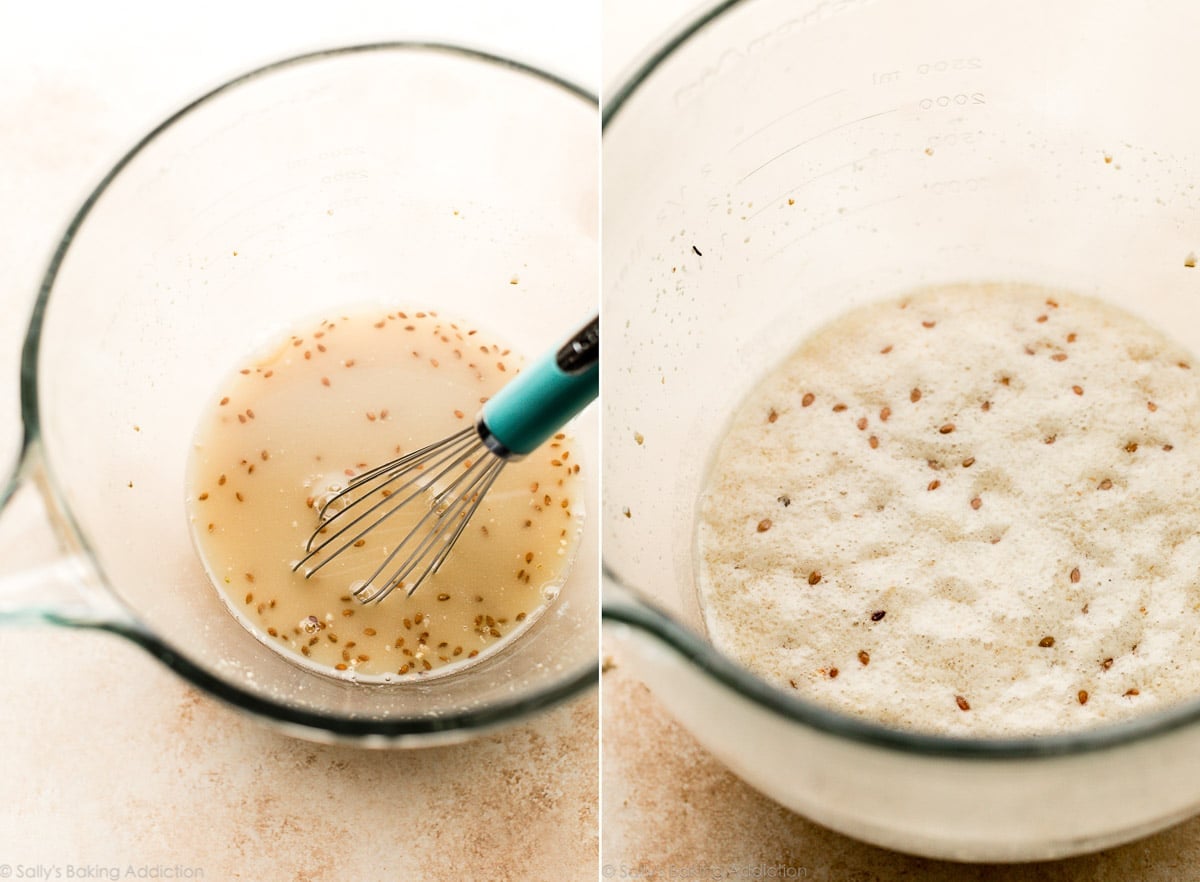
Below left: After it cools down, whisk in the yeast and brown sugar. Below right: After 5-10 minutes, you’ll notice foam or bubbles on the surface. This means the yeast is active and ready. Note that the hot cereal that I use contains flax seeds so that’s what you’re seeing floating on top!
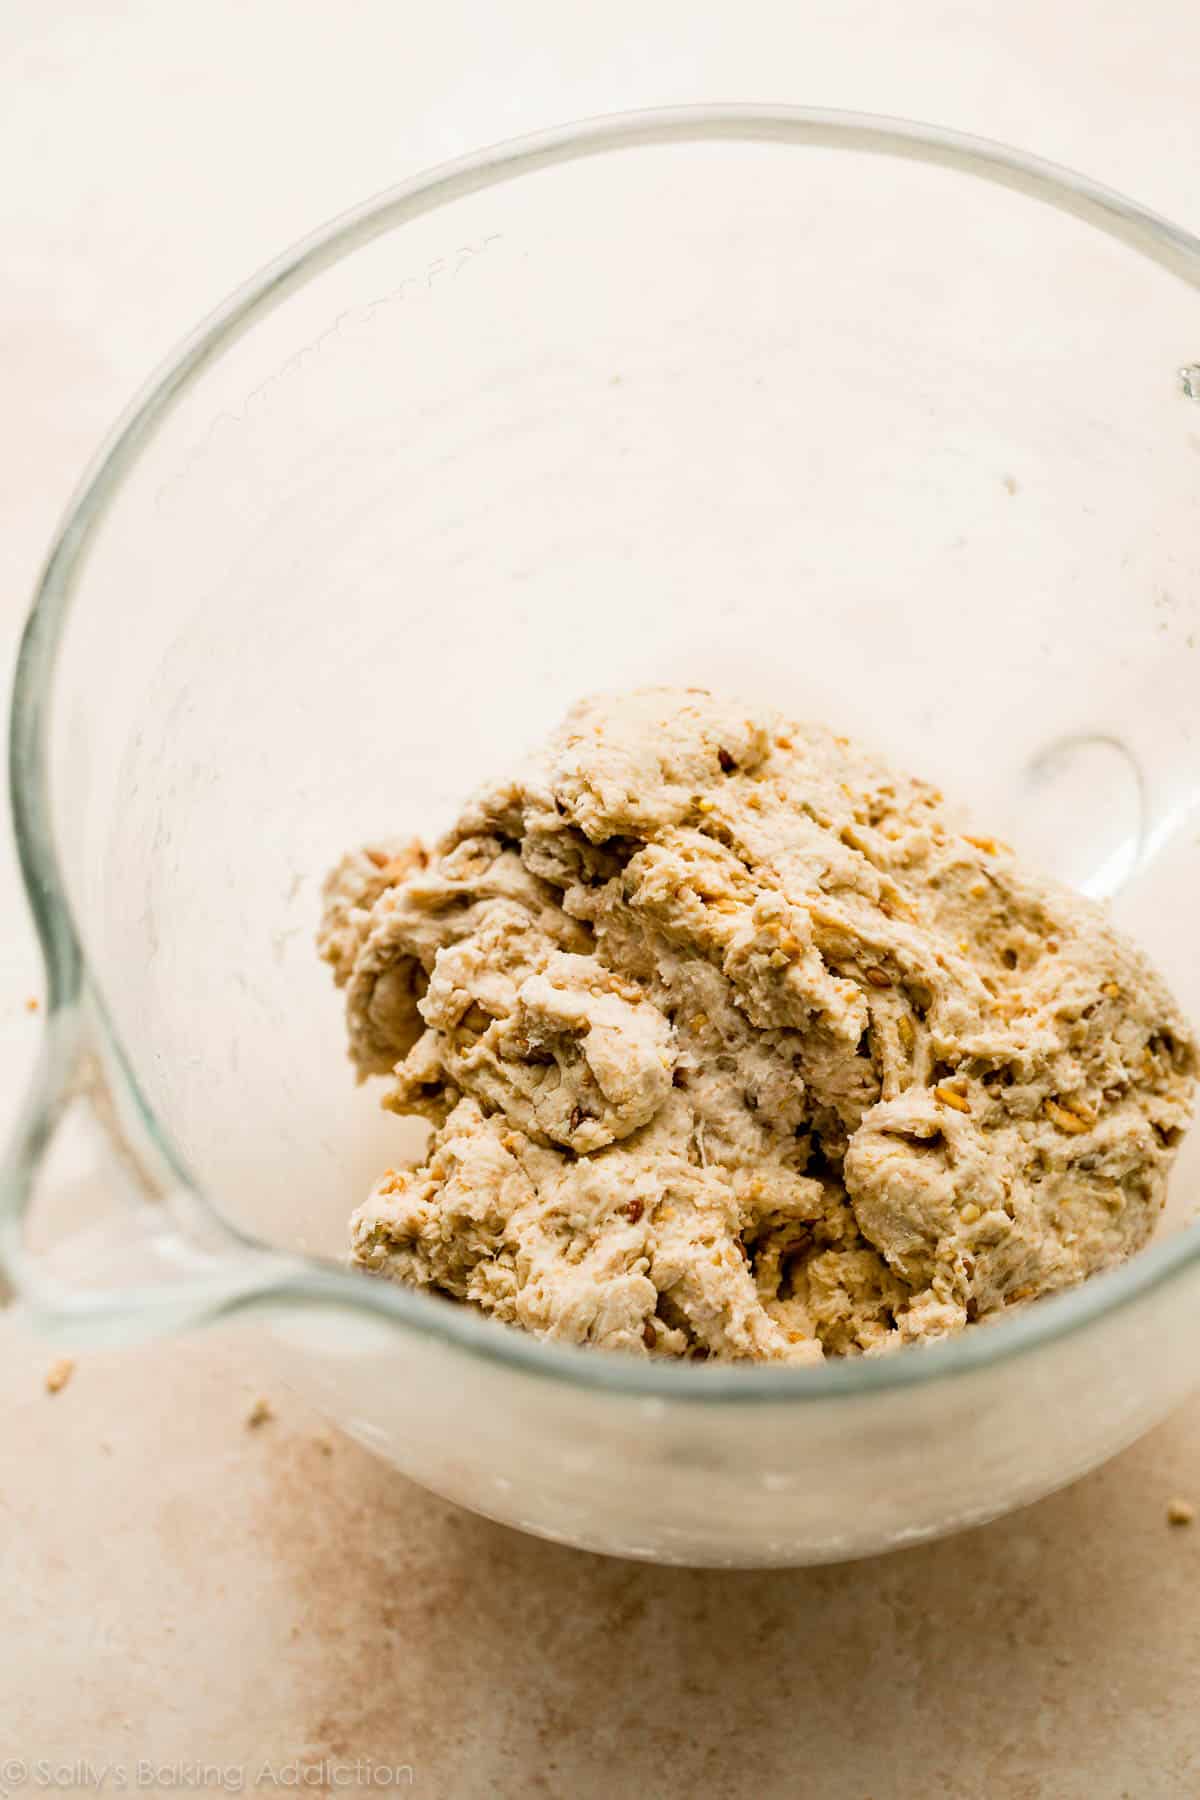
The dough will feel heavy. As instructed in the recipe below, knead it before letting it rise. If you’re new to bread-baking, my How to Knead Dough tutorial will be helpful here.
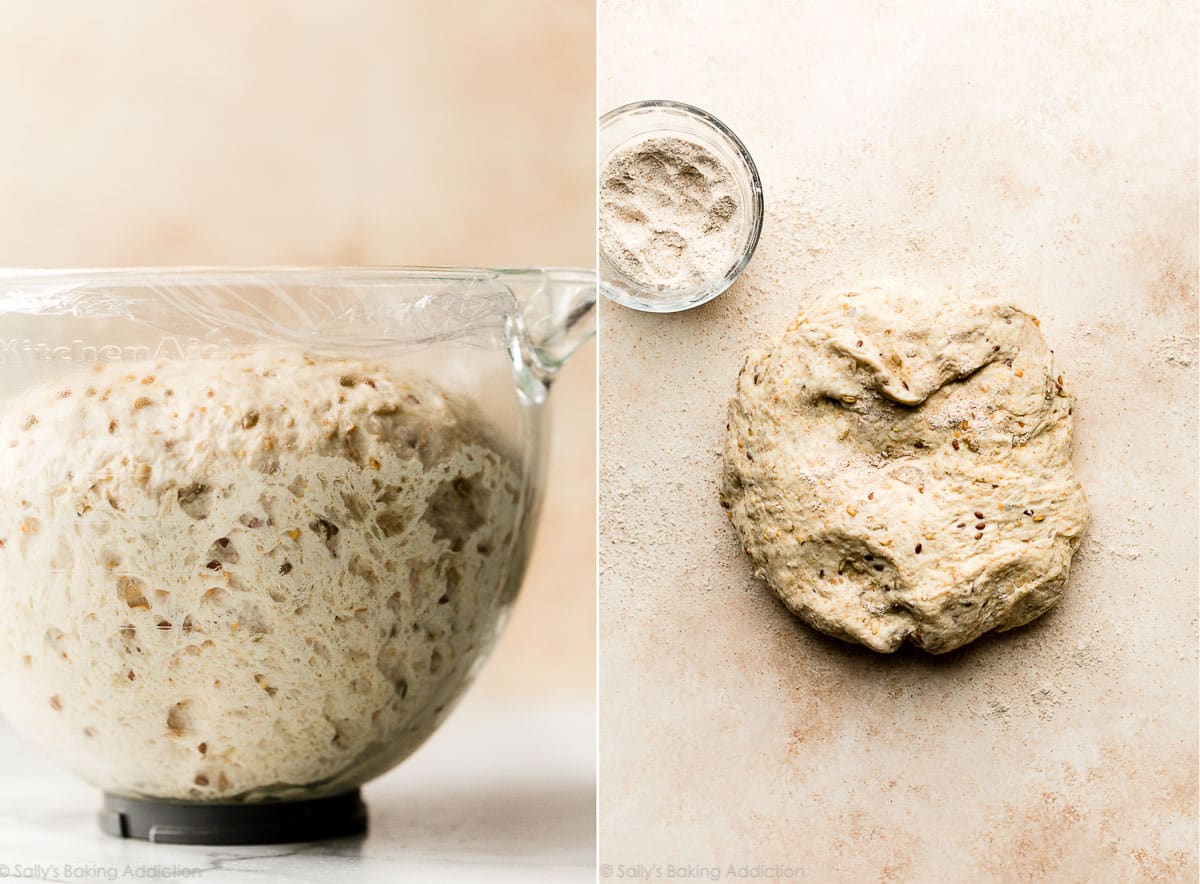
Below left: After you make and knead the dough, let it rise until doubled in size. Below right: Punch it down to release the air, then place on a lightly floured work surface.
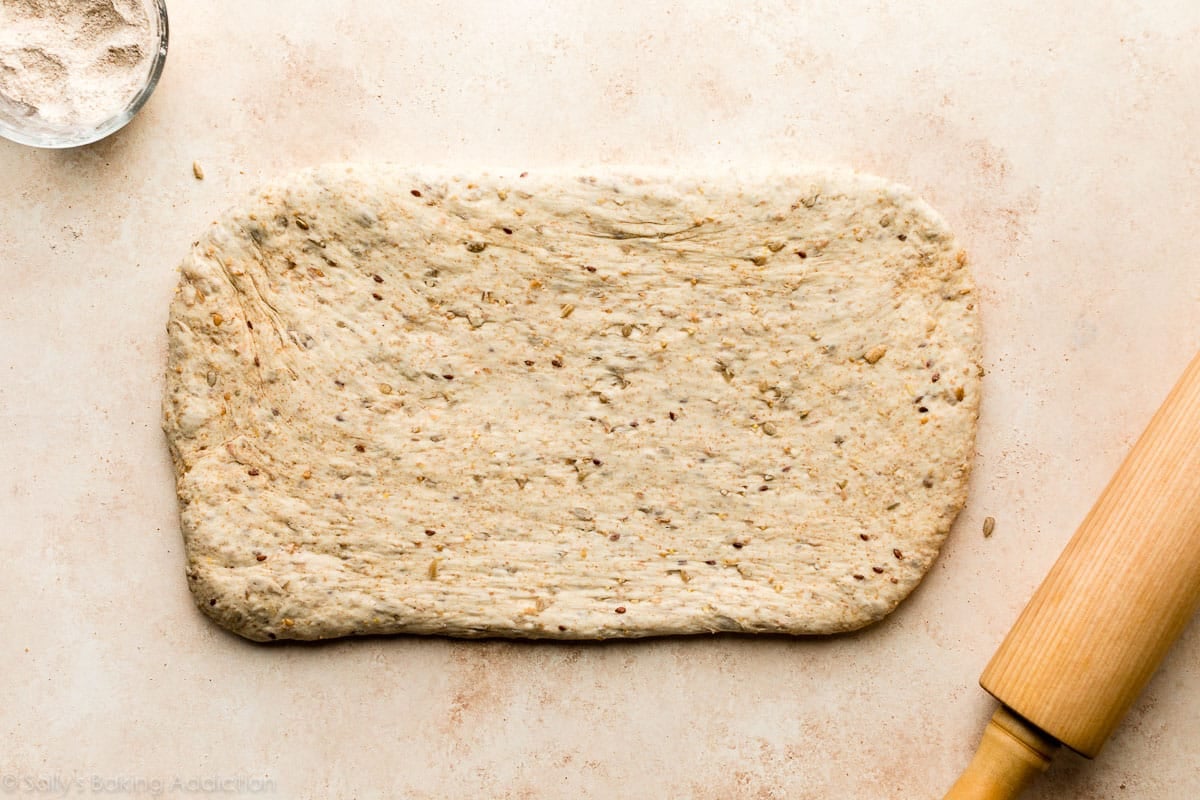
Roll it out into an 8×15-inch rectangle:
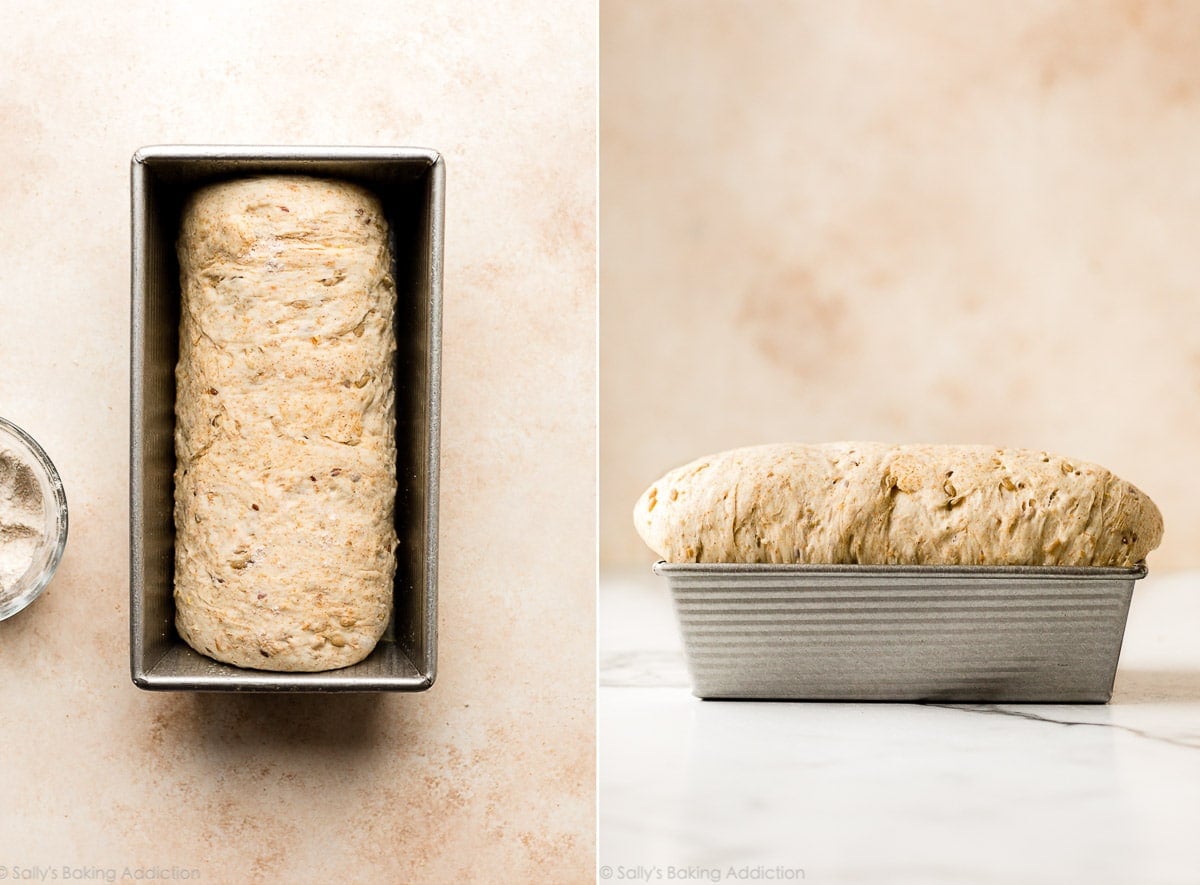
Below left: Roll it up tightly starting with the 8-inch side, so you have an 8-inch roll to fit into your 9×5 inch loaf pan. (Unlike cinnamon rolls where you roll up the dough starting with the larger side.) Below right: Let it rise until it’s 1-2 inches above the rim of the pan.
Look at this height!
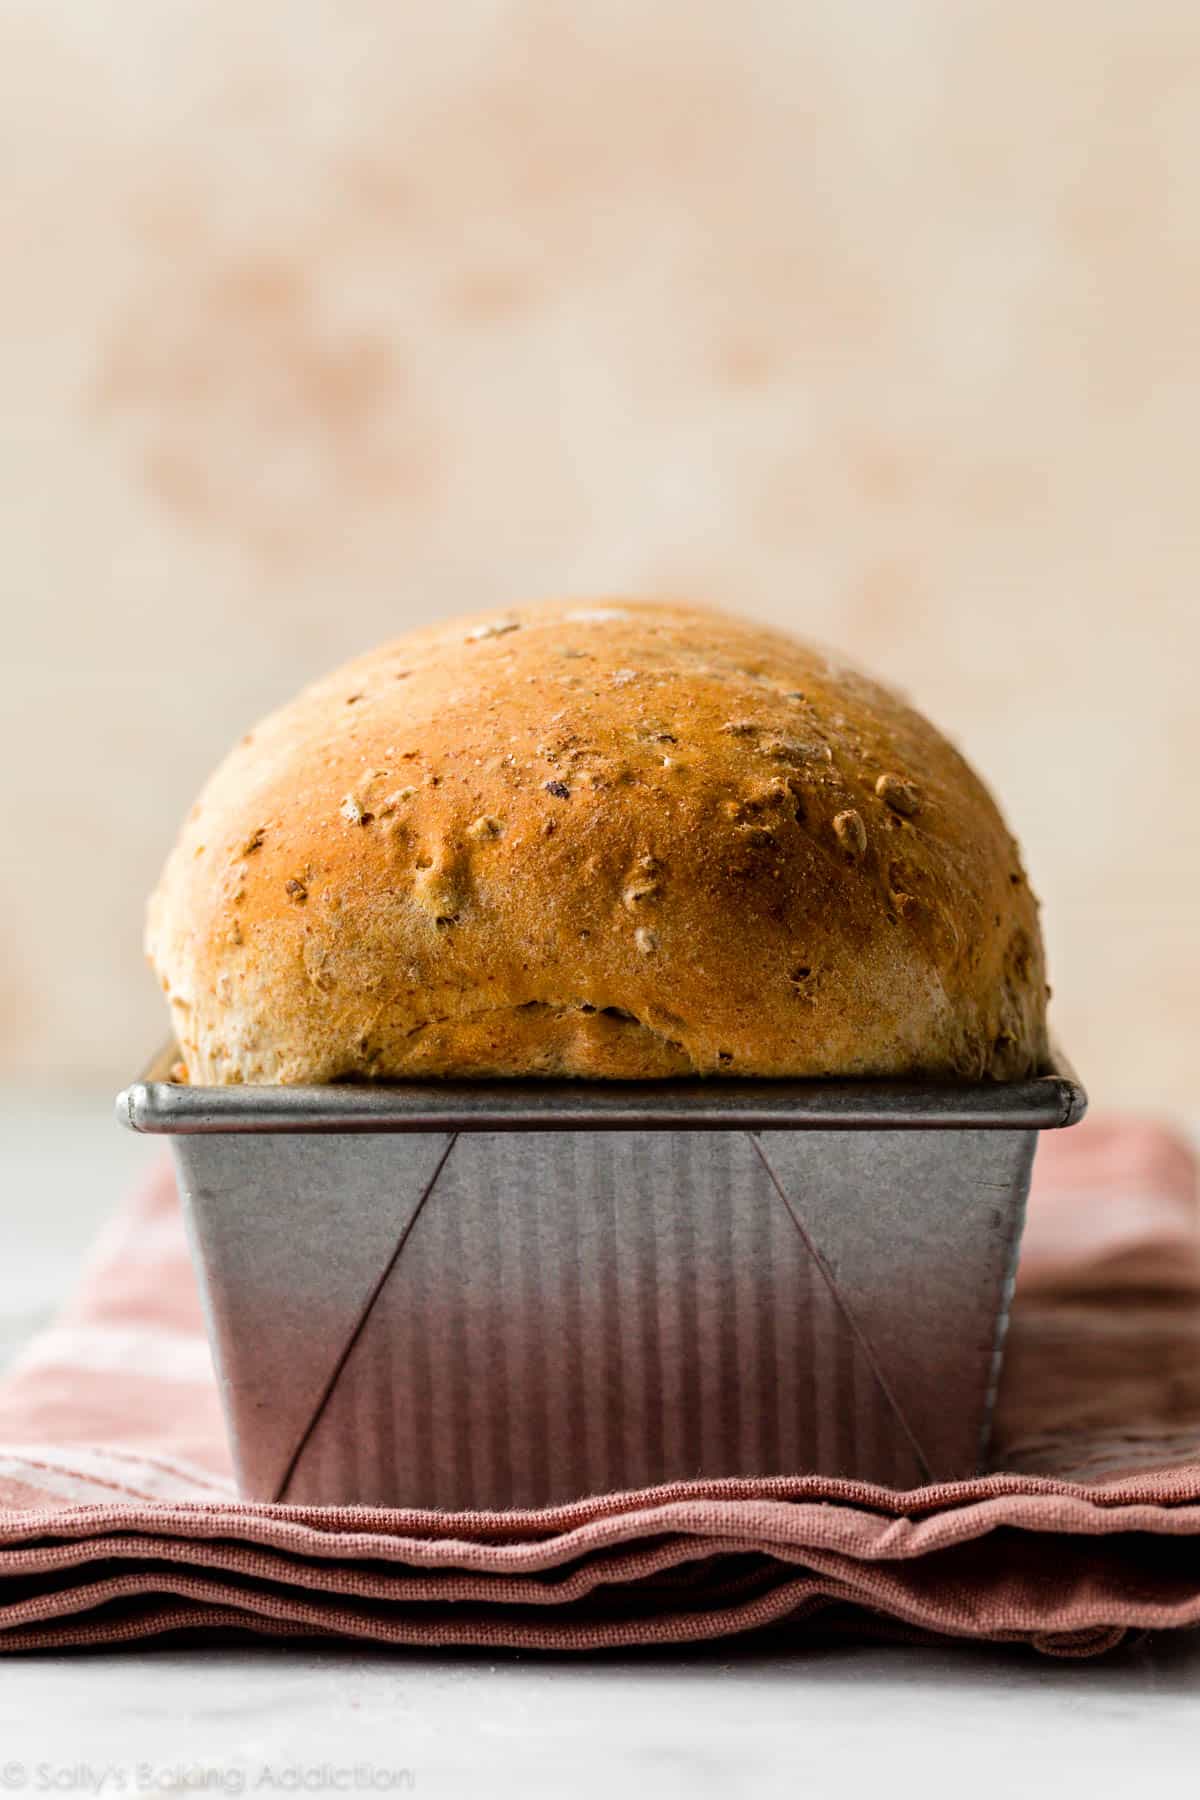
Bake until golden brown:
How do I test for doneness? Give the loaf a light tap. If it sounds hollow, it’s done. For a more accurate test, the bread is done when an instant read thermometer reads the center of the loaf as 195–200°F (90–93°C).
This multigrain bread is phenomenal when sliced and served warm. The exterior is crisp and crusty while cloaking a hearty, yet fluffy crumb inside. The whole slice is just so, so satisfying and cozy. And it’s fabulous with homemade honey butter. This is definitely a homemade bread to try!
If you happen to have any leftovers, day old bread is perfect for soaking up flavors in an easy breakfast casserole.
Can I Make This Into Rolls?
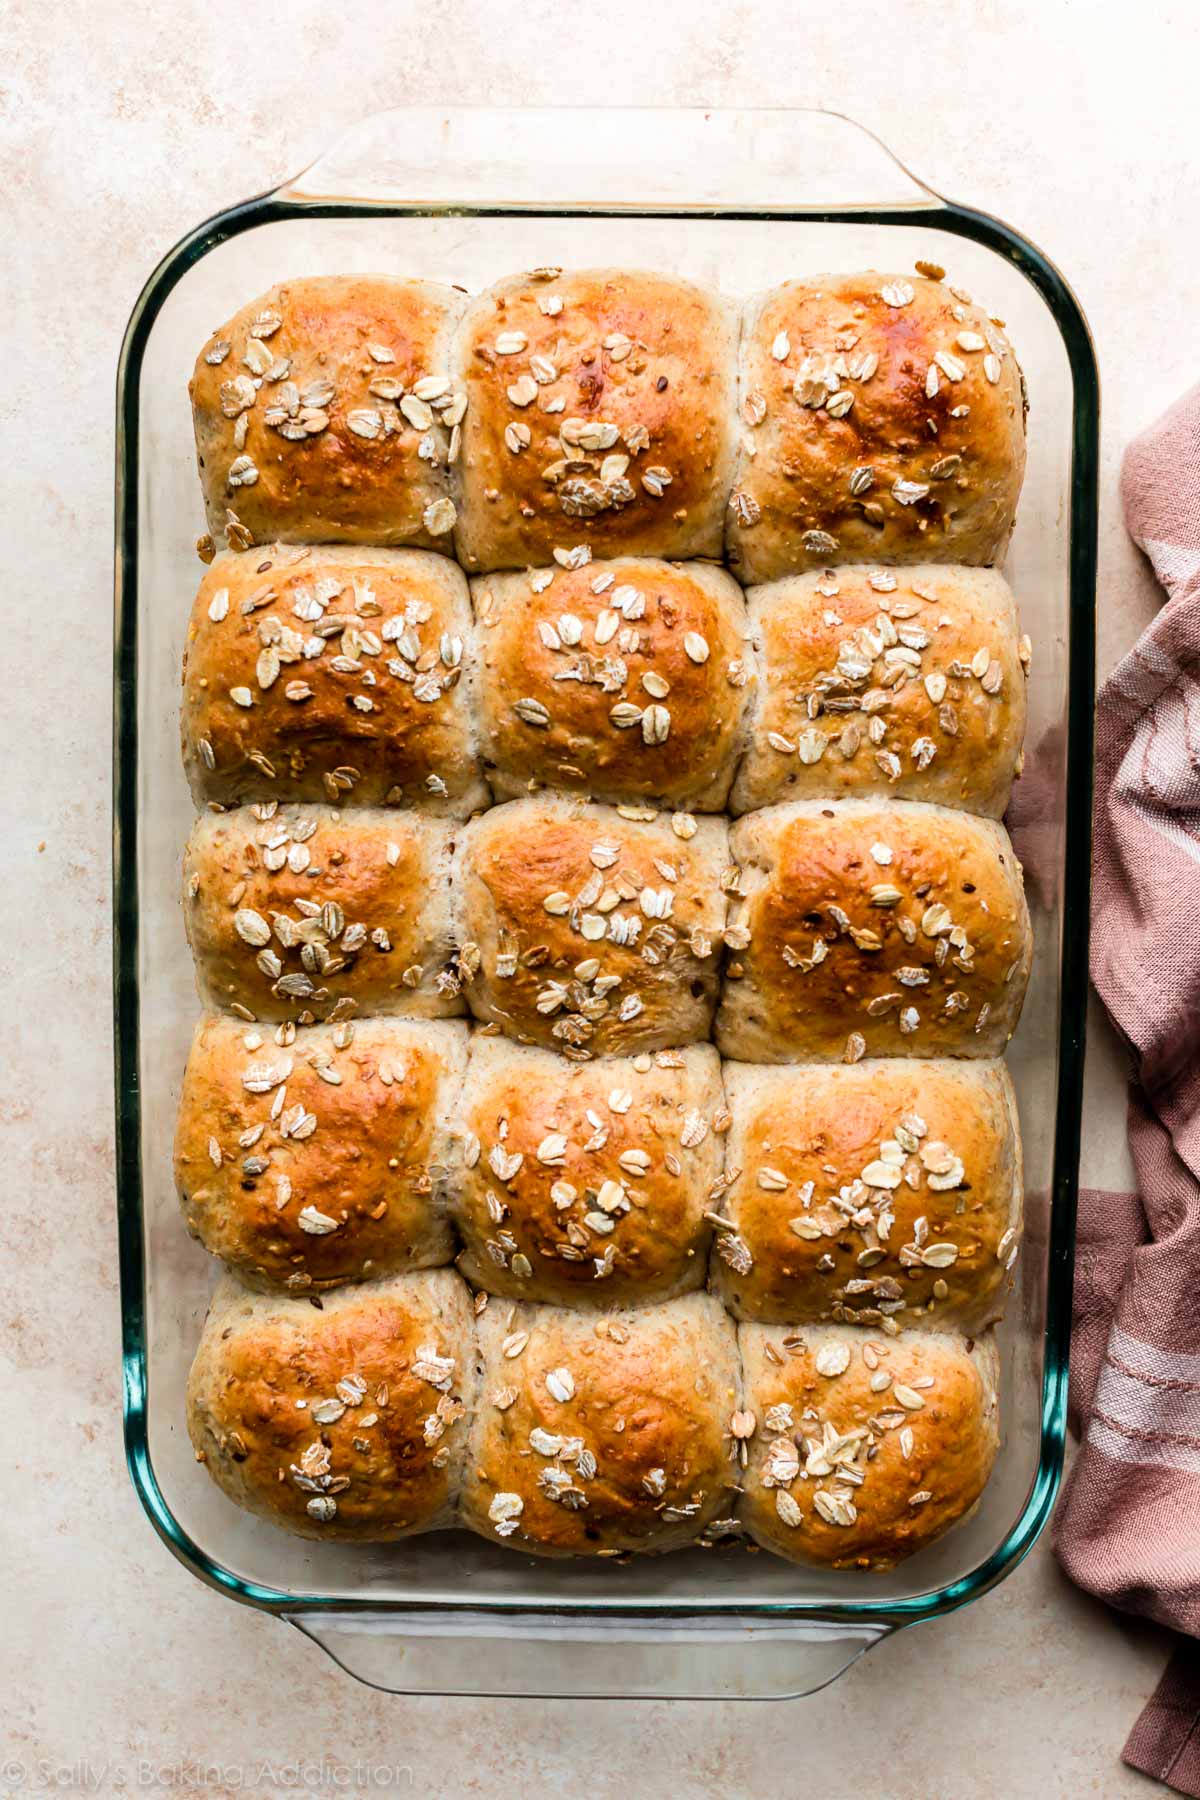
I thought you’d ask! I tested this dough to make multigrain rolls and it worked wonderfully. Not quite as soft as regular dinner rolls and not quite as heavy as whole wheat dinner rolls. I will say that I preferred the multigrain sandwich bread because it had a little more texture from the crust. Served warm with a pat of butter, however, the rolls were fantastic. See recipe note for instructions. Though I haven’t tested it, I imagine you could use this dough to make 3-4 bread bowls, too.
Multigrain AND multipurpose!
More Yeast Bread Recipes
Browse all of my yeast bread recipes.
Print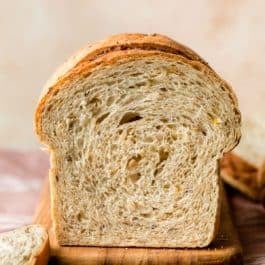
Soft Multigrain Bread
- Prep Time: 3 hours, 40 minutes
- Cook Time: 34 minutes
- Total Time: 4 hours, 15 minutes
- Yield: 1 loaf
- Category: Bread
- Method: Baking
- Cuisine: American
Description
This is wholesome multigrain bread with an irresistibly soft and fluffy interior. For best success, take the time to review the recipe notes before starting. Though not required, an instant read thermometer is helpful in a few of these steps.
Ingredients
- 1/2 cup (60g) dry multigrain cereal mix or old-fashioned whole rolled oats (see note)
- 1 and 3/4 cups (410ml) boiling water
- 2 and 1/4 teaspoons (7g) instant or active dry yeast (1 standard packet)
- 3 Tablespoons (37g) packed light or dark brown sugar
- 3 Tablespoons (43g) unsalted butter, softened to room temperature
- 1 and 1/2 teaspoons salt
- 3 and 1/3 cups (433g) bread flour (spooned and leveled), plus more as needed and for hands/work surface
- optional: 1/2 cup (60g) sunflower seeds, chopped nuts, pepitas, raisins, or dried cranberries
Instructions
- Prepare the dough: Place cereal mix in a large heatproof bowl (you can also use the bowl of your stand mixer). Pour boiling water on top. Let the mixture cool until a digital thermometer reads about 110°F (43°C). This usually takes 20 minutes. Pay attention to the temperature because if it’s too hot, it will kill the yeast. If it became too cool, however, it’s not a problem—the dough may just take a few extra minutes to rise.
- Whisk the yeast, sugar, and all of the warm water/cereal mixture in the bowl of your stand mixer fitted with a dough hook or paddle attachment. Cover and allow to sit for 5-10 minutes or until foamy and bubbly on the surface.
- Add the butter, salt, and 1 cup (about 130g) flour. Beat on low speed for 30 seconds, scrape down the sides of the bowl with a silicone spatula, then add another cup of flour. Beat on medium speed until relatively incorporated (there may still be chunks of butter). Add all of the remaining flour and the seeds/nuts (if using), then beat on medium speed until the dough comes together and pulls away from the sides of the bowl, about 2 minutes. If it seems too sticky, add more flour, 1 Tablespoon at a time until it begins to pull away from the sides of the bowl. *If you do not own a mixer, you can mix this dough with a large wooden spoon or silicone spatula. It will take a bit of arm muscle!*
- Knead the dough: Keep the dough in the mixer and beat for an additional 3-5 full minutes, or knead by hand on a lightly floured surface for 3-5 full minutes. (If you’re new to bread-baking, my How to Knead Dough video tutorial can help here.) If the dough becomes too sticky during the kneading process, sprinkle 1 teaspoon of flour at a time on the dough or on the work surface/in the bowl to make a soft, slightly tacky dough. Do not add more flour than you need because you do not want a dry dough. After kneading, the dough should still feel a little soft. Poke it with your finger—if it slowly bounces back, your dough is ready to rise. You can also do a “windowpane test” to see if your dough has been kneaded long enough: tear off a small (roughly golfball-size) piece of dough and gently stretch it out until it’s thin enough for light to pass through it. Hold it up to a window or light. Does light pass through the stretched dough without the dough tearing first? If so, your dough has been kneaded long enough and is ready to rise. If not, keep kneading until it passes the windowpane test.
- 1st Rise: Lightly grease a large bowl with olive oil or nonstick spray. Place the dough in the bowl, turning it to coat all sides in the oil. Cover the bowl with aluminum foil, plastic wrap, or a clean kitchen towel. Allow the dough to rise in a relatively warm environment for 1-2 hours or until double in size. (I always let it rise on the counter. Takes about 2 hours. For a tiny reduction in rise time, see my answer to Where Should Dough Rise? in my Baking with Yeast Guide.)
- Grease a 9×5-inch loaf pan.
- Shape the bread: When the dough is ready, punch it down to release the air. Lightly flour a work surface, your hands, and a rolling pin. Roll the dough out into a large rectangle, about 8×15 inches. It does not have to be perfect– in fact, it will probably be rounded on the edges. That’s ok! Roll it up into an 8 inch log and place in the prepared loaf pan.
- 2nd Rise: Cover shaped loaf with aluminum foil, plastic wrap, or a clean kitchen towel. Allow to rise until it’s about 1-2 inches above the top of the loaf pan, about 1 hour. (See photo above for a visual.)
- Adjust oven rack to a lower position and preheat oven to 350°F (177°C). (It’s best to bake the bread towards the bottom of the oven so the top doesn’t burn.)
- Bake the bread: Bake for 35-40 minutes– if you notice the top browning too quickly during bake time, loosely tent the pan with aluminum foil. How to test for doneness– give the loaf a light tap. If it sounds hollow, it’s done. For a more accurate test, the bread is done when an instant read thermometer reads the center of the loaf as 195°F-200°F (90°C-93°C).
- Remove from the oven and allow bread to cool for a few minutes before slicing and serving. Feel free to let it cool completely before slicing, too.
- Cover leftover bread tightly and store at room temperature for 2-3 days or in the refrigerator for up to 10 days.
Notes
- Freezing Instructions: This dough isn’t ideal for freezing. The dough has a hard time rising after thawing. Instead, try the overnight instructions (next) or freeze the baked loaf. To freeze the baked loaf, allow the bread to cool completely, then freeze for up to 3 months. Thaw in the refrigerator or at room temperature, then reheat as desired.
- Overnight Instructions: Prepare the recipe through step 7. Lightly cover the shaped bread and refrigerate for up to about 15 hours. At least 2 hours before you need the bread the next day, remove from the refrigerator, keep covered, and allow to rise on the counter for about 1 hour before baking. Alternatively, you can let the dough have its 1st rise in the refrigerator overnight. Cover the dough tightly and place in the refrigerator for up to 12 hours. Remove from the refrigerator and allow the dough to fully rise for 2 more hours. Continue with step 6.
- Special Tools (affiliate links): Electric Stand Mixer | 9×5-inch Loaf Pan | Rolling Pin | 7 Grain Hot Cereal
- Grain Cereal: Use dry multigrain cereal that you would use to make hot cereal, such as 5 grain, 7 grain, or 10 grain cereal. You can also use quick or whole oats, but I do not recommend steel cut oats. There are many variations of hot cereal available in grocery stores– a multigrain version may include rye, barley, oats, whole wheat, and/or more. Honestly any grain cereal you mix with hot water works assuming there’s no flavors or sugars added (for example, don’t use brown sugar cinnamon oatmeal mix). If you can’t find any multigrain hot cereals at the store, you can purchase online– or just use plain oats. I really like this 7 grain + flax seed hot cereal. Multigrain baby cereal works too.
- Yeast: You can use active-dry or instant yeast. The instructions are the same no matter which you use.
- Flours: If you have both bread flour and all-purpose flour on hand, I recommend using bread flour. All-purpose flour definitely works, but you get a sturdier and more bread-like texture from bread flour. I love using whole wheat flour when I can, but this dough is not fit for all whole wheat flour. In my recipe testing, I found that replacing up to 1 cup (around 130g) of the bread/all-purpose flour with whole wheat flour worked just fine. The bread was a bit denser, but had great flavor. I usually make it with 3 cups of bread flour and 1/3 cup whole wheat flour.
- Seeds/Add-Ins: The pictured loaf was prepared with 1/2 cup (60g) of sunflower seeds. I love extra flavor and texture, so I’ve been increasing that amount to 2/3 cup (80g). Use any of the suggested add-ins like sunflower seeds, pecans, walnuts, pepitas, raisins, dried cranberries, or a blend of these. If you want to use smaller seeds, such as poppy, chia, flax, or sesame, I recommend reducing the amount to 2 or 3 Tablespoons. You could, however, blend these smaller seeds with larger seeds/nuts/dried fruit for a total of 1/2 or 2/3 cup (60 or 80g).
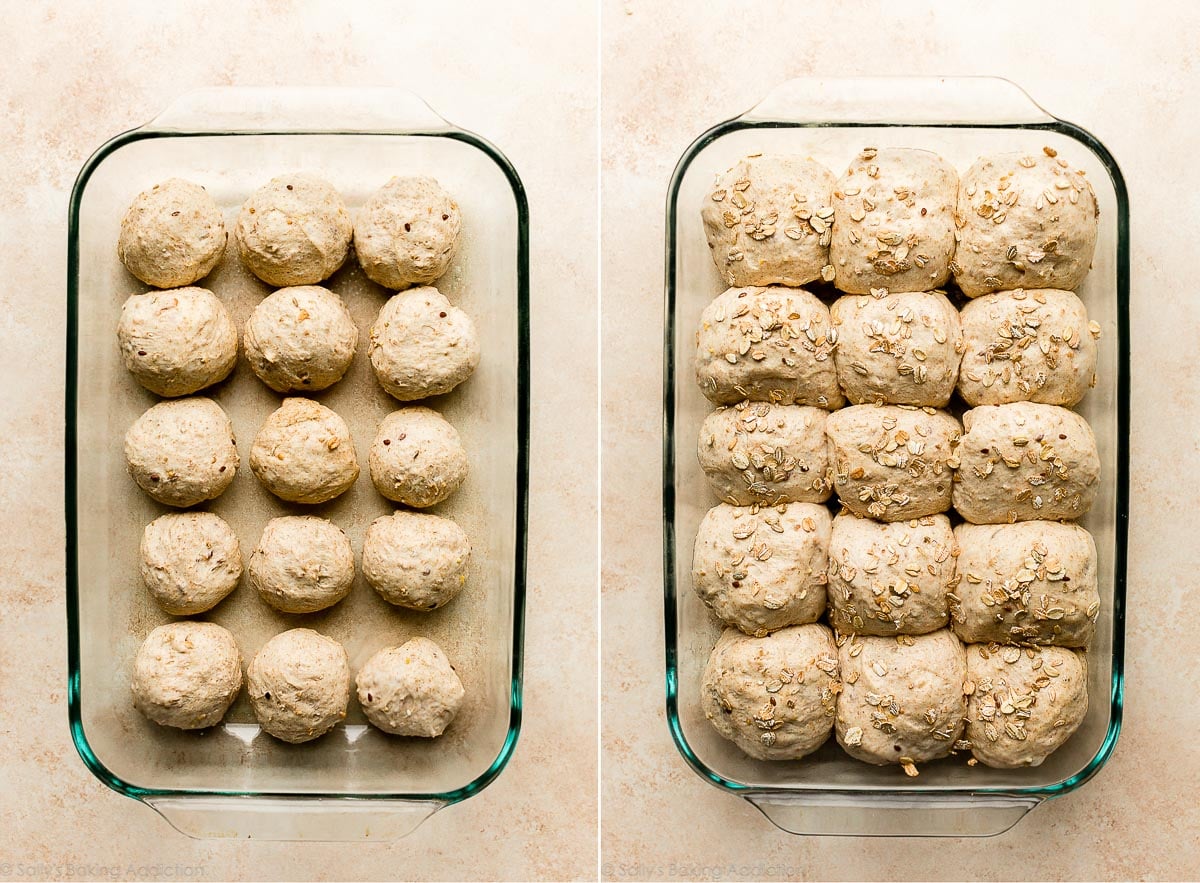
- Multigrain rolls: Make the dough as written above through the first rise (steps 1-5), then follow steps 5-10 in my dinner rolls recipe. Bake time is 25-26 minutes.
- If You Want to Top with Oats or Seeds: If you want to top the dough with oats or seeds prior to baking, carefully brush the dough after the 2nd rise (step 8) with 1 egg white beaten with 1 Tbsp water, then sprinkle 2 Tbsp of oats or seeds on top. Neither will stick without the egg white brushed on first. I did this with the pictured rolls.
- Doubling this recipe: For best results, I recommend making two separate batches of dough. However, if you want to double the recipe all in 1 mixing bowl, double all of the ingredients except for the yeast. Use 2 and 1/4 teaspoons yeast. This amount of dough may overwhelm your stand mixer, so I recommend mixing the dough with a large wooden spoon or silicone spatula instead. It will take a bit of arm muscle.


Reader Comments and Reviews
I made as is, delicious with a perfect crumb. Will be delicious toasted with eggs and breakfast, and grilled for a Reuben later in the weekend. Very easy to hand mix and knead as well, for those without a machine mixer and dough hook. I did use salted butter and reduced the added salt by 1/4 tsp and had a good yeast response.
So very tasty and easy to make! I love how crusty the top is.
Two questions (same for the white bread as well):
– How do I get the too to brown a bit more? It’s still pretty light)
– How do I create a firmer bread? It crumbles easily. Even with a grilled cheese! I couldn’t think of a softer sandwich pairing and it still crumbled.
Hi Amber, Feel free to bake a little longer (or raise the oven rack during the last few minutes) to get a deeper brown color. An extra minute or two should help with the texture also. And be sure the loaf is completely cool before slicing as it can fall apart if it’s still warm.
Will add to the baking time, thanks!
The crumblines was constant throughout the life of the bread, not just directly after baking.
I did a bit of research and I may be letting it rise too much.
Thanks!
I make this all the time. It gets better every time. Is there any nutrition information for it?
First time trying this recipe. Can you advise if the baking temperature given is for conventional oven or fan assisted? Thanks.
Hi Esther! All of the recipes on this site are written for conventional settings.
This bread recipe is my go to now. It is amazing. My extended family loves it. My wife asked me to make her a poofy, rosemary loaf. I’d been wanting to try this recipe so I thought it might be good for this. I added a “dite” more yeast (making sure it was poofy) then added a lot of chopped rosemary. My expectations were totally exceeded. My wife was extremely pleased. I now make this almost every week for several extended family members. My previous go to bread for the holidays is Fannie Farmers Swedish bread recipe which I’ve been making for over 40 years. This year for Thanksgiving I’m using this recipe and making rosemary rolls for the extended family dinner.
Thanks so much for putting this awesome basic bread recipe out for us to try.
Regards,
Alan
Hi Alan, We are so glad you found a new recipe to love. Happy baking!
Your white bread has become my go-to, so I tried this one for some variety. I didn’t have any multi-grain cereal and just used quick-cooking oatmeal and added some finely chopped walnuts. I never have bread flour so I replaced 1/2 cup of AP flour with vital wheat gluten. This bread is absolutely delicious toasted with butter. I wish I’d cut it warm! My oven had a bread-proofing setting that hold the temp at 95 degrees, which speeds up the rising. Altogether it took about 4 1/2 hours start to finish. The cooling down seemed to take a lot longer than 20 minutes though. Definitly buying some multi-grain cereal for the next loaf!
Hi Alice, Thanks for trying the recipe! We are so glad you enjoyed it.
Bread turned out perfect. Well that is what my Sister stated. I gave to her while still warm.
Hi,
I have a question of making this bread,
Is that alright if I omit using sugar at all?
Thank you
Hi Ravisha, we don’t recommend omitting it completely, but you can reduce down to 1 Tablespoon of sugar if desired.
Letting the bread rise for second time in pan.
Just a note for those that live in the South during Summer. This recipe is a wet dough and it is even wetter in the humid south. If you weighed out your ingredients and the dough is still too sticky the slap and fold method does not work so well with this. Just deal with the wet dough if after adding 3 tbs of flour.
After the first rise (that only took 50 minutes in my 80 degree home) the dough is very manageable to roll out and roll up. Although I would suggest some dough forming/tucking and tightening motion before placing in pan for second rise.
The only cereal I have on hand is Great Grains by Post. Will this work?
Hi Dee, those cereals tend to have different add-ins and are not ideal for this recipe. You’ll want to use dry multigrain cereal that you would use to make hot cereal, such as 5 grain, 7 grain, or 10 grain cereal. You can also use quick or whole oats, but we do not recommend steel cut oats. See recipe notes for more details on the best type of cereal to use for this bread.
This bread was so delicious! Rely on signs of proofing though, rather than times. My final proof only took 30 min and if I had waited a full hour, it would have been a flat loaf. I added some whole wheat flour to the bread flour (probably 1/2 cup out of the total 3.33 cups). I used a combination of plain oats, wheat germ, and flax seed for the cereal. Looking forward to baking more loaves and trying different cereal combinations!
I have made this bread multiple times, exactly as directed and comes out perfect every time. This is now my go to bread recipe.
In a lot of years of baking this is the best bread I have ever made. Perfect blend of grain-bread and soft texture. Thank you.
Pretty darned pleased with that beautiful looking golden loaf!!
Can’t seem to find if anyone used Rapidrise yeast since it needs a higher temp to work (between 120 and 129 degrees). Maybe I will try with a higher starting temp. If anyone has made using RapidRise yeast, please advise, thank you!
Well, I made it modifying it for RapiRise yeast temp of between 120 and 129 degrees and thank God it worked! Only needed to proof it 1 hour ten minutes the first proof and less than an hour the second proof…I knew it would rise in oven so I didn’t need to proof it as high as the pics…baked on the middle rack and just covered with foil 19 minutes into cook time and baked 40 minutes total, rubbing butter on top crust after it came out of oven, waited 5 minutes, then cut with electric knife…used Bob’s Red Mill muesli and sliced almonds. Very good indeed! Can’t wait to try different mix-ins! Excellent toasted! A trick with the foil tent is to take a sheet of foil and mold it to the top part of a Kitchenaid mixer and it will create a perfect tent! Thanks Sally!
I love this bread and have made it quite a few times. Can I swap honey for the brown sugar?
Hi Janet, you can use the same amount of honey or reduce down to 2 Tablespoons since it’s pretty sweet.
Just made this bread and it is so good! I followed the recipe as written, using rolled oats and walnuts, with the exception of swapping out 1 cup of bread flour with a cup of whole wheat flour. Absolutely delicious!
Wow wow wow, i came across this recipe yesterday and gave it a go, i added a sprinkle of pumpkin seeds and sunflower seeds, halved the sugar used demerara as no soft brown and followed instructions, i used a 10’pan all i had, and it turned out just perfect, defo my kind of bread, thanks for sharing.
Hi. I made this bread and it turned out great. thank you
I’ve made this bread several times, always changing it up a little. We really love it. Today however, humidity was high and very hot. I had to add about 4 extra T of flour but it was still very wet. Not sure what else I can do to compensate for the humidity. Suggestions please!!
Hi Linda, humidity and temperature can play a huge role in the outcome of dough, especially on very humid and hot days like you mention. It’s totally normal to add additional flour in order for the bread to come together. Glad to hear you enjoy this recipe!
I’ve never even attempted a soft sandwich bread before, and have only made other breads a couple of times total, so I’d consider myself a beginner. This couldn’t have been easier and I’m blown away by the result. Very soft and delicious — the toughest part was slicing it! One question I have: my dough did a wonderful job on both rises, and stayed very tall throughout the bake, however, just beneath the surface was a large air bubble that left the center slices with large holes in them. Any advice on which rise could have been the problem, and what I should have done different?
Hi Madison! Make sure to roll the dough up tightly into the loaf shape. This will help air pockets from developing during baking. So glad you loved this bread!
Electric carving knives are brilliant for slicing bread!
Hi Sally! I loved this recipe- I made it with a mix of old fashioned oats and wheat bran for the grains, and then did a mix of whole wheat and bread flour. Made them into rolls to use as a base for our sloppy joes (mini sandwiches since I didn’t actually make them big enough)- they took 26 minutes, but they didn’t get browned on top at all. Would I need to top it with egg wash in order to get the browning?
I can’t wait to try it as a loaf next time. 🙂 Thanks for a great recipe.
Yes egg wash or milk gives a much more pronounced brown crust. I used 1 US extra large egg mixed with 1/2tbsp water as my egg wash and that gave me a shiny and very brown top. The bread underneath that didn’t get the egg, was matter and a subtler brown (due to 3/4tsp mixed spices per 400g flour). Before that, I brushed my bread with no fat milk and that gave me a less obvious, but still a brown colour than none. Hope that helps! 🙂
Halved this recipe to fit my 1# mini-zo. Worked great! Added 1/4 cup Bob’s Red Mill 7-Grain cereal and 1cup boiling water to bread bucket, let rest for 20 minutes. 1 1/4 ap flour + 1 cup white whole wheat. Added everything else, plus 2 tsp wheat gluten (I add this to most of my breads since I use ap flour), 2 T diastic malt powder (it adds a nuttiness and aids browning), and subbed molasses for brown sugar.
Got a beautiful rise, it sliced very well, and was delish!
Your recipes are AMAZING! Every one that I have tried turns out perfect. And trust me I have had my fair share of fails! I have a son that has a glycogen disorder though and try to avoid anything that can spike his blood sugar. Often turning to agave or stevia. Does anyone have any advice on other options or any recipes that you love with no sugar? Thanks in advance!
Hi Bobbi, we’re so glad to hear this bread was a hit for you! Thank you for making and trusting so many of our recipes. We aren’t trained in baking with sugar substitutes, but we do have a section of “Healthy Sweet” and “Healthy Savory” recipes that might be of interest to you. Hope you can find some there to enjoy!
Thank you so much for another wonderful recipe! I have recently become a great pie crust maker thanks to your wonderful all-butter pie crust recipe and then I made the cinnamon swirl bread…probably my new favorite food. Now, I love this bread as well. I used oatmeal, a scant half-cup of finely chopped almonds (left over from another recipe) and I used 1-1/3 cups King Arthur White Whole Wheat flour to 2 cups of bread flour. It is SO good. I plan to make another loaf next week because homemade bread is now a must. Thank you so much for the excellent instructions you give. I just need to decide what to try next. I do love cinnamon rolls.
So glad to hear you’ve been enjoying our recipes, Lucy!
Can you make the dough in the bread machine?
Hi Joni, we haven’t tested it. Some readers make our regular sandwich bread using a bread machine with no problem, so we can’t see why this wouldn’t work too. Let us know if you try!
The dough rises quickly in the bread machine. Preparing to bake. Thank you!
Joni, did you make any adjustments for the bread machine? Do you mind sharing how you did it? Thank you!!
Hi is this recipe bread machine friendly ?
Hi Irene, we haven’t tested it. Some readers make our regular sandwich bread using a bread machine with no problem, so we can’t see why this wouldn’t work too.
Irene, did you try this in the bread machine? I was just thinking of trying it and wondered how it turned out and what adjustments, if any, you made!
Love this recipe! I made it with the multigrain baby cereal. The results were a truly soft loaf that was perfect for sandwiches. It’s delicious and so easy. Thank you for this wonderful, flexible recipe.
This is my all time favorite!! I made it exactly as the recipe said and it’s amazing. It is soft and delicious
Love this bread recipe! Super delicious with butter and jam. Although, I do have a request for a rye bread recipe.
Hi,
Can I add less sugar? I don’t like it when bread has sweet taste in it.
Thanks for the help.p
Hi Aida, you can reduce down to 1 Tablespoon of sugar if desired.
I love more whole wheat in my bread so I used 310 grams of bread flour and 120 g of whole wheat and threw in a quarter cup of sunflower seeds and a quarter cup of millet, and it was great!! Only thing is I do want a bit more of a crust, so I’ll work on that next time I make this.