

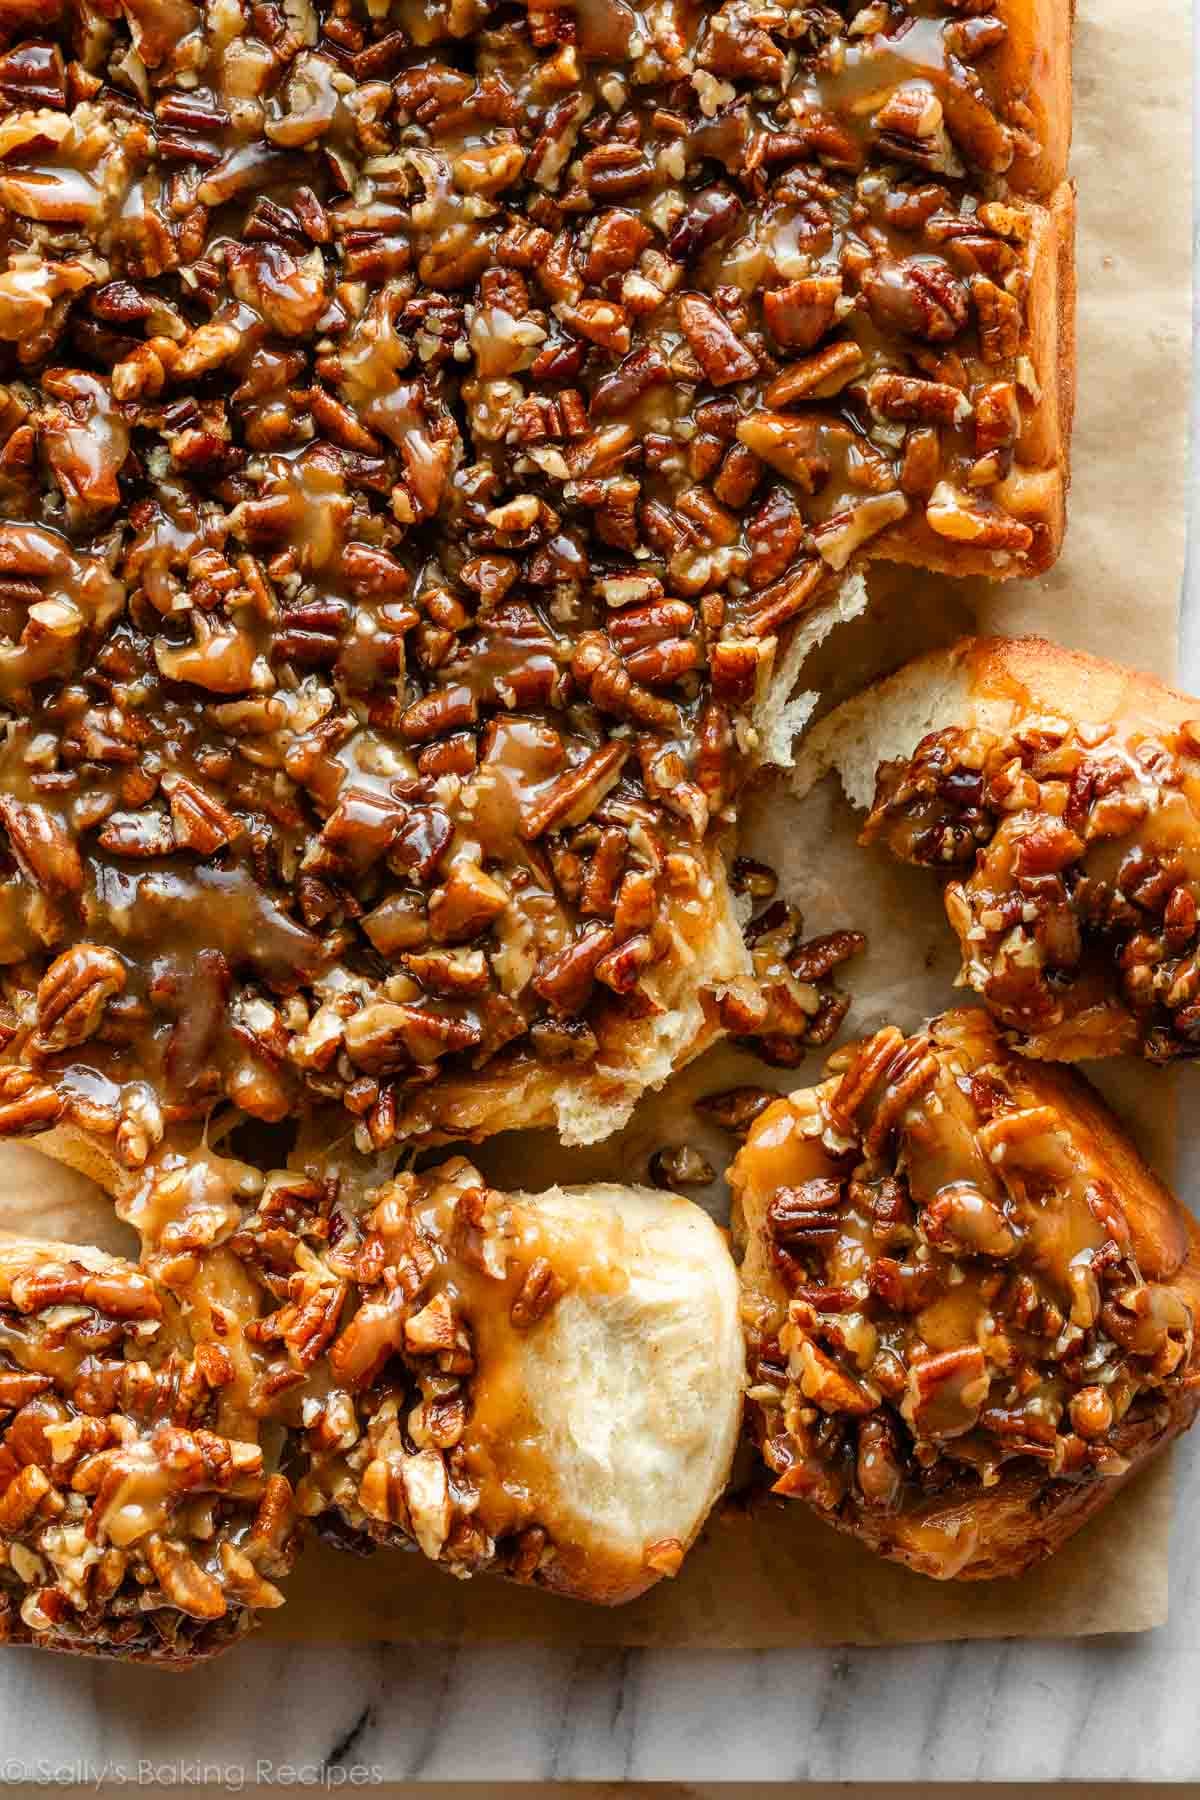
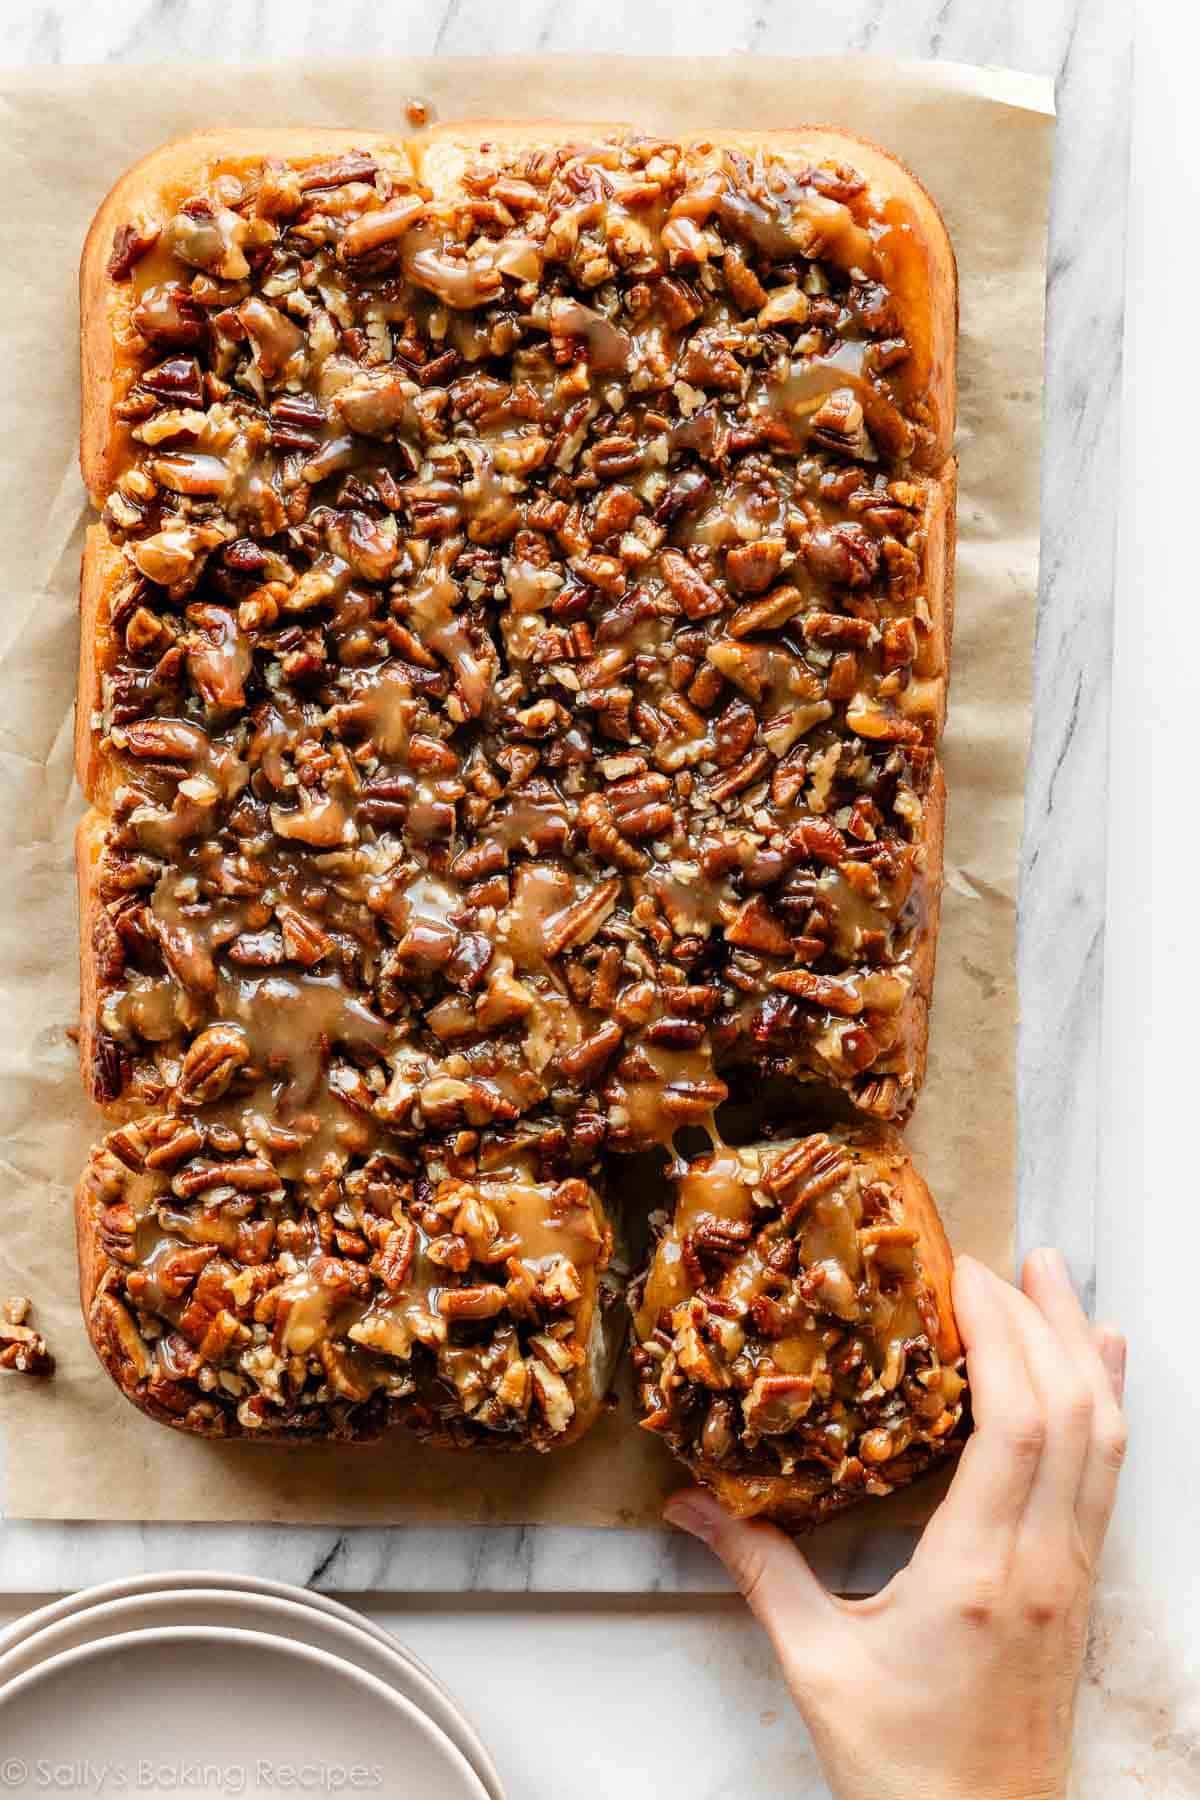
Breakfast has never been more indulgent! These are glorious make-ahead maple pecan sticky buns, made with pure maple syrup in the caramel glaze topping. They’re as flaky and soft as my overnight cinnamon rolls, but with an ooey-gooey pecan layer that becomes the topping. For best results, read through all of my instructions before beginning.
I originally published this recipe in 2017 and have since added new photos, a video tutorial, and additional success tips.
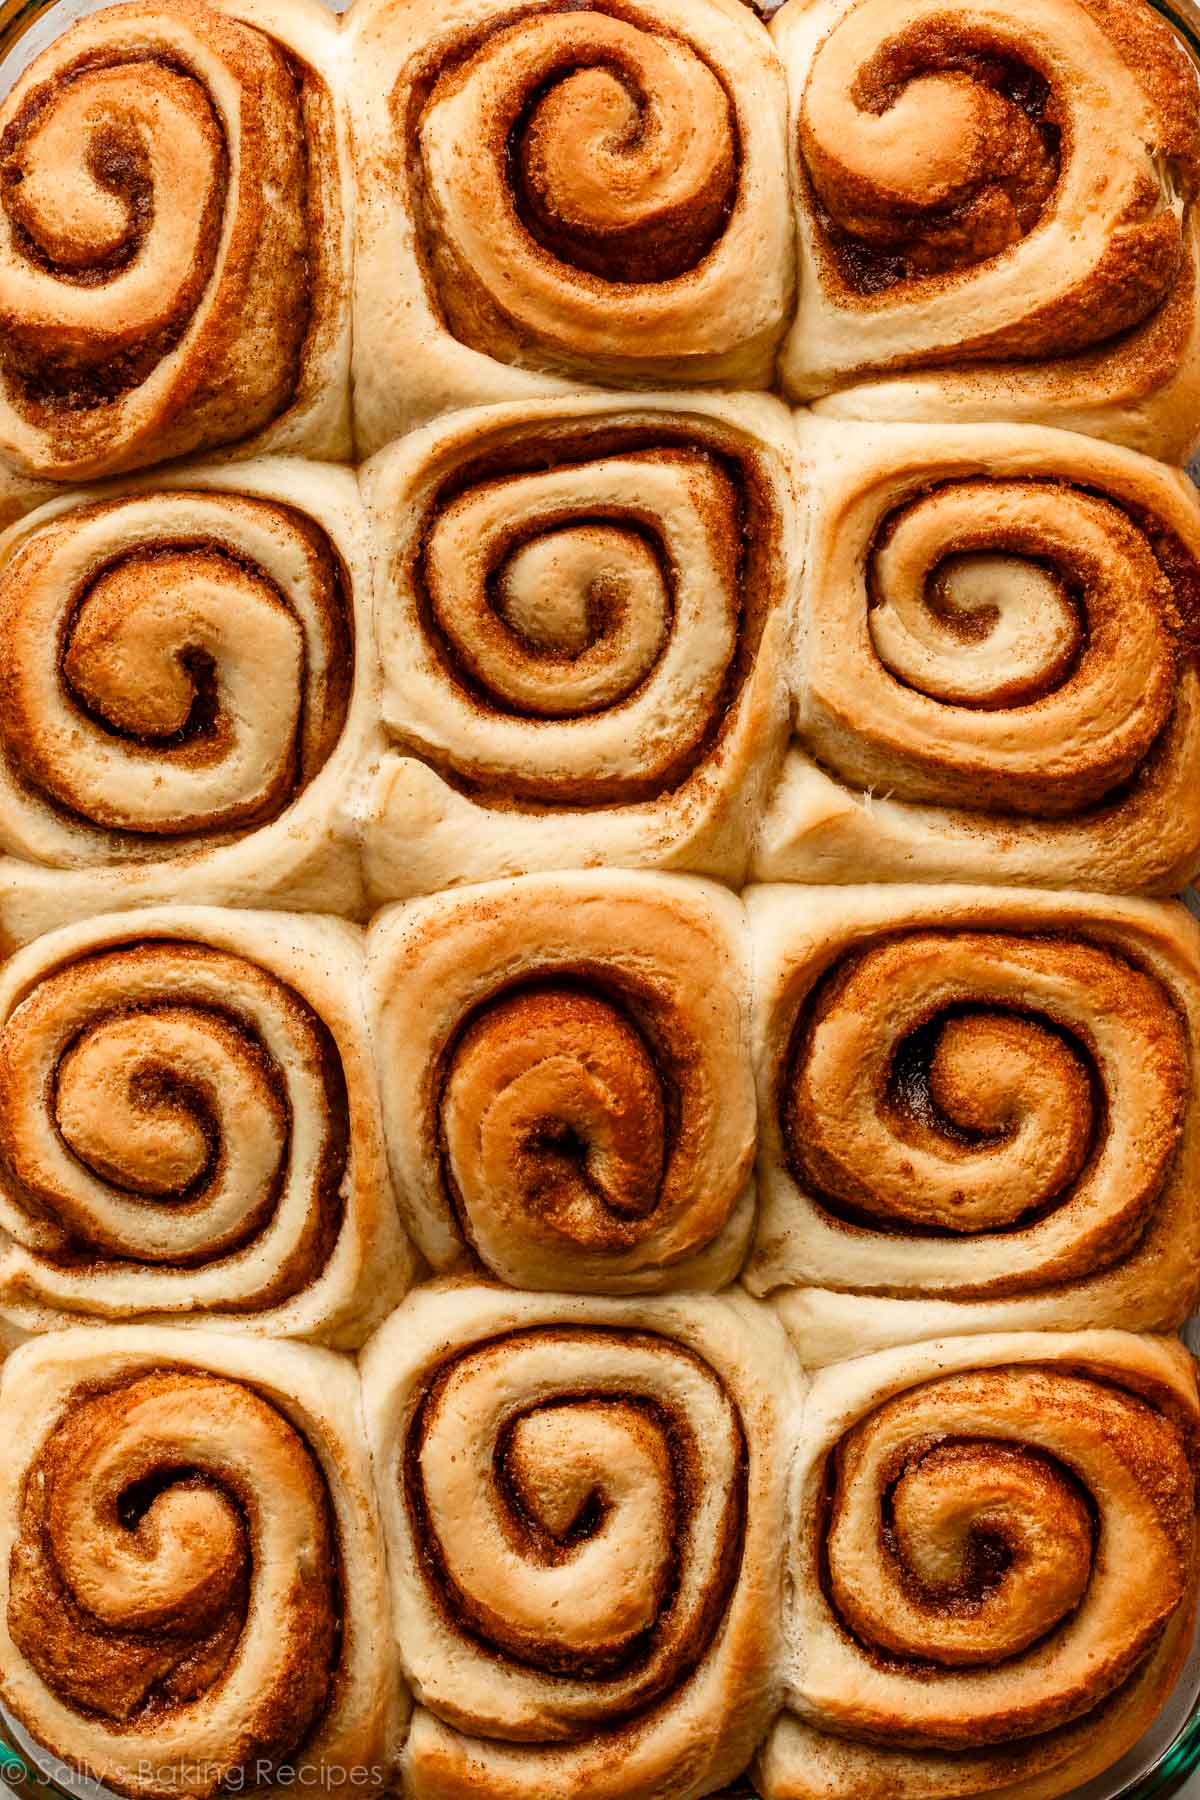
Why have basic cinnamon rolls when you can have brown sugary, butter-y, maple-y pecan sticky buns? There’s absolutely no comparison. They’re tastier than you could even imagine and give regular ol’ cinnamon rolls a run for their money. If you’re on team cinnamon roll, I guarantee this recipe will change your mind. This is probably my most favorite recipe of all time.
I know this is a big statement, but sticky buns > cinnamon rolls.
One reader, Susie, commented: “I’m not an experienced baker with yeast, but these came out perfect on the first try! They may have been the best thing I’ve ever baked and will absolutely be on repeat in my kitchen. ★★★★★”
Another reader, M.J., commented: “What a great recipe. Followed it exactly and the buns were perfect. I have been looking for a recipe for pecan buns like my mom used to make and this hit the mark. ★★★★★“
These Maple Pecan Sticky Buns Are:
- Rich and decadent
- Maple-flavored and nutty
- Packed with warm cinnamon spice
- Made with pure maple syrup
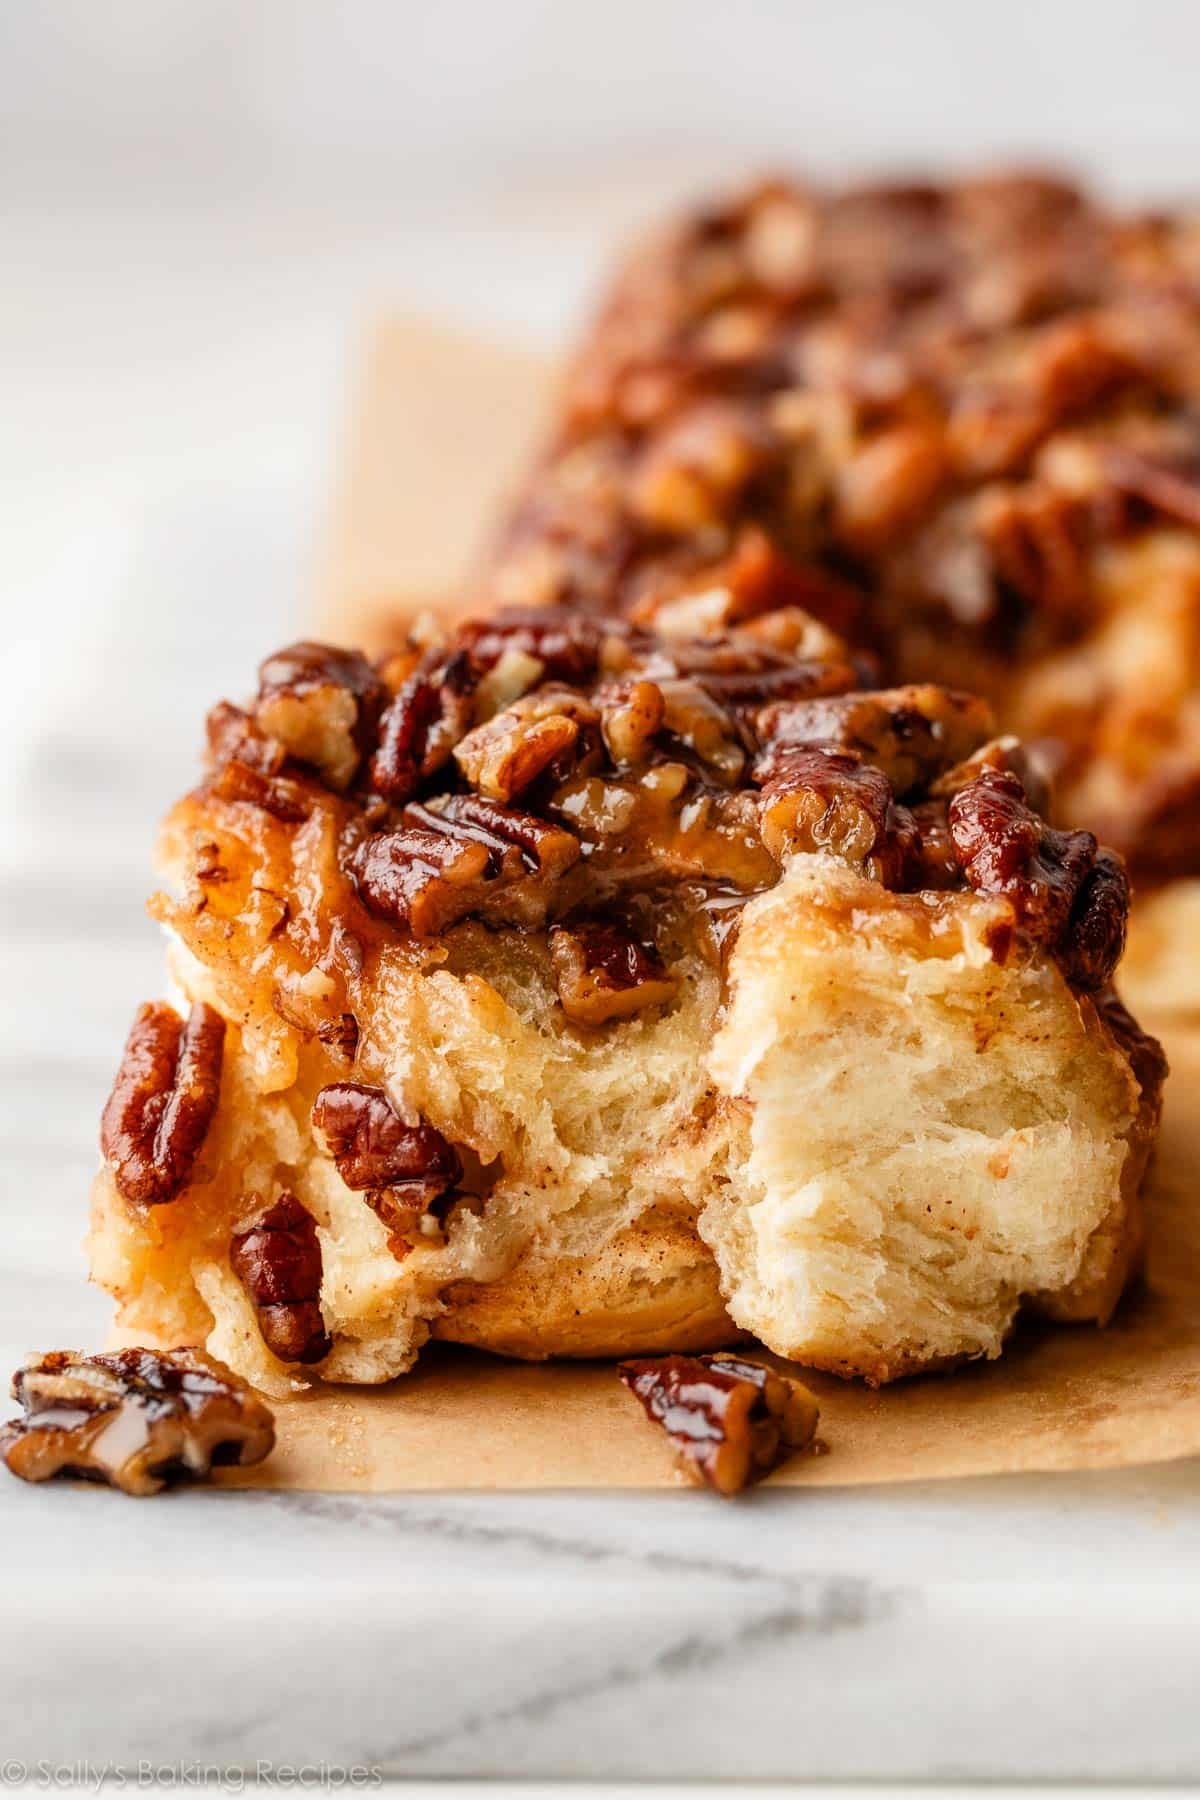
- Piled high with a sticky, brown sugary, caramel-y, buttery, maple pecan topping
- A make-ahead or overnight breakfast recipe, perfect for holiday entertaining
- Simple to prepare and can be started the night before (like pumpkin French toast casserole!)
- An extra special Thanksgiving or Christmas breakfast, or holiday brunch
3 Parts to Pecan Sticky Buns
There are 3 parts to today’s maple pecan sticky buns:
- The soft, rich dough
- The brown sugar-cinnamon filling
- The maple pecan topping
Let’s quickly walk through each.
Dough: This is the same trusty dough I use for my overnight cinnamon rolls and maple cinnamon rolls. Which means 3 things. (1) It’s dependable—I’ve used this dough at least 50x in the past several years, and am even publishing it in my next cookbook, out September 2025. (2) It’s a make-ahead recipe, but doesn’t necessarily have to be. You can begin prepping these maple pecan sticky buns the night before OR you can completely prepare them in the morning. Choose which is best for your schedule. And (3) it’s loved. There’s a reason I turn to this dough recipe time and time again. The dough is buttery and soft—the softest, richest dough I’ve worked with.
Here are all of the ingredients you need, including for the maple pecan topping:
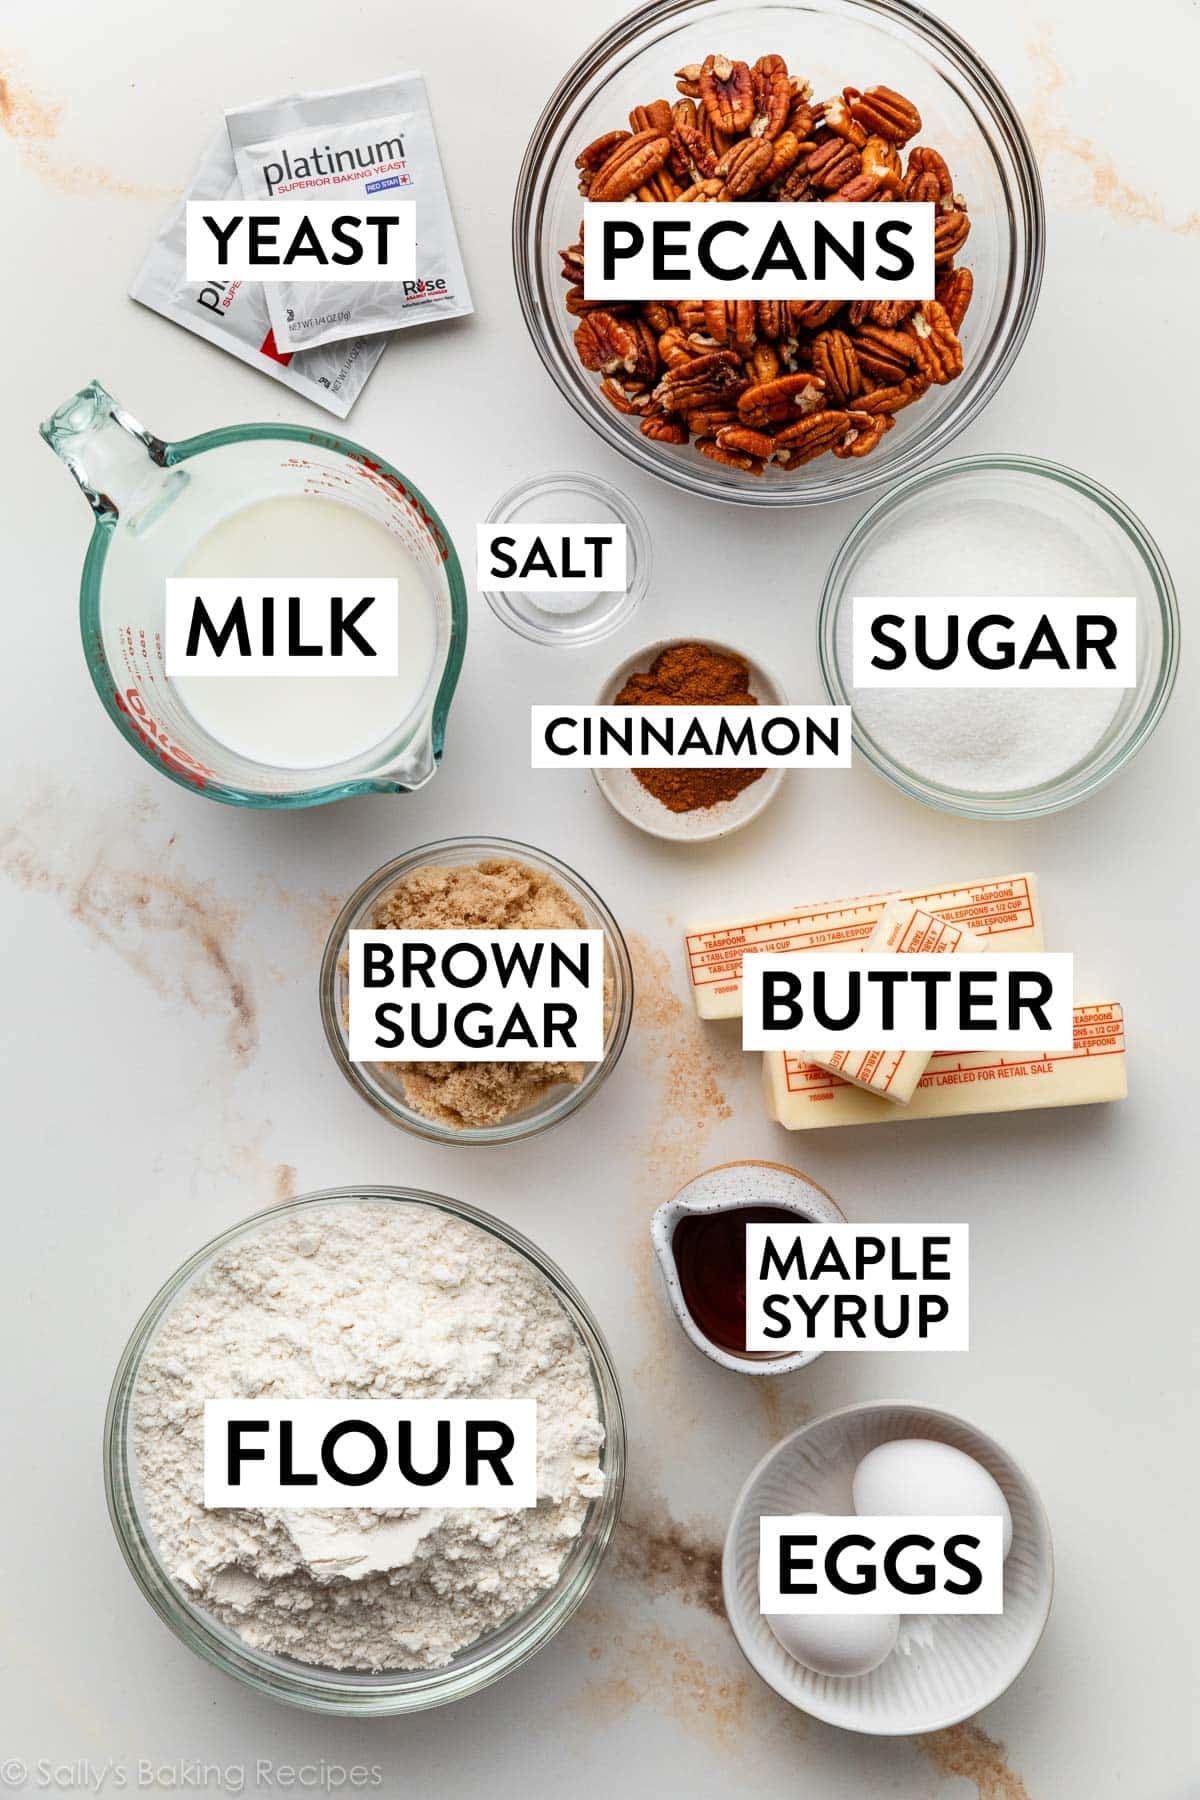
Filling: Use brown sugar in the filling instead of granulated sugar. Why? It has more flavor. If you have dark brown sugar, go ahead and use that. If not, light brown sugar works wonderfully. You’ll combine the sugar with cinnamon, and sprinkle it over softened butter on top of the rolled out dough.
Topping: I decided to introduce maple into the traditional pecan sticky bun topping because I wanted to avoid using corn syrup—and because I often crave maple in the morning! Corn syrup is typically used in the gooey caramel topping, but there’s no reason why pure maple syrup can’t be subbed in… we’d be missing out on so much flavor!
How to Make Maple Pecan Sticky Buns
I have a lot of step photos to walk you through the process, as well as a video tutorial included in the recipe below. I include these step photos because baking with yeast can be intimidating. And I don’t want you afraid of the stuff. Sticky buns aren’t scary! 😉
Baking with Yeast Guide
Reference this Baking with Yeast Guide whenever you work with baker’s yeast. I include practical answers to all of your common yeast questions.
Make the sticky bun dough. If you need extra help kneading the dough, my How to Knead Dough video tutorial will walk you through it.
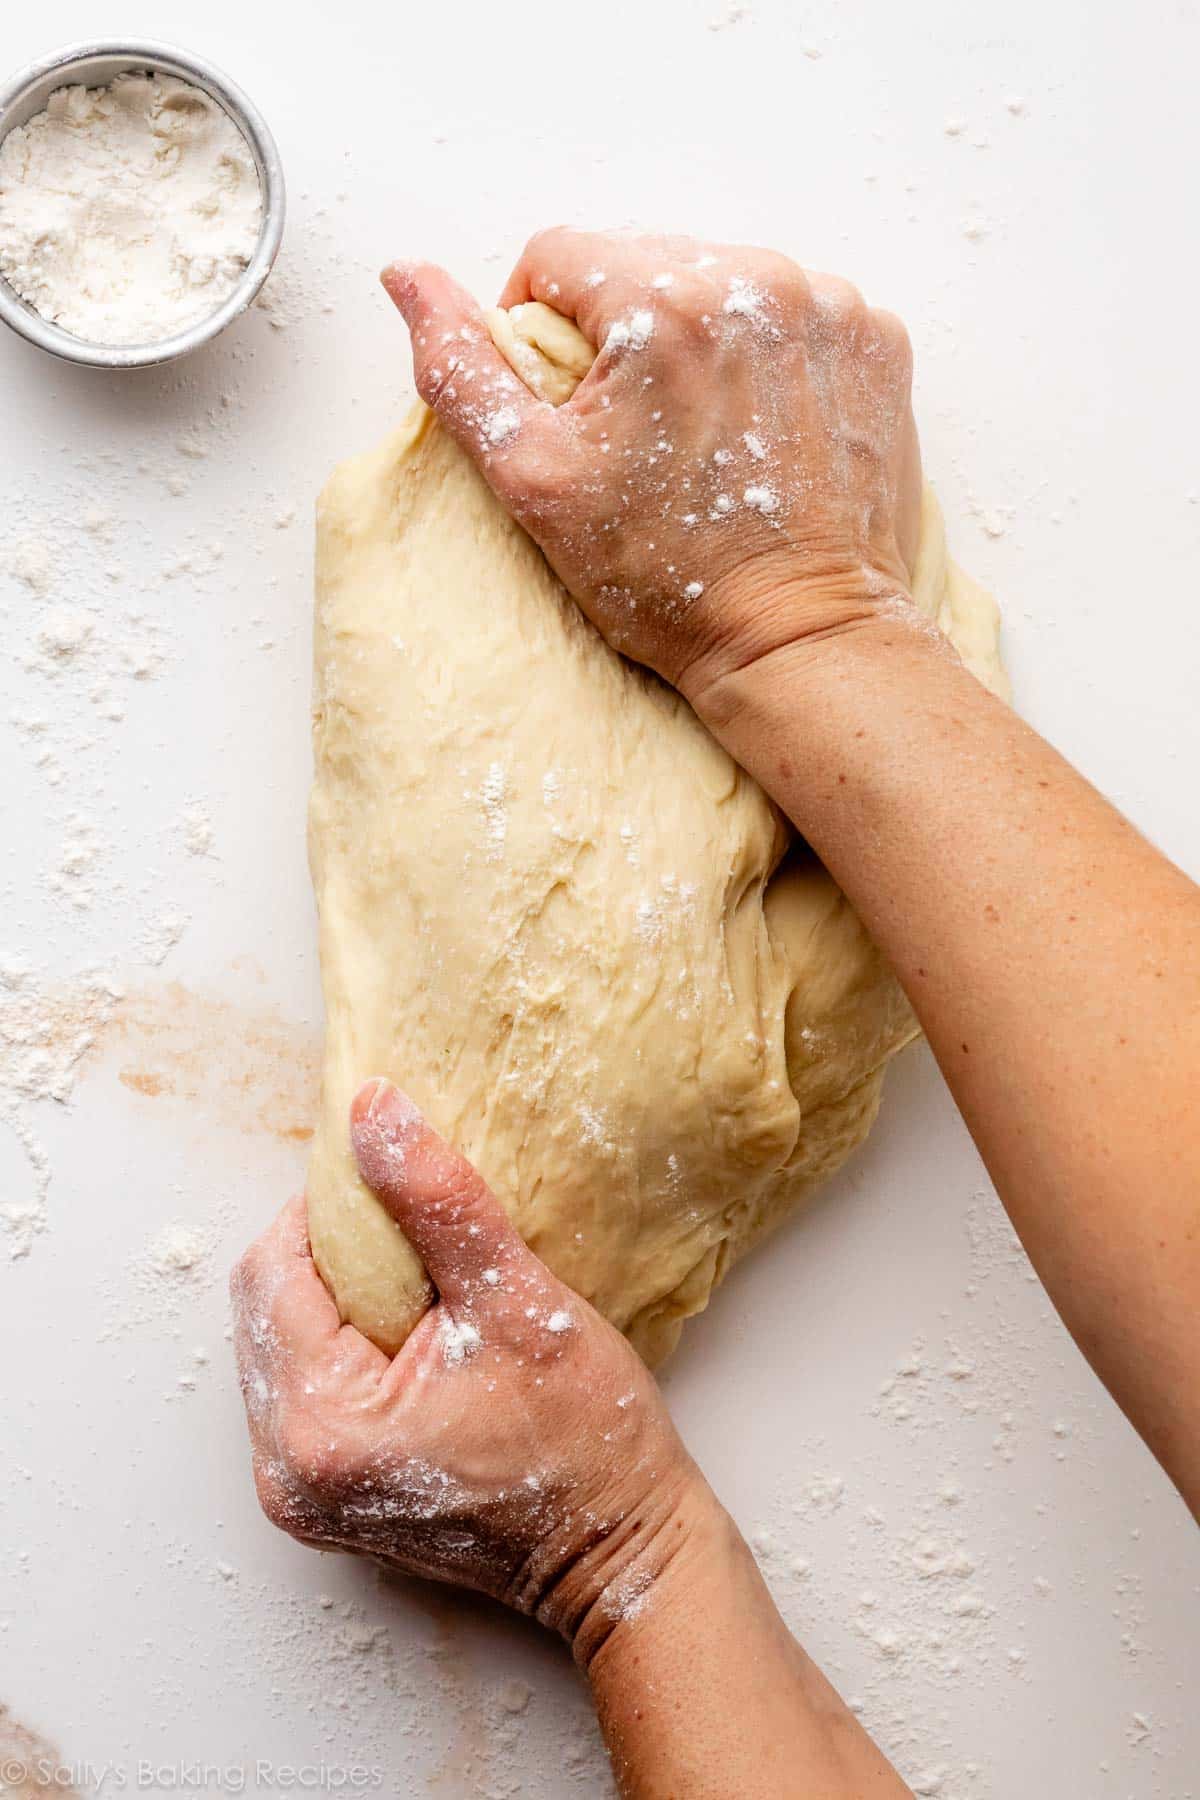
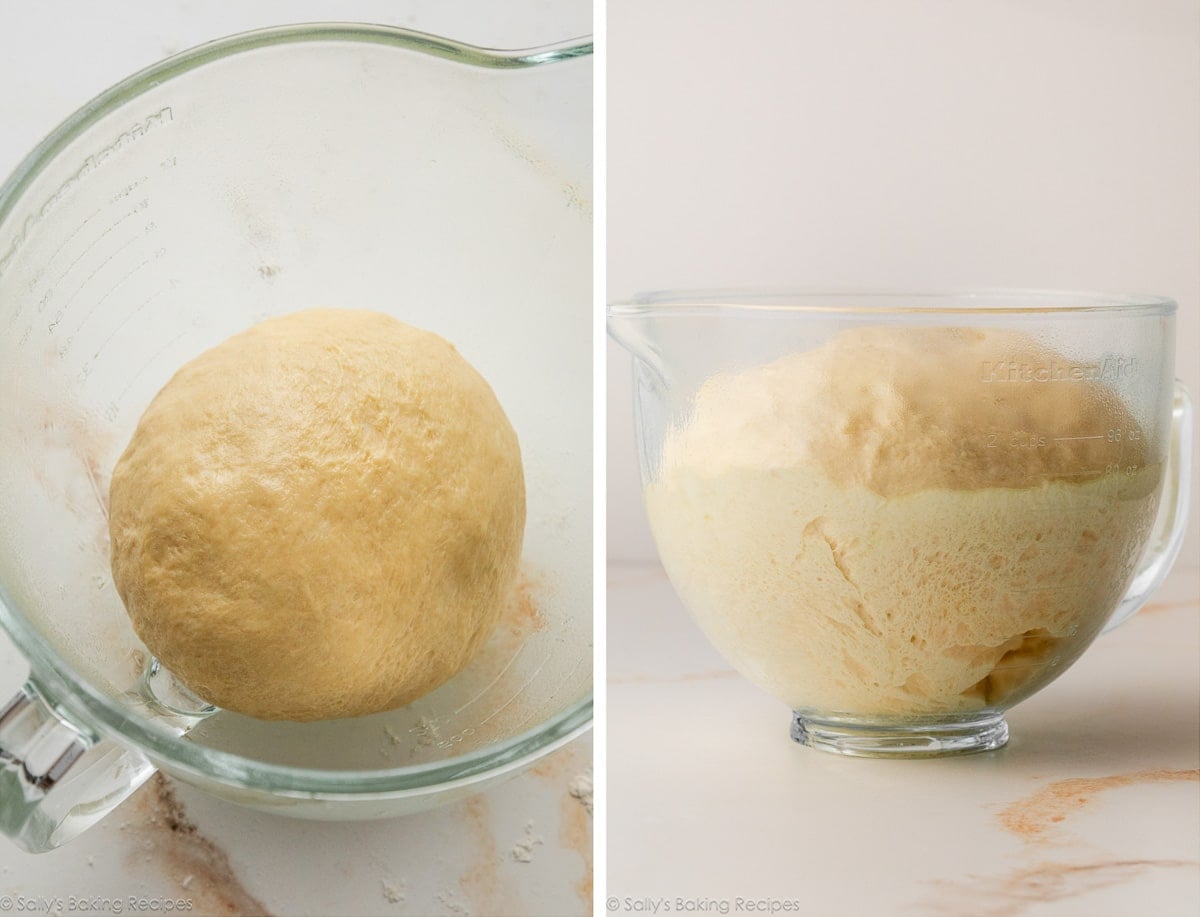
Let the dough rise (1st rise). Transfer the dough onto a floured surface, knead it, then place it in a lightly greased bowl. Let rise until doubled in size, about 1 and 1/2 to 2 hours.
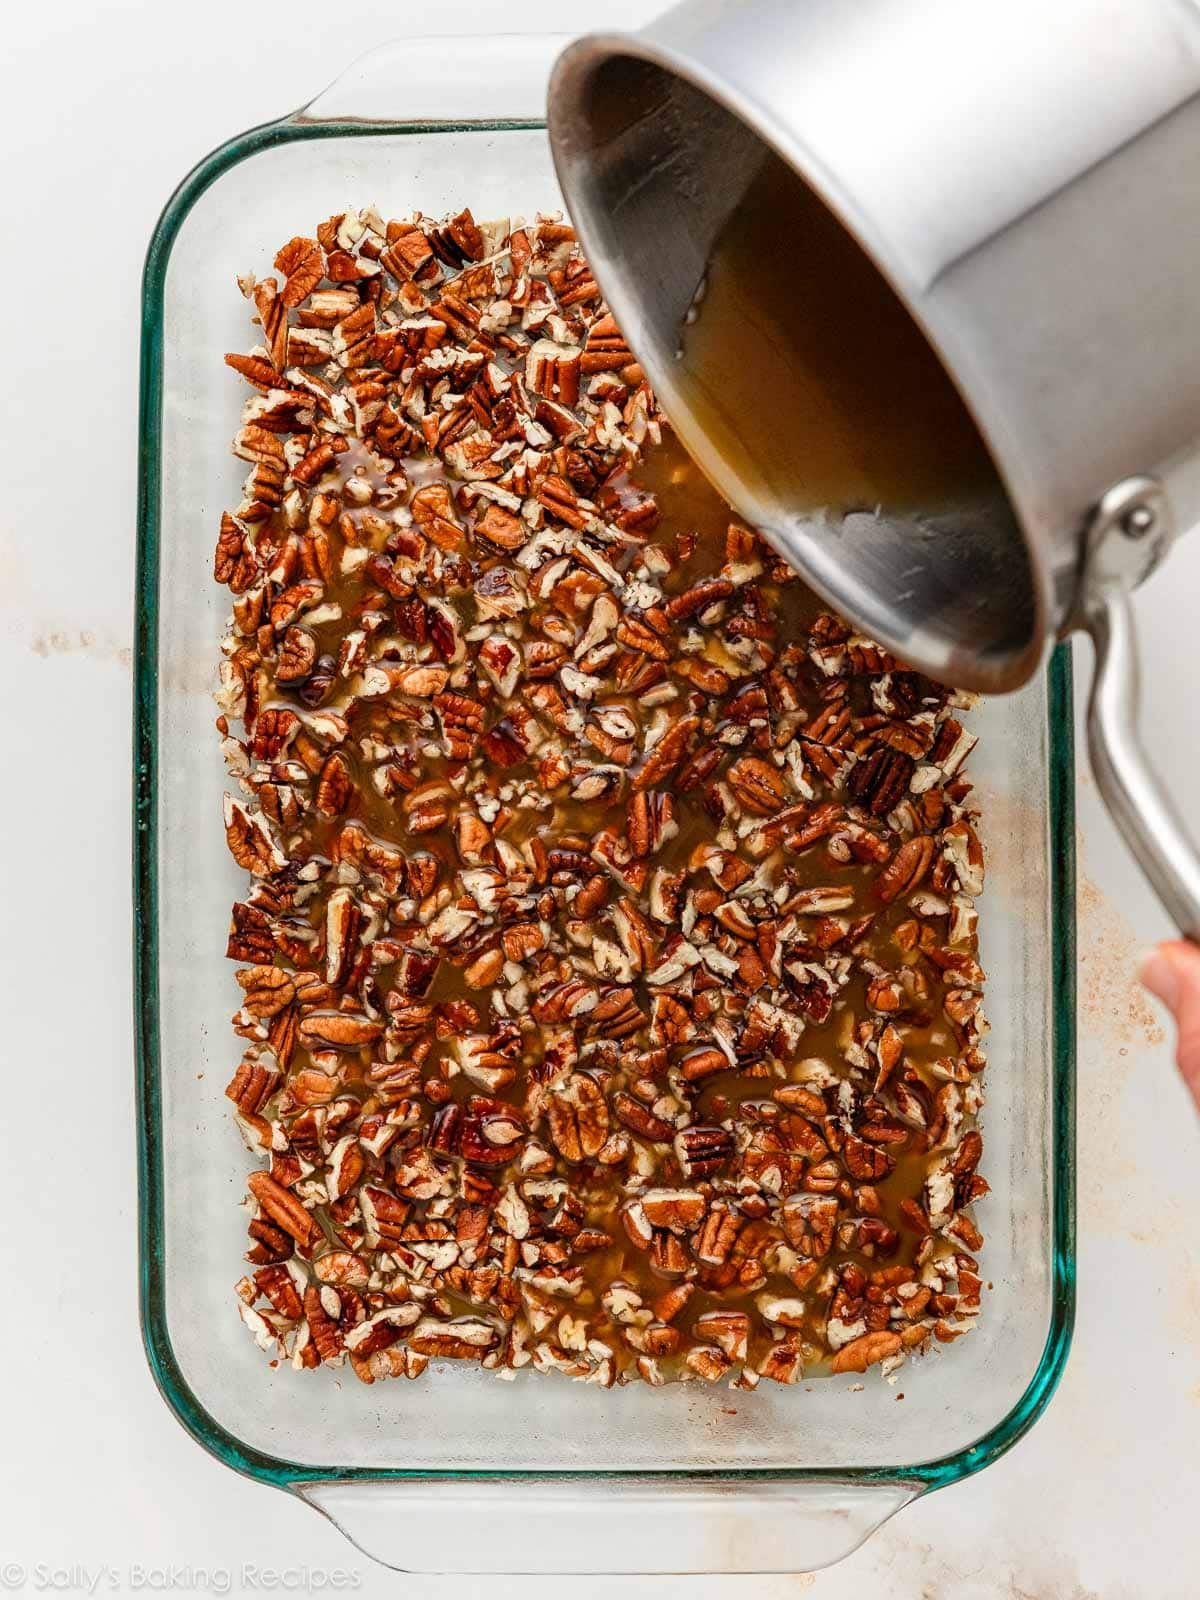
Make the topping, then pour it into a greased 9×13-inch baking pan. I urge you to use a 9×13-inch glass pan or metal pan, and not a ceramic pan. Ceramic pans take longer to heat, and the rolls won’t bake evenly. You’ll wind up with under-baked rolls in the center, while the bottom (the topping) may burn.
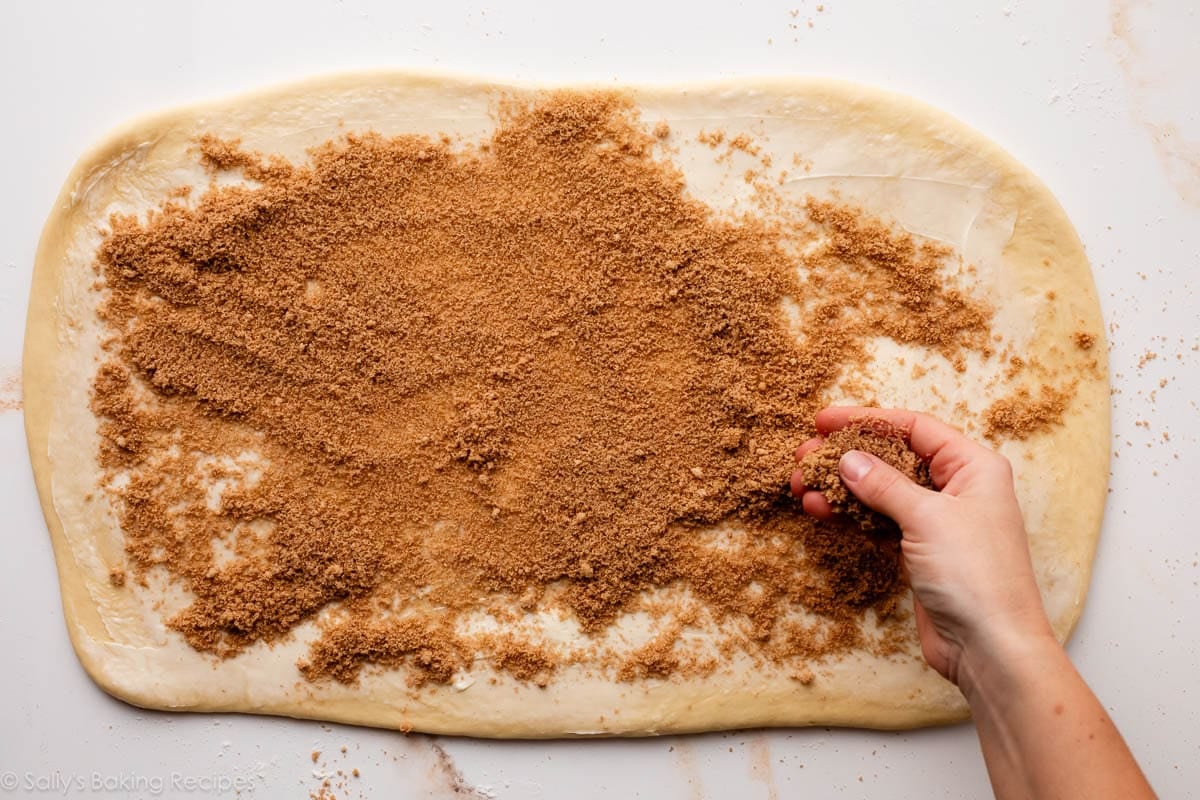
Roll the dough into a rectangle, about 12×18 inches. Make sure the dough is smooth and evenly thick.
Add the filling.
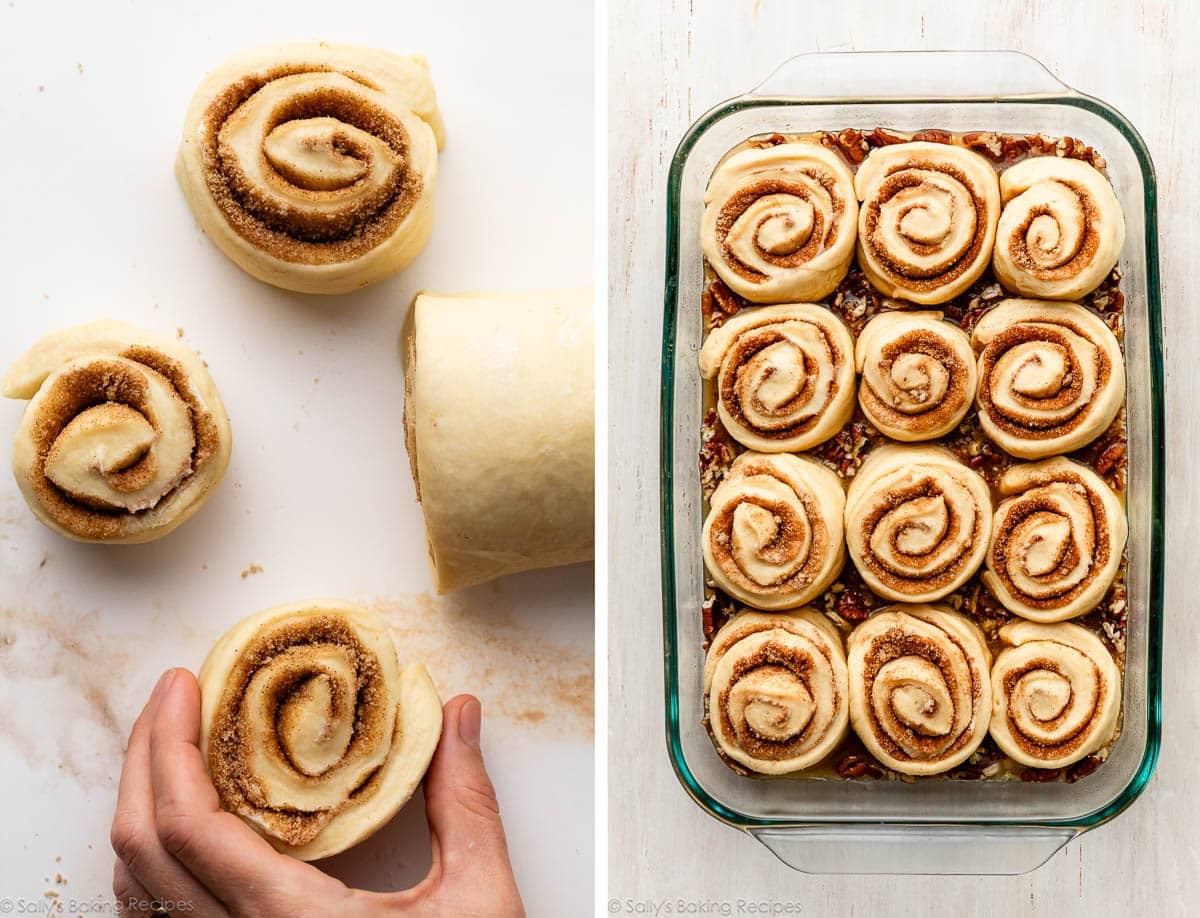
Roll up dough & cut into rolls. This should form an 18-inch log. Cut into 12 even rolls. Arrange them in the baking pan on top of the topping. (You’ll invert the pan when they’re done baking!)
Let the rolls rise (2nd rise). About 30–45 minutes, or until puffy.
Bake. The rolls take about 25 minutes to bake. Tip: halfway through the bake time, cover the rolls loosely with aluminum foil so the tops don’t over-brown.
Flip rolls & serve. Let the rolls cool for 5 minutes. Using oven mitts, carefully invert the pan onto a large serving platter. The warm topping will deliciously melt down the sides! Serve warm.
Who needs cream cheese icing when you have THIS?
Overnight Instructions
These maple pecan sticky buns are a great choice for holiday entertaining because they can be prepared the night before serving. To prepare the night before, simply place the shaped (unbaked) rolls on top of the pecan topping as instructed, cover the rolls tightly, then refrigerate for 8–12 hours. The next morning, remove the rolls from the refrigerator and allow them to rise on the counter for about 1 hour before baking.
To round out your breakfast, this bagel breakfast casserole and spinach and bacon breakfast strata are also great make-ahead options.
Print
Maple Pecan Sticky Buns
- Prep Time: 4 hours (includes rises)
- Cook Time: 28 minutes
- Total Time: 4 hours, 40 minutes (or overnight)
- Yield: 12 buns
- Category: Breakfast
- Method: Baking
- Cuisine: American
Description
Breakfast and brunch have never been more indulgent and delicious than with these make-ahead maple pecan sticky buns! This is a soft, rich dough and a caramel-like stove-top glaze made with maple syrup. Use a 9×13-inch glass pan or metal pan for baking. Review recipe Notes before beginning and see the video tutorial below.
Ingredients
Dough
- 1 cup (240ml) whole milk, warmed to about 100°F (38°C)
- 2/3 cup (135g) granulated sugar, divided
- 1 and 1/2 Tablespoons (14g) active dry or instant yeast (2 standard size packets)
- 1/2 cup (8 Tbsp; 113g) unsalted butter, softened to room temperature and cut into 4 pieces
- 2 large eggs, at room temperature
- 1/2 teaspoon salt
- 4 and 1/2 cups (563g) all-purpose flour or bread flour (spooned & leveled), plus more as needed
- 2 teaspoons canola, vegetable, or olive oil for bowl (or use nonstick spray)
Topping
- 2 cups (250g) chopped pecans
- 1/2 cup (8 Tbsp; 113g) unsalted butter
- 2/3 cup (135g) packed light or dark brown sugar
- 1/4 cup (60ml) whole milk
- 1/4 cup (60ml) pure maple syrup
- 1/4 teaspoon salt
Filling
- 1/4 cup (4 Tbsp; 56g) unsalted butter, softened to room temperature
- 1/2 cup (100g) packed light or dark brown sugar
- 2 teaspoons ground cinnamon
Instructions
- Prepare the dough: Whisk the warm milk, 2 Tablespoons sugar, and the yeast together in the bowl of your stand mixer fitted with a dough hook or paddle attachment. Cover and allow mixture to sit for about 5 minutes or until foamy on top. *If you do not own a mixer, you can do this in a large mixing bowl and in the next step, mix the dough together with a large wooden spoon/silicone spatula. It will take a bit of arm muscle. A hand mixer works, but the sticky dough repeatedly gets stuck in the beaters. Mixing by hand with a wooden spoon or silicone spatula is a better choice.*
- On medium speed, beat in the remaining sugar (which should be 1/2 cup, or 100g) and the softened butter until it is slightly broken up. Add the eggs and salt and beat on medium speed until combined. The butter won’t really be mixing into the mixture, so don’t be alarmed if it stays in pieces. Turn the mixer down to low speed and, with it running, add 1 cup of flour at a time, making sure it’s fully incorporated before adding the next. After 4 cups have been added, add the last 1/2 cup and beat until the dough comes together and pulls away from the sides of the bowl, about 3 minutes. Dough will be soft. If it’s not pulling away from the sides of the bowl, add more flour, 1 Tablespoon at a time, until it reaches a kneadable consistency.
- Knead the dough: Keep the dough in the mixer and beat for an additional 5 full minutes, or knead by hand on a lightly floured surface for 5 full minutes. (If you’re new to bread-baking, my How to Knead Dough video tutorial can help here.) If the dough becomes too sticky during the kneading process, sprinkle a teaspoon of flour on the dough or on the work surface/in the bowl to make a soft, slightly tacky dough. Do not add more flour than you need because you do not want a dry dough. After kneading, the dough should feel soft, smooth, and elastic. Poke it with your finger—if it slowly bounces back, your dough is ready to rise. You can also do a “windowpane test” to see if your dough has been kneaded long enough: tear off a small (roughly golfball-size) piece of dough and gently stretch it out until it’s thin enough for light to pass through it. Hold it up to a window or light. Does light pass through the stretched dough without the dough tearing first? If so, your dough has been kneaded long enough and is ready to rise. If not, keep kneading until it passes the windowpane test.
- 1st Rise: Lightly grease a large bowl with oil or nonstick spray. Place the dough in the bowl, turning it to coat all sides in the oil. Cover the bowl with aluminum foil, plastic wrap, or a clean kitchen towel. Allow the dough to rise in a relatively warm environment for 2 hours or until double in size. (I always let it rise on the counter and it takes about 2 hours. For a tiny reduction in rise time, see my answer to Where Should Dough Rise? in my Baking with Yeast Guide.)
- Meanwhile, make the topping: Grease the bottom and sides of a 9×13-inch glass baking pan or metal baking pan. Spread chopped pecans in an even layer in the pan. Set aside. Combine the rest of the topping ingredients in a small saucepan over medium heat. Stir until the butter has melted, then bring to a simmer. Allow to simmer for 2 minutes, stirring occasionally. Remove from heat, give it a quick whisk, then pour over pecans. Set aside.
- Roll out the dough: Punch down the dough to release the air. Place dough on a lightly floured work surface and, with a lightly floured rolling pin, roll dough into a 12×18-inch rectangle. Make sure the dough is smooth and evenly thick. If the dough keeps shrinking back as you roll it out, stop what you’re doing, cover it lightly, and let it rest for 10 minutes to relax the gluten. When you return to the dough, it should stretch out much easier.
- For the filling: Spread the softened butter all over the dough. The softer the butter is, the easier it is to spread in this step. (Microwave it for a few seconds to soften if needed.) In a small bowl, mix the sugar and cinnamon together. Sprinkle evenly over the butter. Tightly roll up the dough to form an 18-inch-long log. If some filling spills out, sprinkle it on top of the roll. With an extra sharp knife, cut into 12 even rolls, about 1.5 inches wide each. Arrange in the prepared baking pan, on top of the pecan topping.
- 2nd Rise: Cover the rolls tightly and allow to rise until puffy, about 30–45 minutes. (Or use the overnight option in the Notes below.)
- Preheat oven to 350°F (177°C). Bake for 25–28 minutes or until the rolls are golden-brown on top. About halfway through baking time, loosely tent a piece of aluminum foil over the top of the pan to prevent the tops from browning too quickly. Remove pan from the oven and place on a wire rack. Cool for 5 minutes.
- Using oven mitts, carefully invert the pan onto a large serving platter. The warm topping will melt down the sides. Serve warm.
Notes
- Make Ahead Instructions – Overnight: To prepare the night before serving, prepare the rolls through step 7. Cover the rolls tightly and refrigerate for 8–12 hours. (16 hours max. 8–12 hours is best, but 16 hours is OK if absolutely needed. Do not exceed 16 hours.) The next morning, remove from the refrigerator and allow to rise on the counter for about 1 hour before continuing with step 9.
- Make Ahead Instructions – Freezing: You can freeze sticky buns for up to 3 months, and I recommend a few different methods for freezing sticky buns. The first method is to freeze them after shaping, before they’ve had their 2nd rise (step 7). Thaw in the refrigerator overnight, then let rise for 1.5–2 hours at room temperature before baking. The second method is to par-bake the risen buns for 10 minutes, let cool completely, then cover and freeze. Thaw in the refrigerator overnight, then let sit at room temperature for 30 minutes before baking. Finish baking for 15–20 minutes. You can also freeze fully baked sticky buns. See How to Freeze Cinnamon Rolls for more details about all of these methods.
- Special Tools (affiliate links): Stand Mixer or Large Mixing Bowl and Wooden Spoon/Silicone Spatula | 9×13-inch Glass Baking Dish | Rolling Pin | Cooling Rack
- Milk: Whole milk or 2% is best for this rich dough and topping. I do not recommend nondairy milk in the topping, but you could use it in the dough.
- Yeast: If using active dry yeast, the rise times will be slightly longer. I always use an instant yeast. Reference my Baking with Yeast Guide for answers to common yeast FAQs.
- What can I use instead of maple syrup? If you want to skip the maple syrup in the topping, replace it with light or dark corn syrup.
- Gluten Free: We have not tested this recipe with gluten-free flour, so we are unsure of the results.


Reader Comments and Reviews
I made the rolls with the intention of freezing. I got to step 9, baked for 10 minutes per the note, left them on the counter to cool, but when I came back about thirty minutes later to wrap and freeze, the half-baked rolls had “exploded” — best I can decipher, the unbaked middles had continued rising and popped completely out of the baked outer edges. They looked like creatures from a sci-fi movie! I did my best to push the innards back into the rolls, and decided to go ahead and do the full bake now. Any idea why this happened or what I should have done differently? Do you think they will turn out okay? I was planning to serve them to house guests this week!
Hi Cassie, I wonder if you rolled them too tight, so the centers began popping out! Sometimes that happens in the oven, and you have a whack-a-mole situation on your hands. It makes no taste difference either way if you need to push them back down.
They were fine in the oven, but they popped while they were cooling on the counter. I’m guessing they were still just dough in the middle, and that part continued to rise. Like some others have said, I too often have a problem with rolls not baking in the middle. It would make sense that if they are rolled tightly, there wouldn’t be as much air and heat circulation in the middle, causing the insides to not bake as well. But the instructions specifically said to roll tightly, so that’s what I tried to do. I might give them another try and just roll them loosely.
I am trying this weekend. My question how do they do as mini-rolls I am diabetic but could have a mini/
Imade this for myself only, did not share – put in freezer and ate one a week. Making more for holidayl thank you Sally. Can I make this with whole wheat flour.
Hi Josie, so glad you love them! Whole wheat flour would yield a very dense, dry sticky bun. You could try replacing just some of the flour to see how it goes.
I loved this recipe
Mine were soggy on the bottom when I turned the pan over. I tented the tops and they looked done. But the bottoms were not. Can I put back in the oven after flipping to finish baking the bottoms?
Oh my goodness!!!! These turned out SO good, amazing even, and this recipe is going into my recipe box because it is a keeper. I could not be more happy with the results I got from this recipe. I made a half recipe and halved the yeast too. Both my first and second rise went faster than the recipe but my kitchen is warm. Yum. Just Yum.
If you half the recipe, they also work? Did you half ALL the ingredients?
We are only 2 at home and 12 buns is a bit too much! Thank you for writing it down :).
i always halve this recioe except for the filling. i make 6-8 rolls in a round cake pan.
We love this recipe in our house. The flavor is just irresistible. I’m wondering if there is a trick to knowing when the inside rolls are done. Every time I wind up taking it out of the oven thinking it’s done, and when I flip it onto a serving platter the inside rolls are still doughy. I know it has to bake longer, but is there a way to tell when it’s ready? Thank you so much!!
Hi Stacia, If the outside rolls are done, you can tent the pan with aluminum foil to prevent them from browning while allowing the center roll to continue baking through.
Hi Becky again! Thanks for the previous answer! I have the sticky buns resting overnight in the refrigerator. They’ve only been in there two hours, but I can tell they’ve risen. Is that normal?? I was planning on holding them another 10 hours and wondering if they’re going to continue to rise. I could get them out to bake if I had to. What do you think?
Hi Becky, sorry for the delay in response! For next time, the rolls will get puffy during that overnight rise, so that shouldn’t be an issue. If you find they’re over expanding, you can certainly take them out early and bake if you wish. Hope they were a hit!
Sorry, I panicked a little lol, they rose just fine and were absolutely delicious. I’m sure I will be making them again!
I really want to try this recipe, but I do not like maple flavor. What can I use for a substitute?
Hi Vivien, honey or light corn syrup would be the best options.
Hi Sally, would it be ok to use parchment paper when baking?
Hi Linzy, yes, absolutely. You can line the 9×13 inch pan with parchment instead of greasing it.
Mine turned out perfect!! Dad loved them for Father’s Day. Very detailed recipe. Thank you.
Made these twice . Excellent results. My question is, can I make these and rather than baking them after the second rise can I freeze them and bake another day?
Hi Regina, we’re so glad you enjoyed them! See recipe Notes for our recommended freezing instructions.
I tried this recipe and when I flipped my rolls out of the pan discovered the tops of the buns were still raw. Do I just need to cook them longer? All the other parts were done. I cooked in a glass dish. Thanks! I love your recipes and want to try this again.
Hi Jen! Yes, sounds like they needed to bake for longer. The bottoms will bake last with this wet, sticky base. You can cover the top with aluminum foil to prevent it from browning too much while the bases finish baking through.
Hi Sally. I am excited to try out this recipe! It sounds great. Quick question – is there a major difference in the dough if I use all-purpose flour, bread flour, or a combination of the two?
Hi Christine, you can absolutely use either. The rolls will be a little extra chewy with the bread flour.
This is the best recipe for Sticky Buns that I have ever tried!! Thank you for the step by step instructions. ❤️
I tried this recipe for my coffee shop. The rolls were light, fluffy, and perfect. The combination of the maple syrup, pecans & brown sugar definitely elevated this sticky bun recipe. I have tried 5 of Sally’s recipes & each one has been better than the one before. I am in awe of your talent! Thank You sooo very much!
This is the baseline cinnamon bun dough and filling recipe with a completely off the chain topping that just brings smiles. Well done, Ms. Sally. I really enjoyed making this one the first time. The second time I went to make it I was found to be out of maple syrup and I subbed in sugar-free pancake syrup, molasses, and dark caro syrup in my topping mix. Oh boy, instant hit on that way as well. Thank you gain for this one.
These turned out perfect! I followed your instructions exactly and everyone perferred these to the more gooey, frosted cinnamon rolls. My two raises took about half the time as you suggested but I’m at 6000′ in CO so maybe altitude? I didn’t make any altitude adjustments and the rolls were soft, structured and very tasty. The topping was not overwhelming which nicely balanced with the cinnamon roll. You are my “go-to” when searching for recipes! Thank you Sally!
I have question: if we are doing the overnight method, do we uncover the rules when we take them out of the refrigerator the next morning or do we leave them covered?
Hi Mary, when you bring the rolls out in the morning, you can leave them covered as they rise. Enjoy!
Thank you. They turned out perfectly!!
Oh Sally you did it again! these are the best
Love this recipes so much. Made them for the kids and they loved them so much. Their fingers were so sticky and they loved it
What a phenomenal recipe! The dough was a dream to work with. Probably one of the best doughs I’ve made in awhile (and I bake a lot). Thank you for developing such a great recipe.
the dough was so awesome
These were delicious and a crowd pleaser!!
oh yay definitly
These were amazing and delicious with one small problem. I made a slightly smaller batch in a cake pan with 8 rolls, 7 in a circle and 1 in the center. The center roll turned out soft and underdone. Any suggestions?
Hi Dave, it sounds like it simple needed a few extra minutes in the oven. If the outside rolls are done, you can tent the pan with aluminum foil to prevent them from browning while allowing the center roll to continue baking through. We’re glad you enjoyed them!
Hi Sally! I’m team cinnamon roll but my husband is team sticky bun. I was considering splitting the rolls among 2 smaller pans- one with the maple pecan topping and the other without. Would the bake time still be the same? Thanks!
Hi Stephanie, should be the same! Enjoy
I’m not an experienced baker-with-yeast, but these came out perfect on the first try! They may well have been the best thing I’ve ever baked and will absolutely be on repeat in my kitchen.
Sally, you honestly have the best recipes, you are my go to! These are SO fluffy and deliciously decadent!! My husband said they are the best thing I have baked all year. They were perfect for Christmas morning 🙂
This is the best sweet roll recipe I have ever tried! I used cardamom instead of cinnamon because my son doesn’t like cinnamon, and it was delicious. I ended up using bread flour + regular active dry yeast and doing the long overnight rise in the fridge, which was perfect! Thank you so much for your clear and detailed instructions—this recipe is definitely replacing the cinnamon rolls we used to make as our Christmas morning breakfast!
Okay Sally!!!! These are without a doubt the best cinnamon rolls i have ever made. I have followed so many recipes of yours and others and this is the one i will always use moving forward. The fluffiest but still structured cinnamons rolls ever. I legitimately can’t believe i made these.
Thank you!!
Ps i did double the filling and the topping because im a spaz. Totally worth it
I can’t wait to give this a try. I am confused about greasing baking dish first. Then adding the butter mixture. What am I greasing the dish first with? Butter? Oil spray? Is this just to ensure the sides don’t sttick?
Hi Veronika! We usually use a baking spray, like Pam.