

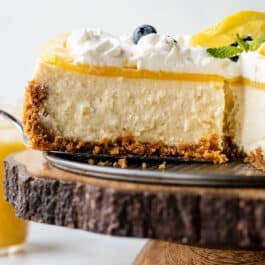
Look no further—this is the only lemon cheesecake recipe you’ll ever make again. Savor every sweet-tart taste of the creamiest, dreamiest cheesecake flavored with fresh lemon, nestled between a buttery graham cracker crust and a layer of homemade lemon curd. Top with clouds of fluffy whipped cream and sunny lemon slices for a simple yet eye-catching presentation.
One reader, Christine, commented: “This recipe is SO amazing that I had to stop and give this 5 stars. It is the perfect texture, the perfect amount of lemon flavor, and the perfect amount of richness. It’s one of the best cheesecakes I’ve tried. My family won’t stop raving about it. If you like lemon and cheesecake, this is a must—if you don’t like them, this recipe will probably change your mind! ★★★★★“
Here we have a pure lemon cheesecake. I adapted this dessert recipe from my popular key lime cheesecake recipe. Some reviews have said they’d love even more key lime flavor, so I kept that in mind here, and infused a little more fresh zest into the batter.
Plan ahead to make this cheesecake—ideally, the day before you plan to serve it. It needs time to bake, cool, and set in the refrigerator. Don’t we all need a little me time before a big event? 😉
3 Parts to This Lemon Cheesecake
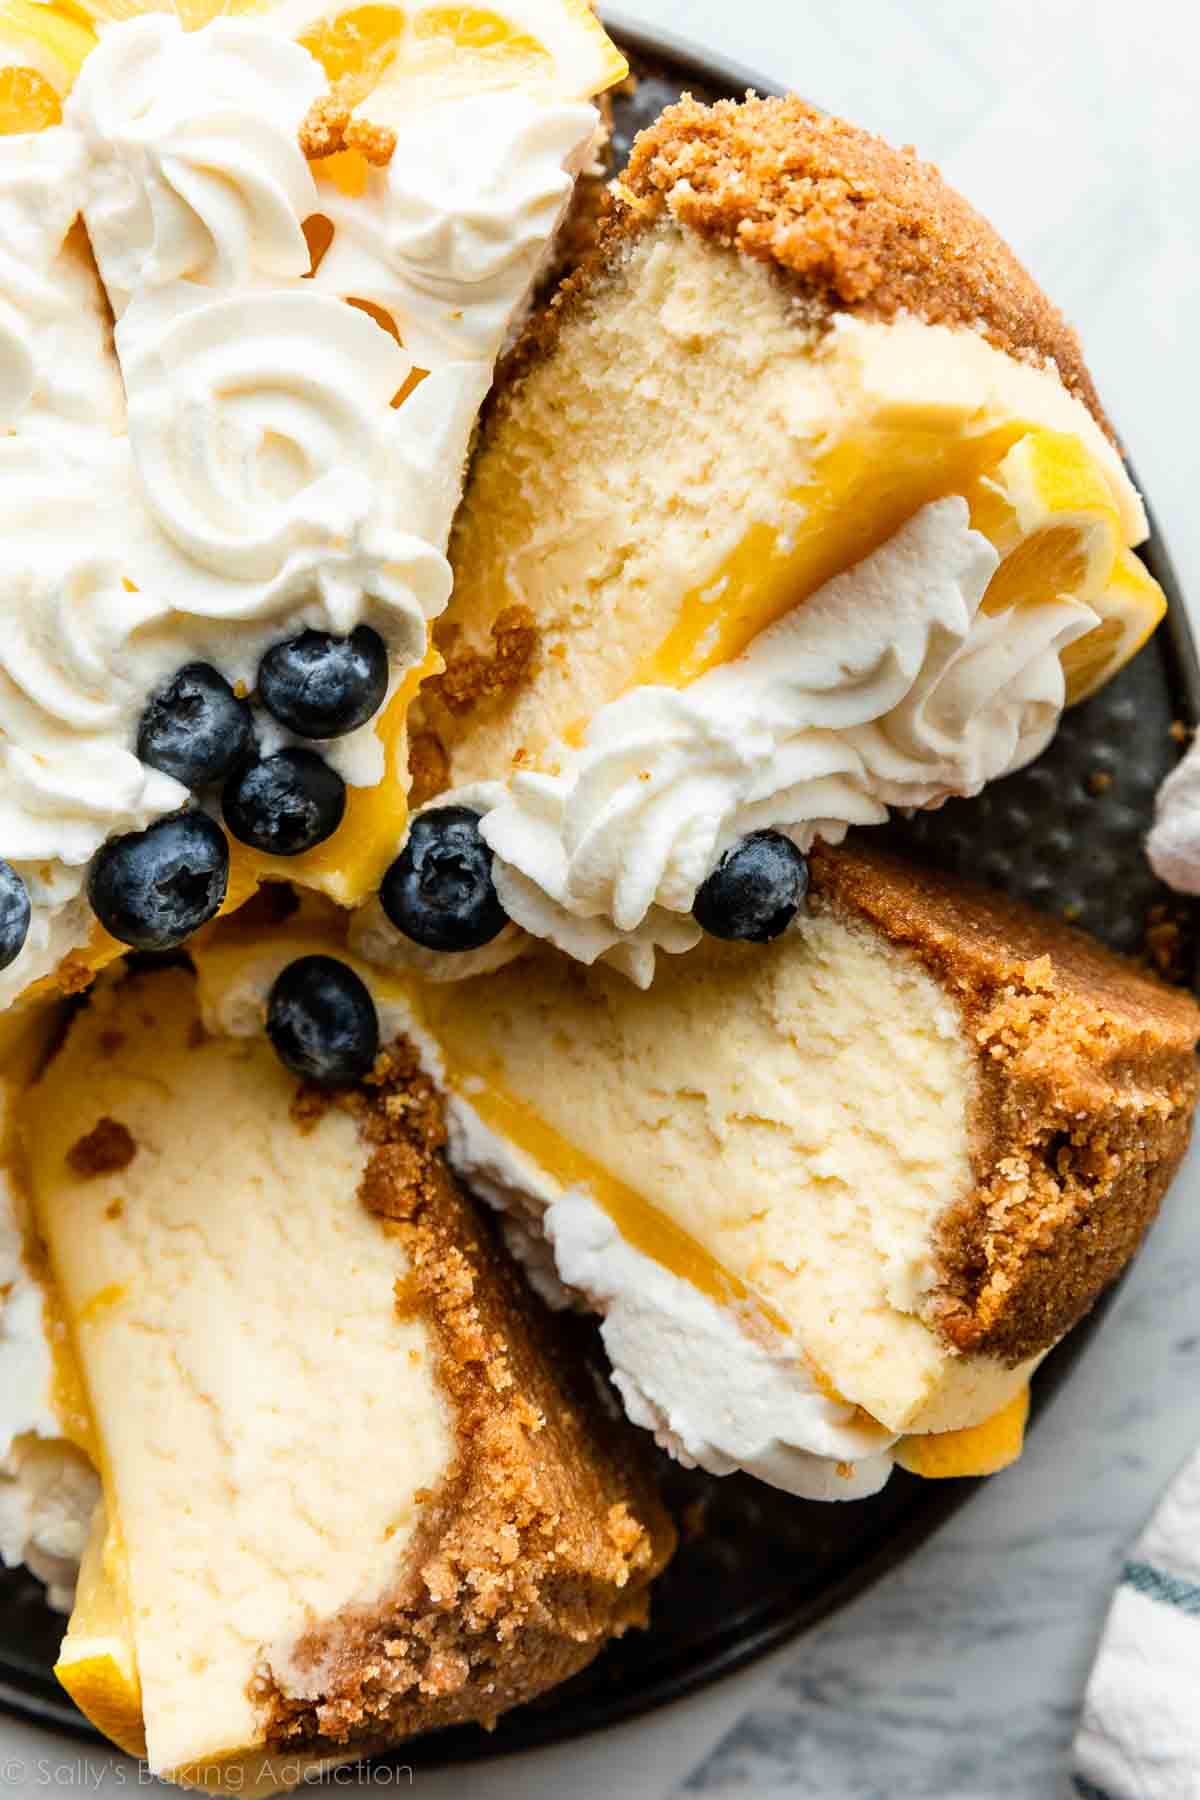
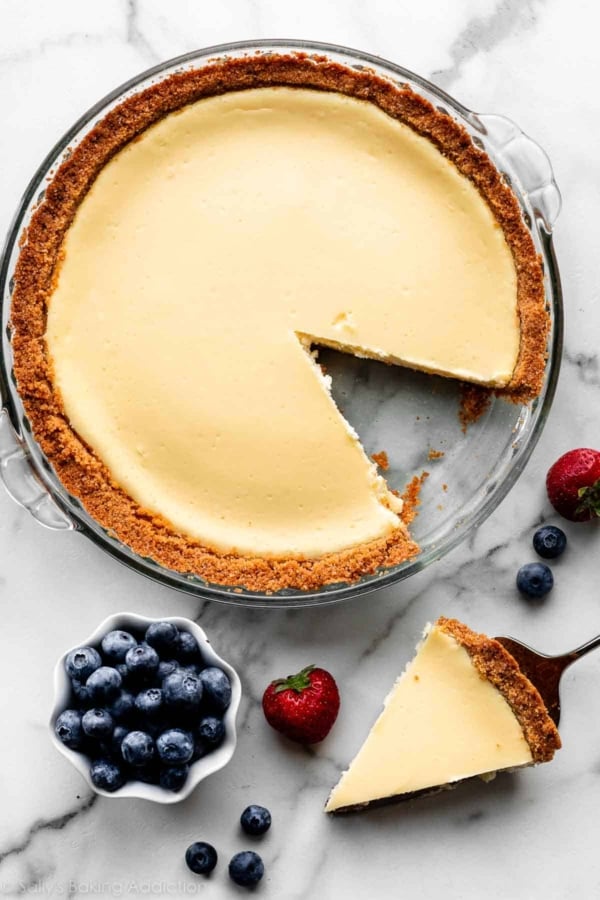
- Graham Cracker Crust: A classic graham cracker crumb crust is the perfect base for this lemon cheesecake. If you can’t find graham crackers where you live, see the post on how to make a graham cracker crust for substitution information.
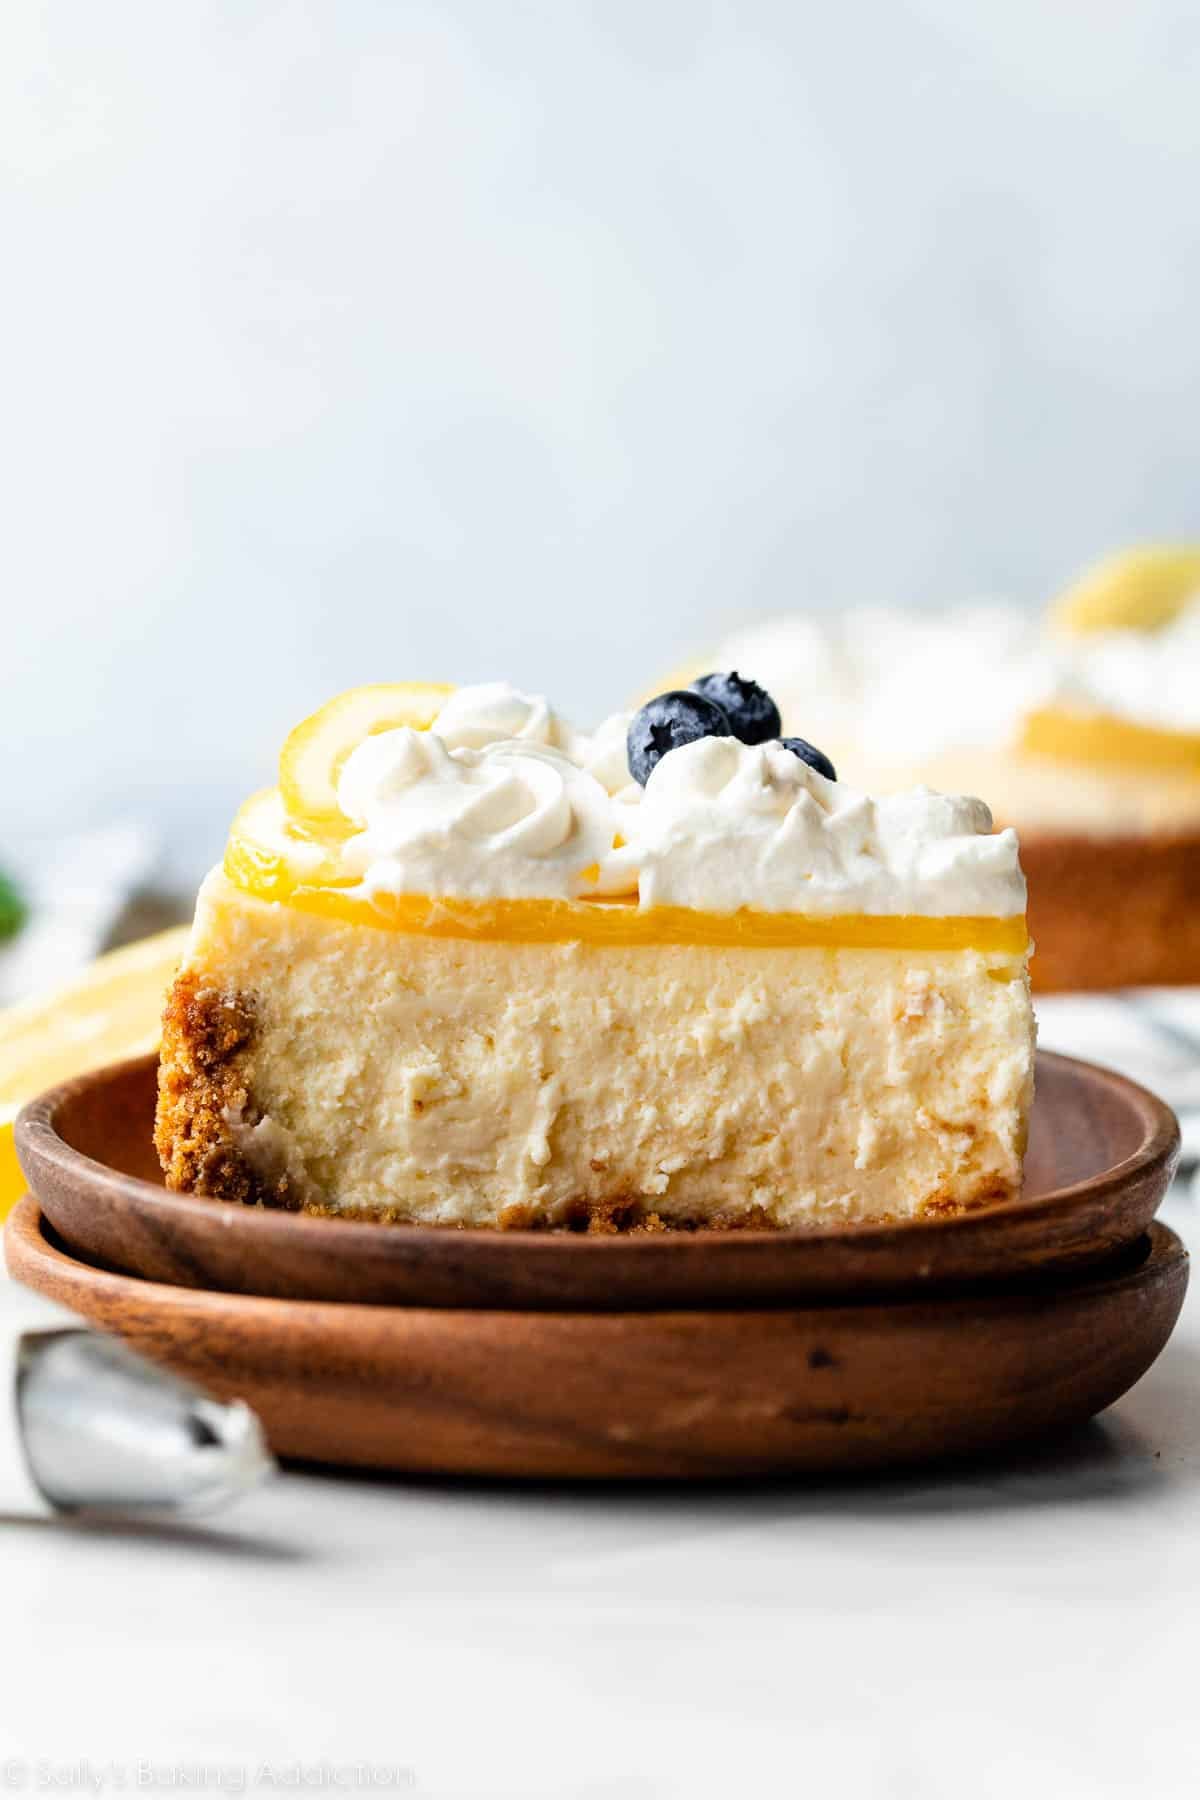
- Lemon Cheesecake Filling: This is a velvety-smooth and creamy filling, not stick-to-the-roof-of-your-mouth-dense like New York-style cheesecake can be.
- Lemon Curd: We’re topping the baked cheesecake with a layer of lemon curd. Have you made it before? It’s surprisingly easy—if you can whisk, you can make lemon curd!
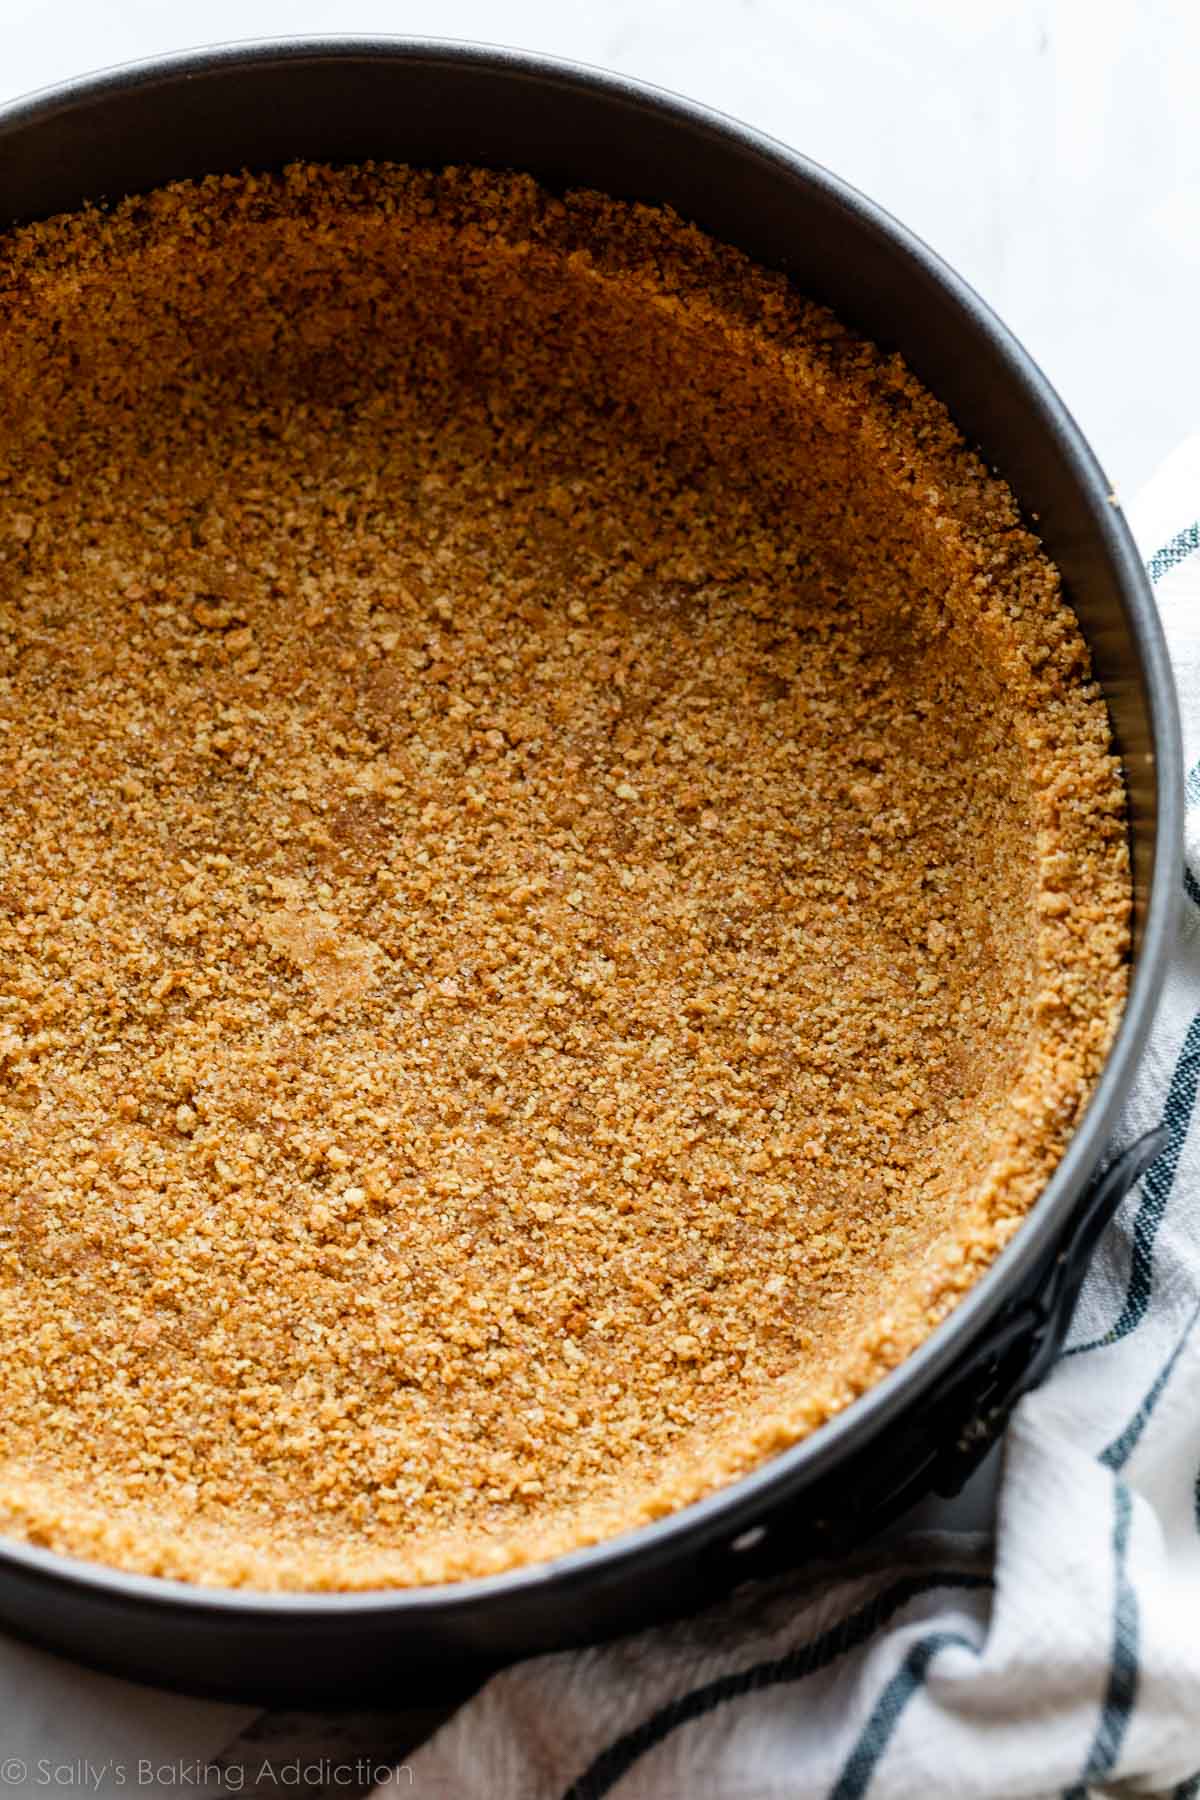
Start With a Crumb Crust
The recipe is basically the same as my traditional graham cracker crust, but with more crumbs and less butter, because cheesecake is so heavy and wet. Note that I use a little more crumbs here than what I use for regular cheesecake because today’s batter is a little thinner. (And therefore you want to start with a slightly drier crust.)
The crust turns out buttery, soft, and crunchy at the same time. Give it a 10-minute head start in the oven before adding the filling.
Make the Filling
Have you ever tried vanilla sugar before? I ask because we’re doing something similar here. Some readers have mentioned they would love more lime flavor in my key lime cheesecake, and so I wanted to amp up the lemon flavor in today’s recipe without actually changing the base recipe.
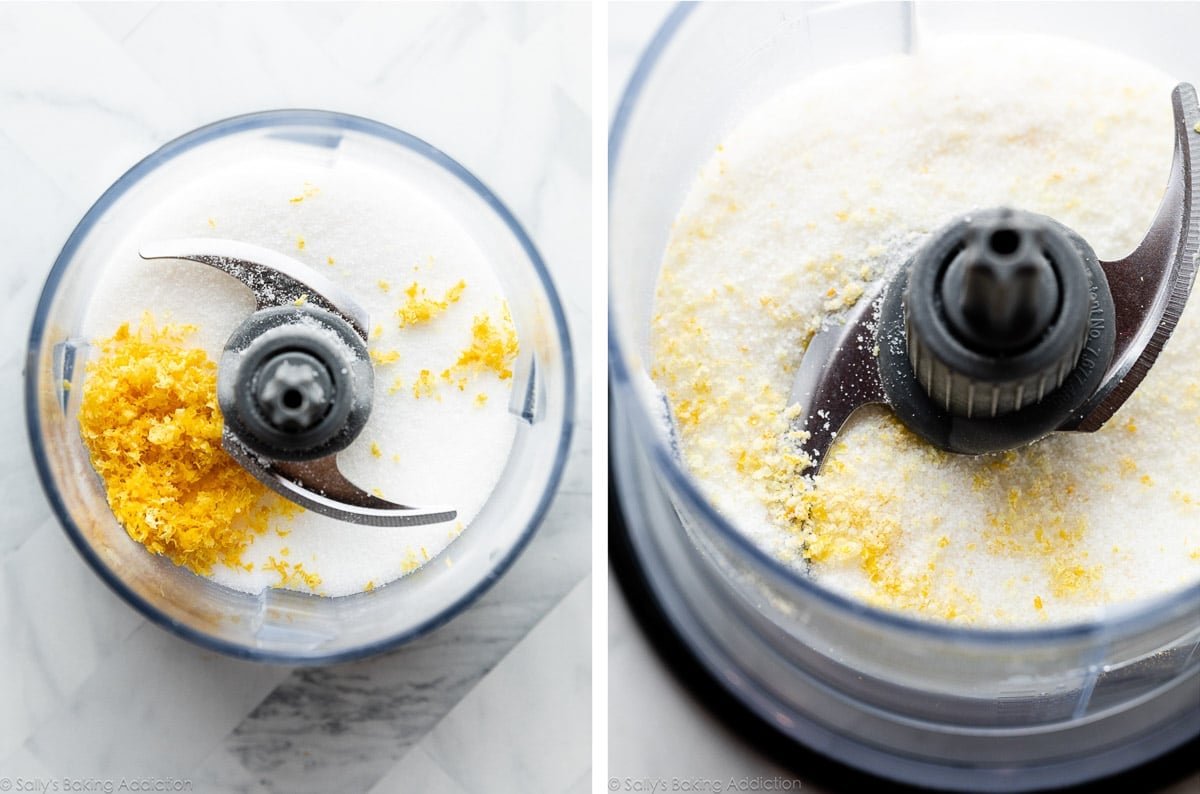
Pulse lemon zest with the sugar you need for the cheesecake filling. This infuses the sugar with lemon flavor. Instead of the lemon zest just sitting in the batter, it’s now broken down in the sugar (which, along with the cream cheese, is the base of the filling). Very easy.
You could really do this with any recipe that calls for granulated sugar and lemon zest. Grab your food processor (something you also need for the graham crackers in the crust!) and pulse away:
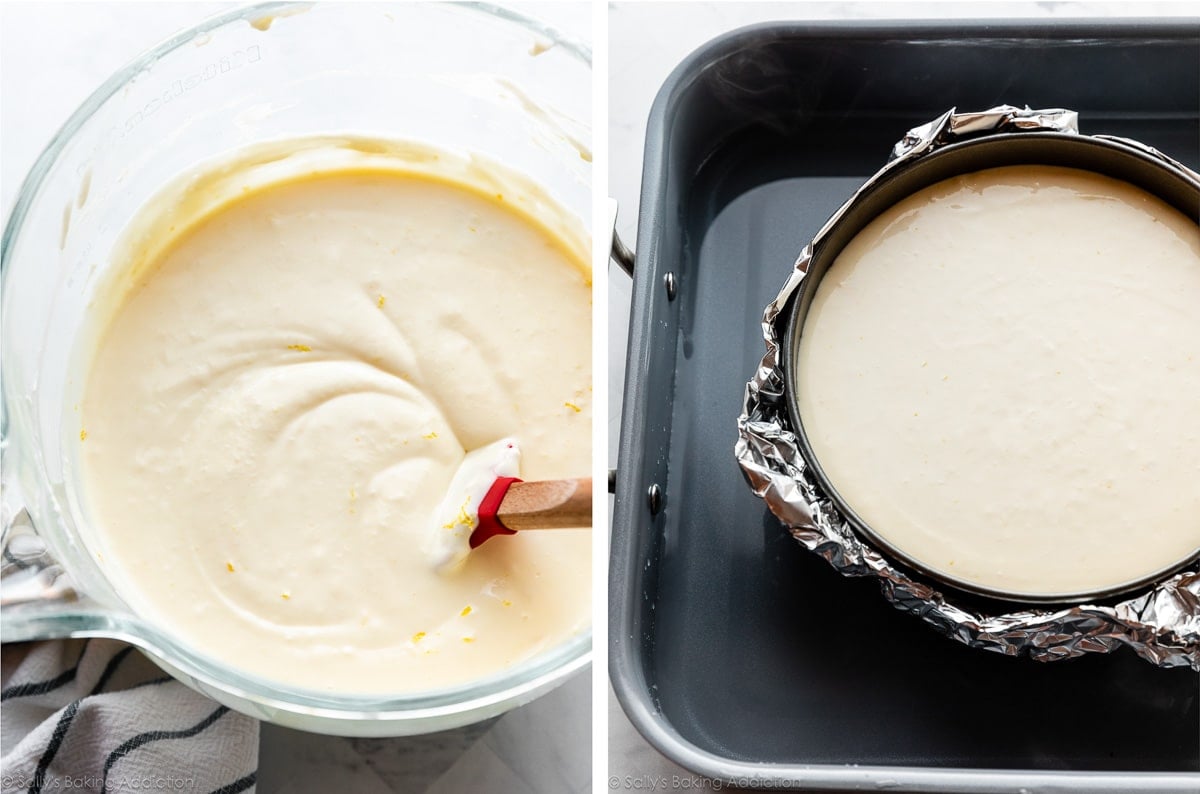
The cheesecake filling ingredients come together in a certain order. Beat the cream cheese and lemon zest-infused sugar together first, and then beat in the rest of the ingredients except for the eggs. Add the eggs one at a time, beating only until combined. Over-beating the eggs incorporates too much air into the batter, which causes the cheesecake to deflate and crack. While a common concern about baking cheesecakes is preventing cracks on the surface, it doesn’t matter as much for this recipe because we’re covering the top with lemon curd. Still, I always bake cheesecake in a water bath.
If you’re interested, I have a deep dive on How to Prevent Cracks in Cheesecake.
Cheesecake Water Bath
I promise a water bath is nothing complicated. All you’re doing is placing the springform pan in a roasting pan, filling it with hot water, and baking. What’s the point, you ask?
I actually have an entire post and video tutorial for How to Make a Cheesecake Water Bath.
You see, cheesecake loves a humid environment. The steam from the hot water will lift the cheesecake up slowly and evenly, reducing the risk of cracks on the surface. Additionally, this slow and even baking method helps prevent the cheesecake from sinking back down as it cools. Taking a few extra minutes to prepare a water bath for this cheesecake recipe is well worth it.
Follow my precise instructions for baking and cooling your cheesecake. I’ve said it before and I’ll say it again: there’s no greater test to your willpower than those few hours waiting for a cheesecake to bake and cool. During this time, you can make the lemon curd topping.
Make the Lemon Curd
I have a complete separate page dedicated to homemade lemon curd, with a video tutorial to help. This is an optional topping, but accentuates the lemon flavor in the dessert. I strongly recommend adding it!
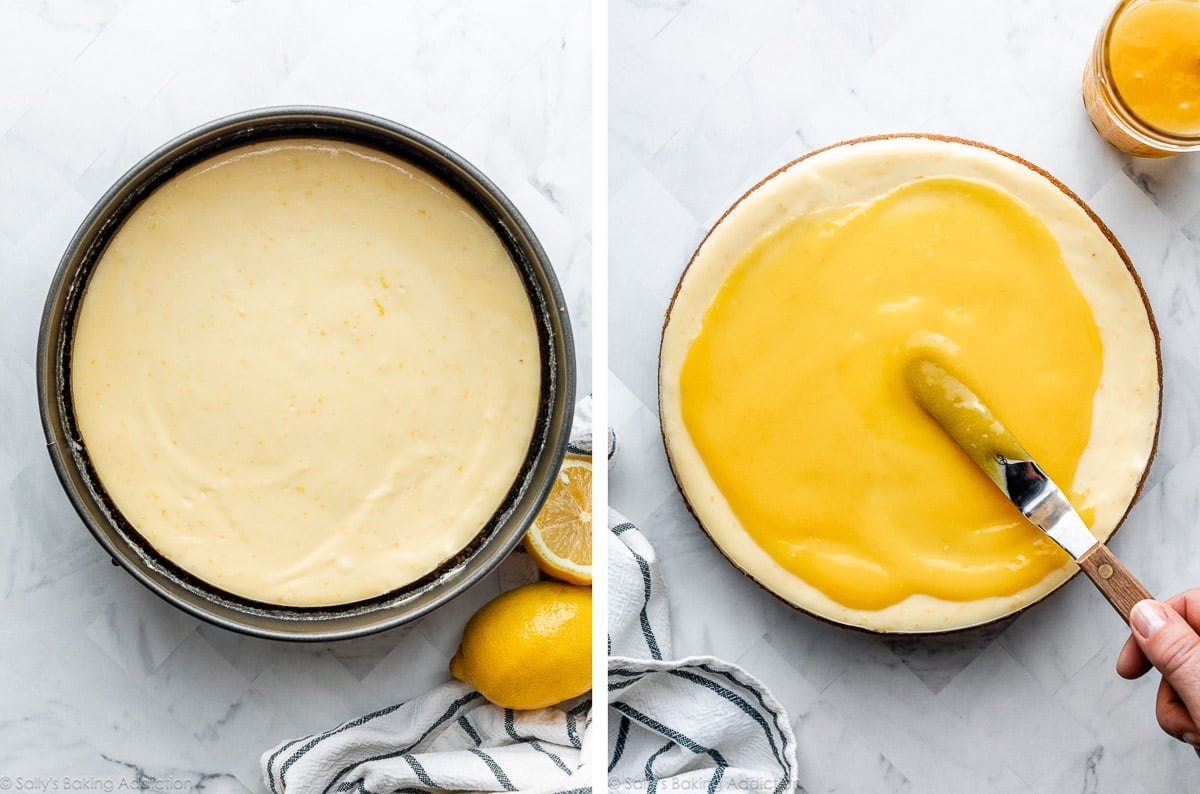
Cool the lemon curd completely. Then spread it on top of the lemon cheesecake after the cheesecake has cooled to room temperature, and before chilling in the refrigerator. You want the lemon curd to chill and set on top of the cheesecake.
After the lemon curd-topped cheesecake has chilled completely, you can garnish and serve.
Optional Garnishes
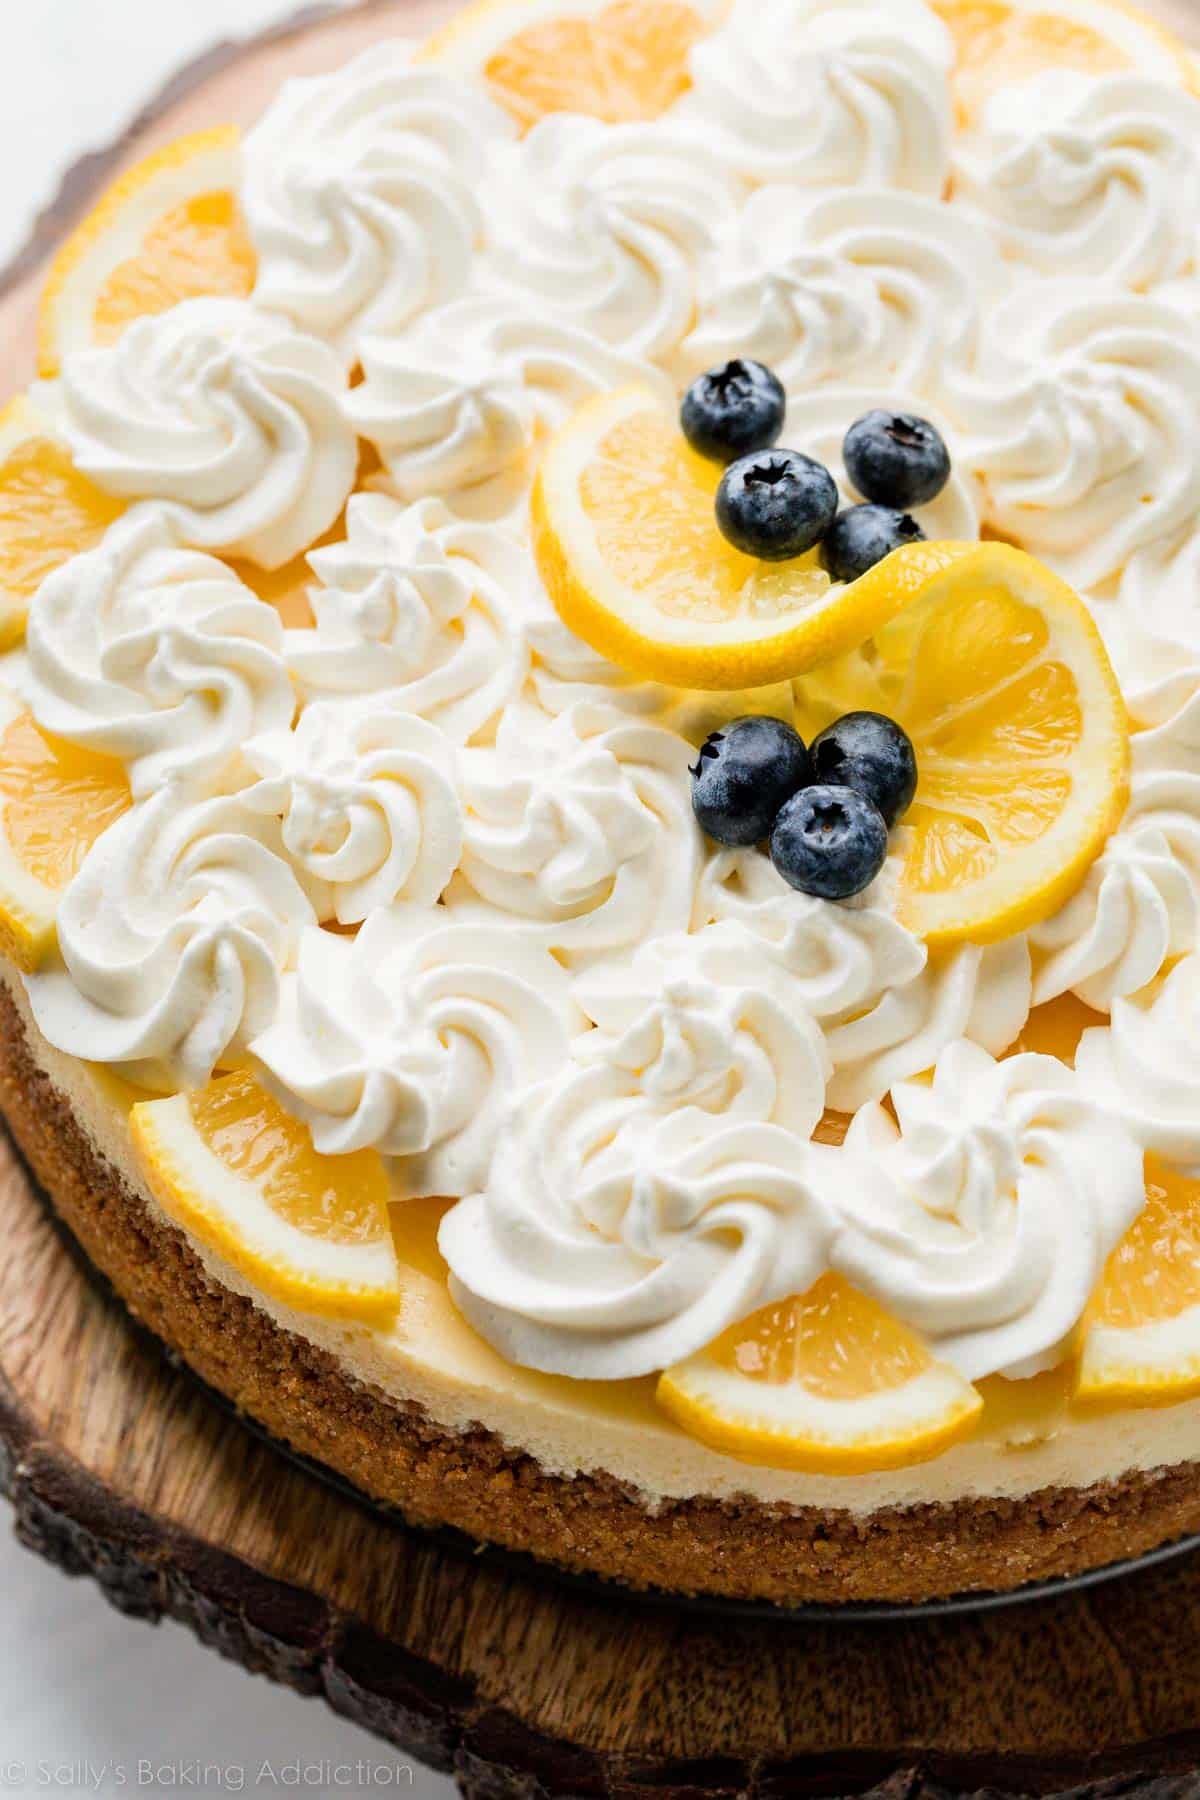
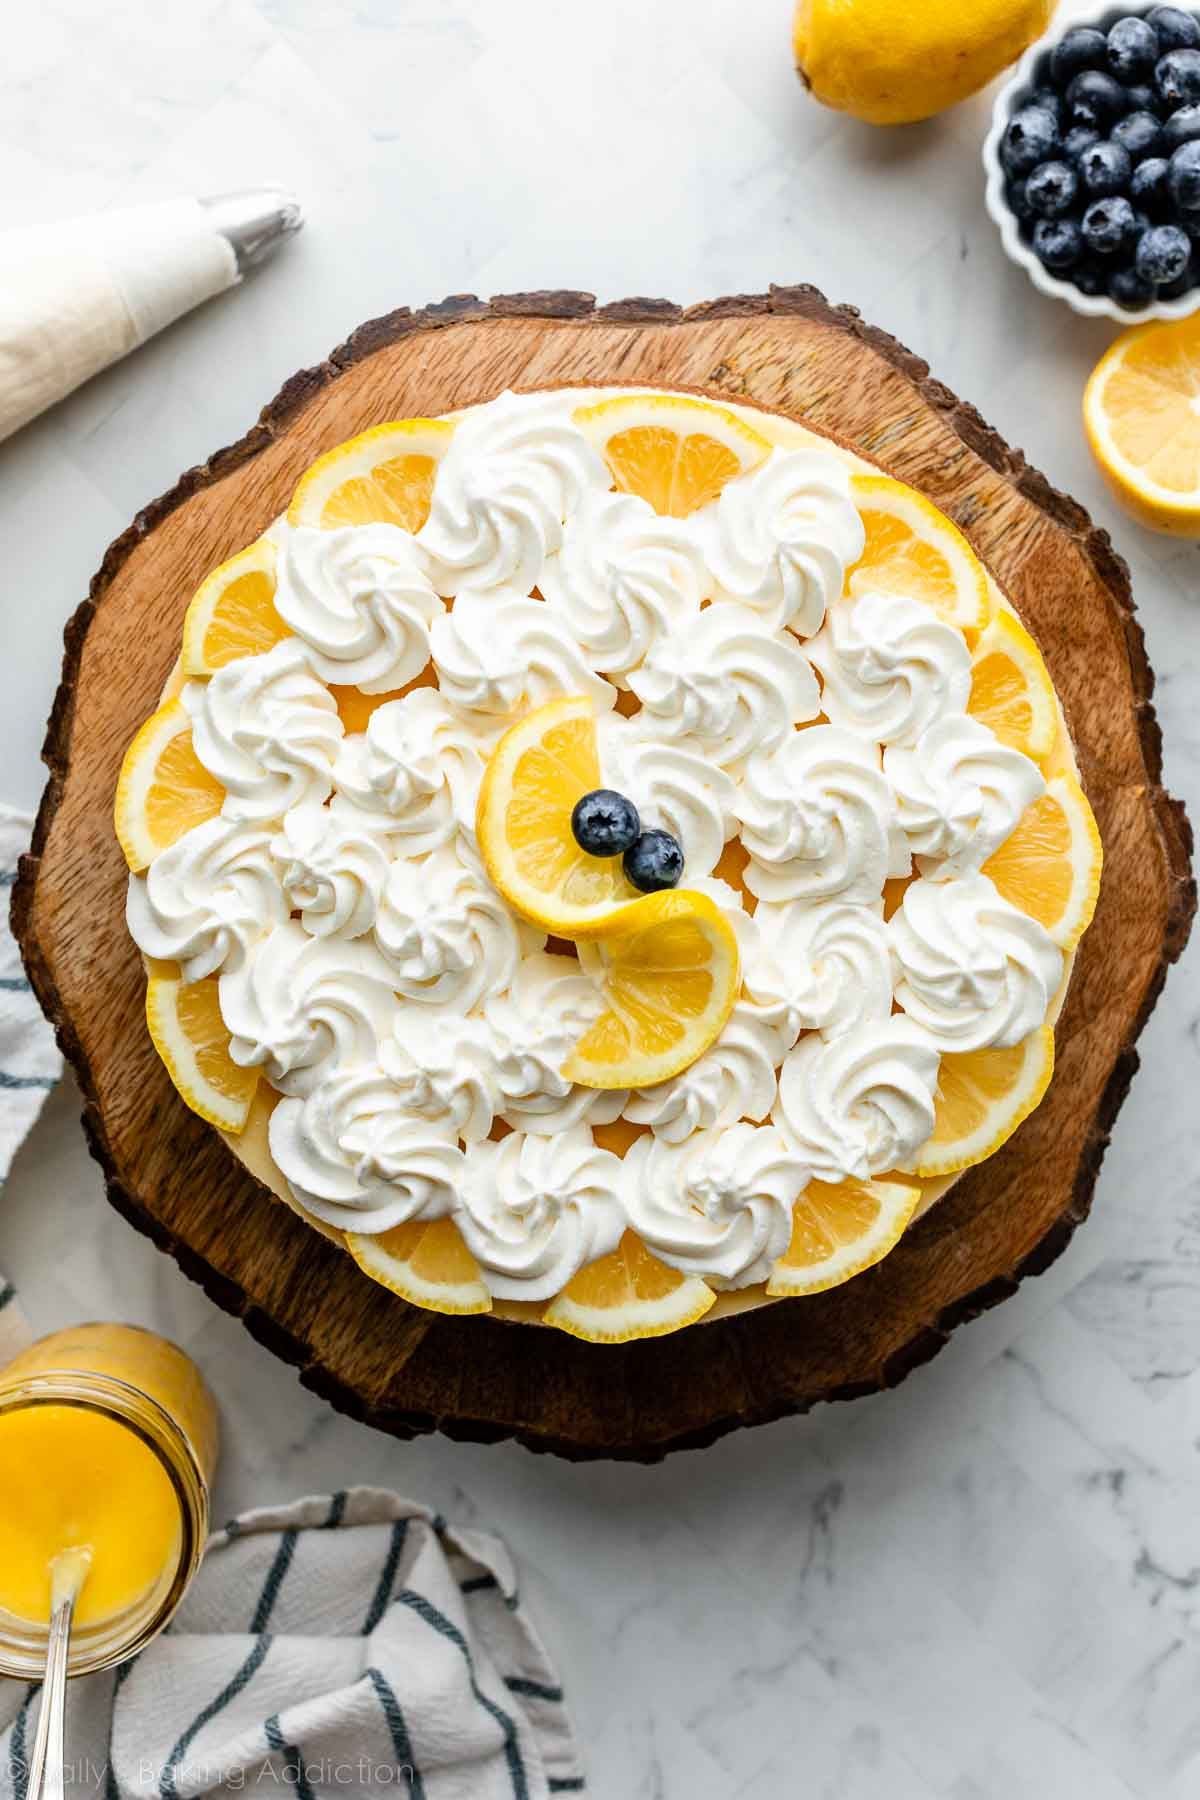
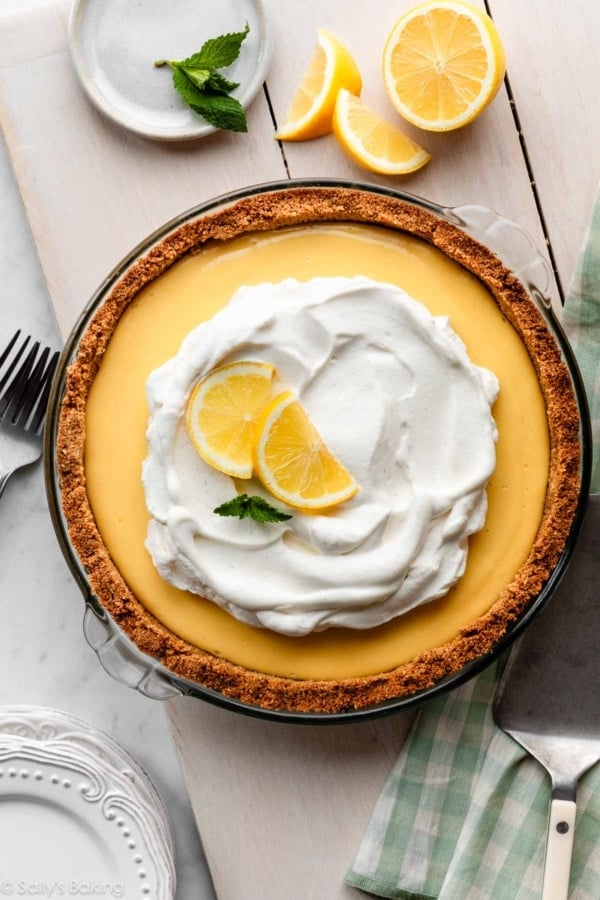
This lemon cheesecake is sublime (or should I say, sublemon—LOL) topped with whipped cream. You could also add fresh lemon slices and berries, and raspberry sauce, blueberry sauce, or strawberry topping would also be delicious.
But extra toppings are completely optional; no one is going to turn down a plain slice of this divine dessert, with its shiny halo of homemade lemon curd.
In the pictured lemon cheesecake, I piped the whipped cream with Wilton 1M piping tip, but you could also just spread it on top like I do with this pumpkin swirl cheesecake. Or you could do a combination of spread and piped whipped cream like I do with this cinnamon swirl cheesecake.

Lemon Cheesecake Success Tips
- Room temperature batter: Make sure all of the cheesecake batter ingredients are at room temperature so the batter remains smooth and combines quickly. Beating cold ingredients will result in a chunky over-beaten batter… hardly the way you want to start!
- Bake the cheesecake: The lemon cheesecake can take anywhere from 55–70 minutes. It’s done when the edges are set. Using an oven mitt, give the pan a light tap. The very center of the cheesecake should still be a bit wobbly.
- Cool the cheesecake: Cheesecake doesn’t like vast temperature changes, so cool it using my guaranteed method: turn off the oven, crack open the door, and let the cheesecake sit in the water bath in the oven for 1 hour. After that, remove it from the water bath and place it on the counter at room temperature to fully cool.
- Chill the cheesecake: After the cheesecake cools to room temperature, spread cooled lemon curd on top and chill it in the refrigerator for at least 4 hours or even overnight.
Lemon Cheesecake Recipe
- Prep Time: 1 hour
- Cook Time: 1 hour
- Total Time: 8 hours (includes chilling)
- Yield: serves 16
- Category: Dessert
- Method: Baking
- Cuisine: American
Description
Savor every sweet-tart taste of the creamiest, dreamiest cheesecake flavored with fresh lemon, nestled between a buttery graham cracker crust and a layer of homemade lemon curd. You can make this lemon cheesecake recipe a day in advance, so the cheesecake has time to set in the refrigerator, and the lemon curd has time to set on top. Add the optional whipped cream and lemon slices or berries right before serving.
Ingredients
Graham Cracker Crust
- 1 and 3/4 cups (210g) graham cracker crumbs (about 14 full-sheet graham crackers)
- 5 Tablespoons (71g) unsalted butter, melted
- 1/4 cup (50g) granulated sugar
Cheesecake
- 1 and 1/4 cups (250g) granulated sugar
- 1 Tablespoon packed lemon zest (about 1 lemon)
- 32 ounces (904g) full-fat brick cream cheese, softened to room temperature
- 1/2 cup (120ml) fresh lemon juice (about 3–4 lemons), at room temperature
- 1/3 cup (80g) sour cream or plain yogurt, at room temperature
- 1 teaspoon pure vanilla extract
- 3 large eggs, at room temperature
Toppings
- 3/4 cup lemon curd (highly recommended)
- homemade whipped cream
- lemon slices and/or fresh berries
Instructions
- Adjust the oven rack to the lower-middle position and preheat oven to 350°F (177°C).
- Make the crust: If you’re starting out with full graham crackers, use a food processor or blender to grind them into fine crumbs. Pour into a medium bowl and stir in sugar until combined, and then stir in the melted butter. Mixture will be sandy. Press firmly into the bottom and slightly up the sides of an ungreased 9-inch springform pan. Pat down until the mixture is no longer crumby/crumbly; you can use the flat bottom of a small measuring cup to help smooth it out if needed. Pre-bake for 10 minutes. Remove from the oven and place the hot pan on a large piece of aluminum foil. The foil will wrap around the pan for the water bath in step 6. Allow crust to slightly cool as you prepare the filling.
- Make the lemon sugar: Place sugar in your food processor or blender. Spoon lemon zest on top. Pulse/blend until the two are blended and the lemon zest is slightly broken down, about 10-12 pulses.
- Continue with the filling: Using a handheld or stand mixer fitted with a paddle attachment, beat the cream cheese and lemon sugar together on medium-high speed in a large bowl until the mixture is smooth and creamy, about 2 minutes. Add the lemon juice, sour cream, and vanilla extract, then beat on medium-high speed until fully combined. On medium speed, add the eggs one at a time, beating after each addition until just blended. After the final egg is incorporated into the batter, stop mixing. To help prevent the cheesecake from deflating and cracking as it cools, avoid over-mixing the batter.
- Pour cheesecake batter into warm crust. Use a rubber spatula or spoon to smooth it into an even layer.
- Prepare the simple water bath (see Note for alternative method): If needed for extra visuals, see my How to Make a Cheesecake Water Bath; the visual guide will assist you in this step. Boil a kettle/pot of water. You need 1 inch of water in your roasting pan for the water bath, so make sure you boil enough. I use an entire kettle of hot water. Place the pan inside of a large roasting pan. Carefully pour the hot water inside of the pan and place in the oven. (Or you can place the roasting pan in the oven first, then pour the hot water in. Whichever is easier for you.)
- Time-saving tip: If topping with lemon curd, which I highly recommend, make the curd on the stove as the cheesecake bakes, so it has time to cool before using in step 10.
- Bake cheesecake for 55–70 minutes or until the center is almost set. (Note: if you notice the cheesecake browning too quickly on top, tent it with aluminum foil halfway through baking.) When it’s done, the center of the cheesecake will slightly wobble if you gently tap the pan. Turn the oven off and open the oven door slightly. Let the cheesecake sit in the oven in the water bath as it cools down for 1 hour.
- Remove from the oven, lift out of the water bath, then cool uncovered cheesecake completely at room temperature.
- Top with lemon curd: After cheesecake has cooled completely at room temperature, spread about 3/4 cup of lemon curd (around 1/2 of the curd recipe) on top, nearing the edge of the cheesecake without spilling over. I use an offset spatula to spread.
- Refrigerate the cheesecake for at least 4 hours or overnight.
- Use a knife to loosen the chilled cheesecake from the rim of the springform pan, then remove the rim. Add more garnishes like whipped cream, lemon slices, and berries, if desired. I used Wilton 1M piping tip for the pictured whipped cream. Using a clean sharp knife, cut into slices for serving. For neat slices, wipe the knife clean and dip into warm water between each slice.
- Cover and store leftover cheesecake in the refrigerator for up to 5 days.
Notes
- Make Ahead Instructions: This cheesecake can be made the day before. It has to chill for quite some time before serving. See step 11. If using, you can make, cover, and refrigerate the lemon curd up to 10 days in advance.
- Freezing Instructions: Another way to make this cheesecake ahead of time is to freeze it, and for best results, I recommend freezing without the lemon curd topping and just topping the cheesecake with the curd before serving. Cool the cheesecake at room temperature. To freeze with the springform pan base: Remove the outer rim from the springform pan. Wrap the cheesecake with the bottom of the pan with a few layers of plastic wrap, then a final layer of aluminum foil. To freeze without the springform pan base: After the cheesecake has completely cooled, run a sharp knife underneath the crust to release it from the bottom of the pan. Carefully slide it onto a parchment paper lined piece of cardboard or use a plate. Wrap it all in a few layers of plastic wrap, then a final layer of aluminum foil. With or without the springform pan base, you can freeze the cheesecake for up to 3 months. Thaw overnight in the refrigerator before serving. Add toppings when serving cheesecake.
- Special Tools (affiliate links): Citrus Juicer | Citrus Zester | Food Processor | Electric Mixer (Handheld or Stand Mixer) | 9-inch Springform Pan | Large Roasting Pan for water bath | Offset Spatula | Piping Bag (Disposable or Reusable) and Wilton 1M Piping Tip (if piping whipped cream)
- Toppings: In addition to the lemon curd, my favorite toppings for this cheesecake are whipped cream, fresh lemon slices, and fresh blueberries. Raspberry sauce, blueberry sauce, or strawberry topping would also be delicious.
- Alternative Water Bath Method: If you do not own a large roasting pan or are nervous about your springform pan leaking, you can bake the cheesecake directly on the oven rack, above a large pan of hot water on the rack below. Boil a kettle or pot of water. You need 1 inch of water in your pan for the water bath, so make sure you boil enough. Place a large metal baking or roasting pan (I usually use a 9×13-inch baking pan—do not use glass) on the bottom rack of the preheated oven. Pour boiling water into pan, about 1 inch deep. Immediately place the cheesecake on the center rack. Close oven to trap the steam inside. This alternative water bath method adds steam to the oven without having the cheesecake sit in the water, so no need to wrap the springform pan in aluminum foil. See How to Make a Cheesecake Water Bath for more information.
- Room Temperature Ingredients: Bring all cold ingredients to room temperature before beginning. Room temperature ingredients combine quickly and evenly, so you won’t risk over-mixing. Also, beating cold ingredients together will result in a chunky cheesecake batter, hardly the way you want to begin!
- Can I use Meyer lemons? Yes. No other changes to the recipe.
- Can I use limes? Yes. Or try my key lime cheesecake.
- Can I make mini lemon cheesecakes? Yes. For about 30 mini cheesecakes in a muffin pan, use the crust and filling above and follow the same baking instructions as these mini margarita cheesecakes. Or, for a smaller batch, follow the margarita cheesecakes recipe and swap the tequila, triple sec, and lime juice with 1/4 cup (60ml) lemon juice and the lime zest for lemon zest. Also, replace the tequila and lime juice in the whipped cream with lemon juice. Feel free to add lemon curd on top of the cooled cheesecakes before chilling.
- Non-US Readers: Don’t have graham crackers where you live? Use 200g ground digestive biscuit crumbs (about 2 cups; 13–14 biscuits), 1/3 cup (67g) granulated sugar, and 6 Tablespoons (85g) melted butter. Pre-bake the crust for a bit longer, about 12–14 minutes. And from what I understand, spreadable cream cheese sold in a tub in countries outside of the US is a little different from the spreadable cream cheese in the US, so may be OK to use in this recipe. I have no experience with it, but some non-US readers have reported success with straining off excess liquid before using. If you try it, let us know how it turns out!


Reader Comments and Reviews
My lemon curd isn’t yellow like yours. Is that my eggs?
Also can I use a metal whisk for the curd (I don’t have a silicon one) if I’m using a glass bowl.
Thank you.
Hi Michelle, The color comes mostly from the egg yolks. Did yours seem pale? For an extra bright curd, you could try pasture raised eggs instead. We do recommend using a silicone whisk if possible, as metal whisks can sometimes still leave a metallic taste in the lemon curd.
I was wondering if I could make this in a 6 inch springform pan instead of 9.
Would I half the recipe?
This was absolutely fabulous.
Hi Leesa! You can try halving all of the ingredients for a smaller 6 inch cheesecake, but we’re unsure of the exact bake time. Let us know if you try it!
My Mother loves anything lemon. I want to make this for Mother’s Day. I would prefer not to transport on the base of my springform. Having made this recipe, I don’t think I can remove the cheesecake from the pan without breaking the cake. Will I mess up the recipe if I line the base with parchment paper?
Hi Elizabeth, you can add a round of parchment paper to the bottom of the pan to make transferring a bit easier. Hope it’s a hit!
Absolutely devine! Sally, I can’t tell you how much joy your wonderful recipes bring to my life. I made this lemon cheesecake (the the glorious lemon curd) Alexa, define aesthetic for my roommate’s birthday and she was just ecstatic. You do a wonderful job of explaining why each step is taken which helps me become a more thoughtful and knowledgeable baker. You are the best!
We’re so glad you enjoyed this recipe, Jack!
I forget to mention that I pulsed the zest and sugar together for both the cake and the curd. The lemon curd turned out perfectly smooth and looked like yellow glass on the cheesecake. A beautiful presentation. Thank you.
Your site is my “go to” for baking recipes. This cheesecake is over the top amazing. The texture is unexpected. So light and airy. When my husband took his first bite he moaned with pleasure. Thank you.
I made this for my husband’s birthday this weekend, and it is fantastic! I love that it’s not quite as heavy as a New York cheesecake.
Hi Sally!
I’ve made many of your recipes (and loved them all), but this recipe will be my first attempt at a cheesecake. When you say “wrap aluminum foil around the springform pan” does that mean just the sides, or the sides and bottom of the pan? Also, does the pan sit directly in the water bath?
Thank you!
Hi Sophie! I’m glad to help. Yes, wrap the sides and bottom in aluminum foil. Yes, the wrapped cheesecake will sit in the water in the oven. Good questions!
I did it! It was only my 2nd cheesecake attempt but Sally, you walked me through it and it came out perfect curd and all!
We’re so glad you had success with this recipe, Leah!
Hello!
Would you know baking time difference if I were to make this in a 10 inch springform pan instead of 9?
Thank you!
Hi Angela, the bake time will be a little shorter because the cheesecake will be thinner. Check it early to see if the center is nearly set. When it’s done, the center of the cheesecake will slightly wobble if you gently tap the pan.
This recipe taste so good.
This was so delicious!
I just made this for Easter and it was a huge hit! It was so delicious, and the lemon curd was fantastic as well. The cheesecake was smooth and the lemon flavor was perfect I’ll definitely be making this one again!
My daughter made this for my Birthday, it sure made turning “60” perfect! There was not a crumb leftover, I give this one 10 stars ⭐️
Made this for Easter – perfection!! The curd is the best I’ve ever had, and the whipped cream is a wonderful complement to the cheesecake. Served with extra curd on the side (bc it’s that amazing). Like all of Sally’s recipes, this one is a keeper! Thank yo
Oh my goodness! This was so good. The best cheesecake I’ve had. The lemony flavor was so fresh but not overpowering. This will be my go to cheesecake.
Our Easter dinner was complete with this amazing dessert! The family raved.
I asked my husband to make this recipe for my birthday. He followed the recipe to the letter, water bath and all. It was absolutely divine. Everyone raved about it. The lemon curd was such a success.
Hi Sally,
This lemon cheesecake looks divine! I have made many cheesecakes but am unable to remove the cakes from the bottom of the pan, especially because there is a lip which prevents the cheesecake from sliding off easily. Any recommendations on how to do this so the cake removes easily without falling apart. Thank you.
Brenda
Hi Brenda! Cheesecake is usually served right on the bottom of the springform pan – so convenient because the sides come away! You can see the bottom of our pan in the photos above.
Hi Sally if I wanted to make 2 of these cheesecakes can I double this recipe and bake them together? Thank you ☺️
Hi Kim, for best results (and to prevent over or under mixing), we recommend making two separate batches rather than doubling. You can bake them at the same time, so long as they can both fit on the same oven rack without touching one another. Do not bake on separate racks. Hope you enjoy the cheesecake!
Hi Team, Can you please tell me how to refrigerate the cheesecake? I am worried about it not being air tight and developing a layer on the cheesecake.
Hi Casey, I usually don’t cover the cheesecake when refrigerating it in step 11. However, you certainly can and aluminum foil is handy for that.
Can I reduce the amount of cream cheese, 1KG seems like a lot and I wanted to make a smaller cake
Hi Saamiah, you may try halving all of the ingredients for a smaller 6 inch cheesecake. Be sure to halve all of the ingredients, not just the cream cheese. We’re unsure of the exact bake time.
Thank you! Ill definitely be trying a smaller version of this cake! Just one last query, if I’m halving all the ingredients, should I use 1 egg or 2?
We would use one and a half! Our general rule for halving an egg is to crack it open, beat the yolk and white together with a fork, measure the volume (should be a few Tbsp), then use half.
Hello
I wanted to ask if I can use kiri block cheese? Here in the middle east, we have kiri block cheese. Only spreadable cheese is available for philidelphia.
Also, the blueberry or strawberry sauce topping can be used in place of lemon curd? Or in addition to it
Hi Saamiah, we have not personally baked with kiri block cheese before, so we’re unsure exactly how it will work in this cheesecake. But, from what we understand, spreadable cream cheese sold in a tub in countries outside of the US is a little different from the spreadable cream cheese in the US. It’s thicker, sturdier, and more solid and should be OK to make this cheesecake. We have no experience with it, but this is what we’ve heard from other non-US readers. And you can use the blueberry or strawberry sauce right on top of the curd, or feel free to omit the lemon curd if desired. Let us know what you try!
Though this recipe with the homemade lemon curd is a bit labor intensive, it is ABSOLUTELY WORTH IT! My chef boyfriend gave it a double “this is so good” approval, and my teenager and I loved every bite. I topped it with fresh raspberries as I like the lemon/raspberry combo in anything and it was delectable! The cheesecake was smooth and creamy and the lemon curd was super tasty. I will definitely make it again!
This cheesecake was absolutely delicious. My mom enjoyed it and asked for two to be made. That’s how I knew it was a keeper. I made it with your blueberry sauce.
This was a lovely cheesecake! The tart to rich ratio was perfect. Recipe was straightforward and easy to follow!
What temperature do you use to bake the cheesecake? I have a recipe that says to bake at 200 degrees for 1 hour. Cheesecake no where near done in 1 hour at this tempature.
Hi Donna! See the detailed recipe above. We bake this cheesecake at 350°F (177°C).
Would this be ok to refrigerate for 3 days and serve on the third day if I add the curd last minute?
Hi Marisa, that should be OK, though the crust may lose a bit of its crispness. Let us know if you give it a try!
Love, love, love this recipe. Thank you for the recipe and easy to follow steps. It was my first attempt at a cheesecake and it came out absolutely perfect! Plus the compliments received were awesome!
Hi Sally! My husband requested a cheesecake with raspberry for his birthday. Do you think I could use your recent recipe for raspberry cake filling as a topping instead of the lemon curd?
Absolutely! Sounds like the perfect match.