

Chill out with a slice of ice cream cake! This crowd-pleasing, totally no-bake Dairy Queen-inspired treat combines two of your favorite ice cream flavors, plus layers of crunchy Oreo cookies, homemade hot fudge, and whipped cream. Because this cake needs to freeze for at least 12 hours prior to serving, it’s a great make-ahead dessert for celebrations.
One reader, April, commented: “I’ve made ice cream cakes several times before. But the hot fudge and Oreo layer in this recipe takes it to the next level! This will be the staple recipe used in our house from here on out. ★★★★★“
One reader, Stacie, commented: “This was a big hit for my daughter’s birthday party! We’ll definitely be making it again. The fudge/Oreo layer in the middle is everything! ★★★★★“
Need a celebratory ice cream dessert? Obviously it’s easiest to just pick up a ready-made ice cream cake from the grocery store or ice cream shop, but if you’ve never made an ice cream cake before, I encourage you to try it at least once! And if you love it, be sure to check out these copycat desserts to make at home for more ideas!
It requires a few back-and-forth trips between the freezer and counter, but other than that, it’s surprisingly easy—absolutely no baking and very few tools and ingredients needed.
And just wait for the moment the jaws drop open when you tell your guests you made this yourself! (And they’ll pretty much remain open until their plates are licked clean. I know this from experience.)
This Homemade Ice Cream Cake Is:
- A fun frozen dessert perfect for a summertime celebration
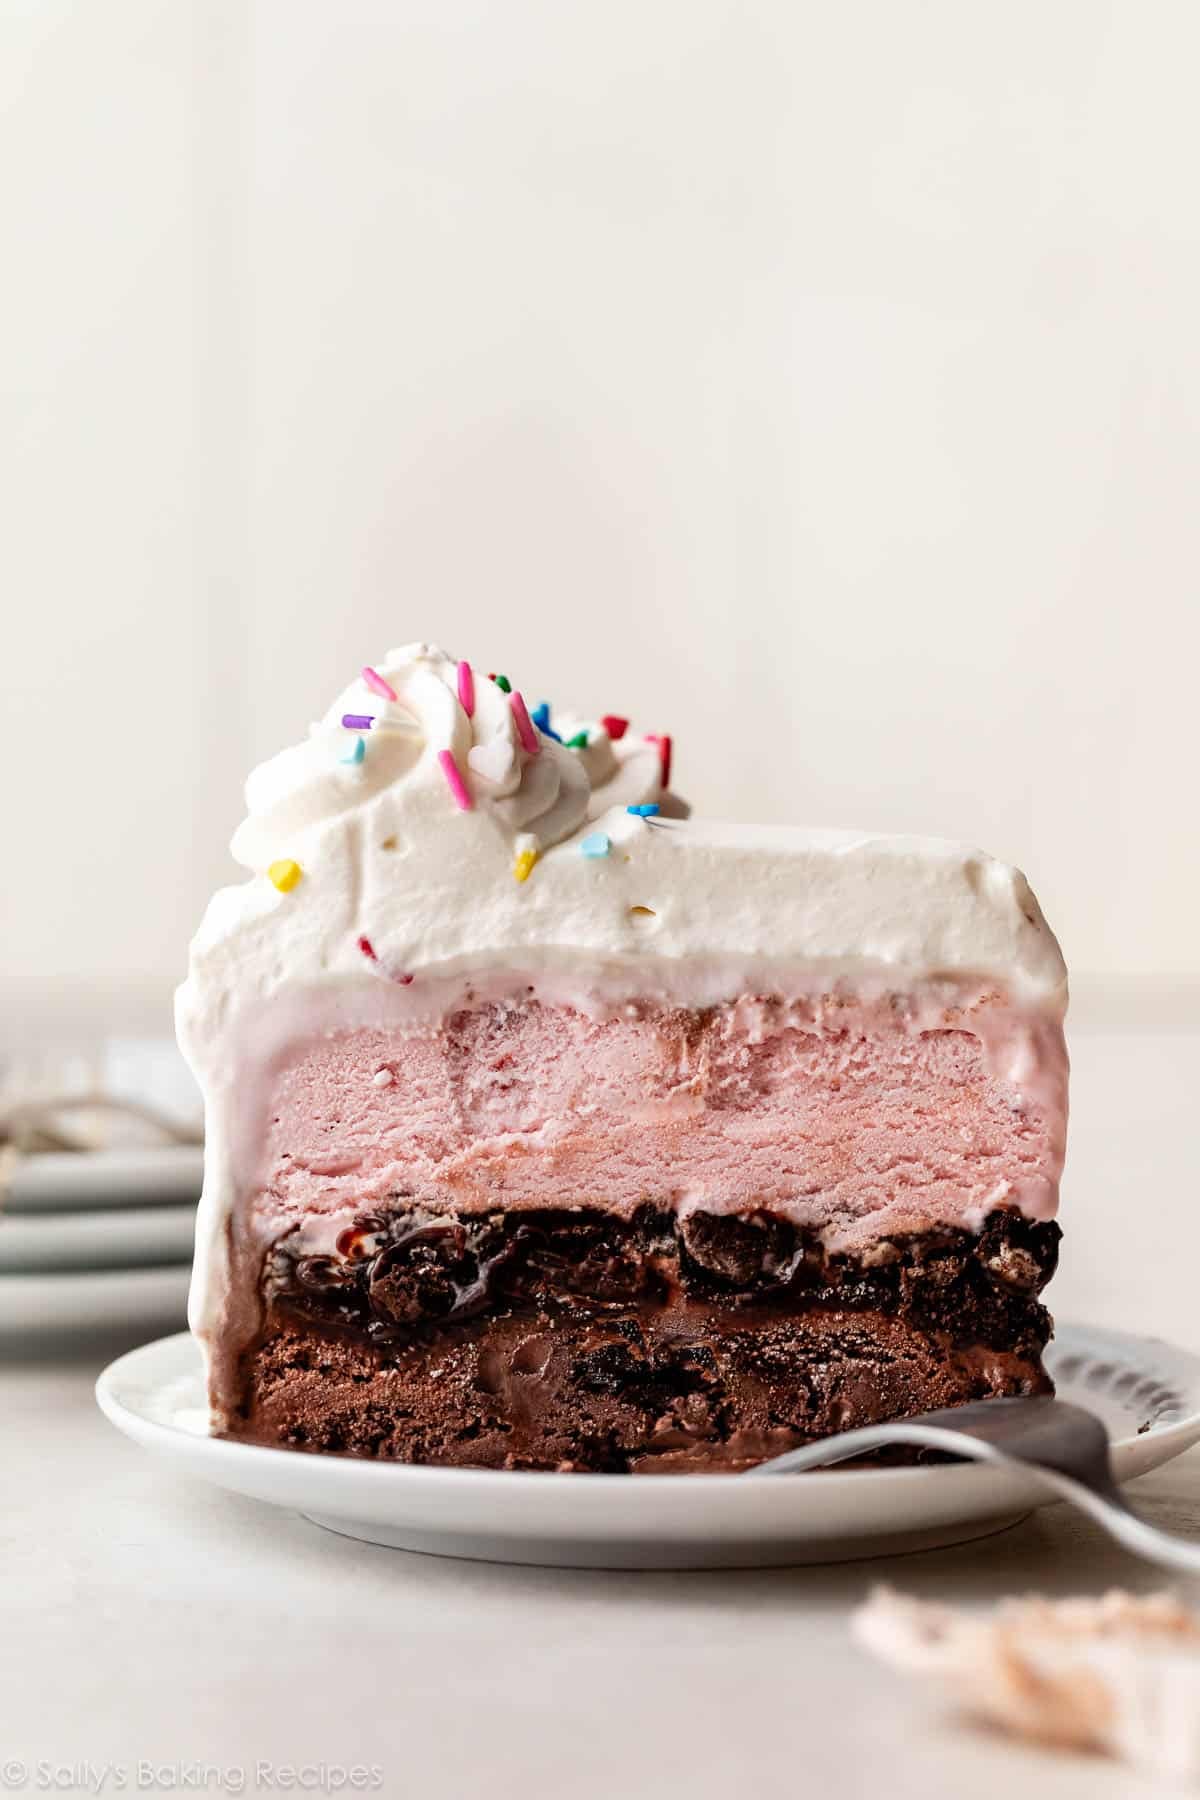
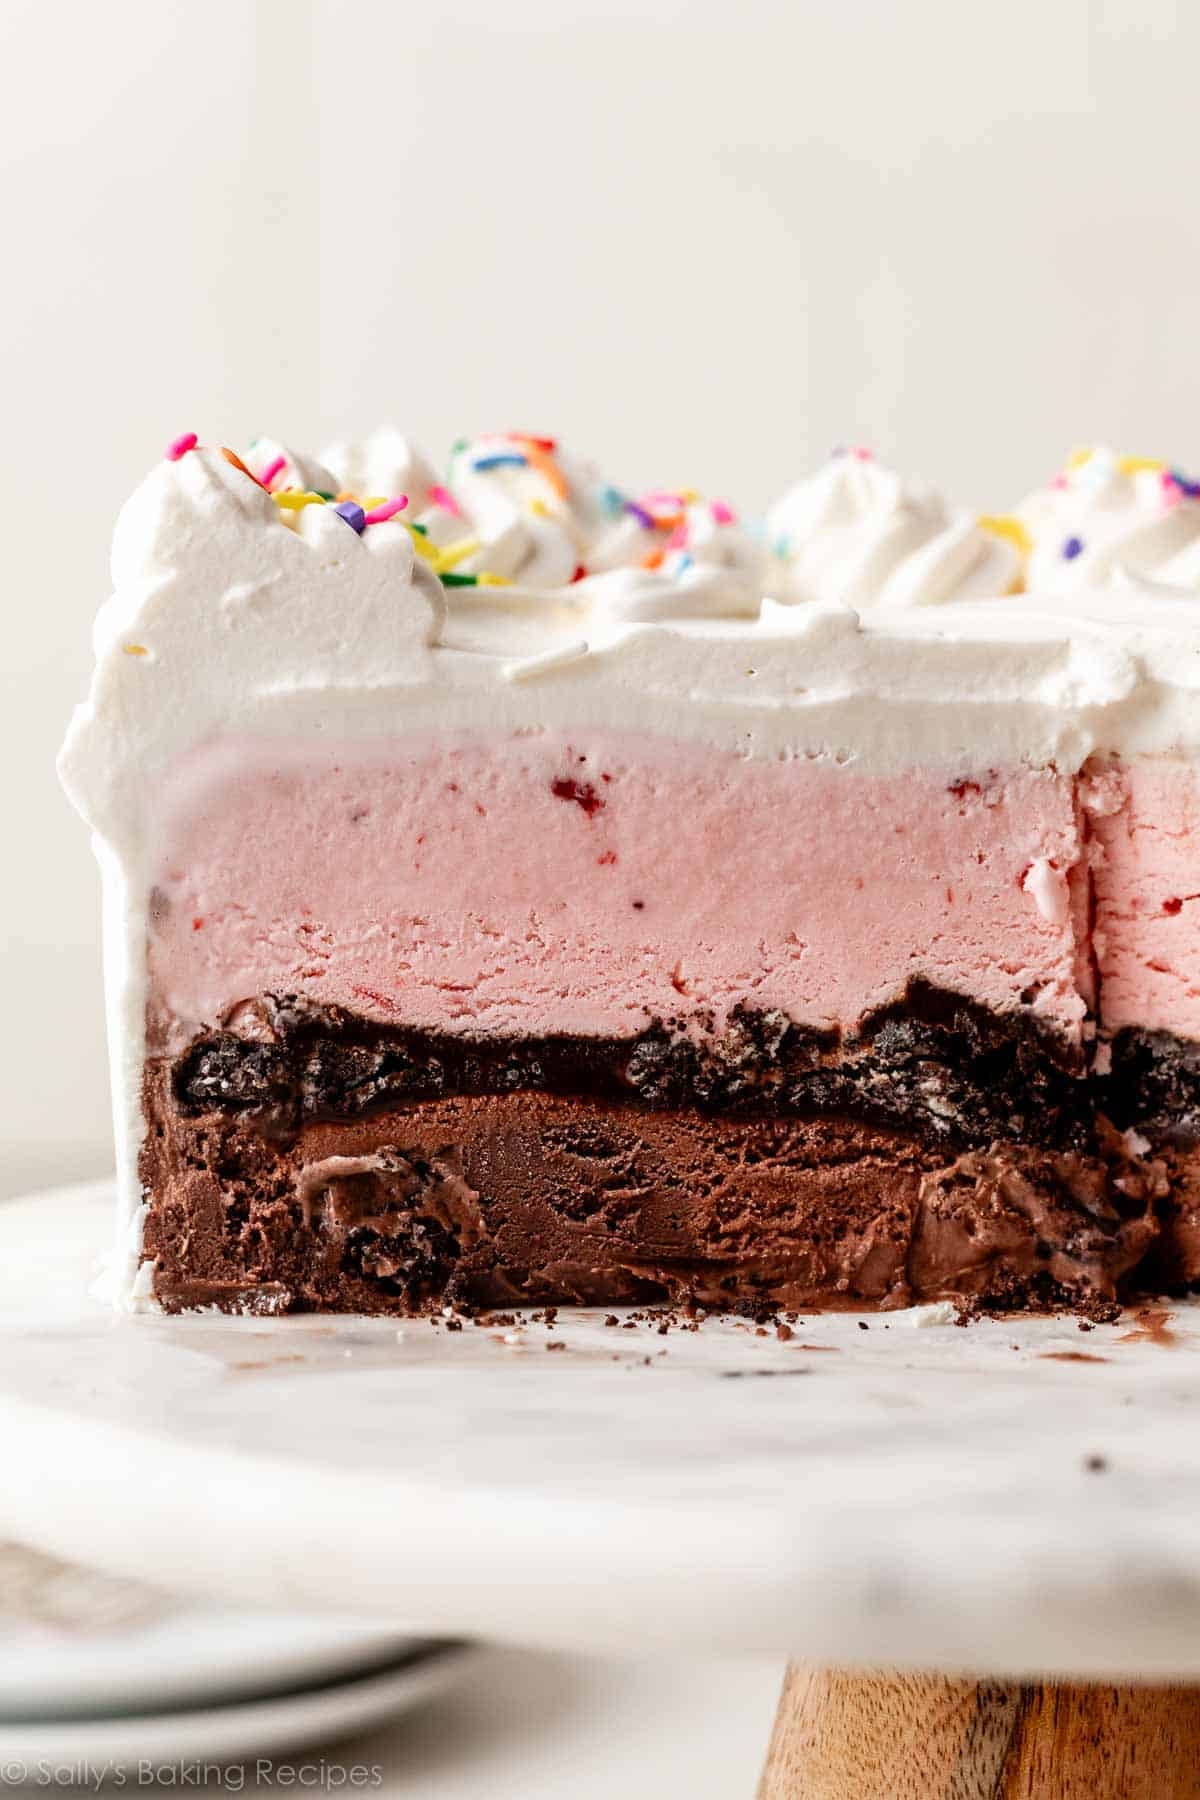
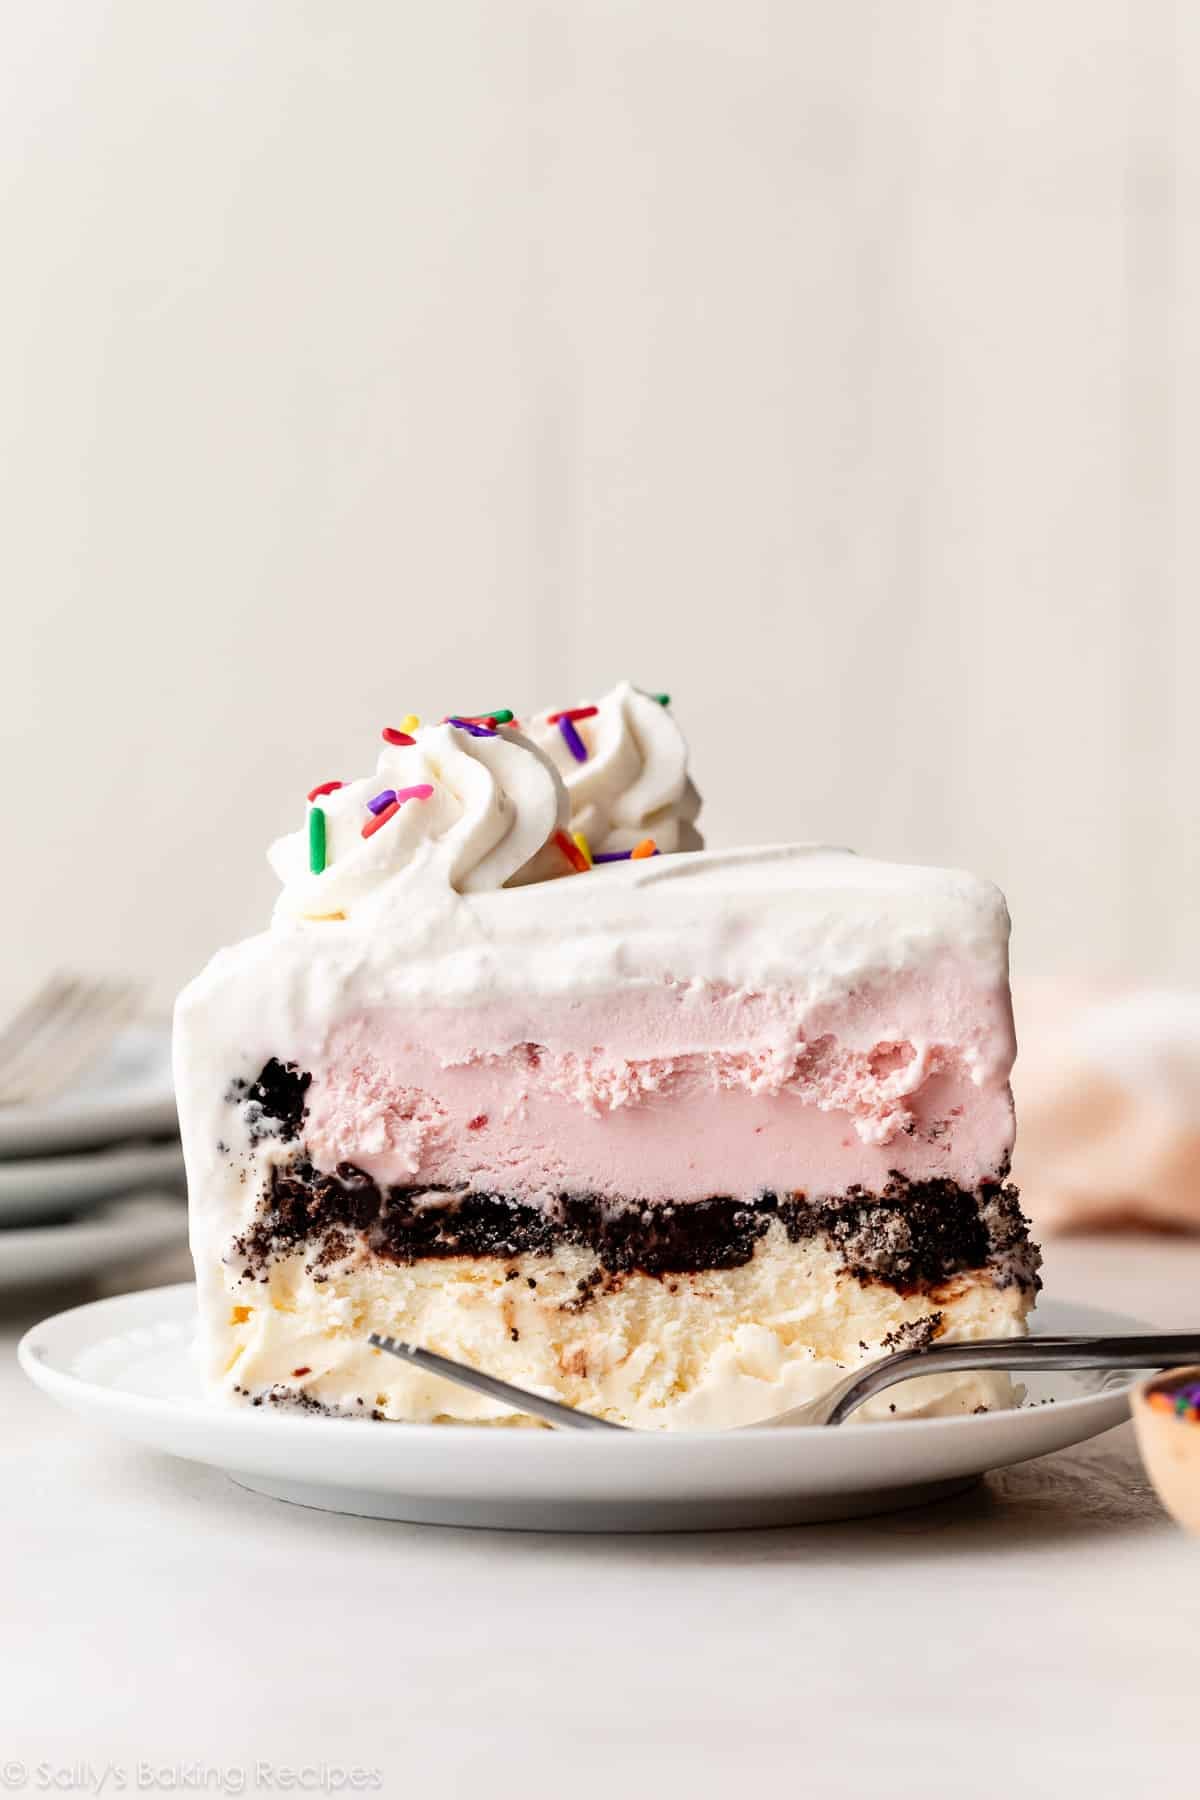
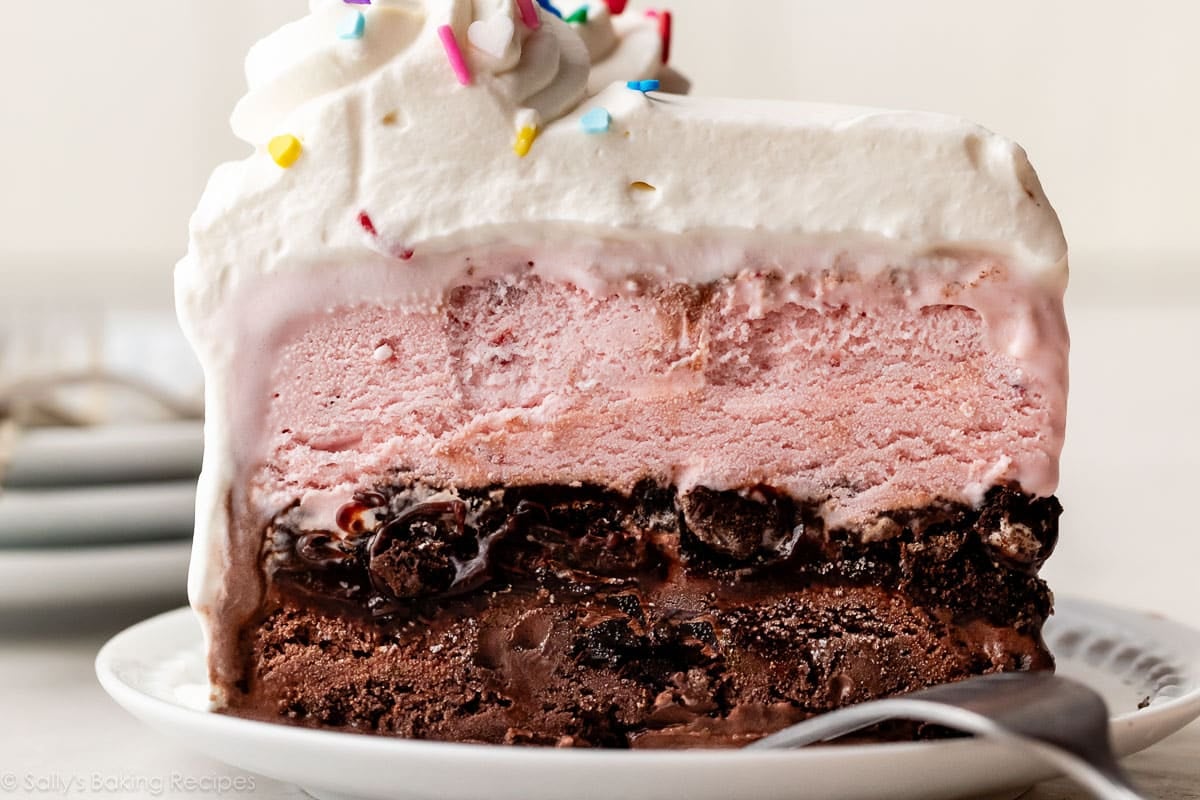
- 5 layers of cool, creamy decadence
- Easy to make, completely no-bake recipe
- Customizable with your favorite flavors of ice cream
- Ribboned with homemade hot fudge
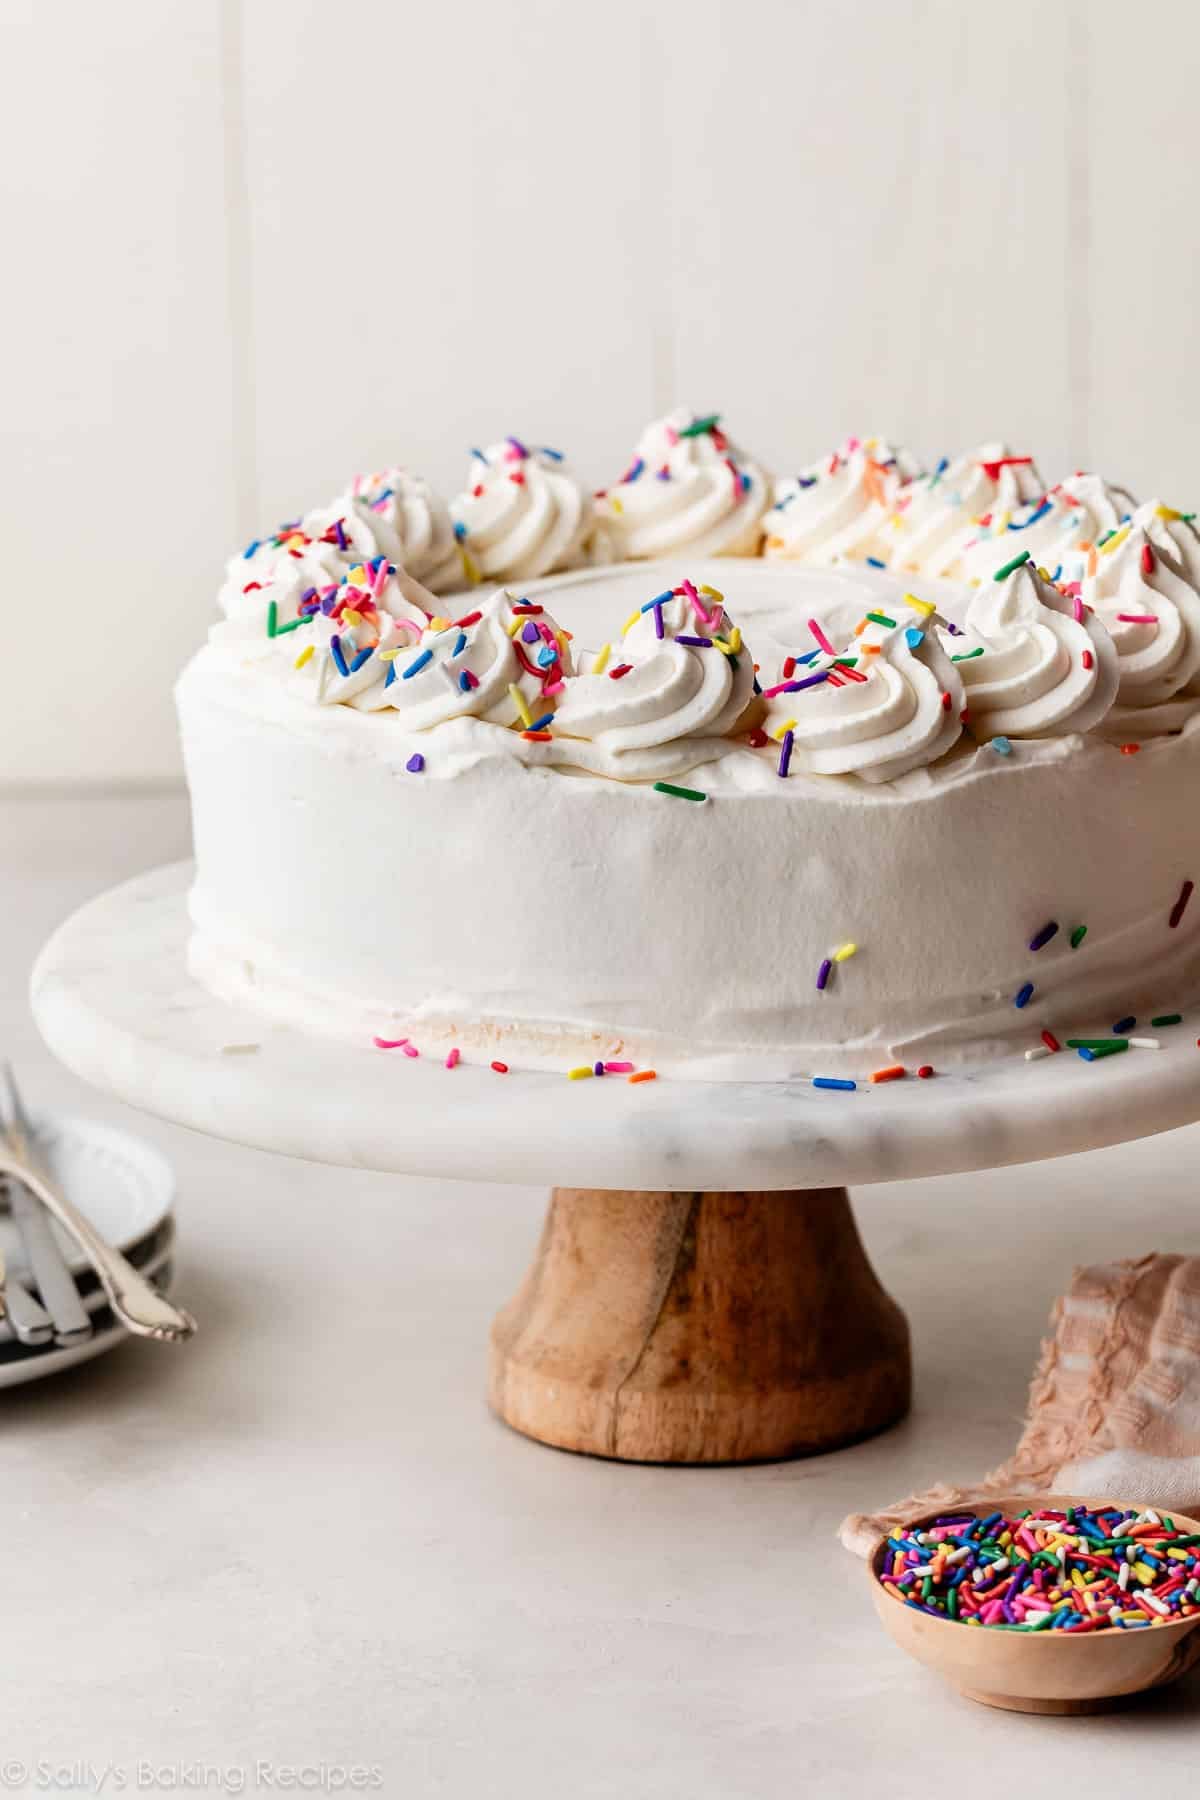
- Topped with fluffy whipped cream and cheerful sprinkles
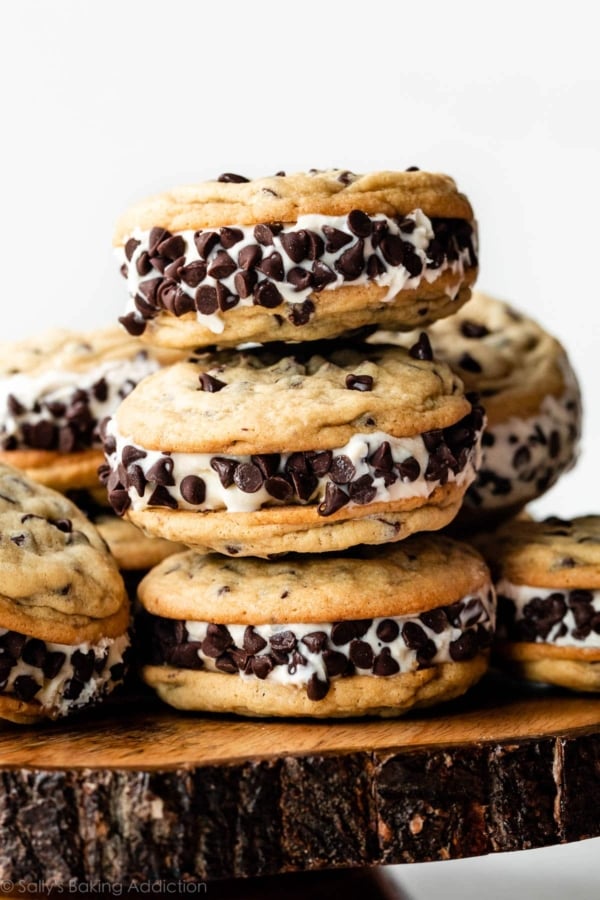
- As tempting as cookie ice cream sandwiches, but made in 1 pan to serve a group
- A great make-ahead option to add to your list of BBQ cookout desserts.
You can use any flavors of store-bought ice cream you want. Chocolate + strawberry is a favorite combination in my family, but you could also try: chocolate + peanut butter, chocolate + mint chip, cookies dough + chocolate, or coffee + cookies and cream. The combination is entirely up to you.
5 Layers to Love
- Ice Cream: Start with a 1.5-quart carton of ice cream, and let it soften.
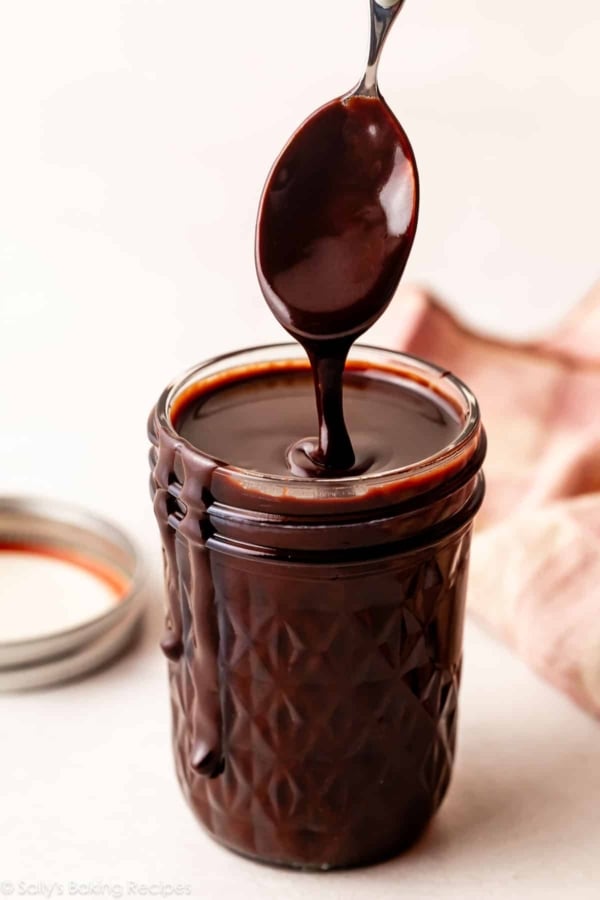
- Hot Fudge: I highly recommend making your own homemade hot fudge—it tastes so much better than store-bought and takes just 5 minutes on the stove.
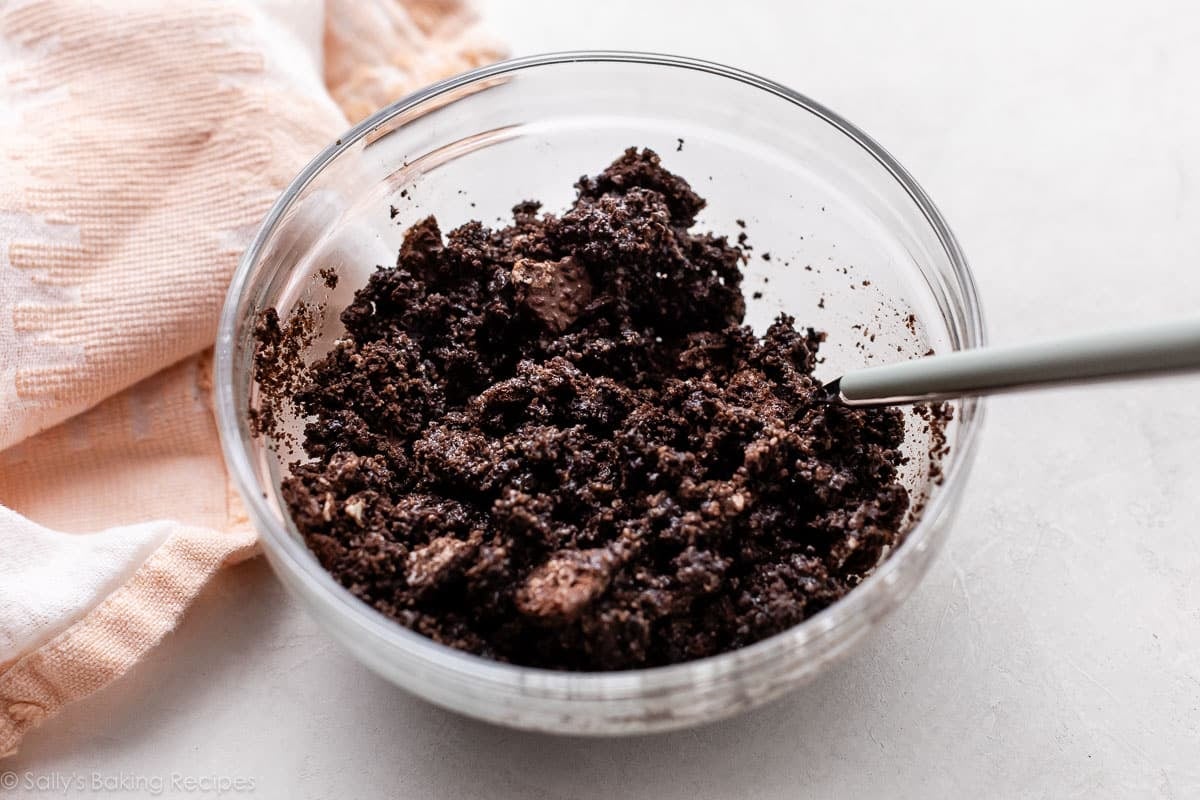
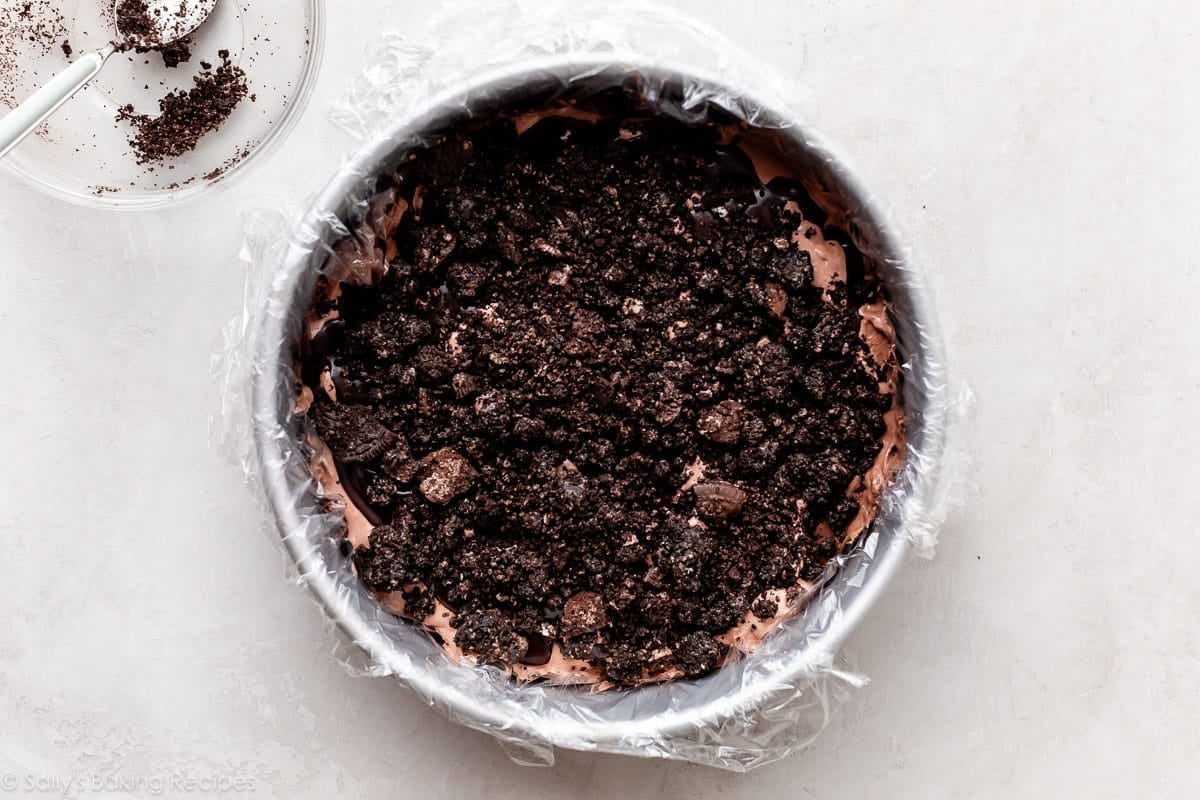
- Crushed Oreo Cookies + Melted Butter: A layer of crushed Oreos mixed with melted butter adds incredible texture to this cake, while keeping the assembly easy and totally no-bake. Melted butter helps the Oreos stay a bit crunchy, and also helps adhere them to the two layers of ice cream. I tested this recipe without the butter, and the two layers completely separated. (Literally, the top layer fell off the cake. It was quite the cleanup job!)
- Ice Cream: A second 1.5-quart carton of softened ice cream, in another flavor.
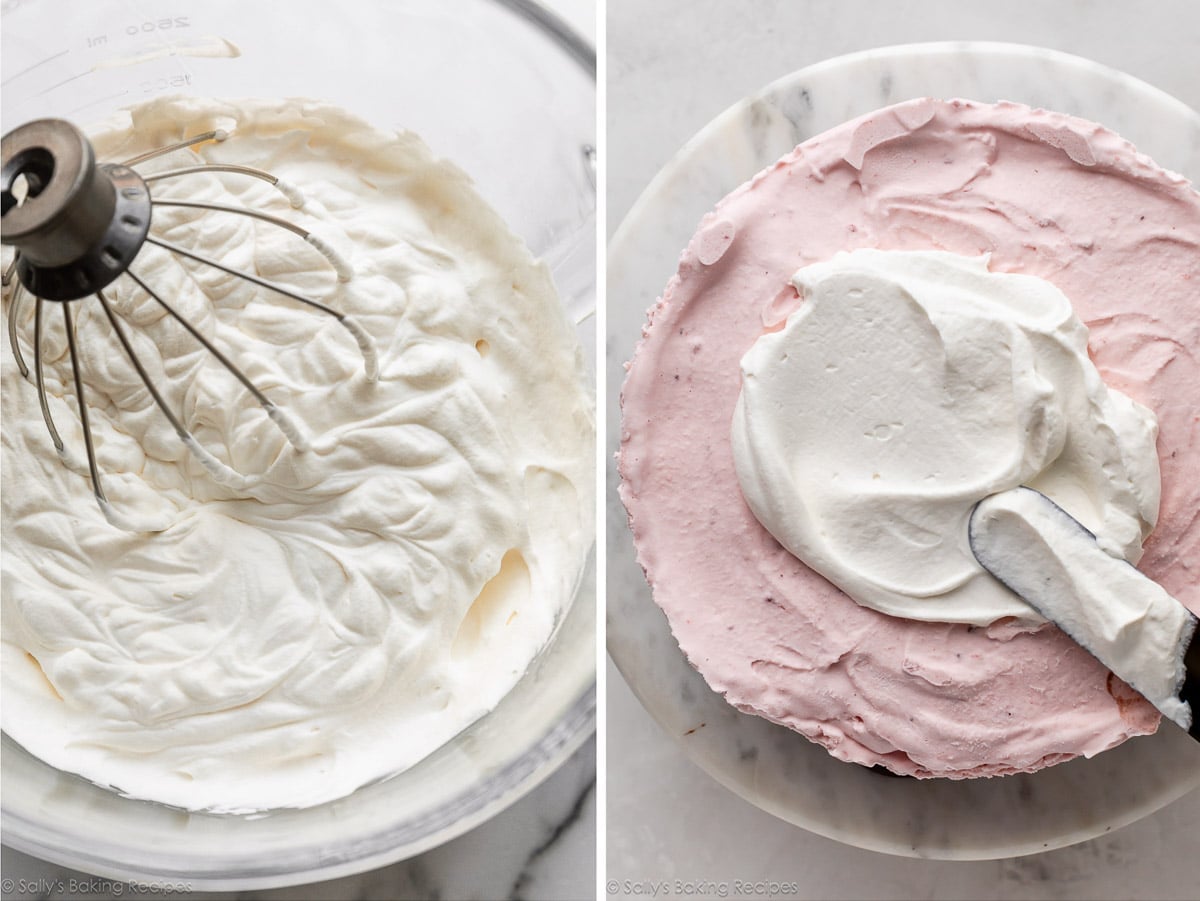
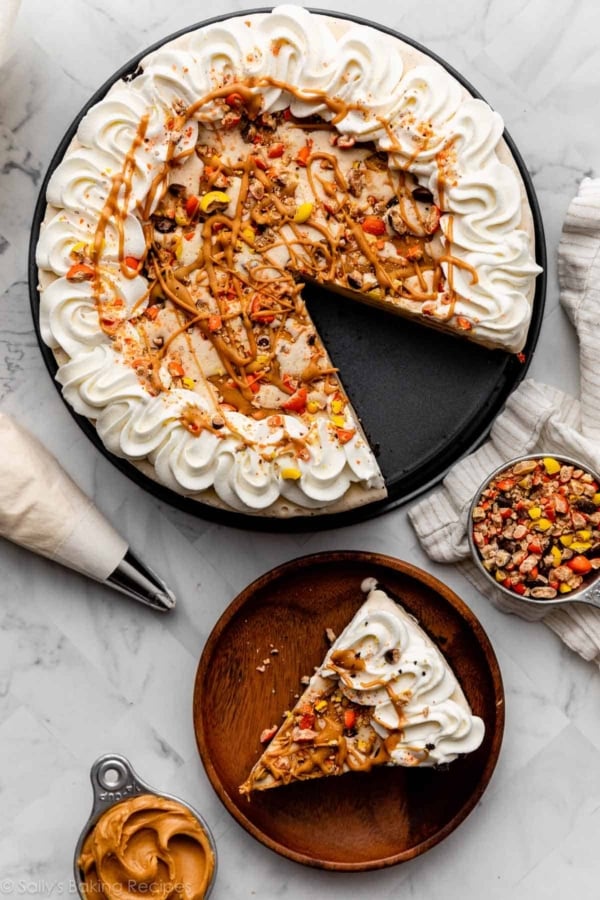
- Whipped Cream: Homemade whipped cream is quick to make and the perfect topping for this frozen dessert. The recipe below yields enough to cover the cake, plus some extra for decorative piping detail. It’s nice to have a second homemade element to this dessert, since we’re using store-bought ice cream and Oreos.
I like to garnish it with sprinkles for a festive finish. Because of course I do!
Best Pan to Use:
You need a 9-inch or 10-inch springform pan that’s at least 3 inches high. If you don’t have a pan this size, you can turn this into a quarter sheet cake using a 9×13-inch pan, or halve the recipe for an 8×2-inch square pan.
Whichever pan you use, line it with plastic wrap. Why? You will have a heck of a time slicing this frozen cake while it’s still inside the pan! You’ll want to completely remove the cake and place it on a frozen or cold cutting board or cake plate to slice. And, if using a springform pan like pictured, the plastic wrap prevents any melty ice cream leakage.
Ice Cream Cake Success Tips (Learned From Experience!)
I made a slew of ice cream cakes the past month, determining the most successful (and non-melty) way to frost and serve this chilly dessert. Take my advice:
- Take the ice cream out of the freezer and let it sit and soften for 10 minutes before layering.
- Line the pan with plastic wrap.
- Freeze the cake as directed in the instructions in between adding your layers.
- Don’t skip the melted butter with the crushed Oreo cookies; the melted butter helps the two layers of hot fudge and ice cream adhere to one another.
- Work quickly. Read through the recipe so you understand each step.
- If using store-bought hot fudge, heat it up a bit. This makes it a little easier to spread on top of the ice cream.
- Freeze the cake for at least 12 hours (and up to 2 days).
- If you intend to serve this on a cake stand or other serving platter, freeze the cake stand/platter for 30 minutes before placing the ice cream cake on top and frosting it with the whipped cream. (Otherwise, it will melt immediately, making frosting very difficult!)
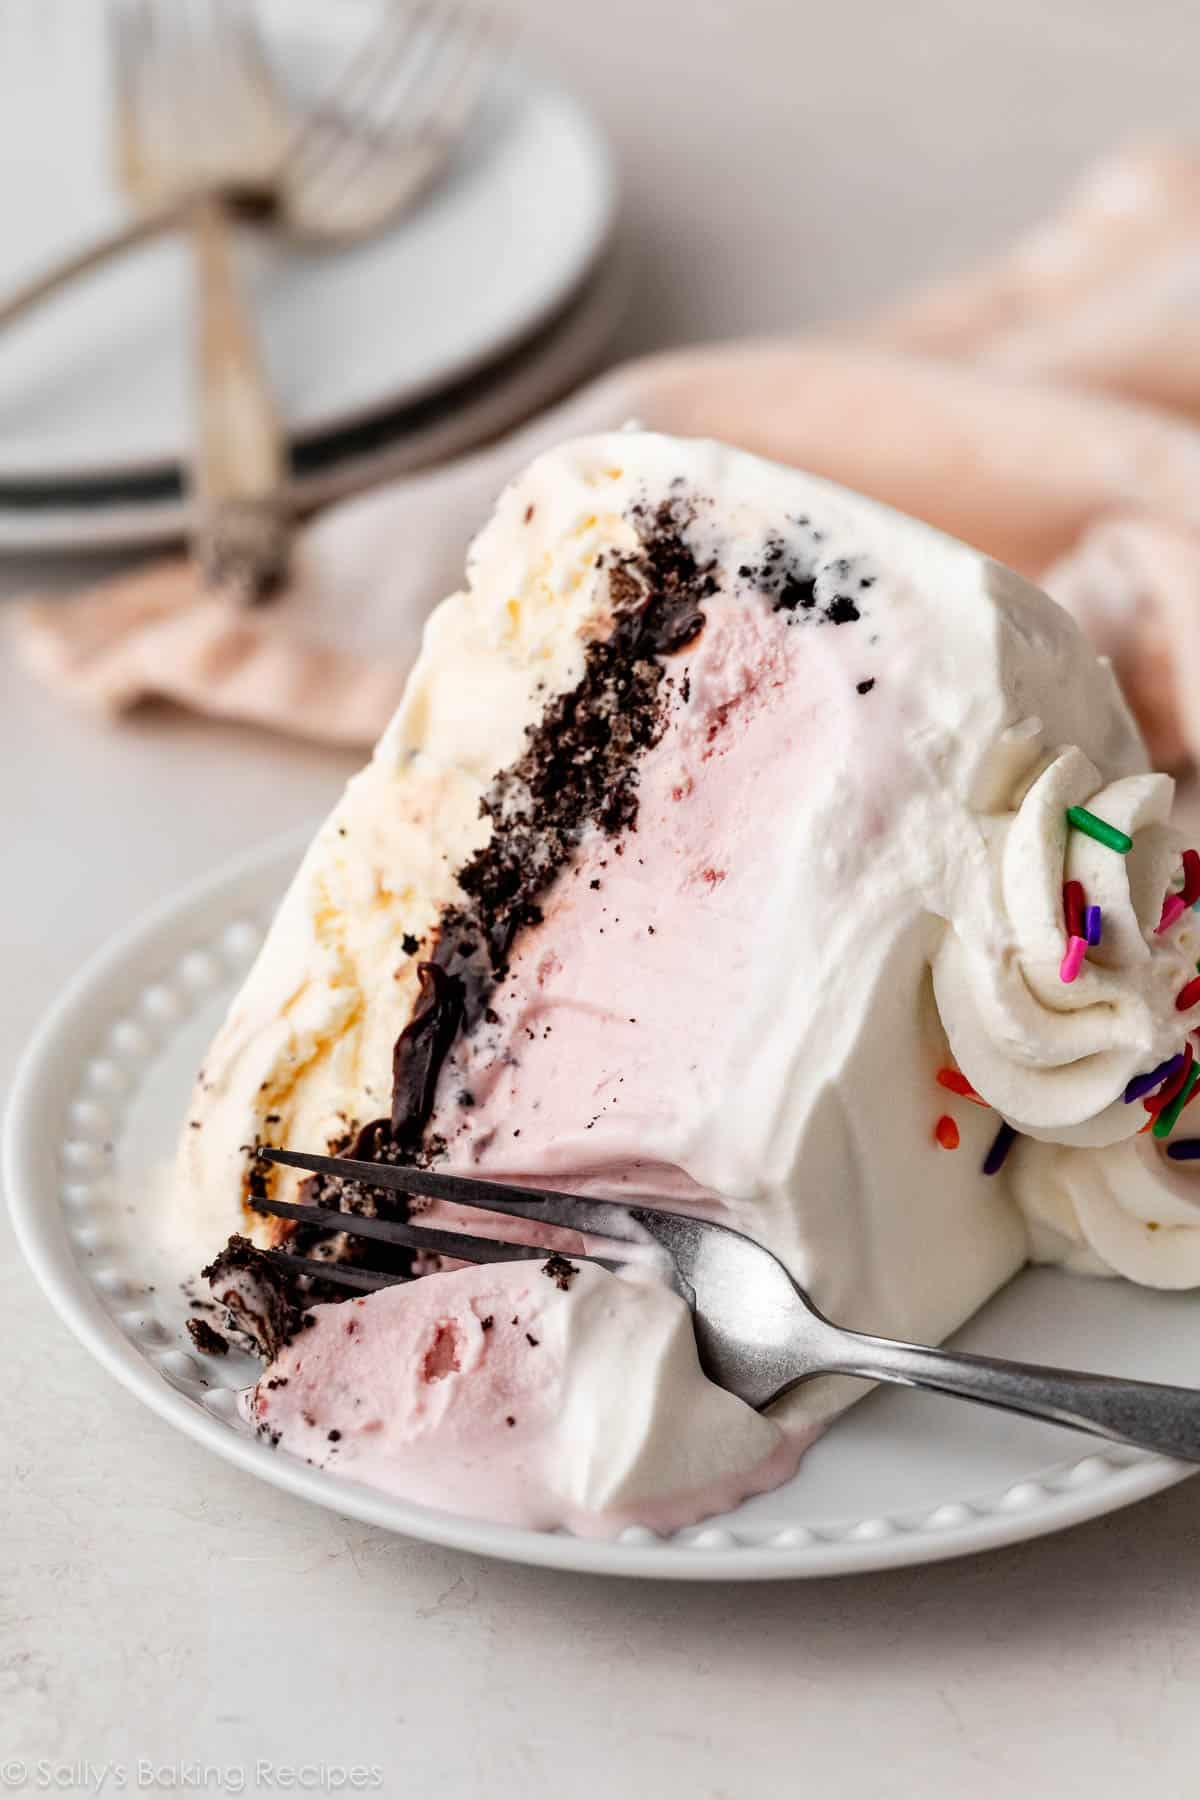
- For clean cuts, run a sharp knife under hot water before slicing. This trick works when cutting brownie ice cream sandwiches, too.
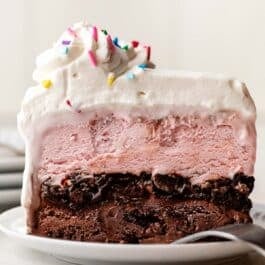
Here is the ice cream cake again with vanilla on the bottom layer. Have fun customizing your own ice cream cake using various flavors!
Ice Cream Cake FAQ
Yes—it can take the place of the bottom ice cream layer. Bake a cake in a 9-inch springform pan. I recommend the vanilla cake recipe from my homemade cake pops or the chocolate cake recipe from my chocolate cake pops. Both yield one 9-inch cake in a springform pan. After the cake cools, keep it in the pan, and freeze for 1 hour. Continue with assembling the remaining layers of the ice cream cake.
You can make this in a 9×13-inch pan, or halve the recipe for an 8×2-inch square pan. Be sure to line the pan with plastic wrap so you can easily remove the ice cream cake from the pan to slice it.
Yes, absolutely. Crushed crunchy chocolate chip cookies (homemade or store-bought), Nutter Butters, Nilla Wafers, graham crackers, and Biscoff cookies are some top choices. Any crunchy cookie works!
Yes. Reduce the ice creams to 1 quart each. Keep the hot fudge, Oreo, and whipped cream amounts the same. Your cake will be a bit shorter.
Homemade Ice Cream Cake (Like Dairy Queen)
- Prep Time: 2 hours
- Cook Time: 0 minutes
- Total Time: 14 hours (includes freezing)
- Yield: serves 10-12
- Category: Dessert
- Method: Freezing
- Cuisine: American
Description
This crowd-pleasing dessert combines two of your favorite ice cream flavors, plus layers of crunchy Oreo cookies, homemade hot fudge, whipped cream, and sprinkles. Read the recipe in full before starting so you’re prepped, and don’t skip freezing the layers during the assembly process. A 9×3-inch springform pan, 9×3-inch pan with removable bottom, or a 10×3-inch springform pan is ideal for this cake. For other pan options, or to add a layer of baked cake, see recipe Notes below.
Ingredients
Cake
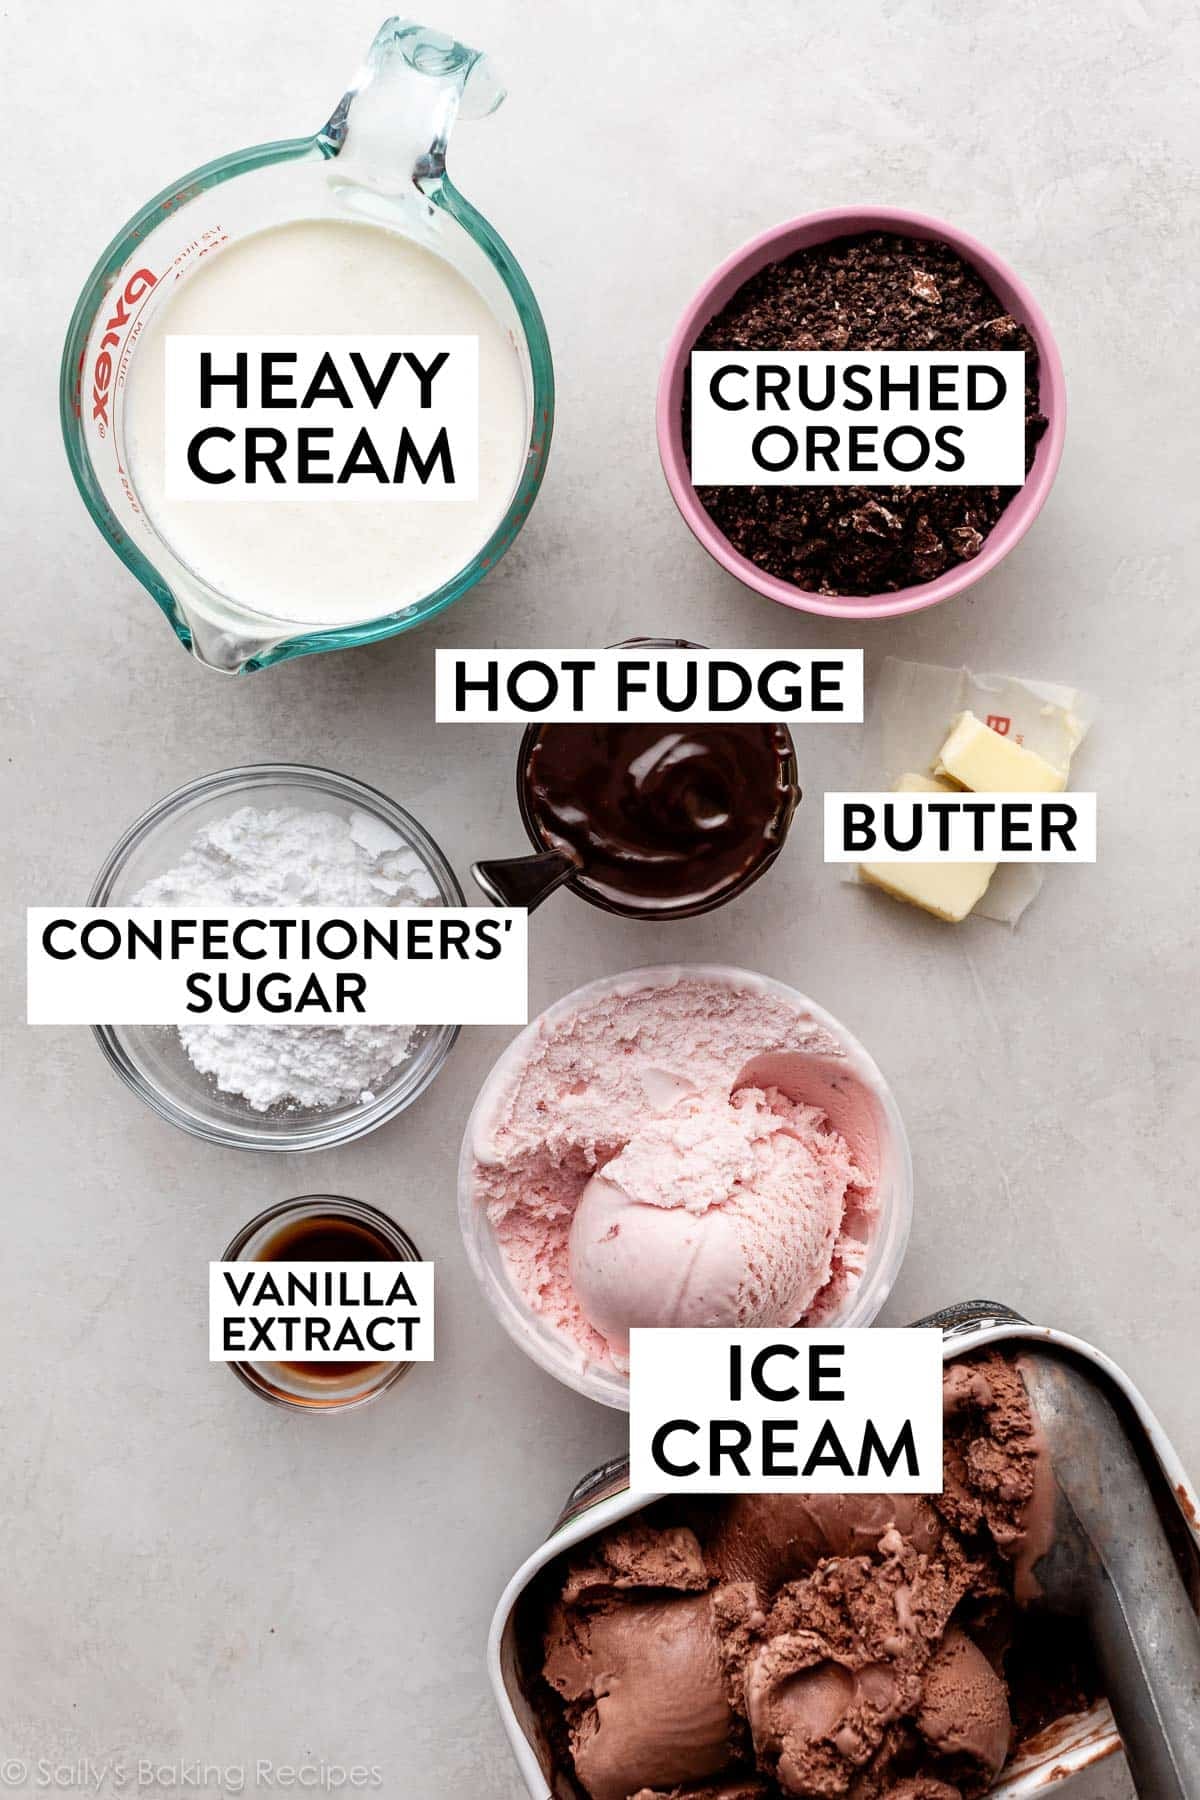
- 10 Oreo cookies (110g)
- 2 Tablespoons (28g) unsalted butter, melted
- 1.5 quarts (1.42L) chocolate ice cream, softened (or other flavor)
- 1 cup (8 ounces/227g) homemade hot fudge (or use store-bought), divided
- 1.5 quarts (1.42L) strawberry ice cream, softened (or other flavor)
Topping
- 2 cups (480ml) heavy cream, cold
- 1/3 cup (40g) confectioners’ sugar
- 1 and 1/2 teaspoons pure vanilla extract
- optional for garnish: sprinkles
Instructions
- In a food processor or blender, pulse 10 Oreos (including the cream filling) into a coarse crumb; feel free to leave some larger chunks. You should have about 1 cup crumbs. Mix with the melted butter and set aside to use in step 4.

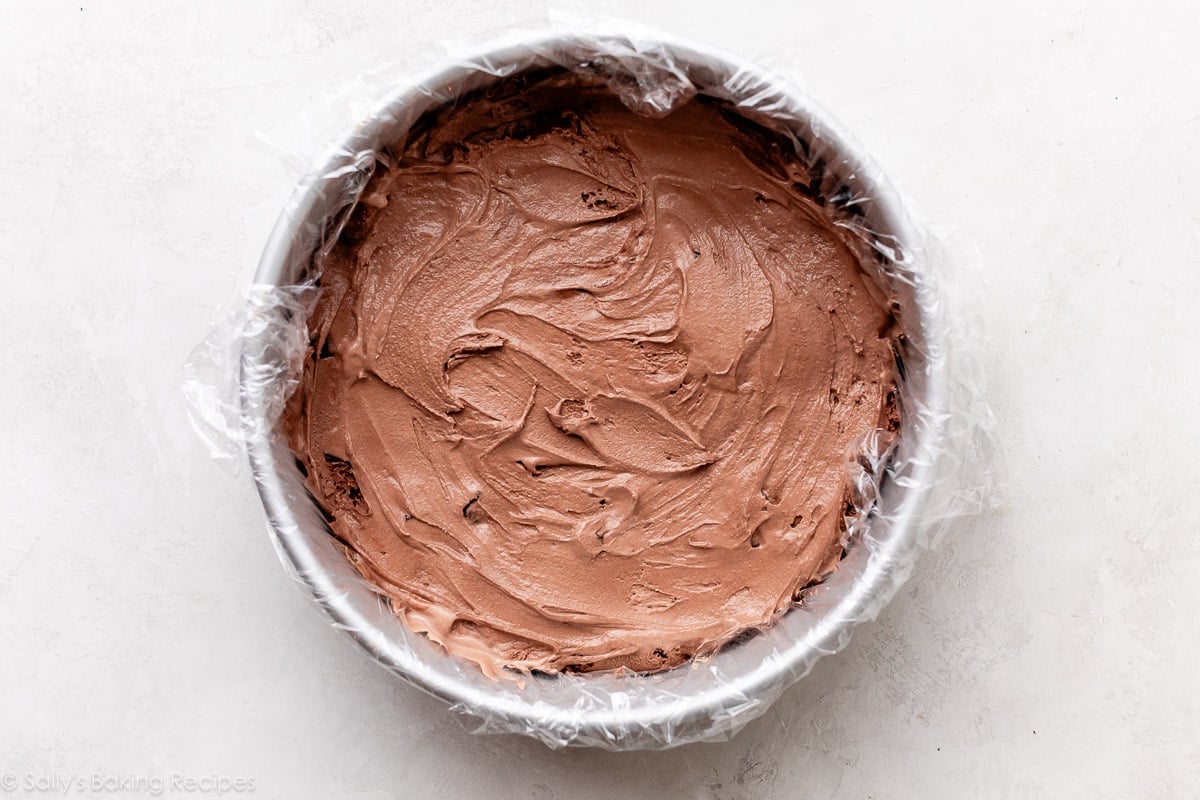
- Remove chocolate ice cream (or desired bottom-layer flavor) from the freezer and let it soften for 10 minutes. Meanwhile, line a 9×3-inch or 10×3-inch springform pan with plastic wrap. I usually use two pieces to ensure all sides have a little overhang. See recipe Note for other pan options.
- Scoop chocolate ice cream into lined pan and, working quickly, use the back of a large spoon to spread it into an even layer as best you can. Place it in the freezer for 30 minutes.
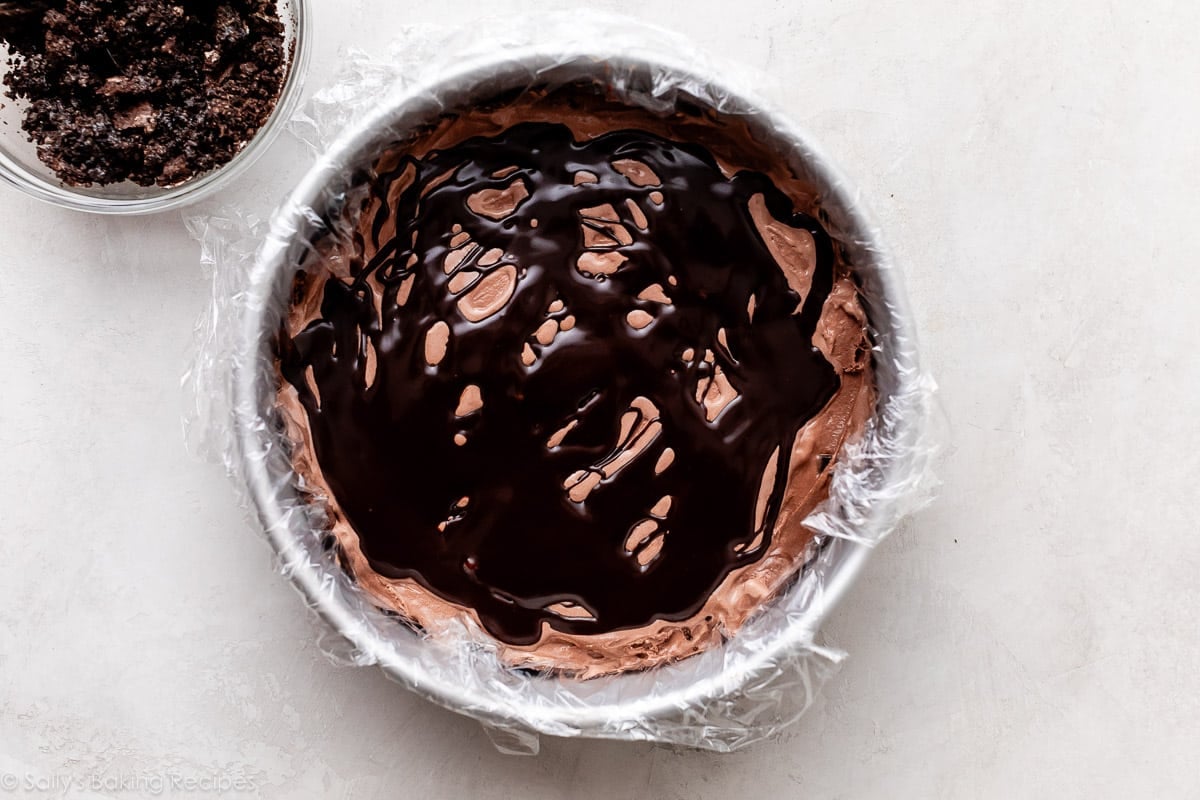
- During that time, make your homemade hot fudge, or warm up pre-made hot fudge sauce so that it’s a spreadable consistency. Pour and spread 1/2 cup hot fudge evenly over the first ice cream layer, then top with Oreo mixture.
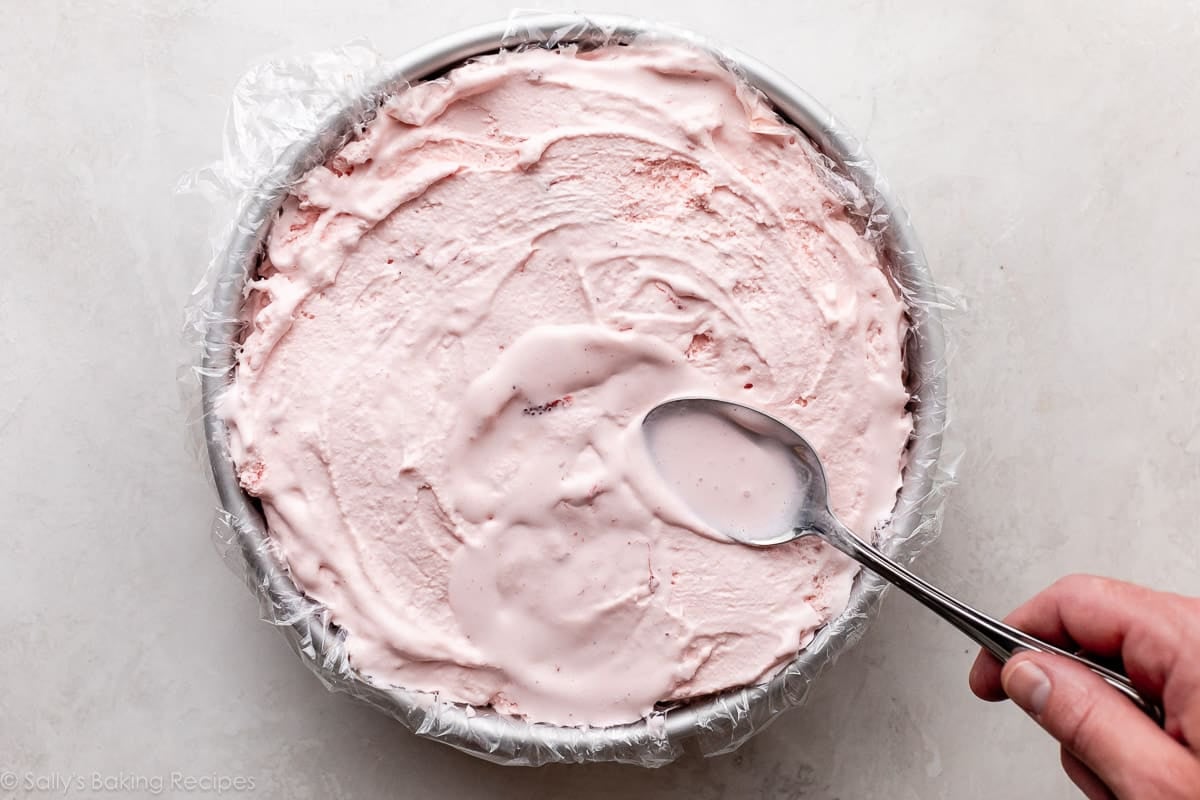
- Freeze for 30 minutes. After 20 minutes, remove strawberry ice cream (or desired top flavor) from the freezer to soften for 10 minutes.
- Drizzle remaining 1/2 cup hot fudge on top of Oreo layer. Working quickly, spoon and spread strawberry ice cream into an even layer as best you can.
- Cover with plastic wrap or aluminum foil and freeze for at least 12 hours and up to 2 days.
- Freeze the cake plate: If you want to serve the cake on something other than the bottom of the springform pan (or if you made this in a 9×13-inch pan or 8-inch square pan), place your desired cake plate/stand or cutting board in the freezer for at least 30 minutes. (The bottom ice cream layer will begin to melt immediately on a room-temperature surface.)
- Make the whipped cream topping: Using a handheld mixer or a stand mixer fitted with a whisk attachment, beat the heavy cream, confectioners’ sugar, and vanilla on medium-high speed until stiff peaks form, about 4 minutes.
- Remove the frozen ice cream cake from the freezer. Remove the rim from the springform pan. Lift the cake up using the plastic wrap and carefully peel off the plastic. Place the cake back on the bottom of the springform pan, or the frozen cake plate/cutting board. Working quickly, spread the whipped cream all over the top and sides of the ice cream cake. Feel free to pipe a border around the top of the cake; I used Wilton 1M piping tip. Garnish with sprinkles, if desired.

- Slice and serve immediately or freeze for up to 1 hour before serving. (I don’t recommend longer than this.) Use a very sharp knife to cut, dipping it into a glass of hot water in between slices. Keep leftover ice cream cake covered in the freezer.

Notes
- Making Ahead: You can prepare this cake through step 7 up to 48 hours ahead. I do not recommend longer than that, as the ice cream cake becomes extremely difficult to cut through. Feel free to extend that time, but the cake will have to sit out for a bit before slicing (and the edges may begin to melt). You can also make the whipped cream ahead of time, up to 24 hours. Cover tightly and refrigerate until ready to use as frosting on the cake.
- Special Tools (affiliate links): Food Processor | 9×3-inch Springform Pan, 9×3-inch Pan with Removable Bottom or 10×3-inch Springform Pan | Electric Mixer (Handheld or Stand) | Piping Bag (Reusable or Disposable) | Wilton 1M Piping Tip
- To Use a 9×2-inch Springform Pan: Reduce the ice creams to 1 quart each. Keep the hot fudge, Oreo, and whipped cream amounts the same. Your cake will be a bit shorter.
- Other Pan Options: You can make this in a 9×13-inch pan, or halve the recipe for an 8×2-inch square pan. Be sure to line the pan with plastic wrap so you can easily remove the ice cream cake from the pan to slice it. In step 8, freeze the cutting board or whatever you are slicing/serving the cake on for at least 30 minutes.
- Instead of Oreos: Crushed crunchy chocolate chip cookies (homemade or store-bought), Nutter Butters, Nilla Wafers, graham crackers, and Biscoff Cookies are some top choices. Any crunchy cookie works!
- Can I Use Homemade Oreos? I don’t recommend it. They aren’t crunchy enough.
- Bottom Cake Layer Instead of Ice Cream: Instead of ice cream, the bottom layer can be a cake and I recommend making this in a 9×2- or 9×3-inch springform pan. I recommend the vanilla cake recipe from my homemade cake pops or the chocolate cake recipe from my chocolate cake pops. Both yield one 9-inch cake in a springform pan. After the cake cools, keep it in the pan, and freeze it for 1 hour. Continue with assembling the cake with the hot fudge/Oreo/top ice cream layer. No need to wrap the pan in plastic wrap. Note that if you used a 9×2-inch springform pan, only 1 quart of top-layer ice cream will fit instead of 1.5 quarts. In step 9, before removing the springform pan’s rim, run a sharp knife around the edges to loosen the ice cream.


Reader Comments and Reviews
This recipe was delicious, but a little tough to work with! You have to be quick, especially at the end when frosting with the whipped cream and serving. Also, I thought the fudge made it a like too sweet and would probably try this sharing without the hot fudge.
Hello! let me just say that I love to read reviews, rarely post any and am typically very annoyed by reviews that literally CHANGE the recipe and then basically review their OWN recipe! Anyway….let me tell you what you said to do that I did not! Every year I buy my husband an ice cream cake for his birthday. So yesterday on his birthday I decided to make him one! Girl, when you say you need to freeze between and for an additional 12 hours YOU ARE NOT KIDDING! HAHA! Next time I follow your recipe I will say YOU GOT IT with every step!
Despite it not looking all that pretty it was fabulous! My husband loves the “crunchies” between layers so I tripled the cookie part (don’t judge) and did 4 layers not giving nearly enough time to freeze! And the homemade hot fudge!! Do not get me started!! New craving unleashed!!
Everyone loved the cake! I will never buy another one but will plan ahead to make it! Thank you so much for sharing your talent!!
This was fun! I have always wanted to do an ice cream cake. I had a small spring form pan so I adjusted size. I chose to do chocolate base and vanilla top. Made homemade fudge per recipe on Sally’s site as well.
Excellent recipe with easy to follow directions! The cake turned out great and we will absolutely be making this again. Very customizable if you’d like to incorporate your favorite flavors of ice cream. Highly recommend making the hot fudge and drizzling on top of your slice!
I made this ice cream cake with Campfire Resses pieces peanut butter cup and vanilla chocolate chip ice cream. I finished it with whipped cream iced around the entire cake and a row of chocolate chips outlining the cake. This cake was very easy and fun to make! I definitely recommend making this cake as a summer treat. It’s great for birthday parties, welcome home treats, and garden parties.
The Ice Cream Cake is delicious and quite easy to make. My only problem was that I let the hot fudge sauce cool too much before I poured it on the cake. It made it too thick and it is a bit of trouble to cut through it when eating a piece of ice cream cake.
The Ice Cream Cake is delicious and is quite easy to make. I think I needed the hot fudge sauce to be a bit warmer and thinner when I poured it onto the cake, because it is a little bit of trouble to cut it when eating the cake.
Melts fast but the fudge is so good! I used chocolate and mint ice cream
I loved this recipe. It does melt fast, so don’t try to bring it somewhere very far away. I used chocolate and mint ice cream. The homemade fudge is the star of the show!
Sally…he preparado los helados en casa. Chocolate y café. Banana y Frambuesas. Me ha quedado espectacular. Lo hice para celebrar el dia de San Juan! Muchas gracias por la receta y sus trucos para que salga perfecto! Besos desde Madrid. Pato
I made the Oreo cookies. They were fast and easy to make. Everyone who had one thoroughly enjoyed them. I’ll be making them again.
Prettiest ice cream cake I’ve made.
LOVE! 5 stars. Wouldn’t think that something this simple would be so delicious, but it was! I used chocolate and cookie dough ice cream and was a huge hit for my fiancé’s birthday! Will be making again!
A crowd pleaser that was super easy to make!
Easy to follow recipe that leds to deliciousness!
Fun, easy recipe for a hot summer day! Homemade Hot Fudge is awesome!
I love this recipe but it was hard to cut. The fudge layer (I made your recipe) was tough and gummy to cut through so no pretty cut pieces. Glad I just made it for family night dinner.
I made the alternate Oreo cookie recipe! It was fantastic!
Extremely easy to follow directions! This ice cream cake was a huge hit! My son always asks for the store bought cookies n cream ice cream cake for his birthday, but allowed me to make his this year to enter the June Baking Challenge! I used chocolate brookie ice cream on the bottom layer, the crushed Oreo and hot fudge filling, and cookies n cream ice cream for the top layer. Finished it off with the perfectly light and soft whipped cream frosting, Oreos, and mini chocolate chips! My birthday boy licked the plate clean, as did our guests! Thank you, Sally. Made my chocolate, Oreo, ice cream lover’s dream come true!
Easy and good summertime dessert!
A summer birthday winner! Made this for my SIL using her favorite locally made Butter Brickle Ice Cream, homemade chocolate cake, Oreo cookie filling, homemade hot fudge, and stabilized whipped cream frosting. Had a small issue with melting since the ice cream was 50% syrupy toffee, but once completely frozen, it was a winner.
Absolutely delicious! It was easy to make and tasted great.
This ice cream cake was so much fun to make. I especially enjoyed making the homemade fudge sauce and picking out the flavors for the ice cream layers!
I made this with peanut butter ice cream and cookies and cream ice cream…AMAZING! My family has not stopped talking about it.
Great recipe and perfect for this time of the year!
Recipe was delicious, easy to make, and perfect for this time of year
I made this for Father’s Day and it was a big hit! It instantly became a new favorite! It was eaten quickly and I will definitely be making this again!
I made this for Father’s Day and it was a big hit! I will definitely be making this again!
Sally we are great fans of the baking challenge, however this was not a “win” at our house. Far too melty, it was hard to get the ice cream at the right temp. When it was sorta the right temp it was crazy to work with. kind of sad I made this. But my grandkids did love the bowl of ice cream and are still looking for the “cake” part.
This is yet another recipe where Sally’s version ends up even better that the original. Delicious! The hot fudge is quick and easy to make and so worth it, and it makes the center fudge crunchy layer awesome. We really enjoyed this – I used mint chocolate chip and chocolate vanilla combo for the layers. The freezing time is the biggest part of this but the assembly is easy. Use a springform pan and the plastic wrap. I’ll definitely be making this again!