

Today I’m teaching you the basics you need to know about how to knead dough. Learn why kneading is an important and necessary step in most yeasted bread recipes, how to do it properly, and how to know when your dough has been kneaded long enough and is ready to rise. In this post & video, I demonstrate 2 techniques I use, which you can use with any yeast dough that requires kneading, whether you’re baking sandwich bread, cinnamon rolls, or homemade pizza.
Despite the delicious taste and alluring aroma of fresh-baked bread, many aspiring bakers hesitate to begin the journey of homemade bread baking. I, too, avoided it for many years. There was just no way I could possible handle a dough with yeast. How scary!
But the truth is that making yeasted bread is a surprisingly simple process, as long as you have reliable, approachable recipes and a basic understanding of how yeast works. (Plus, a little patience!) The hardest part is, truly, finding the courage to just BEGIN.
By the way, if you’re new to working with yeast, reference my Baking with Yeast Guide for simple answers to common yeast FAQs. It’s a massively helpful starting point, and will help give you the base knowledge needed to successfully embark on your bread-baking journey. 😉
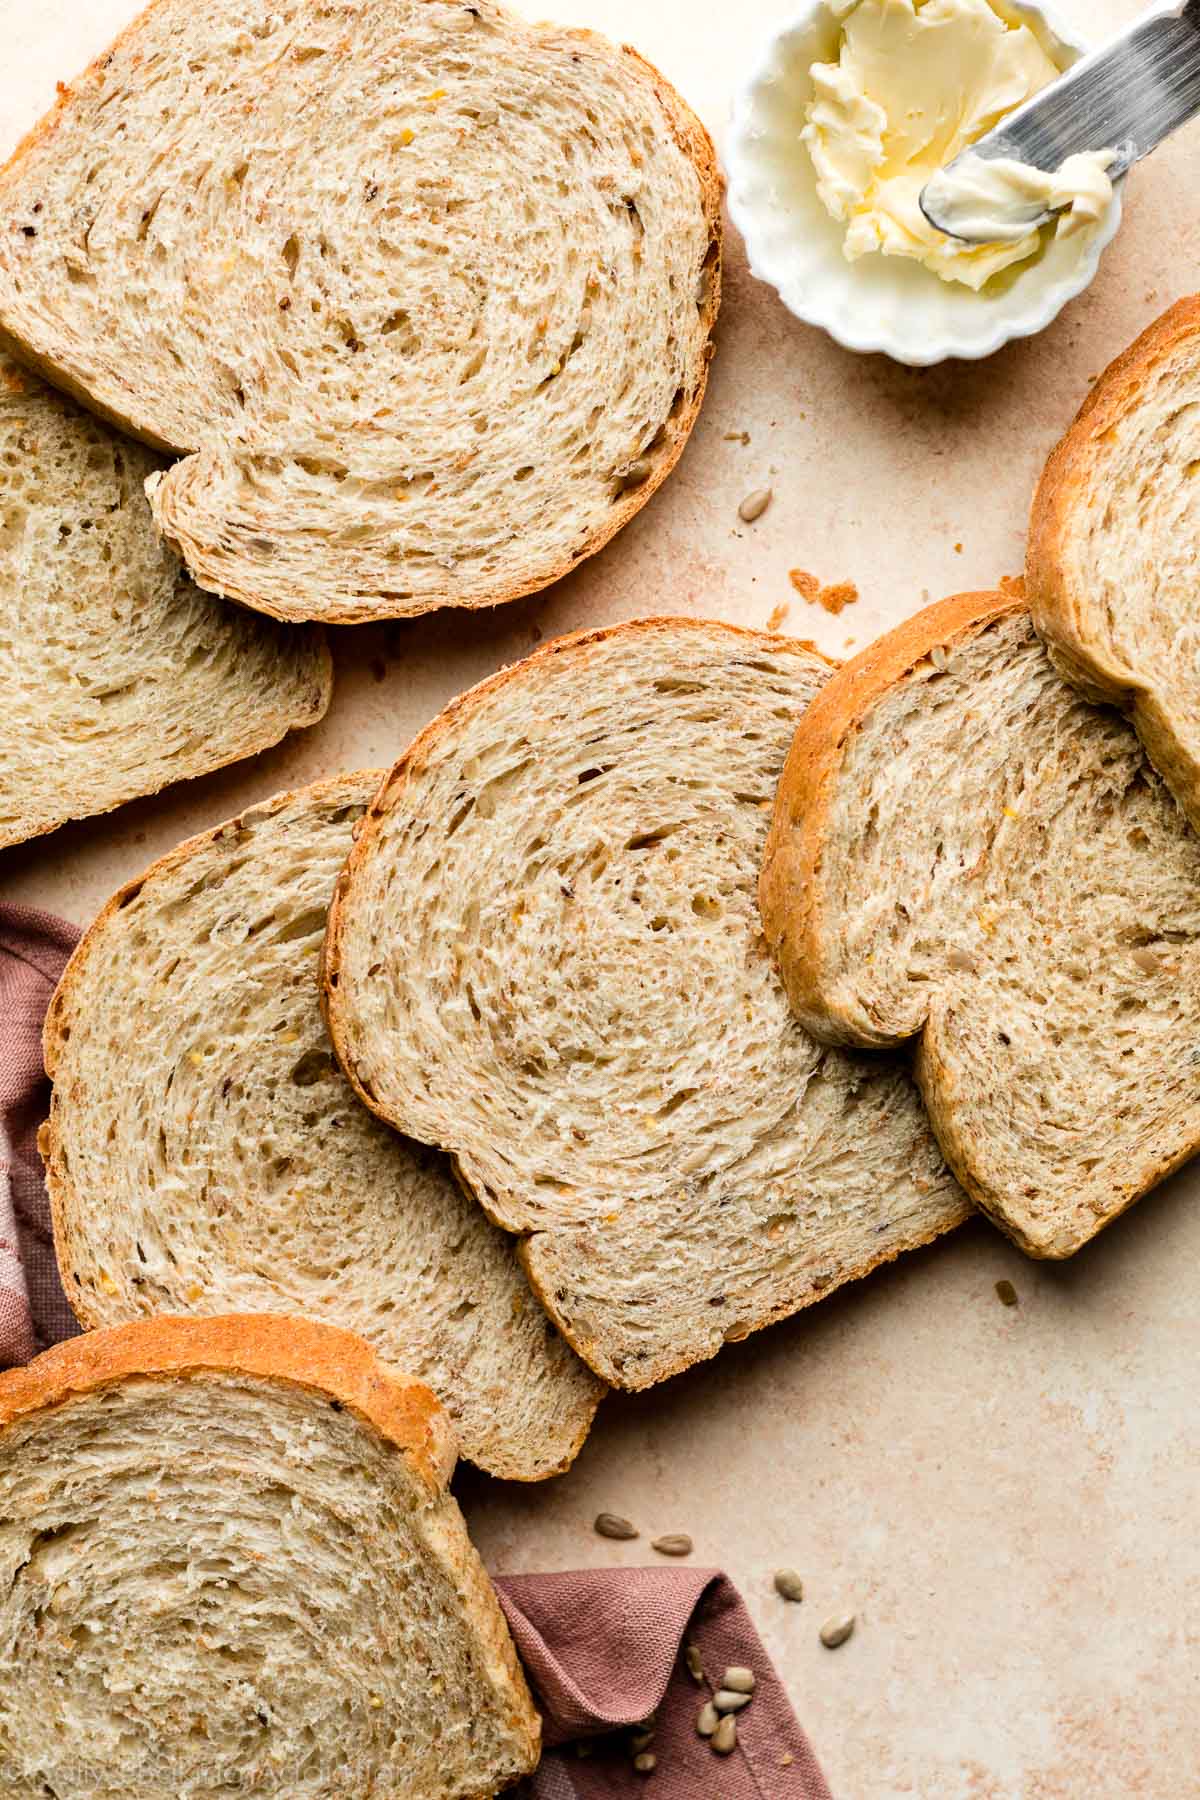
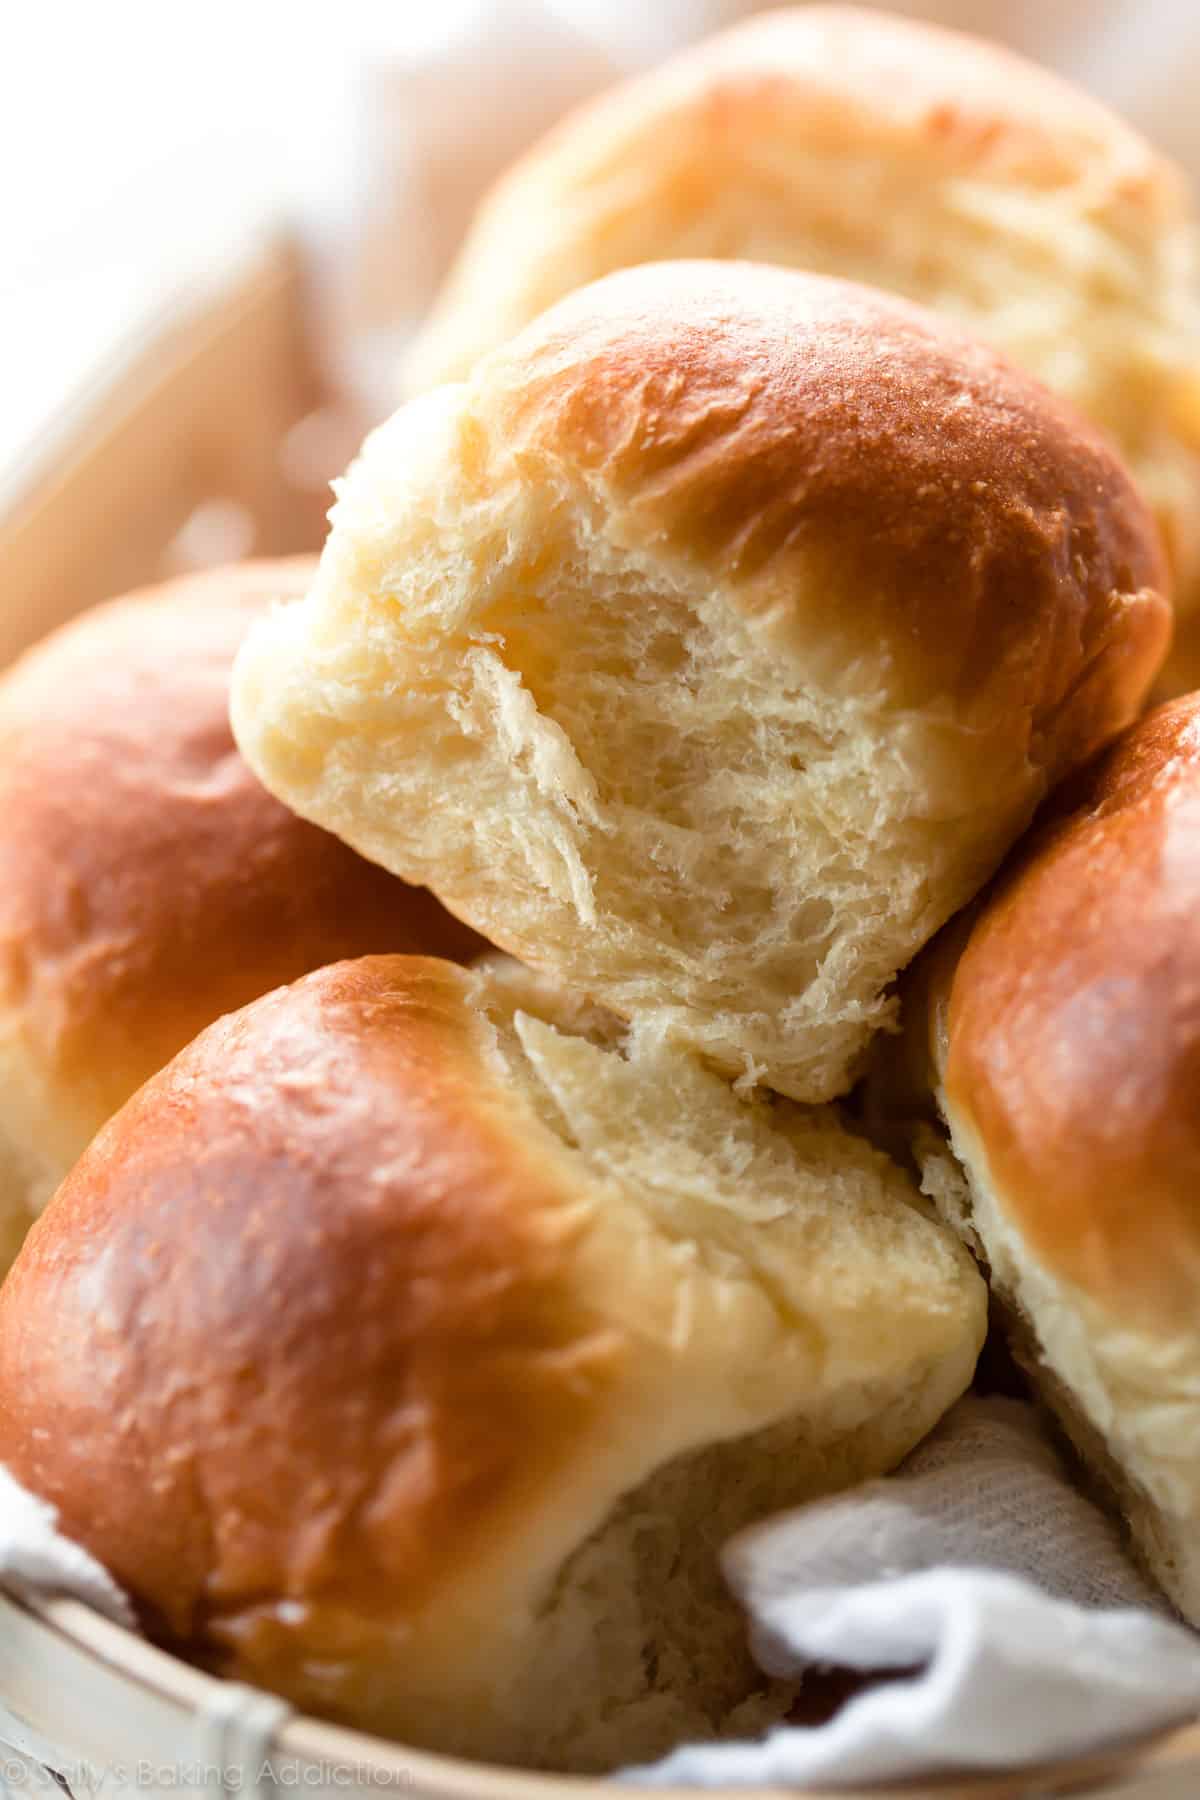
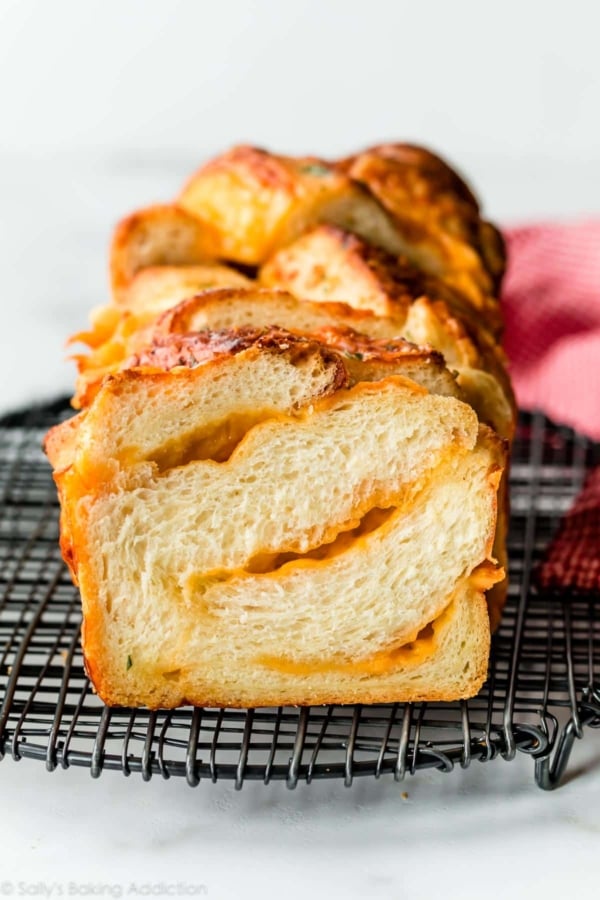
Today’s post is an extension of my Baking with Yeast Guide. Here I’m teaching you how to knead dough. Kneading dough is an essential step in bread baking, whether you’re making soft multigrain bread (pictured above), breadsticks, whole wheat bread, gooey raspberry sweet rolls, or flaky dinner rolls (pictured below).
Why Do We Need to Knead?
Kneading serves a couple of purposes.
First, we’re incorporating air into the dough. And second, we need to stretch out the gluten strands to build structure and strength into the bread. Simply mixing the dough together leaves us with a random, disorganized array of gluten proteins. We still have to “develop” the gluten, i.e., encourage the proteins in the flour and moisture in the dough to link together and form a strong gluten network. This structure allows for trapping of gases so the bread will rise up nice and high. And gluten is what makes bread deliciously chewy.
If you don’t knead your dough, your baked bread won’t rise as high, and the overall texture and appearance will be dense. Properly kneaded dough promises a softer, fluffier, taller, and chewier bread.
OK, that’s your science class done for today!
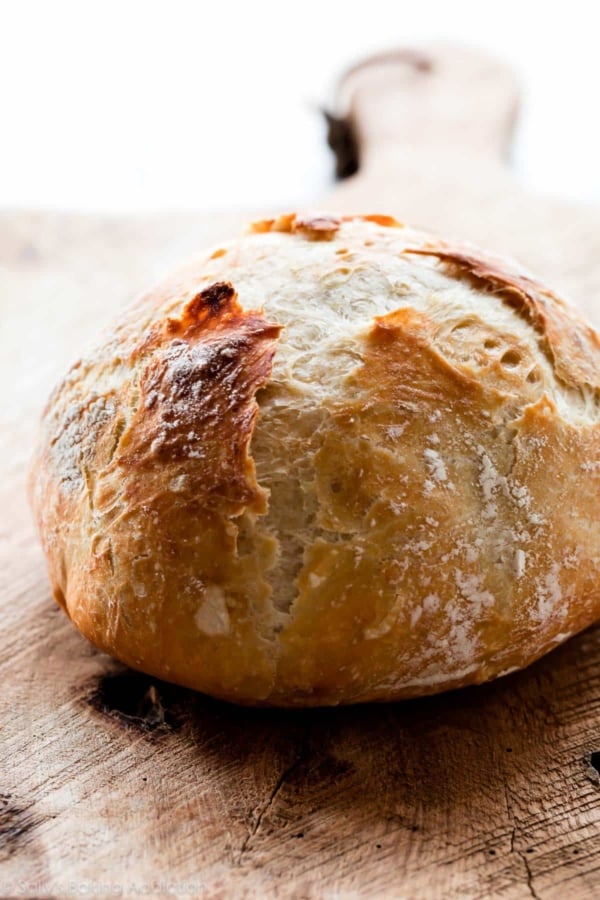
I’ve made yeasted breads before that do not require kneading, and have a few published including this no-knead honey oat bread, cranberry nut no-knead bread, 4-ingredient artisan bread, and this jalapeño cheddar bread. So what’s the difference? Those bread recipes use a very wet dough and a slow-rise method, which allows for fermentation to occur as the highly hydrated dough rests in the refrigerator for at least 12 hours, or even longer.
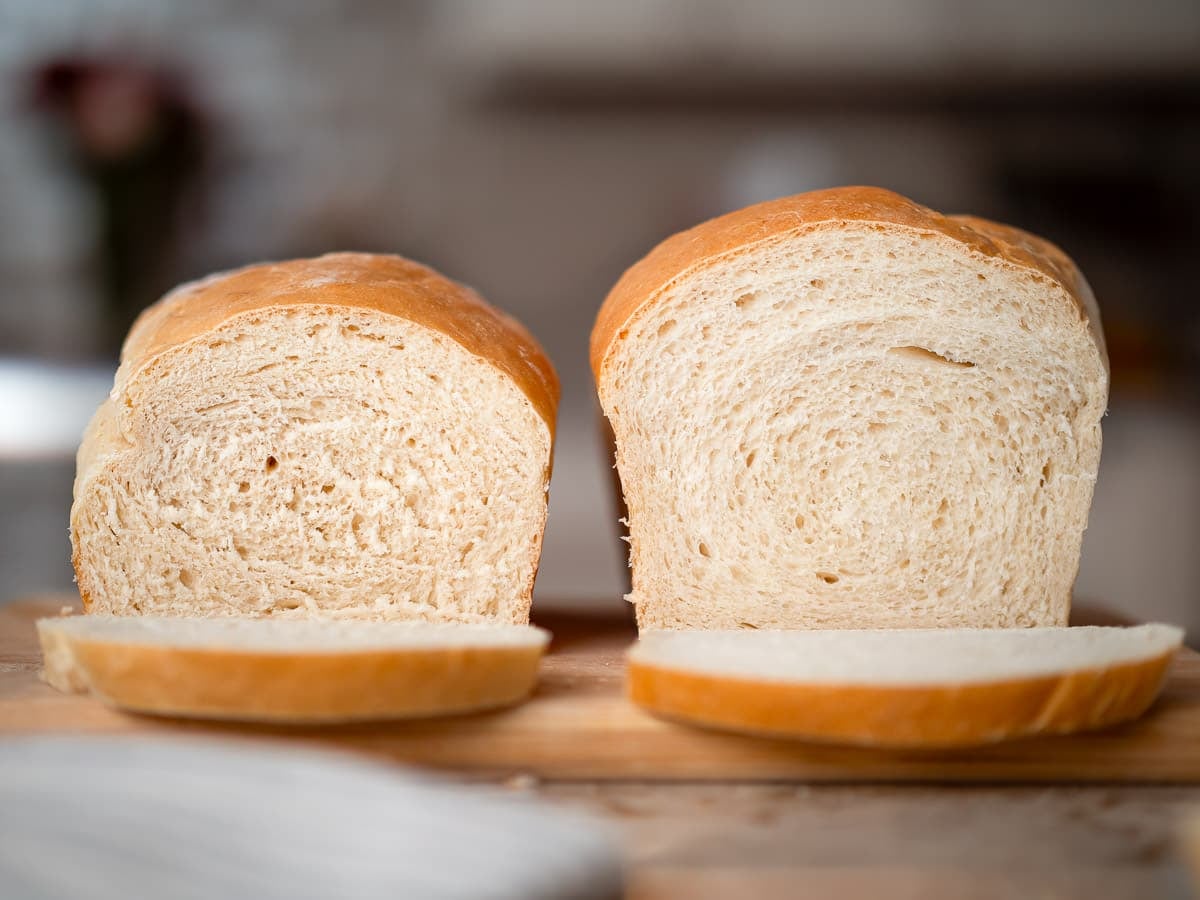
Comparison Photos
Take a look at the following picture. On the left is a dense, squat, and crumbly loaf of sandwich bread. I did not knead the dough that produced this baked loaf. On the right, I kneaded it as the recipe instructs. It’s the same exact dough, only the left was not kneaded.
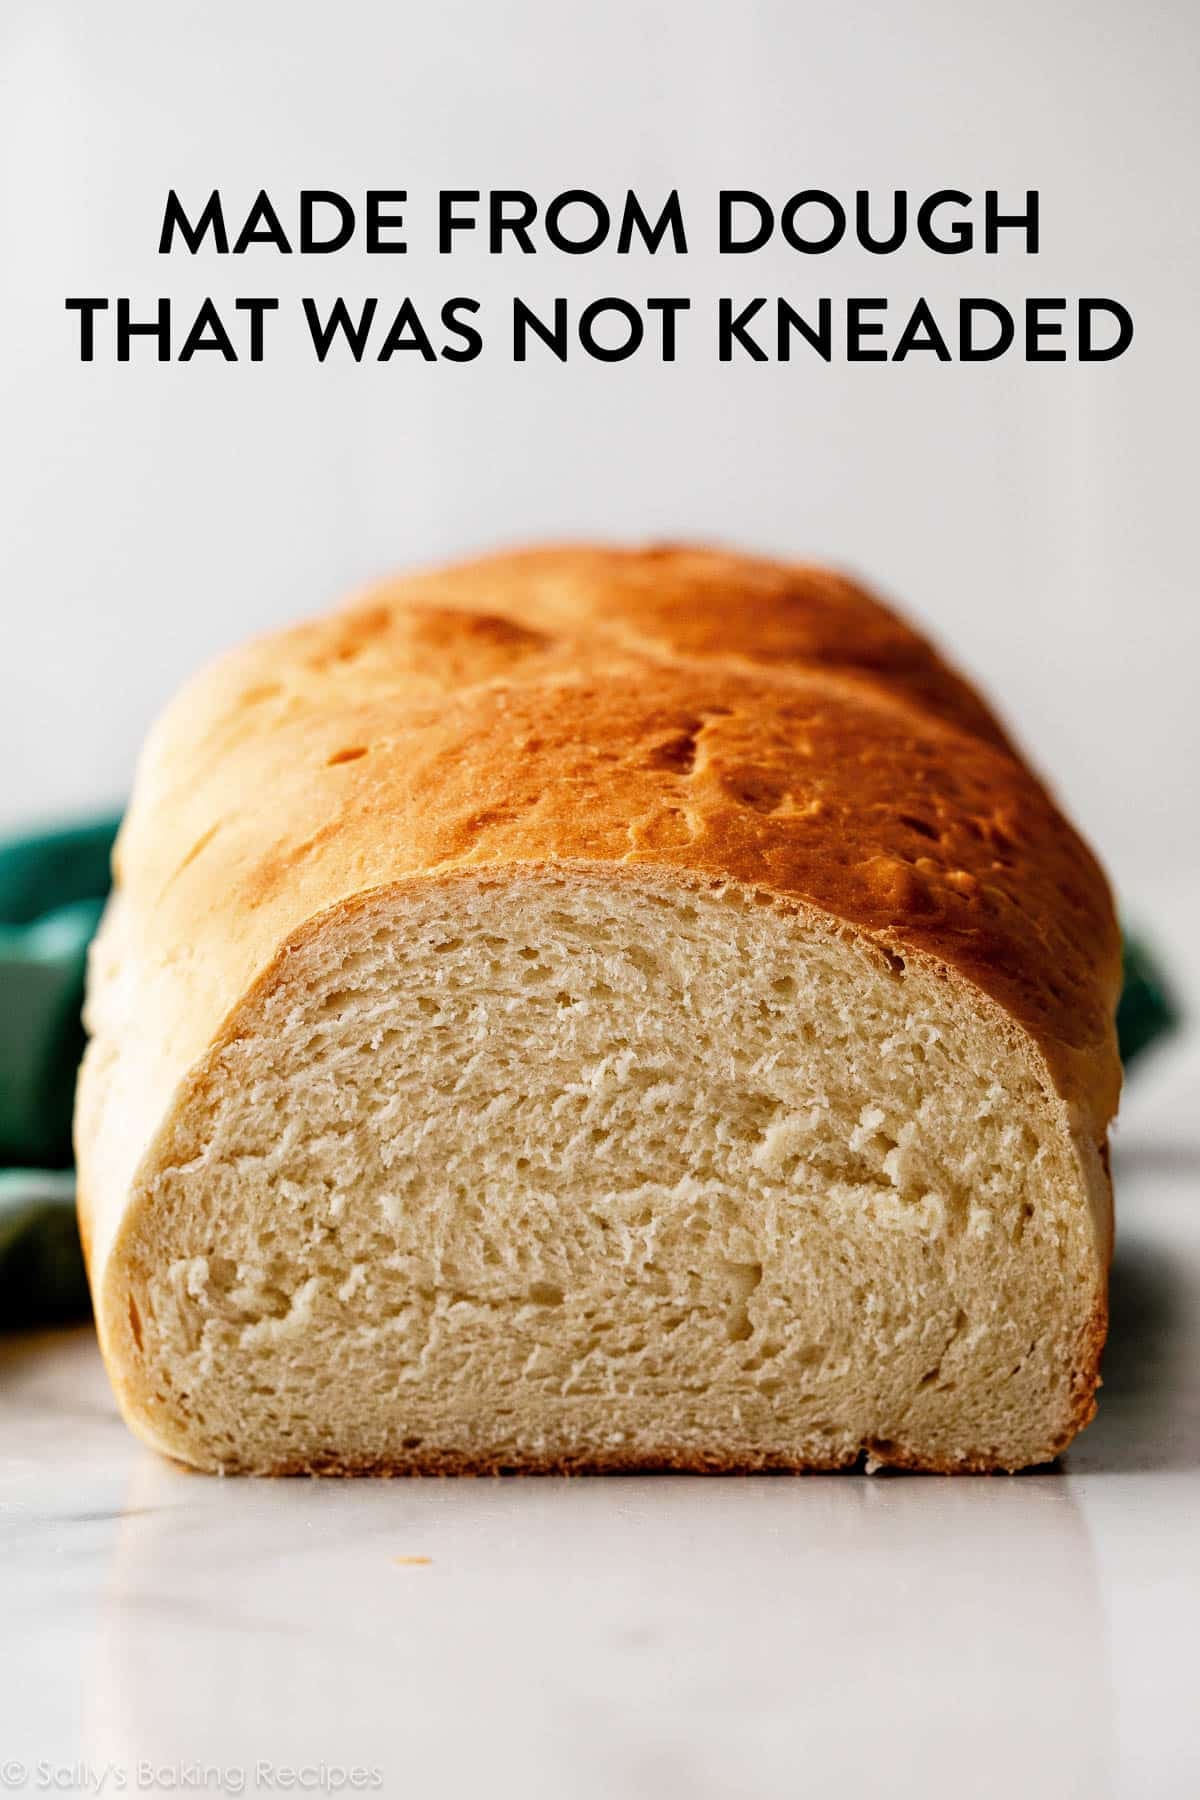
And, below, here is that same “not kneaded” loaf. Because I didn’t knead the dough, it didn’t have the strength to trap the yeast’s gases.
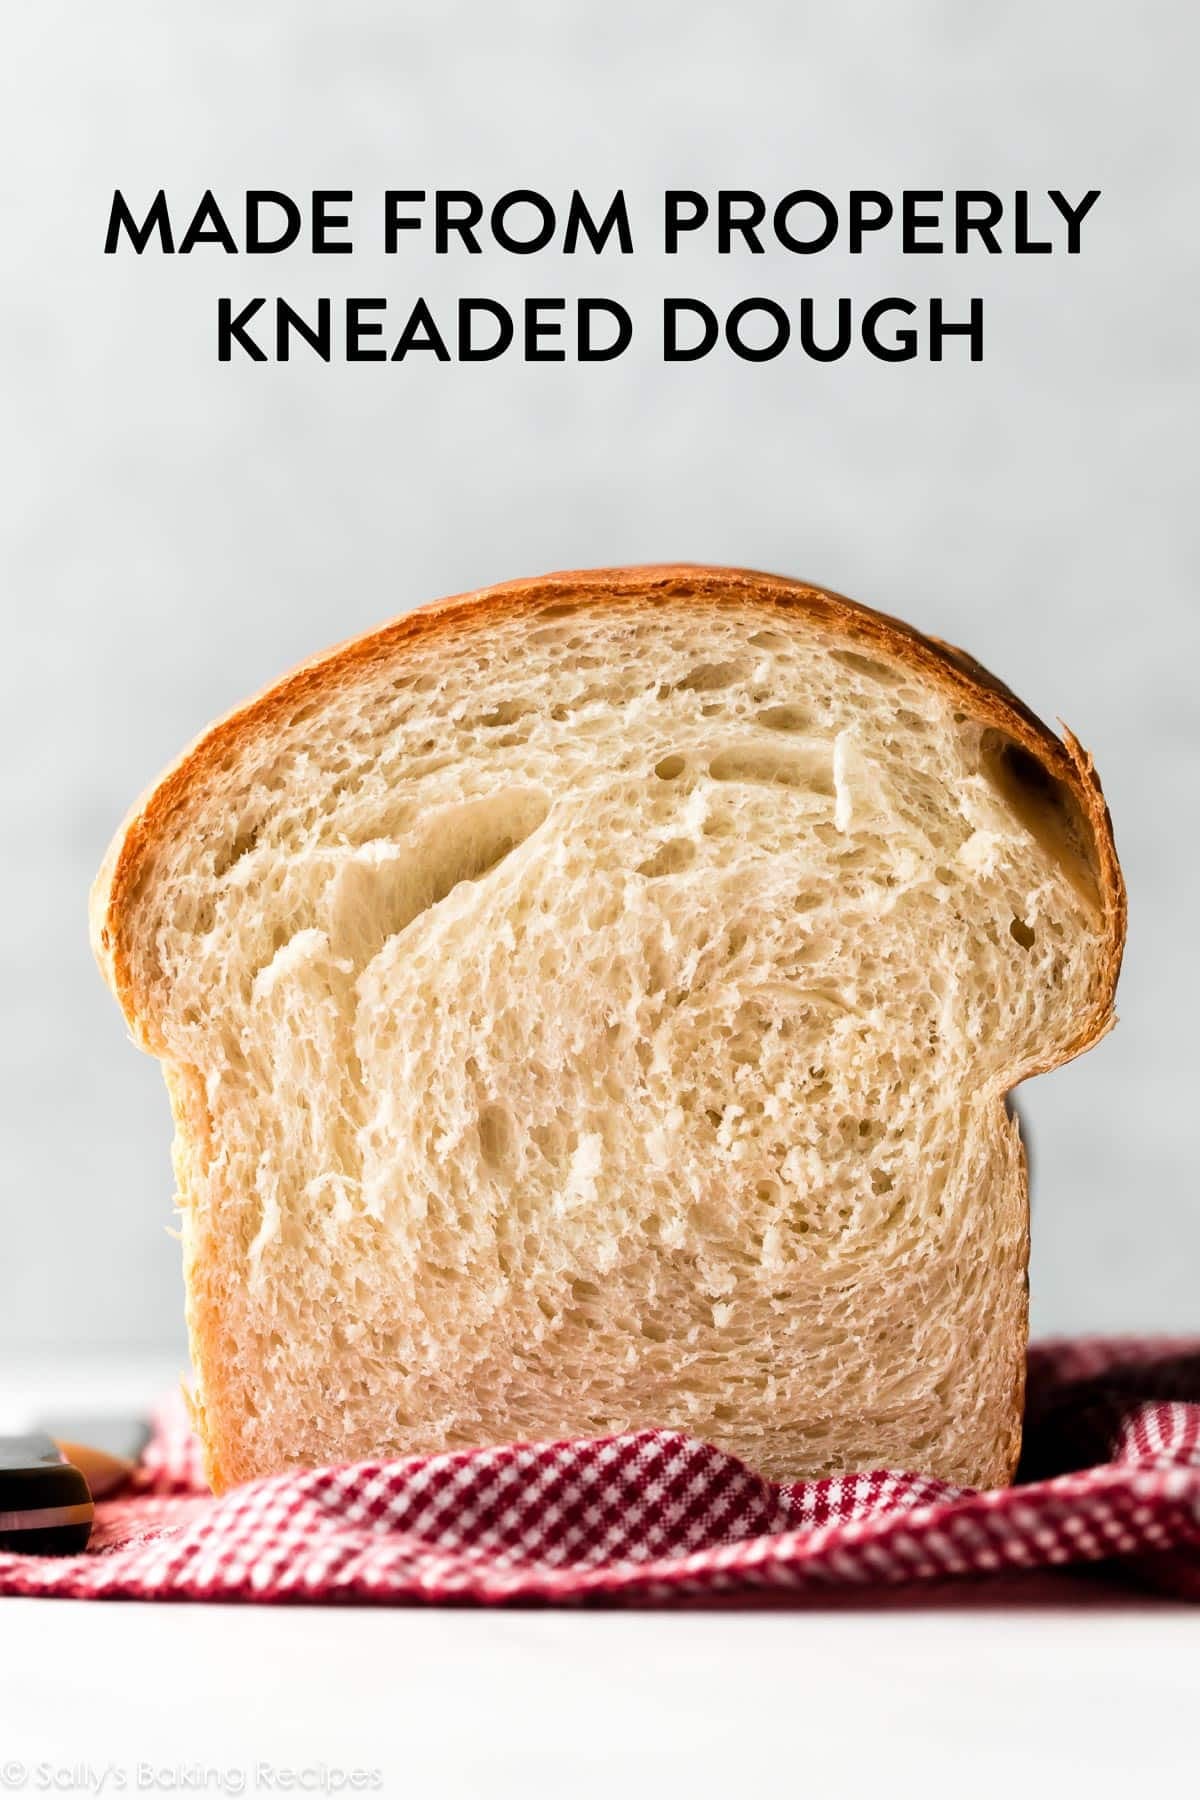
And now, the same sandwich bread recipe, but I took the time to properly knead the dough like the recipe instructs. You can see a MAJOR difference.
How to Knead Dough by Hand
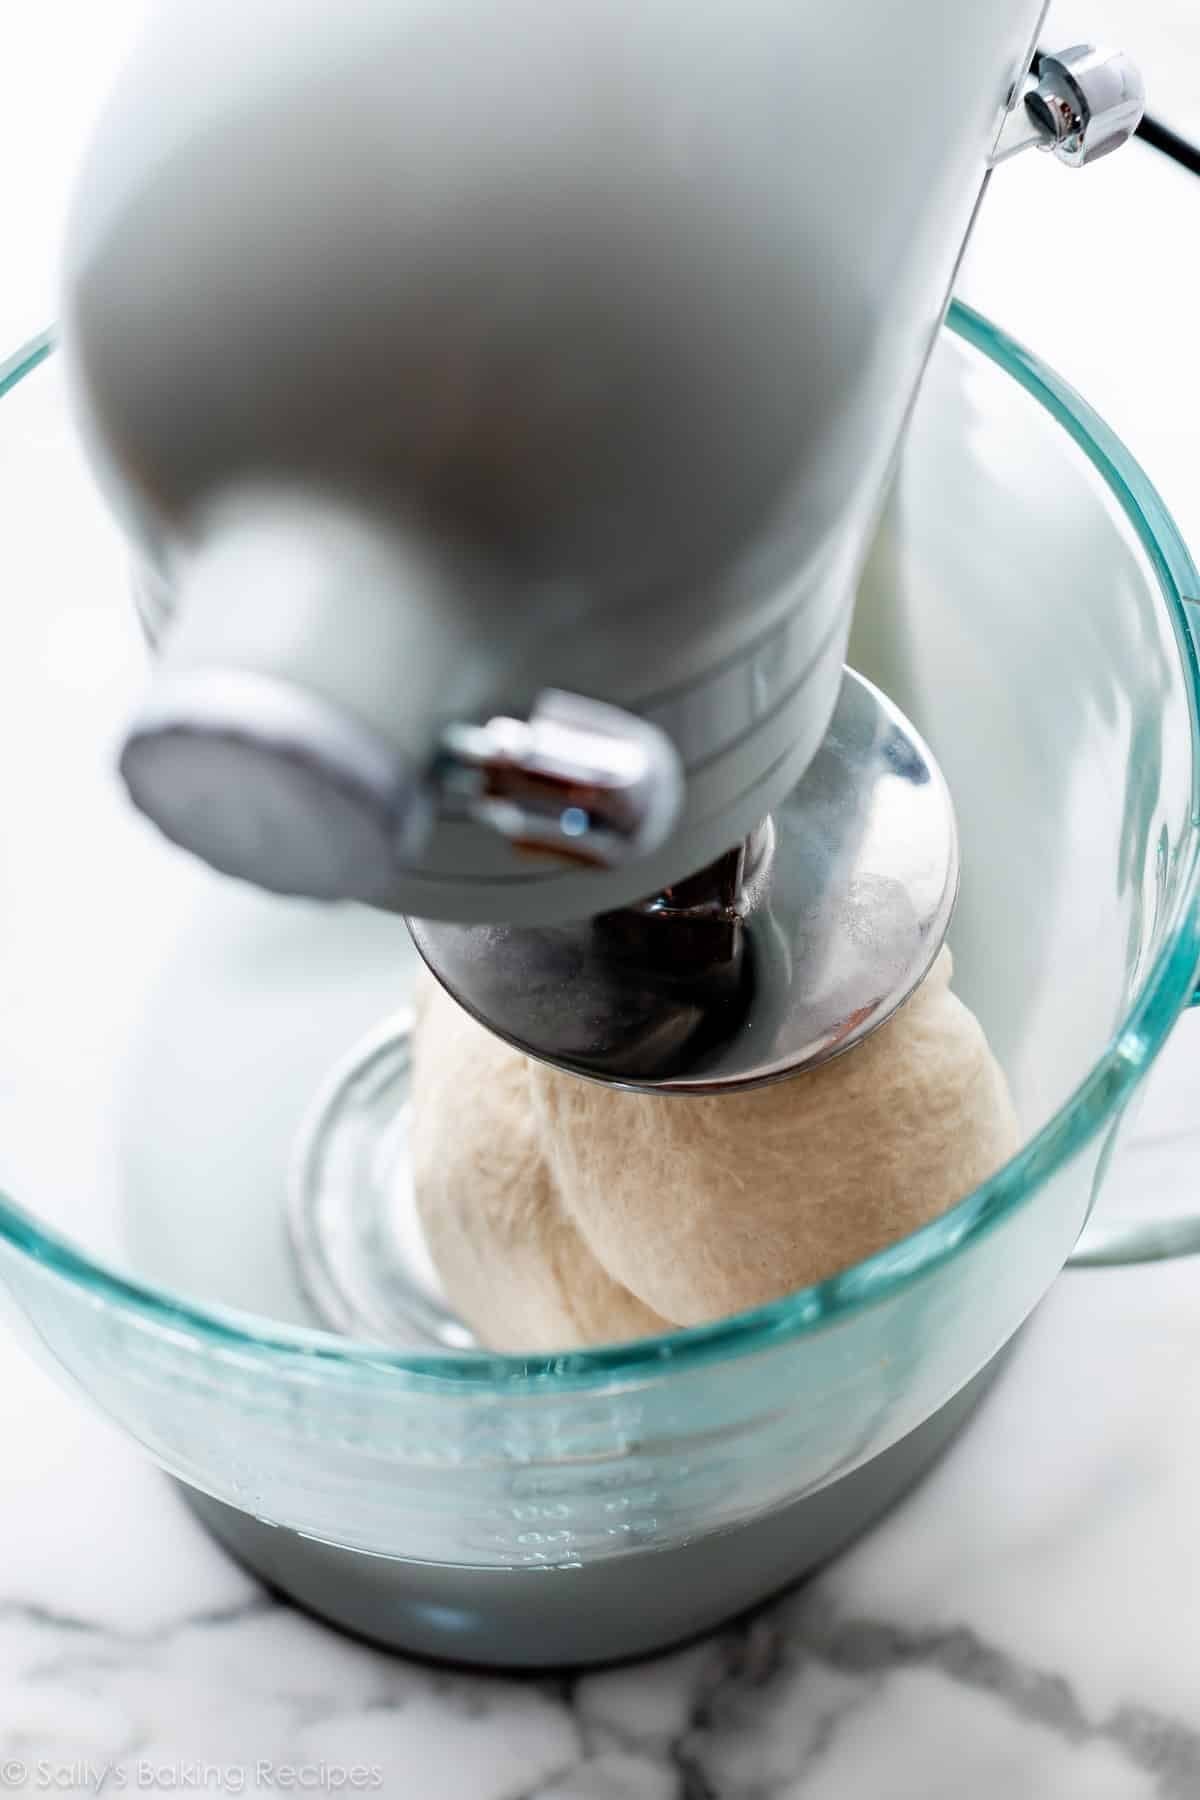
If you have a stand mixer with a dough hook attachment, you can let the mixer run on low speed and the dough hook can do the kneading, which makes the job hands-off; but I much prefer to knead dough by hand, for several reasons:
- Some doughs can be really heavy, and might be too much for your mixer to handle.
- Letting a stand mixer do the work can potentially lead to over-kneading the dough. It’s a lot harder to over-knead dough with your hands, because you get a good feel for the dough, and will notice as the texture changes. And also… you would likely get very tired before you reach that point!
- And of course, kneading by hand is a great stress reliever—give it a try!
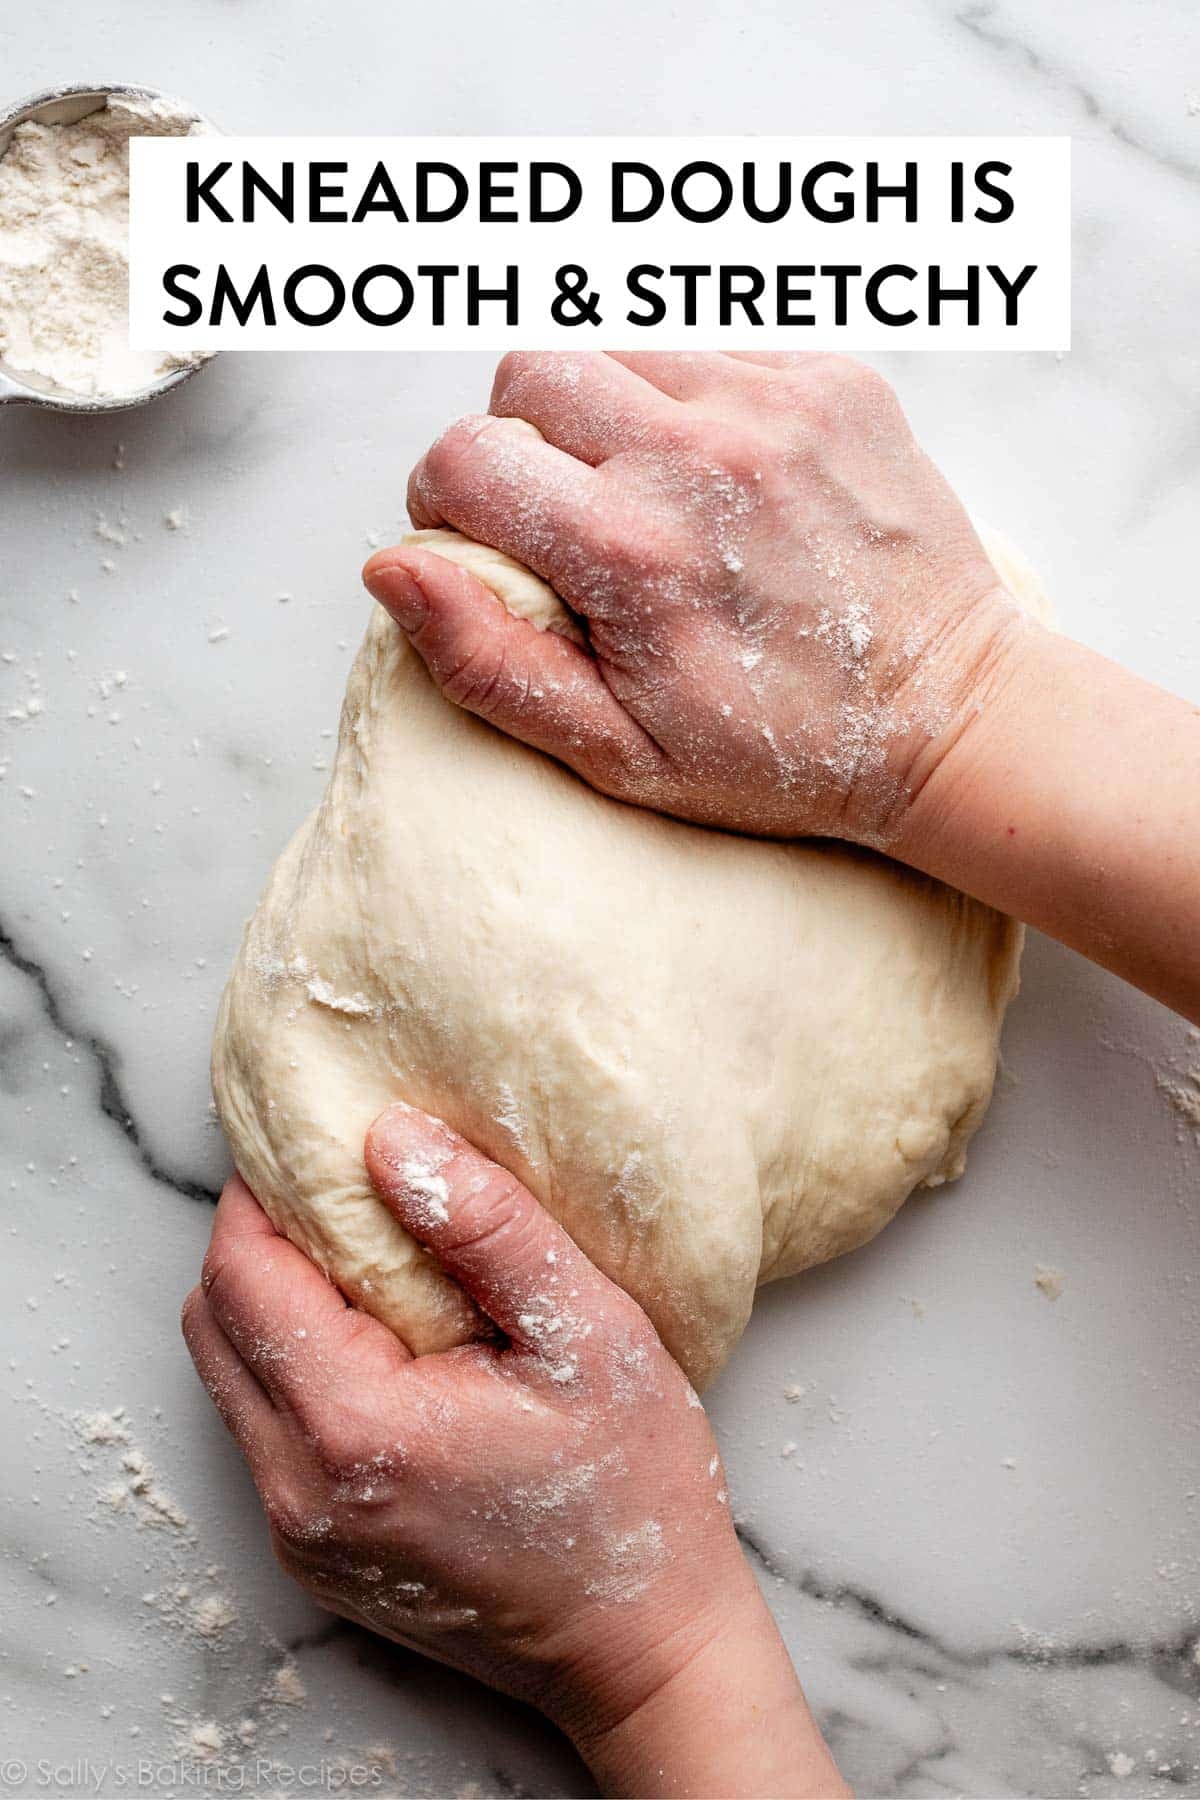
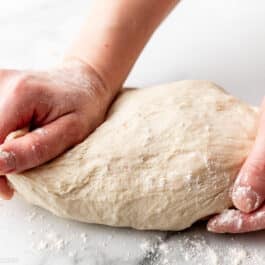
If you decide to knead the dough by hand, here’s how to do it: Using the heels of your hands, gently push the dough away from you in a rocking motion, alternating hands as you go. You want to put some energy into it, to really stretch out the dough.
Video Tutorial
As you can see in the video, after you’ve mixed together all of your dough ingredients, it’s kneading time. Here’s everything you need to knead:
- Clean hard surface, such as a countertop or a large cutting board.
- Small dish of all-purpose or bread flour, aka “bench flour.”
- A bench scraper is a useful tool to have on hand; if the dough is sticking to your work surface, just scrape it off with a bench scraper and then add a little more flour to the surface.
Success Tips
- Don’t add any more flour than you really need—use just enough to prevent it from sticking too much to your hands and work surface. The dough should still feel a little tacky.
- If the dough starts sticking to your hands, add a little more flour to your hands, rather than to the dough, so you don’t throw off that careful ratio of ingredients in your bread recipe.
- As you knead, you’ll start to feel the texture of the dough change; it will begin to smooth out and feel softer and more elastic.
How to Knead Extra-Sticky Dough
If you have an especially soft or sticky dough, there’s another kneading technique you can use. I use this method primarily with extra-soft rich doughs, such as my overnight cinnamon rolls. Rich doughs have more fat in them (for example, milk, butter, and egg), as opposed to lean doughs like pizza dough and homemade bagels.
With the heel of your hand, push the dough out, then fold it back. Give the folded dough a quarter turn, and repeat. Push it out, fold it back, and turn. This method is a little more gentle, and I find it works better when you have a particularly wet, sticky dough. You can watch me do this in the video above.
How to Know When Dough Has Been Kneaded Enough
How do we know when the dough has been kneaded enough and is ready to rise? I have two ways you can test your dough for doneness:
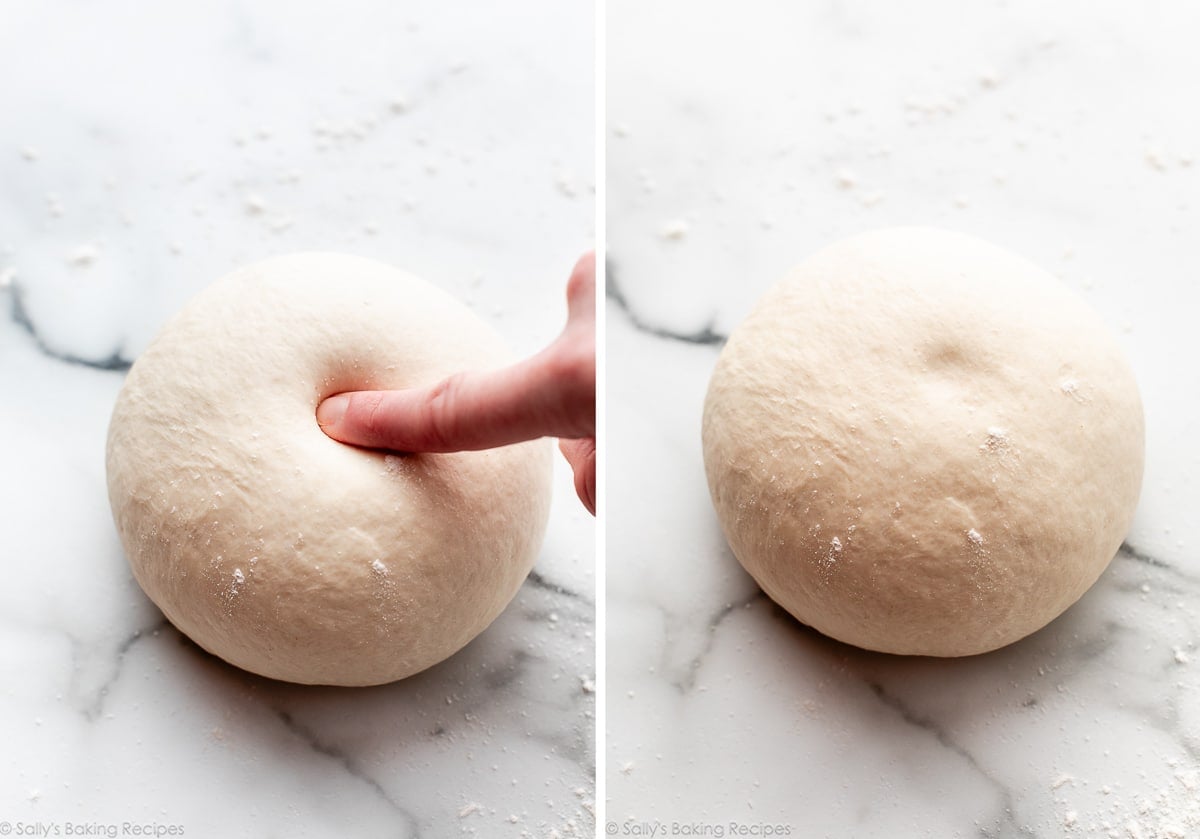
The first way to check is to simply poke the dough with your finger. If the dough bounces back without sticking to your finger, it’s been kneaded enough. If it doesn’t, you need to keep kneading.
Windowpane Test for Dough
The second way to check if your dough has been kneaded long enough is something called the windowpane test. Tear off a small piece of the dough, and stretch it out until you can see some light coming through it. (Just hold it up to a light or a window.) If the dough tears before that point, then you need to keep kneading for a bit longer.
One thing to note, however: the windowpane test may not work for whole-grain dough, like this whole-wheat bread recipe. That’s because the bran present in the whole-wheat flour interferes with the gluten formation. So if you think you have kneaded your whole-grain dough for long enough but it’s not passing the windowpane test, don’t worry—that’s normal.
Kneading length varies greatly in yeast bread recipes. Some doughs take just 3–5 minutes, while others can take up to 10–15 minutes. For those longer knead times, if your arms are getting tired, feel free to pop the dough back into your stand mixer and use the dough hook for a few minutes to give your hands a break.
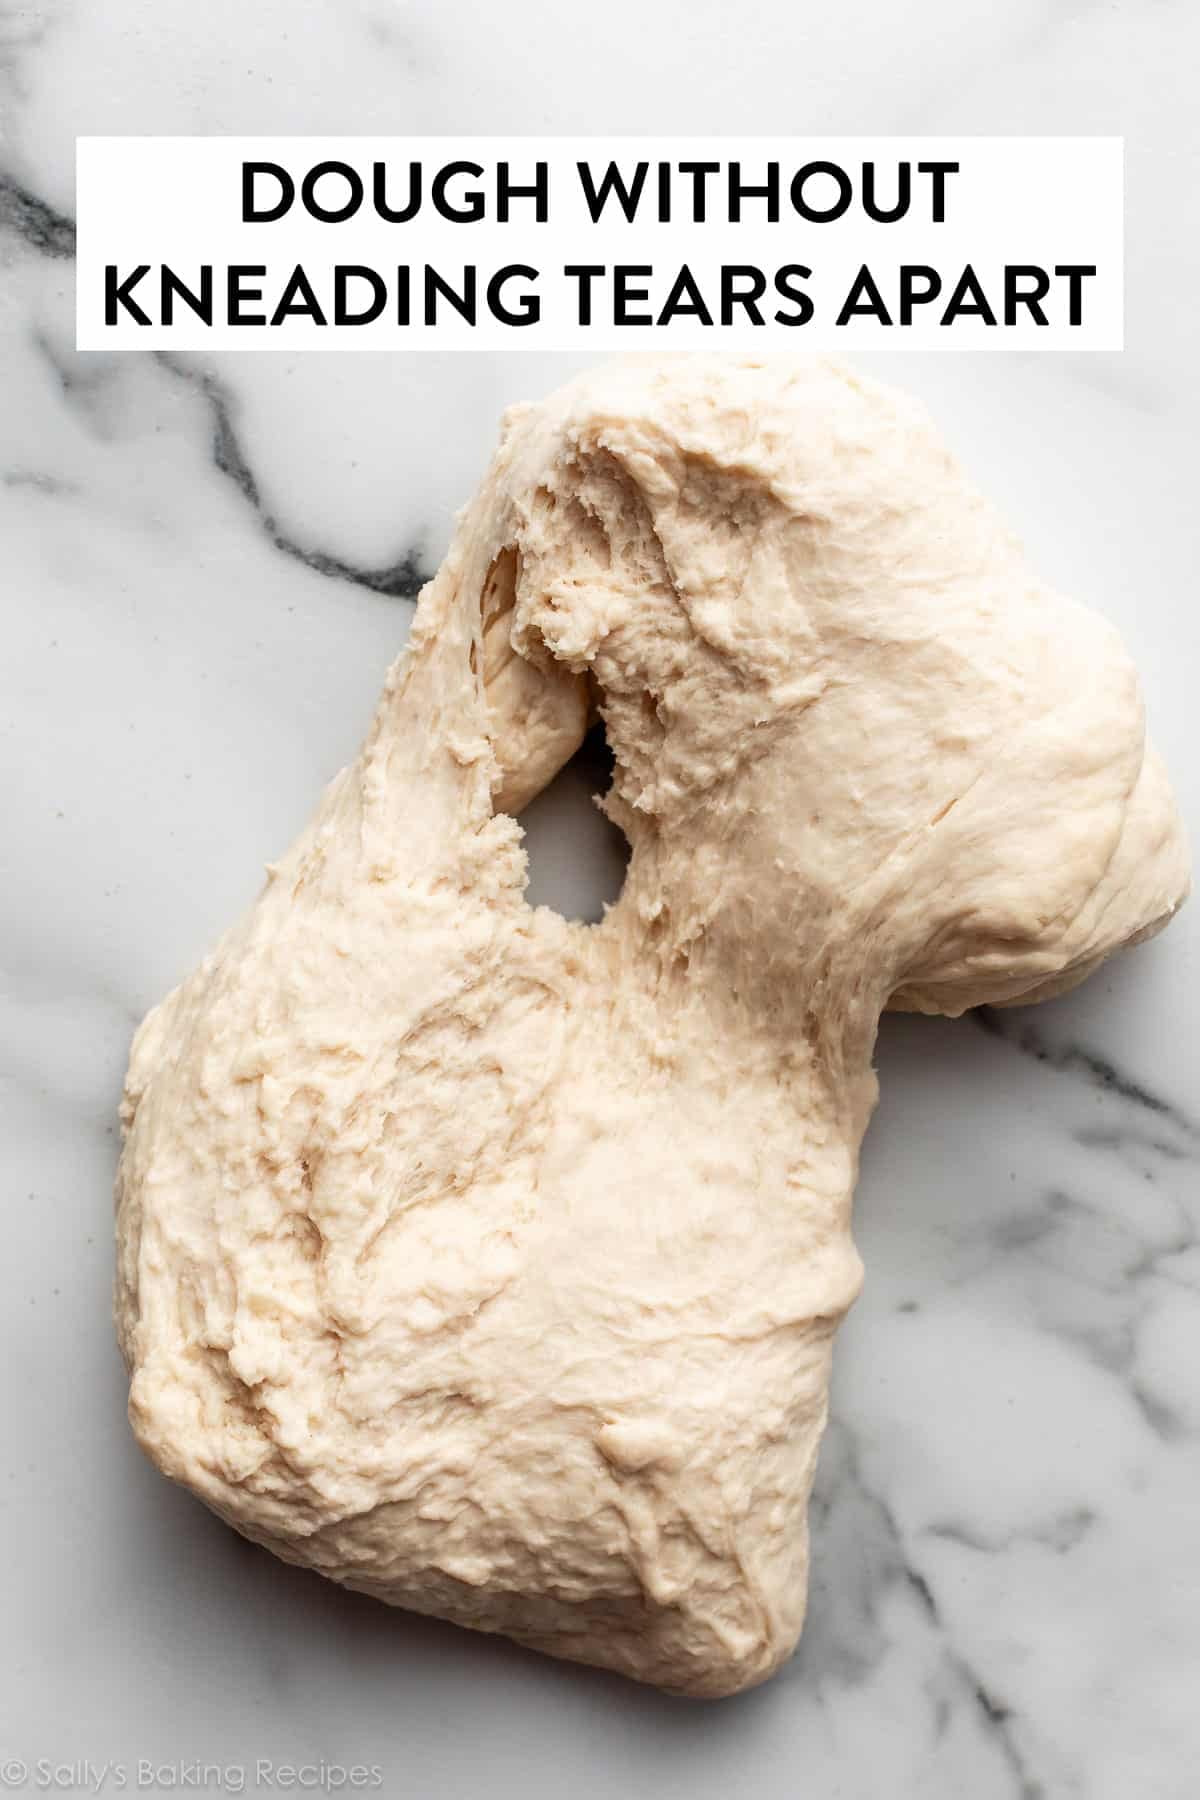
What Does Under-Kneaded Dough Look Like?
Dough that has not been kneaded, or hasn’t been kneaded long enough, appears lumpy, doesn’t stretch very well, and tears easily. If your dough is like this, it needs more kneading. Keep kneading it until it’s smooth, stretchy, and more pliable.
Obviously, kneading dough does take a little time, but the effort is well worth it, especially because you are already taking the time to make bread from scratch. I think you’ll find it’s actually one of the most enjoyable steps in bread-making (well, except for the smelling and tasting parts at the end). Silky smooth, stretchy and cushiony… kneading dough is the original stress reliever toy!
I hope this tutorial has been helpful. Use your new kneading knowledge to make my whole wheat bread if you haven’t already!

Beginner Bread Bakers, Start With These:
- Homemade Pizza & Whole Wheat Pizza
- Soft & Flaky Dinner Rolls
- Homemade Soft Pretzels
- Flatbread Pizza
- Easy 1-Rise Cinnamon Rolls
- Homemade Bread Bowls
- Soft Pretzel Rolls
How to Knead Dough by Hand
- Prep Time: 10 minutes
- Cook Time: 0 minutes
- Total Time: 10 minutes
- Yield: 1 dough
- Category: Bread
- Method: Kneading
- Cuisine: American
Description
Use this tutorial to guide you through a key step in yeast bread baking: kneading dough. See recipe Notes, and watch the video tutorial to help. If you’re new to working with yeast, reference my Baking with Yeast Guide for simple answers to common yeast FAQs.
Ingredients
- Extra flour for hands, work surface, and dough
- Dough that requires kneading, such as sandwich bread dough
Instructions
- Lightly flour your hands, work surface, and dough. Using the heels of your hands, gently push the dough away from you in a rocking motion, alternating hands as you go. You want to put some energy into it, to really stretch out the dough. The dough may get sticky as you knead, and that’s fine. Just sprinkle a little more flour on your hands. Do not add any more flour than you really need—use just enough to prevent it from sticking too much to your hands and work surface. Dough should still feel a little tacky.
- As you knead, you’ll start to feel the texture of the dough change; it will begin to smooth out and feel softer and more elastic. The length of time a dough requires kneading depends on the recipe. Some doughs take just 3–5 minutes, while others can take up to 10–15 minutes. For those longer knead times, if your arms are getting tired and you have a stand mixer, feel free to pop the dough into your stand mixer bowl and use the mixer’s dough hook attachment for a few minutes to give your hands a break.
- How to know when to stop kneading: There are 2 ways to check whether the dough has been kneaded enough and is ready to rise, and you can use either or both. The first way to check is to simply poke the dough with your finger. If the dough bounces back without sticking to your finger, it’s been kneaded enough. If it doesn’t, you need to keep kneading. The second way to check is something called the “windowpane test.” Tear off a small (roughly golfball-size) piece of dough and gently stretch it out until it’s thin enough for light to pass through it. Hold it up to a window or light. Does light pass through the stretched dough without the dough tearing first? If so, your dough has been kneaded long enough and is ready to rise per your recipe’s instructions (such as sandwich bread). If not, keep kneading.
Notes
- If you have an especially soft, wet, or sticky dough, there’s another kneading technique you can use. I use this method primarily with extra-soft rich doughs. Rich doughs have more fat in them (for example, milk, butter, and egg), as opposed to lean doughs like pizza dough. With the heel of your hand, push the dough out, then fold it back. Give the folded dough a quarter turn, and repeat. Push it out, fold it back, and turn. This method is a little more gentle, and I find it works better when you have a particularly wet, sticky dough.
- Can I Knead Dough With a Hand Mixer? No, I do not recommend it. The dough will just get stuck in the beaters. Use a stand mixer or knead by hand.


Reader Comments and Reviews
I am very disappointed that the ingredients are shown, but no quantities
Hi Esme, this is a tutorial for how to knead dough, so here is no written recipe. Rather, you can use this tutorial as a resource when using any of our yeasted bread recipes. Those recipes will each have a complete list of ingredients and amounts. Hope this helps.
Thank you for this tutorial. I have been making your overnight cinnamon rolls for about a year-they are a family favorite! I find that my dough is always soft- I will add up to 3 extra tablespoons of flour in my mixer and kneading for triple the amount of time the recipe states. but the dough remains soft. I follow the recipe exactly. I still allow the dough to rise and make the cinnamon rolls, but do find them to be a little “doughy” though no one complains. Could I really need to knead for longer?
Good
Thank you for this helpful information
Another reason I love your recipes.
You give explicit instructions.
My daughter, granddaughters as well as myself agree your cakes are the very best.
Hi Sally,
First of all I want to say how much I love your Sally’s Baking website. I cannot express how grateful and appreciative I am that I found your website. It’s the most helpful of all the baking websites I’ve found. I can go on and on but I’ll stop here. :-). I am absolutely terrified of using yeast. That being said, I’d like to start attempting to use it in baking. One question about kneading, does it matter what kind of surface is used to knead the dough? I have a very old and small kitchen with almost no counter space so wondered if it mattered if I used an old baking sheet to knead the dough. Thank you for your help!
Hi Joy! You want a surface that won’t move underneath you. A baking sheet would likely move under you while you’re kneading. Many bakers like to knead on large wood cutting boards if they have one.
Sally, I have had the opposite problem when making pizza dough, it’s not soft the way this dough is. It’s much tougher and it takes a lot of effort to knead it! Does this suggest I’m using too much flour? Can you add extra liquid to a dough that is too stiff? Thanks!
Hi Lina, it does sound like there is too much flour. How are you measuring? Be sure to spoon and level (or use a kitchen scale) to ensure the flour isn’t overmeasured, which can dry out the dough and make it heavy. Hope this helps for your next batch!
I’m having an issue with bread rising during the baking process. It rises just fine in the oiled bowl but after that it seems to not rise in the oven. Any suggestions?
Hi Craig, there are a few different reasons why bread may not rise during the second rise. Did it seem to rise too quickly during the first rise? That can cause the dough to over proof and then collapse during baking. Our Baking with Yeast Guide will also be helpful for troubleshooting. Let us know if we can help further!
I am having the same issue in every bread recipe I try and I am hoping you can help me troubleshoot. I now live in Texas (so warm and humid) but had the same issues while in Northern California (cold and wet). With all recipes and in both places, my bread consistently rises much more quickly than the recipe suggests, the texture is flimsy after baking, and it often falls in the oven. I have tried using bread flour, all-purpose, mixes with rye and whole wheat, and get the same results. I knead in my mixer and finish by hand.
Any suggestions?
Hi Claire, how warm do you keep your kitchen? When dough rises too quickly, it’s often because of a warm environment. You can try moving your dough to a slightly cooler spot to see if that slows the rise, and try reducing your rise time just slightly so that it doesn’t rise quite as much. Let us know if this works for you!
Thanks! Very informative for an old man.
Thank you for this detailed explanation but how do you punch the dough down prior to baking? I’m making pizza with all-purpose flour.
Hi Jeuner, our pizza dough recipe video has a nice visual for what it means to “punch the dough down”. You can find the video in the gray recipe card, and Sally punches the dough down at about 1:30 in that video (watch on YouTube here).
You are an excellent instructor that is very encouraging. I have never made bread or even given it a thought because I did not know how. I will attempt tomorrow after I go shopping to buy yeast.
We made a Christma stollen and the stollen was too solid inside and not a good texture, and it didn’t rise. I think my husband made it using 5 cups of bread flour and proceeded with the recipe. It had a okay taste with the candied fruit in it soaked in brandy over night. What I’m asking is do you have a good stollen recipe.
Hi Kathleen, we wish we did, but don’t have a trusted recipe for stollen. Let us know if you find one you love!
I’ve just recently started making yeasted breads and started with recipes on other sites and they ended up tasting ok, but the texture was way off. I thought it would take me months, maybe years, to make a decent loaf until I found your site! The instructions and info on kneading and how yeast works are easy to follow and have been extremely helpful. I made your basic sandwich bread and it turned out perfect! I was shocked. This has given me the confidence to try more creative yeasted bread recipes (maybe even cinnamon rolls!). Thank you for sharing your gift of baking!
We’re so happy to read this, Bethany!
As someone who’s been kneading bread for 40 some years not without experiencing some pitfalls, I’ll add a couple of things. Cleanliness is everything. If you’re using a countertop make sure that its clean and has no residue of your cleaning solution which means rinse and rinse again both the countertop and your bowls and tools. I’ve learned to use a large and heavy plastic cutting board that can go in the dishwasher for kneading. Second, always proof your yeast. Third and finally, for maximum rising, learn when to put your bread in the oven. If you do it too soon it won’t quite rise to its potential. Wait too long and it can start to collapse before its finished baking.
I have to cut this recipe in half because I’m only working with a toaster oven but the amounts are spot on.
How do I fix rough dough ball? It just doesn’t seems to get smooth!
Hi Jane, we’re happy to help troubleshoot. Which recipe are you using? Some doughs may be a bit more shaggy/rough than others, especially if they have add-ins.
This actually worked! I love this dough
Sally, I am a 69 year old soon to retire Plastic Surgeon. I have started making breads and everyone loves the ones that turn out well! I hide the others. I have needed to have a perfectionist attitude in my career and it spills over into my hobbies. Your tutorials are excellent and I look forward to honing my skills. Thank you for making things easy to understand.
Precisely what I was looking for, thankyou for putting up
Does the dough proof all the way to the top of the kitchen aid bowl?
Hi Bonnie, it really depends on the recipe and how much dough starts in the bowl. You really just want it to double in size; usually that’s not to the top of the bowl but sometimes if there is a lot of dough, it is. For the sandwich bread dough used in the video and photos, it rises about 3/4 of the way to the top.
I loved all your recipes Sally. Easy to follow and understand your recipes. I couldn’t believe I baked Oatmeal Cookies and with Chocolate Chips and peanut Butter Cookies I donated them in the Church. I heard lot of good comments. I watched your video how to knead. Hope I can do it . I so excited to make a Sandwich bread and Cinnamon Rolls. Thank you so much Sally.
Hi Mila, we’re so glad you’re enjoying the recipes!
Best demonstration of the ‘poke test’ I’ve seen. However, my question is more about too much rather than not enough – how do I avoid over-kneading? What’s the worst that could happen if I do?
Over kneaded dough will often be tough to roll out and result in a hard, dense baked bread. Be sure to follow the kneading times in your specific recipe closely, but if you knead dough by hand instead of using a mixer, it’s very difficult to over knead! You’ll know it has been kneaded enough when you poke the dough and it slowly bounces back, or with the window pane test outlined here.
when making something such as bagels, how long should you knead in a stand mixer on low? i have a kitchen aid, it says don’t use above speed two for more than two minutes at a time with the dough hook. if it’s 6-7 minutes of hand kneading, what would the time be in a stand mixer?
Hi DJ, for our bagel recipe, we recommend 6-7 minutes by mixer as well. You can stop and pause briefly if needed.
You mentioned overkneading. What effect does it have on the bread and how would I know if I have overkneaded my dough? Is there a way to correct overkneaded dough? Thank you so much for your tips. I have used several of your Cake recipes and want to try baking Fresh bread now
Hi Aminatu, overkneaded dough will often be tough to roll out and result in a hard, dense baked bread. Be sure to follow the kneading times in your specific recipe closely. You’ll know it has been kneaded enough when you poke the dough and it slowly bounces back, or with the window pane test outlined here.
Your no knead method of making bread is amazing, I have made bread for a number of years using the Paul Hollywood method with pretty good results, learning and experimenting as I go but this is a fantastic method as we have friends who have difficulty in working the dough.
I have passed this your simple tips on to others and have recommended your website to them.
Keeps up the good work
thank you
I absolutely love your soft dinner rolls. I am a complete failure with yeast, but my daughter is a fabulous baker! She sent a whole loaf of this bread home for me today and I’m in love! That’s the best bread I’ve ever had!! I have to try again. I’ll have to be rolled down the ramp to my house if I can manage to make it as good as hers!!!
Im a beginner bread maker. I havent tried your recipe yet but maybe you can still answer my question. I made a whole wheat bread and let it rise once in bowl and once in the pan, but my dough was stuck to the cover I had over it and it deflated some when i took it off. Can you tell me why?
Hi Louise! Make sure to keep the cover nice and loose to prevent this from happening. The bread needs room to grow.
Do you have a recipe for buttertart crust and pie crust
Hi Tamara, we do not have a buttertart recipe at this time, but here is our favorite pie crust recipe. Or, here is our all-butter pie crust recipe.
Great tutorial! Such a common thing in baking that often doesn’t get explained but can make such a difference in the success of a recipe. Thank you, Sally!
Thanks for the helpful video and step-by-step instructions.
You never said/showed how tobake it!!!
Hi Jim, this is just a tutorial for how to knead bread. You can find all of our yeasted bread recipes here; each recipe will have specific directions on how to bake the bread.
Do I need to grease the bowl that I put the dough in to rise
If the bread recipe you are using instructs you to, then use. Most will have you grease it.
This is great!! Thanks so much!!
I have such a terrible time with dough.