

Learn how to make homemade blueberry bagels completely from scratch. These bagels are chewy on the outside, soft and dense on the inside, and packed with real blueberries. Taste testers said they were the most flavorful blueberry bagels they’d ever had, and we agree—just look at their gorgeous color!
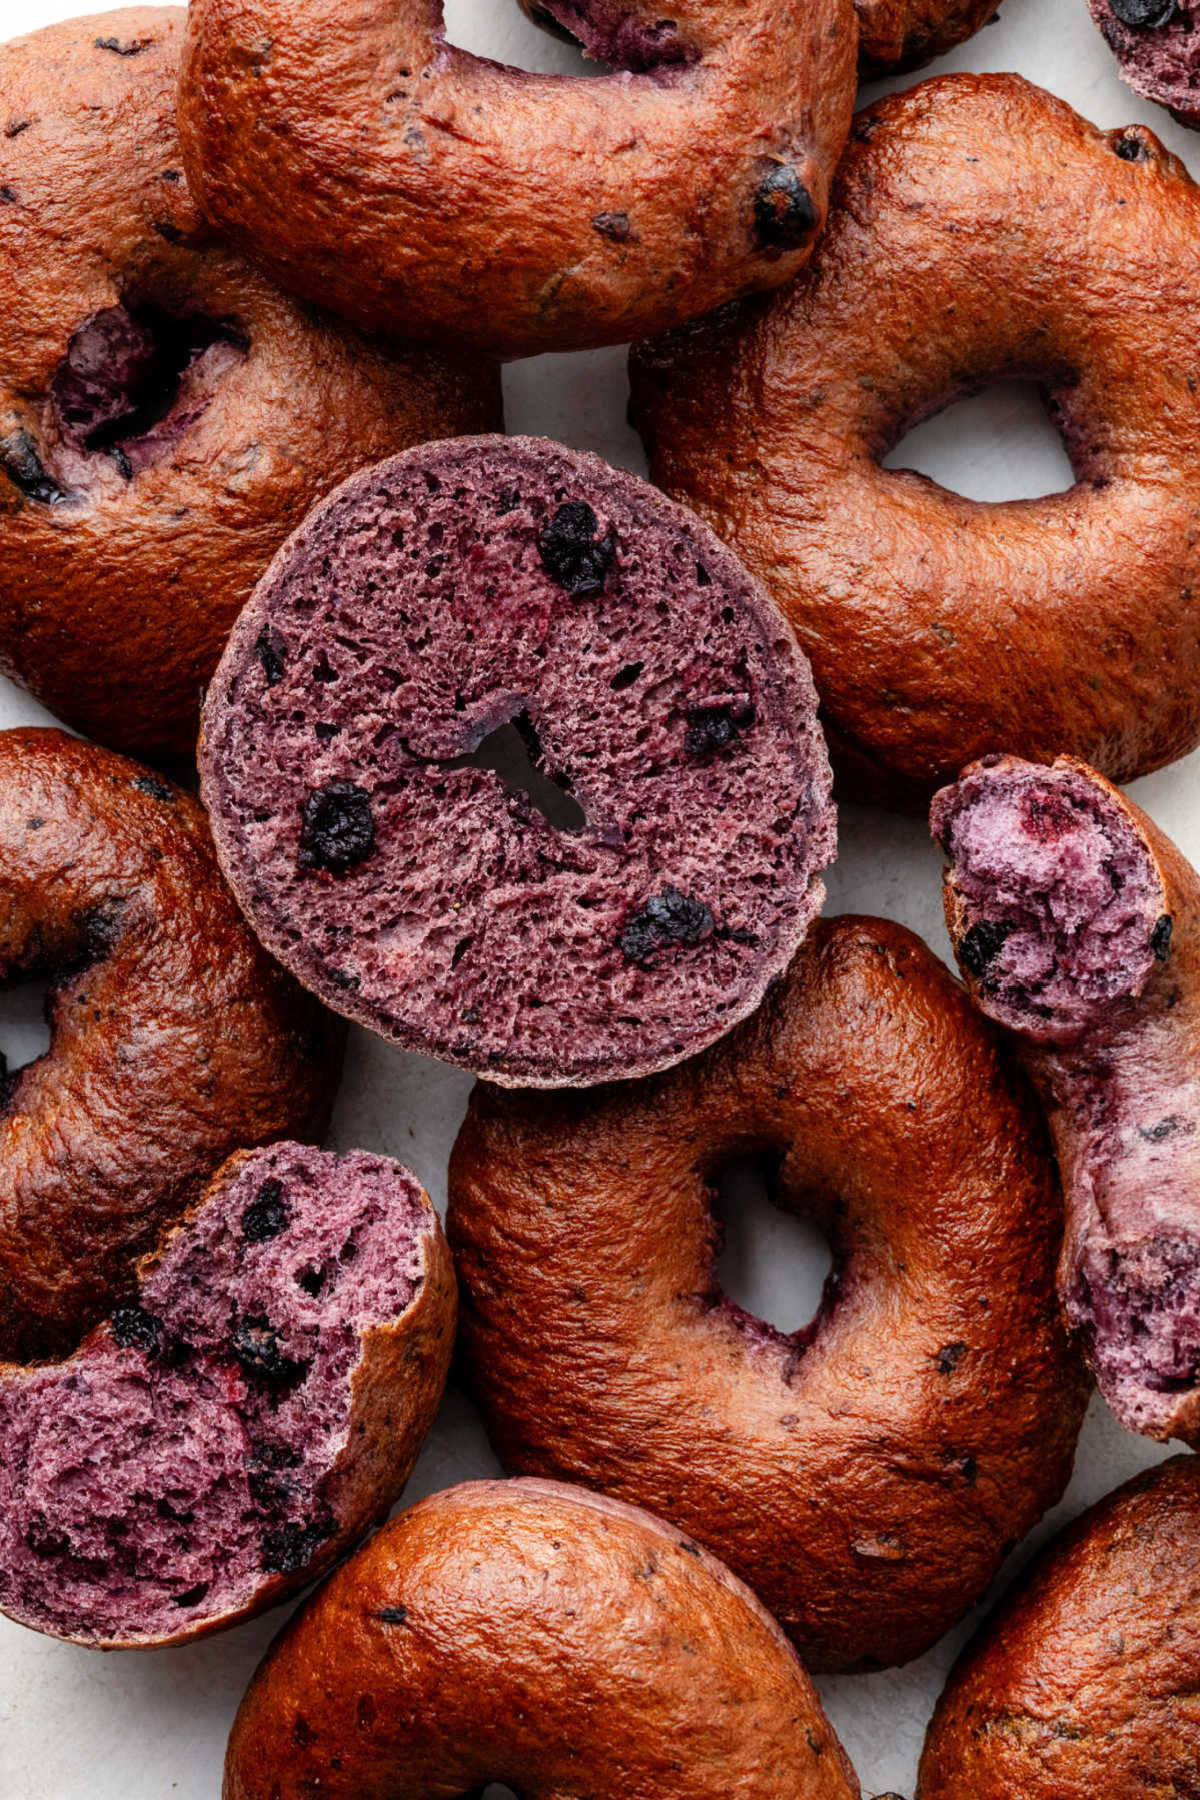
There’s nothing quite like a fresh bagel, especially when it’s warm from the oven, lightly crisp on the outside, and packed with blueberries inside! These homemade blueberry bagels are soft, very chewy, subtly sweet, and boast a gorgeous, naturally violet hue. Best of all, they’re made with simple, real ingredients and the dough can be prepped ahead.
My team and I tested these blueberry bagels many times over the past 2 months to get the texture just right: not too dense, not too bready, and never gummy. The key is a sturdy yet soft dough, a quick boil before baking, and plenty of blueberries in every bite. This was a tall order!
If you’ve ever made homemade bagels, the process will be familiar to you. And if this is your first time, let me assure you: this recipe is very doable, even for beginners.

Yeast Beginners: Start Here
Reference this Baking with Yeast Guide whenever you work with baker’s yeast. I include practical answers to all of your common yeast questions.
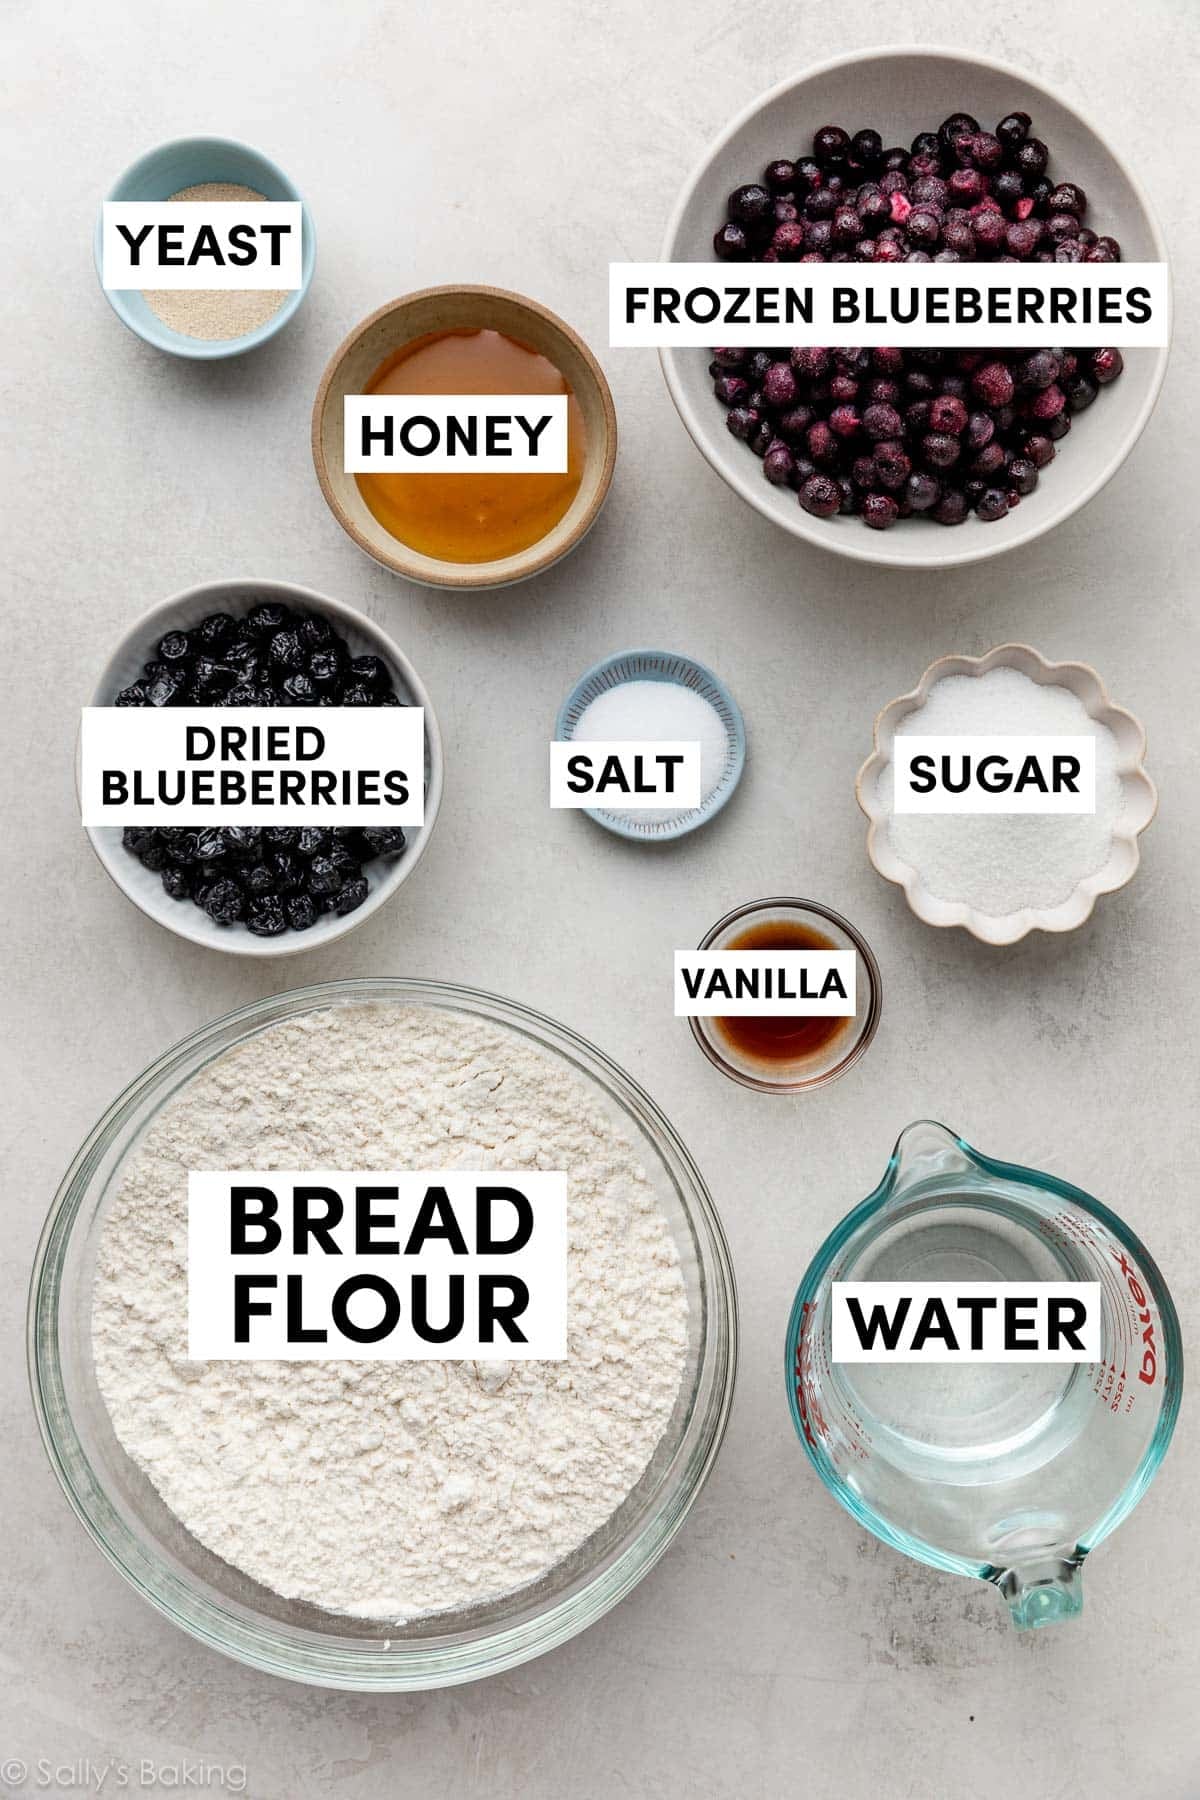
Ingredients You Need:
- Fresh or Frozen Blueberries: We’ll flavor and tint the dough with a homemade blueberry reduction. Something similar to this blueberry sauce topping, but not as thick. For the reduction, you can use fresh or frozen blueberries; I use frozen, which are convenient and available year round.
- Granulated Sugar: You’ll need to divide it in half; cook half with the blueberries, and add the remaining half to the yeast and water.
- Warm Water: Liquid for the dough.
- Yeast: Allows the dough to rise. I recommend an instant or active dry yeast.
- Vanilla: A teaspoon of vanilla extract complements and enhances the blueberry flavor.
- Dried Blueberries: Look for the kind that are chewy, like raisins or dried cranberries. We haven’t tested these bagels with freeze-dried blueberries.
- Bread Flour: A high-protein flour is necessary for bagels. We want a dense and chewy texture, not soft and flaky like homemade cinnamon rolls.
- Salt: Can’t make flavorful bread without it!
Step-by-Step: How to Make Blueberry Bagels
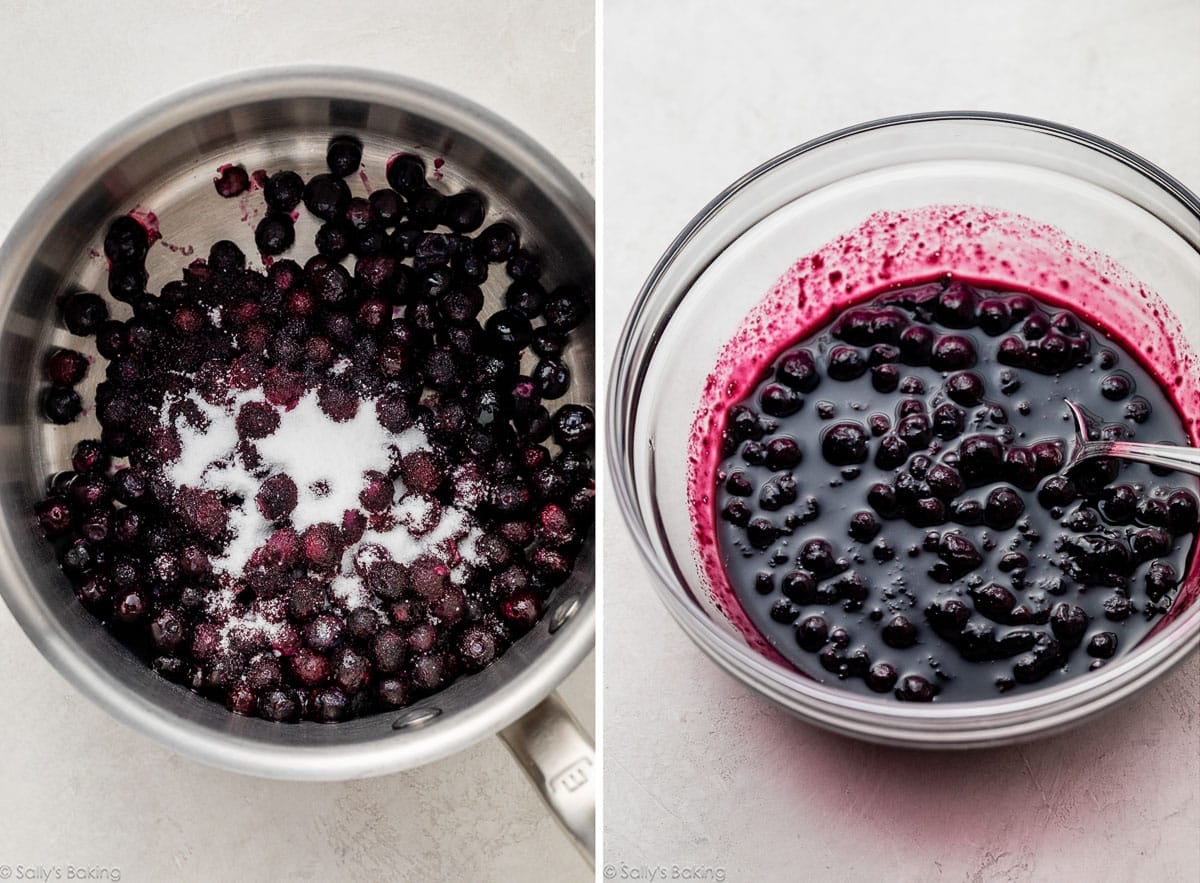
Cook the fresh or frozen blueberries with a little sugar until they break down into a loose sauce, about 10 minutes. You should have 1/2 cup (about 130g); do not use more than that in the dough. Let it cool slightly before adding it to the dough (too much heat can kill the yeast).
The blueberry reduction will be looser/thinner than a jam, and even thinner than blueberry sauce topping. This is what you’re going for:
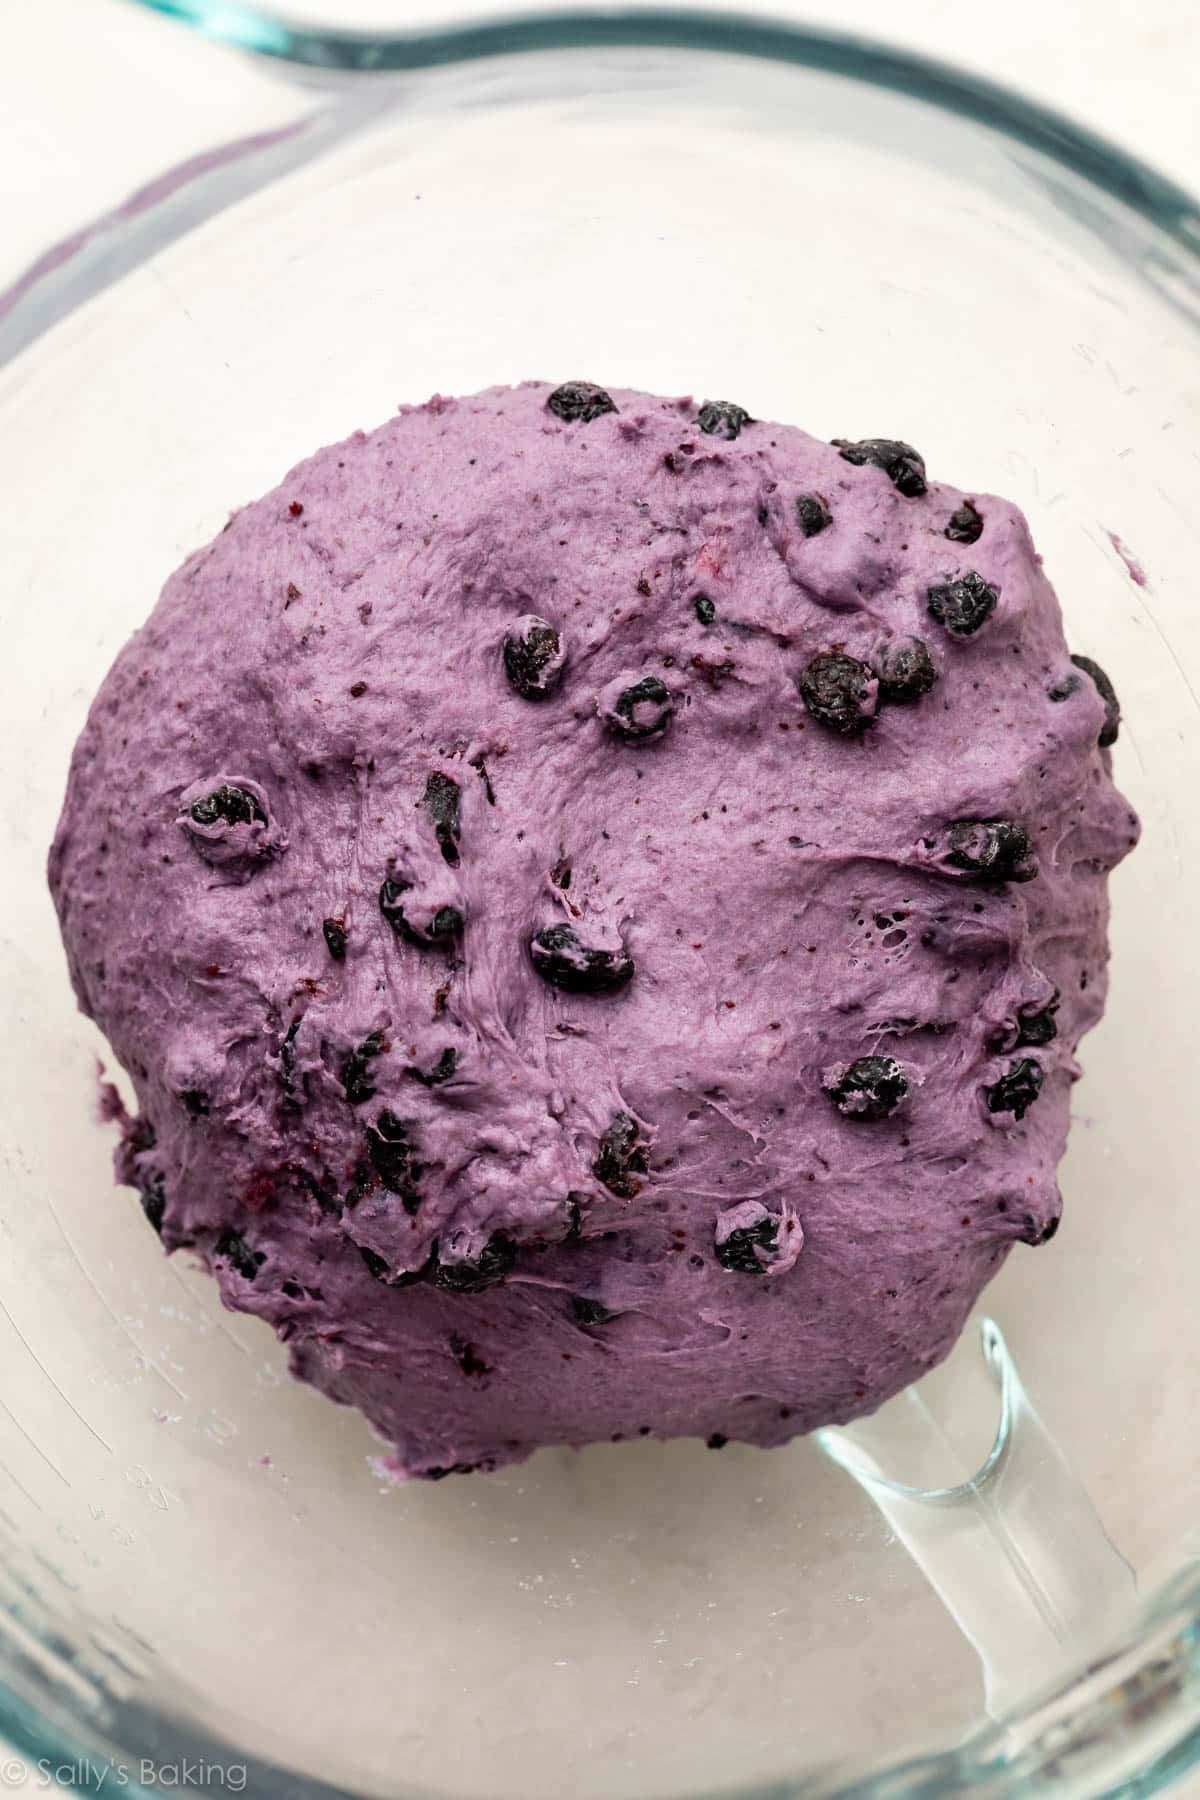
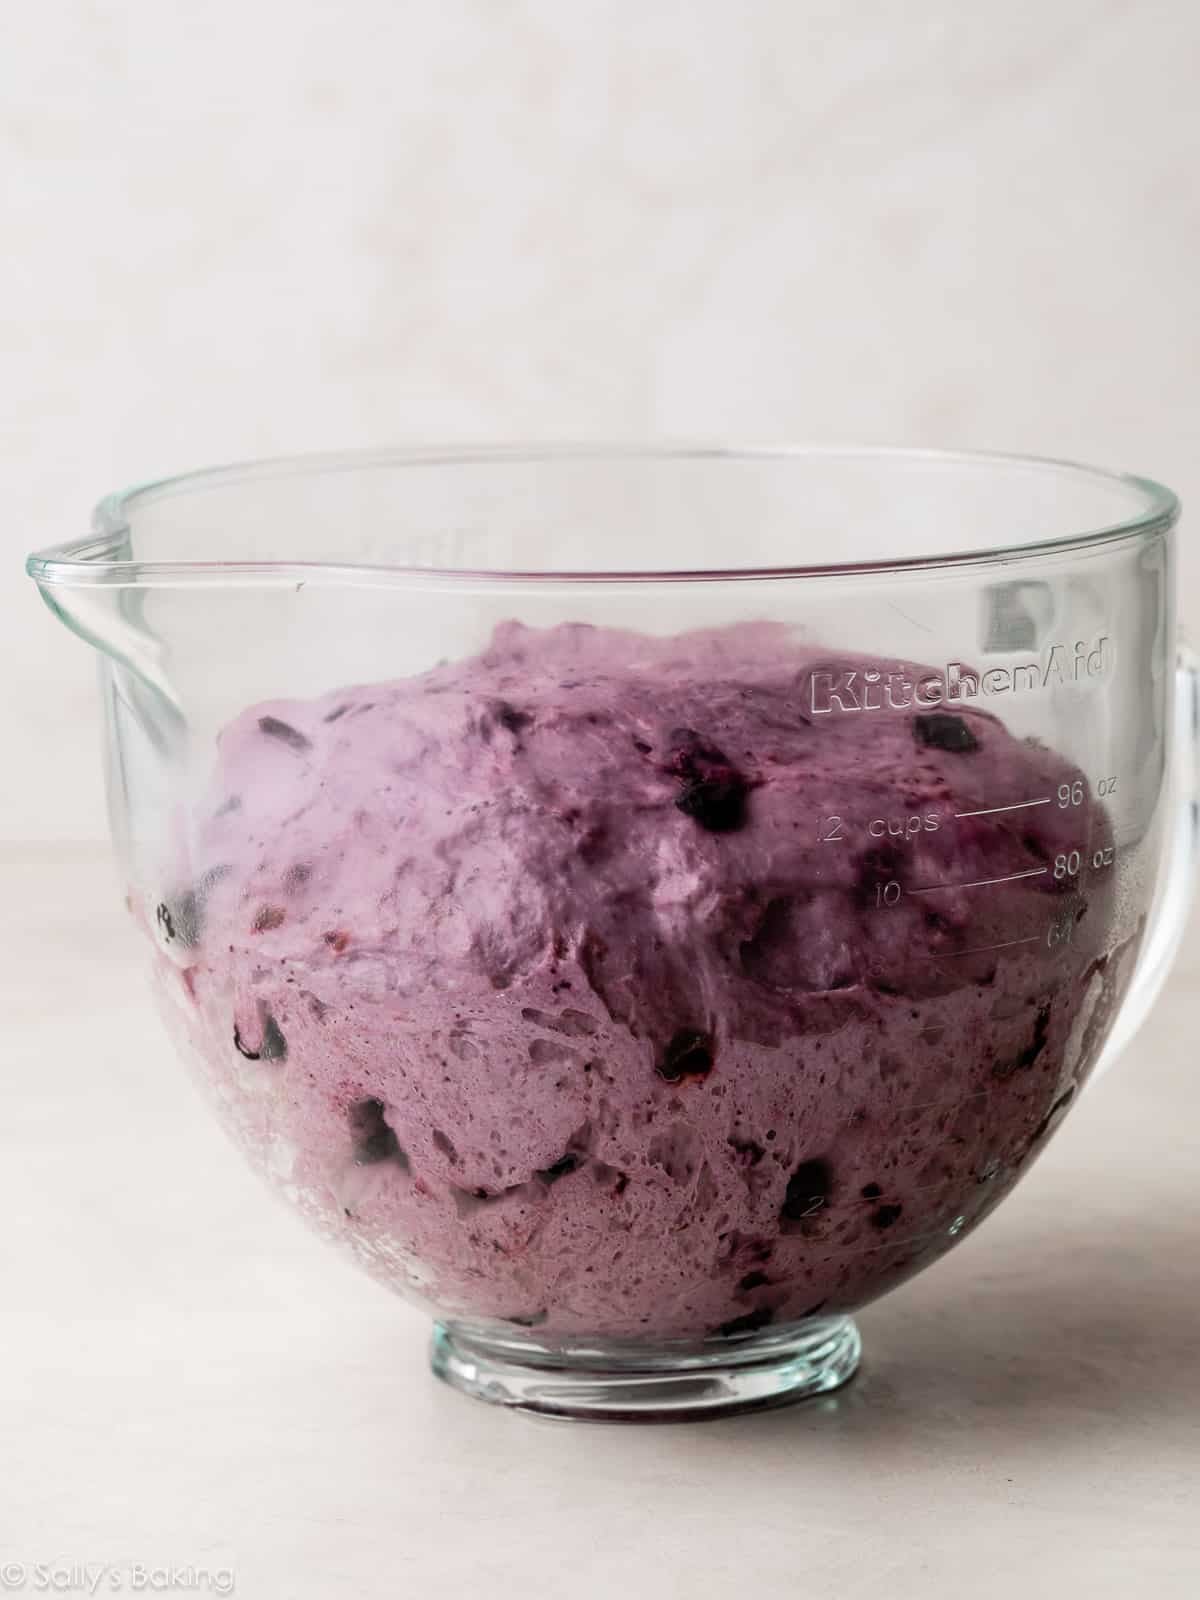
Whisk together the remaining sugar, warm water, and yeast. Cover and let it sit for about 5–10 minutes until foamy and frothy. Mix in the remaining dough ingredients, including the cooled blueberry mixture and dried blueberries, until a dense, slightly tacky dough forms. If it feels dry, add more water, 1 teaspoon at a time.
Knead the dough by hand or use a stand mixer. (Need help? I have a full visual guide in my How to Knead Dough tutorial.)
After the dough has been kneaded, cover it and let it rise until about doubled in size, about 2 hours:
How to Shape Blueberry Bagels
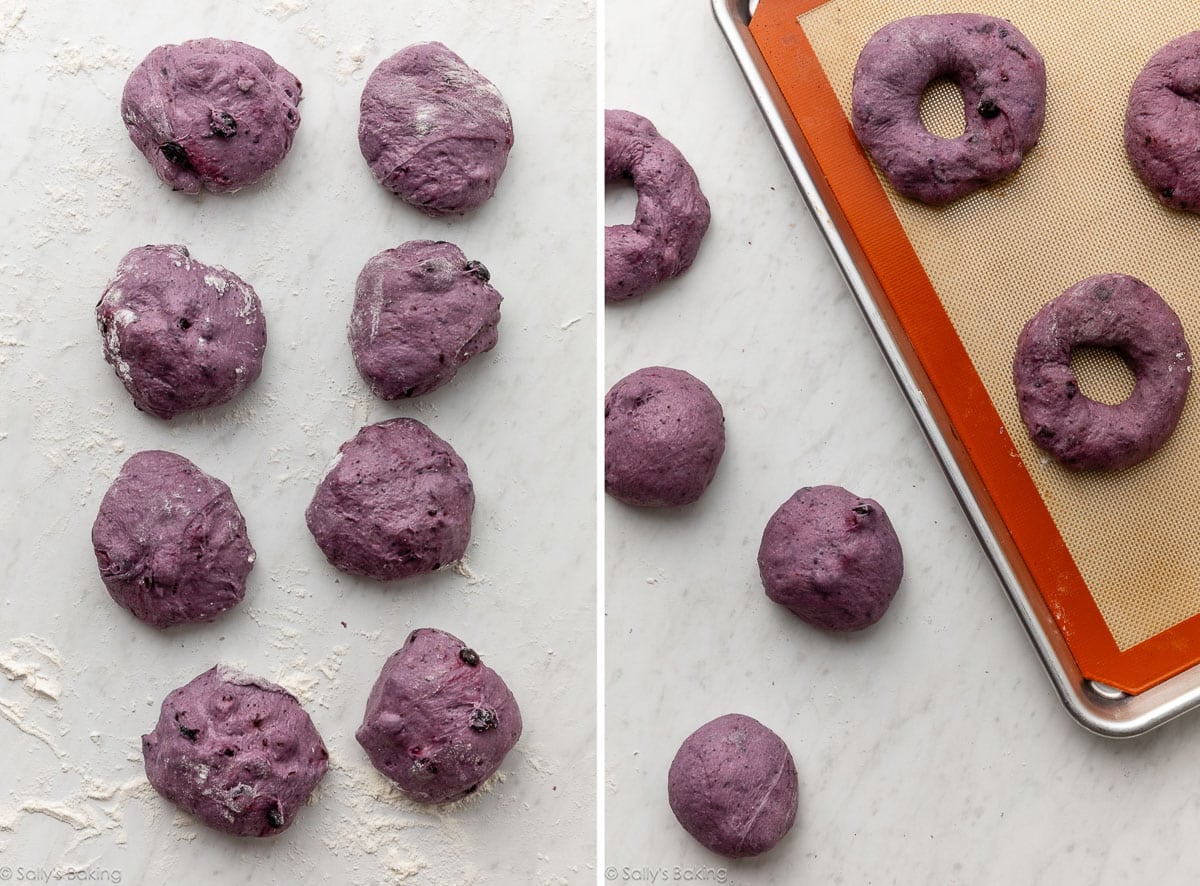
Punch down the dough, then divide it into 8 sections and shape into bagels. If you have a food scale, it’s helpful here for dividing the dough evenly. Our bagels each weighed around 130g.
Poke a hole through the center and gently stretch to about 1.5–2 inches wide. They don’t need to be perfect!
Bagel Water Bath
Bagels must cook for 1 minute on each side in a pot of boiling water. This is actually the most important step in the whole recipe. Why?
- Boiling the bagels gives them their beautiful shine. But looks aren’t everything—this shine is actually a result of the dough’s starches gelatinizing, which creates a crisp, shiny coating. I learned this from Cooks Illustrated.
- Boiling bagels cooks the outer layer of dough, which guarantees they’ll hold their shape in the oven.
Add honey or barley malt syrup to the water bath. Why? The sugar adds extra caramelization and crisp. Brushing the boiled bagels with egg wash does the same. Don’t skip either!
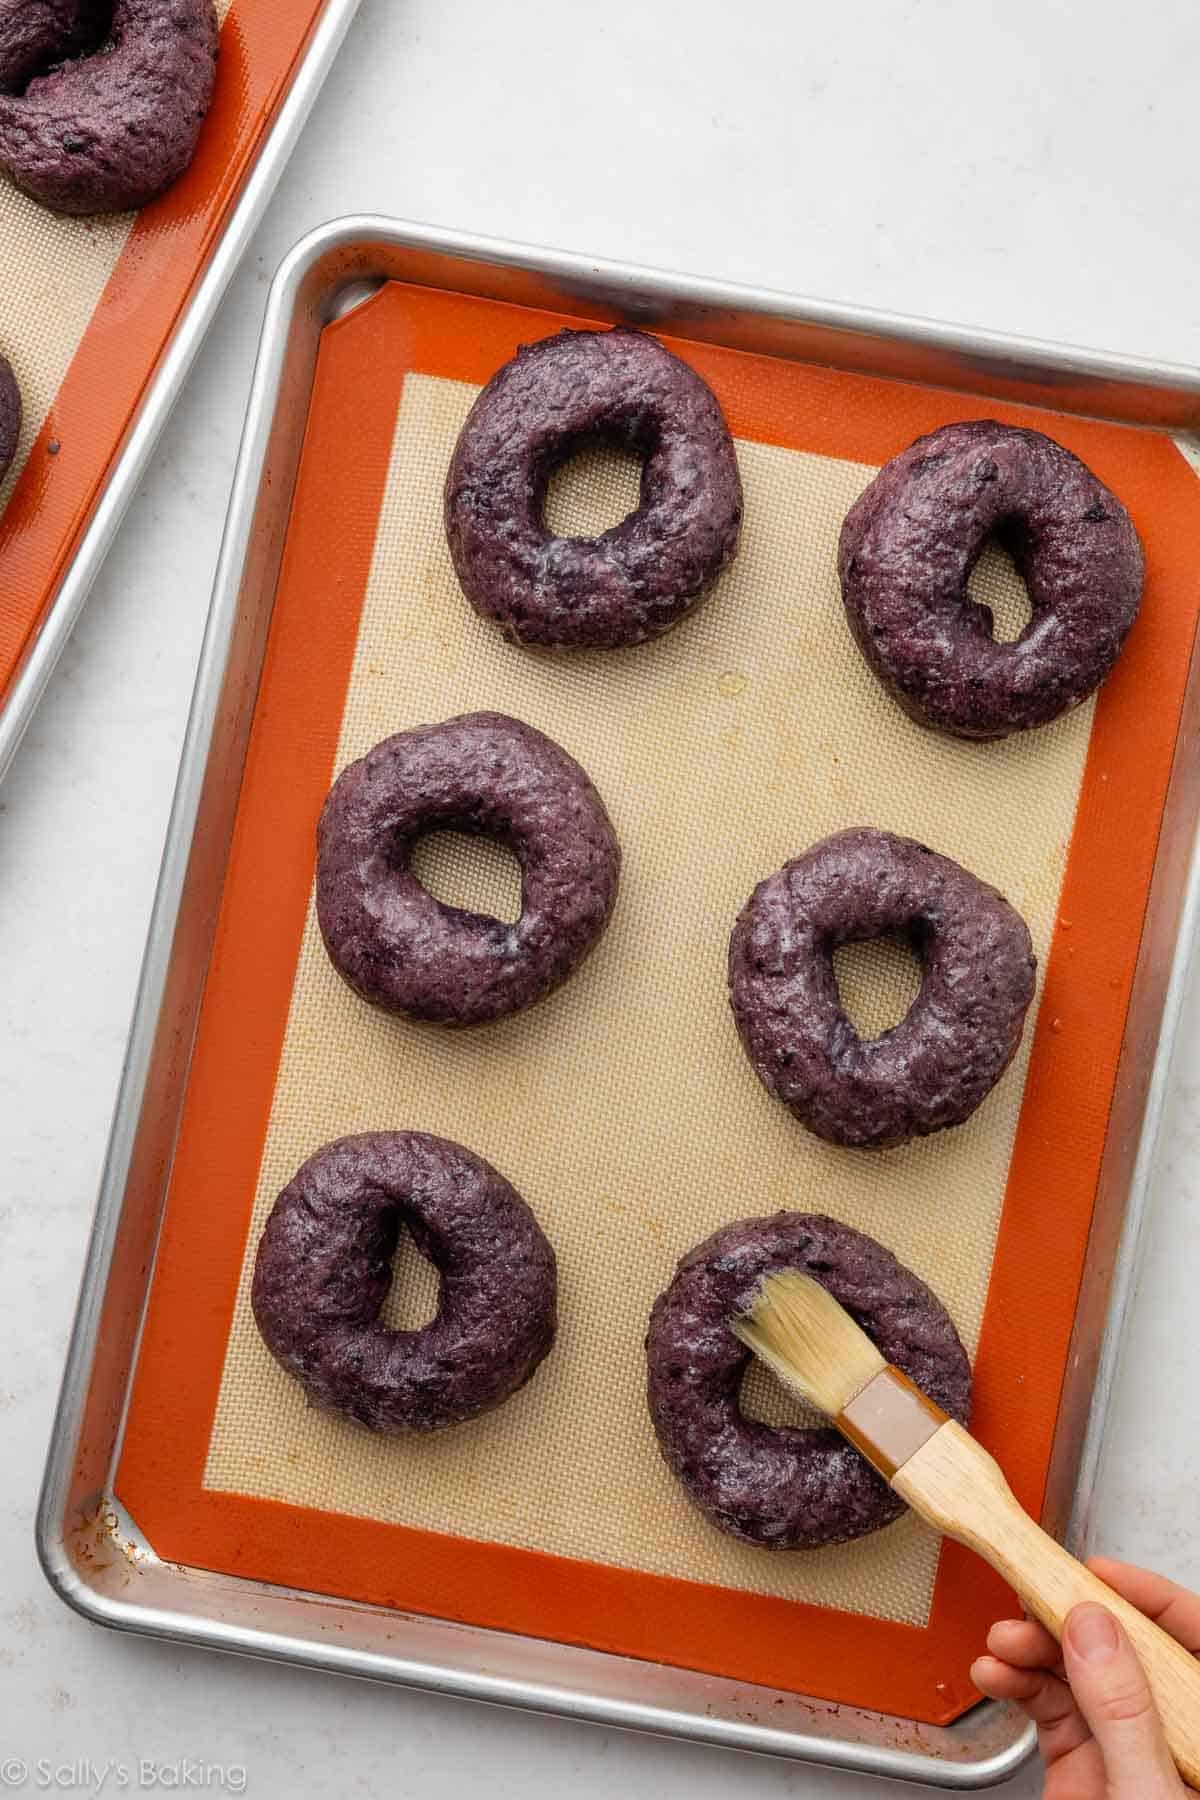
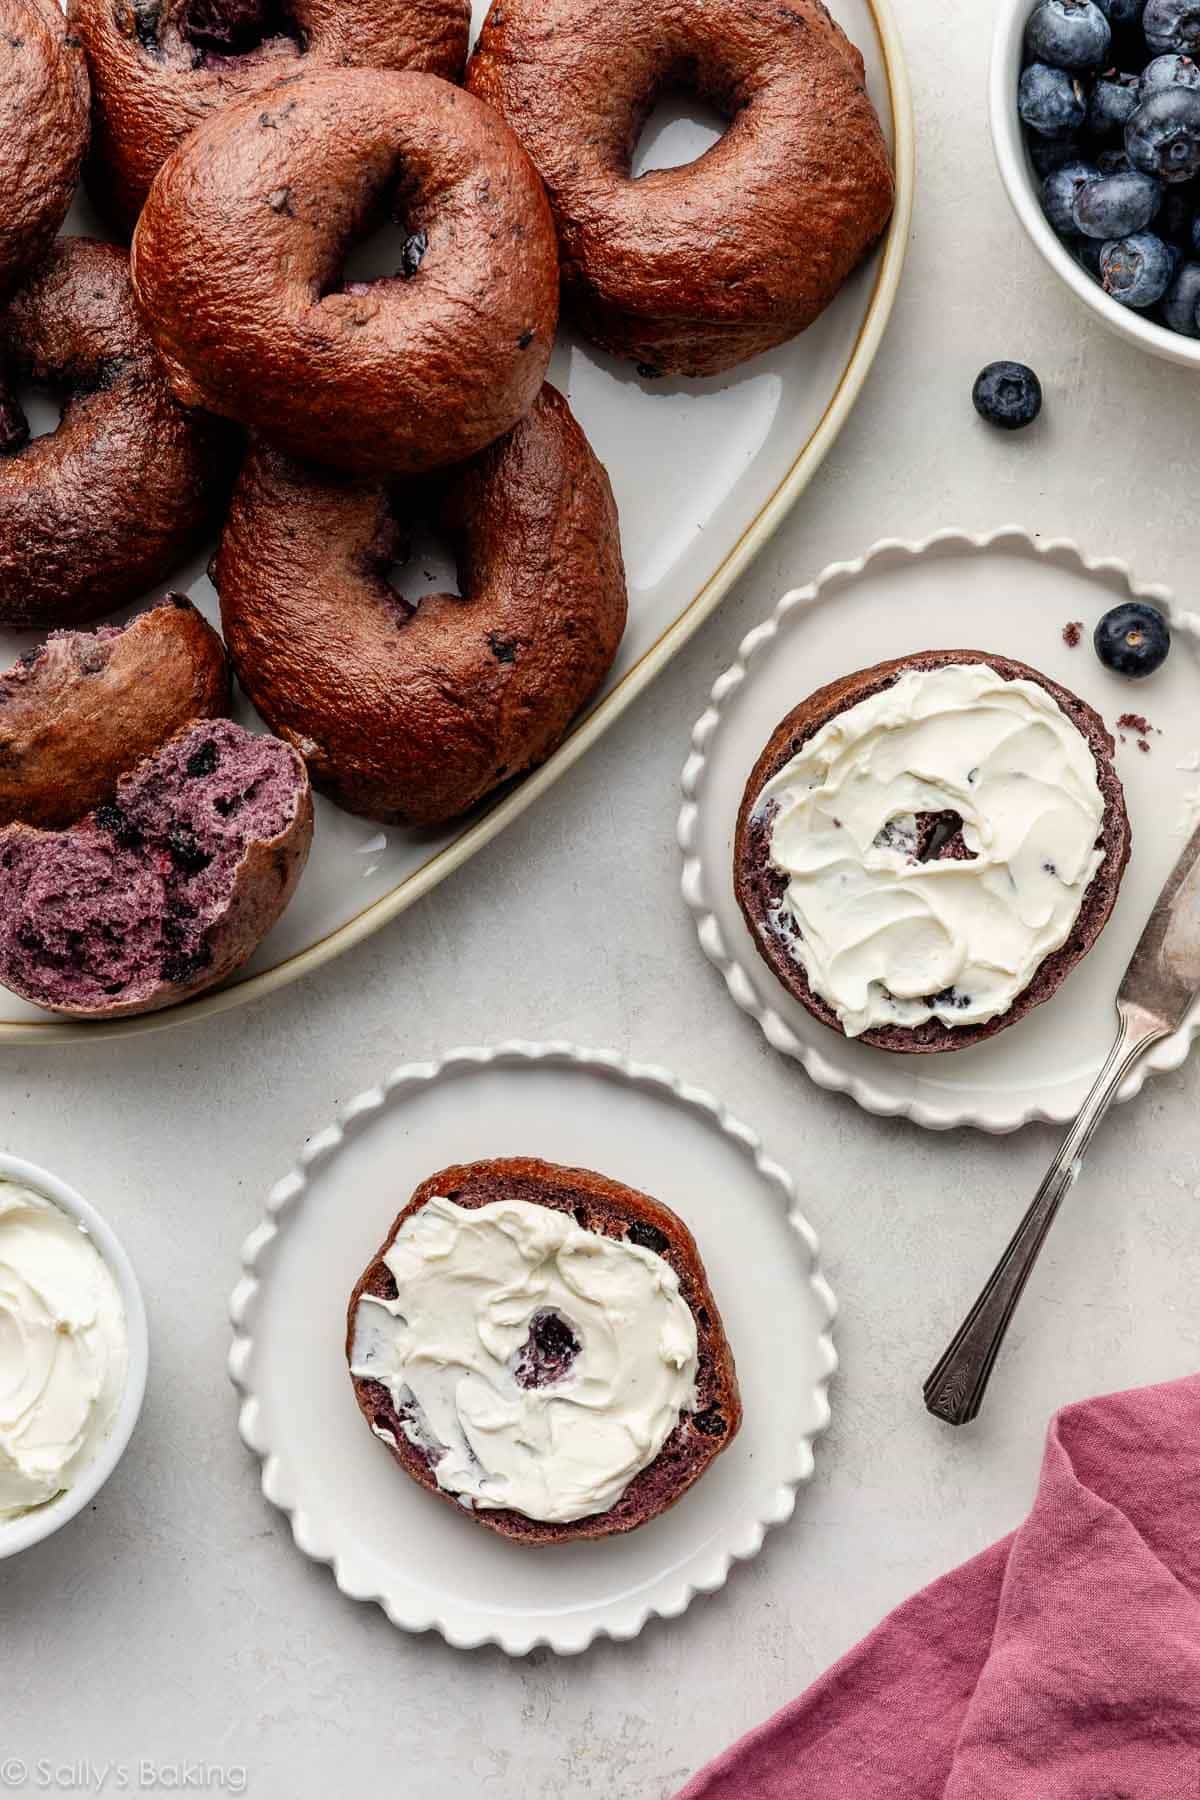
Once your bagels are boiled and egg-washed, they’re ready for the oven! Bake until these purple beauties darken on top to a deep golden-brown shade.
Homemade blueberry bagels are one of those baking projects that feel extra rewarding, because they taste infinitely better than store-bought. Slice, toast, slather with cream cheese, enjoy plain… however you like them, they’re always a win.

Homemade Blueberry Bagels
- Prep Time: 2 hours, 40 minutes
- Cook Time: 26 minutes
- Total Time: 3 hours, 10 minutes
- Yield: 8 bagels
- Category: Bread
- Method: Baking
- Cuisine: American
Description
These homemade blueberry bagels are wonderfully chewy on the outside, soft and dense on the inside, and packed with real blueberries. The dough is flavored with a quick stovetop blueberry sauce and chewy dried blueberries. Made completely from scratch with simple ingredients and unbeatable flavor! Make-ahead and freezing instructions included below.
Ingredients
- 1 and 1/2 cups (about 200g) fresh or frozen blueberries
- 1/4 cup (50g) granulated sugar, divided
- 1 cup (240g/ml) warm water (between 100–110°F/38–43°C)
- 1 Tablespoon instant or active dry yeast*
- 1 teaspoon pure vanilla extract
- 3/4 cup (120g) dried blueberries
- 3 and 3/4 cups (488g) bread flour (spooned & leveled), plus more as needed*
- 2 teaspoons salt
- for coating the bowl: nonstick spray or 2 teaspoons butter or olive oil
For Boiling & Topping
- 2 quarts (1.9L) water
- 1/4 cup (85g) honey or barley malt syrup
- egg wash: 1 egg white beaten with 1 Tablespoon water
Instructions
- Cook the blueberries: Place the blueberries and half of the sugar (2 Tbsp/25g) in a small saucepan over medium-low heat. Cook, stirring with a silicone spatula, until you have a blueberry sauce, a little thinner than a jam, about 10 minutes. You should have around 1/2 cup of sauce, or about 130g. Pour into a heat-proof bowl and let cool slightly (to about 110°F or cooler). Feel free to speed it up by placing it in the refrigerator while you continue.
- Prepare the dough: In the bowl of a stand mixer fitted with a dough hook attachment, whisk the warm water, remaining 2 Tablespoons of sugar, and yeast together. Cover and allow to sit for 5-10 minutes until foamy and frothy on the surface. *If you don’t have a stand mixer, use a large mixing bowl and mix the dough with a wooden spoon or silicone spatula in the next step.*
- To the yeast mixture, add 1/2 cup (130g) of the slightly cooled blueberry sauce (do not exceed that amount), followed by the vanilla extract, dried blueberries, 1 cup of the bread flour, and the salt, then beat on medium speed until incorporated. Add the remaining flour and beat on medium speed for 2 minutes, until the dough comes together and pulls away from the sides of the bowl. If it seems too sticky and clings to the sides of the bowl instead of forming a rough mass around the dough hook or spoon, add more flour, 1 tablespoon at a time, and continue to mix until the dough pulls away from the sides of the bowl. The dough should be stiff. If it is dry or crumbly and breaks off in pieces, add more water, 1 teaspoon at a time, mixing well after each addition.
- Knead the dough: When the dough has reached the proper consistency, beat on low speed with the dough hook for an additional 6–8 minutes, or knead by hand on a lightly floured surface for 6–8 minutes, until the dough feels smooth and elastic. (If you’re new to bread-making, my How to Knead Dough video tutorial can help here.) If the dough becomes too sticky during the kneading process, sprinkle 1 teaspoon of flour at a time on the dough or on the work surface/in the bowl to make a soft, slightly tacky dough. Do not add more flour than you need because you do not want a dry dough.
- Lightly grease a large bowl with nonstick spray, butter, or oil. Place the dough in the bowl, turning it to coat all sides in the oil. Cover the bowl with plastic wrap or a clean kitchen towel. Allow the dough to rise at room temperature for 2 hours, or until doubled in size.
- Line two large baking sheets with parchment paper or silicone baking mats.
- Shape the bagels: When the dough is risen, punch it down to release the air. On a lightly floured surface, divide the dough into 8 equal pieces, about 130g each. Shape each piece into a ball. Press your index finger through the center of each ball and stretch to create a bagel shape with a hole about 1.5–2 inches in diameter. Arrange the shaped bagels on the prepared baking sheets. Loosely cover the shaped bagels with a kitchen towel or plastic wrap and let them rest for 5–10 minutes as you prepare the water bath.
- Preheat the oven to 425°F (218°C).
- Water bath: Fill a large, wide pot with 2 quarts (1.9L) of water. Whisk in the honey or barley malt syrup. Bring to a boil over high heat, then reduce heat to medium-high. Drop 2 or 3 bagels in at a time, making sure they have enough room to float around. Boil the bagels for 1 minute, then use a spatula to flip each bagel over and boil for 1 minute more. Using a slotted metal spatula, lift the bagels out of the water, letting the excess water drain off. Place the bagels back on the lined baking sheets. Repeat with remaining bagels.
- Using a pastry brush, brush the egg wash on top and around the sides of each bagel.
- Bake for 26–30 minutes, rotating the pans halfway through, until the bagels have lightly browned. Allow the bagels to cool on the baking sheets for 20 minutes, then transfer to a cooling rack to cool completely.
- Slice, toast, top, whatever you want! Cover leftover bagels tightly and store at room temperature for up to 2 days or in the refrigerator for up to 5 days. You can freeze them for up to 3 months.
Notes
- Overnight Make-Ahead Instructions: Prepare the dough through step 5, but allow the dough to rise overnight in the refrigerator instead of at room temperature. The slow rise gives the bagels wonderful flavor! In the morning, remove the dough from the refrigerator and let the dough rise for 45 minutes at room temperature. Continue with step 6. I don’t recommend shaping the bagels the night before as they will puff up too much overnight.
- Freezing Make-Ahead Instructions: Baked bagels freeze wonderfully! Freeze them for up to 3 months, thaw overnight in the refrigerator or at room temperature, then warm to your liking. You can also freeze the bagel dough. After punching down the dough in step 7, wrap the dough tightly in plastic wrap, then a layer of aluminum foil—or seal it tightly in a freezer bag. Freeze for up to 3 months. Thaw overnight in the refrigerator, then punch the dough down again to release any air bubbles. Continue with the rest of step 7.
- Special Tools (affiliate links): Small Saucepan | Stand Mixer | Baking Sheets | Parchment Paper or Silicone Baking Mats | Food Scale | Large Pot (such as a 5- or 6-quart Dutch oven) | Pastry Brush
- Yeast: Use instant or active dry yeast. If using active dry yeast, the rise time may be slightly longer. 1 standard packet is about 2 and 1/4 teaspoons, so you will need a little more than 1 packet of yeast. Reference my Baking with Yeast Guide for answers to common yeast FAQs.
- Dried Blueberries: Look for the kind that are chewy, like raisins or dried cranberries. You can skip them if needed, but they add concentrated blueberry flavor and chewy texture. Without them, the bagels will be milder in flavor. We haven’t tested these bagels with freeze-dried blueberries.
- Bread Flour: Bagels require a high-protein flour. Bread flour is a must. Here are all my recipes using bread flour if you want more recipes to use it up. All-purpose flour can be used in a pinch, but the bagels will be flimsy and not nearly as chewy.
- Bread Machine: Place the dough ingredients into the pan of the machine. Program the machine to dough or manual, then start. After 9–10 minutes, the dough will be quite stiff. Allow the machine to complete its cycle, then continue with the recipe.
- Halve or Double: You can halve this dough recipe by simply halving all of the dough ingredients (do not halve the water or honey for the boiling step). No changes to the recipe instructions. For best taste and texture and to not overwhelm your mixer with excess heavy dough, I do not recommend doubling this dough recipe. Instead, make separate batches of dough.


Reader Comments and Reviews
My husband said these are 5 star bagels! The recipe was easy to follow, turned out exactly like Sally’s pictures. I saved the extra blueberry reduction to put on top of our bagels and my husband loved that. Good bagel recipe!
I’ve made these many times and they always come out delicious!
This was just my second time even making bagels, first time making blueberry bagels. Recipe was straight forward and easy to follow. They look great!
Very easy to follow recipe, and delicious bagels!!
Great recipe!
First time making bagels. They were not difficult to make except for the shaping. I’ll need to work on that. They were chewy on the outside and soft on the inside. We ate one while still warm with some leftover cream cheese frosting. Decadent but yum!
Loves the bagels! I needed to use up my blueberries so I decided to make bagels and I always come to this site for recipes. I didn’t have the dried blueberries so I made it without them. The blueberry flavor is mild but I honestly like them like that! So good!
This recipe was very easy to follow. The bagels turned out great with wonderful flavor!
The blueberry bagels were a great snow day project! And my former food writer/restaurant critic partner loved them! He said the texture was just right!
Easy to make and very tasty!
Made these with King Arthur gluten free bread flour. They turned out amazing, with the gluten free adjustments. That is proof of a great recipe if it stands up to gf swaps. We loved the beautiful shade of purple that these had after using the blueberry reduction.
We’re so happy to read this, Adrienne! Thanks for giving this recipe a try.
The bagels were pretty tasty. Although I did choose to omit the dried blueberries as I didn’t have any on hand. Sally was right! They would have added a lot of flavor. Next time!
Were tasty for sure
These were shockingly easy to make! The first day, they were good but kind of tough. But as they aged, they were delicious and the perfect texture after being toasted. Will definitely make again. Also, I used freeze-dried blueberries as I didn’t realize that wasn’t what the recipe called for until I saw the notes at the end, but they still turned out great!
How was the texture of the freeze-dried blueberries once they’re cooked in bagels?
Delicious! (And not too complicated.) I had lots of fun making these bagels with my 8 year old niece. They are soft and chewy with the perfect hit of sweet from the dried blueberries. Thanks, Sally, for making what may seem like an intimidating recipe manageable (and fun!).
Easy to follow directions and love the addition of real blueberries. Taste great!
Delicious! The recipe was very clear and easy to follow as well – the results were great!
We’re so glad you enjoyed these bagels, Heather! Thanks for giving our recipe a try.
This recipe was easy to follow. I was nervous it would have a fake blueberry taste with the dried blueberries, but it didn’t at all!
Chewy and super tasty even on its own!
Blueberry bagels were a big surprise! I made the bagels and half were eaten while cooling!
The bagels are delicious . I baked them this afternoon and we had egg and bagel sandwiches for dinner. Yum!!
I do have a question though. The bagels pictured are a nice golden brown. Mine are blue through and through. What did I do to cause that .
Hi Karen! The color will turn out a little different depending on your oven and the blueberries you used. Glad you enjoyed them!
These turned out so so good!!
Just made these bagels. They are so delicious. Blueberries are one of my favorite fruits. Very easy to make. Will definitely be making these again!
This was my first time making homemade bagels, and I was really happy with the texture—perfectly chewy and satisfying. The blueberry flavor was milder than I expected, even with both the blueberry sauce and dried blueberries, but they still turned out delicious. I’m glad I pushed myself out of my comfort zone and tried something new.
My kids love blueberry bagels and were impressed that we could make them at home!! Great recipe!
These came out great and were pretty easy to make. Great for breakfast!
These are amazing! I did the overnight method and they turned out so, so delicious! Incredibly flavorful – so good I didn’t even put anything on them and just ate them plain! Will definitely make these again!
I love blueberries and can’t wait to make these. I haven’t been able to find dried blueberries in my small market, so I am making my own first, and then I will be all set to make these. I have made bagels before but the addition of the blueberries has me really excited. I won’t have them done for the baking challenge but will enjoy them when they are done.
These were really easy for my first time making these. Even though I couldn’t get them perfectly circular, they still turned out to have a very good chewiness to them and a wonderful blueberry flavor. I will definitely be making these again.
I made these bagels for the January 2026 Baking Challenge. They definitely had good blueberry flavor, but the texture and bake were off. I’ve made enough of Sally’s recipes to know that I was the problem, not the recipe! But my bagels were very dense and over baked, even thought I followed the lower end of the suggested baking times. If I were to try bagels again, I think I would use the directions for an overnight raise to hopefully get a lighter texture. The directions were straightforward, though, so I still recommend giving this recipe a try!