

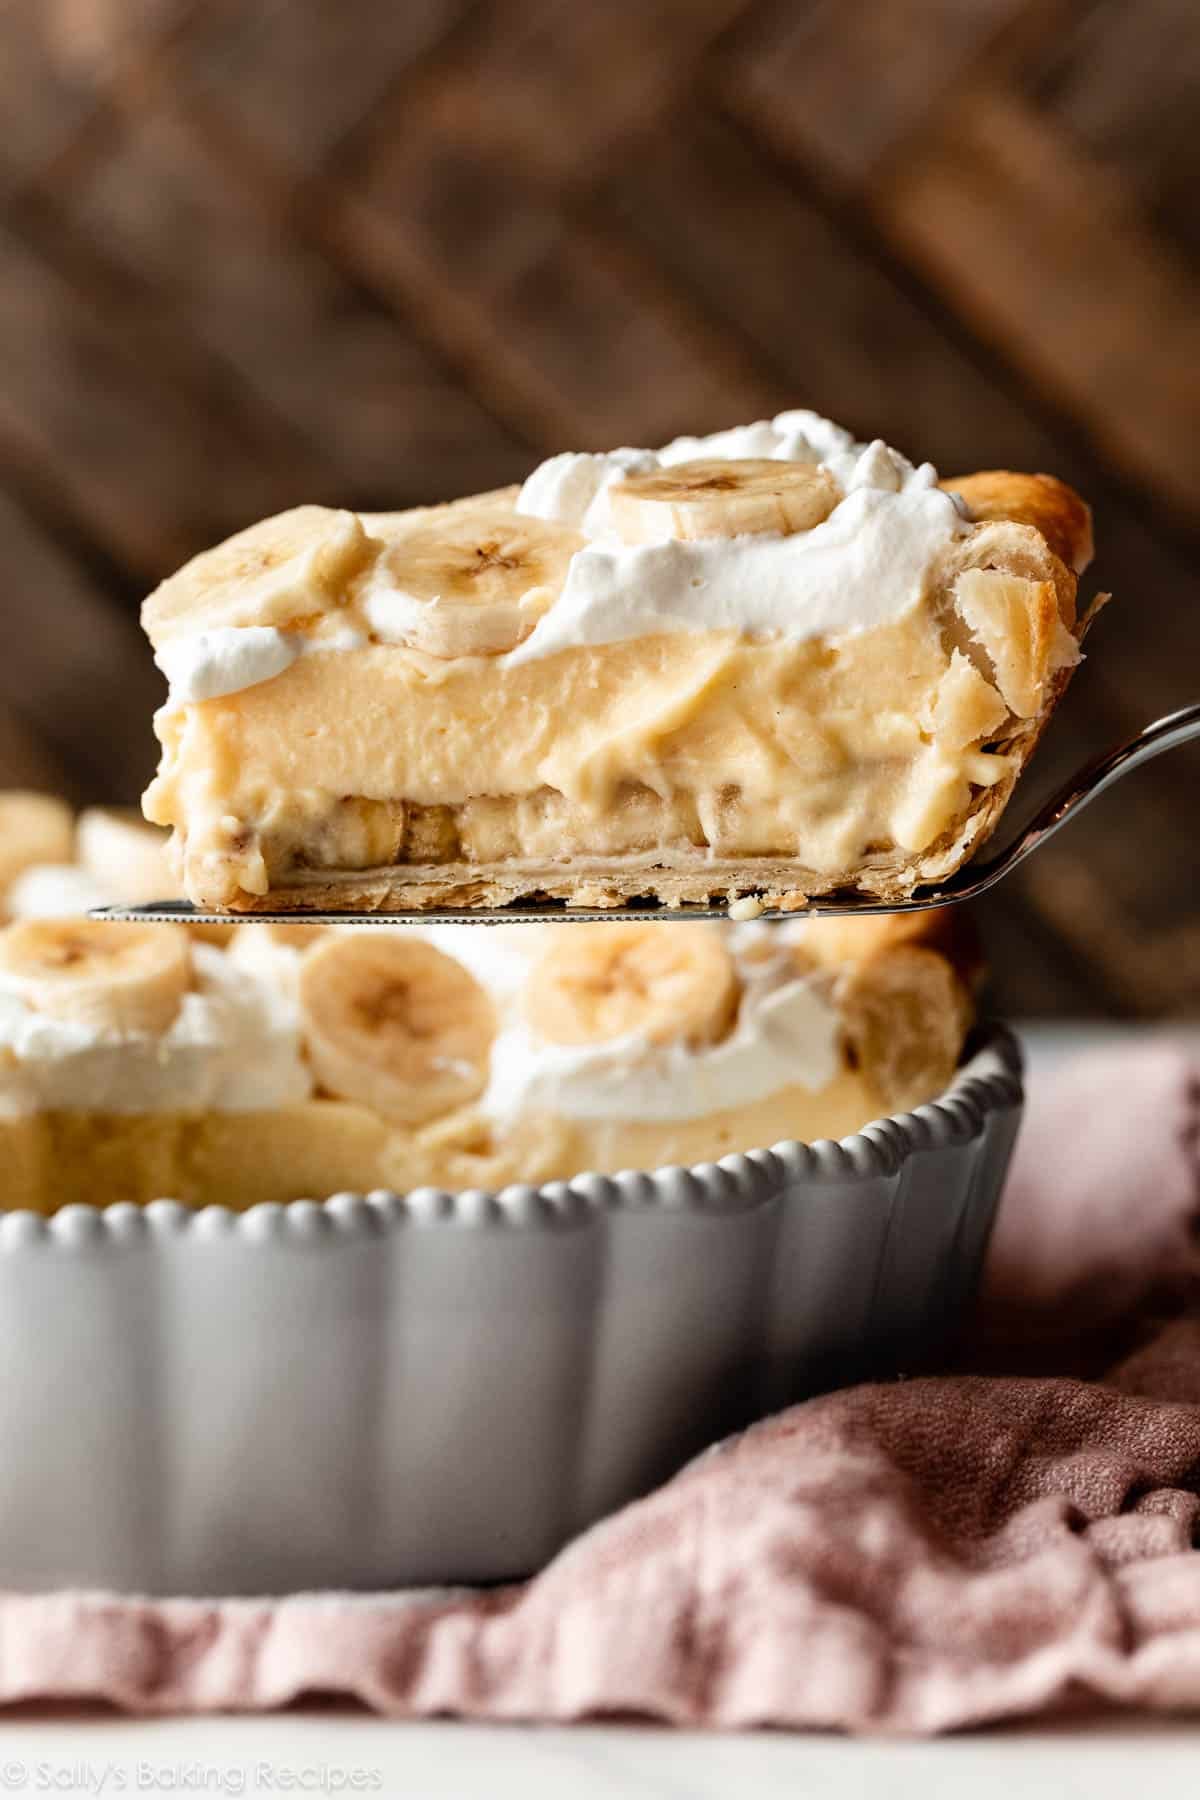
Creamy and smooth from-scratch custard joins bananas, whipped cream, and a buttery flaky baked pie crust to make one epic banana cream pie. This classic dessert is 100% homemade, like my cherry pie, and the perfect make-ahead option because the layered beauty needs to set before garnishing and serving.

I originally published this recipe in 2016 and have since added new photos, a video tutorial, and have fine-tuned the process and recipe. See recipe notes for exact changes.
This is a completely from-scratch banana cream pie recipe. You won’t find any box pudding mixes or artificial flavors hiding inside. Get ready for a blissful banana experience where you can truly taste the homemade difference. And it will graciously satisfy your heart, soul… and your tastebuds.
Here’s Why You Will LOVE This Banana Cream Pie
- 100% from scratch dessert recipe, and you can taste the difference.
- Creamy and undeniably rich.
- If custard is cooked properly, it’s sturdy and smooth.
- Flaky pie crust shell, or try a graham cracker crust.
- An optional sprinkle of cinnamon adds a special and flavorful touch.
- Perfect make-ahead dessert.
One reader, Stephanie, says: “…This is the first time I’ve used this particular recipe and it was AMAZING. Honestly the best one I’ve made. I will be bookmarking this one for the future! ★★★★★“
What Is Banana Cream Pie?
The combination of kitchen magic. 😉 Seriously, though, banana cream pie combines homemade pie pastry crust, fresh bananas, vanilla custard, and fluffy whipped cream.
- Baked Pie Crust Shell
- Banana Slices
- Homemade Vanilla Custard: This is a lot like my caramelized banana pudding, only a bit sturdier so it holds a nice slice.
- Whipped Cream
Let me walk you through each layer, so you’re fully prepared when it’s your turn to make it.
First, Bake Your Pie Crust
It’s helpful to review my how to blind bake pie crust tutorial before getting started. Blind baking a pie crust shell = baking it without a filling. Why do we do that? Well, if you have a no-bake pie filling like coconut cream pie, butterscotch pie, or today’s banana cream pie, you need a baked pie crust.
Start with homemade pie dough. I always use this pie crust recipe, or I have an excellent all butter pie crust option. To bake pie crust without a filling, you need to weigh it down to help prevent it from shrinking. I’m pretty loyal to these ceramic pie weights; they’re inexpensive and get the job done. You can also use dry beans. (Note: You’ll need 2 packs of the pie weights!)
Here are the steps:
- Make the pie dough ahead of time, and then refrigerate or freeze until you’re ready to make the pie. Pie crust must chill for at least 2 hours before rolling out.
- Roll it out, then fit into your 9-inch pie dish. Crimp or flute the edges. See my how to crimp and flute pie crust tutorial for helpful tips and visuals.
- Chill the shaped pie crust for at least 30 minutes. This prevents shrinking. Remember that pie dough must be cold when it hits the oven.
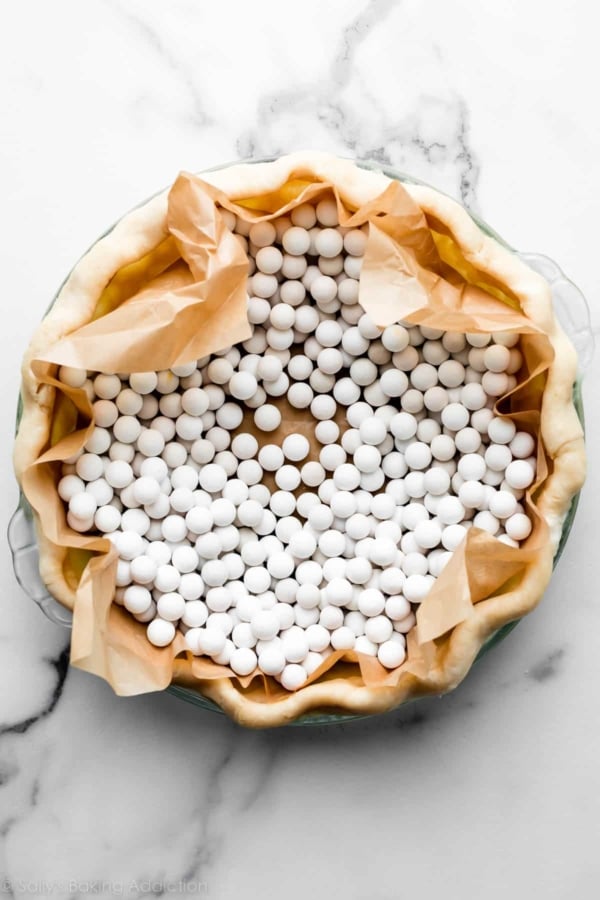
- Line with parchment paper, and then fill with pie weights.
- Bake until the edges are lightly brown, about 15 minutes.
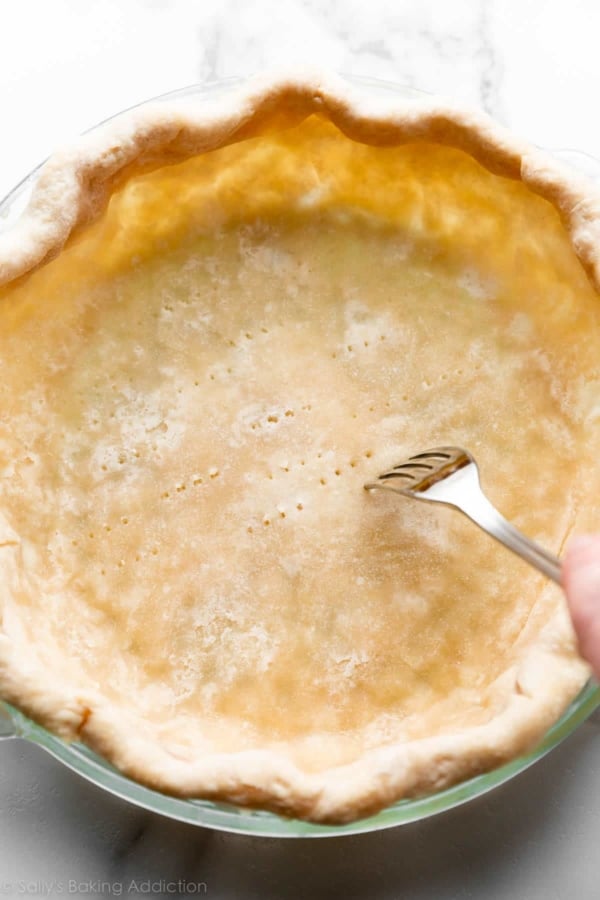
- Remove pie weights, then prick the bottom with a fork. This lets air escape the bottom.
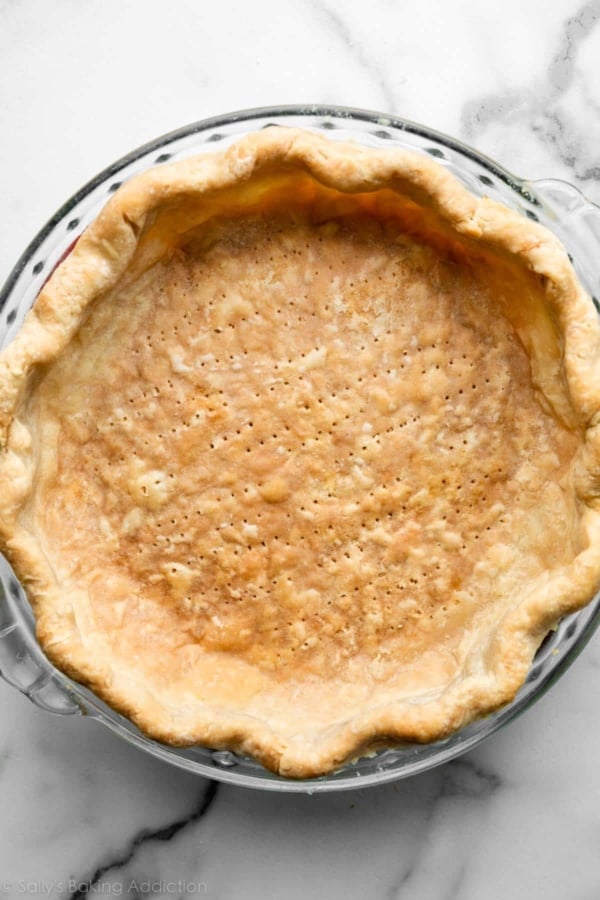
- Return crust to oven until the entire pie shell is golden brown.
- Cool pie shell completely. You can do this up to 3 days ahead of time!
This baked pie crust “shell” is crispy, flaky, and ready for your banana cream filling.

Other Crust Options:
- For something easier, you can use a graham cracker crust. Make sure you bake it for 10 minutes at 350°F (177°C), then let it cool completely before filling.
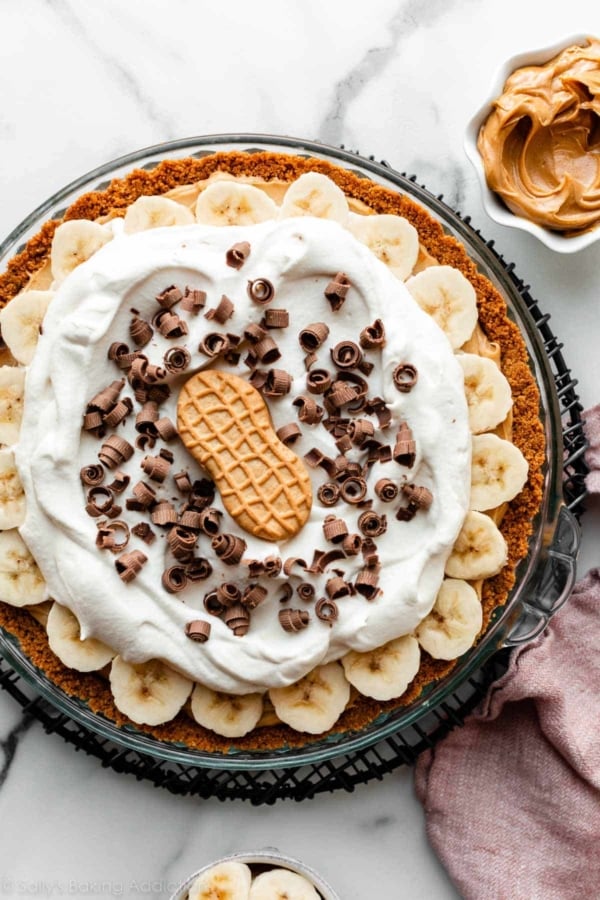
- Or try the peanut butter cookie crust from my peanut butter banana cream pie!
Now Let’s Work on the Filling
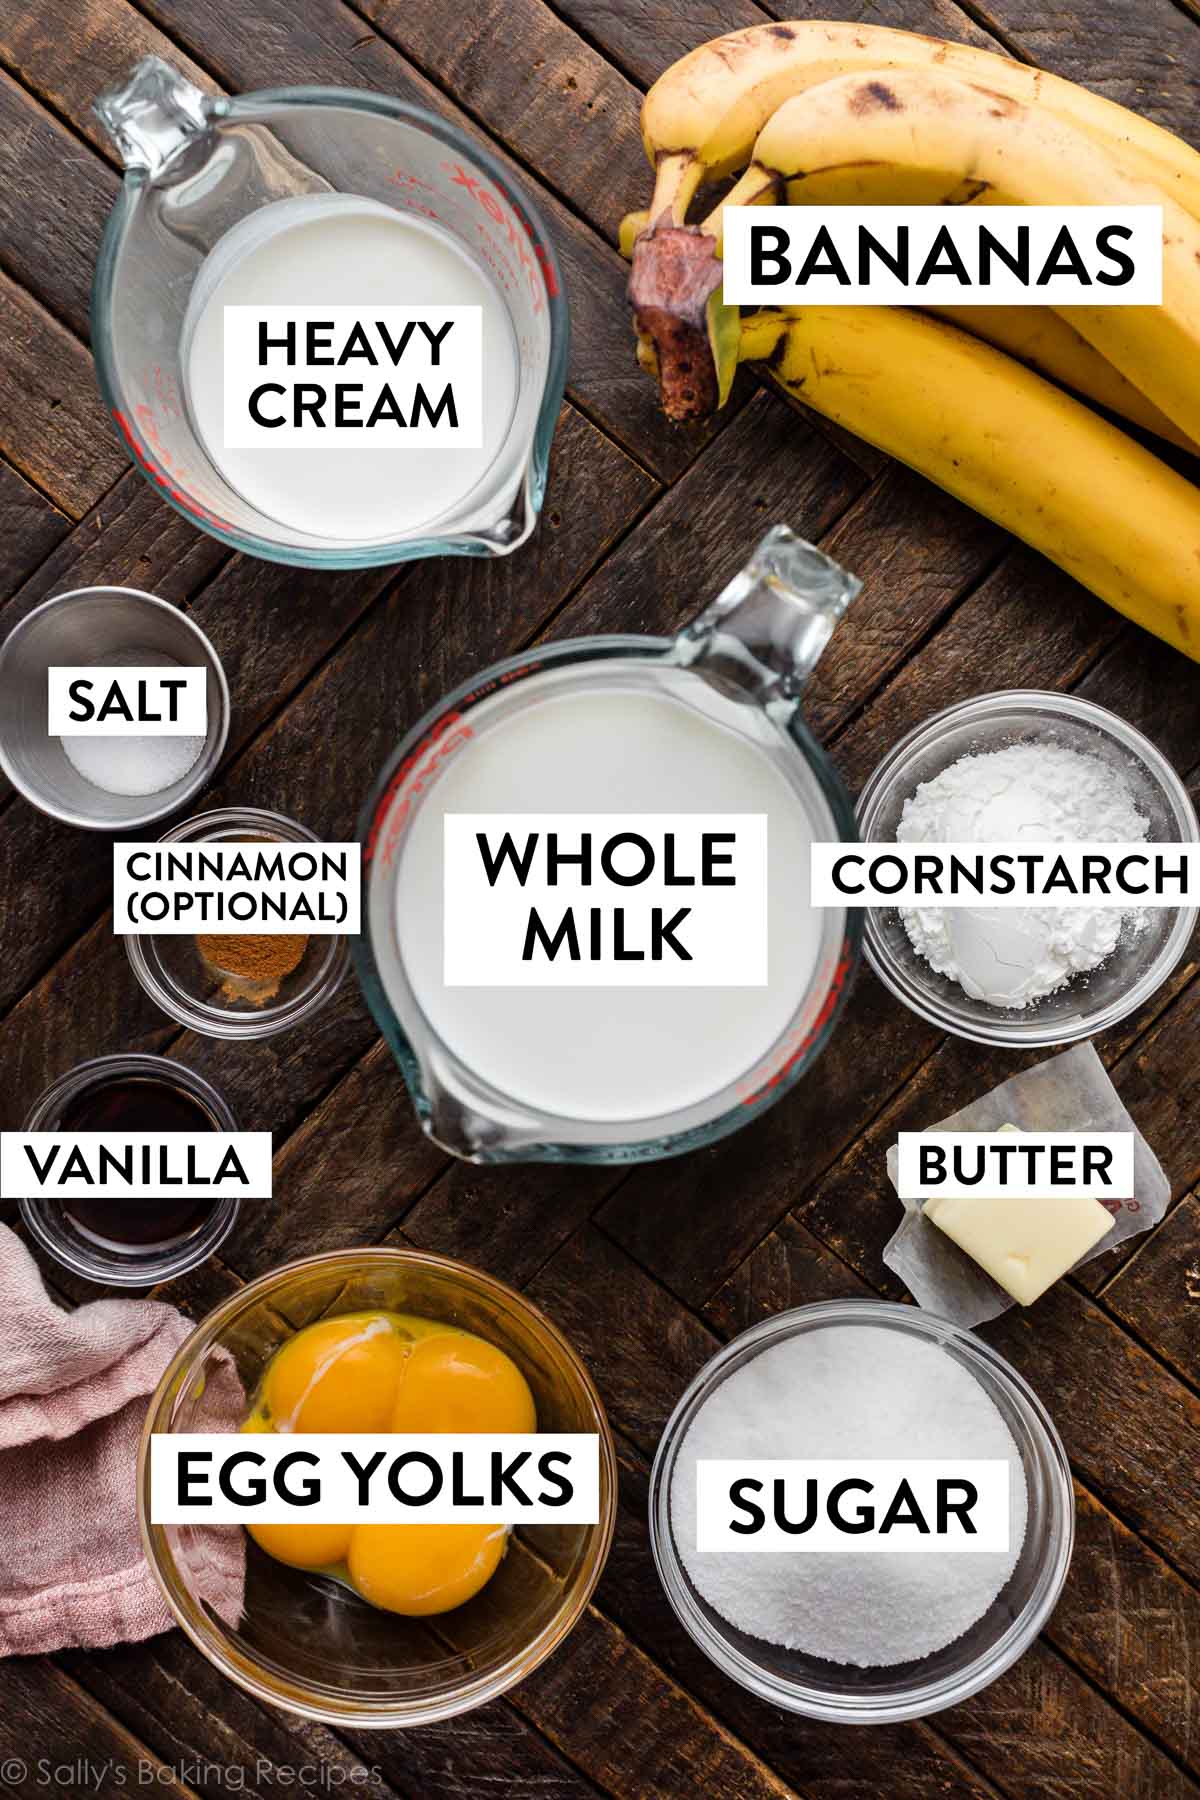
Here are the ingredients you need:
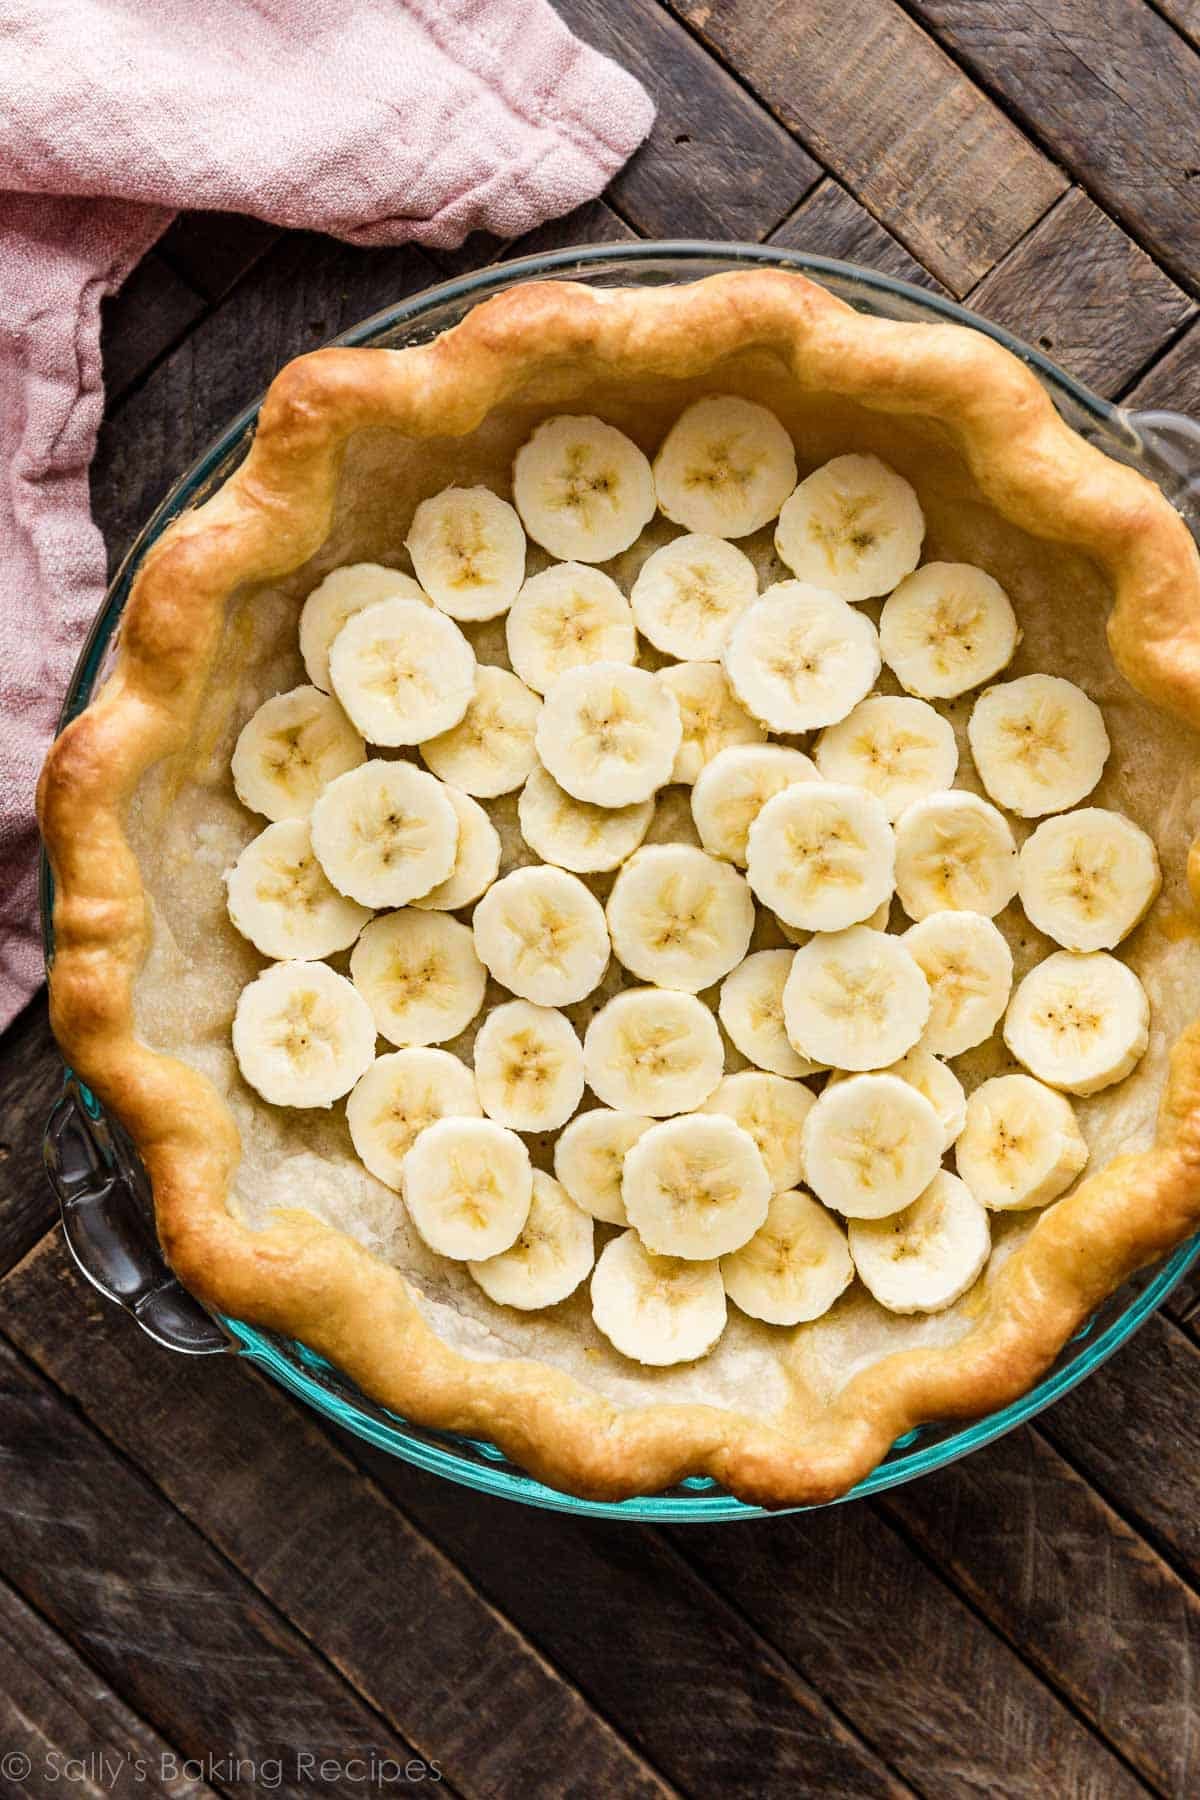
Layer in Your Banana Slices
Layer banana slices into your baked pie crust shell. Sometimes I add a sprinkle of cinnamon on top of the banana slices. This is definitely a unique addition to BCP, but wow!!! It tastes unbelievable. I didn’t add it to the pictured pie, but taste testers and readers who have tried it usually rave about it.
Success Tip: Don’t use overly ripe bananas because they can seep liquid and break your thick custard filling. Save your brown spotty bananas for banana bread or banana baked oatmeal, and use the yellow ones for banana cream pie.
I squeeze in as many banana slices as I can:
Homemade Custard Filling
I’m here to squash any fears that you may have about from-scratch custard. It’s actually pretty easy—if you know how to whisk, you can make it. If you’ve ever made coconut cream pie, mocha chocolate pudding pie, homemade dirt pudding, pumpkin pie in a jar, pastry cream, or even mille-feuille, the process will look familiar. You’ll need sugar, whole milk, heavy cream (also needed for the whipped cream topping), and egg yolks. For flavor, you’ll add vanilla and butter. For thickening, you’ll use cornstarch. (The egg yolks and cream help, too.)
The first step is to mix egg yolks and cornstarch together:
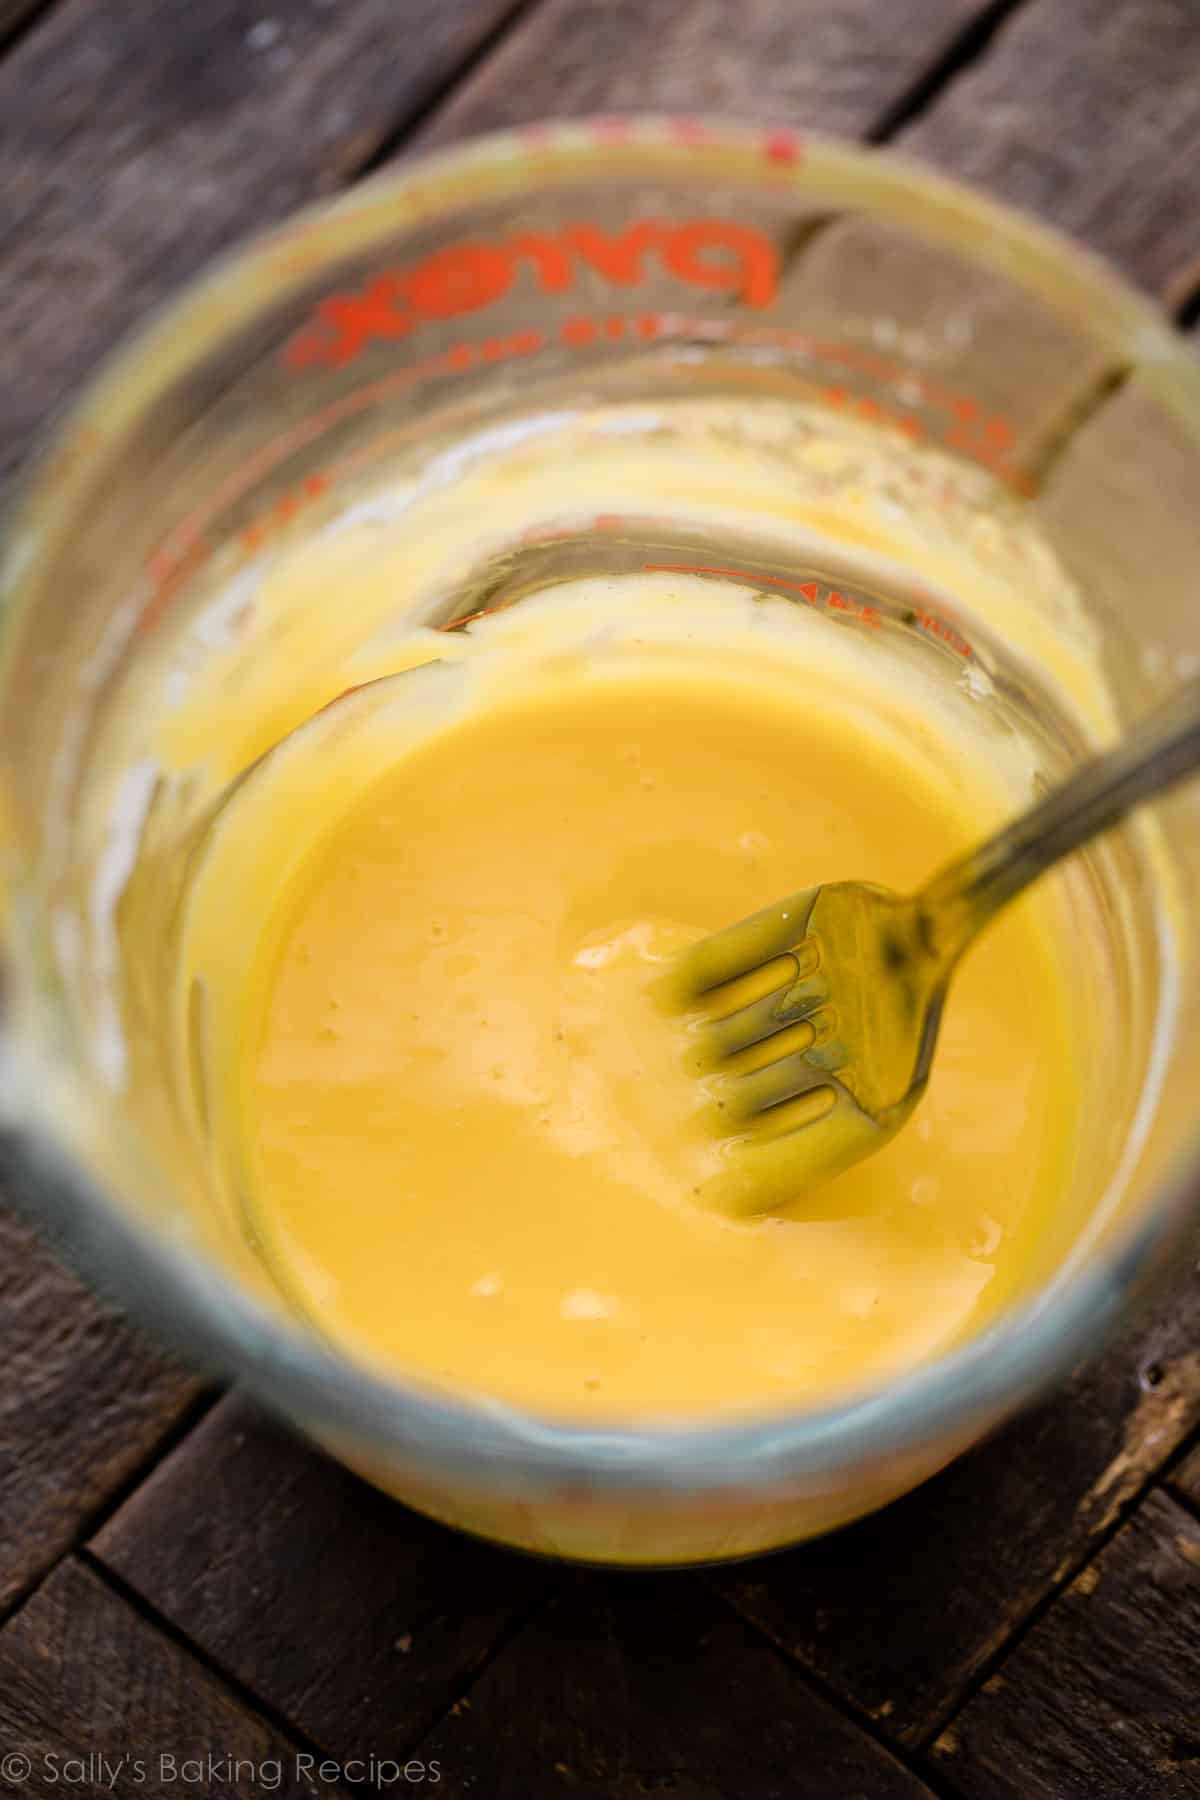
I usually do this with a fork in a liquid measuring cup, because we’ll eventually pour this into the cooking milk mixture.
Heat whole milk, cream, sugar, and a little salt on the stove. Once the milk/cream/sugar is gently simmering, slowly stream and whisk a little of this milk mixture into the egg yolk/cornstarch mixture. This is called tempering. The slow and steady stream of warm milk is bringing the egg yolks’ temperature up without scrambling them.
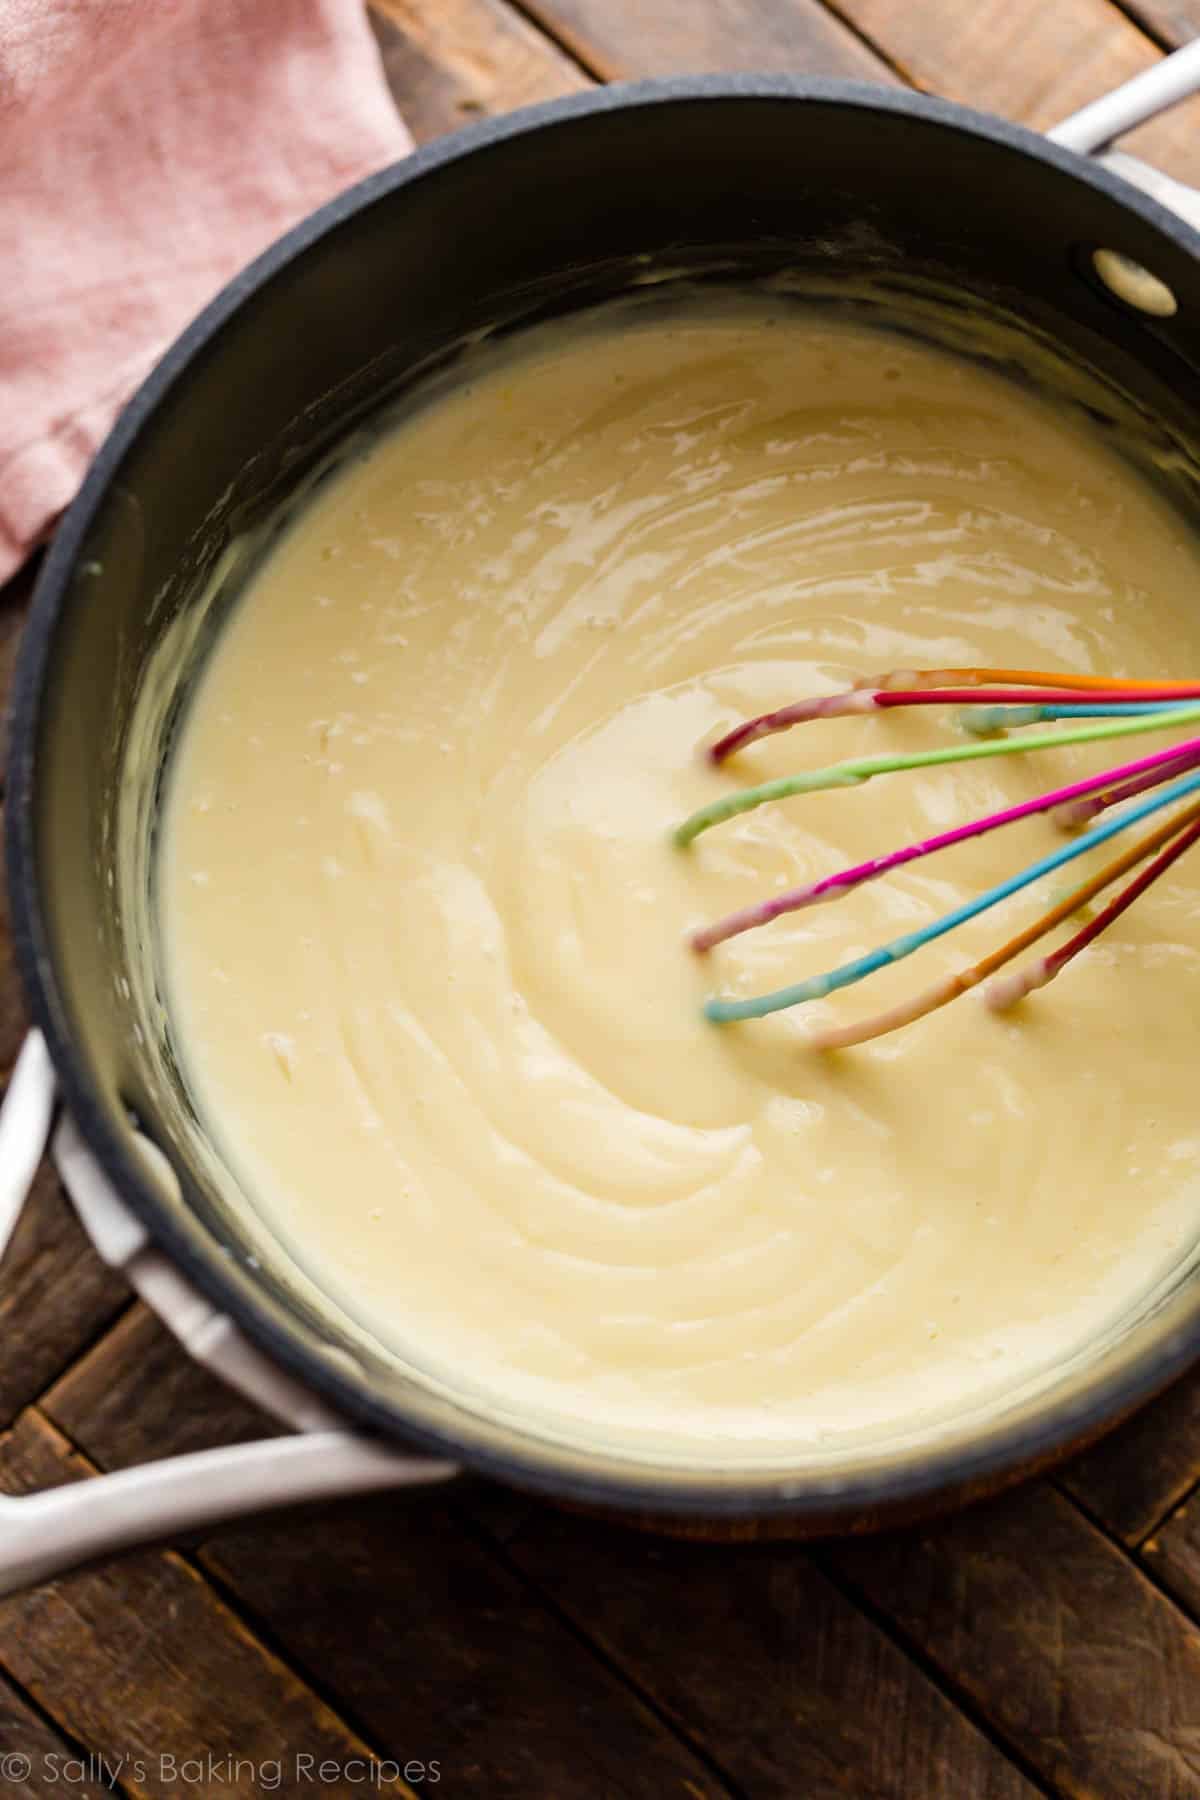
Then stream and whisk the heated egg yolk mixture into the rest of the milk/cream/sugar on the stove. Cook on low, and let it begin to bubble, which happens pretty quickly. Whisk it while it pops and bubbles for just 1 minute. Remove from heat, then stir in the vanilla and butter, and allow to slightly cool.
The custard will be smooth, rich, and silky:
FAQ: Why Isn’t My Custard Smooth?
Do you notice little bits of egg yolks in your custard? You may not have tempered them slowly enough. Remember to *very slowly* stream and whisk some of the cooking milk mixture into the egg yolk/cornstarch mixture, and then *very slowly* stream and whisk it back into the pot. Whisk constantly.
If your best efforts still result in a few chunks, you can strain the finished warm custard through a fine mesh sieve. Or just leave it—you can’t really taste it.
How to Ensure Your Banana Cream Pie Sets
With 4 egg yolks, 4 Tablespoons of cornstarch, and some heavy cream, you can be certain this custard sets into a pretty sliceable texture. Be sure to whisk it on the stove often, and let it bubble and cook long enough for the heat to help bind the cornstarch to the fat. (1 minute is plenty.)
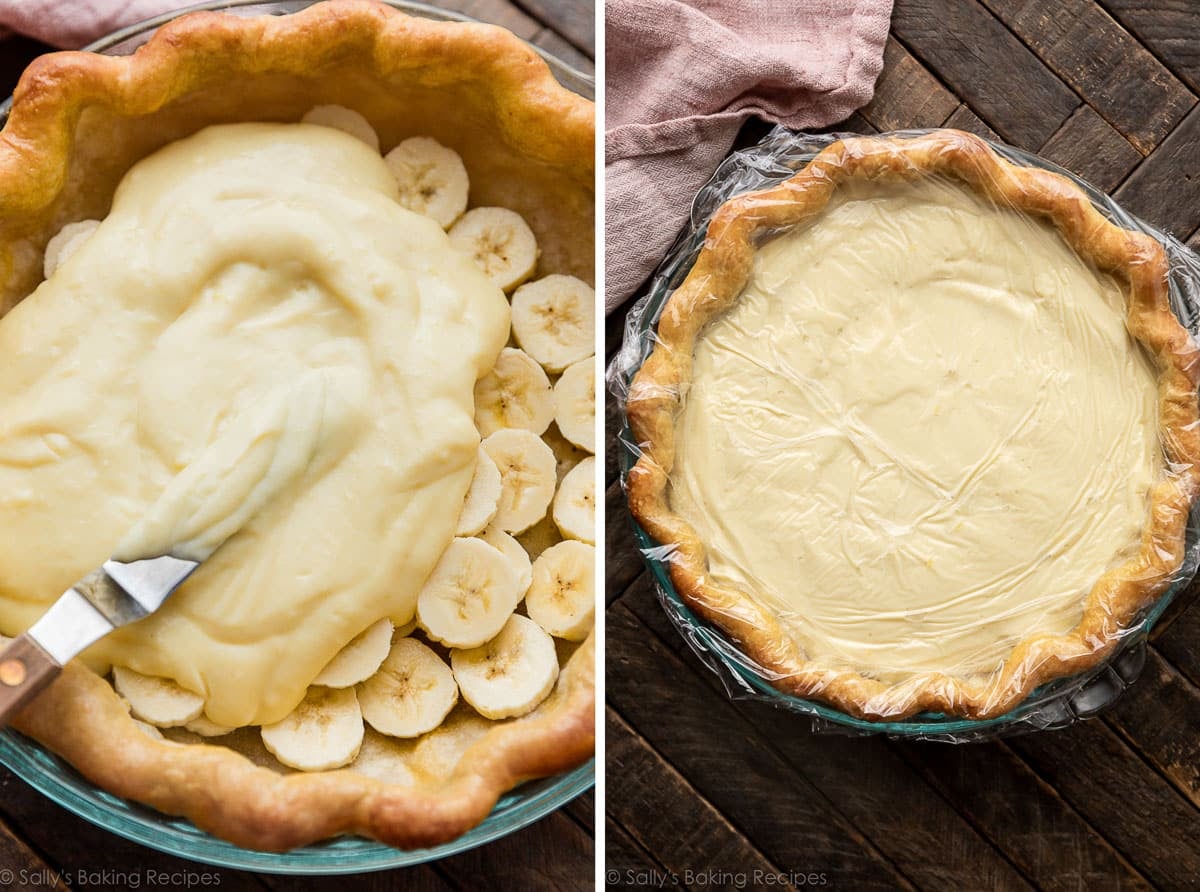
Spread the vanilla custard filling over the banana slices, cover with plastic wrap right on the surface to prevent a skin from forming, then refrigerate the pie for at least 4 hours and up to 1 day.
FAQ: Can I Make Banana Cream Pie in Advance?
This is a make-ahead dessert. You can make the pie dough in advance and bake the pie crust shell in advance. You can also refrigerate your assembled (but not garnished) banana cream pie for up to 1 day, with the plastic wrap right on top of the surface. And you can make the whipped cream topping in advance, but don’t add it until right before, or up to 1 hour before serving. So if you’re looking for Easter dessert recipes or hoping to make this pie for a special celebration, be sure to plan ahead.
You don’t want to decorate the pie with banana slices in advance because they’ll brown. (A brush of lemon juice can extend their freshness by a couple hours, but will affect their flavor.)
Right before, or up to 1 hour before, serving, top the pie with homemade whipped cream. You can decorate it any which way—a thick layer of whipped cream like this banoffee pie, or pretty piped dollops or swirls like the pictured pie. I use Wilton 1M piping tip to pipe it.
You could also use up your leftover egg whites and top it with this marshmallow meringue topping, and toast it with a kitchen torch!
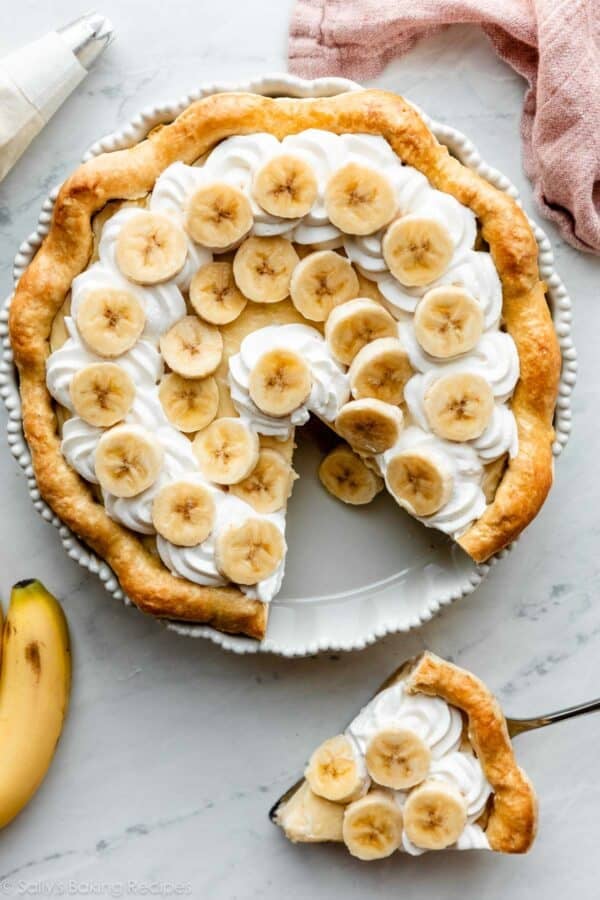
When ready to serve, add banana slices on top. I usually go heavy on the sliced banana garnish. I love texture in desserts, and banana cream pie doesn’t usually deliver on that front. But with lots of banana slices, we’ll get there.
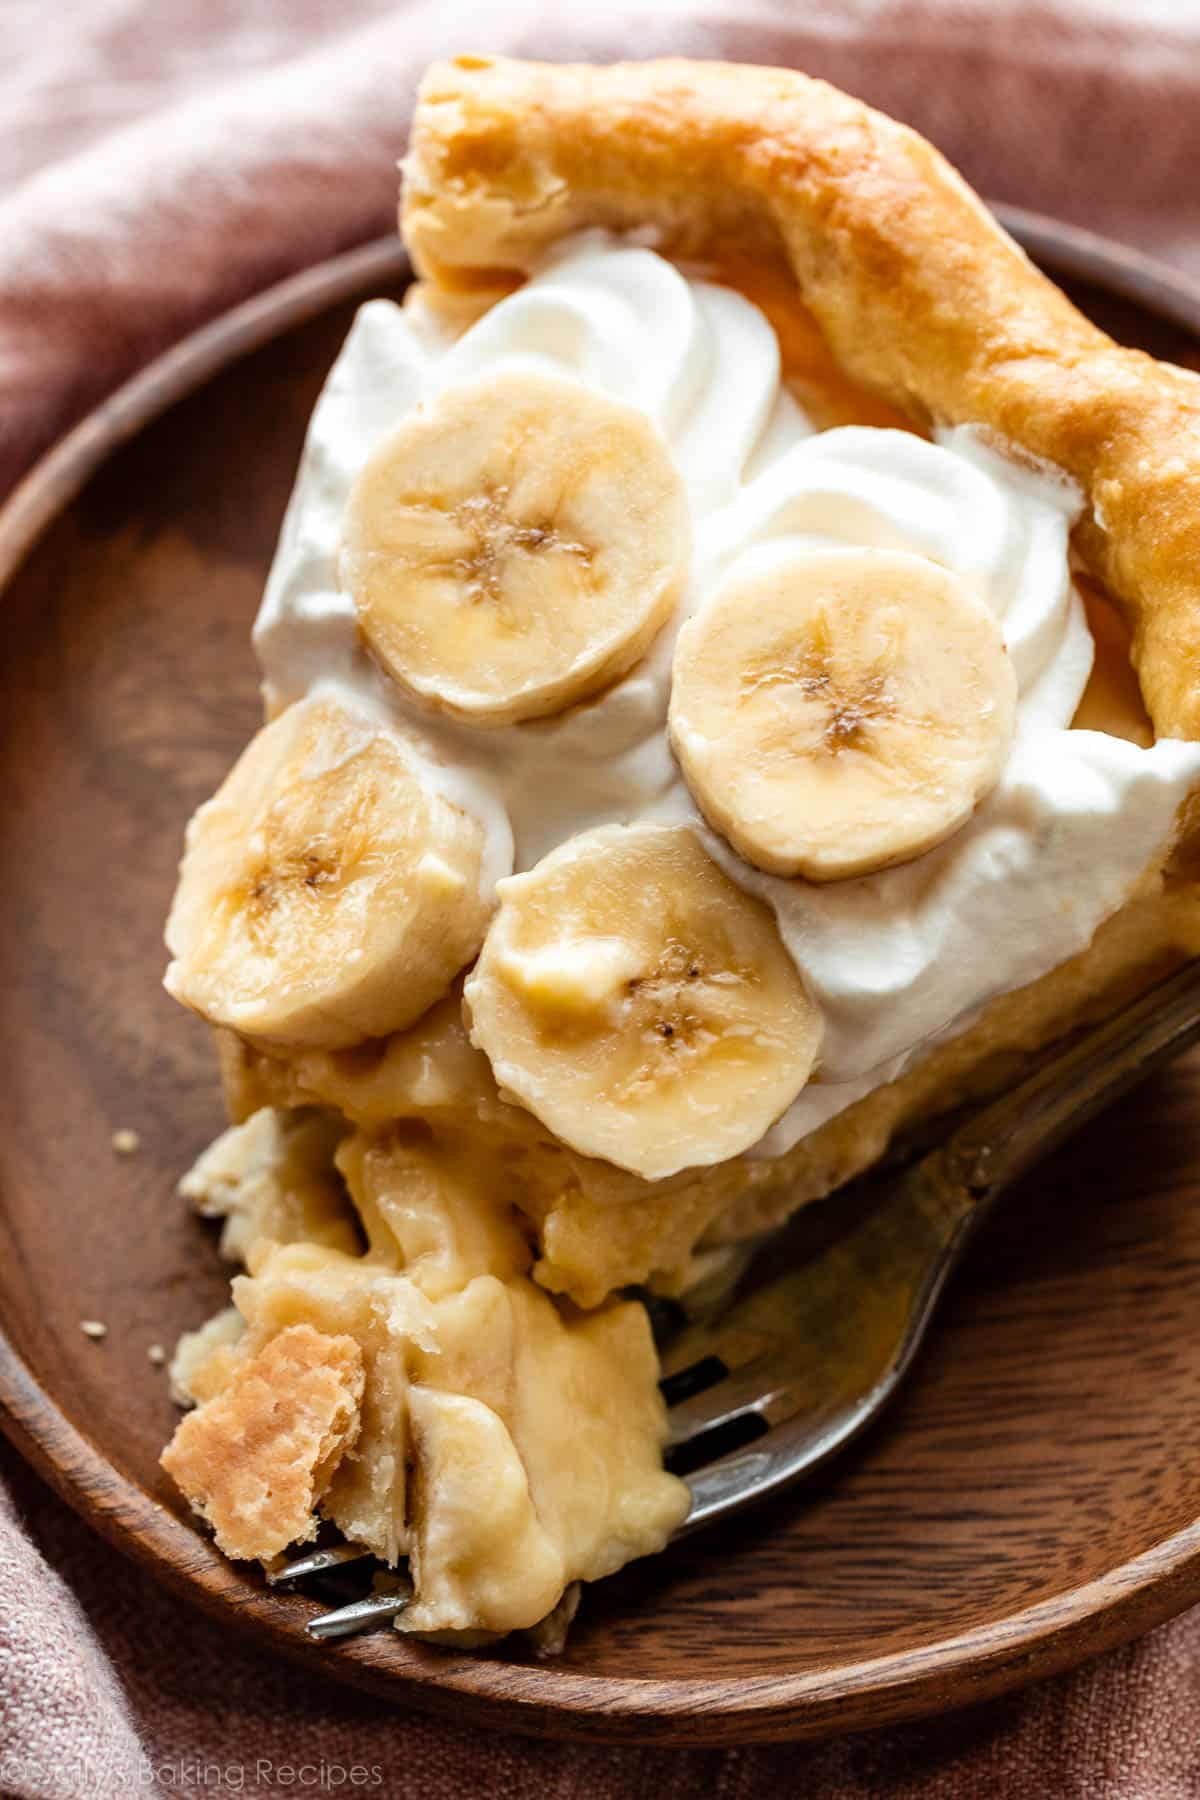
Now savor every flaky, creamy, fluffy bite as it melts in your mouth, because you deserve to. You made this all from scratch!
Print
Homemade Banana Cream Pie
- Prep Time: 4 hours (includes crust)
- Cook Time: 30 minutes
- Total Time: 8 hours (includes chilling)
- Yield: 1 9-inch pie
- Category: Pie
- Method: Baking
- Cuisine: American
Description
Creamy and smooth from-scratch custard joins bananas, whipped cream, and a buttery flaky baked pie crust to make one epic banana cream pie. There are plenty of ways to make this banana cream pie recipe ahead of time. See various steps.
Ingredients
Crust
- 1 unbaked pie crust (what I used) or all butter pie crust*
- optional egg wash: 1 large egg white beaten with 1 Tablespoon milk
Custard Filling
- 4 large egg yolks
- 1/4 cup (30g) cornstarch
- 2 cups (480ml) whole milk
- 1/2 cup (120ml) heavy cream
- 1/2 cup (100g) granulated sugar
- 1/8 teaspoon salt
- 2 teaspoons pure vanilla extract
- 2 Tablespoons (28g) unsalted butter, softened to room temperature
- 4 yellow bananas (not super ripe yet)
- optional: sprinkle of ground cinnamon
Whipped Cream
- 1 cup (240ml) cold heavy cream
- 2 Tablespoons (15g) confectioners’ or granulated sugar
- 1/2 teaspoon pure vanilla extract
Instructions
- At least 2 hours ahead, make the pie dough: Make the pie crust through step 5 according to my directions and video tutorial in my pie crust recipe. Make pie dough in advance because it needs to chill in the refrigerator for at least 2 hours before rolling out (step 2). The recipe makes 2 crusts, and you only need 1 for this pie, so save the other for another pie.
- Roll out the chilled pie dough: On a floured work surface, roll out one of the discs of chilled dough. Turn the dough about a quarter turn after every few rolls until you have a circle 12 inches in diameter. Carefully place the dough into a 9-inch pie dish. Tuck it in with your fingers, making sure it is completely smooth. To make a lovely thick edge, I do not trim excess dough around the edges. Instead, fold the excess dough back over the edge and use your hands to mold the edge into a rim around the pie. Crimp the edges with a fork or use your fingers to flute the edges. (Review this how to crimp and flute pie crust page if you need extra help with this step.) If dough is too warm, fluting/crimping will be difficult, so you can always chill it in the refrigerator for 5–10 minutes first. After fluting/crimping the edges, chill the pie dough in the refrigerator for at least 30 minutes and up to 5 days. Cover the pie crust with plastic wrap if chilling for longer than 30 minutes. Chilling the shaped dough helps prevent the crust from shrinking.
- While the crust is chilling, preheat oven to 375°F (190°C).
- Blind bake the crust: Line the chilled pie crust with parchment paper. (Crunch up the parchment paper first so that you can easily shape it into the crust.) Fill with pie weights or dried beans. (Note that you will need at least 2 standard sets of pie weights to fit.) I like to push the weights up against the sides of the pie crust to help ensure the sides don’t shrink down. Bake until the edges of the crust are starting to brown, about 15–16 minutes. Remove pie from the oven and carefully lift the parchment paper (with the weights) out of the pie. Prick holes all over the bottom crust with a fork. If desired for a shiny golden crust, brush egg wash on edges. Return pie crust to the oven and bake for 14–15 minutes, or until bottom has browned. Remove from the oven, and cool on a wire rack completely before filling. You can blind bake the crust up to 3 days ahead of time. Cover cooled crust tightly and refrigerate until ready to fill. (Review this how to par-bake pie crust page if you need extra help with this blind-baking step.)
- Make the custard filling: Whisk the egg yolks and cornstarch together. (A fork works nicely for this, or a small whisk.) Set aside. Combine the milk, heavy cream, sugar, and salt in a medium saucepan over medium heat. Whisk until all the sugar has dissolved, then bring to a gentle simmer, whisking occasionally. Once simmering, remove about 1/2 cup (120ml) of the milk mixture and, in a slow and steady stream, whisk into the egg yolk and cornstarch mixture. Keep those egg yolks moving so they don’t scramble. In a slow and steady stream, pour and whisk the egg yolk mixture into the pot. The pudding will immediately begin to bubble and thicken. Stand back and use caution as the bubbles may burst. Cook for 1 full minute, whisking constantly.
- Remove the pan from heat and whisk in the vanilla and butter. You will have about 3 cups of filling. If you notice a lot of little chunks of egg yolk, they may not have been tempered properly. To fix, you can run the warm custard through a fine mesh sieve.
- Place a piece of plastic wrap directly on top of the warm pudding to prevent a skin from forming on top. Allow to cool for 15 minutes. I do not recommend any longer than this, as it will be too thick to spread neatly into the crust.
- Slice 2–3 bananas and arrange slices into the cooled pie shell. Sprinkle with cinnamon, if desired. Spread custard on top (it’s ok if it is still slightly warm). An offset spatula is helpful for spreading. Place a piece of plastic wrap directly on top of the custard; again, to prevent a skin from forming. Refrigerate for at least 4 hours and up to 1 day.
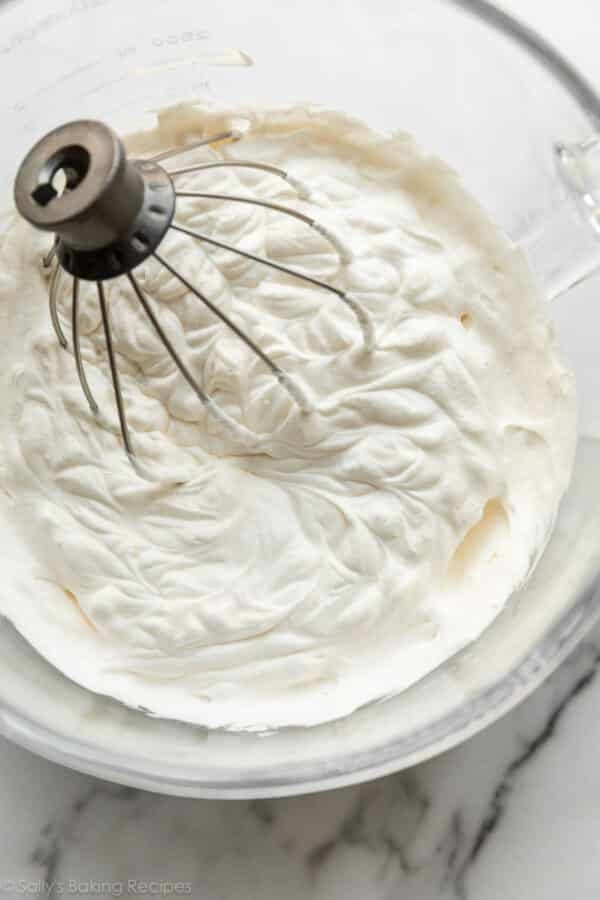
- When ready to serve, or up to 1 hour before serving, make the whipped cream: Using a handheld or stand mixer fitted with a whisk attachment, whip the heavy cream, sugar, and vanilla extract on medium-high speed until medium peaks form, about 3–4 minutes. Medium peaks are between soft/loose peaks and stiff peaks and are the perfect consistency for topping and piping on desserts.
- Pipe or spread the whipped cream on top. (I use Wilton 1M tip.) Slice remaining banana and garnish with banana slices and serve pie immediately, or refrigerate for up to 1 hour and then garnish with banana slices and serve. (Best to garnish with banana slices immediately before serving, but whipped cream can go on the pie up to 1 hour in advance.)
- Slice and serve. Cover leftovers and store in the refrigerator for up to 5 days.
Notes
- Make Ahead & Freezing Instructions: The pie dough can be prepared ahead of time and stored in the refrigerator for up to 5 days or in the freezer for up to 3 months. There are plenty of ways to make this recipe ahead of time. See end of step 2, end of step 8, and step 10. This is not the best pie to freeze; the filling’s texture is never quite the same. However, if you have leftover slices and aren’t concerned as much about taste and appearance, you can freeze leftover pie for up to 3 months. Thaw in the refrigerator.
- Special Tools (affiliate links): Rolling Pin | 9-inch Pie Dish | Pie Weights | Pastry Brush | Egg Separator | Whisk | Offset Spatula | Electric Mixer (Handheld or Stand Mixer) | Piping Bag (Disposable or Reusable) and Wilton 1M Piping Tip if piping
- Pie Crust: Both linked pie crust recipes make 2 crusts. You only need 1 crust for this pie, so freeze the 2nd half for another use.
- Crumb Crust Alternative: To cut back on time, try using a graham cracker crust. Make sure you bake it for 10 minutes at 350°F (177°C), then let it cool completely before filling. Or you can use the crust recipe and baking instructions for the peanut butter cookie crust used in this peanut butter banana cream pie.
- Whole Milk & Heavy Cream: These are imperative for the custard to set properly. I do not recommend any substitutions.
- Prevent Bananas From Browning: Feel free to very, very lightly spritz or brush banana slices with lemon juice prior to arranging in pie crust shell, and prior to using as garnish. They will eventually brown, so it’s best to assemble the pie up to 1 day in advance (step 8), and garnish with banana slices right before serving (step 10).
- Update in 2023: Recipe used to call for 1 and 3/4 cups whole milk and 1 and 1/2 teaspoons vanilla extract. For a slightly smoother, more flavorful custard, I now use 2 cups whole milk and 2 teaspoons vanilla, as you can now see in the recipe.


Reader Comments and Reviews
Can I use coconut milk instead?
Hi Jordyn, we haven’t tested the custard for this pie with coconut milk, but we do use it in this coconut cream pie.
I’ve been experimenting with baking lately and came across this recipe while looking for new stuff to try. This turned out so good!! I made it for a family reunion and everyone loved it. I’m definitely making ht again
Update: I just made this again and it was just as good if not better!!! This time I tried making the flaky pie crust linked in this recipe and, while it was a little difficult with (I think my shortening was not cold enough + I didn’t add enough water), it came out so good! It’s so worth the time and the effort. I definitely recommend, if you have the time and the means, it’s worth making it from scratch
Tasted great I love pudding! For a pie it didn’t stand up. What do you think it needed more cornstarch? And I did follow the recipe.
Hi Jo Anne, if the filling is too runny, it’s likely the stovetop pudding wasn’t thick enough. Did you make any substitutions by chance? Even the smallest? Was it completely cooled and chilled? Make sure it thickens on the stove before removing from heat. Big bubbles will burst on top when it’s ready to come off heat. Thank you for giving this recipe a try, and let us know if we can help to troubleshoot further!
This recipe was perfection!!! Saving for myself and sharing with everyone I know! So easy to make and it hit the craving spot!! My parents who usually don’t like pie, they really liked this pie!
Definitely need to add the cornstarch to something other than the egg yolks. There’s no way to prevent egg clumps because it ends up being a solid mass of yolk and cornstarch.
No clumps for me and floored the directions exactly!
Can you substitute the sugar for maple syrup?
Hi Maggie, we recommend sticking with granulated sugar here.
All the recipes so far a great this one needed more bananas so I mashed up 2 bananas in the milk mixture then I used Nila wafers for crust. Banana layer custered banana mix Banana on top with Nila crumbs on top. Then whip cream to serve.
Good recipe. I found adding the corn starch to the egg yolks problematic. I am thinking of combining the sugar and corn starch and then adding the milk to heat. Once it thickens, then tempering the yolks with the hot mixture and adding back to the pot to cook. I have made custard in another recipe and it works well. No lumps.
Looking forward to trying this – looks great! Quick question on #7 – should I let the custard cool in the fridge or at room temperature for 15 min before putting it in the pie pan? Also curious how long the bananas stay yellow-looking after slicing if not using the lemon juice method? Hoping to make this tomorrow for an event! Thanks so much.
Hi Natasha, you can cool at room temp! The decorative bananas on top will start to turn brown. You can wait to add the banana slices as you serve to help prevent that. Enjoy!
Just wanted to report back – I made this for an event where we had an informal pie-judging competition. This pie won 1st out of 8 or 9 pies! I made it with the graham cracker crust. Amazing, will definitely be making this again.
Hi Sally, can I double the custard to make two pies?
I’ve made this pie before and it was fantastic; however, I am feeding 10 people on Sunday night and was wondering if I’d be setting myself up for failure if I whisk 8 egg yolks (yikes) at once…
Hi Slynne! We do fear the custard won’t cook properly with double the volume; you’ll have to extend the cook time. It could work, we just can’t guarantee it. It may be better to make two batches!
I have no experience making pies and made this yesterday for my birthday – I thought it would be fun to take on a new challenge. It was delicious and turned out perfectly!!
So glad you enjoyed this recipe, Audrey. Happy birthday!
Recipe sounds amazing. Would love to make a banana cream cheesecake. Have you a recipe for that. Had it in a restaurant and it was an amazing combo. Love your recipes.
Hi Nancy, we do not have a recipe for banana cream cheesecake at this time—but sounds delicious!
I made the banana cream pie this morning and we love it. Simple to make, creamy with great flavour but slices nicely, and so delicious (not sweet or starchy and no chemicals)!
I am looking forward to making this recipe! Would Gelatin be a good replacement for the corn starch? Has anyone else replaced the corn starch???
Terrific recipe! I used a pecan crust and plenty of bananas and it’s delicious. Thank you for another great recipe!
This banana cream pie is phenomenal. I’ve made it 3 weekends in a row. I’m scared to try the coconut cream pie now because I don’t think I should be eating this much pie lol
Thank you for this recipe.
PLEASE consider an alternative to the plastic wrap step – plastic is carcinogenic and endocrine disrupting, terrible for animals and the environment.
The chemicals used to make plastic flexible are fat soluble (and so plastic should never come in contact with fatty foods like cream, cheese, or meat).
We may never know how many cases of cancer are directly caused by plastic in our environment!
Some of us have known this for decades but the science has only recently started to be widely disseminated – we should all do our part to reduce plastic consumption.
(Also, I myself don’t sislike the skin that forms on pudding ;P.
I used parchment paper instead of the plastic for this very reason. It worked great–no skin on top. It helps to crumble the paper into a ball and then pull it flat again. This trick makes the paper easier to direct when you’re trying to cover the custard while cooling and again while setting in the fridge. I was able to use the same parchment paper for both steps. Other than using parchment instead of plastic, I made the pie as is and it was fantastic. Thank you for a great recipe.
this is a good recipe
Made this for my neighbor for his birthday. It’s his favorite. Said it was better than his mom’s, Wow! Used your graham cracker crust too. The best
I love this recipe! I’m hoping to make banana cream pie cups with a graham cracker crumble for a party. I’m just wondering if I can make double the amount of filling at one time or is it best to do two separate batches?
Hi Amy, sounds delicious! For best results, we recommend making two separate batches rather than doubling.
This recipe is fantastic!!! I’ve made this for my family a few times now and it’s turned out beautifully. I use the ready-made graham cracker crust which my hubby loves and bonus it’s a timesaver. The hardest part is tempering the yolks but if you’re patient and go very slow it’ll be worth it!
This pie brought joy to the whole family, especially my dad. Thanks for a wonderful recipe!
Made this pie recently. I tend to prefer a slightly stronger banana flavor (natural, never artificial). This pie was excellent, albeit with a fairly subtle banana flavor. My family LOVED it though and thought it was perfect… so hey what do I know? LOL
Did you actually put bananas in it??? It’s a great recipe and has plenty of flavor!
Hi it taste of s great but it did not set up. Was more like a runny pudding.
Hi Charlotte, if the filling is too runny, it’s likely the stovetop pudding wasn’t thick enough. Did you make any substitutions by chance? Even the smallest? Was it completely cooled and chilled? Make sure it thickens on the stove before removing from heat. Big bubbles will burst on top when it’s ready to come off heat. Thank you for giving this recipe a try, and let us know if we can help to troubleshoot further!
I’ve made this twice before and loved it. Second time around and it’s just as good. One tip, I use a shortbread crust and it pairs well. Sally also has a great video on how to make whipped cream!
I am sad to say that although you’re recipes I’ve used are amazing, I was disappointed with the banana cream pie. I cooked the custard longer than the recipe suggests to get it to the right thickness but after 6 hours refrigerated, custard was thick in parts and runny in other parts. I plan on taking out the custard filling today, adding more corn starch and not only cooking it to a pudding consistency but adding a box of instant banana pudding.
Hi Barbara, thank you for reporting back. I’m just seeing your comment now, but what you can do next time, if you experience this again, is whisk the refrigerated pudding together to bring it all into 1 even consistency. I don’t think adding more cornstarch would be necessary.
So delicious that I had to make it twice in two weeks. I ate most of it myself but my husband loved it too.
I forgot to chill the custard before filling the pie.. will it be ruined? I’m thinking it might impact the texture of the bananas?
I forgot to let my custard cool 15 min before filling the pie.. will it be ruined?
I have a favorite crust recipe I used, but the filling recipe was beautifully written and everything about the pie was amazing.