

This easy homemade bagels recipe proves that you can make deliciously chewy bagels in your own kitchen with only a few basic ingredients and baking tools! Watch the video tutorial before you get started.
Today I’m teaching you how to make homemade bagels with only a few basic ingredients and kitchen tools. Today you’re going to tackle any fears of yeast-bread baking—and I’m right here to guide you along! This recipe is such a fan favorite that I included it in my New York Times best-selling cookbook, Sally’s Baking 101.
Bagels, crème brûlée, soft pretzels, and French macarons. What do these foods have in common? Each seem really complicated to make at home. That’s why you’ll often find them on your baking bucket list. But secretly, they couldn’t be easier. Homemade bagels taste fresher, are cheaper, and you’ll earn the bragging rights for from-scratch baking. (P.S. Each of those recipes has a video tutorial!)
Bagels Require a Lean Dough
The first step is to make the bagel dough. You need only 5 ingredients:
- Warm Water: Liquid for the dough.
- Yeast: Allows the dough to rise. I recommend an instant or active dry yeast.
- Barley Malt Syrup or Sugar: Bakeries use barley malt syrup to sweeten the bagel dough—it can be a little difficult to find, but either white or brown sugar is a fine substitute.
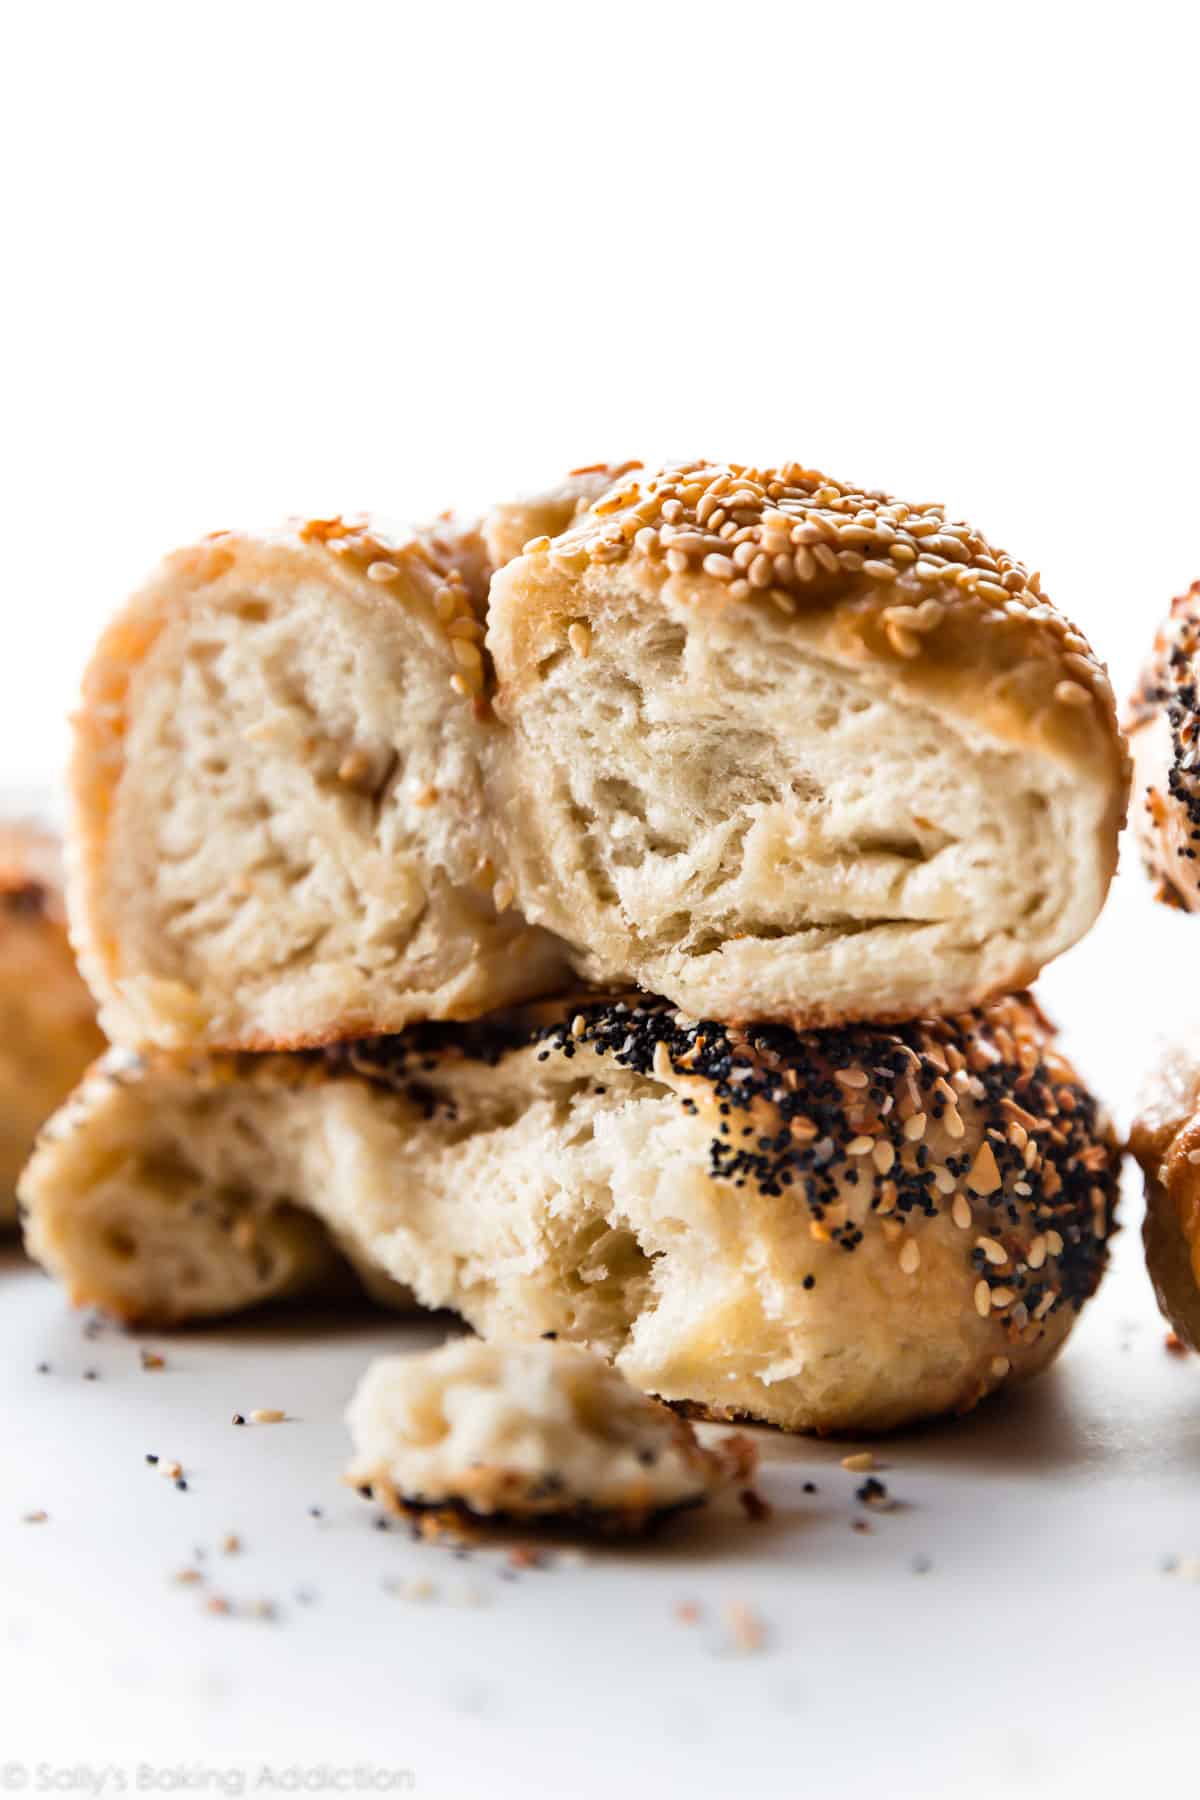
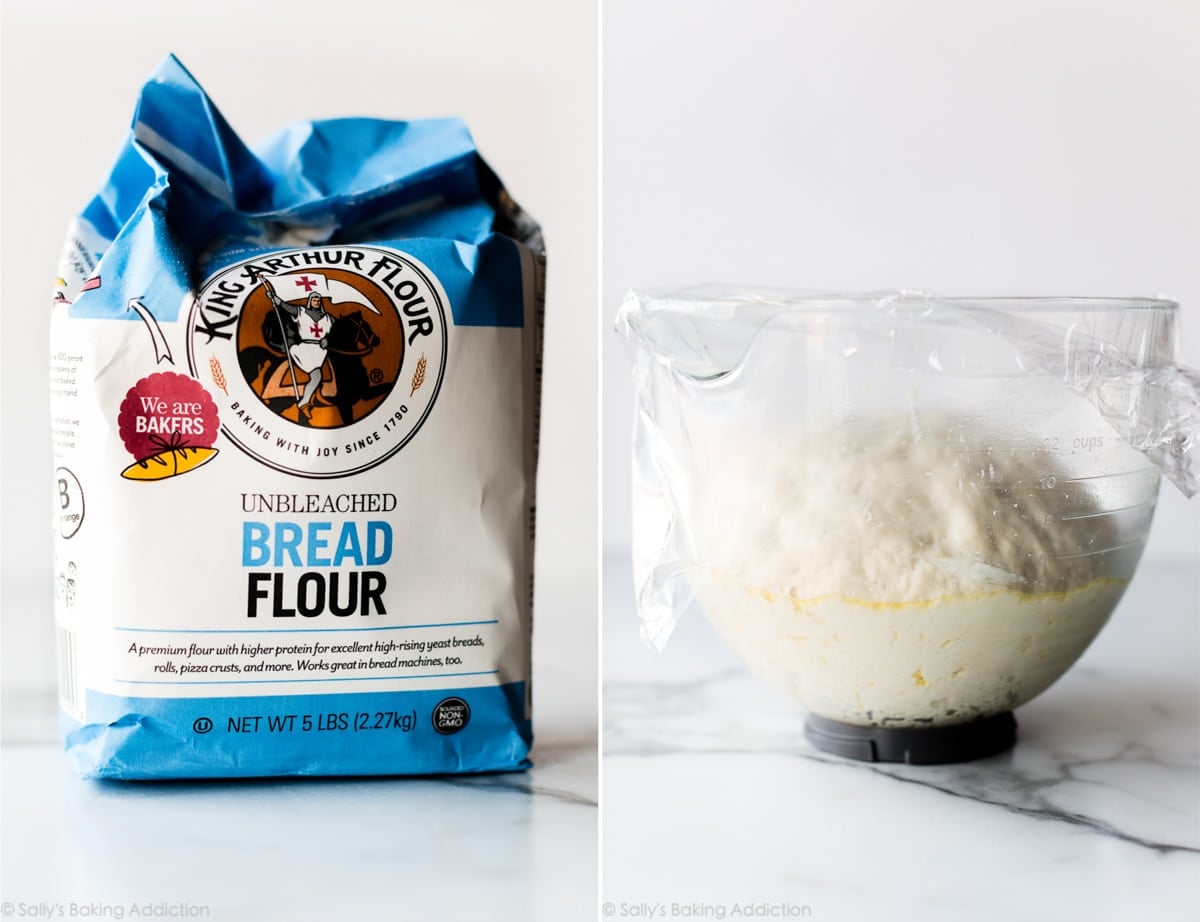
- Bread Flour: A high-protein flour is necessary for bagels. We want a dense and chewy texture, not soft and airy like cinnamon rolls. Bread flour is the only solution!
- Salt: Flavor.
Notice how there is no fat? This is called a lean dough. Lean dough is ideal for recipes like focaccia, pizza dough, artisan bread, and cranberry nut no-knead bread. Breads like dinner rolls and homemade breadsticks, and sweet bread, such as cinnamon rolls, include fat for richness and flavor.
You can prepare and knead the dough with a stand mixer or by hand. If you’d like a visual of how to knead the dough by hand, you can watch the full video tutorial in my post on How to Knead Dough.
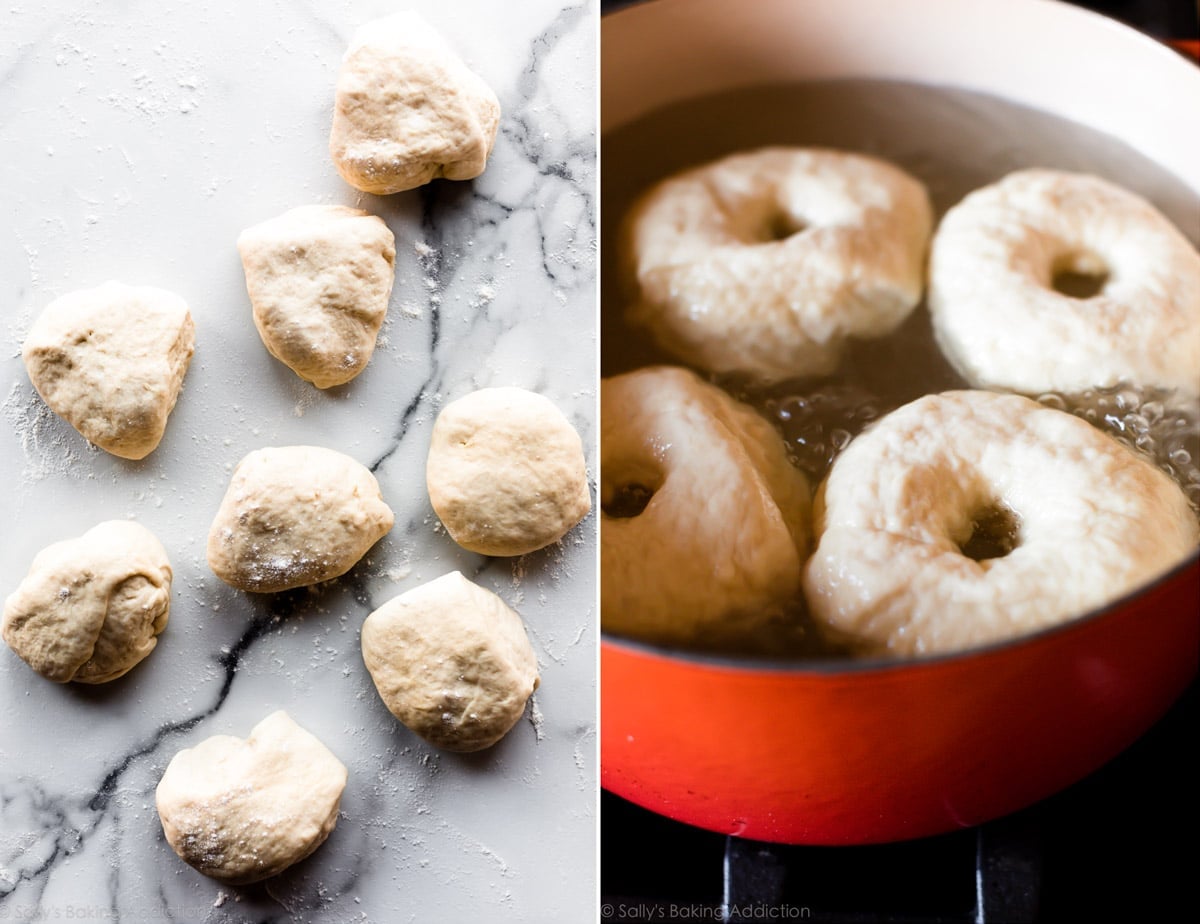
After the dough has been kneaded, let it rise for 60–90 minutes. Punch it down, then divide into 8 sections and shape into bagels.
How to Shape Bagels
Shaping bagels is easier than it looks. Poke your finger through the center of the ball of dough, then use 2 fingers to widen the hole to about 1.5–2 inches. That’s it! I don’t really do anything fancy and the bagels don’t need to be perfect. Mine never are!
Bagel Water Bath
Bagels must cook for 1 minute on each side in a pot of boiling water. This is actually the most important step in the whole recipe. Why?
- Boiling the bagels gives the bagel its beautiful shine. But looks aren’t everything—this shine is actually a result of the dough’s starches gelatinizing which creates a crisp, shiny coating. I learned this from Cooks Illustrated.
- Boiling bagels cooks the outer layer of dough, which guarantees they’ll hold their shape in the oven.
Add honey or barley malt syrup to the water bath. Why? The sugar adds extra caramelization and crisp. Brushing the boiled bagels with egg wash does the same. Don’t skip either!
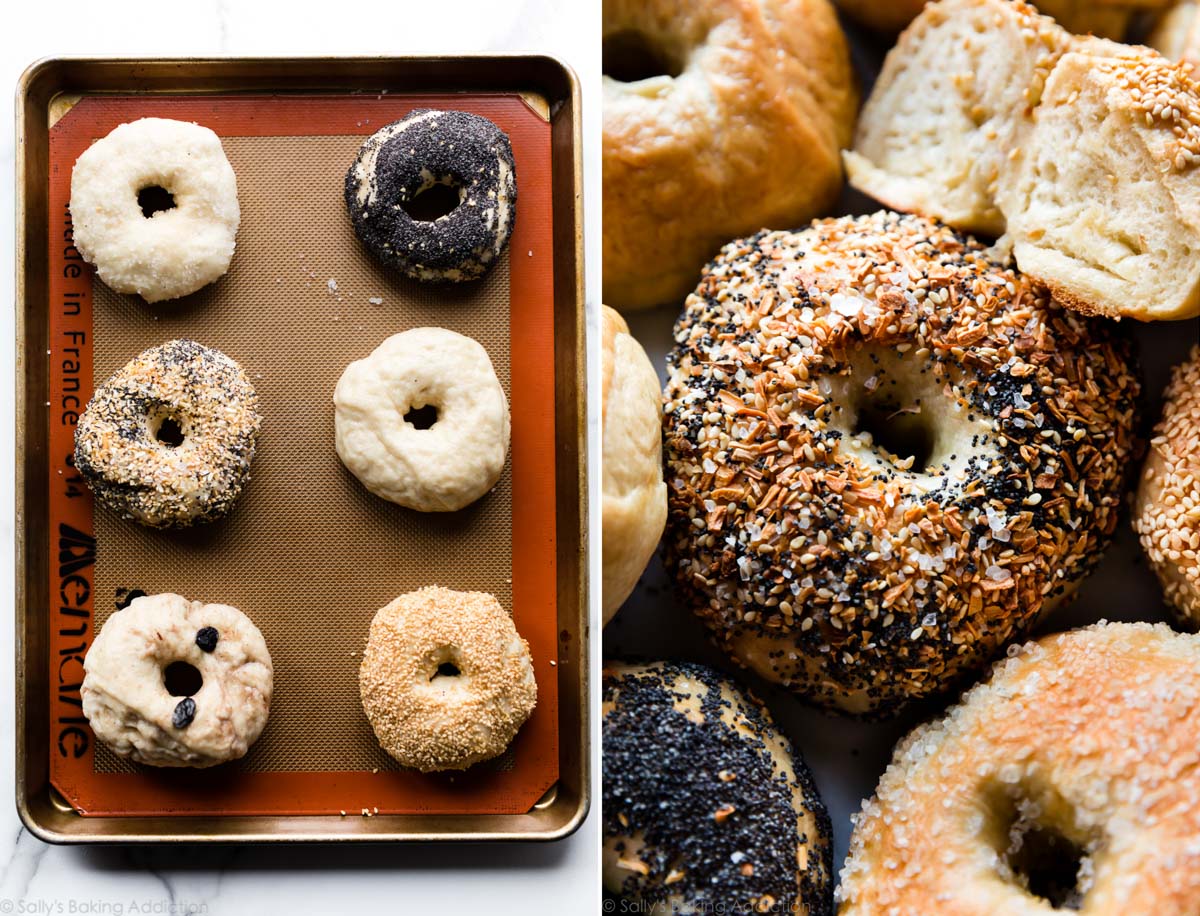
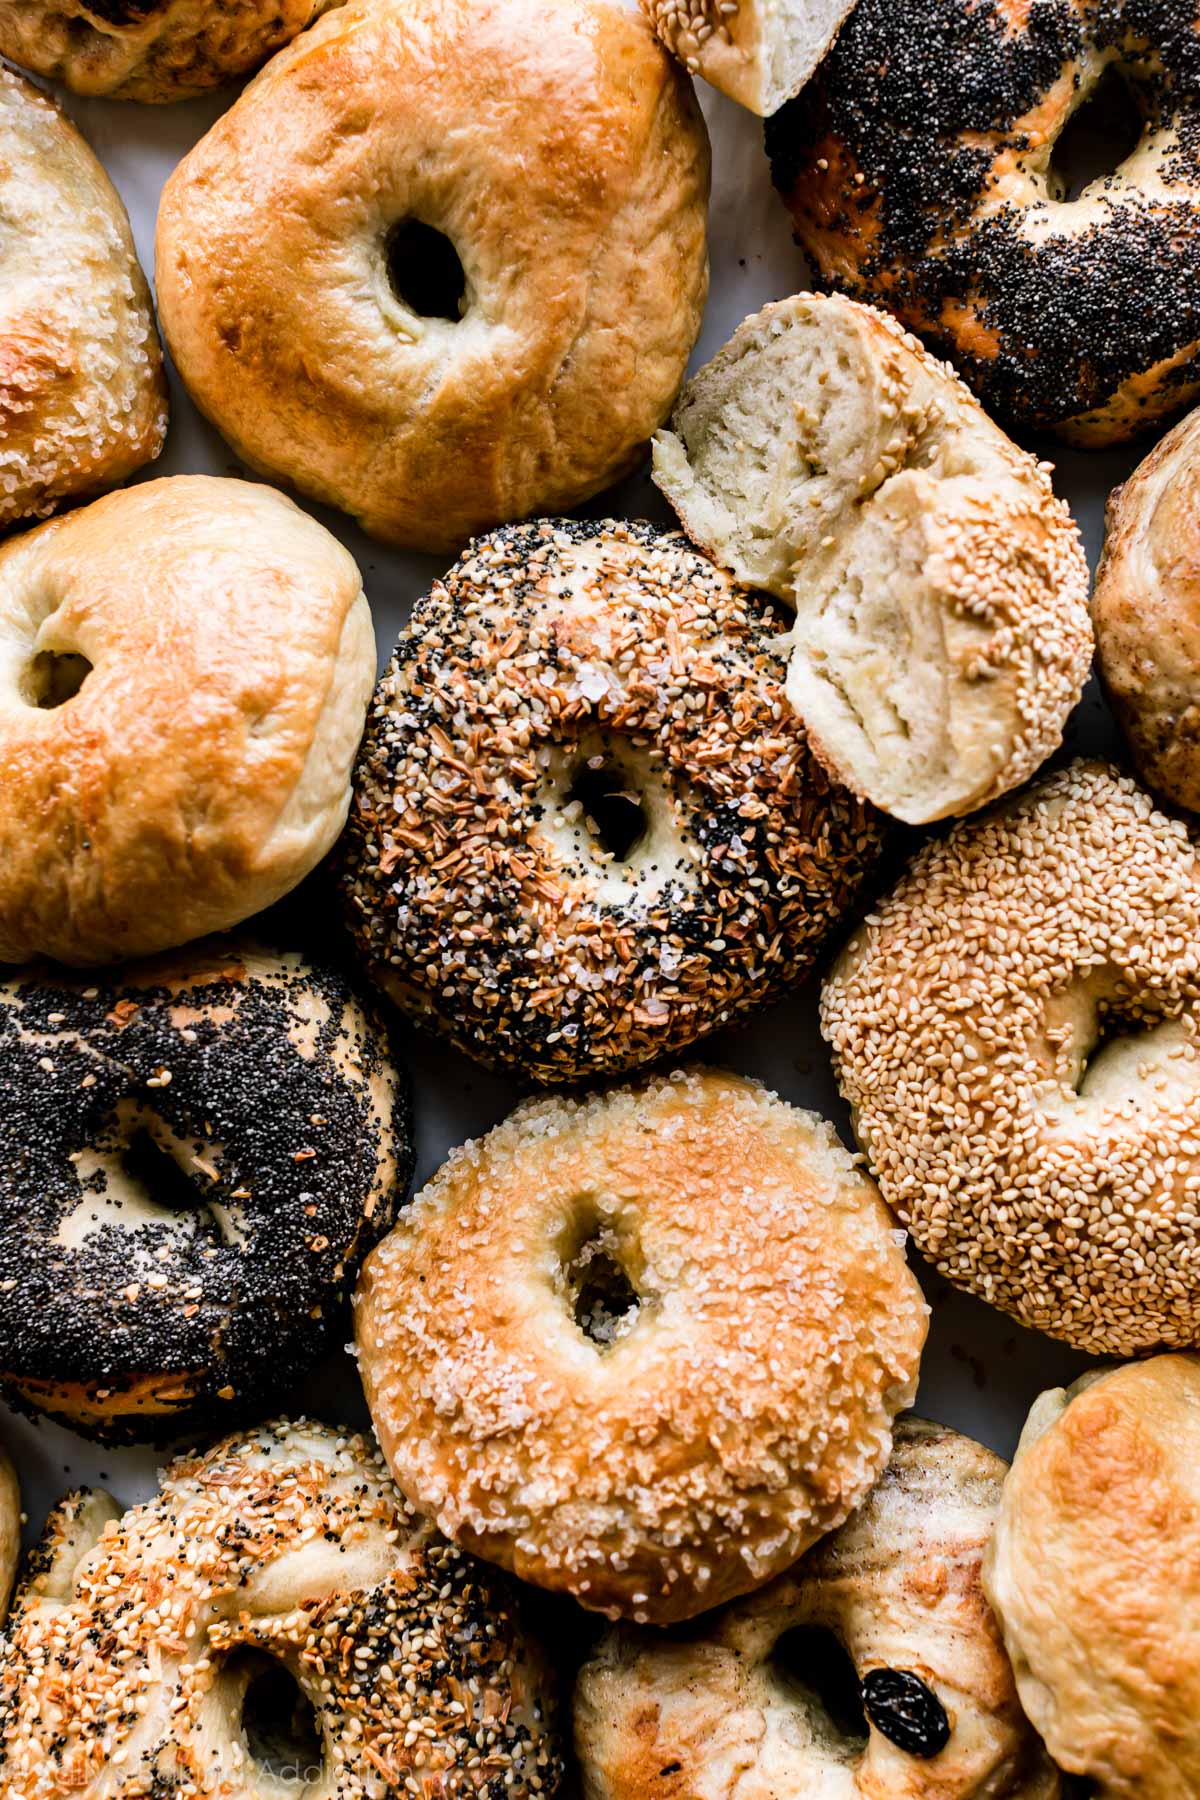
Homemade Bagel Varieties
- Plain Bagels: Follow the recipe below. These are excellent as the base for breakfast casserole.
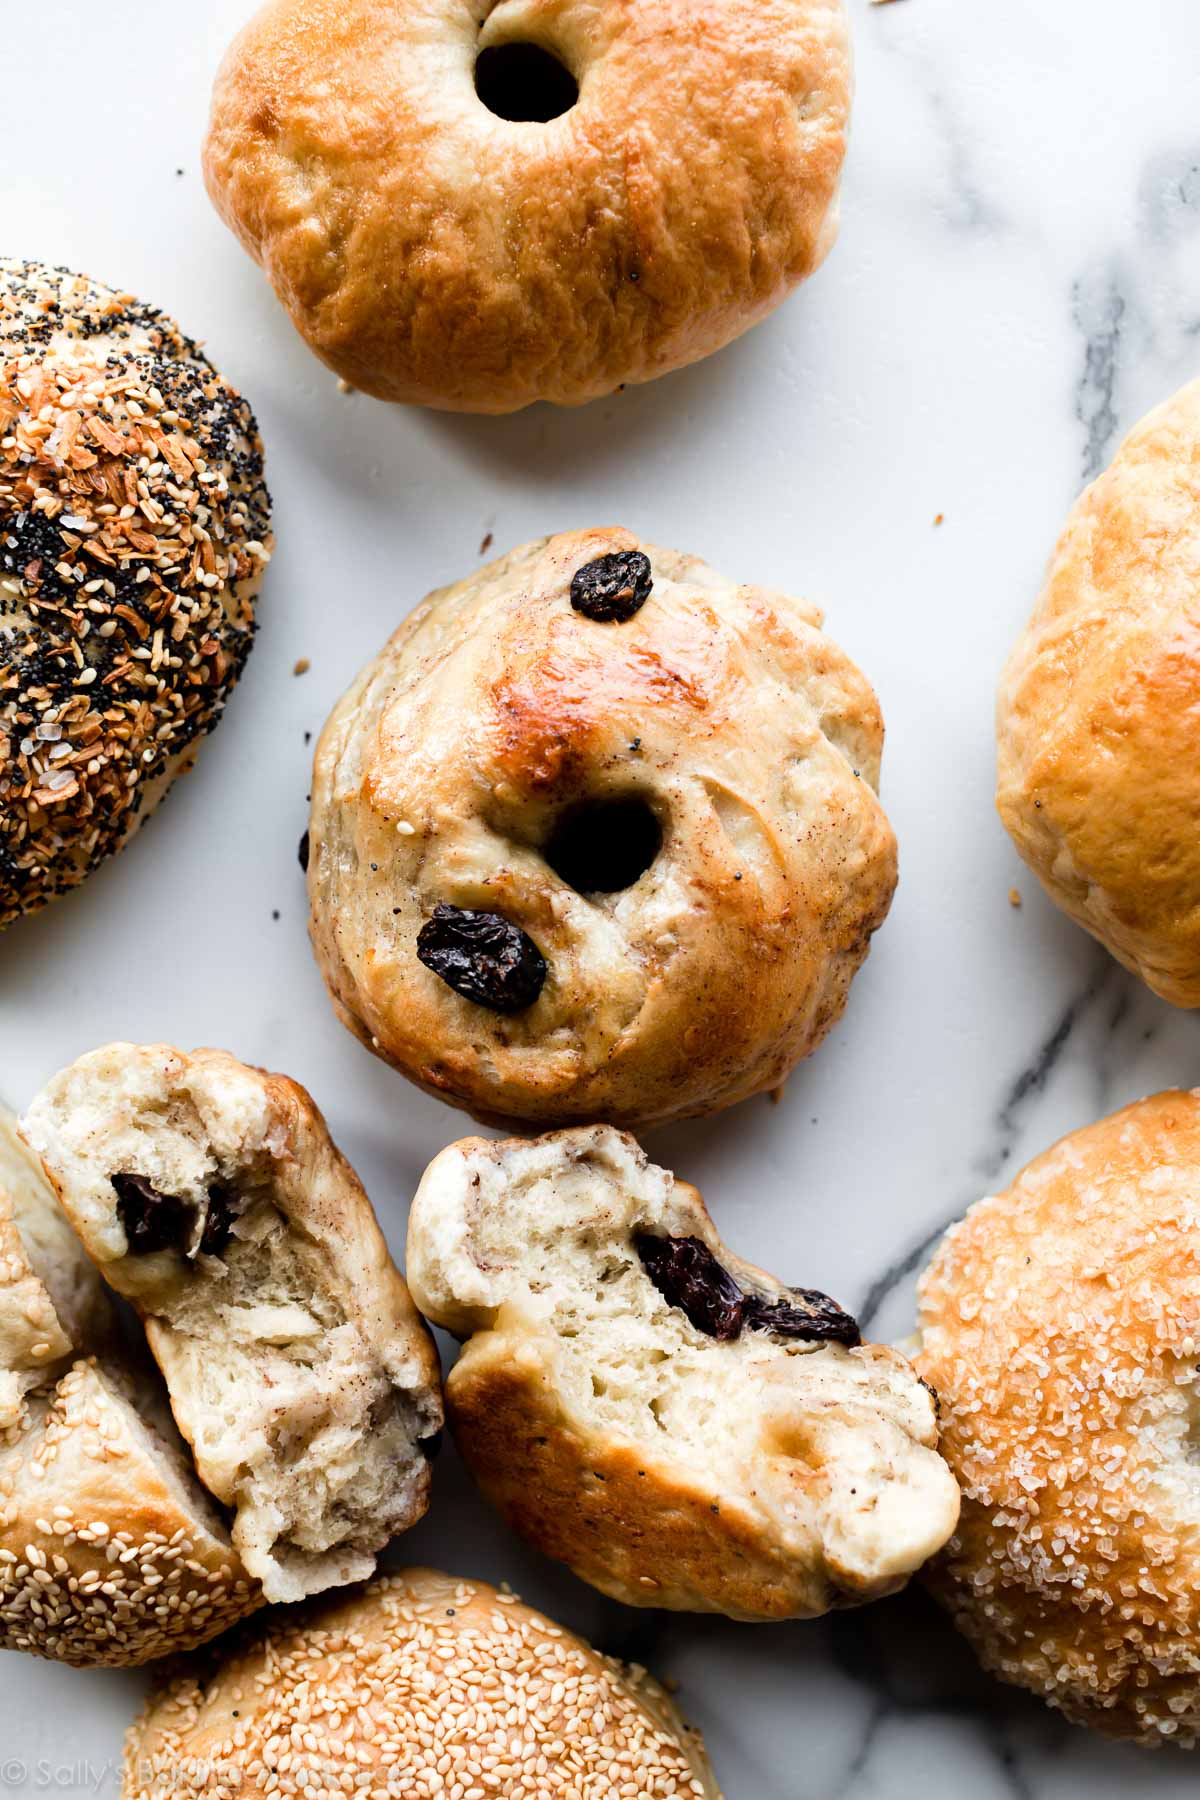
- Cinnamon Raisin Bagels: Follow my cinnamon raisin bagels recipe.
- Everything Bagels: Follow my everything bagels recipe.
- Blueberry Bagels: Follow my blueberry bagels recipe.
- Sesame Seed Bagels: Use 1/3 cup sesame seeds. After brushing with egg wash in step 9, top with or dunk each bagel into topping. Use more as needed.
- Poppy Seed Bagels: Use 1/3 cup poppy seeds. After brushing with egg wash in step 9, top with or dunk each bagel into topping. Use more as needed.
- Salt Bagels: Use 1/3 cup coarse sea salt. After brushing with egg wash in step 9, top with or dunk each bagel into topping. These are pretty salty, so feel free to go lighter on the salt.
- Cheese Bagels (Asiago, Cheddar, etc.): Add 1/2 cup of shredded cheese to the dough when you add the flour. After brushing with egg wash in step 9, sprinkle with extra cheese.
- Cinnamon Crunch Bagels: Add 1 teaspoon of cinnamon to the dough recipe below when you add the salt. Double the cinnamon crunch topping from cinnamon crunch bread. After brushing the bagels with the egg wash in step 9 below, spoon cinnamon crunch topping on each.
Some readers have used this bagel recipe to make whole wheat bagels by replacing half of the bread flour with whole wheat flour. I haven’t tried it, but I do use some whole wheat flour when making homemade English muffins, another breakfast staple!

Homemade Bagels Recipe
- Prep Time: 2 hours, 10 minutes
- Cook Time: 25 minutes
- Total Time: 3 hours
- Yield: 8 bagels
- Category: Bread
- Method: Baking
- Cuisine: American
Description
Make fresh bagels right at home with this tested dough recipe. Don’t skip the water bath and egg wash—both provide an extra chewy and golden brown crust. This recipe is also in my cookbook, Sally’s Baking 101.
Ingredients
- 1 and 1/2 cups (360g/ml) warm water (between 100–110°F/38–43°C)
- 2 and 3/4 teaspoons (8g) instant or active dry yeast*
- 1 Tablespoon barley malt syrup, granulated sugar, or brown sugar*
- 4 cups (520g) bread flour (spooned & leveled), plus more as needed*
- 2 teaspoons salt
- for coating the bowl: nonstick spray, butter, or oil
For Boiling & Topping
- 2 quarts (1.9L) water
- 1/4 cup (85g) barley malt syrup or honey
- egg wash: 1 egg white beaten with 1 Tablespoon water
Instructions
- Prepare the dough: In the bowl of a stand mixer fitted with a dough hook attachment, whisk the warm water, barley malt syrup/sugar, and yeast together. Cover and allow to sit for 5 minutes. *If you don’t have a stand mixer, use a large mixing bowl and mix the dough with a wooden spoon or silicone spatula in the next step.*
- Add the flour and salt, and beat on medium speed for 2 minutes, until the dough comes together and pulls away from the sides of the bowl. If it seems too sticky and clings to the sides of the bowl instead of forming a rough mass around the dough hook or spoon, add more flour, 1 Tablespoon at a time, and continue to mix until the dough pulls away from the sides of the bowl. The dough should be stiff and somewhat dry. If it is crumbly and breaks off in pieces, add more water, 1 teaspoon at a time, mixing well after each addition.
- Knead the dough: When the dough has reached the proper consistency, beat on low speed with the dough hook for an additional 6–7 minutes, or knead by hand on a lightly floured surface for 6–7 minutes, until the dough feels smooth, supple, and elastic. (If you’re new to bread-making, my How to Knead Dough video tutorial can help here.) If the dough becomes too sticky during the kneading process, sprinkle 1 teaspoon of flour at a time on the dough or on the work surface/in the bowl to make a soft, slightly tacky dough. Do not add more flour than you need because you do not want a dry dough. After kneading, the dough should still feel a little soft. Poke it with your finger—if it slowly bounces back, your dough is ready to rise. You can also do a “windowpane test” to see if your dough has been kneaded long enough: tear off a small (roughly golfball-size) piece of dough and gently stretch it out until it’s thin enough for light to pass through it. Hold it up to a window or light. Does light pass through the stretched dough without the dough tearing first? If so, your dough has been kneaded long enough and is ready to rise. If not, keep kneading until it passes the windowpane test.
- Lightly grease a large bowl with nonstick spray, butter, or oil. Place the dough in the bowl, turning it to coat all sides in the oil. Cover the bowl with plastic wrap or a clean kitchen towel. Allow the dough to rise at room temperature for 1.5–2 hours, or until doubled in size.
- Line two large baking sheets with parchment paper or silicone baking mats.
- Shape the bagels: When the dough is risen, punch it down to release the air. On a lightly floured surface, divide the dough into 8 equal pieces, about 4 ounces (113g) each. Shape each piece into a ball. Press your index finger through the center of each ball to make a hole, then stretch and widen the hole to about 1.5–2 inches in diameter. Arrange the shaped bagels on the prepared baking sheets. Loosely cover the shaped bagels with a kitchen towel or plastic wrap and let them rest for 5–10 minutes as you prepare the water bath.
- Preheat the oven to 425°F (218°C).
- Water bath: Fill a large, wide pot with 2 quarts (1.9L) of water. Whisk in the barley malt syrup or honey. Bring to a boil over high heat, then reduce heat to medium-high. Drop 2 or 3 bagels in at a time, making sure they have enough room to float around. Boil the bagels for 1 minute, then use a spatula to flip each bagel over and boil for 1 minute more. Using a slotted metal spatula, lift the bagels out of the water, letting the excess water drain off. Place the bagels back on the lined baking sheets. Repeat with remaining bagels.
- Using a pastry brush, brush the egg wash on top and around the sides of each bagel. If you’re adding toppings, dip the tops of the bagels into the toppings immediately after applying the egg wash.
- Bake for 20–25 minutes, rotating the pans halfway through, until the bagels are dark golden brown. Allow the bagels to cool on the baking sheets for 20 minutes, then transfer to a cooling rack to cool completely.
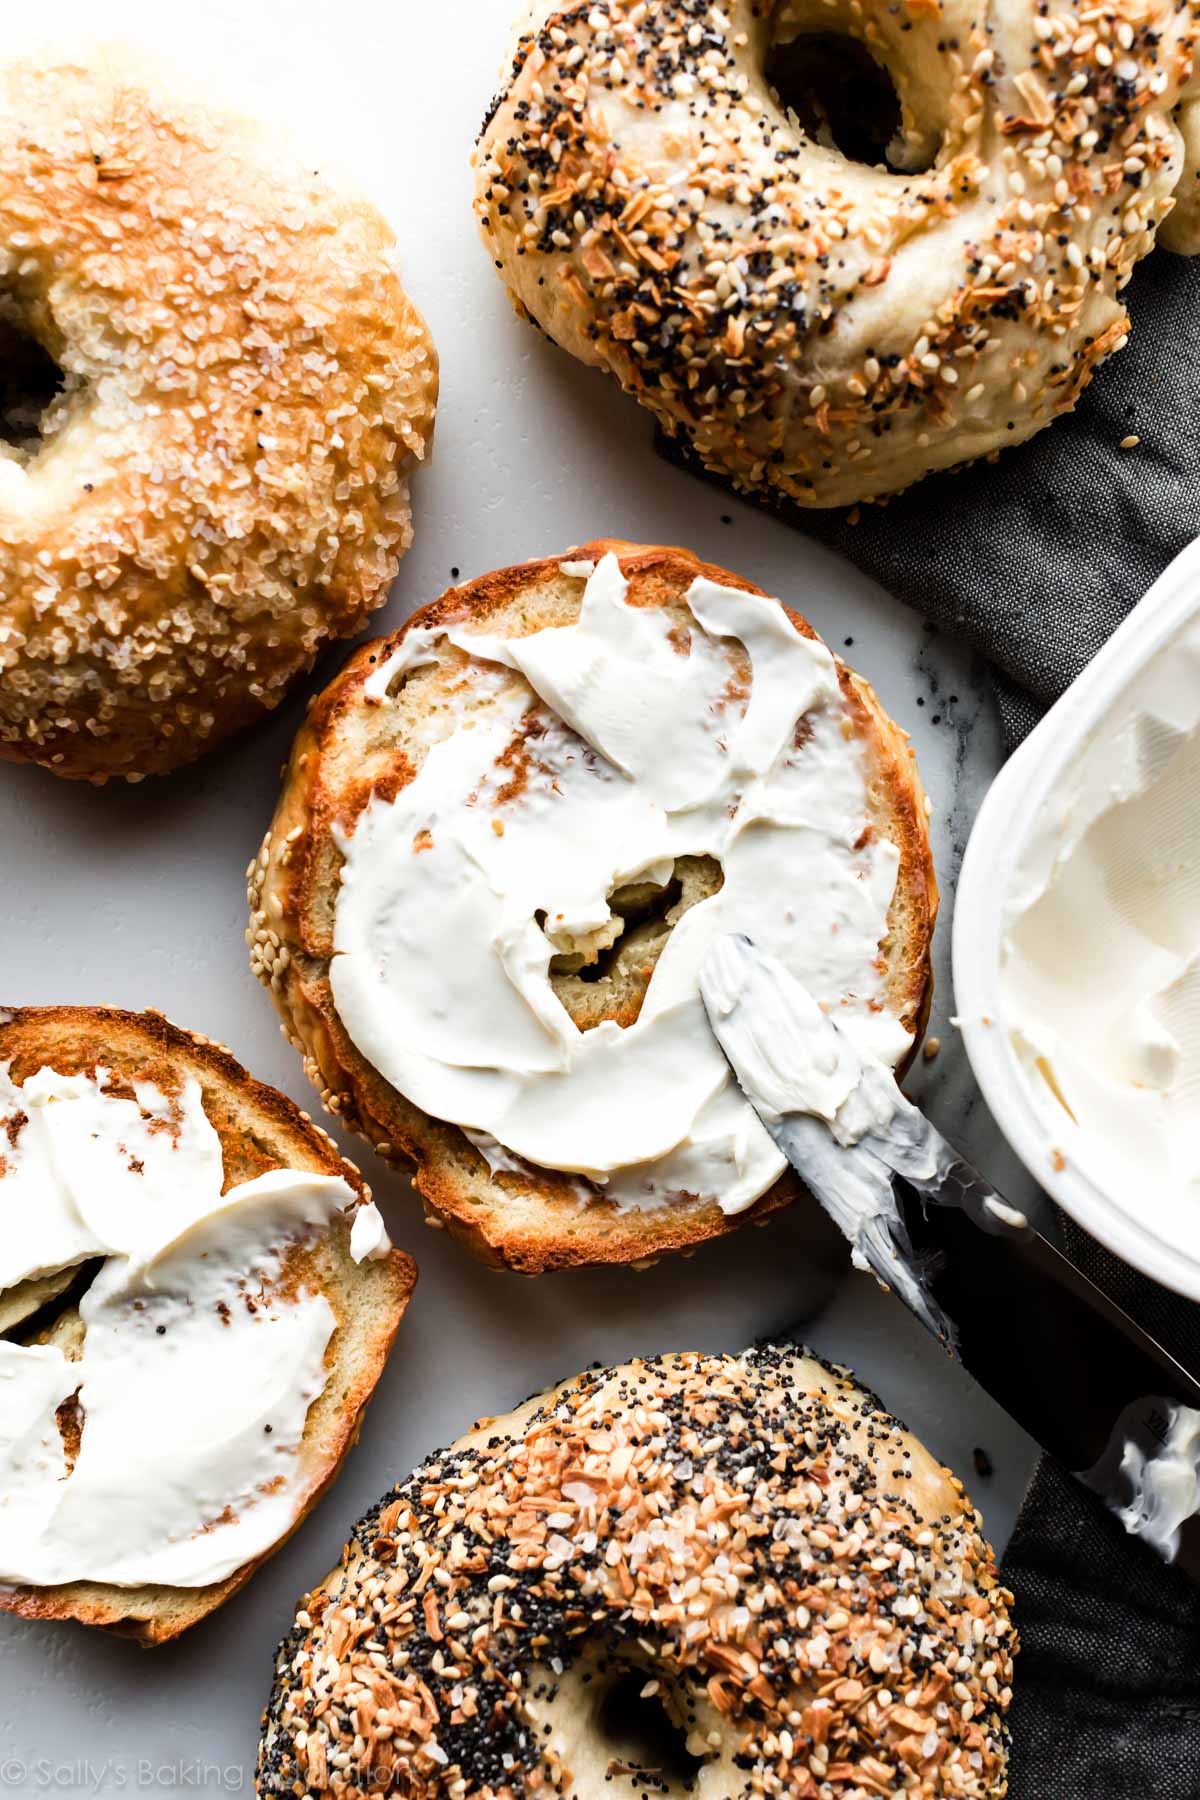
- Slice, toast, top, enjoy however you want! Cover leftover bagels tightly and store at room temperature for up to 4 days or in the refrigerator for up to 1 week.
Notes
- Overnight Make-Ahead Instructions: Prepare the dough through step 4, but allow the dough to rise overnight in the refrigerator instead of at room temperature. The slow rise gives the bagels wonderful flavor! In the morning, remove the dough from the refrigerator and let the dough rise for 45 minutes at room temperature. Continue with step 5. I don’t recommend shaping the bagels the night before as they may puff up too much overnight.
- Freezing Make-Ahead Instructions: Baked bagels freeze wonderfully! Freeze them for up to 3 months, thaw overnight in the refrigerator or at room temperature, then warm to your liking. You can also freeze the bagel dough. After punching down the dough in step 6, wrap the dough tightly in plastic wrap, then a layer of aluminum foil. Freeze for up to 3 months. Thaw overnight in the refrigerator, then punch the dough down again to release any air bubbles. Continue with the rest of step 6.
- Special Tools (affiliate links): Stand Mixer | Baking Sheets | Parchment Paper or Silicone Baking Mats | Large Pot (such as a 5- or 6-quart Dutch Oven) | Pastry Brush
- Yeast: Use instant or active dry yeast. If using active dry yeast, the rise time may be closer to 2 hours. 1 standard packet is about 2 and 1/4 teaspoons, so you will need a little more than 1 packet of yeast. Reference my Baking with Yeast Guide for answers to common yeast FAQs.
- Barley Malt Syrup: This ingredient can be a little hard to find, but truly gives bagels that traditional malty flavor we all know and love. Most natural food stores carry it. I offer alternatives such as brown sugar in the dough and honey in the water bath; I’ve made bagels with these alternatives AND with barley malt syrup and honestly love both versions.
- Bread Flour: Bagels require a high protein flour. Bread flour is a must. Here are all my recipes using bread flour if you want more recipes to use it up. All-purpose flour can be used in a pinch, but the bagels will taste flimsy and won’t be nearly as chewy.
- Bread Machine: Place the dough ingredients into the pan of the machine. Program the machine to dough or manual, then start. After 9–10 minutes, the dough will be quite stiff. Allow the machine to complete its cycle, then continue with the recipe.
- Bagel Varieties: See blog post above for various add-ins and toppings. Note that the toppings are added after the egg wash in step 9. Some readers have used this bagel recipe to make whole wheat bagels by replacing half of the bread flour with whole wheat flour. I haven’t tried it, but let me know if you do!
- Halve or Double: You can halve this dough recipe by simply halving all of the dough ingredients (do not halve the water or honey for the boiling step). No changes to the recipe instructions. For best taste and texture and to not overwhelm your mixer with excess heavy dough, I do not recommend doubling this dough recipe. Instead, make separate batches of dough.
- Adapted from a mix of recipes I’ve tried: King Arthur Flour, Cook’s Illustrated, and Complete Book of Breads


Reader Comments and Reviews
Boiled them 90 seconds each side made them chewer.
Hi there! 1st time making and was easy but I found the dough was very crumbly… suggestions?
Hi Rebecca, the dough should be a little soft. Is it dry and shaggy? If so, there could have been too much flour used.
Simple recipe with a fantastic end result. Thank you for sharing. I have been baking them every weekend for the past month. My neighbors and co-workers love them. I believe the barley malt makes the difference. Thanks again! Bake-On!
THANK YOU. This recipe is awesome!!!
Your instructions for the overnite refrigerator rise states to work through step 4. Does that mean that the dough rises on the counter, and then goes in the fridge or is the dough placed in the bowl directly after kneading.
Hi Sara, For the overnight instructions we are allowing the dough to rise overnight in the refrigerator instead of at room temperature (so skip the room temperature rise). This slower rise gives the bagels wonderful flavor!
found these recipes when looking to make everything bagels for the hubby, we made them sunday and now have the cinnamon craisan bagels in oven right now. recipe is so easy to follow, I make the dough the night before and let it rise in the fridge overnight. my mouth is watering waiting to try them out….thank you for posting the recipe..
the bagels were really good nice and doughy but not to much the still had a nice chew to them
Sally, I’ve tried your everything, cinnamon raisin and cheese bagels. They are the best bagels I’ve ever tasted. Thank you so much for your great recipes. I was wondering if you had a recipe for onion bagels.
We are so happy you enjoy them, Donna! We haven’t tested onion bagels, but recommend adding about 1/4 teaspoon onion powder and 1/3 cup dried minced onion in the dough. Add both when you add the flour. You can also top with more dried minced onion. You can find this in the baking aisle with the spices. Let us know if you try it!
Wonderful recipe! Bagels were a Sunday breakfast tradition in my family, one that I miss since moving away from New York. Making them myself always seemed like it would be a daunting task–I had no idea how straightforward this process could be! Thank you for the detailed instructions and suggested variations. I look forward to keeping this in rotation.
Is it bad to let the dough rise for longer than 90 min? I was stuck making dinner, feeding kids & bedtime before I could get back to my dough.. not sure how long it went but it was def over 90 min. They are cooling now but wondering if there are any immediate “oh no’s!”
Thanks
I’ve made the cinnamon bagels twice now and I’ve never been much of a bread maker. Thanks for this easy recipe! I’m currently trialling substituting gluten free bread flour in regular bagels. The dough needed more flour as was very wet, so I added extra flour and a little regular bread flour. They have turned out good!
I’ve never made bread before but decided to try this recipe. It was my first time baking with yeast and I’m really pleased with how they came out!! Some of them were a bit misshapen but the taste is fantastic. I was worried they would be too bland with plain cream cheese but they have a great flavor! Can’t wait to try making the cinnamon raisin version.
Lovely recipe!!! Bagels were chewy! But I find that the bagels had a strong yeast smell. Any way to reduce the smell/taste of yeast in the bagels? Thankyou!
Hi Clara, Letting the dough rise too long can give the finished product a strong yeast flavor. Usually it takes between 60-90 minutes for the dough to rise, but keep an eye on them and move on to the next step when they have doubled in size.
This is a fantastic recipe! Took a bit of effort but well worth it. They came out chewy with a good flavor. No more trips to Mr. Bagel!
My family loved the plain bagels, but now my teenage boys are begging for chocolate bagels and I don’t see that as a click on option above. How can I modify these to make chocolate? Thanks!!
Marisol
Hi Marisol, glad your family enjoys these homemade bagels. I’ve never made chocolate bagels before so I can’t offer any advice. You can, however, make chocolate chip bagels by adding about 1 cup of chocolate chips to the dough.
Hi Marisol – I would try cocoa powder as a first attempt. I’m questioning what kind of bagel you would have adding the additional liquid of melted chocolate.
My family loves this. I make the dough Saturday night– let my kitchen aid do the kneading- leave it in the fridge overnight to rise and it’s all ready for shaping/boiling and baking Sunday morning. I’ve also experimented with multigrain flour, molasses for the sweetener…..all delicious and successful.
Should you let the dough rise for 60-90 minutes before putting it in fridge if you are going to let it rise overnight?
Hi Tally, For the overnight instructions we are allowing the dough to rise overnight in the refrigerator instead of at room temperature (so skip the 60-90 minute room temperature rise in step #4). This slower rise gives the bagels wonderful flavor!
These were so much easier than I thought. Thank you! I would love to make sundried tomato bagels-do you think I should use the ones in oil or just the dried tomatoes?
That sounds delicious, Sarah! You can try using the dried tomatoes (not packed in oil). Let us know how they turn out!
Tried this recipe the bagels came out great! I’m wondering how do I adjust this recipe to make pumpkin spice bagels?
Just made this recipe. It was perfect! They were delicious. Thank you!
Hi Sally, my bagels turned out flat! It tasted amazing but unfortunately turned out really flat. I’ve followed every step to a T! I was wondering what I could have done wrong? thanks!
Hi Caren! Was the dough particularly sticky? A little more flour will help for next time– a firmer dough should create puffier bagels. Did they puff up during the boiling step?
I followed the recipe and knead the dough for 2 mins at low speed with the stand mixer and transfer to be kneaded by hand. But the dough is so sticky and slimy that it’s impossible to knead them by hand after that. Did I do something wrong?
Hi Charis, a dough’s consistency relies on many variables including how you measure the flour, brand of flour, even the weather and humidity in the air. While this should be a soft dough, it sounds like yours could benefit from extra flour. Don’t be afraid to add 1/3 – 1/2 cup more flour to the dough before or during kneading.
I went full McGyver on this recipe and it was awesome! Here in Puerto Rico and thus, in many markets in American latin areas they sell a delicious carbonated Malt drinks (Malta India, Malta Polar, etc). Looking at them I saw they are just carbonated water, malt, cane sugar. So, I decided to make my own Malt syrup by bringing to a boil a can of Malta and then lower the heat down for around 30 minutes till it got reduced to less than half, actually like 70% (4 ounces out of a 12oz can). Although it remains liquid, it is very sweet. I then used 1 Tbsp as the recipe calls for of this pseudo-syrup, and the remaining part I used on the boiling water pot afterwards.
The bagels turned out AMAZING. I did had to add a bit more flour during kneading, possibly cause the Malta added more liquid. Also, I used the overnight fridge method to allow them to get flavorful. No Malta flavor on them, but a savory, rich sweet taste very similar to NY Style ones.
One last thing. Don’t trust your instincts— make that hole BIG! I did mine 1 inch, and they mostly closed up before boiling. Even then I reopened them and still they closed on me on the baking phase. For me was no issue — more area to spread cream cheese!
How would I make pumpernickel bagels?
This is the fourth or fifth time I’ve made these and they are awesome. This time I made them with half bread flour and half white whole wheat flour and I’m in love! They really turned out perfect!
We only made a half batch of cheese bagels, but now we wish we’d made more. After 20 minutes of baking, these turned out completely cooked, but still moist, chewy, and surprisingly full of flavor. Thanks for another great recipe!
Do you have any tips to keep the bagels fresh so that they aren’t dry and rubbery the next day?
Hi Minu! Best way to store these is to tightly cover and store them at room temperature.
I sometimes fold or roll a paper towel or small piece of cloth, wet it, squeeze out the excess and place it in a sealed container with the bagels. Don’t let the damp towel touch the bagels. You can make a barrier with a piece of aluminum foil or plastic wrap. Seems to work for bread, cookies etc.,. However, moisture can provide an environment for bacteria or mold to grow. Adjust moisture by adding more or removing the towel if necessary and know this is good only for a couple of days.
These were perfect! Thank you for the detailed instructions!! I subbed in 1 cup of whole wheat flour…excellent bagels. This NY-er transplant in VA is very happy!!
This was my first time making this recipe, which was easy to follow. My only issue is that my bagels came out a bit flat. I would guess only about half of the height they should be. Sally, can you tell me the possible reason for this please?
Thanks
Will
Hi Will, Was the dough too sticky and/or shaping too difficult? Was your yeast expired too, by chance? If the bagels were flat, try adding another couple Tbsp of flour next time. That should help them hold their shape a little better.
Another tip is to not let your dough rise too long (you want it to double in size). Yeast recipes/breads will deflate if the dough has risen/proofed too long. I hope this helps!
Just as I suspected, the dough was left to rise too long for sure. I had to run out for a bit, which turned into nearly 3 hours. Made them a 2nd time and they were perfect.
Love love love this recipe. I’m a baker but not an expert. Easy to follow directions. I have made them three times and they turn our great each time. Highly recommend you try. So much better then store bought. We are hooked.
When following the overnight instructions, does the dough rise on the counter first, or does the dough go straight into the refrigerator? Thanks for your help! Really excellent bagels!!!
Straight into the refrigerator!
My family can not get enough of these. I double the batch and still can’t keep up with their demand!
Question:
What is the easiest way to transfer the bagel to the water. I seem to have flat bagels.
Hi Linda, You can watch Sally in the video above just pick them up with her hands to transfer them. However you can use any type of flat spatula or a bench scraper to help move the dough without your hands.