

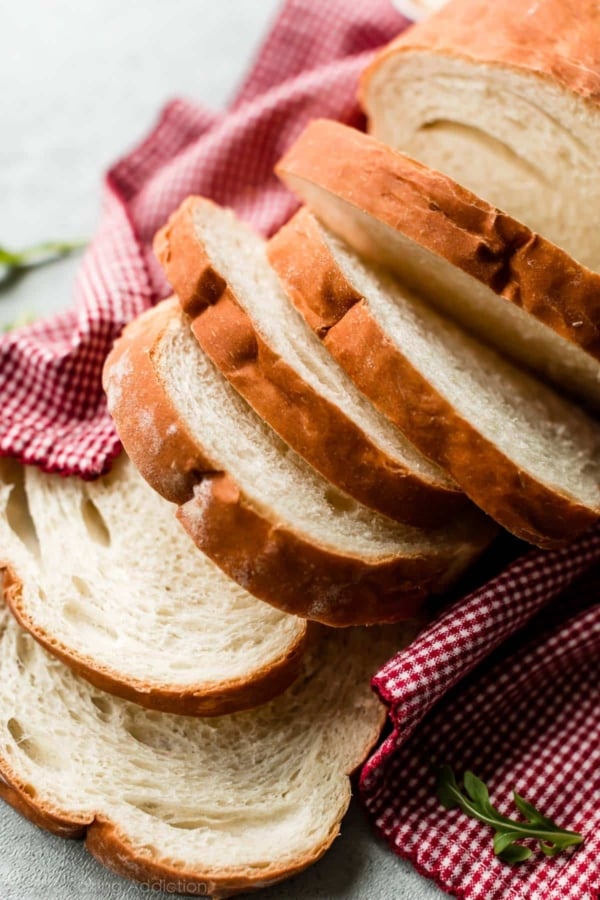
These homemade garlic knots are extra soft and flavorful, and use a dough similar to this reader-favorite pizza dough. Top with garlic herb butter before AND after baking for the tastiest knots!
I originally published this recipe in 2020 and have since made a few changes to improve the texture and flavor of the dough, which are reflected in the recipe below. This recipe is brought to you in partnership with Red Star Yeast.
Tell Me About These Garlic Knots:
- Made from an easy homemade dough
- Leftovers freeze beautifully
- Super soft and fluffy
- Golden brown
- Extra garlic butter
And I know you’ll appreciate this too: You can use the entire batch of dough for 16 knots OR you can use half of the dough to make a pizza or stromboli, and then have 8 knots on the side. Perfect for pizza night—no delivery required.
One reader, Michelle, commented: “These were perfect! Brushing on the garlic butter before baking makes such a difference. These are near foolproof! So fluffy and delicious! ★★★★★“
One reader, Catie, commented: “My husband agrees—best garlic knots ever! This recipe works! ★★★★★“
Garlic Knots From Pizza Dough
You can make these garlic knots with 1 or 2 pounds of store-bought or homemade pizza dough. Today’s dough is very similar to my homemade pizza dough, which yields about 2 pounds of dough. You can make 16 knots or 1 pizza + 8 knots. If you only need about 8 knots, freeze the other half of dough for another time. You will want to make these garlic knots again.
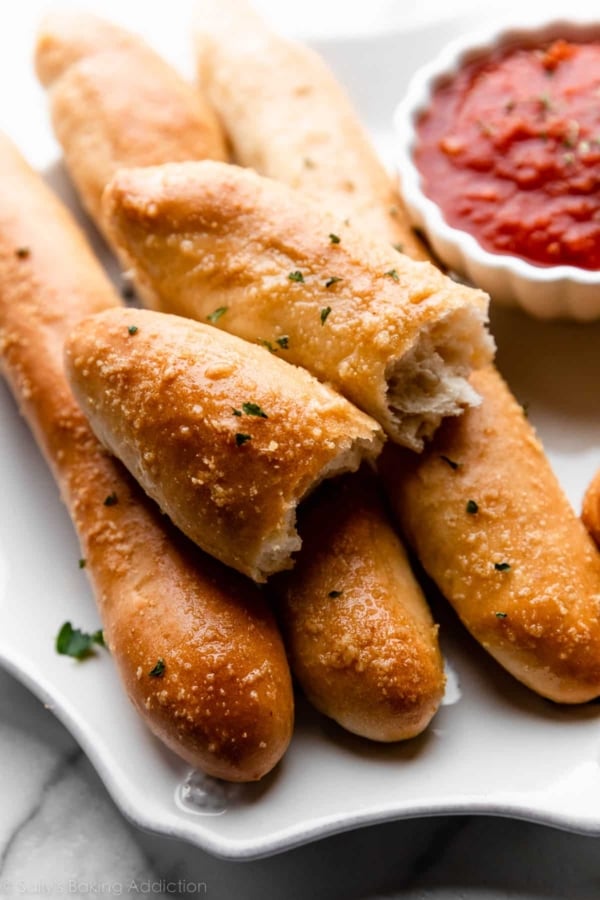
- Besides garlic knots and pizza, you can use this dough for cheesy breadsticks, pepperoni pizza rolls, and ham & cheese pockets too! So versatile.
Compared to my pizza dough, I reduced the water so the dough is easier to handle when shaping into knots. I add 1 extra Tablespoon of olive oil for a little extra flavor and richness, and include garlic powder too. Sometimes for extra flavor I use butter instead, similar to what I do when making homemade breadsticks. Either one works. (Melted butter in the dough is convenient because you also need melted butter for the topping.)
Even though store-bought dough is convenient, I encourage you to try homemade dough. The dough requires so few ingredients!
Ingredients You Need:
- Water: Use warm water here, to activate the yeast.
- Instant Yeast: I always use Platinum Yeast from Red Star. If you’ve been baking my yeast breads for a while, you know I swear by it! Its careful formula strengthens dough and makes working with yeast simple. You can use active-dry yeast instead; the rise time may be a bit longer.
- Sugar: To feed the yeast.
- Olive Oil: Or melted butter.
- Salt: Can’t make flavorful bread without salt!
- Garlic Powder: We’ll top the knots with fresh minced garlic, but you can use garlic powder in the dough.
- Bread Flour: The original recipe called for all-purpose flour, but we find that bread flour makes for a better texture. If you don’t have any, you can use all-purpose instead.
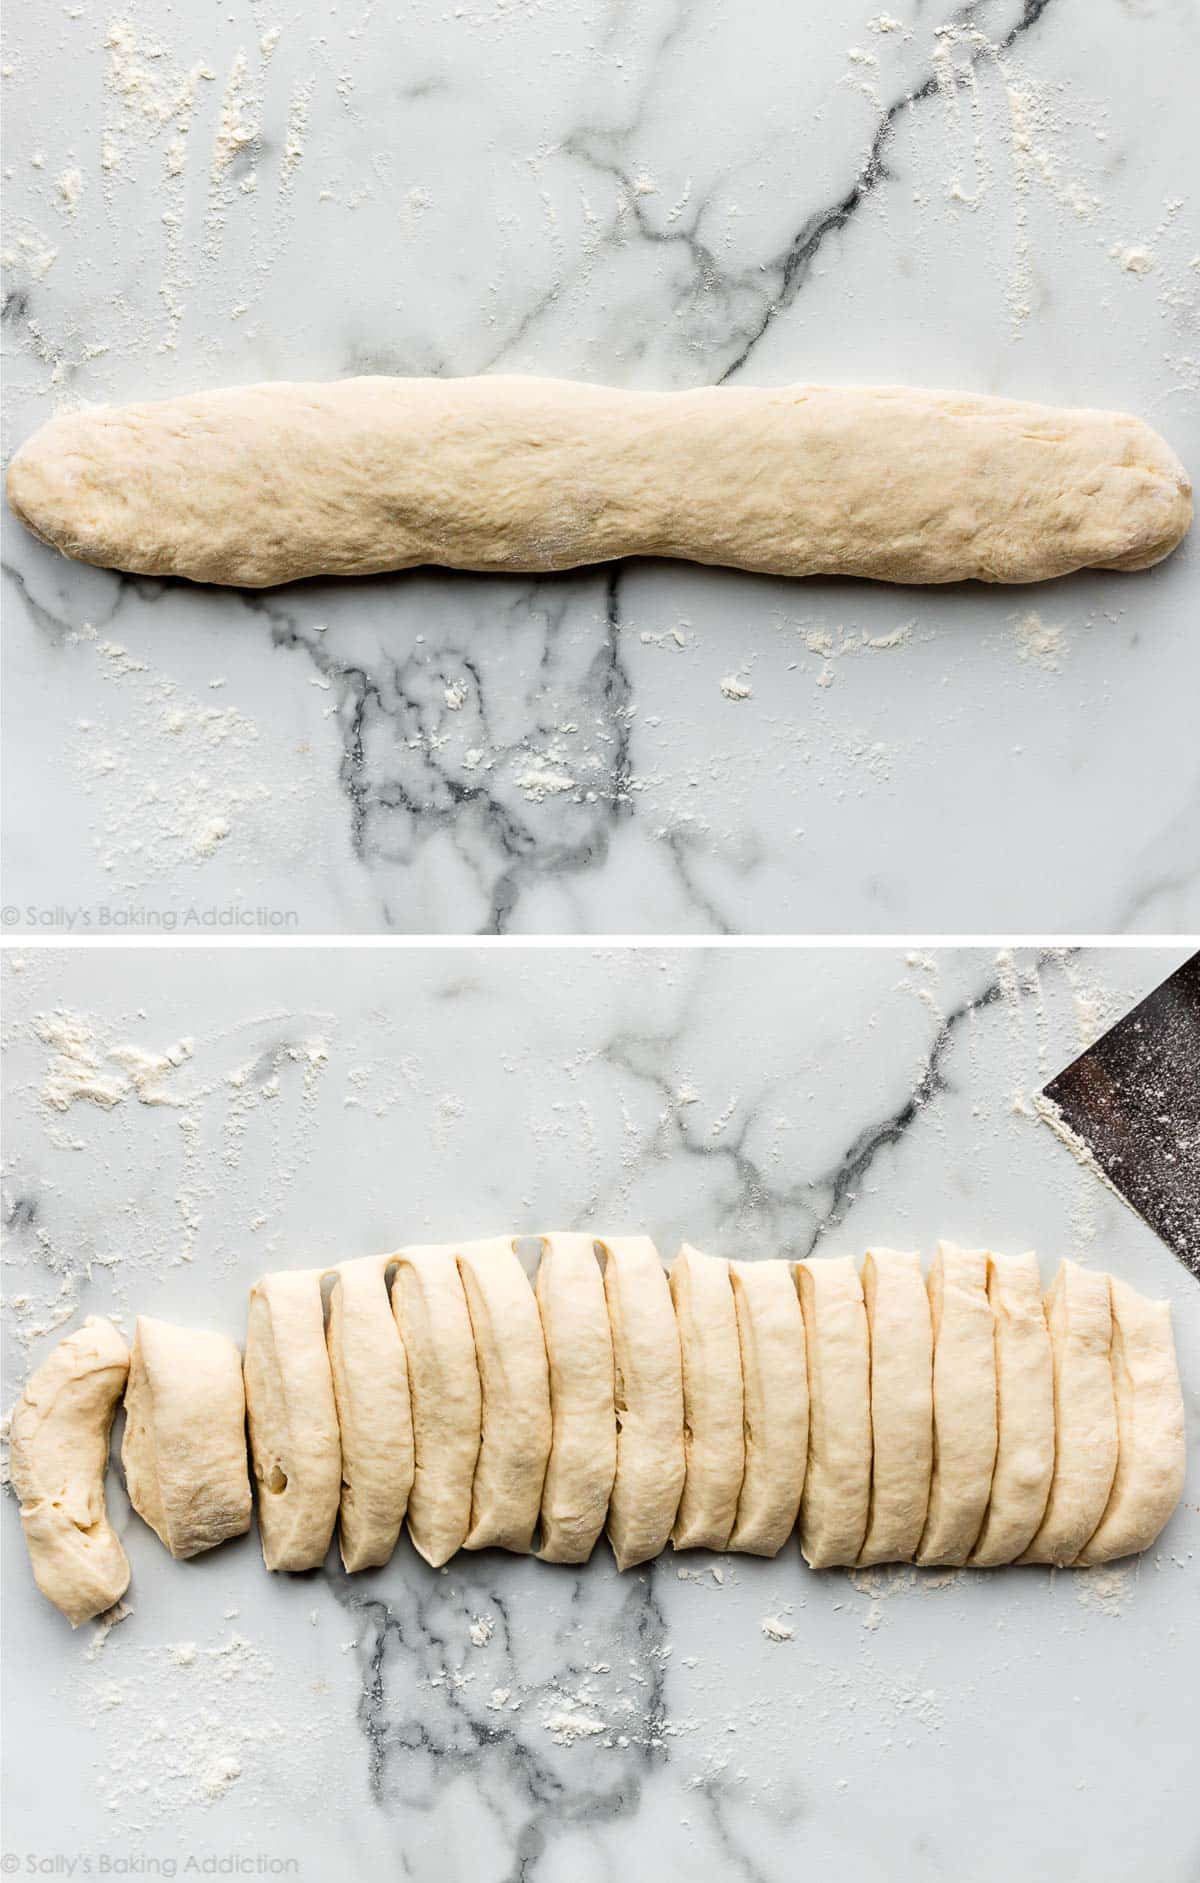
Let Me Show You How to Shape Garlic Knots
After the dough rises, punch it down to release the air. Then begin shaping the dough. If you know how to tie a knot, you can shape garlic knots.
- Shape into a 16-inch log: Using your hands, shape the dough into a 16-inch log. No need to use a rolling pin because this doesn’t need to be perfect.
- Cut into 16 pieces: Cut the log into 16 1-inch sections of dough.
- Roll each piece into an 8-inch rope.
- Tie the rope into a knot.
Here are step-by-step pictures of the shaping process. It’s a lot easier than it sounds, and you don’t need any special tools.
Shape each rope into a knot:

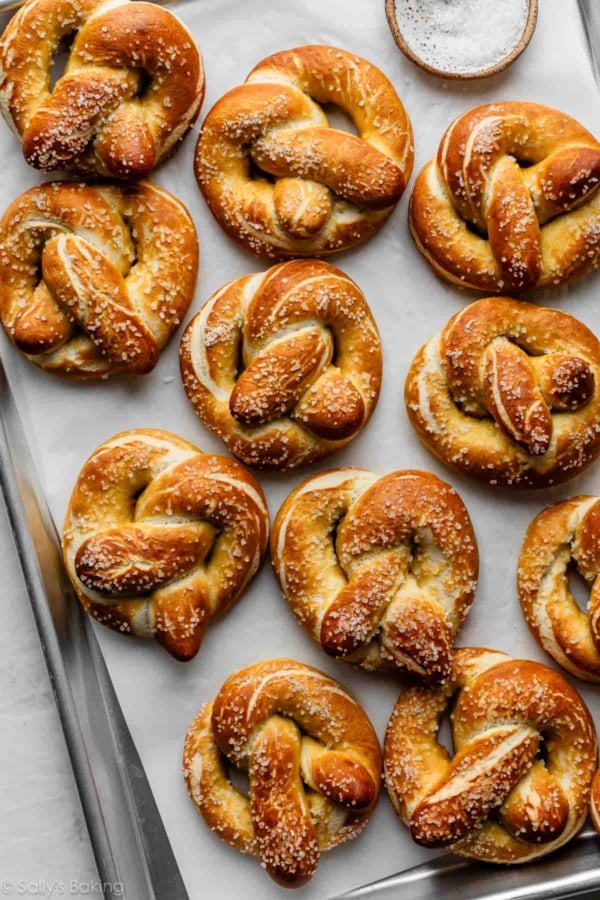
You can tuck the ends underneath the knot or leave them out—that’s totally up to you. The ropes are longer when making soft pretzel knots, but tying the knot is the same.
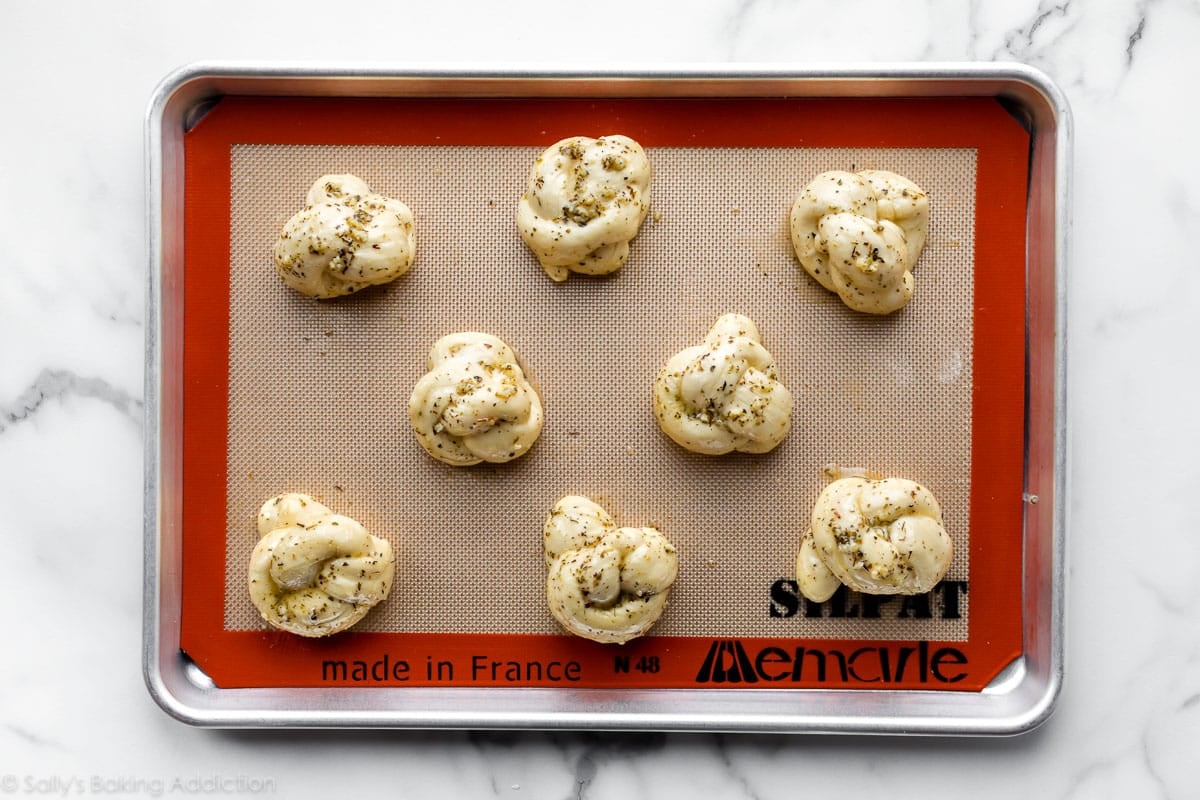
Let the shaped knots rest for about 30 minutes before brushing with garlic butter and baking.
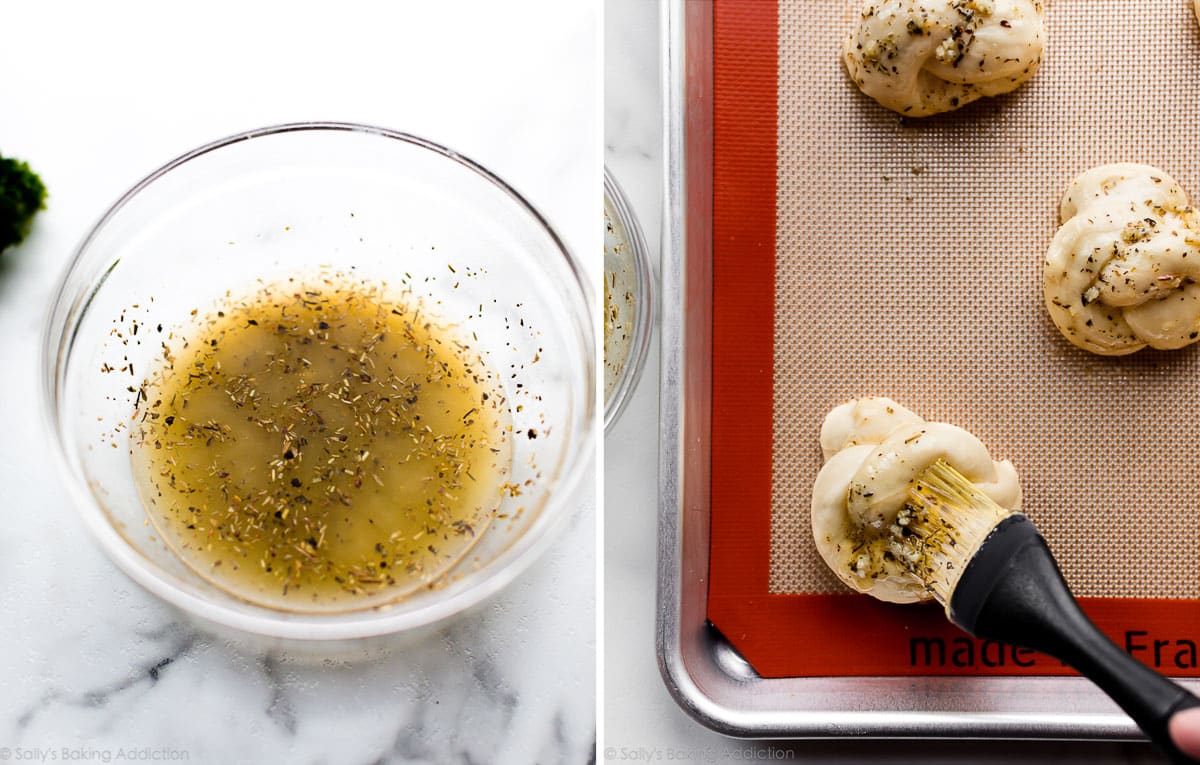
Garlic Herb Butter
Right before baking, generously brush the knots with garlic herb butter. Simply combine melted butter, fresh minced garlic or garlic powder, Italian seasoning, and salt.
If you can’t find an herb mixture labeled “Italian Seasoning” in the spice aisle of the grocery store, use dried oregano, dried basil, and/or dried parsley instead.
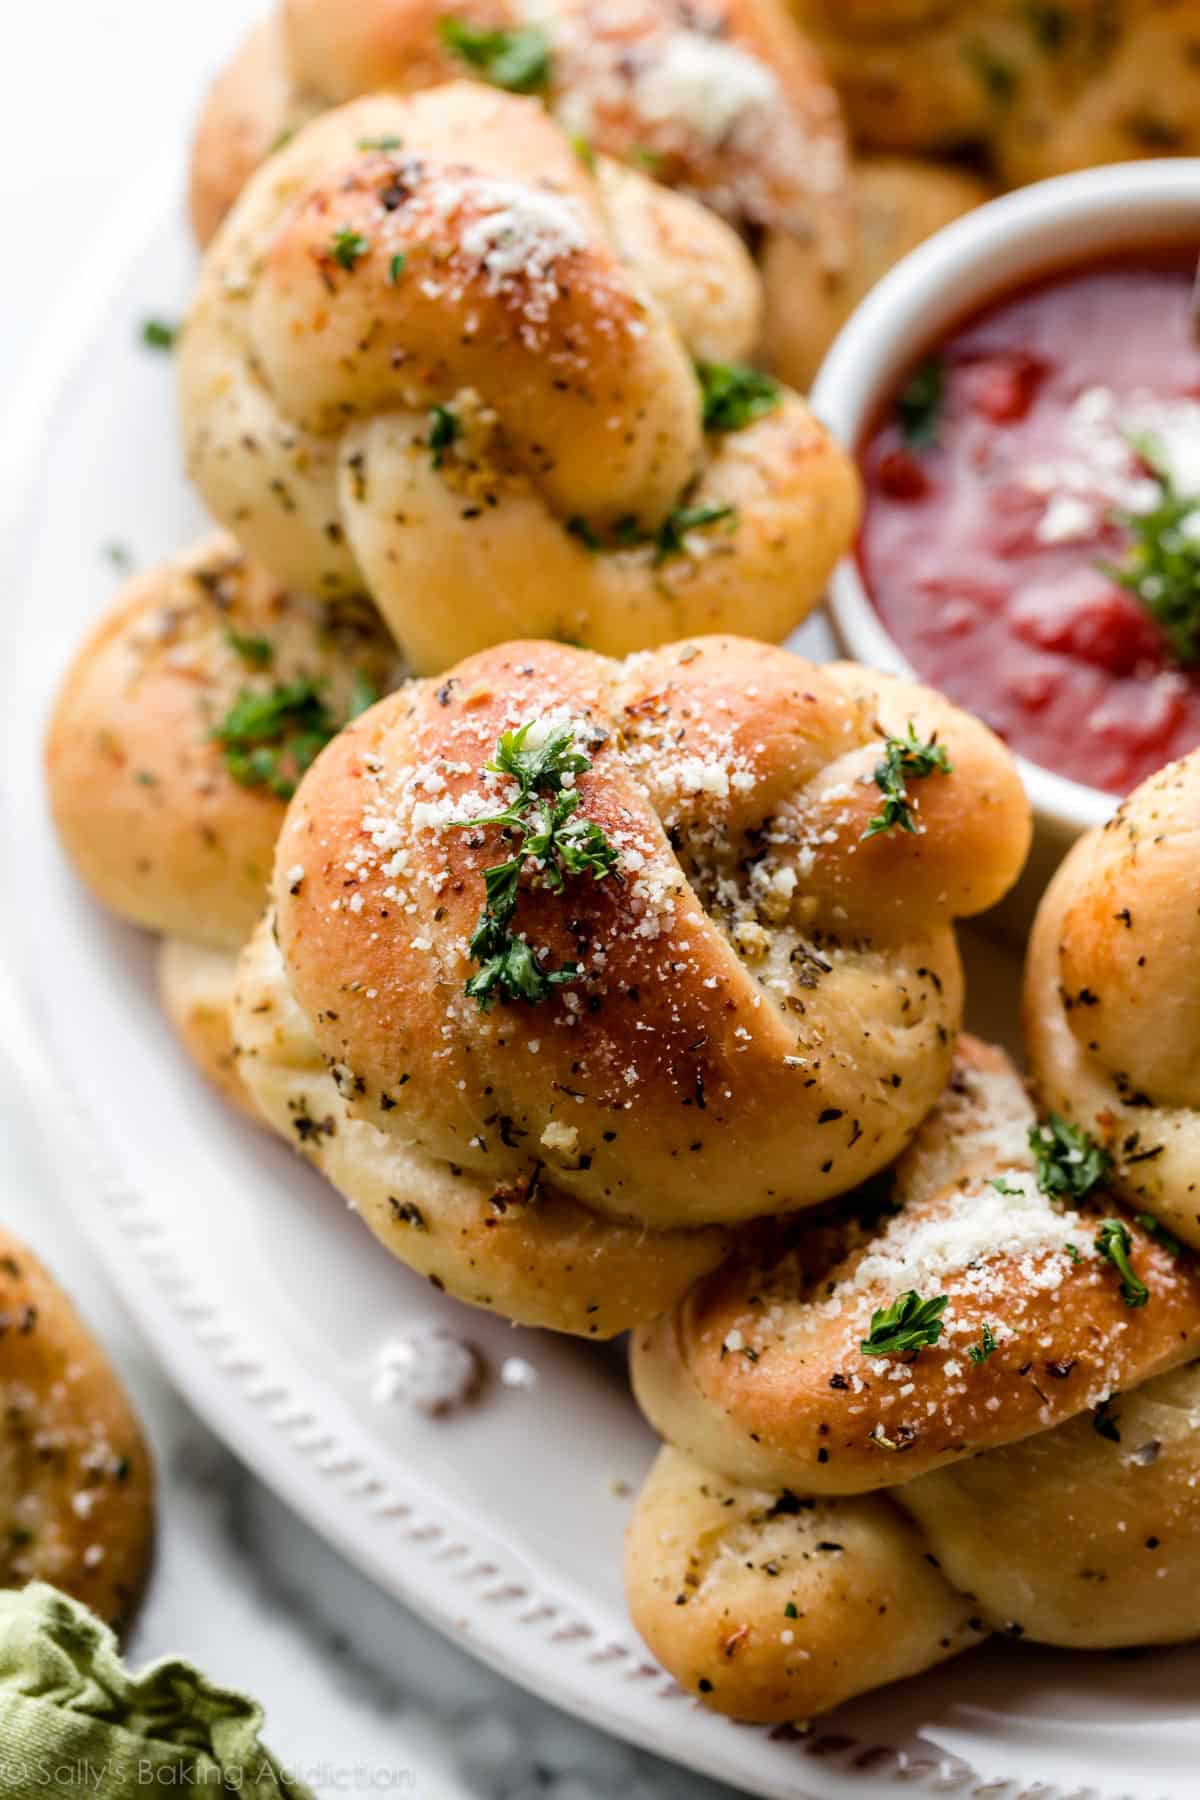
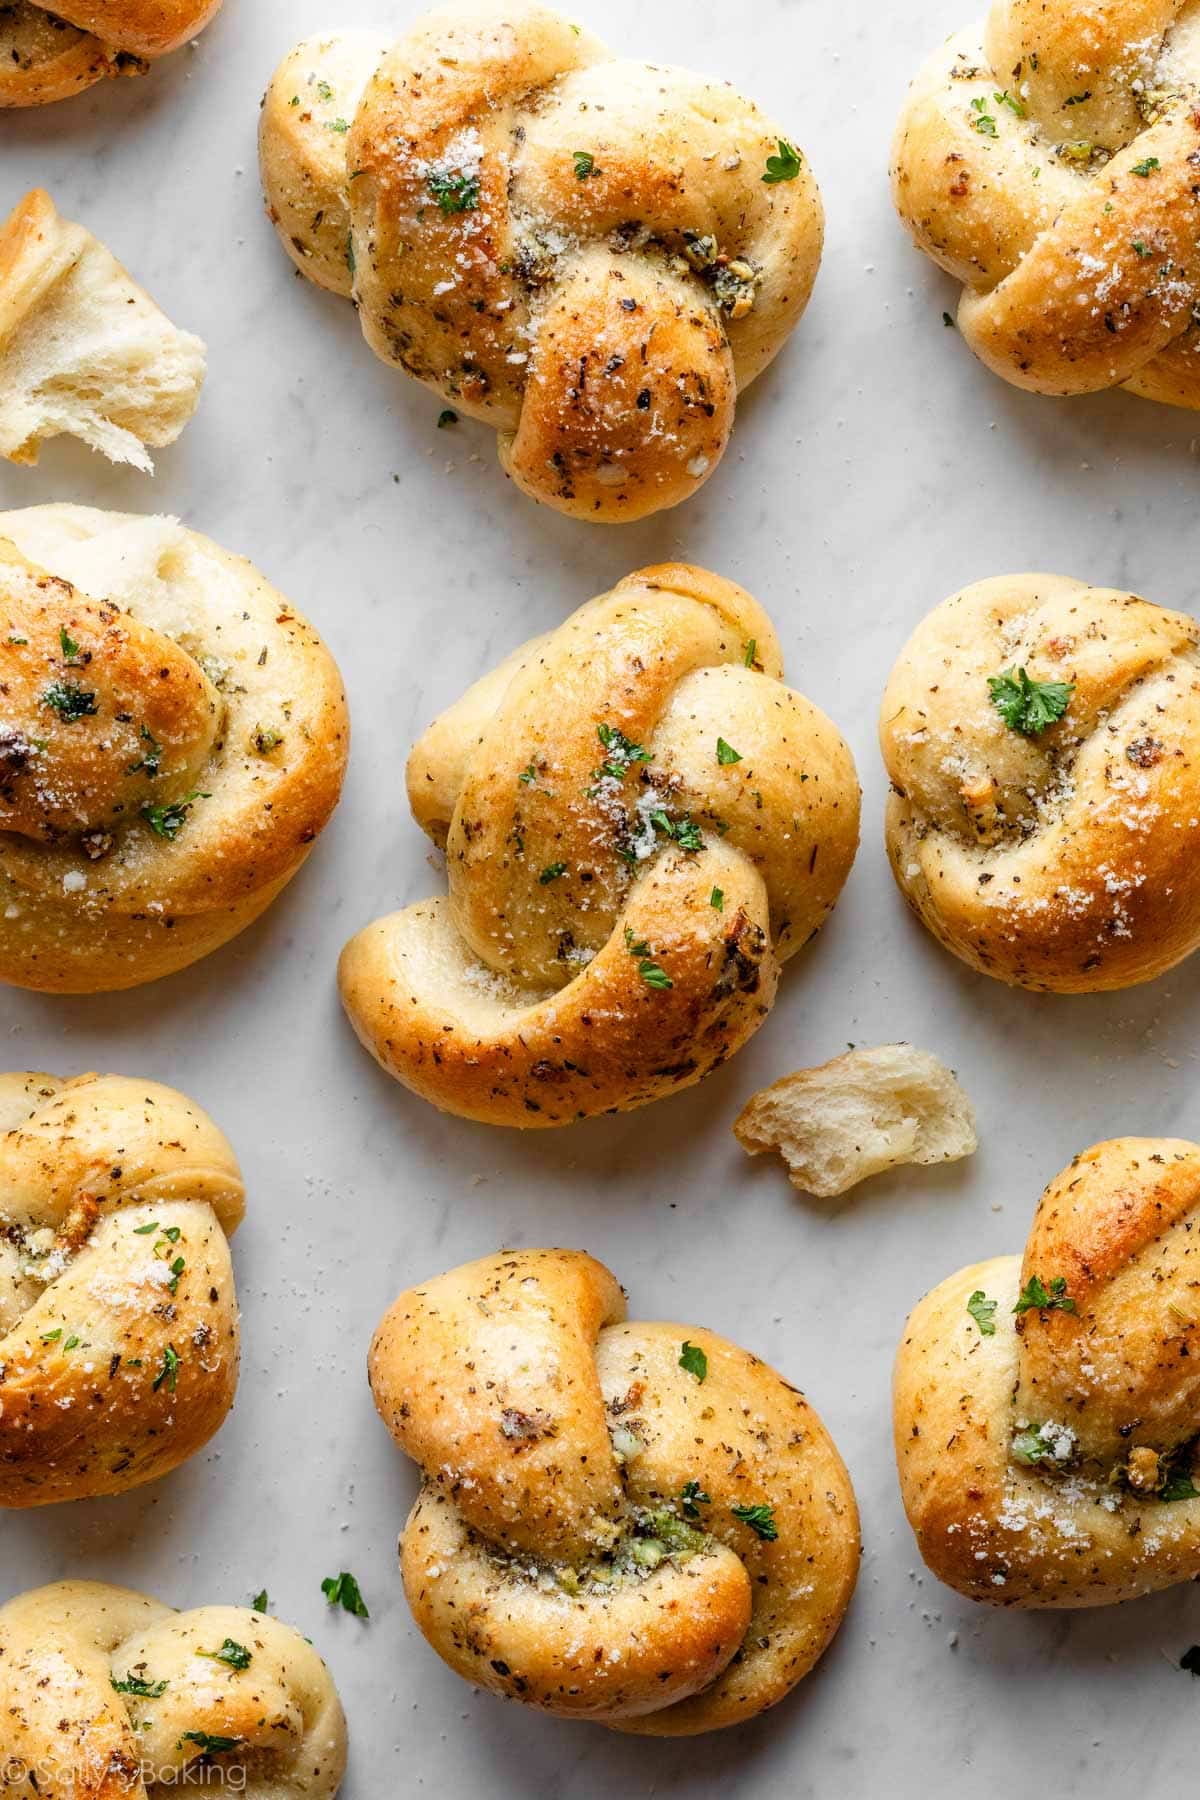
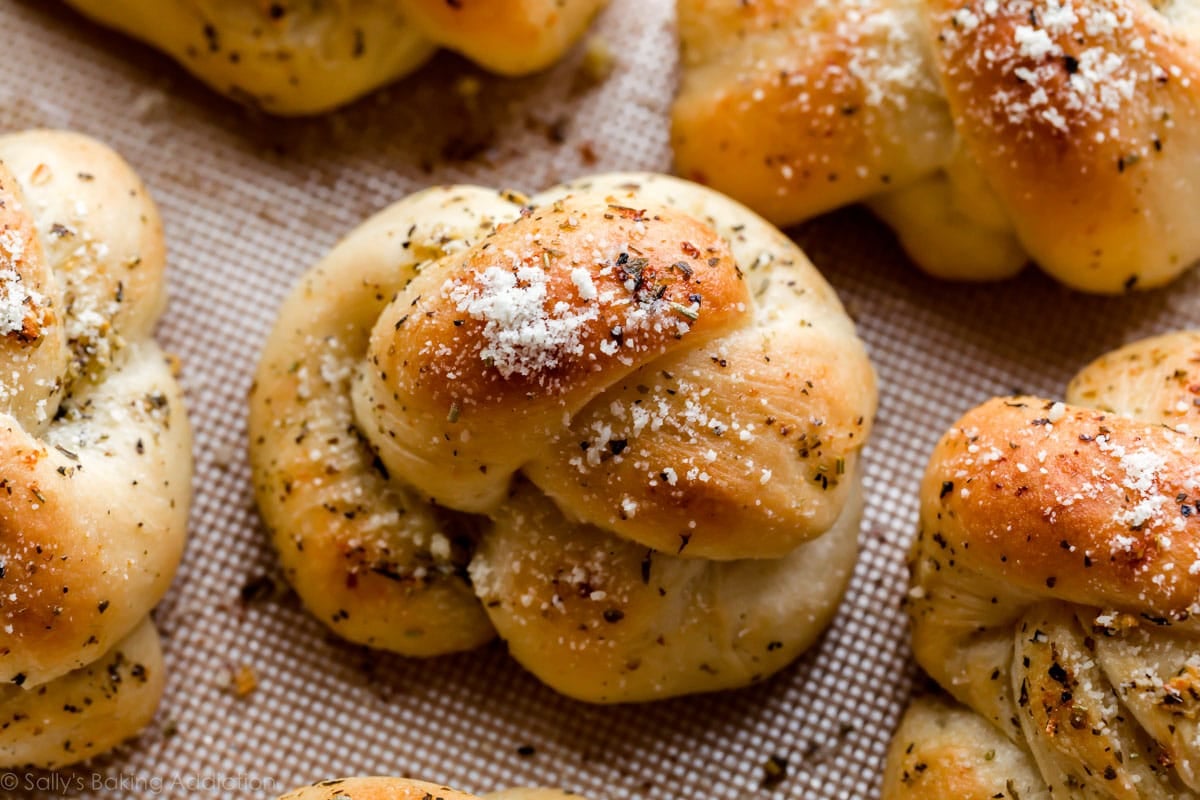
Bake the knots until golden brown and experience the lofty smell of garlic throughout the kitchen. Everyone (maybe even your neighbors) will know what’s on the menu tonight!
Flavor Tip: Save some of the garlic butter to brush onto the knots as they come out of the oven, then top each with fresh parmesan and chopped parsley. The parmesan and parsley are completely optional, but make a fabulous garnish.
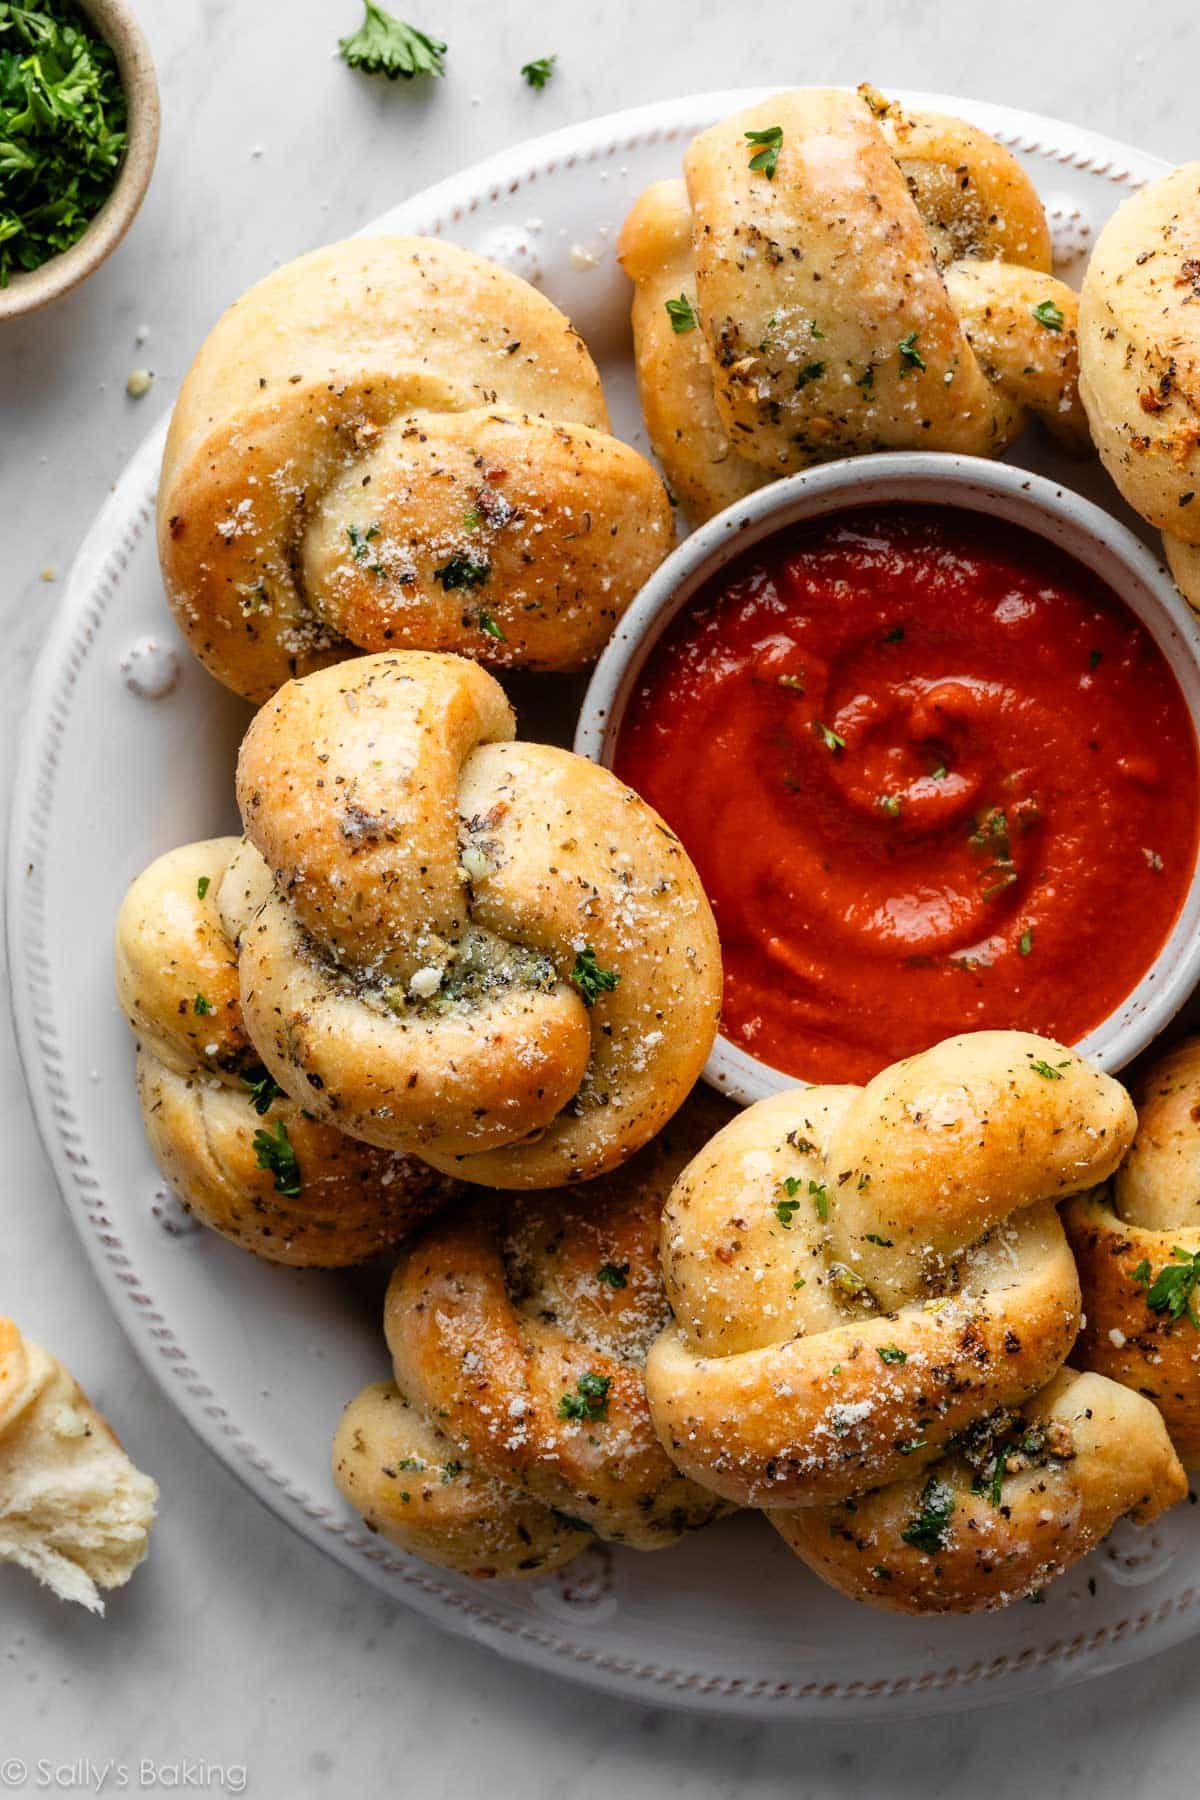
Serve the garlic knots warm, with a side of warm marinara sauce or homemade tomato soup for dipping. This is your happy place!*
*Unless you’re a vampire.

Homemade Garlic Knots
- Prep Time: 3 hours (includes rising)
- Cook Time: 20 minutes
- Total Time: 3 hours, 25 minutes
- Yield: 16 knots
- Category: Dinner
- Method: Baking
- Cuisine: Italian
Description
These homemade garlic knots are extra soft, fluffy, and packed with flavor thanks to a buttery garlic-herb topping brushed on before and after baking. Made from an easy homemade dough similar to my reader-favorite pizza dough, they freeze beautifully and are perfect for pizza night—no delivery required.
Ingredients
Homemade Dough
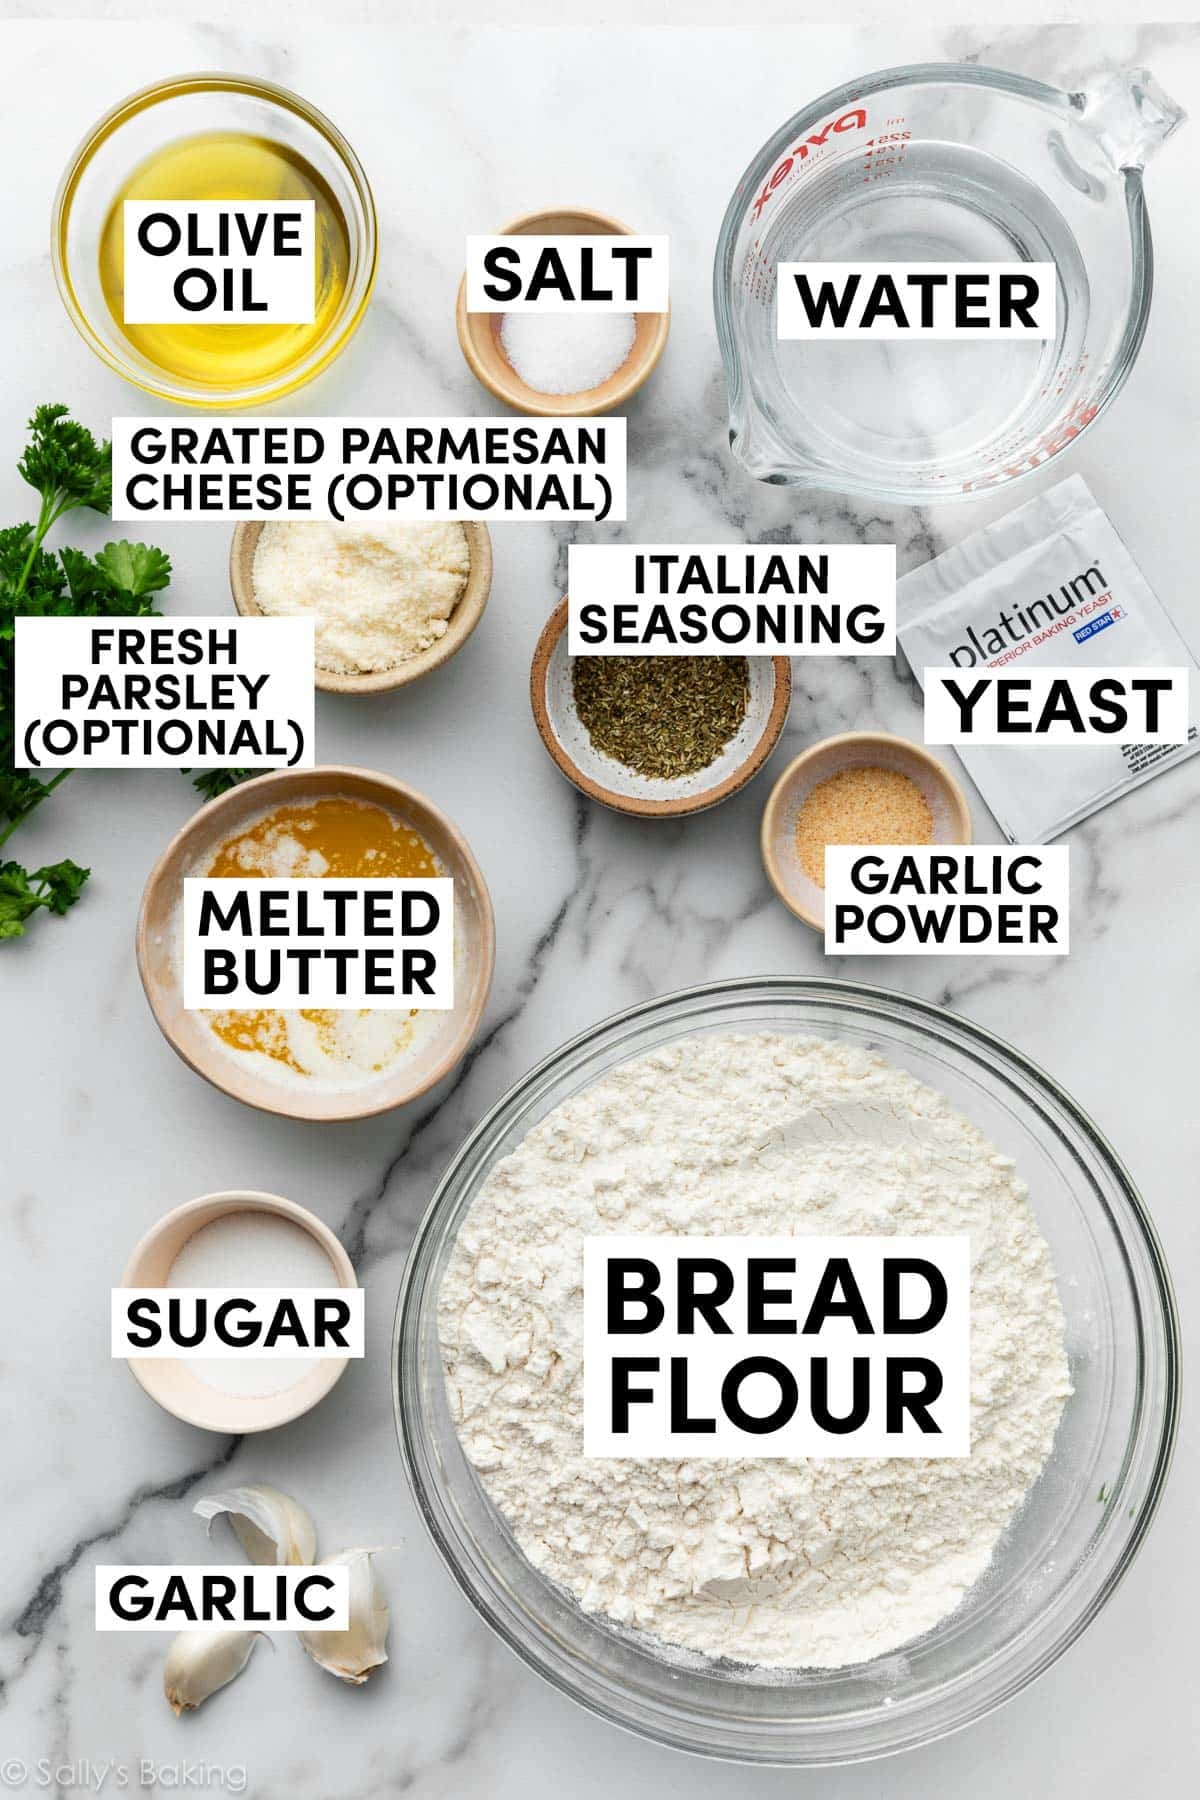
- 1 cup + 2 Tablespoons (270g/ml) warm water (between 100–110°F/38–43°C)
- 2 and 1/4 teaspoons (7g) Platinum Yeast from Red Star instant yeast (1 standard packet)*
- 1 Tablespoon (13g) granulated sugar
- 3 Tablespoons (43g/ml) olive oil or melted butter
- 1 teaspoon salt
- 1 teaspoon garlic powder
- 3 and 1/3 cups (433g) bread flour* (spooned & leveled), plus more for hands and work surface
Topping
- 5 Tablespoons (71g) unsalted butter, melted
- 3 garlic cloves, minced; or 1/2 teaspoon garlic powder
- 1 teaspoon Italian seasoning*
- 1/4 teaspoon salt
- optional after baking: 1/4 cup (25g) grated Parmesan cheese
- optional after baking: 2 Tablespoons chopped fresh parsley
Instructions
- Proof the yeast: Whisk the warm water, yeast, and sugar together in the bowl of your stand mixer fitted with a dough hook or paddle attachment. Cover and allow the mixture to sit for about 5 minutes, or until foamy on top. *If you do not own a stand mixer, you can do this in a large mixing bowl and, in the next step, mix the dough together with a large wooden spoon or silicone spatula. It will take a bit of arm muscle. A hand mixer works, but the sticky dough can repeatedly get stuck in the beaters. Mixing by hand is the better choice.
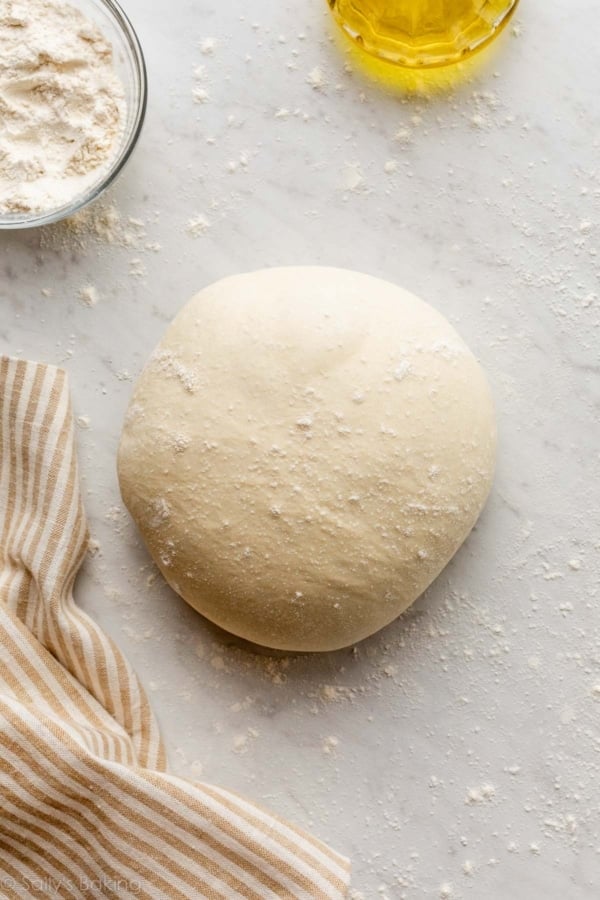
- Make the dough: Add the olive oil (or butter), salt, garlic powder, and about half of the bread flour. Beat on low speed for 30 seconds. Scrape down the sides of the bowl and add the remaining flour. Beat on low speed for 2 minutes, or until a soft dough forms and pulls away from the sides of the bowl. Dough will be very soft, but should not be overly sticky. If it seems too sticky and clings to the sides of the bowl instead of forming a rough mass around the dough hook, add more flour, 1 Tablespoon at a time, and continue to mix until the dough pulls away from the sides of the bowl but is still moist and tacky. If it feels dry and crumbly, add more water, 1 teaspoon at a time, mixing well after each addition.
- Knead the dough: Keep the dough in the mixer (and switch to the dough hook if using the paddle) and beat for an additional 5 full minutes, or knead by hand on a lightly floured surface for 5 full minutes. (If you’re new to bread-baking, my How to Knead Dough video tutorial can help here.) If the dough becomes too sticky during the kneading process, sprinkle 1 teaspoon of flour at a time on the dough or on the work surface/in the bowl to make a soft, slightly tacky dough. Do not add more flour than you need because you do not want a dry/tough dough. After kneading, the dough should still feel a little soft. Poke it with your finger—if it slowly bounces back, your dough is ready to rise. You can also do a “windowpane test” to see if your dough has been kneaded long enough: tear off a small (roughly golfball-size) piece of dough and gently stretch it out until it’s thin enough for light to pass through it. Hold it up to a window or light. Does light pass through the stretched dough without the dough tearing first? If so, your dough has been kneaded long enough and is ready to rise. If not, keep kneading until it passes the windowpane test.
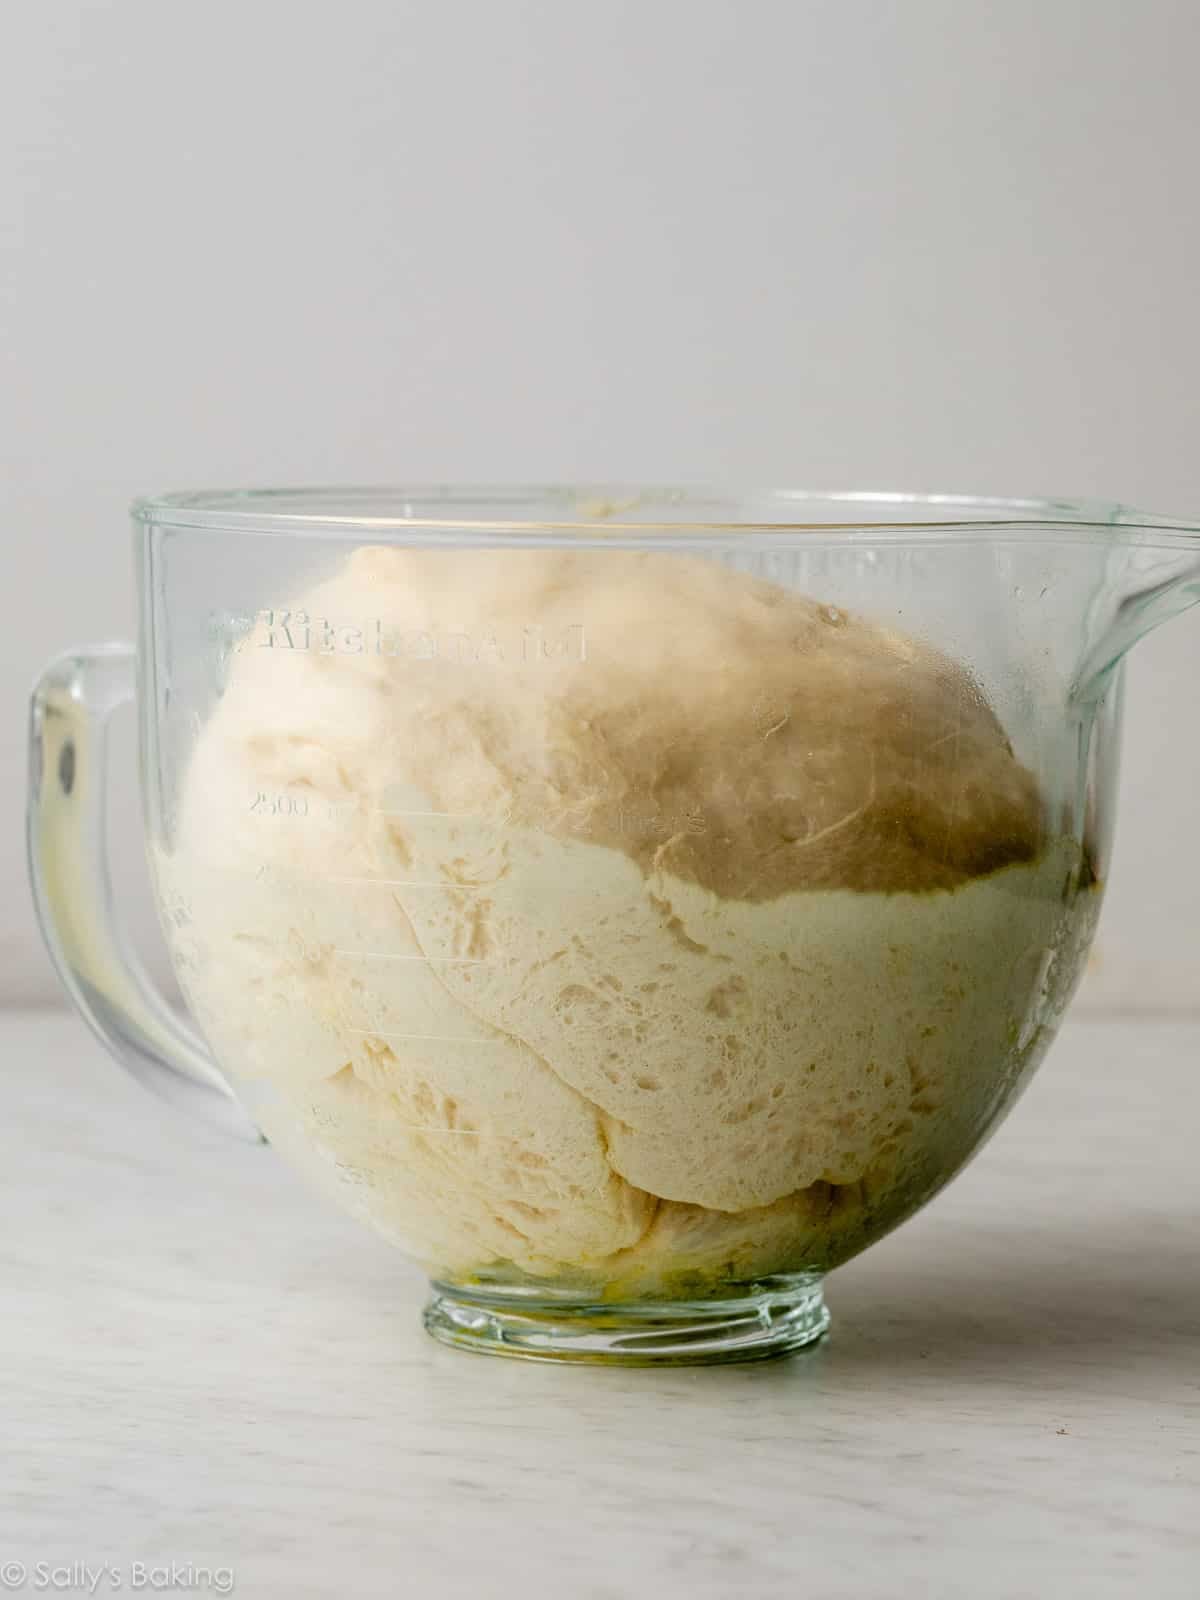
- 1st rise: Lightly grease a large bowl with oil or nonstick spray—just use the same bowl you used for the dough. Place the dough in the bowl, turning it to coat all sides in the oil. Cover the bowl with aluminum foil, plastic wrap, or a clean kitchen towel. Allow the dough to rise in a relatively warm environment for 2 hours or until double in size. (I always let it rise on the counter and it takes about 2 hours. For a tiny reduction in rise time, see my answer to Where Should Dough Rise? in my Baking with Yeast Guide.)
- Line two baking sheets with parchment paper or silicone baking mats.
- Shape the dough: Use the step-by-step photos in the blog post as your guide for this step. When the dough is ready, punch it down to release the air. Using floured hands on a lightly floured work surface, shape the dough into a 16-inch (41cm) log. Using a very sharp knife, pizza cutter, or bench scraper, slice the log into 16 1-inch sections. Roll each piece of dough into an 8-inch rope. Tie each rope into a knot. You can tuck the 2 ends of the knots underneath or leave them out. Arrange the knots on the prepared baking sheets.
- 2nd rise: Lightly cover the shaped knots and let them rest for 30–45 minutes. They will slightly puff up during this time, producing softer rolls.
- Towards the end of the rise time, preheat the oven to 400°F (204°).
- Make the topping: Stir the melted butter, garlic, Italian seasoning, and salt together. Brush on the knots. Reserve some of the topping for when the knots come out of the oven.
- Bake for about 20–23 minutes or until golden brown on top. Remove from the oven and brush the warm knots with remaining garlic butter. Sprinkle with parmesan cheese and/or parsley, if using.
- Serve warm, plain or with marinara sauce for dipping.
- Cover and store leftover knots at room temperature for up to 2 days or in the refrigerator for up to 1 week. Reheat as desired.
Notes
- Freezing Dough: After the dough has its 1st rise and you punch it down to release the air, lightly coat all sides of the dough ball with olive oil. Place the dough into a freezer zipped-top bag and seal tightly, squeezing out all the air. Freeze for up to 3 months. Thaw in the refrigerator overnight. Once thawed, remove the dough from the refrigerator and allow to rest for 1 hour on the counter, then continue with step 6.
- Freezing Unbaked Shaped Knots: Instead of freezing the dough as a whole, you can freeze the shaped knots before baking them. Shape the knots as directed in step 6. Arrange on a lined baking sheet. Freeze, uncovered, for 1–2 hours. Remove from the freezer. At this point, knots should be frozen and no longer sticky. Place them into a freezer-friendly container or zipped-top bag. Freeze for up to 3 months. Thaw in the refrigerator or on the counter. Bring to room temperature, arrange on 2 lined baking sheets, cover lightly, and allow to rest/rise for 1 hour before continuing with step 8.
- Special Tools (affiliate links): Electric Stand Mixer or Glass Mixing Bowl and Wooden Spoon or Silicone Spatula | Dough Scraper | Pizza Cutter | Baking Sheets | Silicone Baking Mats or Parchment Paper | Pastry Brush
- Halving the Recipe: This recipe yields about 2 pounds of dough, which is enough for 16 knots or 1 pizza + 8 knots. If you want to make just 8 knots, punch the dough down as directed in step 6. Cut in half. Use the other half of the dough however you’d like or freeze for later. Shape into an 8-inch log and cut into 8 1-inch strips. Continue with the recipe as directed.
- Yeast: Platinum Yeast from Red Star is an instant yeast. You can use active dry yeast instead. The 1st rise time may take a little longer. Reference my Baking With Yeast Guide for answers to common yeast FAQs.
- Italian Seasoning: If you can’t find Italian seasoning in the spices section of the grocery store, use a mix of dried oregano, dried basil, and/or dried parsley instead.
- Recipe Updates in 2026: Based on reader feedback, we retested and updated the dough recipe as written above. If you prefer the original version, increase the water to 1 and 1/3 cups (320ml), use all-purpose flour instead of bread flour, and reduce the garlic powder to 1/2 teaspoon.


Reader Comments and Reviews
These are ready fir the oven and I am so excited. So easy using my stand mixer and bread hook.
I have several packets of fast rise yeast I would like to use up. What are your suggestions?
Love every recipe of yours I have tried. Thank you!
Hi Karen! We use instant yeast in this recipe, fast rise and instant are the same. You can reference our Baking with Yeast Guide for answers to common yeast FAQs.
Trying this recipe today! They look amazing. Quick question, if I am trying to have everything done a little early, can I put the dough knots in the refrigerator? And should I do it before the second rise? Thanks! Love every recipe I’ve made of yours!!!!
Hi Margaret! Sorry we’re just seeing your question now. Letting the dough rest for a bit in the fridge shouldn’t affect the knots too much, though the dough could rise too much. We include make ahead instructions in the recipe notes as well for next time. Would love to hear how they went for you!
Absolutely delicious!!!! The directions were so clear and easy!!
Hi, I’m trying this recipe on the weekend and I’m wondering if I can use ready made pizza dough?
Hi Necia! You can make these garlic knots with 1 or 2 pounds of store-bought or homemade pizza dough. If you only need about 8 knots, freeze the other half of dough for another time.
I made these and had a blast doing it. They tasted amazing and it was my first time making any sort of bread from scratch. Must try!
Wow, soooo good! I make different types of bread here and there but wanted something different. I cannot believe how easy and delicious these were. The instructions are detailed/perfect and I couldn’t have asked for a better result. Thank you so much for a wonderful recipe!!
Oh my! These are seriously so good. The buttery garlic on top makes them have such a yummy crisp. This is definitely a keeper recipe! Is it bad that my family already knew this is a Sally’s recipe after they tasted them…? Lol;) Your recipes are my favorite that I turn to all the time!
Hi Sally,
Tried this recipe and it came out beautifully. The bread was puffy, soft and chewy. Everyone liked it a lot. Thank you so much.
Could you tell how to replace eggs in some of your bread recopies? Like your soft cheese bread.
Thank you so much for such wonderful recipes.
Balu
Hi Balu, we don’t have much experience with egg-free baking, but we do have a section of naturally egg-free recipes that you might find helpful. We hope you find some to enjoy — thank you for making and trusting our recipes!
Love these garlic knots! Made them pretty much as described and they were wonderful! Sally’s recipes never disappoint! We ate a few and froze the rest of them. Very good!
Hi Sally! I have made these garlic knots twice and they have been delicious both times, however the flavor of the garlic was very subtle and they weren’t very buttery. What can do to maximize the garlicy taste and make them more buttery? Thanks so much 🙂
Hi Sets, thank you so much for trying these. We recently began adding garlic powder to the dough. If you ever try them again, see if that helps. The butter is only used as a topping, so feel free to add more.
I am a baker and I loved the recipe it was amazing the only thing I did instead of butter I crushed garlic and olive oil
Hi Allison, it sounds like the dough over-proofed, which created a crust on the exterior. When this happens, doughs don’t brown properly in the oven. If you ever try the recipe again, see if you can reduce the 2nd rise time to just 15 minutes. (More of a “rest” time than a rise time.) For the flavor, feel free to add some seasoning to the dough itself such as 1 teaspoon garlic powder or an Italian seasoning blend. Thanks for trying them.
These are absolutely incredible! I used bread flour and the knots held their shape beautifully. The bottoms had almost a fried texture from some of the butter running onto the pan and the insides were light, fluffy, and melt in your mouth amazing.
I would strongly recommend not following the note suggesting to make 8 rolls and a pizza…just double the batch of dough if you want both. These are so good you would regret not having a pan full 🙂
One note, I used minced garlic from a jar in my butter sauce (not a fan of garlic powder), but the garlic scorched a bit too much for my taste while baking. For my next batch, I’m going to try mixing the garlic (and maybe some parmesan cheese) into the dough to work the flavor throughout the knot and keep it from the tops to prevent burning. Another way to work around this might be to brush just butter on before baking and the seasoned butter on after, using a garlic paste instead of minced garlic, or baking on a slightly lower oven rack.
Hello – if I am only making 8 knots and saving half of the dough, would there be any changes to rolling the dough into knots? Is it still a 16 inch rope? Thank You.
this came out perfect and it was my first time making any type of bread. would recommend
I always wonder when a recipe calls for salt, especially when baking, is it fine salt, not kosher?
Hi Linda, unless otherwise noted, I use regular fine table salt in baking. If a recipe uses kosher salt, I specify kosher.
I am a Foodie and we dine at a favorite Italian restaurant in the mountains and the garlic knots are a favorite.. Wanting to make them …I found your recipe and followed it ..They were delicious and I have already shared it .The only available yeast was Fleishmans .They are delicious
Hi Sally! Could I use whole-wheat flour instead of all-purpose flour?
Hi Kim, You can try to use half of each flour for a heartier dough. Or you can try using this recipe for Whole Wheat Pizza Crust shaped as knots.
My first try turned out pretty good. I think I could’ve used used more butter/salt/garlic for a more intense flavour, but the dough was excellent.
The bottoms came out a bit burned and too hard and crunchy. Any tips on what I can do to avoid that next time?
Hi Stan! Sounds like your oven may run a little hot. Try using an in-oven thermometer or turning your oven down a few degrees next time.
Hey Sally! I followed the recipe exactly except that I baked for 10 minutes only since my oven generally takes lesser time and has higher temperature. The top did not brown and turned a teensy bit hard, although they came out nice, fluffy and chewy from inside. What do you think is the issue?
Hi Shruti, It was likely the oven temperature and baking time. Is your oven convection heat? If so try turning down the temperature by 25 degrees F and they still may take a shorter time so keep an eye on them.
Thank you Stephanie!! I baked them again by lowering the temperature by 30 degrees and baking for 11 minutes. Everything was perfect except I didn’t get the beautiful brown colour on top
Absolutely amazing!! Thank you it was a hit!!
these were pretty easy – and I am NOT a breadmaker! The dough was easy to mix up, and rose like expected. I cooked them a bit longer than I should have – so the bottoms were crunchier that I like, but the flavor was great!
First time I’ve had success with anything that included ‘yeast’.
Love these garlic knots! Super easy and super delicious!! I was wondering if there way a way to freeze them before baking?
Yes! See recipe note #2 “Freezing Shaped Knots Dough”
These were just delicious and fun to make!! I have extra wheat flour I haven’t used and did the same as one other commenter and split the flour to half wheat.
I just made these last night and they were amazing! It was pretty easy and the dough was so soft. If anyone is debating making these just go for it. I have some tips for anyone wanting to make these:
-I would recommend checking them in the oven around 14-15 minutes if you don’t want them crispy. I took them out at that time and they were perfect and still had that wonderful golden brown color. After the 15 minute mark just keep an eye on them to make sure they don’t get too dark
– I just used regular instant yeast (Fleischmann’s) and it worked fine
– If you want CHEESE STUFFED garlic knots~ what I did is after cutting the dough into strips, I just flattened each strip to make it wider and then sprinkled shredded mozzarella. Then I folded the strip and made sure to pinch the seams closed, before proceeding to make the knot. This way you have a cheese-stuffed strip of dough before shaping. Alternatively you could take cubes of mozzarella and tie the knot around it for a punch of cheese in the middle rather than little bits throughout the garlic knot
– If you want more garlic flavor consider adding some to the dough, and don’t be shy with the melted butter topping 🙂
Made these today with butternut squash soup and they were the perfect accompaniment! To be honest, I ate 5 of them, so it’s a good thing you recommended freezing half the knots. My stomach thanks you!
Hello Sally!
I tried making this garlic knots today but I could not get pass the first stage of making the dough! The dough was so sticky, I could barely do anything with it 🙁 It did not come out as per your video (Where you could just take the dough out of the bowl.. it was all stuck to my hands).
Where did I go wrong? 🙁
Appreciate some help and tips from you. Thank you, Sally!
Hi J, Thank you for trying this recipe! There are a lot of variances that go into the consistency of dough, even down to the brand of flour and the weather and humidity in the air. There’s nothing wrong with adding a little more flour to bring the dough into a less sticky and knead-able consistency.
Can you add spices to the dough to add more flavour? If so, how much would you recommend?
We love these garlic knots! Thanks for sharing! My hubby wants cheesy garlic knots. Can shredded cheese be added to this recipe or should I try your cheese bread and add garlic to that recipe? It’s all so yummy!
Hi Molly! Either works. You could definitely add 1 cup of shredded cheese into this dough when you add the second half of the flour. The cheese might melt around the edges a bit as the knots bake, but that’s not a problem. Lining your pan with silicone baking mats or parchment is best.
Just made these for family with garlic braised short ribs. They were perfect. I made them with raw pizza dough that I bought from the bakery at my local grocery store. Let it rise, punched it down, made a log…seriously it was that easy and everyone raved and went for more of the juice so they could dip the knots. Crunchy on the bottom and top and oh so tender inside. Make these. Seriously. Oh and when tying the knots….the dough is super forgiving and easy to tie.
This is the best dough recipe ever.