

These homemade garlic knots are extra soft and flavorful, and use a dough similar to this reader-favorite pizza dough. Top with garlic herb butter before AND after baking for the tastiest knots!
I originally published this recipe in 2020 and have since made a few changes to improve the texture and flavor of the dough, which are reflected in the recipe below. This recipe is brought to you in partnership with Red Star Yeast.
Tell Me About These Garlic Knots:
- Made from an easy homemade dough
- Leftovers freeze beautifully
- Super soft and fluffy
- Golden brown
- Extra garlic butter
And I know you’ll appreciate this too: You can use the entire batch of dough for 16 knots OR you can use half of the dough to make a pizza or stromboli, and then have 8 knots on the side. Perfect for pizza night—no delivery required.
One reader, Michelle, commented: “These were perfect! Brushing on the garlic butter before baking makes such a difference. These are near foolproof! So fluffy and delicious! ★★★★★“
One reader, Catie, commented: “My husband agrees—best garlic knots ever! This recipe works! ★★★★★“
Garlic Knots From Pizza Dough
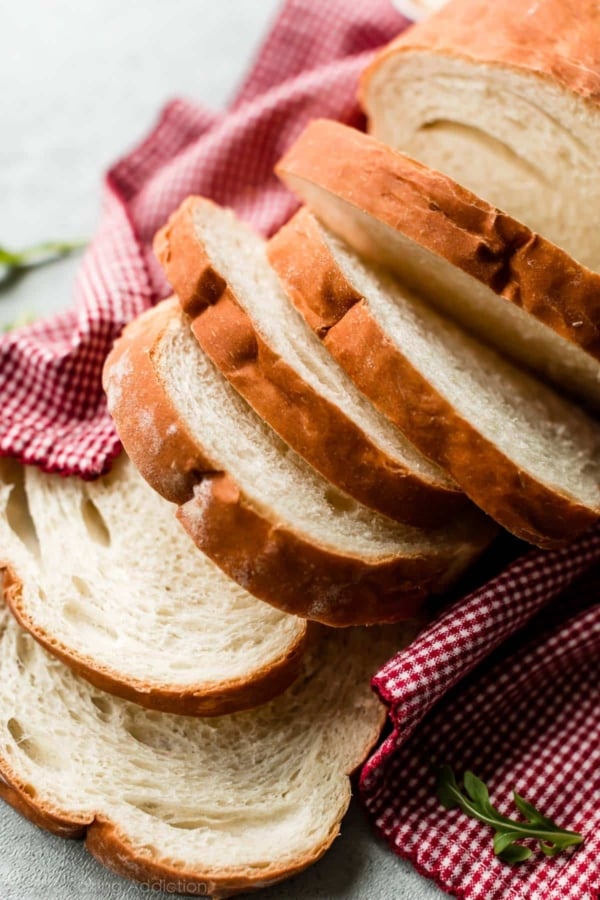
You can make these garlic knots with 1 or 2 pounds of store-bought or homemade pizza dough. Today’s dough is very similar to my homemade pizza dough, which yields about 2 pounds of dough. You can make 16 knots or 1 pizza + 8 knots. If you only need about 8 knots, freeze the other half of dough for another time. You will want to make these garlic knots again.
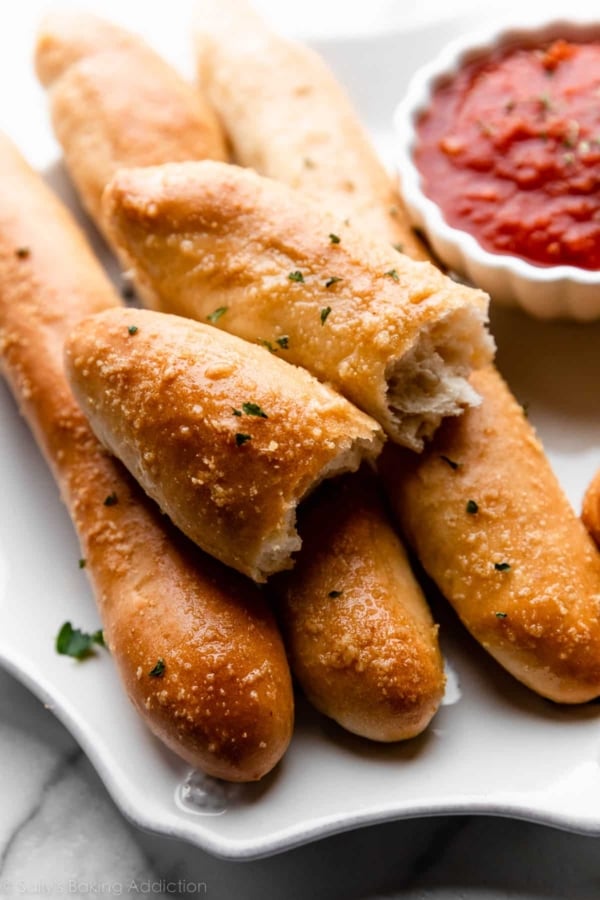
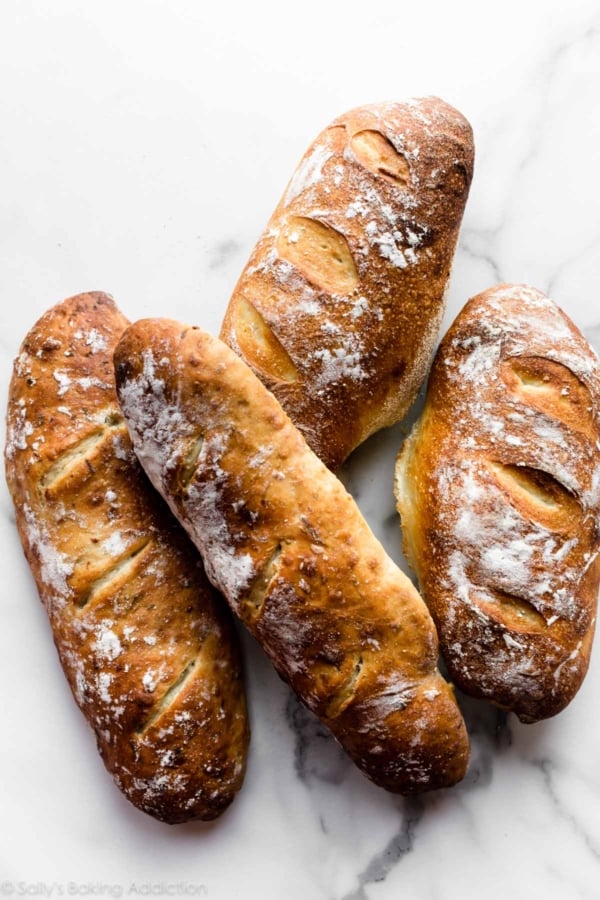
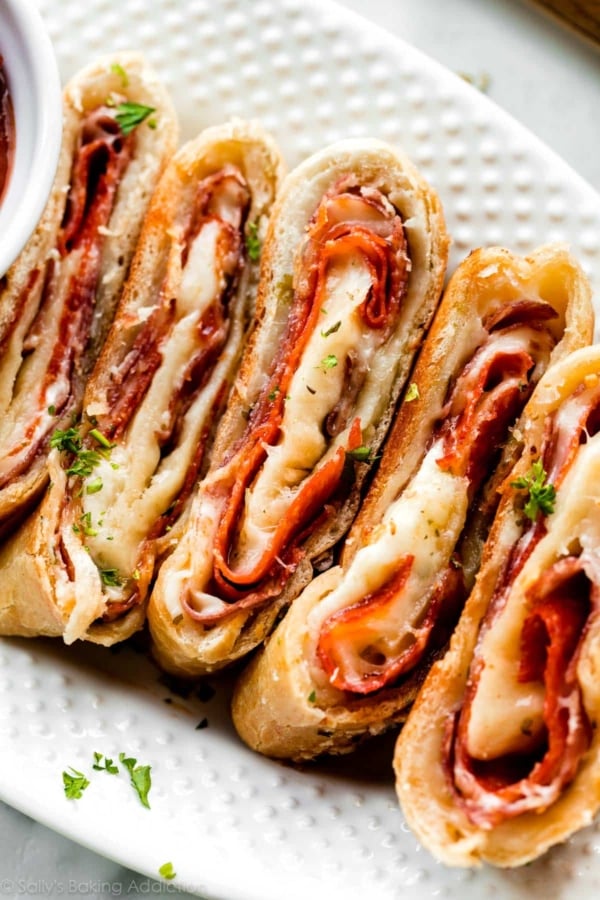
- Besides garlic knots and pizza, you can use this dough for cheesy breadsticks, pepperoni pizza rolls, and ham & cheese pockets too! So versatile.
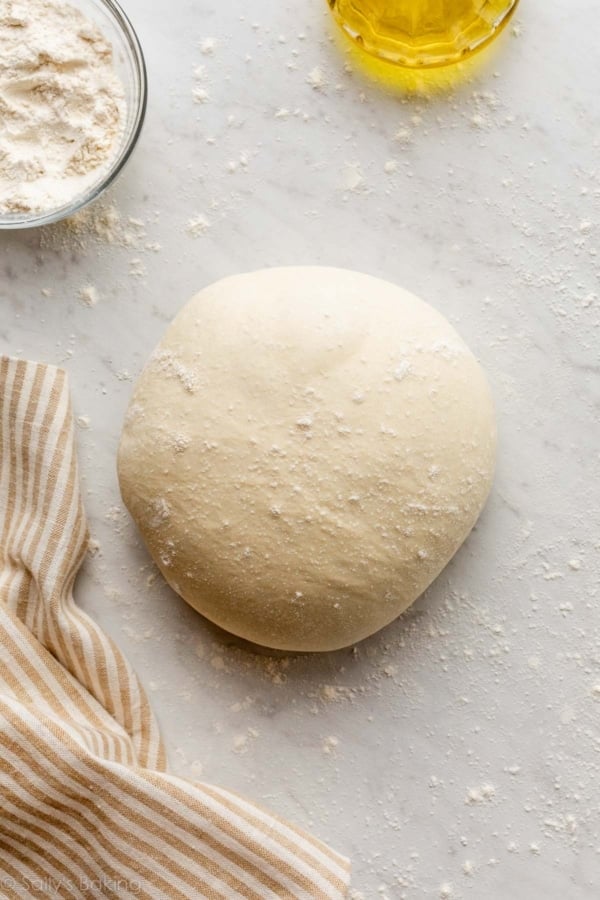
Compared to my pizza dough, I reduced the water so the dough is easier to handle when shaping into knots. I add 1 extra Tablespoon of olive oil for a little extra flavor and richness, and include garlic powder too. Sometimes for extra flavor I use butter instead, similar to what I do when making homemade breadsticks. Either one works. (Melted butter in the dough is convenient because you also need melted butter for the topping.)
Even though store-bought dough is convenient, I encourage you to try homemade dough. The dough requires so few ingredients!
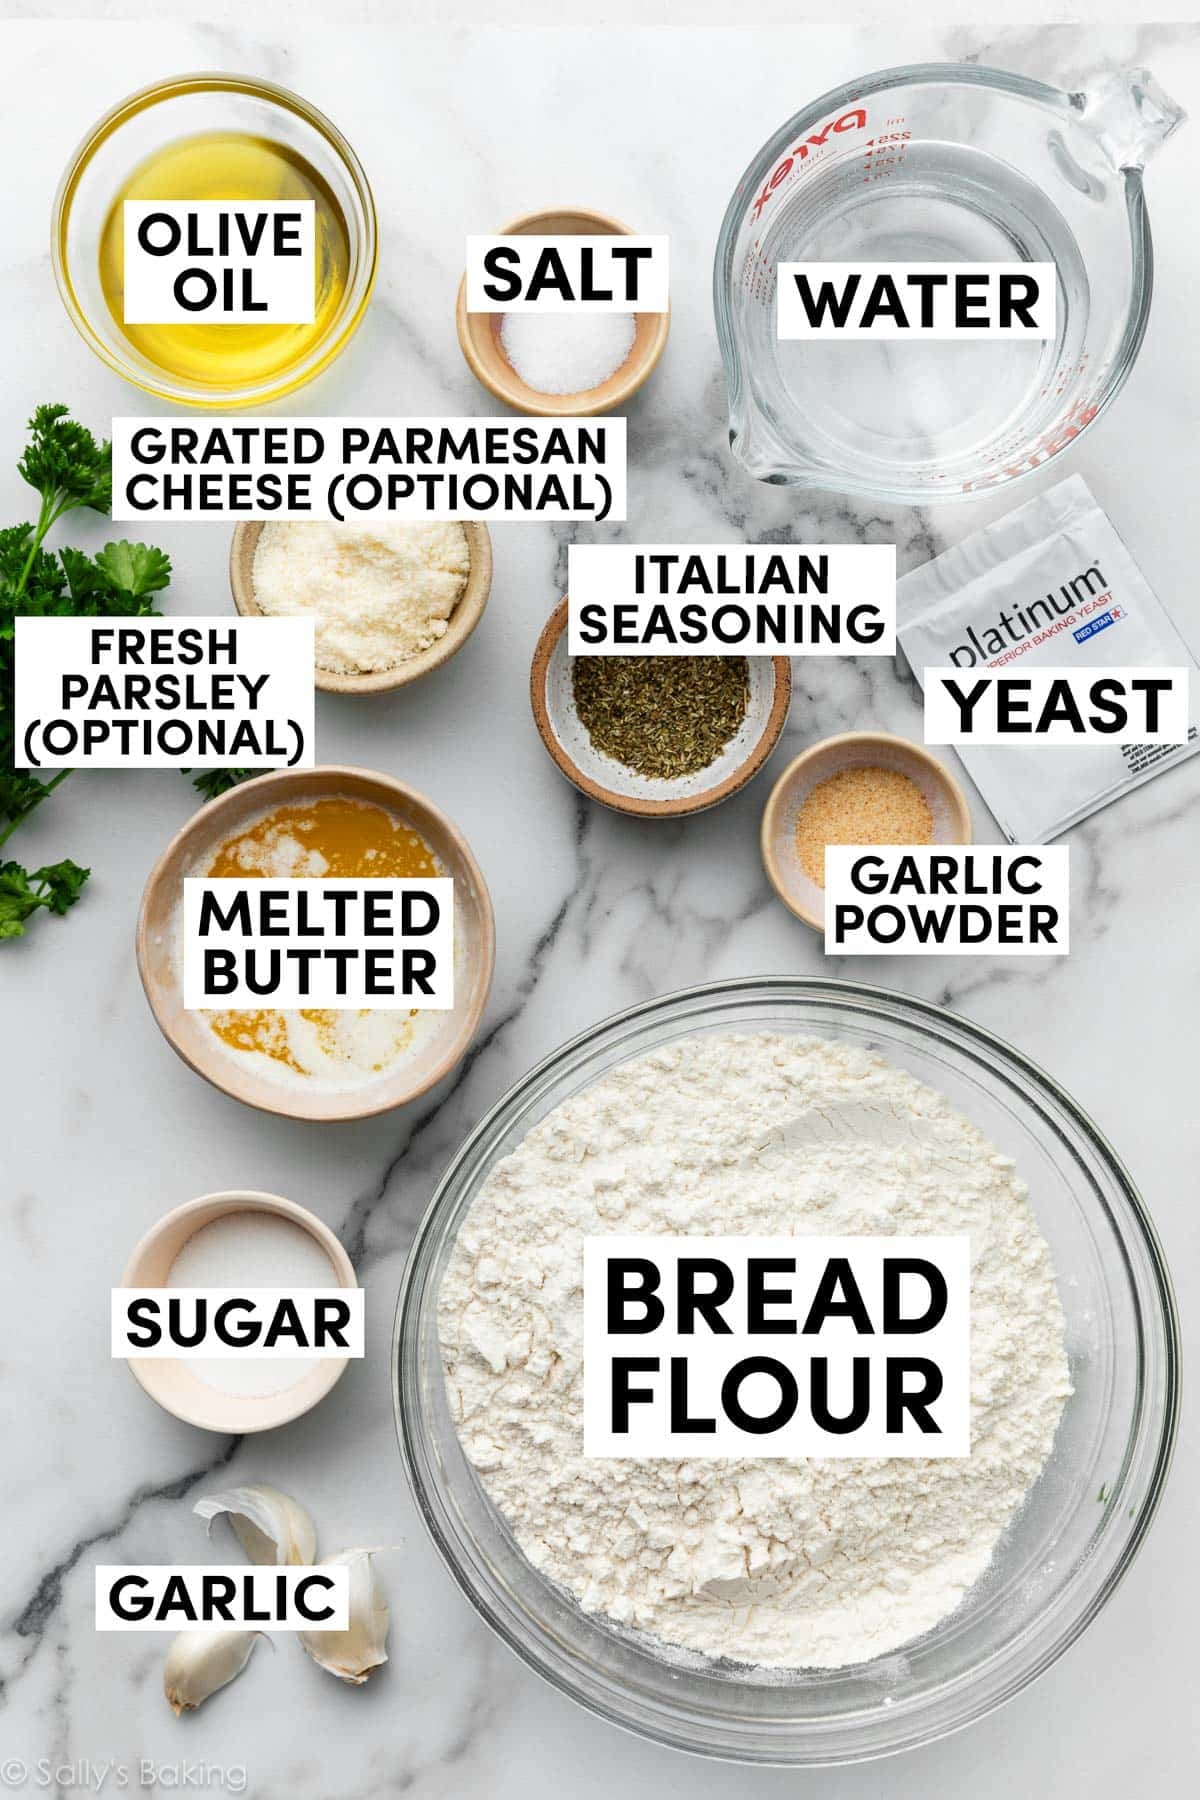
Ingredients You Need:
- Water: Use warm water here, to activate the yeast.
- Instant Yeast: I always use Platinum Yeast from Red Star. If you’ve been baking my yeast breads for a while, you know I swear by it! Its careful formula strengthens dough and makes working with yeast simple. You can use active-dry yeast instead; the rise time may be a bit longer.
- Sugar: To feed the yeast.
- Olive Oil: Or melted butter.
- Salt: Can’t make flavorful bread without salt!
- Garlic Powder: We’ll top the knots with fresh minced garlic, but you can use garlic powder in the dough.
- Bread Flour: The original recipe called for all-purpose flour, but we find that bread flour makes for a better texture. If you don’t have any, you can use all-purpose instead.
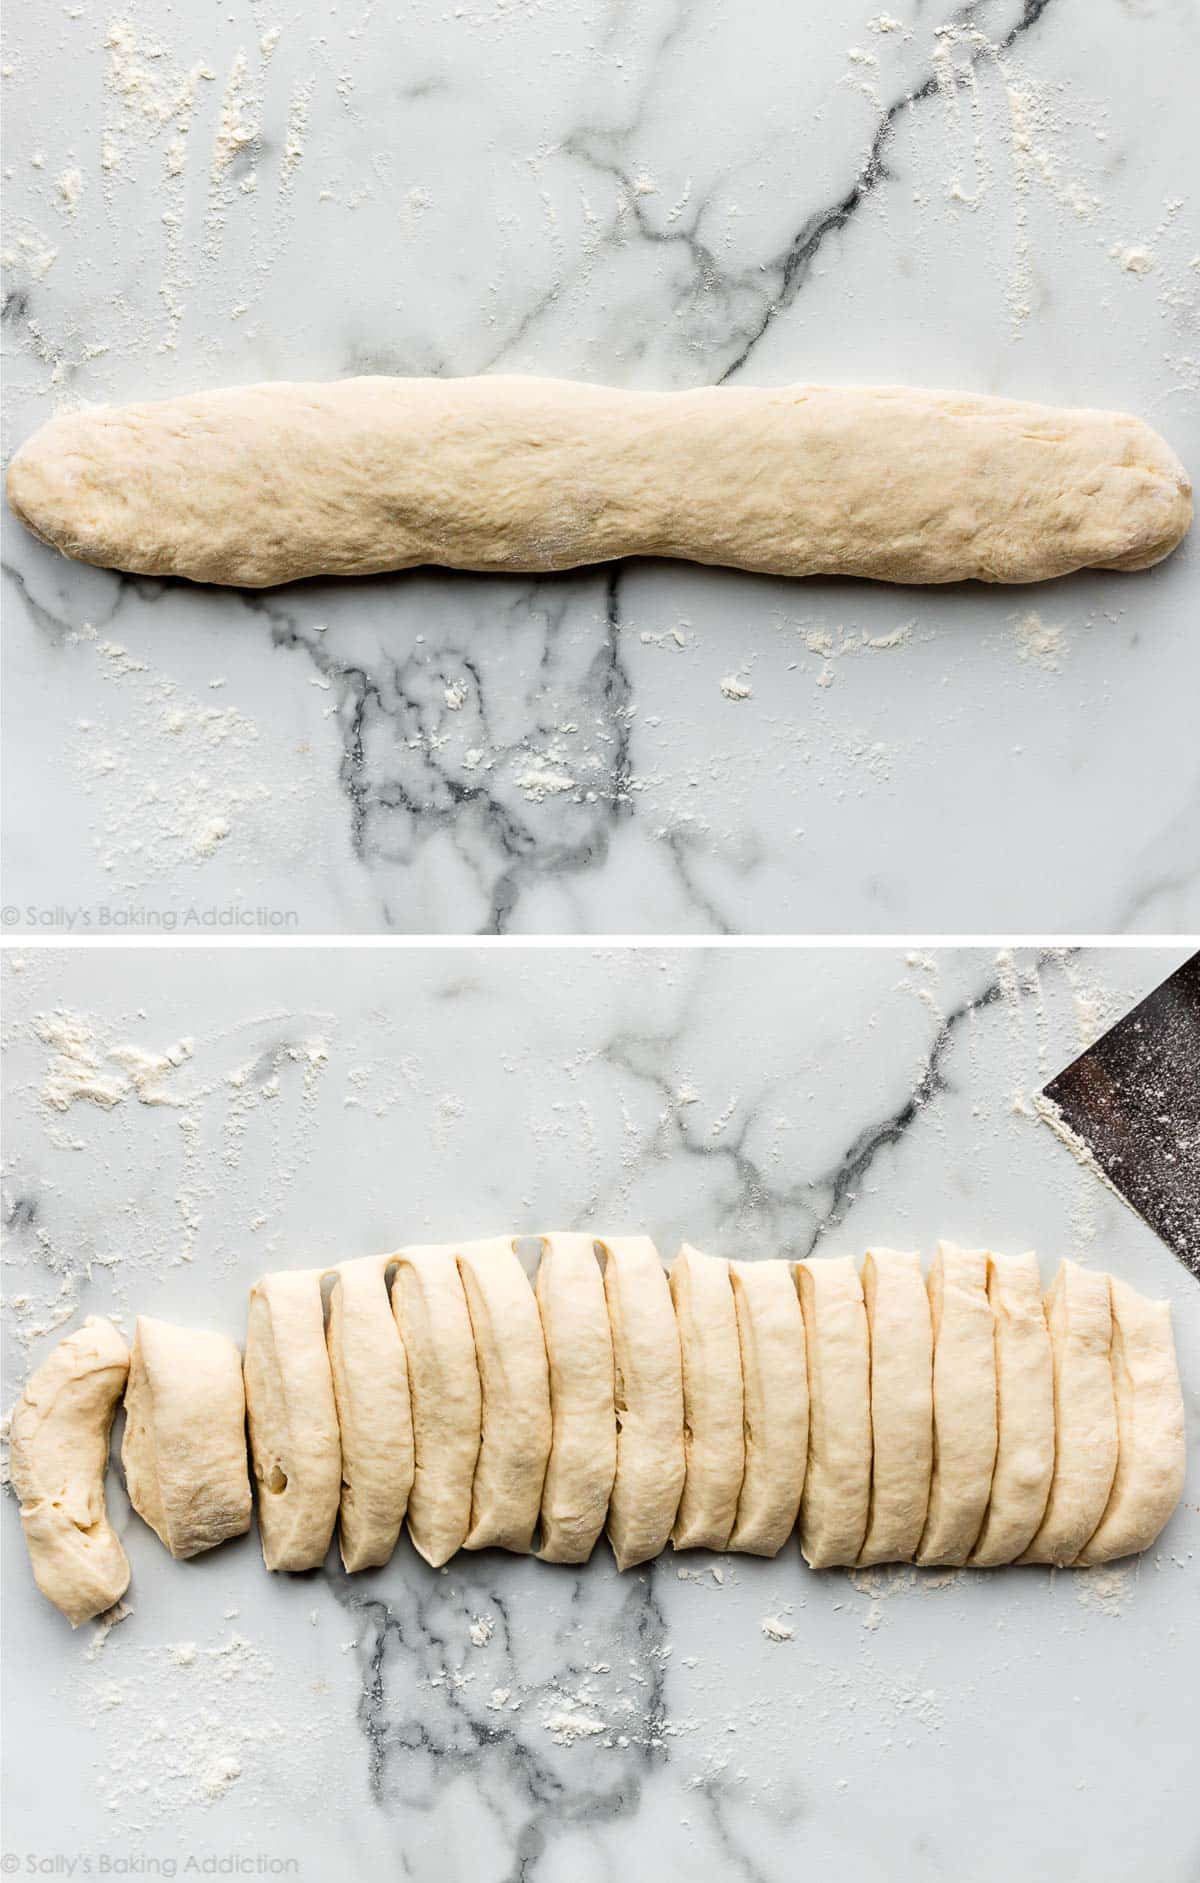
Let Me Show You How to Shape Garlic Knots
After the dough rises, punch it down to release the air. Then begin shaping the dough. If you know how to tie a knot, you can shape garlic knots.
- Shape into a 16-inch log: Using your hands, shape the dough into a 16-inch log. No need to use a rolling pin because this doesn’t need to be perfect.
- Cut into 16 pieces: Cut the log into 16 1-inch sections of dough.
- Roll each piece into an 8-inch rope.
- Tie the rope into a knot.
Here are step-by-step pictures of the shaping process. It’s a lot easier than it sounds, and you don’t need any special tools.
Shape each rope into a knot:

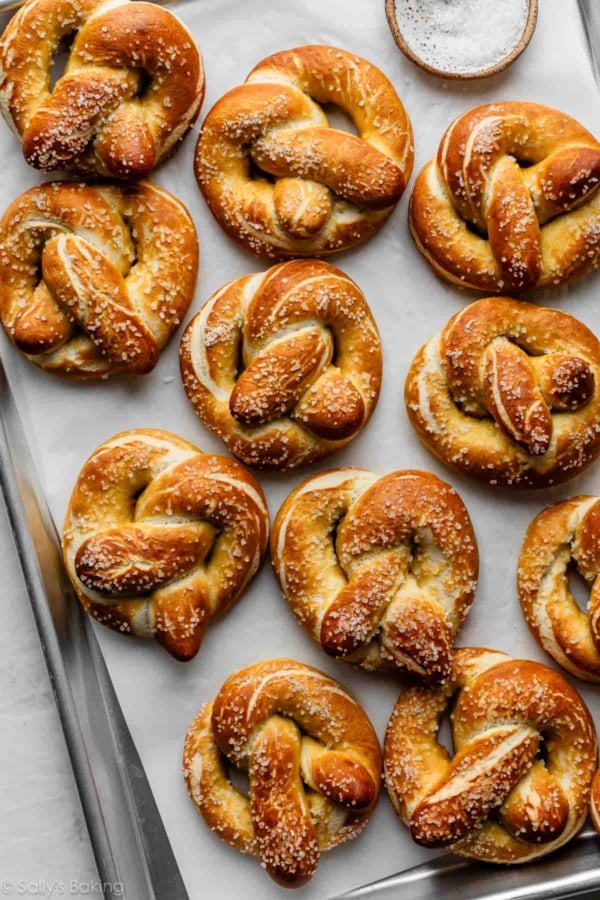
You can tuck the ends underneath the knot or leave them out—that’s totally up to you. The ropes are longer when making soft pretzel knots, but tying the knot is the same.
Let the shaped knots rest for about 30 minutes before brushing with garlic butter and baking.
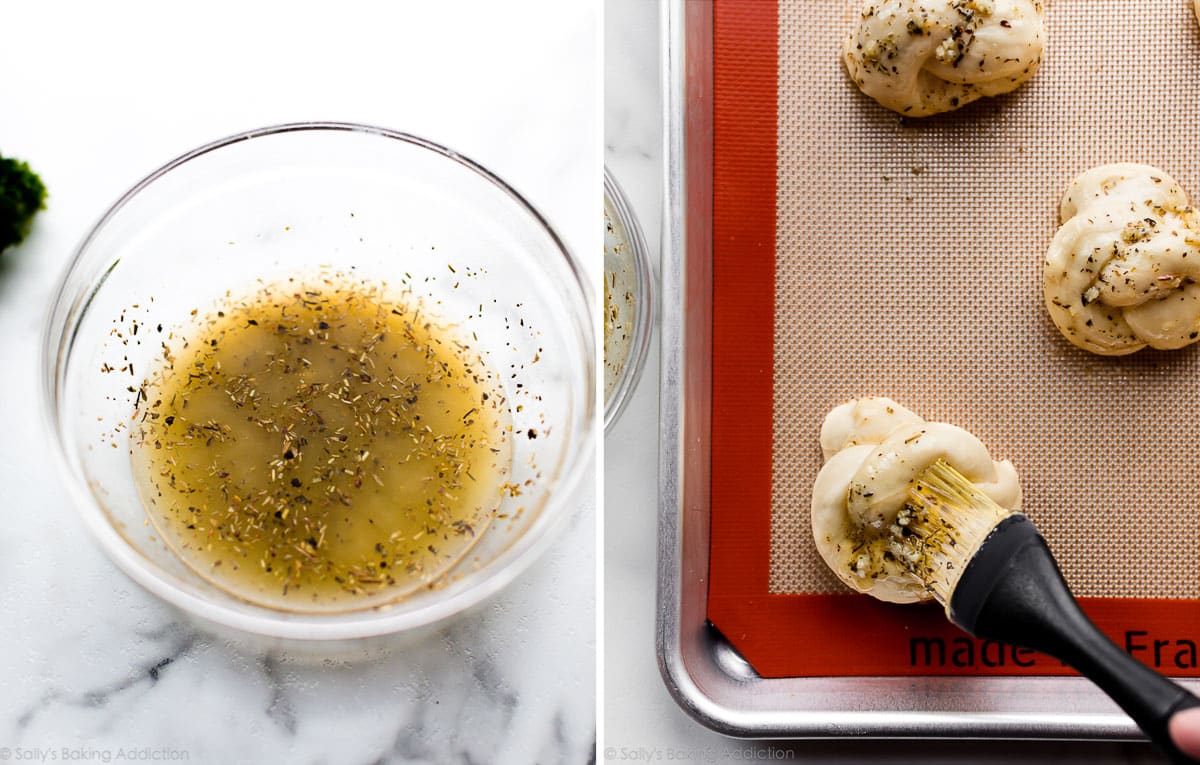
Garlic Herb Butter
Right before baking, generously brush the knots with garlic herb butter. Simply combine melted butter, fresh minced garlic or garlic powder, Italian seasoning, and salt.
If you can’t find an herb mixture labeled “Italian Seasoning” in the spice aisle of the grocery store, use dried oregano, dried basil, and/or dried parsley instead.
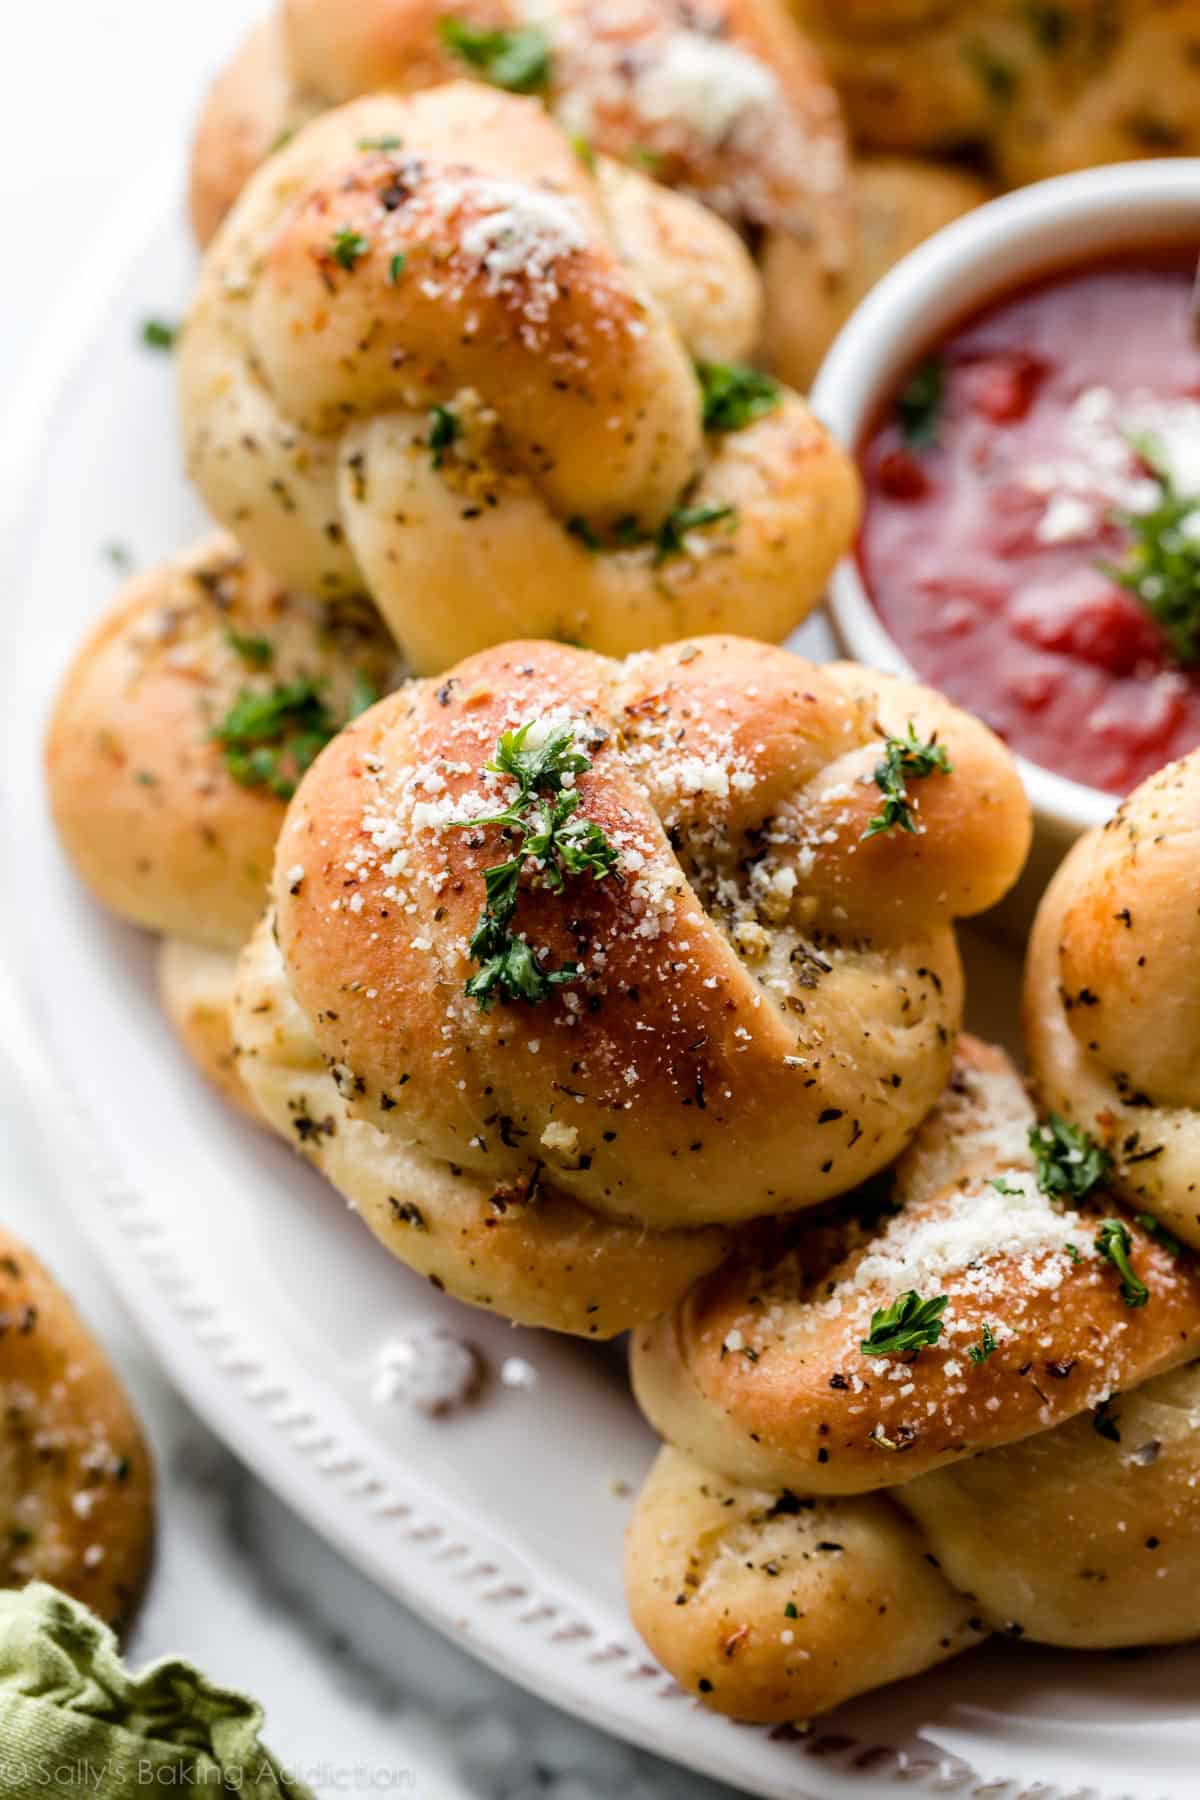
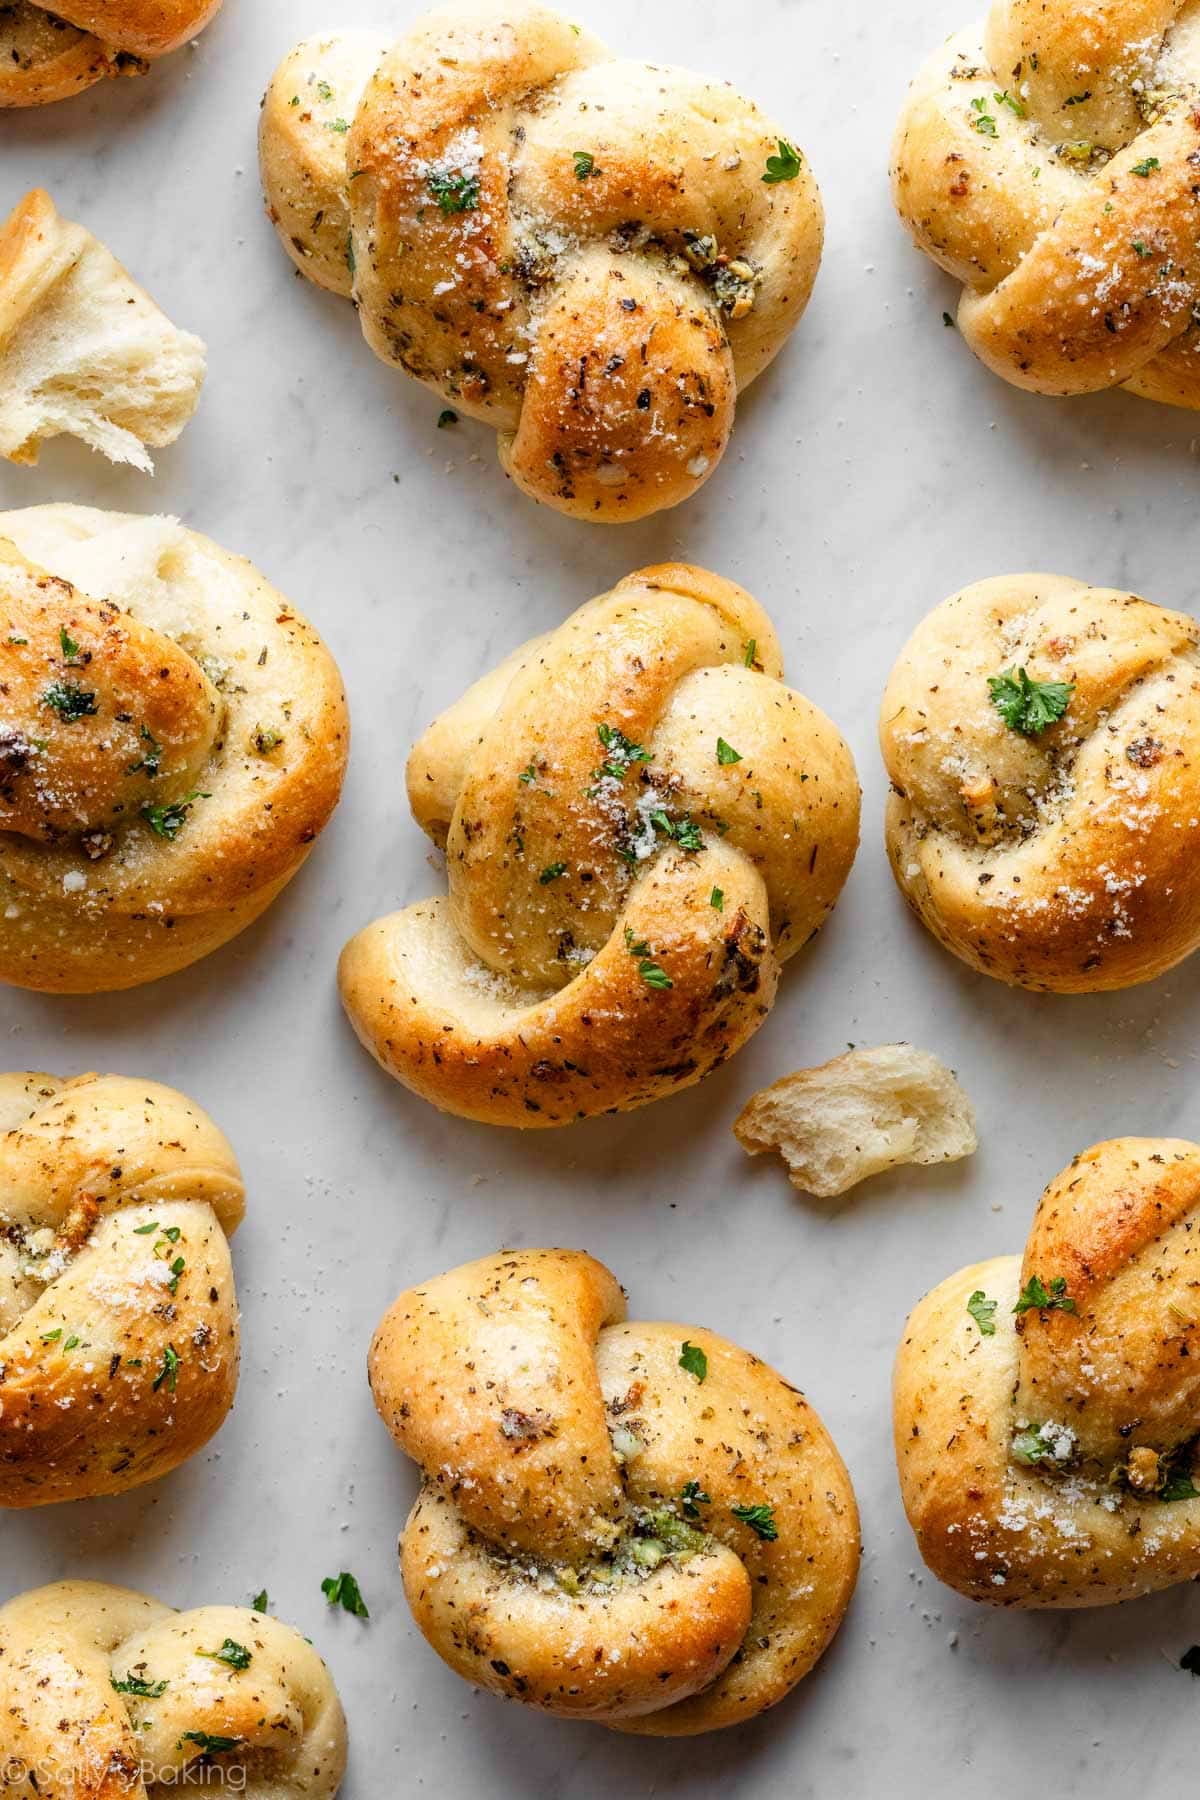
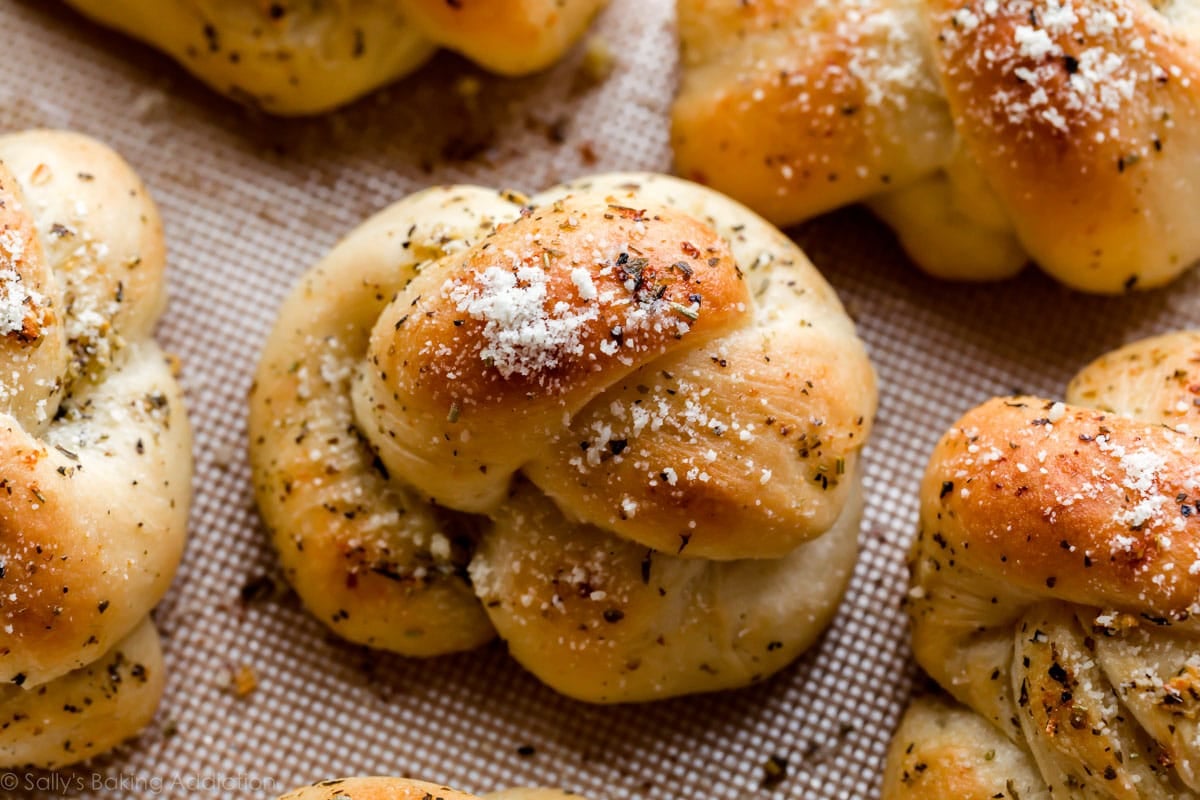
Bake the knots until golden brown and experience the lofty smell of garlic throughout the kitchen. Everyone (maybe even your neighbors) will know what’s on the menu tonight!
Flavor Tip: Save some of the garlic butter to brush onto the knots as they come out of the oven, then top each with fresh parmesan and chopped parsley. The parmesan and parsley are completely optional, but make a fabulous garnish.
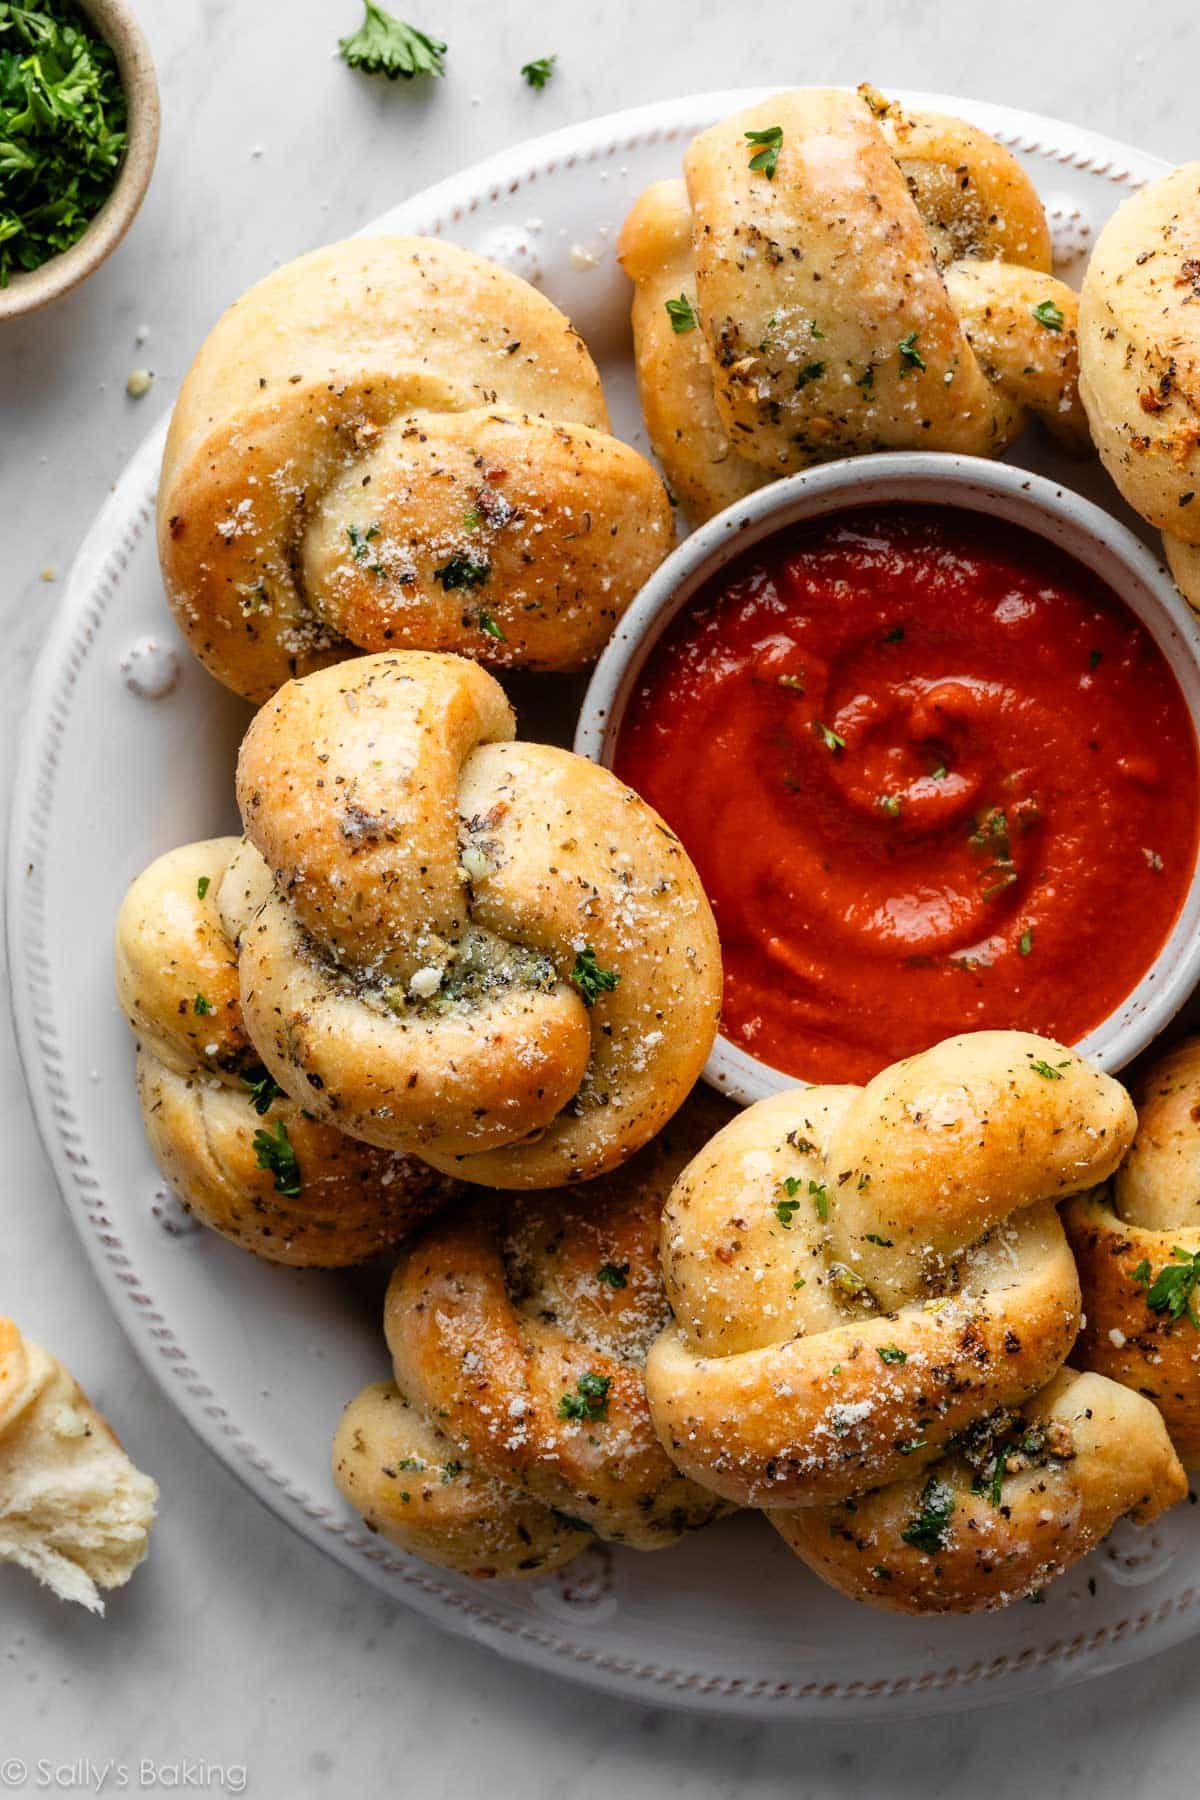
Serve the garlic knots warm, with a side of warm marinara sauce or homemade tomato soup for dipping. This is your happy place!*
*Unless you’re a vampire.

Homemade Garlic Knots
- Prep Time: 3 hours (includes rising)
- Cook Time: 20 minutes
- Total Time: 3 hours, 25 minutes
- Yield: 16 knots
- Category: Dinner
- Method: Baking
- Cuisine: Italian
Description
These homemade garlic knots are extra soft, fluffy, and packed with flavor thanks to a buttery garlic-herb topping brushed on before and after baking. Made from an easy homemade dough similar to my reader-favorite pizza dough, they freeze beautifully and are perfect for pizza night—no delivery required.
Ingredients
Homemade Dough
- 1 cup + 2 Tablespoons (270g/ml) warm water (between 100–110°F/38–43°C)
- 2 and 1/4 teaspoons (7g) Platinum Yeast from Red Star instant yeast (1 standard packet)*
- 1 Tablespoon (13g) granulated sugar
- 3 Tablespoons (43g/ml) olive oil or melted butter
- 1 teaspoon salt
- 1 teaspoon garlic powder
- 3 and 1/3 cups (433g) bread flour* (spooned & leveled), plus more for hands and work surface
Topping
- 5 Tablespoons (71g) unsalted butter, melted
- 3 garlic cloves, minced; or 1/2 teaspoon garlic powder
- 1 teaspoon Italian seasoning*
- 1/4 teaspoon salt
- optional after baking: 1/4 cup (25g) grated Parmesan cheese
- optional after baking: 2 Tablespoons chopped fresh parsley
Instructions
- Proof the yeast: Whisk the warm water, yeast, and sugar together in the bowl of your stand mixer fitted with a dough hook or paddle attachment. Cover and allow the mixture to sit for about 5 minutes, or until foamy on top. *If you do not own a stand mixer, you can do this in a large mixing bowl and, in the next step, mix the dough together with a large wooden spoon or silicone spatula. It will take a bit of arm muscle. A hand mixer works, but the sticky dough can repeatedly get stuck in the beaters. Mixing by hand is the better choice.
- Make the dough: Add the olive oil (or butter), salt, garlic powder, and about half of the bread flour. Beat on low speed for 30 seconds. Scrape down the sides of the bowl and add the remaining flour. Beat on low speed for 2 minutes, or until a soft dough forms and pulls away from the sides of the bowl. Dough will be very soft, but should not be overly sticky. If it seems too sticky and clings to the sides of the bowl instead of forming a rough mass around the dough hook, add more flour, 1 Tablespoon at a time, and continue to mix until the dough pulls away from the sides of the bowl but is still moist and tacky. If it feels dry and crumbly, add more water, 1 teaspoon at a time, mixing well after each addition.
- Knead the dough: Keep the dough in the mixer (and switch to the dough hook if using the paddle) and beat for an additional 5 full minutes, or knead by hand on a lightly floured surface for 5 full minutes. (If you’re new to bread-baking, my How to Knead Dough video tutorial can help here.) If the dough becomes too sticky during the kneading process, sprinkle 1 teaspoon of flour at a time on the dough or on the work surface/in the bowl to make a soft, slightly tacky dough. Do not add more flour than you need because you do not want a dry/tough dough. After kneading, the dough should still feel a little soft. Poke it with your finger—if it slowly bounces back, your dough is ready to rise. You can also do a “windowpane test” to see if your dough has been kneaded long enough: tear off a small (roughly golfball-size) piece of dough and gently stretch it out until it’s thin enough for light to pass through it. Hold it up to a window or light. Does light pass through the stretched dough without the dough tearing first? If so, your dough has been kneaded long enough and is ready to rise. If not, keep kneading until it passes the windowpane test.
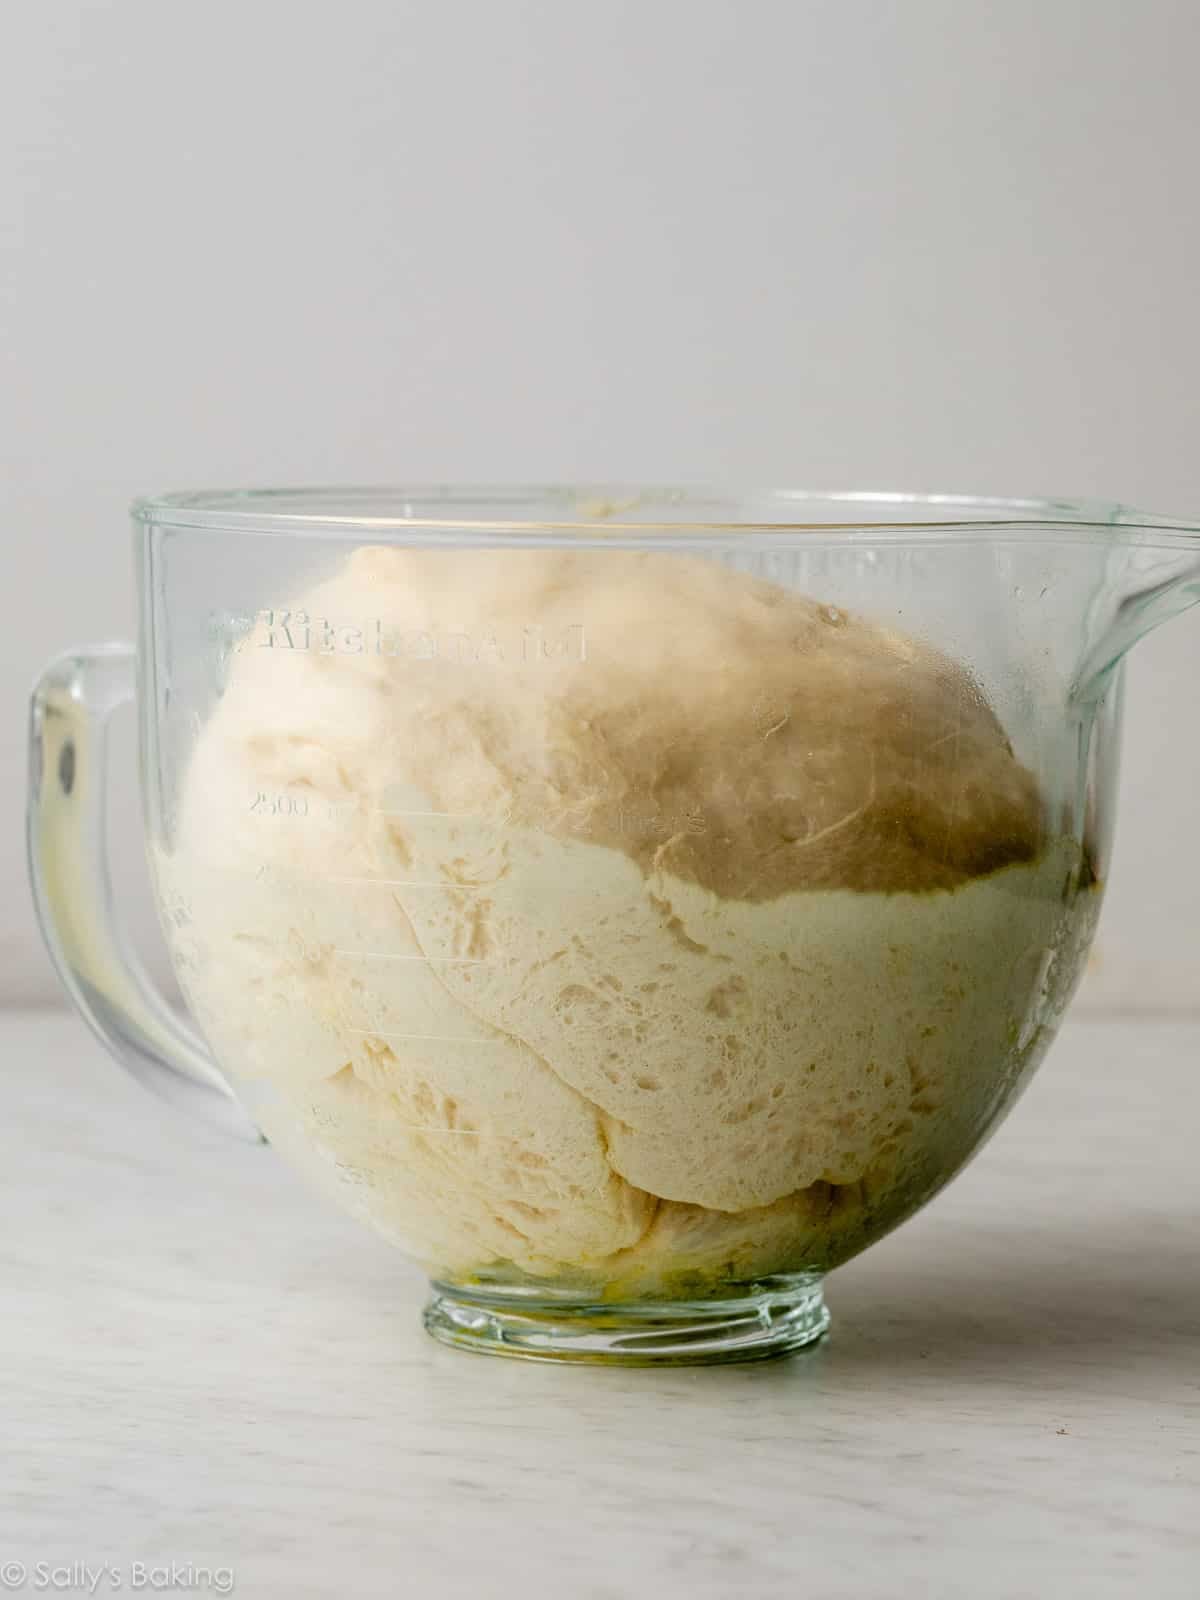
- 1st rise: Lightly grease a large bowl with oil or nonstick spray—just use the same bowl you used for the dough. Place the dough in the bowl, turning it to coat all sides in the oil. Cover the bowl with aluminum foil, plastic wrap, or a clean kitchen towel. Allow the dough to rise in a relatively warm environment for 2 hours or until double in size. (I always let it rise on the counter and it takes about 2 hours. For a tiny reduction in rise time, see my answer to Where Should Dough Rise? in my Baking with Yeast Guide.)
- Line two baking sheets with parchment paper or silicone baking mats.
- Shape the dough: Use the step-by-step photos in the blog post as your guide for this step. When the dough is ready, punch it down to release the air. Using floured hands on a lightly floured work surface, shape the dough into a 16-inch (41cm) log. Using a very sharp knife, pizza cutter, or bench scraper, slice the log into 16 1-inch sections. Roll each piece of dough into an 8-inch rope. Tie each rope into a knot. You can tuck the 2 ends of the knots underneath or leave them out. Arrange the knots on the prepared baking sheets.
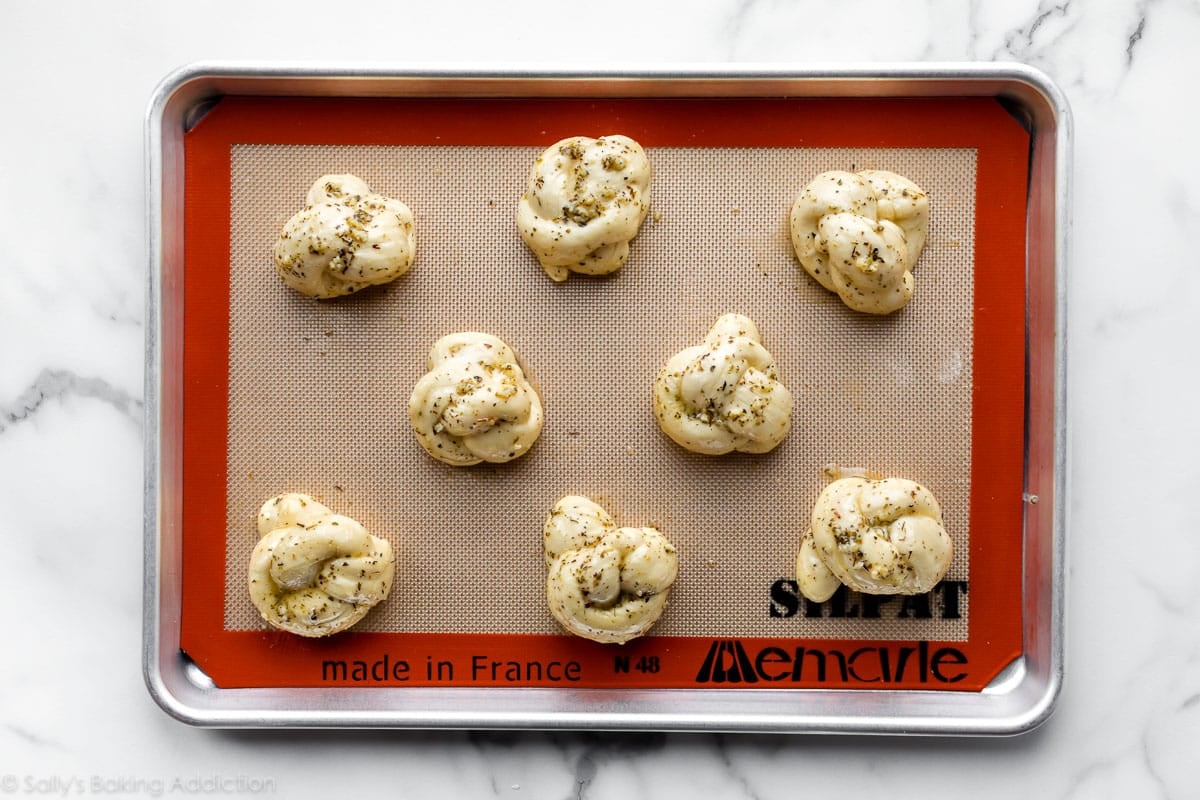
- 2nd rise: Lightly cover the shaped knots and let them rest for 30–45 minutes. They will slightly puff up during this time, producing softer rolls.
- Towards the end of the rise time, preheat the oven to 400°F (204°).
- Make the topping: Stir the melted butter, garlic, Italian seasoning, and salt together. Brush on the knots. Reserve some of the topping for when the knots come out of the oven.
- Bake for about 20–23 minutes or until golden brown on top. Remove from the oven and brush the warm knots with remaining garlic butter. Sprinkle with parmesan cheese and/or parsley, if using.
- Serve warm, plain or with marinara sauce for dipping.
- Cover and store leftover knots at room temperature for up to 2 days or in the refrigerator for up to 1 week. Reheat as desired.
Notes
- Freezing Dough: After the dough has its 1st rise and you punch it down to release the air, lightly coat all sides of the dough ball with olive oil. Place the dough into a freezer zipped-top bag and seal tightly, squeezing out all the air. Freeze for up to 3 months. Thaw in the refrigerator overnight. Once thawed, remove the dough from the refrigerator and allow to rest for 1 hour on the counter, then continue with step 6.
- Freezing Unbaked Shaped Knots: Instead of freezing the dough as a whole, you can freeze the shaped knots before baking them. Shape the knots as directed in step 6. Arrange on a lined baking sheet. Freeze, uncovered, for 1–2 hours. Remove from the freezer. At this point, knots should be frozen and no longer sticky. Place them into a freezer-friendly container or zipped-top bag. Freeze for up to 3 months. Thaw in the refrigerator or on the counter. Bring to room temperature, arrange on 2 lined baking sheets, cover lightly, and allow to rest/rise for 1 hour before continuing with step 8.
- Special Tools (affiliate links): Electric Stand Mixer or Glass Mixing Bowl and Wooden Spoon or Silicone Spatula | Dough Scraper | Pizza Cutter | Baking Sheets | Silicone Baking Mats or Parchment Paper | Pastry Brush
- Halving the Recipe: This recipe yields about 2 pounds of dough, which is enough for 16 knots or 1 pizza + 8 knots. If you want to make just 8 knots, punch the dough down as directed in step 6. Cut in half. Use the other half of the dough however you’d like or freeze for later. Shape into an 8-inch log and cut into 8 1-inch strips. Continue with the recipe as directed.
- Yeast: Platinum Yeast from Red Star is an instant yeast. You can use active dry yeast instead. The 1st rise time may take a little longer. Reference my Baking With Yeast Guide for answers to common yeast FAQs.
- Italian Seasoning: If you can’t find Italian seasoning in the spices section of the grocery store, use a mix of dried oregano, dried basil, and/or dried parsley instead.
- Recipe Updates in 2026: Based on reader feedback, we retested and updated the dough recipe as written above. If you prefer the original version, increase the water to 1 and 1/3 cups (320ml), use all-purpose flour instead of bread flour, and reduce the garlic powder to 1/2 teaspoon.


Reader Comments and Reviews
I only rate if I follow a recipe verbatim. These garlic knots are perfection!
I always wonder when anything online gets all 5-star ratings, but I made these today and they were perfect, more like 10 stars on a 5 scale. The only change I made was half butter and half olive oil for the topping (trying to reduce saturated fat), which worked well. The garlic knots look just like your photos and were warm and almost flaky inside and just the right crispness on the outside. Totally delicious – thank you!
Hi Sally, This looks great. But before I try I need a tip from you. If I want to try half quantity of these, then how much of yeast should I 7u8use?
Hi Shakeba, You can cut the yeast in half as well. So you would need 1 and 1/8 tsp (or half of a standard packet).
Very soft and delicious ! I made with half whole wheat and half all purpose white flour and it came out lovely .
Followed directions closely. At 18 minutes the knots didn’t look at all ready. At 23 they were better looking but still not anything like the photos. They were kinda crunchy, tasted good, but we’re quite far from being fluffy and looking like the photo. How might I get them to turn out better?
Excellent recipe! We all loved it.
Soft and crunchy in the right places =)
Super awesome recipe for garlic knots. Soft chewy n yummy. Feeling satisfied
These came out perfectly on the first try. With my oven they took 15 minutes so recommend watching them closely. They were light, soft and delicious!
I made these last night to go with spaghetti and meatballs. They were amazing! Thanks for such a great recipe, this one is a keeper!
Another fabulous recipe from Sally! Made these to go with spaghetti and meatballs. I added italian seasoning and garlic powder to the dough. My knots weren’t the prettiest, but were super tasty. Def adding this to our pasta night menu. 🙂
Tried garlic knots for the first time and these were perfect! My girls (15, 13) enjoyed making the knots! Thanks so much!
Hi Sally !
Just tried this recipe. Came out so well. Nice and soft in between and tastes so good.
One question though, the top and bottom were a little crunchy. Should i have taken them out earlier?
I made garlic knots for the first time and I followed your recipe. They turned out great!! Thank you for this great recipe
Simple recipe and detailed instructions. Thanks!!! My knots turned out great. Another yeast recipe success after using your pretzel recipe with success as well.
Hi Sally
I have made these but only once. My family found we wanted more garlic flavor. Is there a way to get garlic into the dough itself?
Sure can! Add 1 teaspoon garlic powder or 1 clove minced garlic to your dough. Enjoy!
Fabulous! I have never baked with yeast before and these came out perfect! Thank you Sally!
Hi Sally, I made these for the first time and they turned out delicious! A bit crunchier and crispier than I expected but probably because I left them in for 20 min instead of 18. I didn’t have fresh garlic but garlic powder did the trick, plus some dried parsley. For some reason the knots didn’t hold their shape very well so it all blended together after they were baked (looked kind of like garlic rolls). Any idea why? I figured it was just a rookie mistake. Yours are way prettier, but in any case, I can’t complain about the recipe though, because hubby and I ate them all within 24 hours! They were even good the next morning. Thanks for the recipe.
Hey Sally, this recipe is just what I was looking for! After trying a few others, this has been the best. Thanks for sharing :).
Such a great recipe. My fanily loved it.
Hello! Just wanted to say that these taste amazing, me and my family loved it. We didn’t have Italian seasoning so i used oregano and thyme instead.
Hello, I am new to dough making. I want to prep these knots during the day and then pop them in the oven right before dinner. After kneading it, can I put the dough in the refrigerator for a couple of hours and then let it come to down to room temperature before making the knots?
Hi Priya, I don’t recommend letting the shaped dough sit for longer than 45 minutes. You can however do a slow rise in step 3 for 8-12 hours in the refrigerator. See my pizza dough recipe notes for full instructions.
Any idea on calories or shouldn’t I ask.
Thank you
Hi Steve, I’m unsure of the nutritional info of this recipe, but there are many great online calculators like this one: https://recipes.sparkpeople.com/recipe-calculator.asp
Oh my! These turned out wonderful. Didn’t brown on top enough…so I turned up to 500, three minutes later…perfect! Everyone raved! Thanks again. This recipe is a keeper.
Such an amazing recipe. With everything that’s going on with the virus I’ve had more time to learn new skills. I made them to go along with our deer stew and they were so good. My partner gave them a 9/10 (he said the only thing that would have made them better was if I had cut them open and put butter inside) Definitely becoming a staple in our home.
These are so delicious! I usually make Sally’s pizza crust recipe – use one half for the pizza and the other half for these garlic knots. Since they bake at different temperature than pizza, I bake these first, then bake the pizza while the knots cool down. Great appetizer while waiting for the pizza. They are very addicting!
Made these the other night to go with a homemade pasta alfredo and wow, they were so good! Mine were a bit… wide and flat? Thinking I must’ve let it rise too long the first time (way more than doubled) and then again rest too long after forming the knots (my 14yo interrupted me for help with Algebra). But the taste and consistency were amazing, even though they looked a bit more like garlic buns than knots. Can’t wait to make a pizza with this dough recipe!
They turned out fab! Thanks so much Sally… Will try more bread variations with your dough recipe xxx
These were so simple to make and turned out AMAZING! The recipe and video were easy to follow. They look and taste impressive, and these are going to be my
go-to for dinner parties in the future!
Hi Sally! These garlic knots could not have been more perfect! They looked and tasted absolutely amazing! I can’t wait to make them again! Thank you for such a great recipe!