

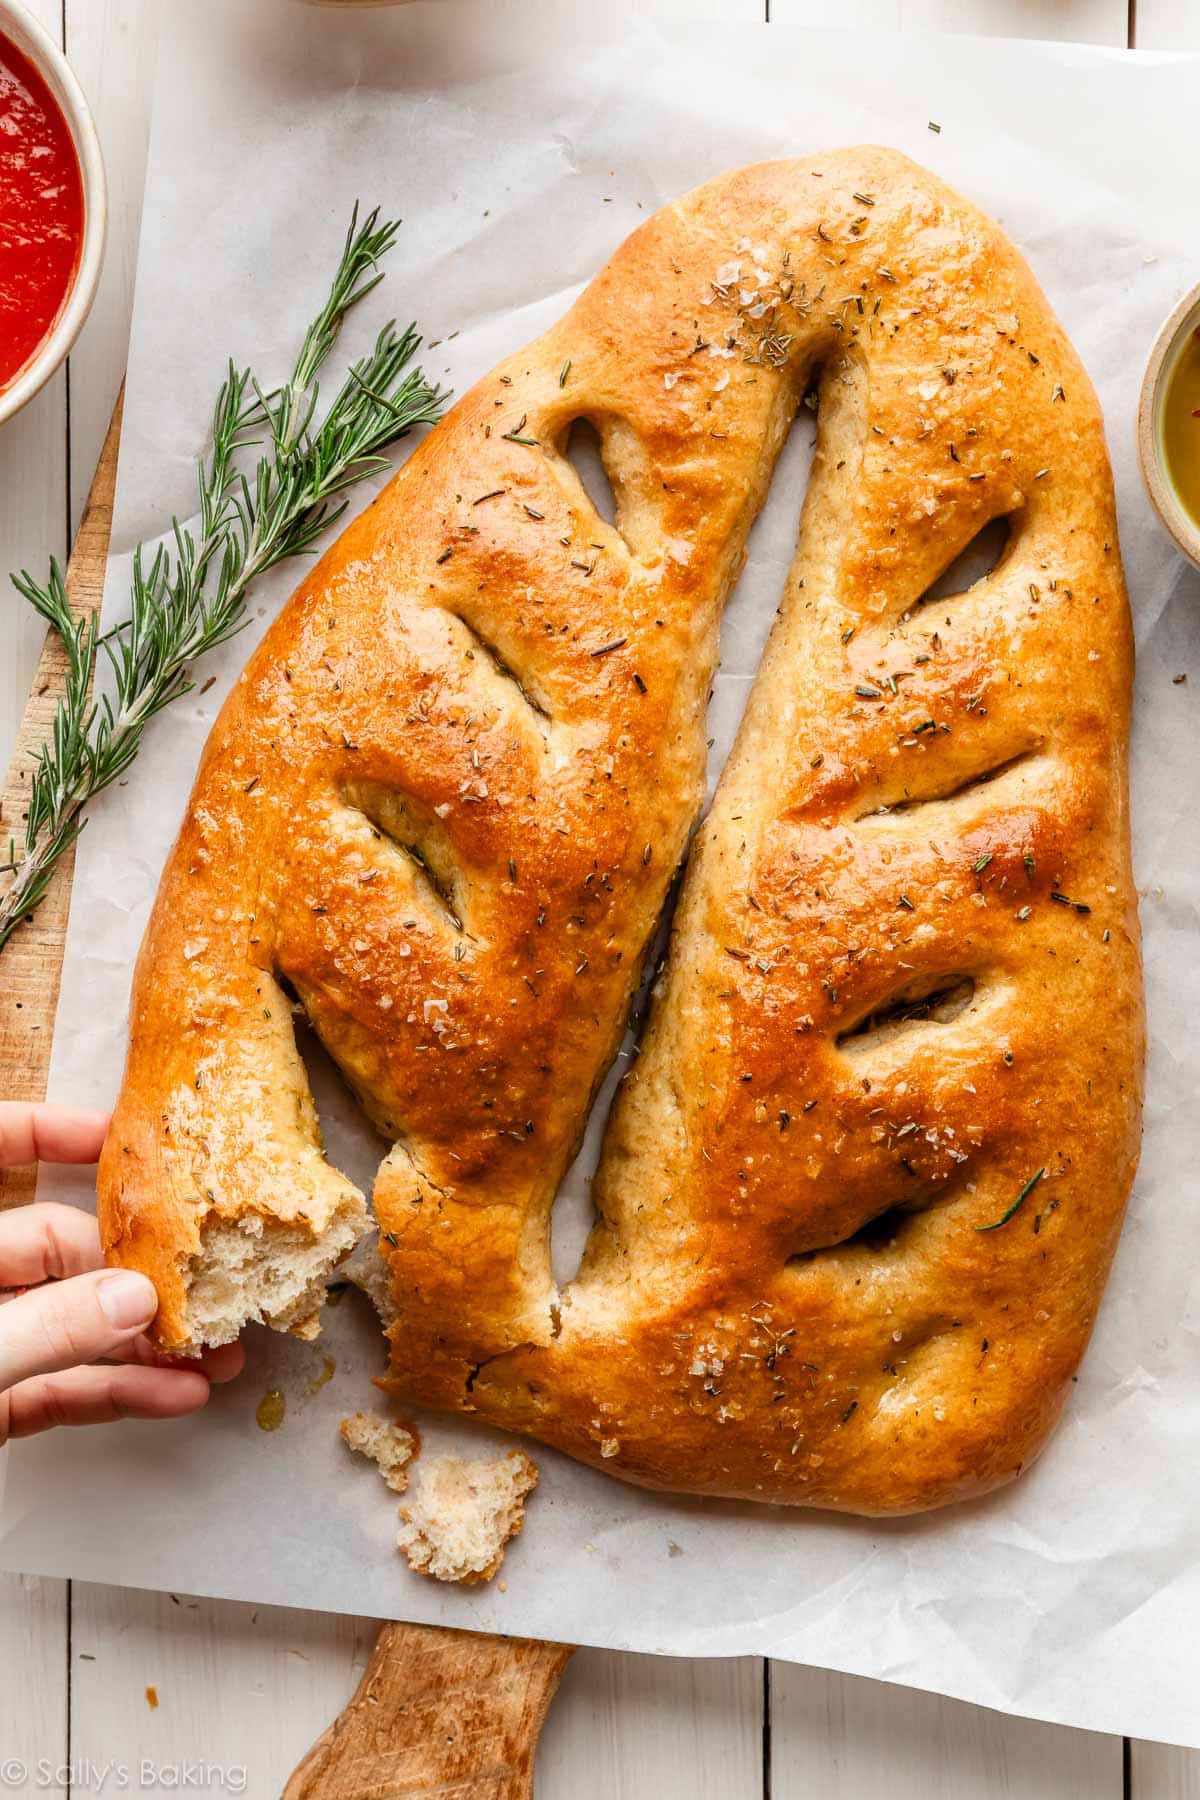
Fougasse is a French flatbread from Provence shaped and cut to look like a leaf or an ear of wheat. Like the French cousin of Italian focaccia, this “hearth bread” features a chewy, crusty texture and rustic savory flavor. This recipe requires making a preferment a day ahead of time (takes less than 5 minutes!), which is key for developing flavor and structure.
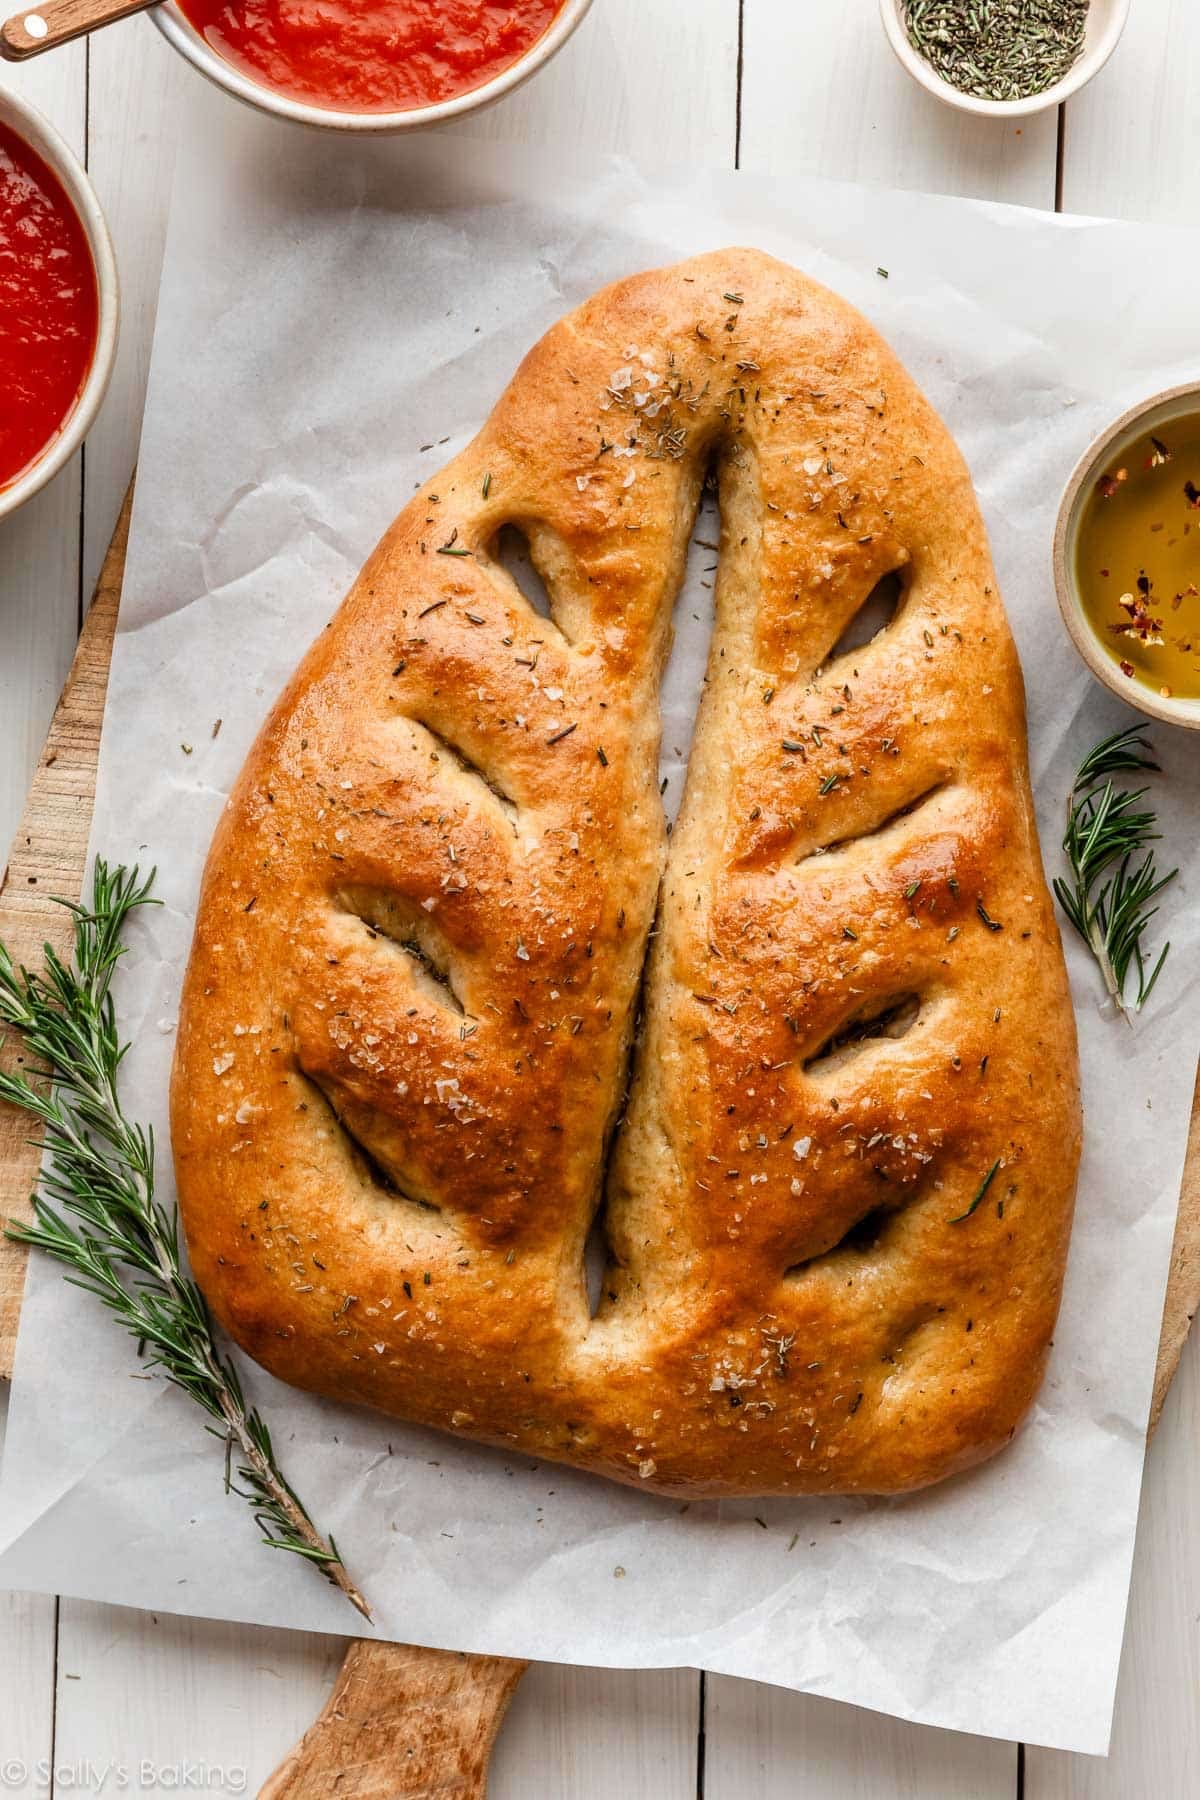
Like the French cousin of focaccia, fougasse is a rustic, olive oil–kissed flatbread meant for sharing, tearing, and dipping. Traditionally shaped and slashed to resemble a leaf or stalk of wheat, those signature cuts create extra crispy surface area as it bakes.
While we aren’t using the exact method you’d learn in a bread class in France, this streamlined version delivers consistent, bakery-worthy results in your home kitchen. It’s also a wonderful introduction to preferment breads—an impressive home baking project that you’ll feel proud to pull from the oven.
Turn on your favorite French café playlist, get out the olive oil, and let’s bake!
One reader, Yvonne, commented: “Intimidating, but honestly super simple and a definite crowd pleaser. I always check this website first for recipes; the explanations are so clear and I love how much I learn! This fougasse was easily the most attractive bread I’ve personally baked and definitely on the simple side, despite the number of steps. Thanks for this and all the other great recipes! ★★★★★”
Another reader, Ann, commented: “This is a delicious recipe! I’ve been curious about fougasse and was so glad that I could try it at home! I have a solid sourdough starter, so I used it in place of the biga. This is full of flavor, and I love the whole wheat in it adding texture and nuttiness! ★★★★★”
Another reader, Heather, commented: “The bread was delicious! I love trying something new and challenging. Even though this recipe takes some time, much of it is hands off and it’s well worth it. Perfect for a nice dinner! The directions were easy to follow and all the pictures were super helpful! ★★★★★”
What Is Fougasse?
Fougasse is a crusty French flatbread from Provence with a deeply savory flavor and beautifully contrasted texture. Think of it as somewhere between rustic bread crust and a thin focaccia. Here’s what makes it so special:
- Savory and aromatic: Olive oil richness with notes from herbs like rosemary or thyme.
- Crispy exterior: Thanks to its thin shaping and decorative slashes.
- Chewy interior: Especially when made with bread flour and a preferment.
- Add-ins are welcome: Fougasse is often studded with black olives, sun-dried tomatoes, and/or cheese (like Gruyère or Parmesan). But even in its simplest form—olive oil, salt, and herbs—it’s deeply satisfying.

How We Tested This Recipe
This fougasse went through multiple rounds of testing to get the flavor, texture, and structure just right.
My team and I experimented with:
- Different yeast amounts
- Warm vs. room-temperature water
- Various ratios of bread flour to whole wheat flour
- Baking at both 425°F and 450°F
- Adjusting the olive oil for tenderness & flavor
Some versions turned out too dense. One was far too dry and wouldn’t even come together. Others were softer but lacked structure. The final version (below) strikes the balance we were looking for: crisp edges, a chewy interior, and enough olive oil to keep the crumb tender without losing that rustic character.
Though long and sometimes frustrating, the testing process confirmed something important: small adjustments in hydration, whole wheat percentage, and yeast make a big difference in a hearth-style bread like this.
What most fougasse recipes have in common:
- Bread flour (often with some whole wheat)
- Olive oil
- Decorative slashes before baking
Where they vary:
- Some use a preferment (like a biga or poolish), others don’t. We found the flavor improved greatly with this simple step.
- Some rely on stretch-and-folds instead of kneading—this is the method we prefer.
- Some bake on a stone for extra crispness. We use a preheated baking sheet, and both work well.
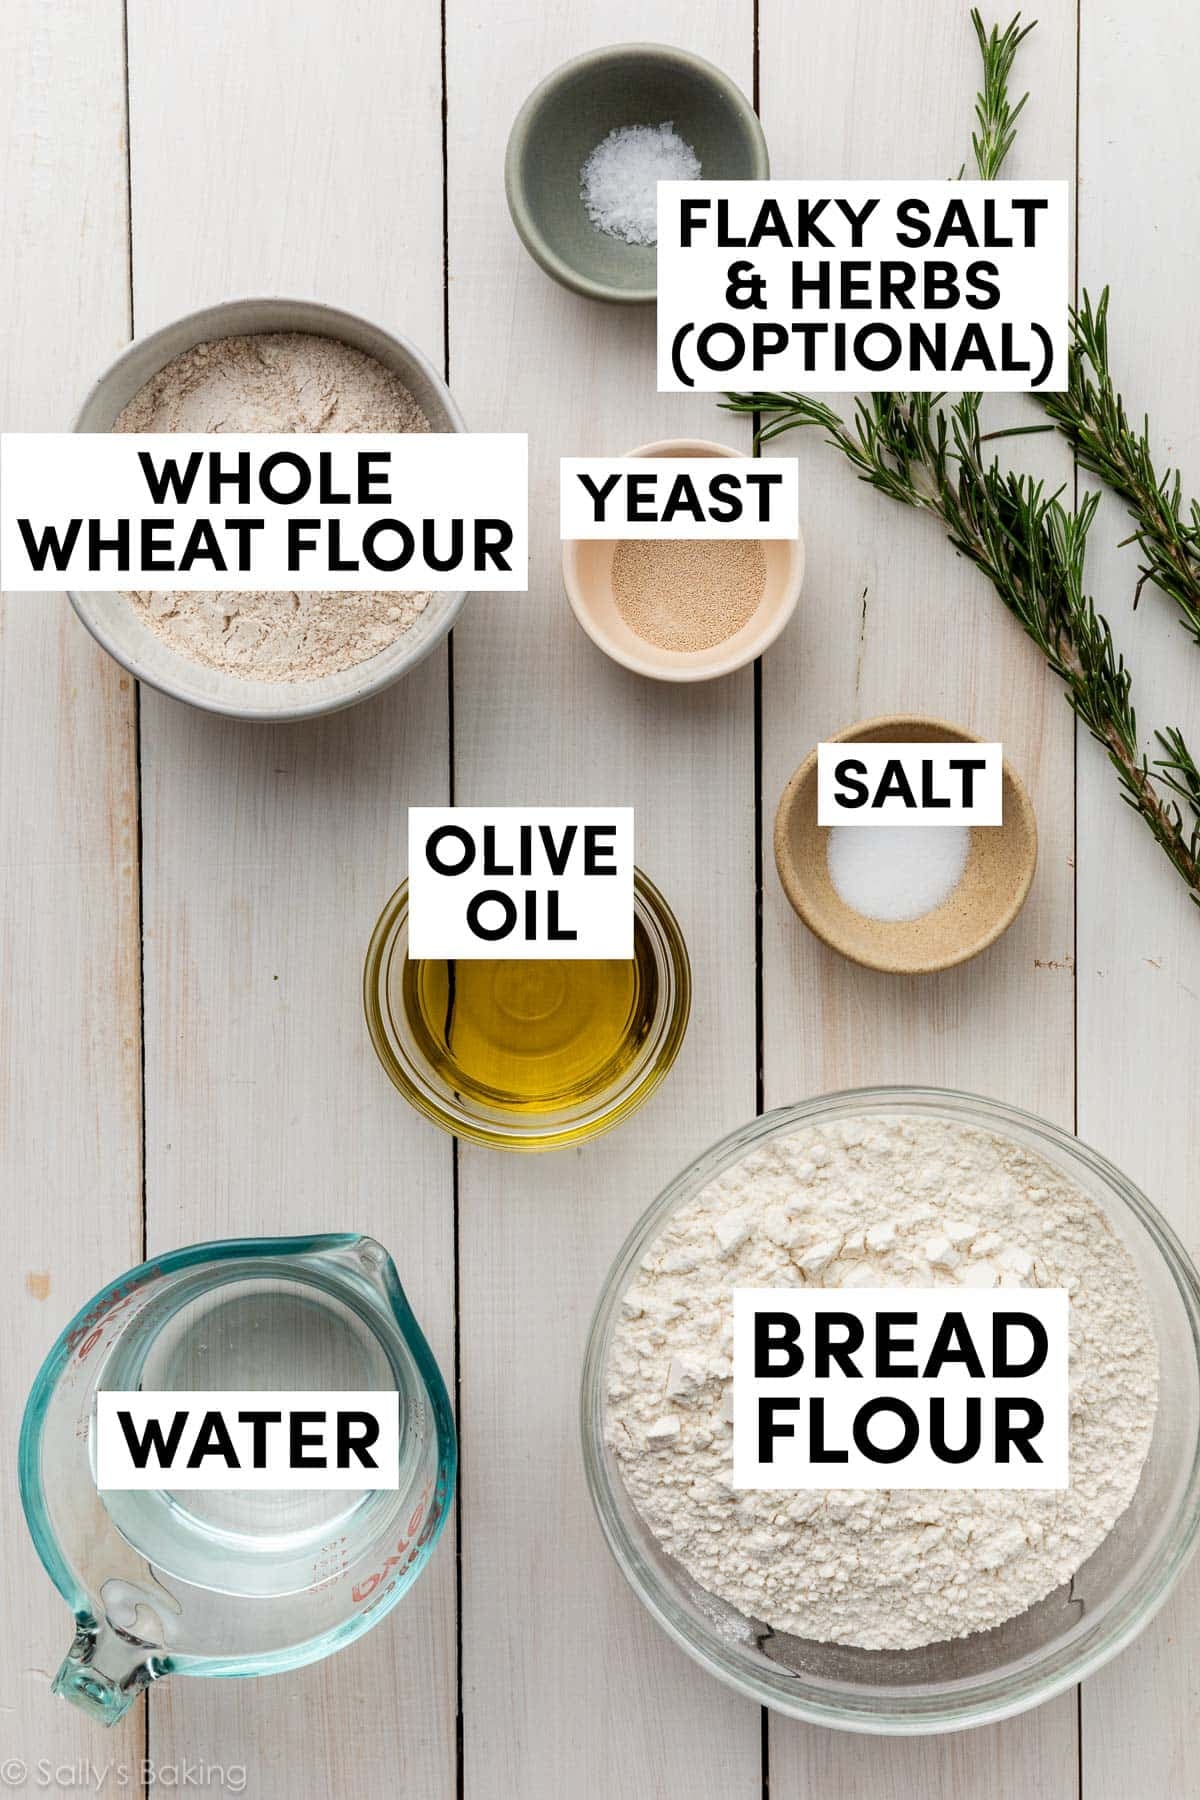
Ingredients You Need for Fougasse
- Bread Flour: While you can use all-purpose flour in this recipe, I strongly recommend using bread flour. Just like when we make olive bread, pizza bread, and asiago-crusted skillet bread, bread flour produces a stronger, chewier crumb.
- Whole Wheat Flour: Adds depth and subtle nuttiness for a hearty flavor.
- Instant or Active-Dry Yeast: You can use either. Take note that you will not use an entire standard packet of yeast.
- Salt: You just can’t make good bread without salt—it’s essential for flavor. Use regular table salt today.
- Water: Some yeasted bread recipes, like my soft dinner rolls, call for warm liquid because it helps the yeast work faster. On the other end of the spectrum, bread recipes with a long rest time, like this no-knead honey oat bread, call for cool or room-temperature water. The cooler the water, the longer the dough takes to rise and, usually, the better the bread’s flavor. (This is important because there are so few ingredients to add substantial flavor!)
- Olive Oil: A little goes in the dough, and then you’ll need more for greasing and for brushing before baking. And for dipping!
Plus, an invisible ingredient: time. The preferment, a couple strategic rests, and proper proofing after shaping all work together to develop flavor.
Overview: How to Make Fougasse
It may seem like a long process, but keep in mind that most of the time is hands-off, while the dough rests. You also have flexibility with the timing, so you can work it into your day!
Day 1: Make the preferment.
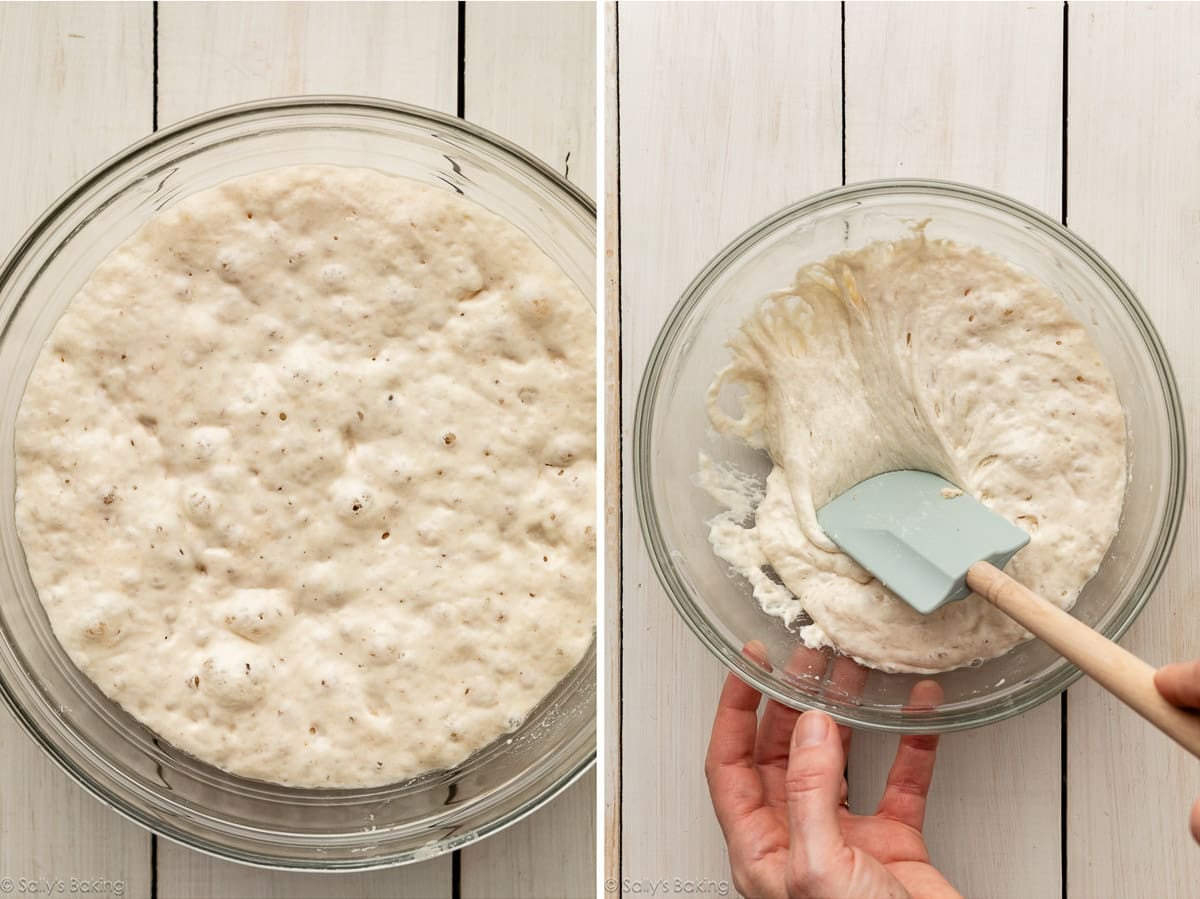
- Mix together the biga/preferment. We’re using the same preferment as ciabatta bread. Cover and let sit at room temperature for 12–24 hours. It will about double in size and be very bubbly.
This is after 24 hours:
Day 2: Make the bread.
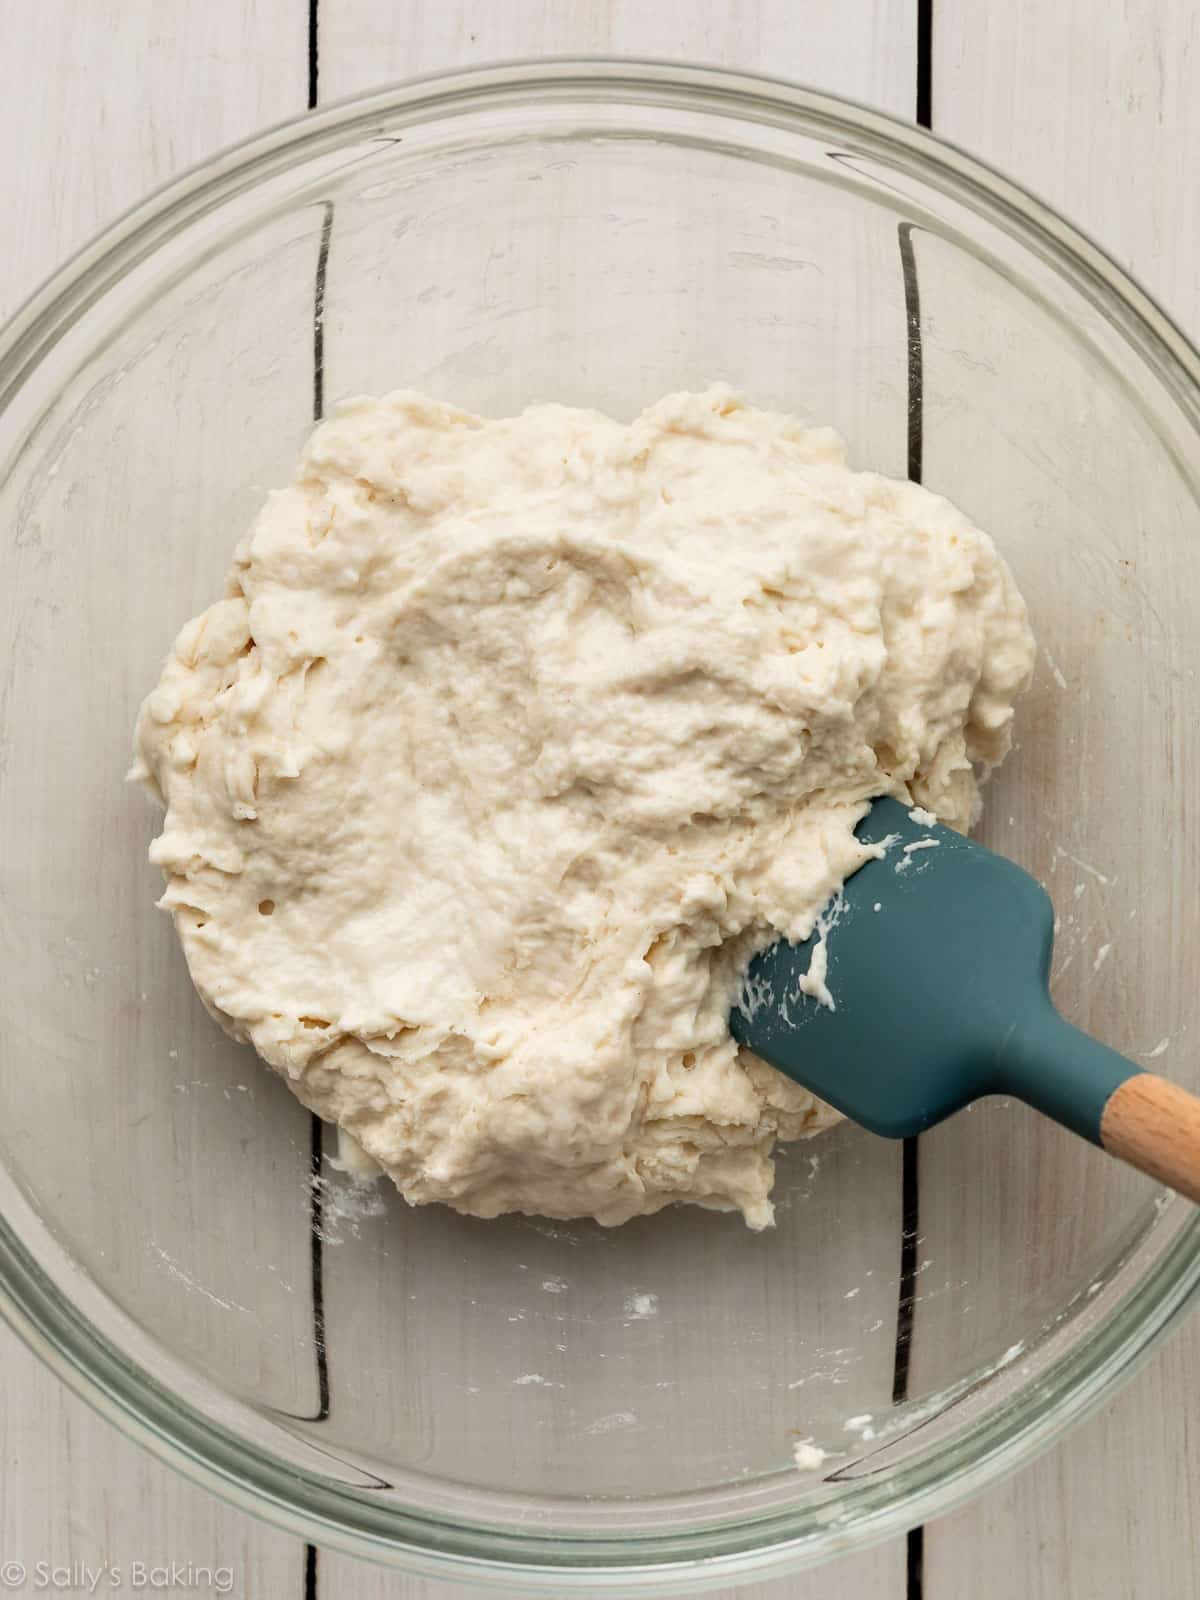
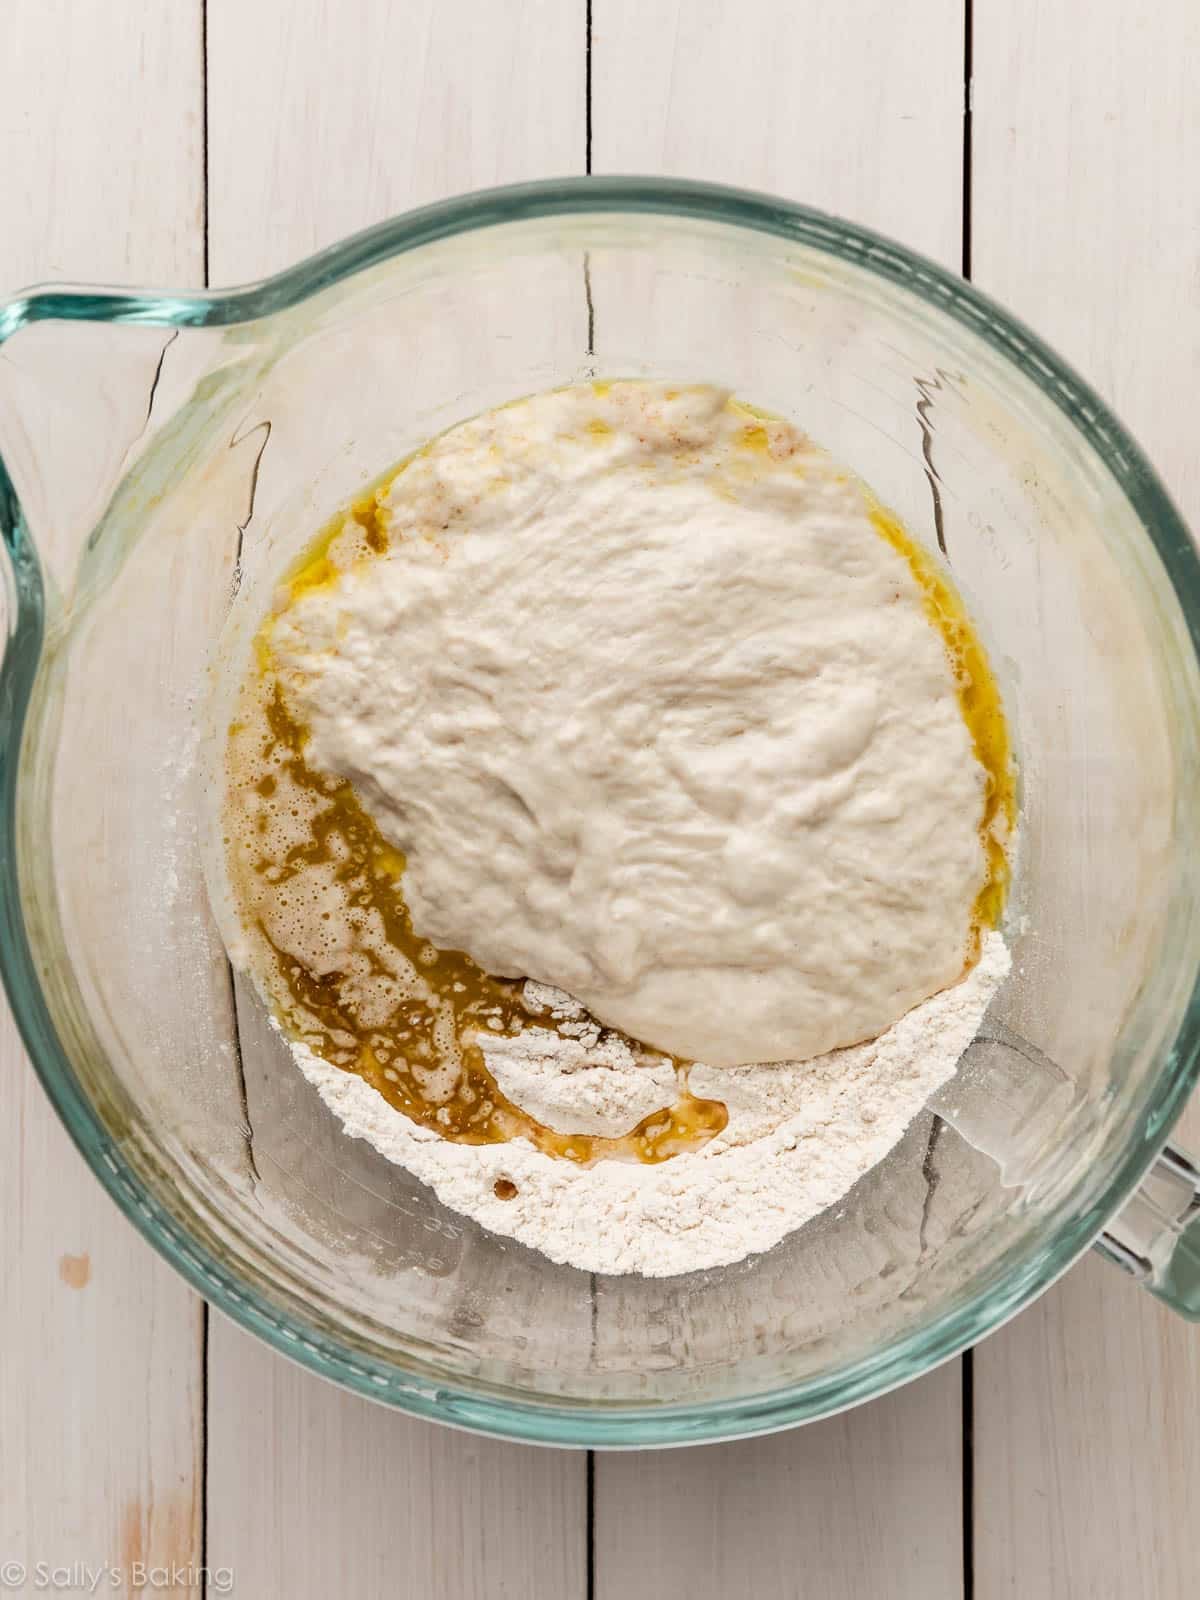
In a large bowl, whisk the flours, yeast, and salt. Add the preferment, water, and olive oil. Stir by hand, or use a stand mixer fitted with a dough hook attachment, until a shaggy dough forms.
Turn onto a lightly floured surface and knead 3–5 minutes, until smooth. The dough should be slightly sticky but workable.
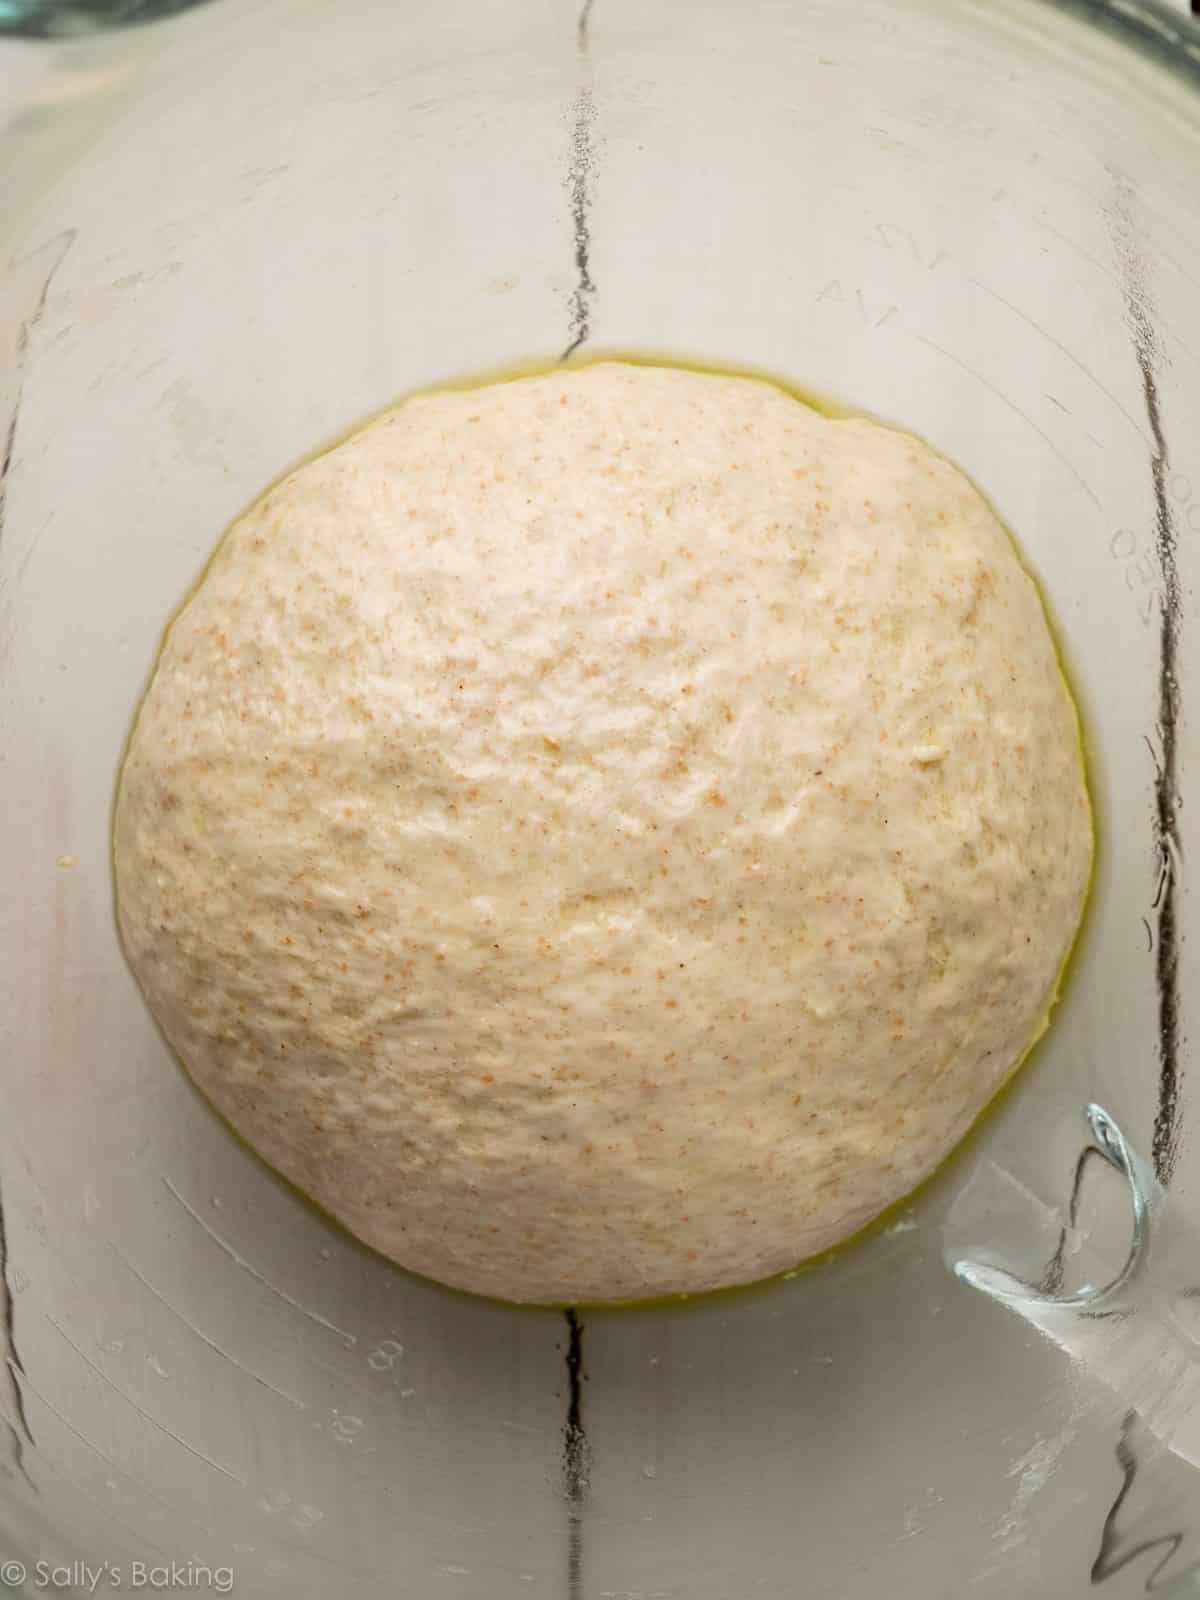
Place in an oiled bowl, cover, and let rest for 45 minutes. It’s fine if it rests a little longer.

Now we’ll build a little extra structure with one quick stretch-and-fold.
How to Stretch & Fold Sticky Dough
After the dough rests for 45 minutes, lightly grease your fingers or a silicone spatula with a bit of olive oil. Using your greased hand or spatula, lift up one side of the dough and gently stretch it up and pull it toward the opposite side of the bowl, folding it down over the dough. I like to visualize a clock on top of the dough for this. You’ll be folding it at the 12 o’clock mark and pulling it down over the 6 o’clock mark. Then, turn the bowl 90 degrees and repeat. Do this until you’ve gone around the bowl once, for a total of 4 folds:
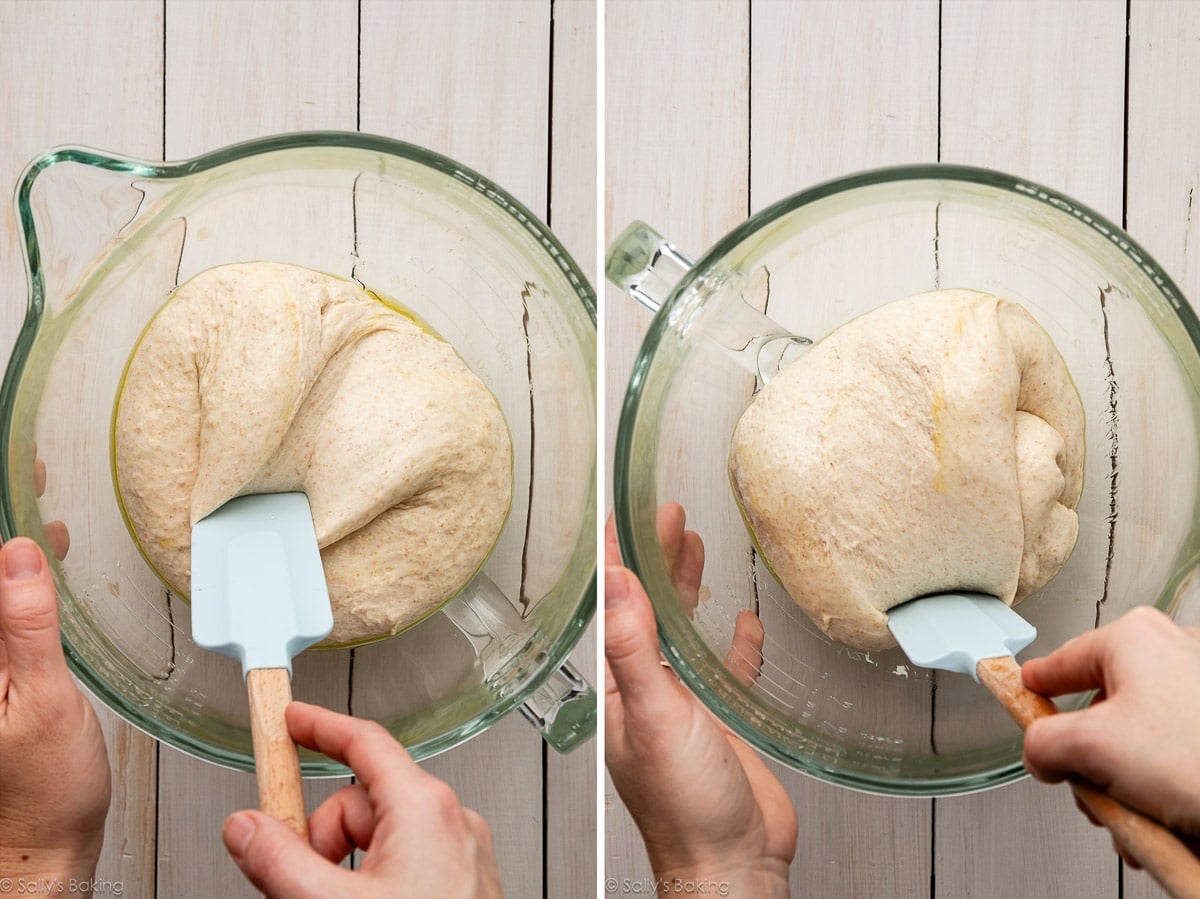
The stretch-and-fold method is similar to kneading dough but much gentler and more precise; it’s designed to handle the dough’s stickiness without overworking it. You’re building structure and strength.
A single round of stretching and folding is enough to strengthen the dough without overcomplicating the process. When you’re done, let the dough rest for at least 45 minutes and get ready to shape.
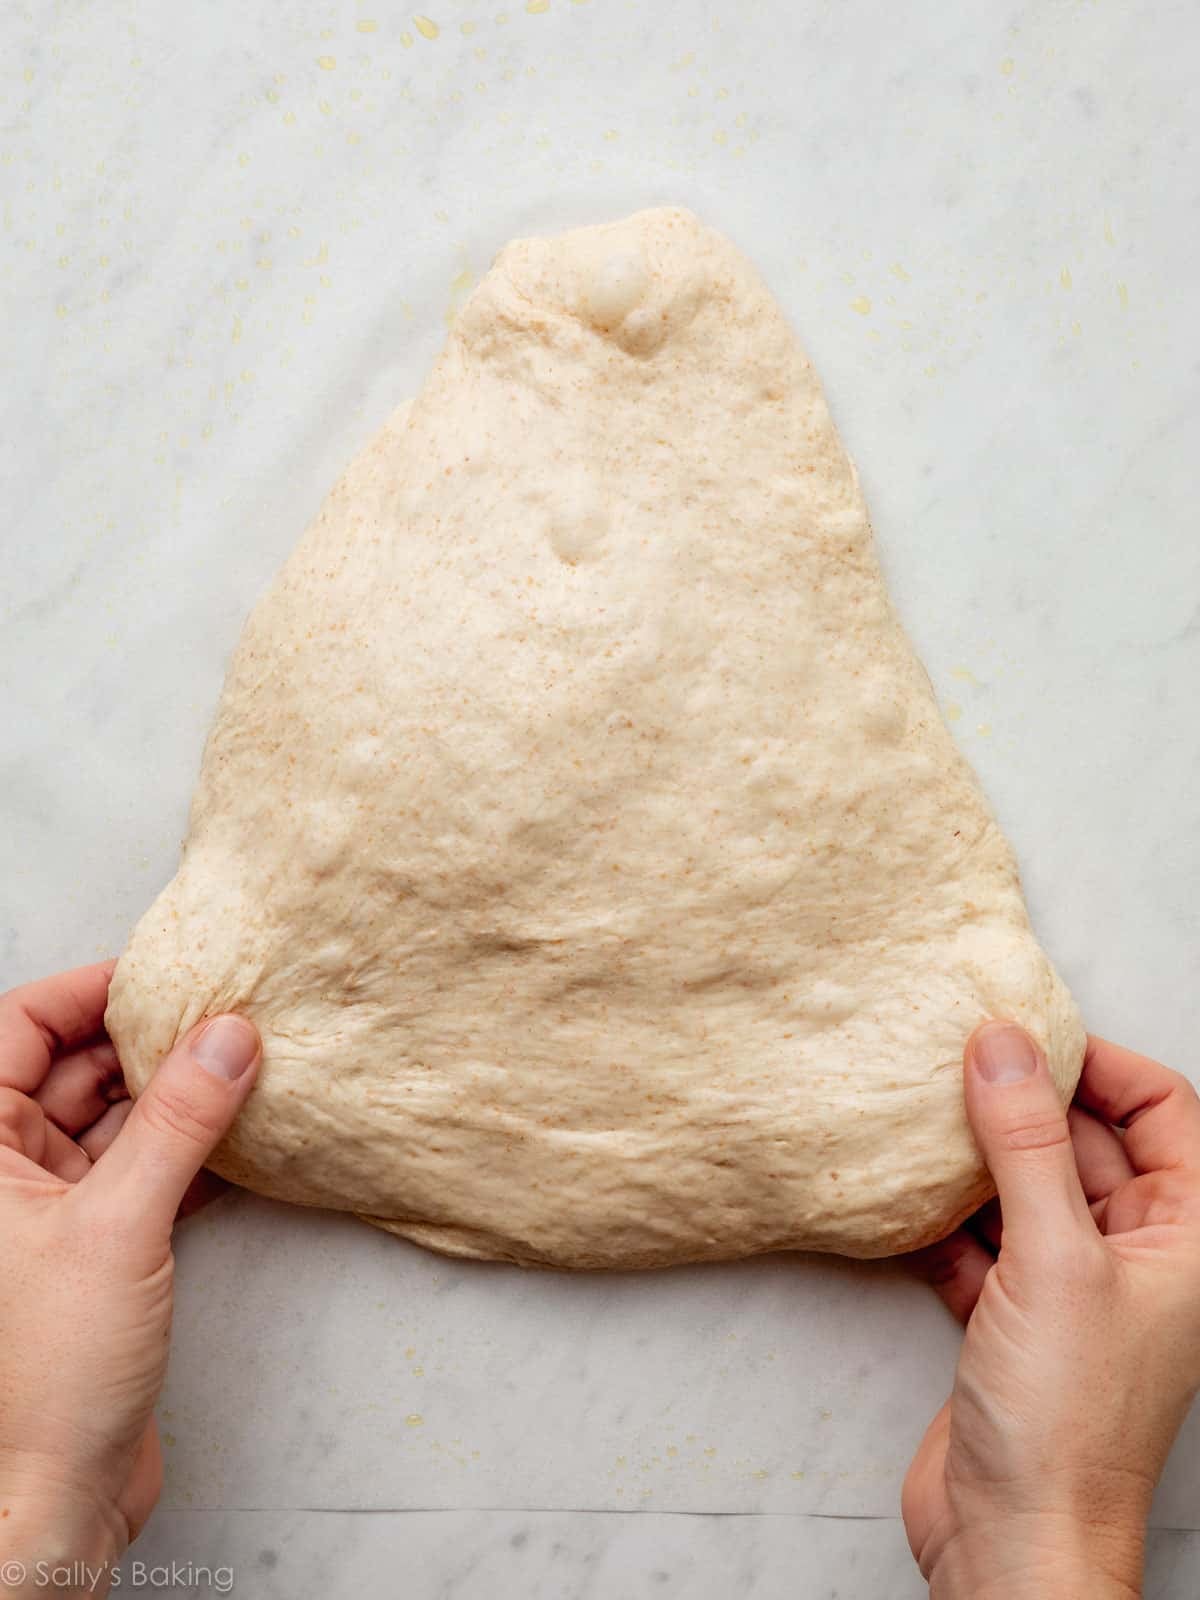
How to Shape Fougasse
Press the dough into a rounded triangle shape, about 12 inches long and 6 inches wide at the base. Cover and rest for 30 minutes to let the gluten relax.
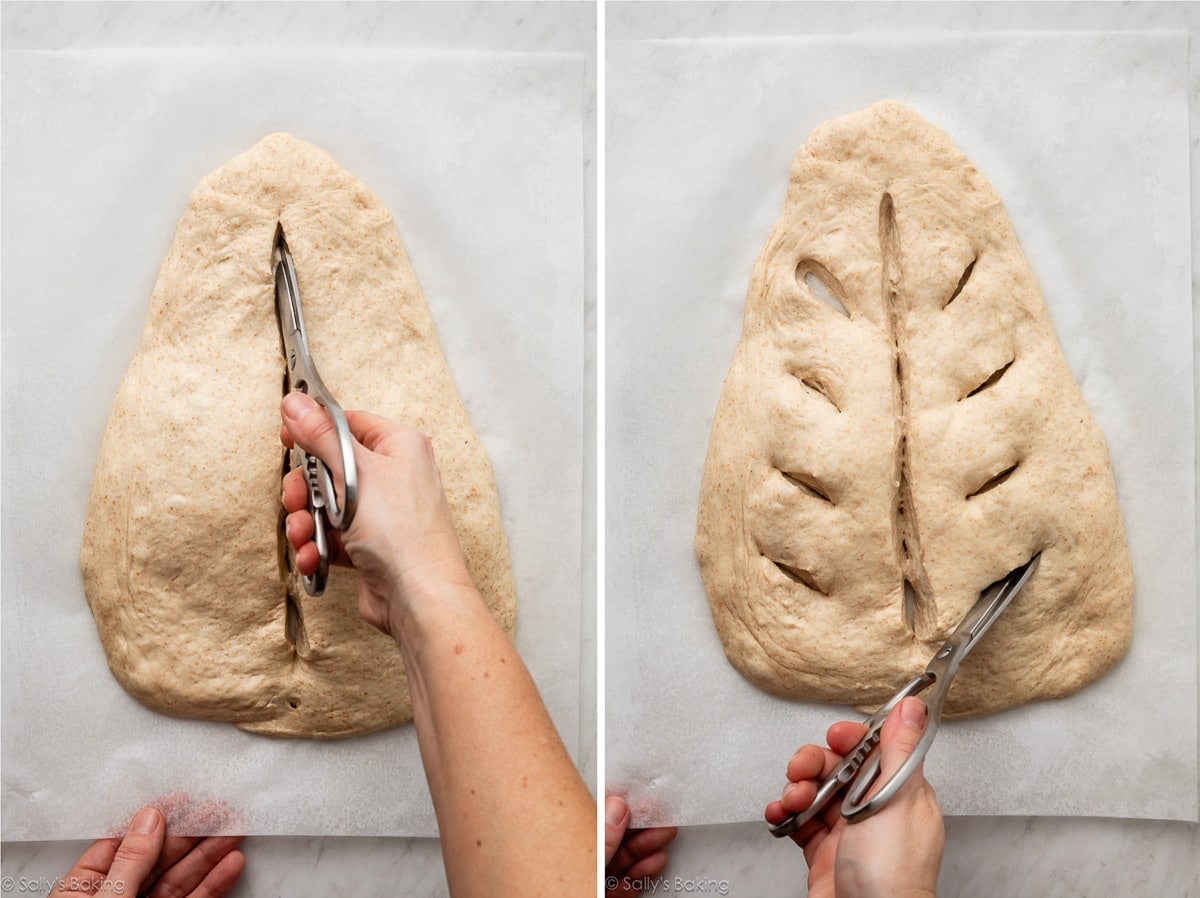
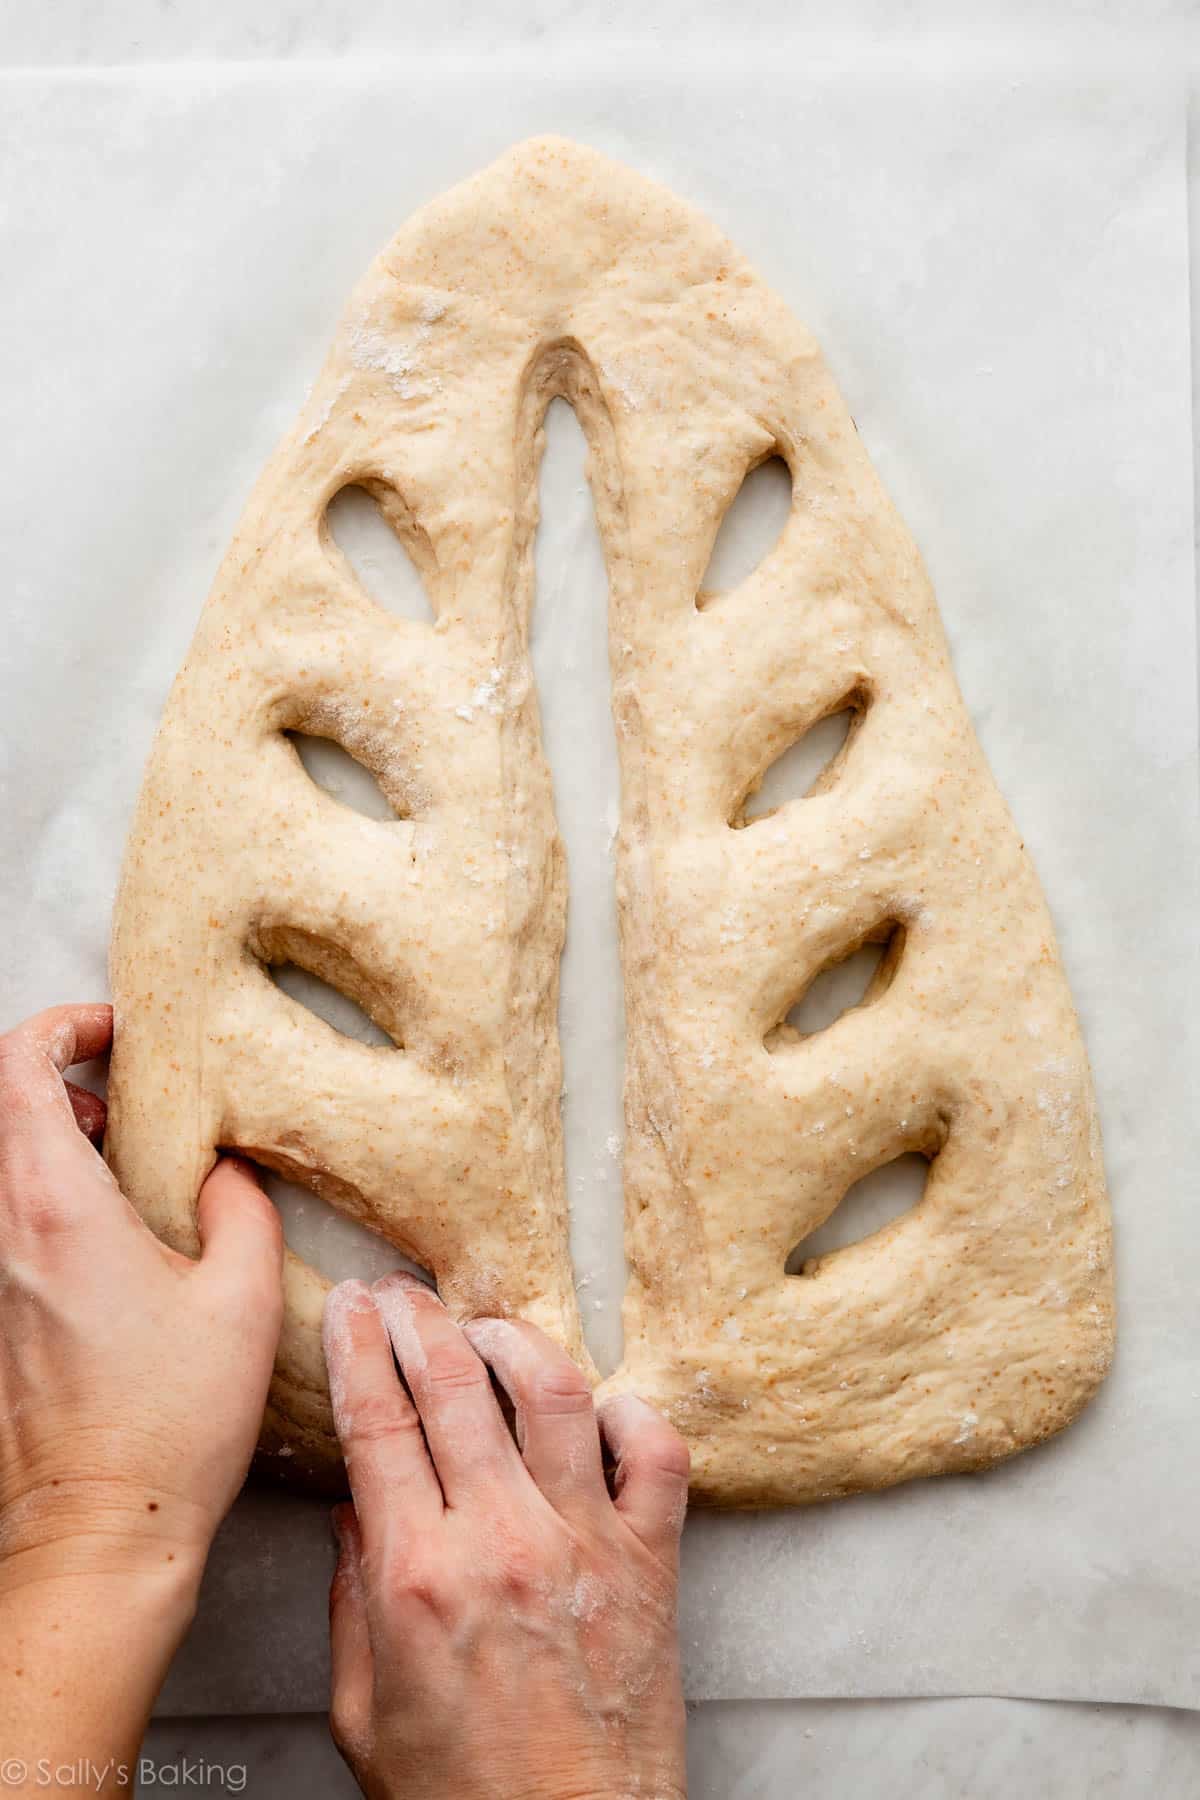
Using a sharp knife or kitchen shears, cut one long slash down the center (leave 1 inch at each end). Add 3–4 diagonal slashes on each side. Gently stretch the openings to create 2-inch gaps.
Rest another 30 minutes while the oven preheats to 450°F (232°C). Place a baking stone or an inverted baking sheet in the oven so it preheats as well.
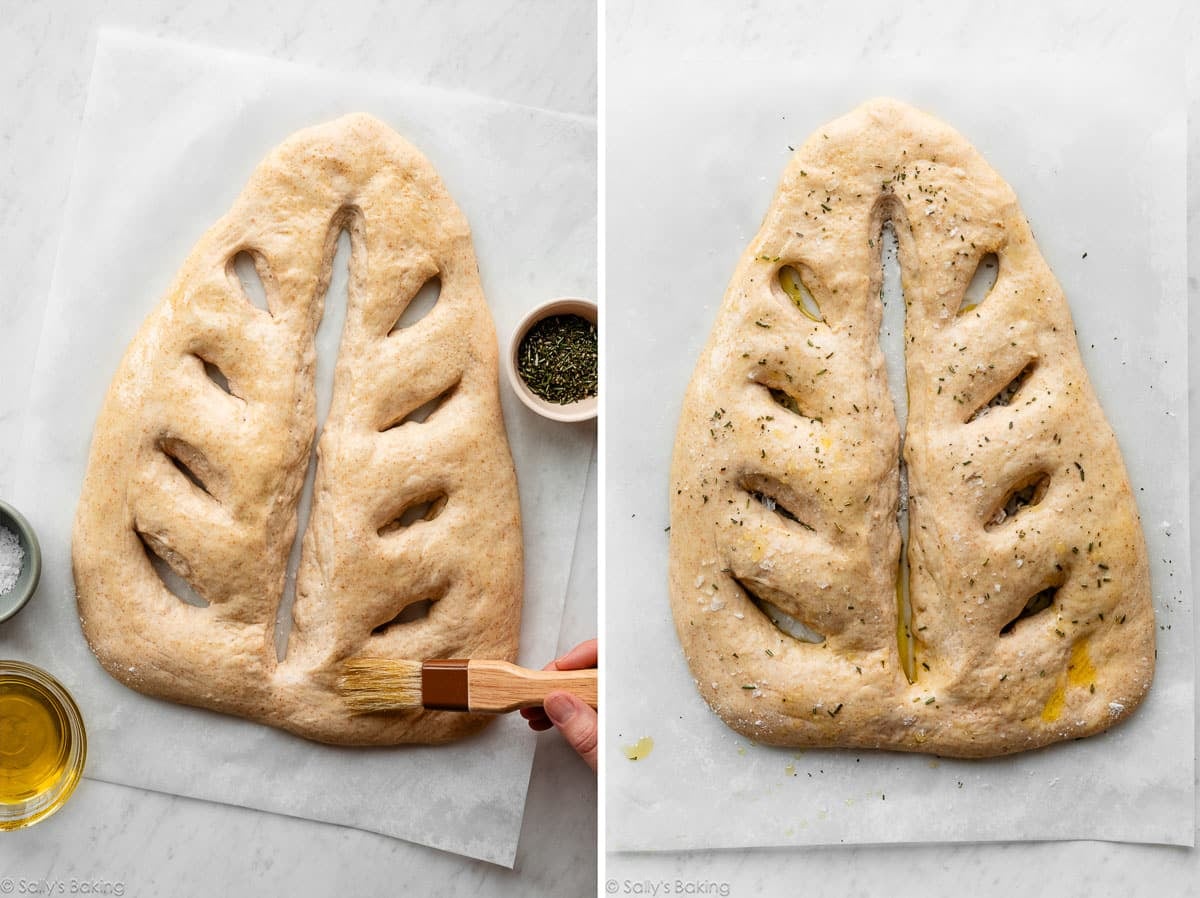
Brush dough with olive oil, and sprinkle with flaky sea salt and herbs, if desired. We typically use chopped fresh rosemary. Dried Herbes de Provence is delicious, too.
Slide the parchment (with the dough) onto the preheated baking sheet. Bake about 20 minutes, until deeply golden and hollow-sounding when tapped. Cool slightly, then serve warm!
Quick Lesson: Why Use a Preferment?
Preferment, sponge, biga, poolish, levain… what’s the difference? All preferments ferment a portion of the flour, water, and yeast ahead of time to improve flavor, structure, and shelf life. It’s a small step that makes a big difference.
Here’s a quick breakdown:
- Sponge: A flexible, yeast-based preferment often made a few hours (or overnight) before mixing the final dough.
- Biga (what we use here): A stiffer sponge (about 50–60% hydration). It creates deeper flavor and a stronger, chewier structure. It’s perfect for breads like ciabatta and today’s fougasse.
- Poolish: Equal parts flour and water (100% hydration). Thinner and more batter-like, producing a lighter, more open crumb.
- Levain (from a sourdough starter): Naturally fermented (from wild yeast), giving sourdough bread its signature tang and chew.
For this fougasse, the biga gives us complexity and structure without making the process complicated. A little planning ahead, and your bread tastes like it came from a bakery!
We haven’t tested this recipe with a sourdough starter, so are unsure of the results. The hydration percentage of your sourdough starter may be different than the biga, so your results may vary. If you’d like to try it, replace the biga with 1 cup, or 240g, of sourdough starter. Let us know how it goes!

Homemade Fougasse
- Prep Time: 45 minutes (hands-on)
- Cook Time: 20 minutes
- Total Time: 12 hours (includes preferment)
- Yield: one 12-inch loaf
- Category: Baking, Bread, Dinner
- Method: Baking
- Cuisine: French
Description
This homemade fougasse is a rustic French flatbread with crisp, golden edges and a chewy interior. Made with a very easy biga-style preferment for enhanced flavor and structure, this hearth-style bread is brushed with olive oil and baked at high heat to create its signature crackly crust. Shaped and slashed to resemble a leaf or stalk of wheat, fougasse is as beautiful as it is delicious! This extensively tested version uses bread flour for chew, a touch of whole wheat flour for depth, and olive oil for tenderness. Serve with olive oil and balsamic vinegar, alongside soup or salad, or as part of a cheese board.
Ingredients
Biga/Preferment
- 1 cup (130g) bread flour (I use this), spooned & leveled
- 1/8 teaspoon instant or active-dry yeast
- 1/2 cup (120g/ml) room-temperature water (about 70°F (21°C))
For the Fougasse
- 1 and 1/2 cups (195g) bread flour (spooned & leveled), plus more as needed
- 1/2 cup (65g) whole wheat flour (spooned & leveled)
- 3/4 teaspoon instant or active-dry yeast
- 1 teaspoon table salt
- 1/2 cup (120g/ml) room-temperature water
- 2 Tablespoons (28g) extra-virgin olive oil, plus more as needed
- optional, for topping: flaky sea salt and herbs, such as rosemary, thyme, or Herbes de Provence
Instructions
- Day 1: Make the Biga/Preferment: In a medium bowl, whisk together the bread flour and yeast. Add the water and mix with a silicone spatula until combined. Cover the bowl tightly with plastic wrap and let rest at room temperature for 8–24 hours.


- Day 2: Make the Dough: In a large bowl or the bowl of a stand mixer fitted with a dough hook, whisk together the bread flour, whole wheat flour, yeast, and salt. Add the biga, water, and olive oil. Mix until a shaggy dough forms. If you do not have a stand mixer, mix the dough together by hand with a silicone spatula.
- If using a stand mixer, knead with the dough hook on medium-low speed for 3–5 minutes, until the dough is smooth and slightly tacky. If mixing by hand, turn the dough out (all the shaggy bits!) onto a lightly floured surface and knead for 3–5 minutes, until smooth. The dough should be sticky but workable. If it’s very sticky, lightly flour your hands or the dough as needed. Avoid adding too much extra flour; the dough should remain slightly tacky.
- Drizzle or brush a little olive oil around the inside of the mixing bowl you were using. Place the ball of dough in the bowl, turning it to coat all sides of the dough in the oil.
- 1st Dough Rest: Cover tightly and let the dough rest for 45 minutes, and up to 2 hours. (See make-ahead instructions if you want to extend this time.)
- Stretch and Fold (1 Round): Visualize a clock on top of your dough. You’ll be folding it at the 12 o’clock mark. With an olive oil-greased spatula or lightly oiled hands, lift up the dough at 12 o’clock and gently stretch it up and pull it toward the opposite side of the bowl (6 o’clock), folding it down over the dough. Turn the bowl 90 degrees and repeat. Do this until you’ve gone around the bowl once, for a total of 4 folds. Flip the dough over so it’s seam side down.
- 2nd Dough Rest: Cover tightly and let the dough rest for 45 minutes, and up to 2 hours.
- Shape the Dough: Turn the dough out onto a piece of parchment paper and use your fingers to press it into a rounded triangle or egg shape, (roughly) 12 inches long by 6 inches wide at the base.
- 3rd Dough Rest: Cover lightly and let rest for 30 minutes, and up to 2 hours.
- Cut the dough: Using a sharp knife, pizza wheel, or kitchen shears, cut the dough lengthwise down the center, stopping about 1 inch from each end. Then make 3 or 4 diagonal cuts on each side of the center cut. To create a leaf-like appearance, use your fingers to gently stretch out each cut until the holes are about 2 inches wide.


- 4th Rest: Cover lightly and let rest for 30 minutes, and up to 1 hour. Meanwhile, preheat the oven to 450°F (232°C). If you have a baking stone, preheat it on the center rack. Otherwise, place a large flat baking sheet, or a rimmed baking sheet upside down, on the center rack to preheat.
- Brush the fougasse with olive oil, and sprinkle with herbs and/or sea salt, if using. Carefully slide the fougasse, along with the parchment paper, onto the preheated baking stone or baking sheet.
- Bake the fougasse until golden brown, about 20 minutes. If you give the top of the bread a tap, it should sound hollow. For a more accurate test, the bread is done when an instant-read thermometer reads the internal temperature as 190–200°F (88–93°C).
- If desired, brush the warm bread with more olive oil. Serve warm with dipping oil and balsamic vinegar, alongside soup or salad, or as part of a cheese board.
- Fougasse is best the day it’s baked. Store leftovers covered at room temperature for up to 2 days. If desired, reheat in a 350°F (177°C) oven, uncovered, for 5–8 minutes to crisp back up.

Notes
- Make-Ahead Instructions: There are a few ways to get ahead. First, the biga (step 1) can sit at room temperature for up to 24 hours before using. Second, after the first 45-minute dough rest in step 5 (before the stretch-and-fold), you can cover the bowl tightly and refrigerate the dough for up to 24 hours. When ready to continue, let the dough sit at room temperature for about 30–60 minutes before proceeding with the stretch-and-fold and shaping.
- Freezing Instructions: The best way to freeze this is to freeze the baked bread. Let it cool completely, then wrap tightly and freeze for up to 3 months. Thaw at room temperature and refresh in a 350°F (177°C) oven, uncovered, for 5–8 minutes to crisp it back up.
- Special Tools (affiliate links): Kitchen Scale | Glass Mixing Bowls | Stand Mixer | Silicone Spatula | Baking Sheet | Pastry Brush | Instant-Read Thermometer | Cooling Rack
- Flour: For absolute best flavor and chewy texture, I strongly recommend using bread flour. You can use a 1:1 substitution of all-purpose flour in a pinch with no other changes to the recipe; however, the dough may not be as strong, and may not hold shape as well.
- Whole Wheat Flour: This small amount adds depth of flavor and subtle nuttiness without making the bread dense. You can replace it with additional bread flour if needed; the texture will be slightly lighter and less hearty. I don’t recommend increasing the whole wheat flour beyond 1/2 cup, as too much can make the fougasse dry and dense.
- Yeast: You can use instant or active-dry yeast, but I highly recommend an instant (aka “rapid rise” or “quick rise”) yeast. If using active-dry yeast, there are no changes needed to the recipe. Reference my Baking with Yeast Guide for answers to common yeast FAQs.
- Optional Add-Ins: In step 2, when you mix the preferment with the dough ingredients, you can add up to 3/4 cup of chopped olives, sun-dried tomatoes, or shredded cheese. Avoid adding too much, which can weigh the bread down and affect shaping. You can also add 2 teaspoons chopped fresh herbs, or 1 teaspoon dried herbs.
- Can I Use a Sourdough Starter for This Recipe? To rely only on a sourdough starter and not yeast, I recommend looking for a specific sourdough fougasse recipe. However, if you’d like to try it, replace the biga with 1 cup (240g) of sourdough starter. Depending on the hydration percentage of your starter, results may vary.


Reader Comments and Reviews
Such an easy to follow recipe! It turned out very well and is so beautiful.
The fougasse bread was a lot of fun to make! And so pretty when baked…the crust was a little chewy and the inside soft…perfect!
Made this for a party and it was devoured! Everybody loved it. The recipe was easy to follow–it does require attention, though, with lots of rests.
I never heard of Fougassa but after seeing the recipe on Sallys Challenge Page I had to try. I always read the step by step instructions first. Glad I did since the biga is made in advance. There are a lot of steps but they are easy with Sallys guidance. I did olive oil and dried rosemary. It was so good. Chewy with a nice crust.
Delicious! Turned out wonderfully. I had to add a lot of extra flour when kneading to get the dough to come together on the dough hook, although it was a humid weekend. Without the usual video, I wasn’t sure what the consistency of the dough should be like but figured I needed to get it to pull away from the walls of the bowl as we had for past bread recipes. I’m giving it a four because I think some description is lacking which might make it difficult for a novice bread maker to troubleshoot, but in my heart it’s a five because I knew what to do to solve the problem because of participating in six years of your challenges!
Turned out good. Not sure it was worth the time. Maybe next time I’ll try adding olives, sun dried tomato and Parmesan to the dough.
Worth the wait !
This recipe was so much fun to make. I use the sourdough suggestion, and added olives. All the ladies in my Bible study group loved it. Thank you.
Easy enough for a novice bread baker! My whole wheat flour had some critters in it, so I subbed in pumpernickel rye flour and added a bit more water. Though dense and chewy, my CIA baking school graduate partner thought it was good, and both kids gobbled it up!
This is so easy and highly delicious! Thank you for the step by step instructions.
This bread is delicious! Dipped in olive oil, garlic, and balsamic vinegar became a meal.
This is so easy, and highly delicious! Thank you for the step by step instructions.
While the recipe is time-intensive, it’s not particularly labor intensive. It was a great recipe for a snowy 24 hours, and was great with the soup I made for the snow day, as well as some charcuterie. I topped it with salt and herbs de Provence, and it was absolutely delicious!
A perfect bread! Complex in flavor but not fussy to make. The directions are clear the result is unique and delicious!
Excellent! Easy to make.
Yum! This was so popular when we took it to a get-together
The dough came together very well. It was fun to shape and design. It had great flavor, too! I topped with Italian Seasoning since I had that on hand. It paired well with the soup I had planned for dinner. Thanks, Sally!
Delicious! Was left wondering what to look for with the dough rest times being a wide range (45-120 mins). How to know when to move onto the next step? But recipe turned out great with ~60 for each rest.
My husband and did this challenge together. The instructions were easy to follow and the dough came together well. It tastes delicious!
I have always wanted to make Fougasse, but afraid to do so. Sally really broke down the recipe into very easy steps. In fact , this is one of the easiest bread recipes I’ve ever made! I loved how the bread can be made over a couple of days, which is great.If you’re a busy person. It was easy to prepare the recipe on a friday night and bake the bread on saturday afternoon for dinner. The bread is so tasty and very airy. I followed her instructions for verbatim and I think next time I might try it with less or no wheat flour to see how that changes. Overall , a recipe that I will keep in my wheelhouse , and continue to make!
Really delicious! Easier to make than I expected. I loved the crust— it definitely is best served warm
As the others said, don’t be intimidated by this recipe’s length; it takes one day and a half but the steps are truly easy. I have a healthy respect for any recipe involving leavening, yet this turned out great. I added chopped walnuts into the dough at Step 2, glazed with olive oil and sprinkled with salt, origano and rosemary before baking, then ate it with a simple oil and paprika dip while still warm. So comforting and cosy!
First time making bread of any kind. My daughter told me it was FABULOUS!
Will be making this again!
Beautiful and fun to make. So good for dipping!
Haven’t broken into it yet, but it looks great and smells divine! And even though the recipe looks a bit fussy, it’s easy with such good directions. Looking forward to a chunk of it with tonight’s broccoli soup dinner!
Easy to make and taste delicious!
After seeing this on the Great British Baking Show a few years back, I made Paul Hollywood’s version a couple of times, so I was interested to try this different recipe. His does not call for a preferment or whole wheat flour, but I still like the flavor of both. Sally’s recipe probably gets the edge because I really liked the flavor from the whole wheat flour. Upon first reading the recipe, this seemed like it was going to be hard to time/kind of a lot of steps… but it was very easy. I made the preferment the day before and then just followed all the steps the next day. It was actually a much more flexible recipe than I originally thought, and really makes for something different to serve with dinner.
This was my first preferment bread. I was surprised by how easy it was and how well it turned out!
This was delicious! It was a perfect pairing with our soup and reheated great. The process was intimidating, but super easy to follow and not hard to do. I will be making this again.
This recipe was very easy to follow. I added sun dried tomatoes and feta cheese to pair with our Greek dinner. The bread was quite good. I think I would prefer it without the wheat flour….next time I will give that a try.
This is probably one of the hardest recipes I’ve done from Sally’s Baking! It is a lot of waiting, which is not awful, but it ends up taking quite a bit of time. I also think I messed up somehow because mine ended up with a relatively thick crunchy exterior. I would definitely be willing to try it again to see if I could fix where I went wrong, and it had the potential to look really pretty, but it didn’t end up being my favorite recipe.
Excellent, detailed instructions. Thank you for making an intimidating recipe, simple and delicious!