

Many beginner bakers are SHOCKED at how easy creme brûlée is! You only need 6 ingredients, and if you follow my success tips, you’ll be gifted with the smoothest, creamiest dessert ever.
One reader, Madison, commented: “Made this recipe for my mother on Mother’s Day, and she LOVED it! Creme brûlée is her all-time favorite and this recipe did more than curb her craving. Saving this recipe for many more occasions to come! It might just be a new dessert staple in this household—it’s incredibly easy to make! ★★★★★”
Another reader, Mary, commented: “My husband keeps inviting people over to our house for dessert so I can make this for them. I asked for a torch for Christmas so I could learn how to make it. This is the second recipe I’ve tried, and it’s a keeper. Tonight will be my 3rd time making this recipe since Valentine’s Day. Save this recipe FOREVER. ★★★★★“
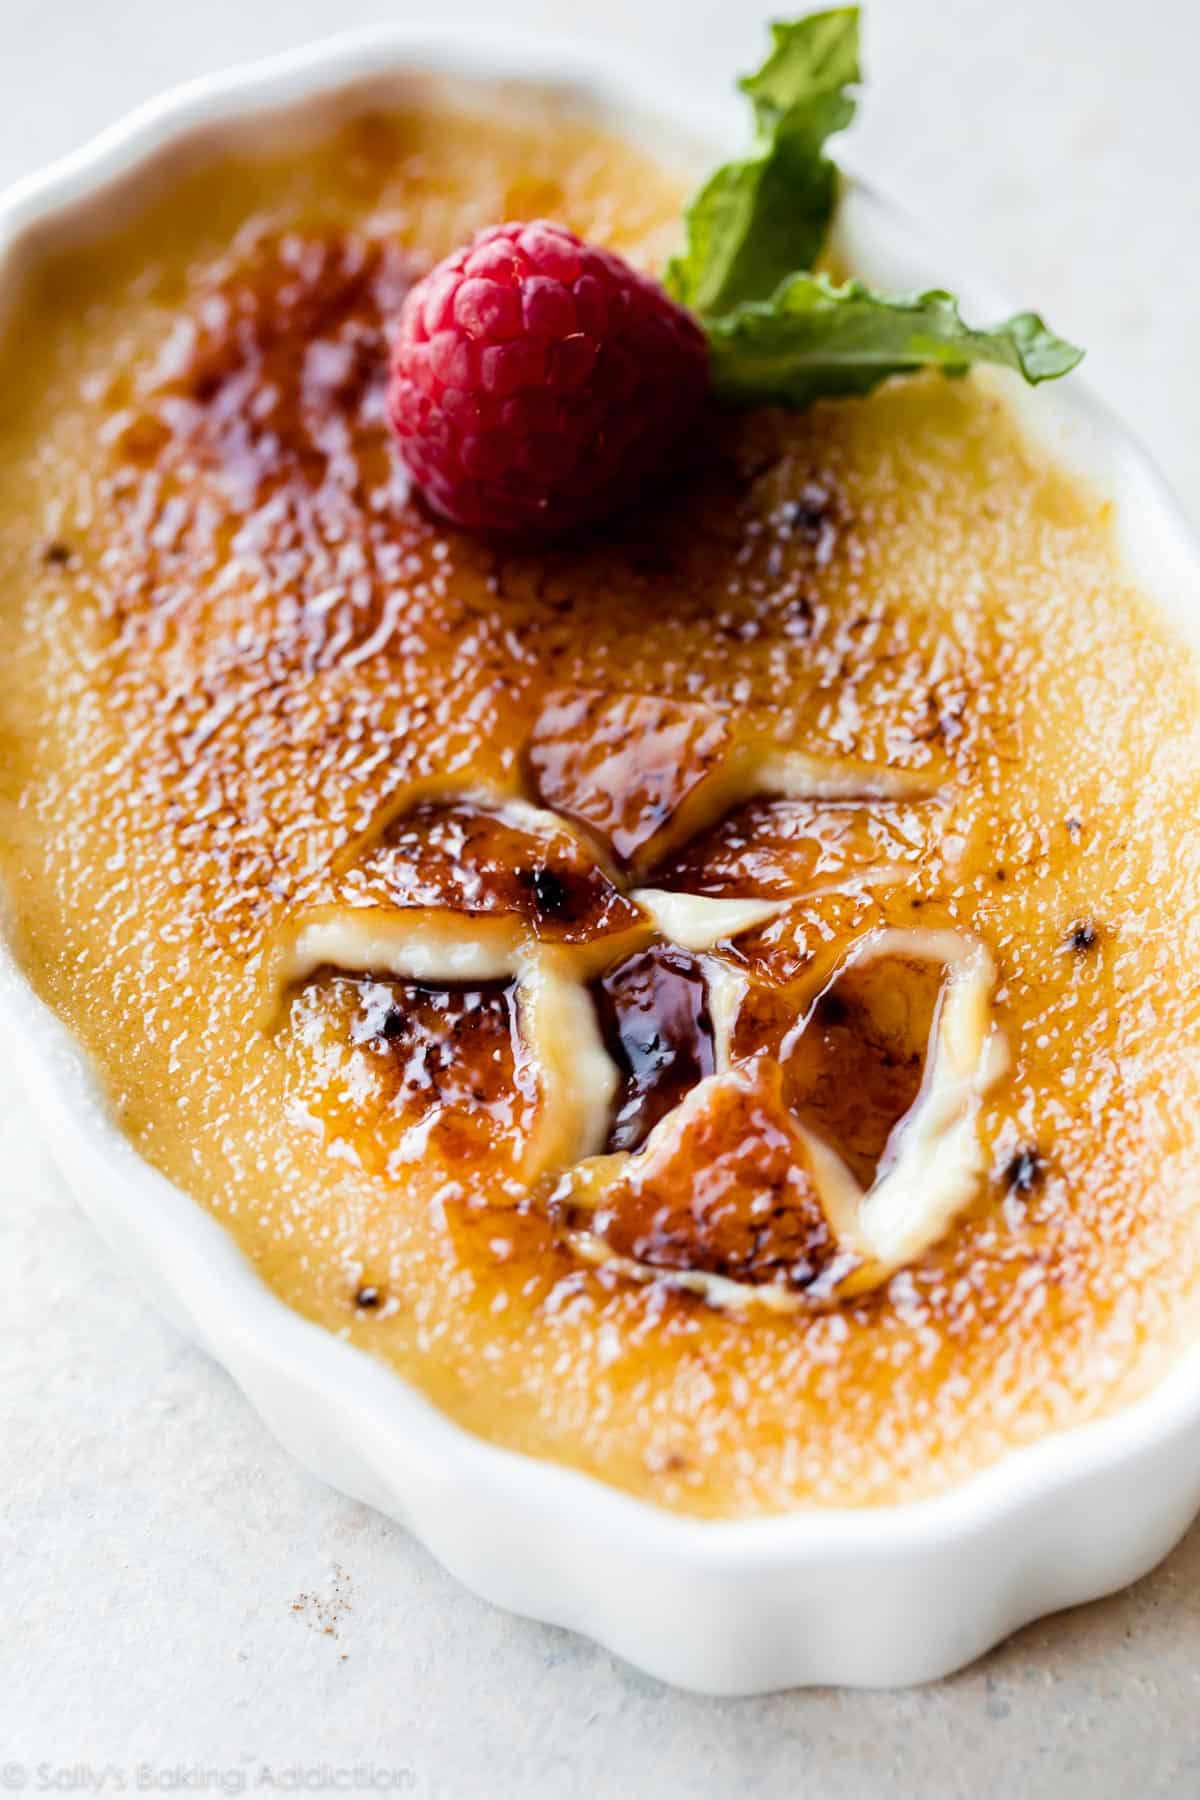
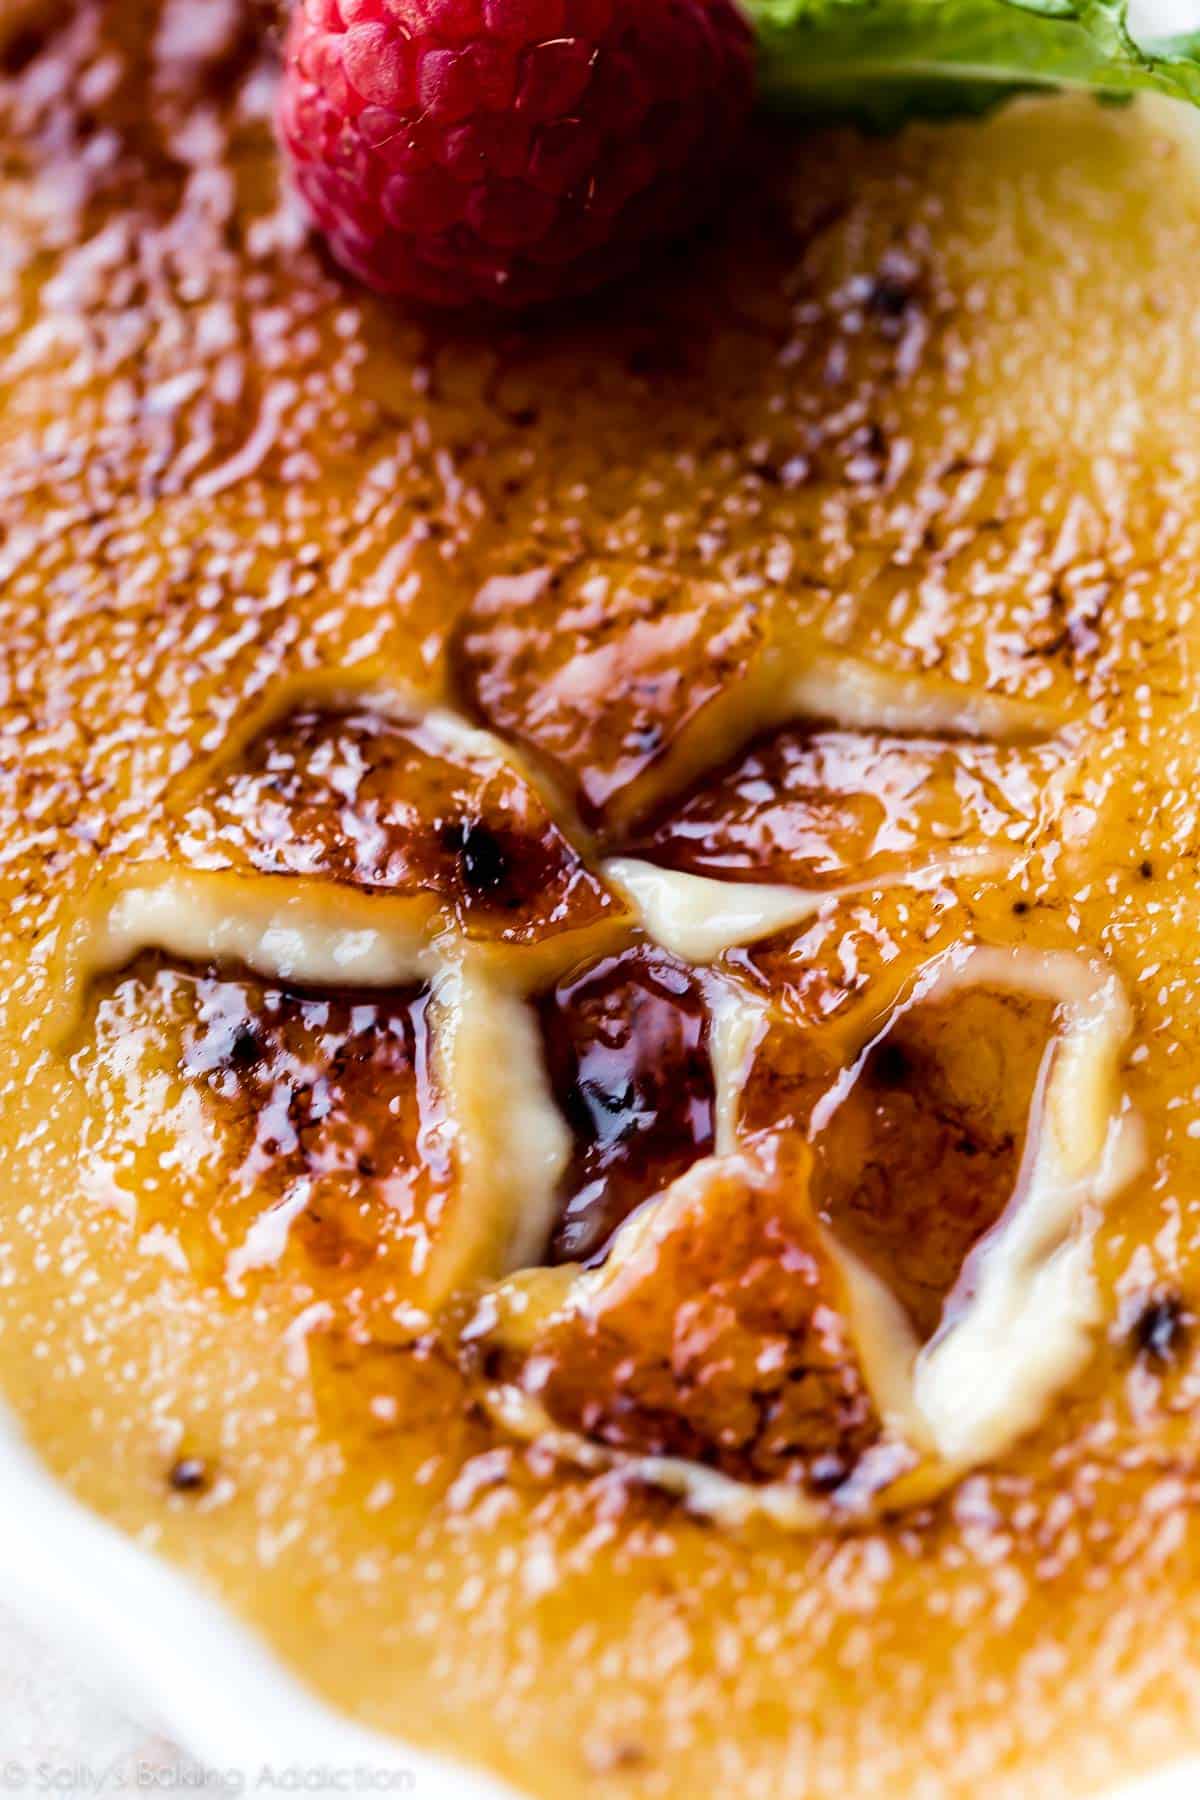
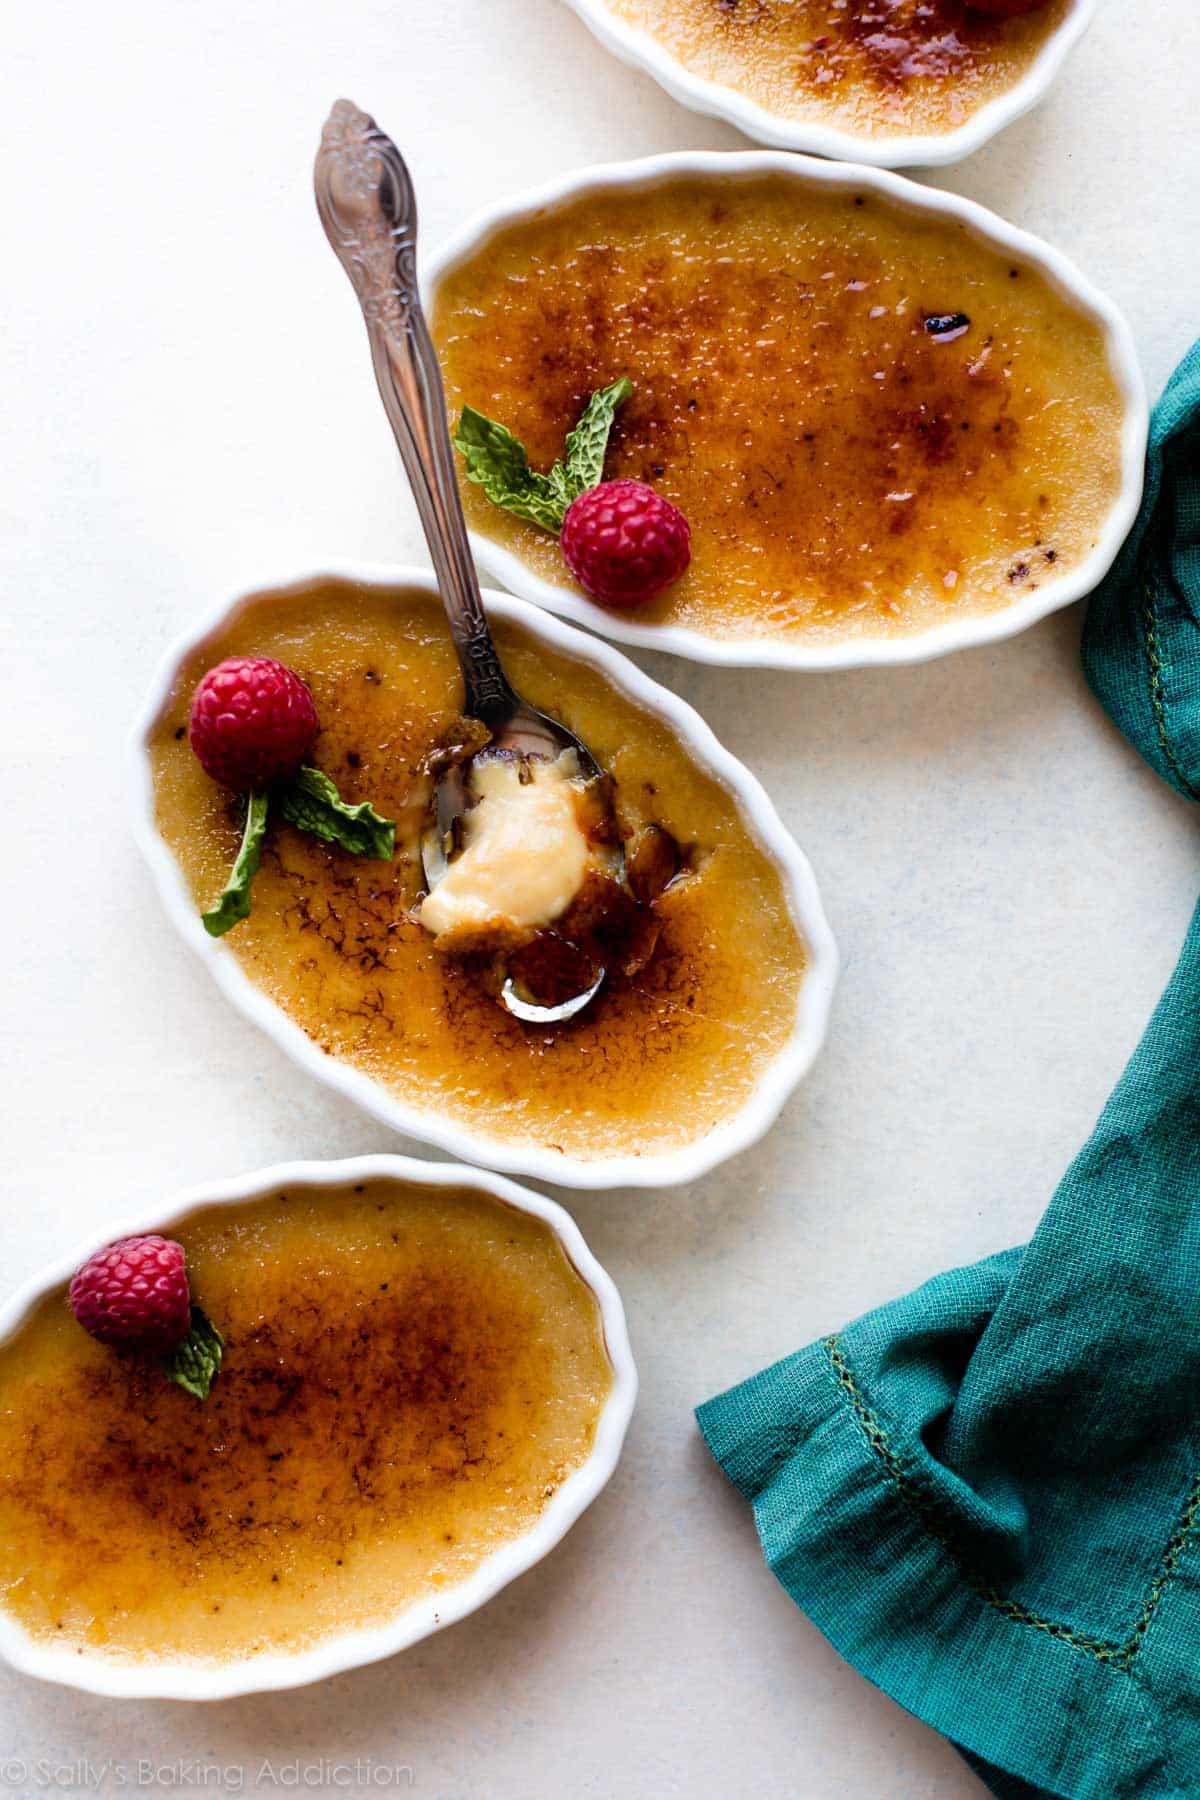
Flecked with espresso and flavored with pure vanilla, this is my favorite crème brûlée recipe. The brilliantly creamy custard can only be reached by cracking through a crisp caramelized sugar ceiling. The textural difference between the two layers is unbelievable and separates this dessert from every other. Simply put, crème brûlée tastes like luxury and has always been a baking bucket list recipe for me, and for good reason.
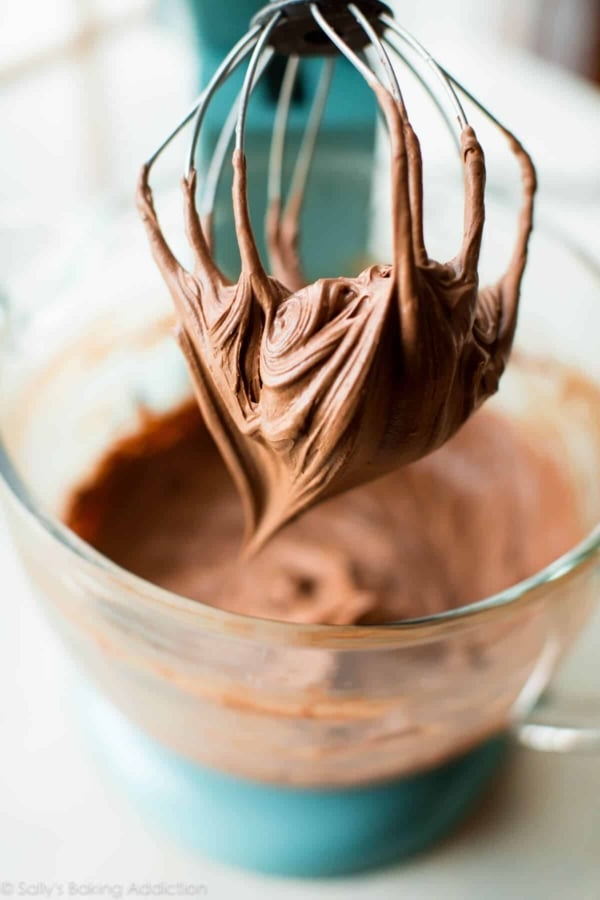
The GREAT news is that you don’t need to dine at a fancy restaurant for the best crème brûlée experience. Not many realize how easy it is to make at home, especially for occasions like Valentine’s Day, Mother’s Day, Father’s Day, anniversaries, etc. Like crème brûlée, homemade chocolate mousse is also surprisingly approachable in your home kitchen.
Overview: How to Make Crème Brûlée at Home
The full printable recipe is available below, but let me walk you through the process so you can understand the steps before beginning.
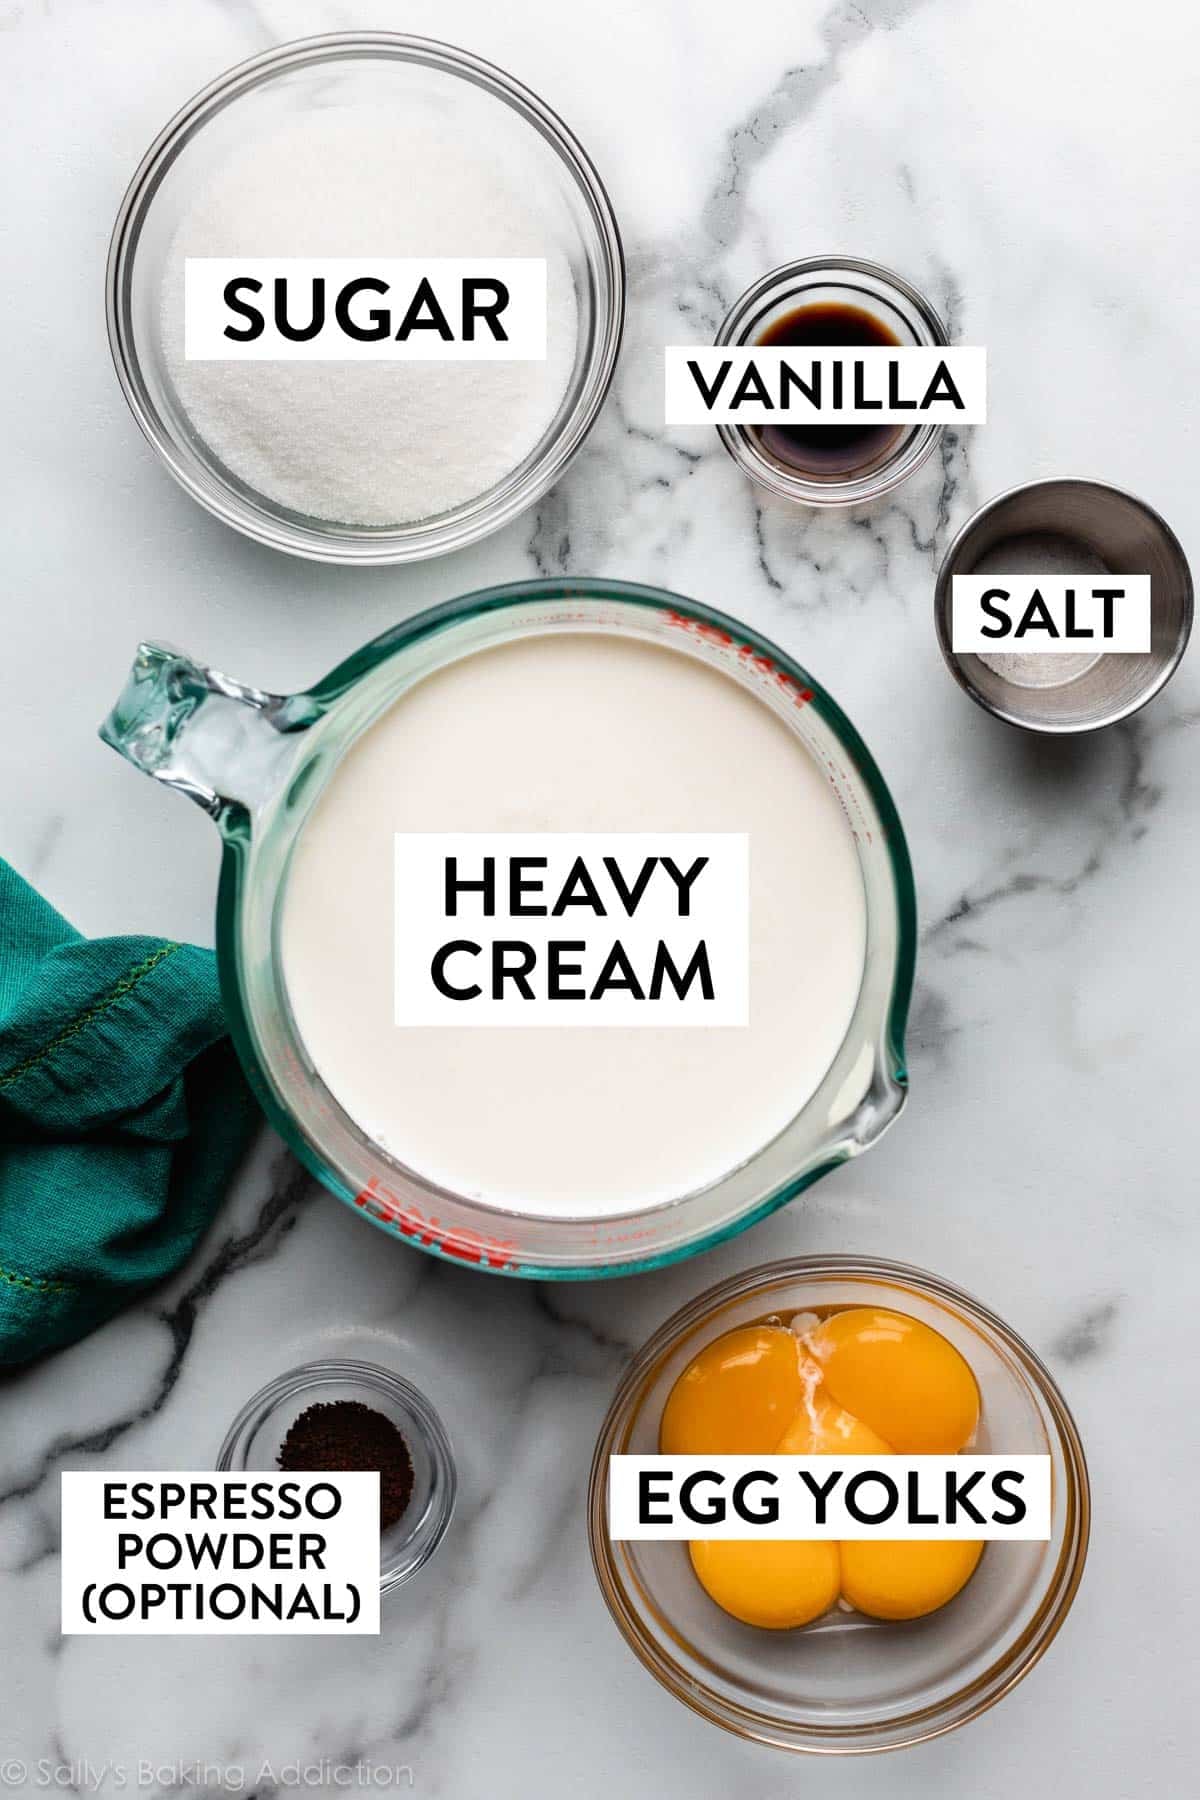
- Start with kitchen staples: heavy cream, sugar, egg yolks, salt, vanilla. I like adding a little espresso powder for added flavor. What a difference it makes! I know many may not have espresso powder at the ready, so it’s an optional ingredient. But trust me when I say that espresso powder makes a good crème brûlée the best crème brûlée. You can find espresso powder in the coffee aisle at the grocery store or online.
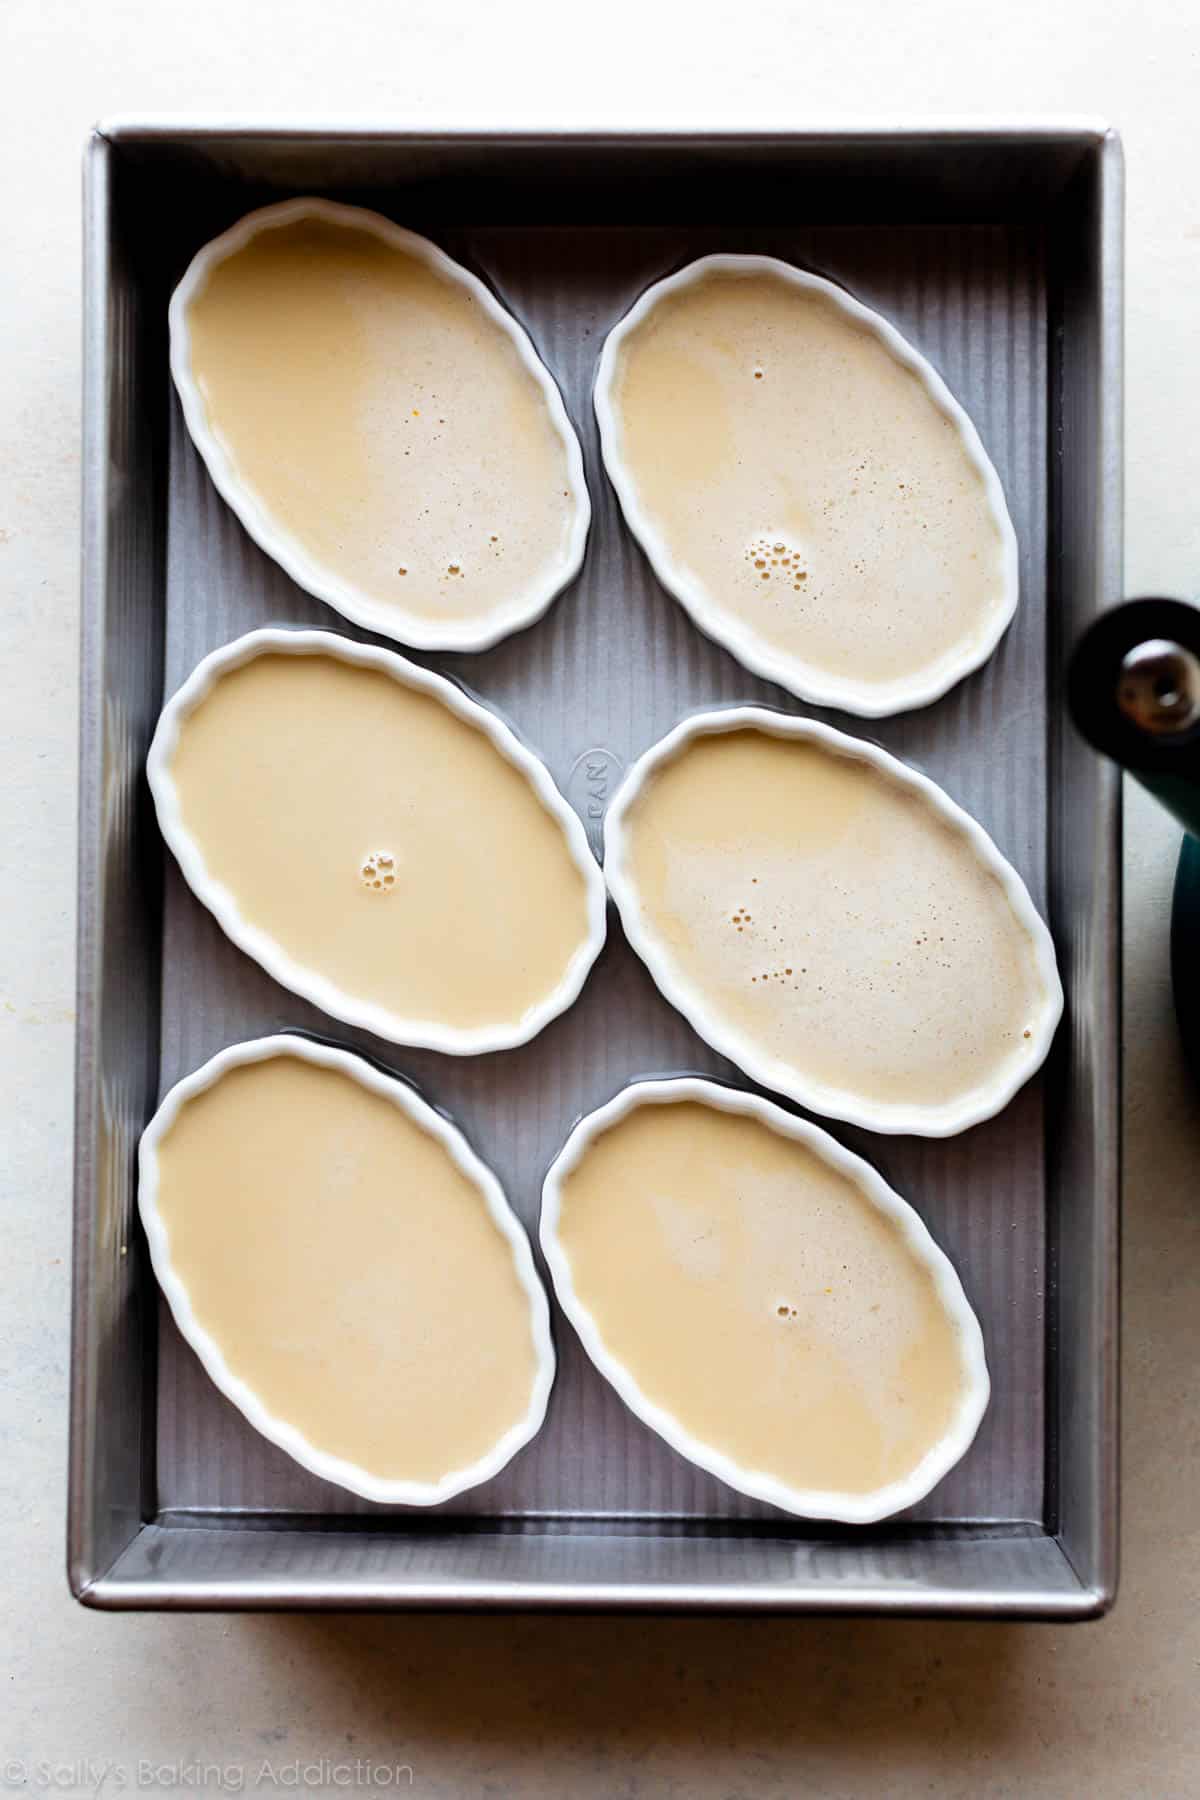
- Cook: Heat the heavy cream + salt on the stove. Off heat, add vanilla to flavor. Whisk the egg yolks and sugar together. Temper the egg yolk mixture by slowly whisking in some of the warm heavy cream. Pour into ramekins and bake. Let them cool down, then chill for at least 4 hours or even overnight. (Overnight makes crème brûlée an AWESOME make-ahead dessert, and your guests will be entertained when you whip out that kitchen torch for the topping!)
- Top with: sugar, then caramelize it under the broiler or with a kitchen torch.
That’s it… you’re done. Yes, it really is this easy.
Heavy cream and egg yolks are the key ingredients in crème brûlée. It took a little bit of testing to figure out the best ratio, but I loved 5 egg yolks with 3 cups of heavy cream the most. This produces a VERY creamy and lush crème brûlée. Save the leftover egg whites and add them to omelets and scrambled eggs the next few mornings.
Why are we using just the egg yolks, and not whole eggs? Egg whites help set a firmer pudding texture, but with crème brûlée you want a silky-smooth creamy texture, and the fat in egg yolks provides that. We use this same yolks-only trick for the custard in butterscotch pie and banana cream pie, too.

Crème Brûlée Success Tips
- Temper egg yolks: If you’ve never done it before, tempering egg yolks is nothing to fear—all you’re doing is slowly raising the temperature of the egg yolks so they don’t scramble. Whisk *some* of the warm heavy cream into the egg yolks + sugar, then whisk it all into the pot of warm heavy cream. You can watch me temper the egg yolks in the video tutorial.
- Should I strain it? Straining the custard before cooking it is, in my opinion, optional. If you notice the custard is thick with any lumps, definitely use your sieve to strain it before baking.
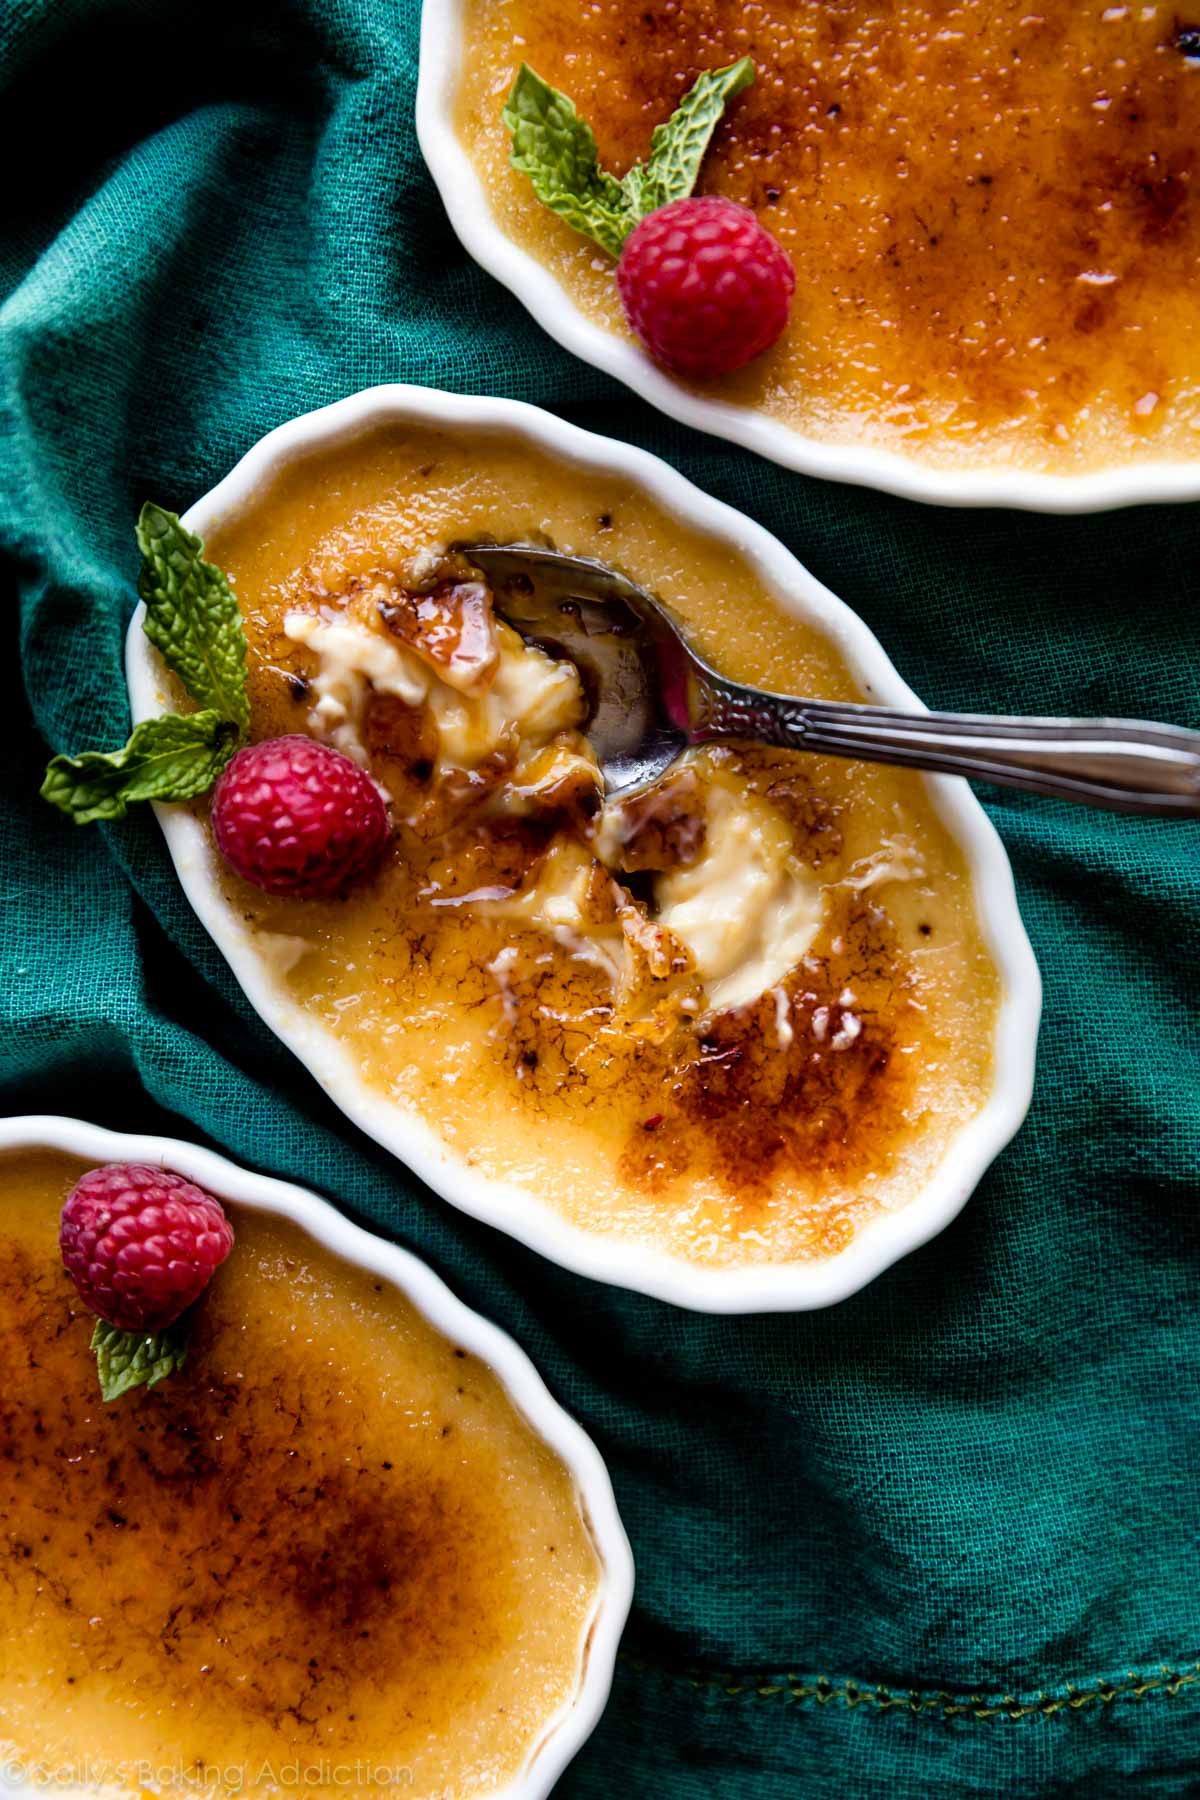
- Shallow ramekins: Serve crème brûlée in individual ramekins. The small ramekins ensure the custard cooks evenly, though you could use a large wide ceramic dish instead. See my recipe note below. I love using individual wide, shallow ramekins so there is more surface area for the caramelized sugar! I suggest these oval ramekins or these circle ramekins. (This recipe yields about 8 crème brûlées so you’ll need 2 sets of the oval ramekins OR you can bake the extra custard in other ramekins you may have.)
- Water bath: Place the ramekins in a large baking dish (I used a 9×13-inch baking pan), pour the custard in each, then fill the pan with hot water. The water bath creates a moist and humid environment for the crème brûlée, which is imperative for their texture. (Same story for lemon pudding cakes.) A regular hot oven typically produces rubber-y tasting crème brûlée with cracked surfaces.
- Best bake time: You will likely over-bake the crème brûlée your first time. That’s what my friend told me before I began my crème brûlée adventures. They key, he said, is to look for a jiggly center. The edges will be set, the centers will jiggle like jello. (Anyone ever watch My Best Friend’s Wedding with Julia Roberts? Crème brûlée can never be jell-o. YOU could never be jell-o.) For a more accurate answer, use an instant-read thermometer. They’re done when the thermometer registers 170°F (77°C).
By the way… my friend was right, I over-baked them my first try. The next few tries, pictured in this post, are texture perfection. You want that creamy custard. Learn from my mistake and take those custards out of the oven early.
Burnt Sugar Topping
Crème = cream. Brûlée = burnt. Burnt cream. So as many times as I say “caramelized sugar” it’s really burnt sugar. It’s the CRUNCH on the CREAM and it’s so so tasty!
After the custards bake, cool, and chill, it’s time for that special finishing touch. All we’re doing here is sprinkling the surface with granulated sugar. Some recipes insist on superfine sugar for the topping and some recipes call for coarse sugar. I tested the recipe with both, but ended up just using regular granulated sugar—the same sugar we’ll use in the custard. It produced a thick and sturdy caramelized sugar topping, just the kind we want!
One important note: Cover the entire surface with a thin layer of granulated sugar. No exposed custard. When applied to heat, the cooled custard will curdle.
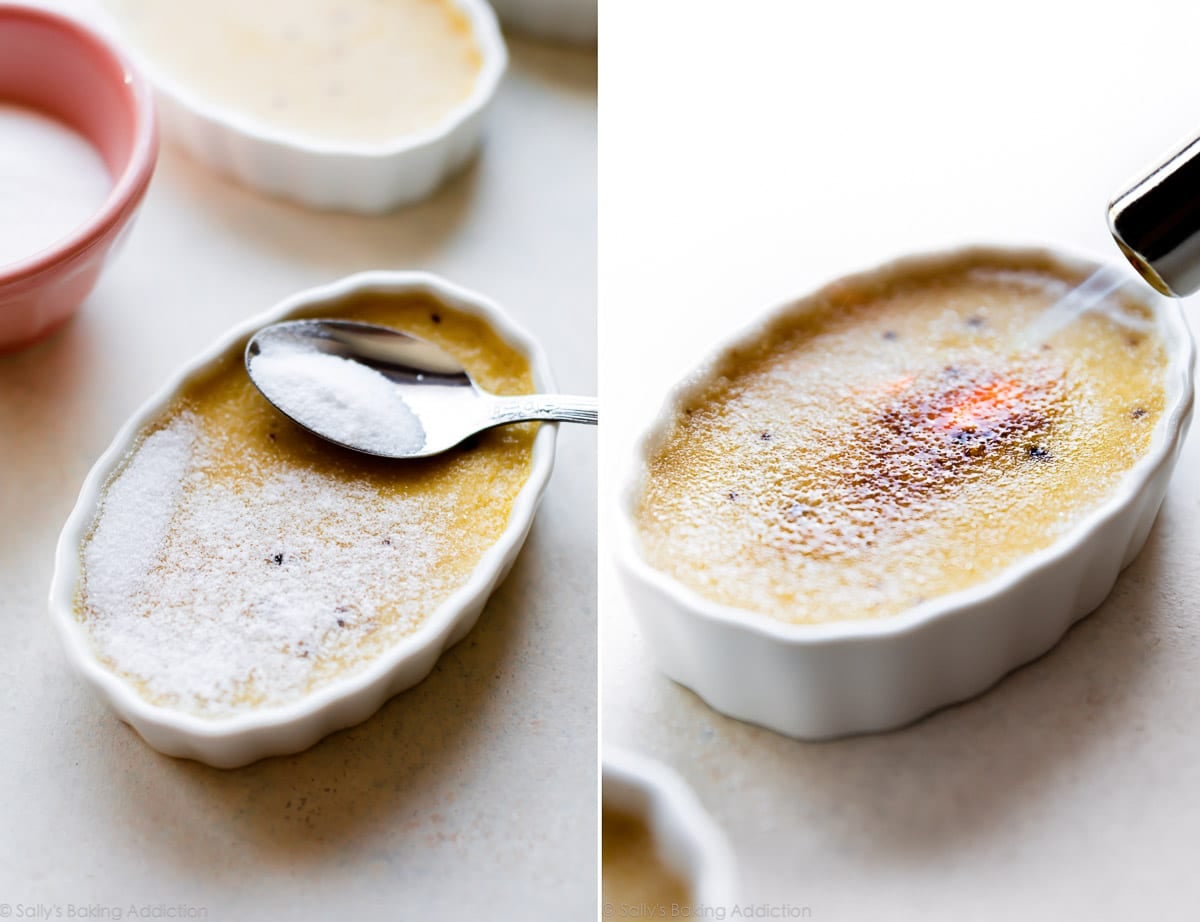
Kitchen Torch or Oven Broiler?
For caramelizing, you need intense heat. A kitchen torch is magic. Kitchen torches are surprisingly inexpensive and the couple times a year that I need it, I’m glad I have one. It really makes a difference. Other recipes where I use my kitchen torch:
See the recipe Notes (below the recipe) for using the oven broiler instead.
Burnt sugar on creamy custard = simple beauty and decadence. Doesn’t this make you feel fancy? We should be wearing pearls and eating our crème brûlées with crystal spoons while sitting on our gold thrones calling each other on our diamond-encrusted phones talking about how fancy we are.
Bonus: Crème brûlée is always a favorite for those in need of gluten-free dessert recipes!
Print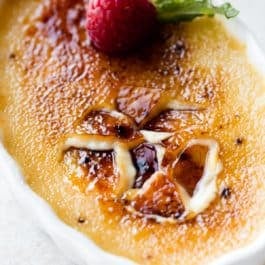
Easy Crème Brûlée
- Prep Time: 15 minutes
- Cook Time: 35 minutes
- Total Time: 4 hours, 50 minutes
- Yield: serves 8
- Category: Dessert
- Method: Baking
- Cuisine: French
Description
This is the BEST and creamiest crème brûlée recipe! Flecked with espresso and vanilla, you only need 6 simple ingredients and they’re ready to bake in only 15 minutes.
Ingredients
- 8 shallow 4-ounce oval ramekins
- 5 large egg yolks
- 3/4 cup (150g) granulated sugar, divided
- 3 cups (720ml) heavy cream or heavy whipping cream*
- 1/2 teaspoon espresso powder (optional but recommended)*
- 1/4 teaspoon salt
- 1 and 1/2 teaspoons pure vanilla extract*
Instructions
- Preheat oven to 325°F (163°C).
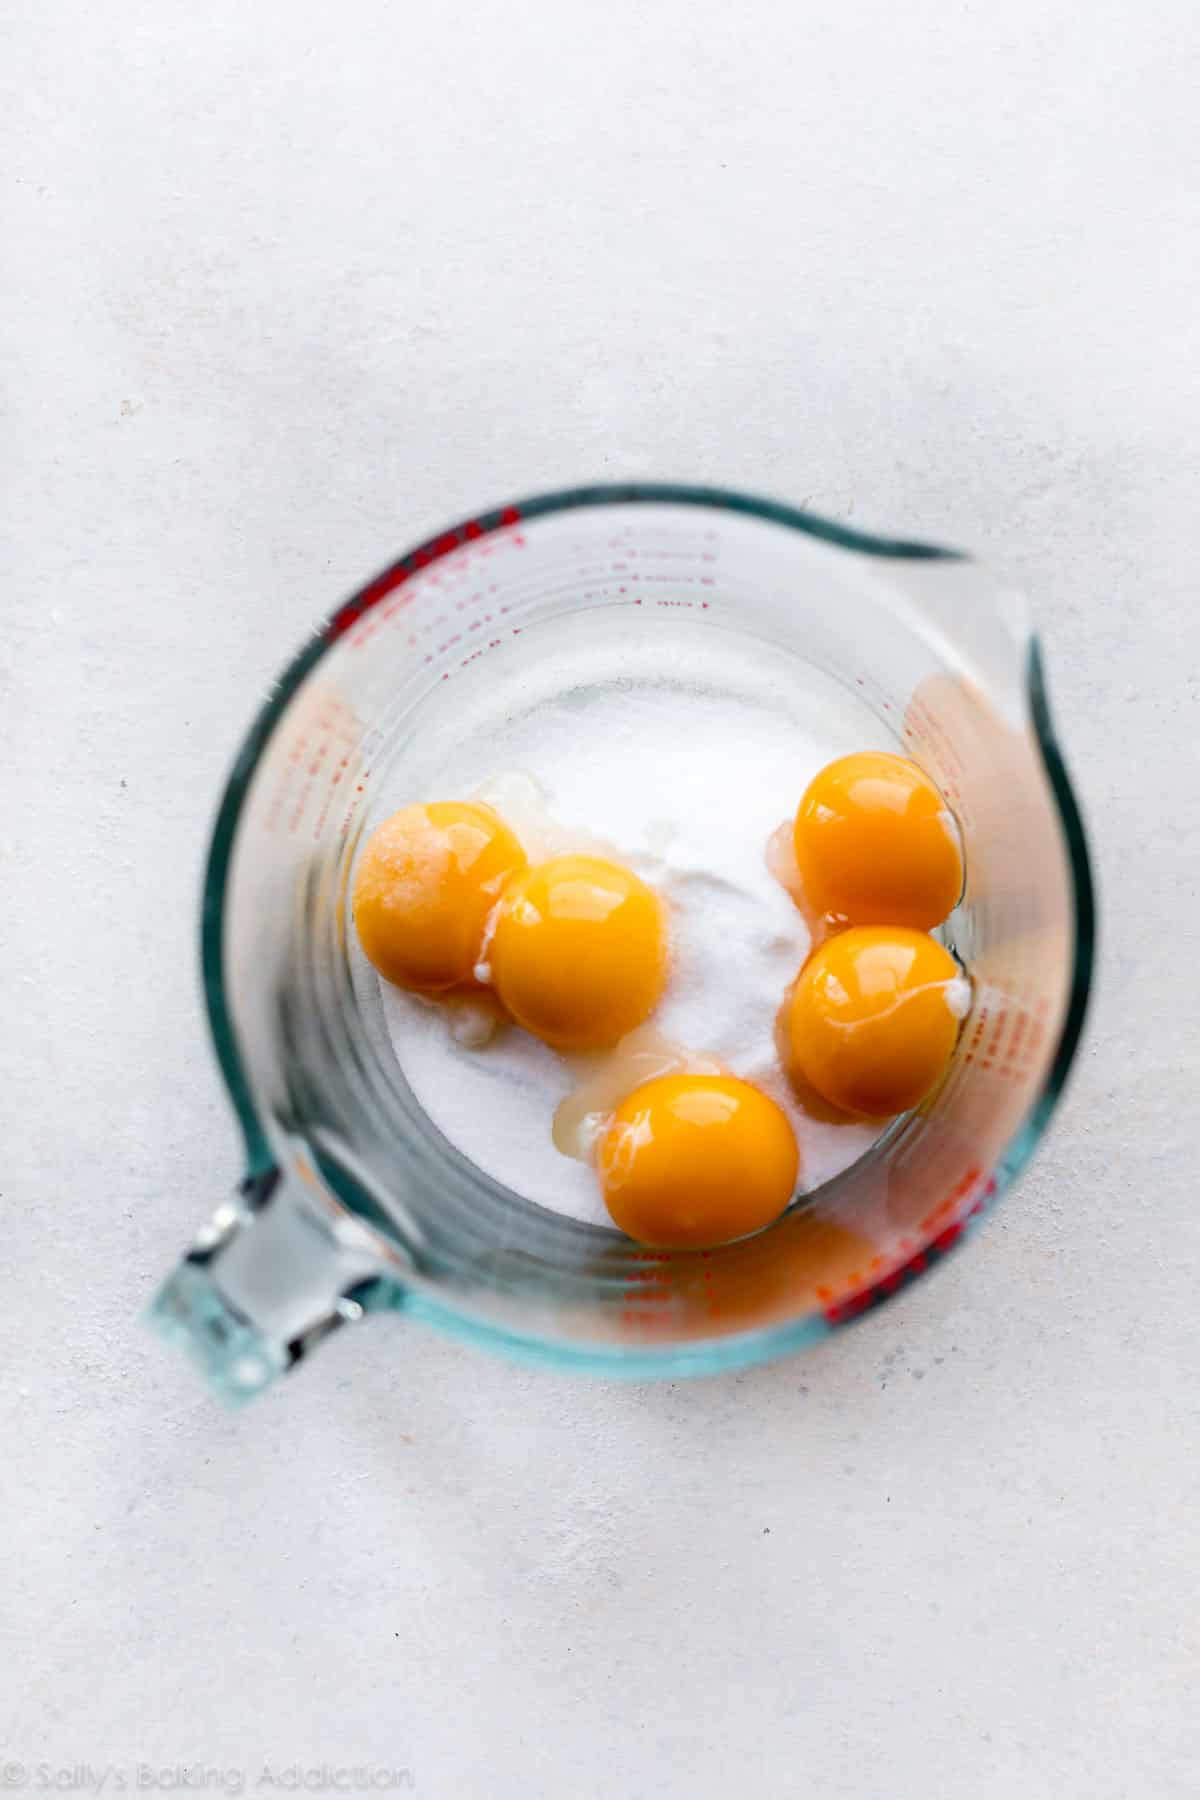
- Whisk the egg yolks and 1/2 cup (100g) of granulated sugar together. Set aside. (At this point or before you temper the egg yolks in the next step, bring a small kettle or pot of water to a boil. You’ll need hot water to pour into the baking sheet for the water bath.)
- Heat the heavy cream, espresso powder, and salt together in a medium saucepan over medium heat. As soon as it begins to simmer, remove from heat. Stir in the vanilla extract. Remove about 1/2 cup of warm heavy cream and, in a slow and steady stream, whisk into the egg yolks. Keep those egg yolks moving so they don’t scramble. In a slow and steady stream, pour and whisk the egg yolk mixture into the warm heavy cream.
- Place ramekins in a large baking pan. If you don’t have 1 pan large enough, bake them in a couple pans. Divide custard between each ramekin, filling to the top. Carefully fill the pan with about a 1/2 inch of the hot water. The baking pan will be hot so use an oven mitt to carefully transfer the pan to the oven.
- Bake until the edges are set and centers are a little jiggly. The time depends on the depth of your ramekins. My ramekins are 1-inch and the custard takes 35 minutes. Begin checking them at 30 minutes. For a more accurate sign, they’re done when an instant read thermometer registers 170°F (77°C).
- Remove pan from the oven and, using an oven mitt, remove the ramekins from the pan. Place on a wire rack to cool for at least 1 hour. Place in the refrigerator, loosely covered, and chill for at least 4 hours and up to 2 days before topping.
- Using the remaining granulated sugar, sprinkle a thin layer all over the surface of the chilled custards. Caramelize the sugar with a kitchen torch and serve immediately or store in the refrigerator for up to 1 hour before serving. (Caramelized topping is best enjoyed right away.)
Notes
- Make Ahead Instructions: Prepare the custard mixture through step 4. Cover tightly and refrigerate for up to 1 day before baking. You can bake the custard up to 2 days ahead of time. See step 6.
- Special Tools (affiliate links): Glass Mixing Bowl | Whisk | Medium Saucepan | Oval Ramekins | Large Baking Pan (such as a 9×13-inch baking pan) | Cooling Rack | Kitchen Torch
- Heavy Cream: 3 cups of half-and-half may be substituted for heavy cream. The custard’s texture will be a little lighter.
- Espresso Powder: I know many may not have espresso powder at the ready, so it’s an optional ingredient. But trust me when I say that espresso powder makes a good crème brûlée the best crème brûlée. Leaves great flavor, but the custard doesn’t necessarily taste like coffee. Rather, it’s hinted with espresso flavor. You can find espresso powder in the coffee aisle at the grocery store or online. Instead of espresso powder, you can use 2 teaspoons quality instant coffee.
- Pure Vanilla Extract: Pure vanilla extract is stirred into the heavy cream after it’s heated. You can use the seeds scraped from 1/2 a vanilla bean or 1 teaspoon vanilla bean paste instead. Either can be whisked into the heavy cream when you add the salt and espresso powder.
- Ramekins: Small ramekins ensure the custard cooks evenly, though you could use a large wide ceramic dish instead. I love using individual wide and shallow ramekins so there is more surface area for the caramelized sugar. I suggest these oval ramekins or these circle ramekins. If you don’t have ramekins, use a large wide ceramic or glass dish. Do not use metal. The bake time will increase with a larger size pan.
- Oven Broiler Directions: If you don’t have a kitchen torch, use the oven broiler to caramelize the sugar in step 7. After the custard has chilled as directed in step 6, dust the tops with reserved granulated sugar, then place them on a baking sheet on an oven rack directly under the broiler. Broil on high until caramelized. Keep a close eye on it.
- Adapted from Allrecipes and Mark Bittman


Reader Comments and Reviews
Hello, I am not an experienced baker by any means but would love to try this out! I have aluminum baking cups the same size as a normal ramekin. Would those still work with the timing in this recipe or would they require different instructions?
Hi Maria, I assume it would be the same exact timing. That’s what I would do if using the cups you have.
I made this for my daughter’s birthday and she and everyone else loved it!
I am glad you provided the additional details which prevented me from over baking it! Yes, that’s right, my first time making it and I did not over bake it. Thanks to your comments. I set the timer for 5 minutes less so I could check it. It was a lot more giggly than I thought it should be. It looked very wet in the center. But I tested the temperature and it was 170! So I removed from the oven, even though it did not seemed cooked through.
I followed instructions by letting it cool on wire rack and then refrigerating them. The sugar was easily caramelized (burnt) and was great. I bought a torch that worked well. Warning, torches do not come with butane.
Anyway, my daughter is a huge crème brûlée fan and she said it was fine dining restaurant quality! Win! I was initially intimidated by the recipe but it was easy to make. I read the instructions twice before making.
Question: using brown sugar in the Creme part of the Creme brûlée- has anyone tried it? Does it make it more caramel flavoured?
You are leaving out an incredibly important step! The ramekins should be arranged in a Bain Marie. This will ensure an even cook and f the custard.
Sorry to have to ask, but how is a band Mari different from placing the ramekins in a pan of water in the oven
Lovely recipe! Would recommend using a thermometer to tell when it’s done as it removes guess work.
Mine didn’t look set after 30 minutes so I placed it back for another 10. Decided to use a thermometer and it read 87c (10 degrees over the 77c mentioned in the recipe). Next time I’ll use the thermometer right away instead
Hi Sally!! I am obsessed with this recipe. I’ve made it at least 5 times and it’s my 9-year-old’s favorite dessert. For the holidays I’m curious if you’ve experimented with a pumpkin version? Thank you!
Hi Liz, We’re so thrilled to hear that you love this creme brûlée recipe! We haven’t tested a pumpkin version, but if you wanted to do any experimenting, we’d start by reducing the cream and adding pumpkin puree. Let us know if you give it a try!
This turned out perfect!
I had to cook it a lot longer for edges to bake but then realized my water bath had evaporated. I added more boiling hot water to the pan and it finished cooking within 15 more minutes. Next time I will know to keep an eye on the water level.
Great recipes. Thank you!
My 13 yr old son wanted to try to make crème brûlée, so I picked this as an easy recipe. I thought it was super simple and delicious. I used half the instant espresso coffee measurement and it still tasted a lot like coffee which disappointed my son because he wanted more vanilla flavor ♀️
Ok adding this to my to do list immediately. I’m so curious about the espresso powder, but I know that’s something my partner wouldn’t like – is it possible to add that at the end to half the custard, or does it need to be heated up with the cream early?
Hi AK, that should work just fine to add it a bit later, just make sure it has dissolved thoroughly. Enjoy!
I only have regular ramekins. I don’t have the space to add specialty ramekins. Will the cook time be the same?
Hi Kim, Small ramekins ensure the custard cooks evenly, though you could use a large wide ceramic dish instead.
If you tap the ramekins to get the air bubbles to the top before you cook them you can use a torch to pop the bubbles and then bake so you have a smooth top out of the oven
Hi! I only have 4 ramekins would there be a way for me to take the crème brûlée out so I can do another round of the crème brûlée?
Hi Lisa, we aren’t aware of any tricks for removing creme brulee in one piece. Sorry we can’t be of more help here!
I have 4 larger ramekins. They are almost 1.75″ high and 3.5″ diameter. I am wondering about baking time. When do you think I should start checking them for the jiggle middle? Thanks!!
Hi Karen, we’re unsure of the exact timing for that size pan, but we’d start checking between 30-35 minutes to ensure they do not overbake.
I have Delallo instant espresso powder—would I use 1/2 teaspoon still as your recipe states?
Hi Deb, yes, you can still use 1/2 teaspoon of instant espresso powder.
Followed every step to make the most perfect Creme Brulee recipe!!
Made this recipe for my mother on Mother’s Day, she LOVED it! Crème brûlée is her all time favourite & this recipe did more than curb her craving. Saving this recipe for many more occasions to come! It might just be a new dessert staple in this household, it’s incredibly easy to make!
I wanted to love this so much!
Major fail for me. I was making for the first time for a friend’s birthday. I couldn’t get to 170 degrees, It wasn’t going above 142 degrees. I threw out the first batch and started over, 2nd batch was also a fail. Is it possibly in the cooking of the custard? The directions said to bring cream to a simmer and remove from heat. My simmer was the heavy cream beginning to have an undercurrent of a boil not yet an active boil, is that what you meant? I’m trying to figure out where I went wrong. Thx.
Hi Patrick, somehow I missed your question last month. By simmering, I mean simmering around the edges. How deep are your ramekins? Because if they are quite deep, the custard will need longer to come up to temperature. I would simply extend the bake time until you hit that temperature.
Sally, I’m planning to make this recipe in two days, but I am unable to find any ramekins (I live in Costa Rica, so many goods are hard to obtain). I plan to make this in a glass dish but I’m uncertain of the size. Do you have any suggestions or could you tell me how much creme brulee each of your ramekins contains so I can figure it out? Thank you.
Hi Jennifer, If you don’t have ramekins, use a large wide ceramic or glass dish. Do not use metal. The bake time will increase with a larger size pan.
I have several glass dishes and was wondering how much liquid one ramekin held so I can multiply that by 4 and then know roughly how much liquid there is overall, and then I’d know which dish to use.
I used this recipe to make creme brûlée for my 1st time ever for a friend’s bday because it’s her fav dessert. I was honestly so stressed (I’m a perfectionist), but the recipe was quite clear w/great tips, and is relatively simple. Because of Sally mentioning you will overbake your first time, I set my timer for 25 mins and checked and it seemed done so I took them out. I also halved the recipe and for the 1/2 egg yolk, I just weighed it and took out half the weight. In the end, it all worked out and came out perfectly! I didn’t get to try it but my friend said it was so good and came out perfect – woo hoo! Haha thanks Sally for always having my back
I made this last year and it was sooo good. but I am running short on time.
can I caramelize the creme brule right after I take them out of the oven?
Hi KM! You really want the filling to set and cool before caramelizing.
I couldn’t get mine to set all the way through, even after chilling overnight. The ratio of cream to eggs is off on this recipe. Super bummed I used this recipe for my son’s birthday.
I’ve been having issues with the setting temp of this. I have done several that were at low 170 F and were very runny.
I make them in 7 oz. ramikans so of course it takes longer, but internal temp is what rules.
To get the 7 oz. ones done without burning they need to be covered after ~ 30 minutes. From what I recall they take perhaps 50 minutes to be done.
Small 4 oz. one after 35 minutes is nicely set with a temp of 183-185 F.
I suggest that the target temp be bumped up perhaps 15 degrees F.
I am pulling back on my comment somewhat. I made some more up to 180’s and they weren’t very nice – got all grainy and rough.
I think what was happening at first was that I had some mixed temperatures and was on the threshold. I measured several that were 170+ish, two of them ended up runny, the others just fine.
I suspect the temperature needed is maybe 175 (?), not much more. I guess I was on the cusp and most were ok but 2 duds. IOW, heat just enough to get to set. I wish I knew what that exact # was. Definitely don’t venture into the 180’s.
I have never tried to make creme brûlée before but it was delicious. However, it was so runny! I followed the directions exactly, I think. But reading the other comments it doesn’t seem like anyone else had this problem! Any suggestions on what went wrong?
Hi Annie! Did you use heavy cream or heavy whipping cream? You want to make sure to see the word “heavy” in the title, anything else will be too thin and not set properly.
Yes, I did. I used heavy whipping cream. Maybe I just need to try it again.
This turned out wonderful! Your directions were easy to follow.
Hi! I have a set of ramekins that are smaller around and deeper. How would cook time/temp be adjusted for this?
Hi Emily, though a deeper ramekin is usually fine, we do find the thinner ramekins (as pictured) produce a more evenly textured baked custard. We’re unsure of the exact bake time for the deeper ramekins, but they set up nicely in the refrigerator, so err on the side of under-baking.
My husband keeps inviting people over to our house for dessert so I can make this for them. 😀 I asked for a torch for Christmas so I could learn how to make it. This is the second recipe I’ve tried, and it’s a keeper. Tonight will be my 3rd time making this recipe since Valentine’s Day. Save this recipe FOREVER.
It was such an incredible experience to find a recipe that was easy to follow and yielded amazing results. Thank you so much for sharing. I am not much of a baker and even I had success making one of the very best desserts.
The espresso powder…. Is that instant espresso or actual ground ground coffee
Hi Leslie, it’s instant espresso powder, not ground coffee. In the ingredients list, you can see a link to a product we like to use, so you can look for something similar at your grocer. Instead of espresso powder, you can use 2 teaspoons quality instant coffee.
Can i do half a recipe for the Creme Brulee
Thanks for the response
A this recipe bell doubled? Have a dinner party for 16 and ramekins will be 6 oz
Hi Annette, Yes you should be able to double this recipe. Enjoy!