

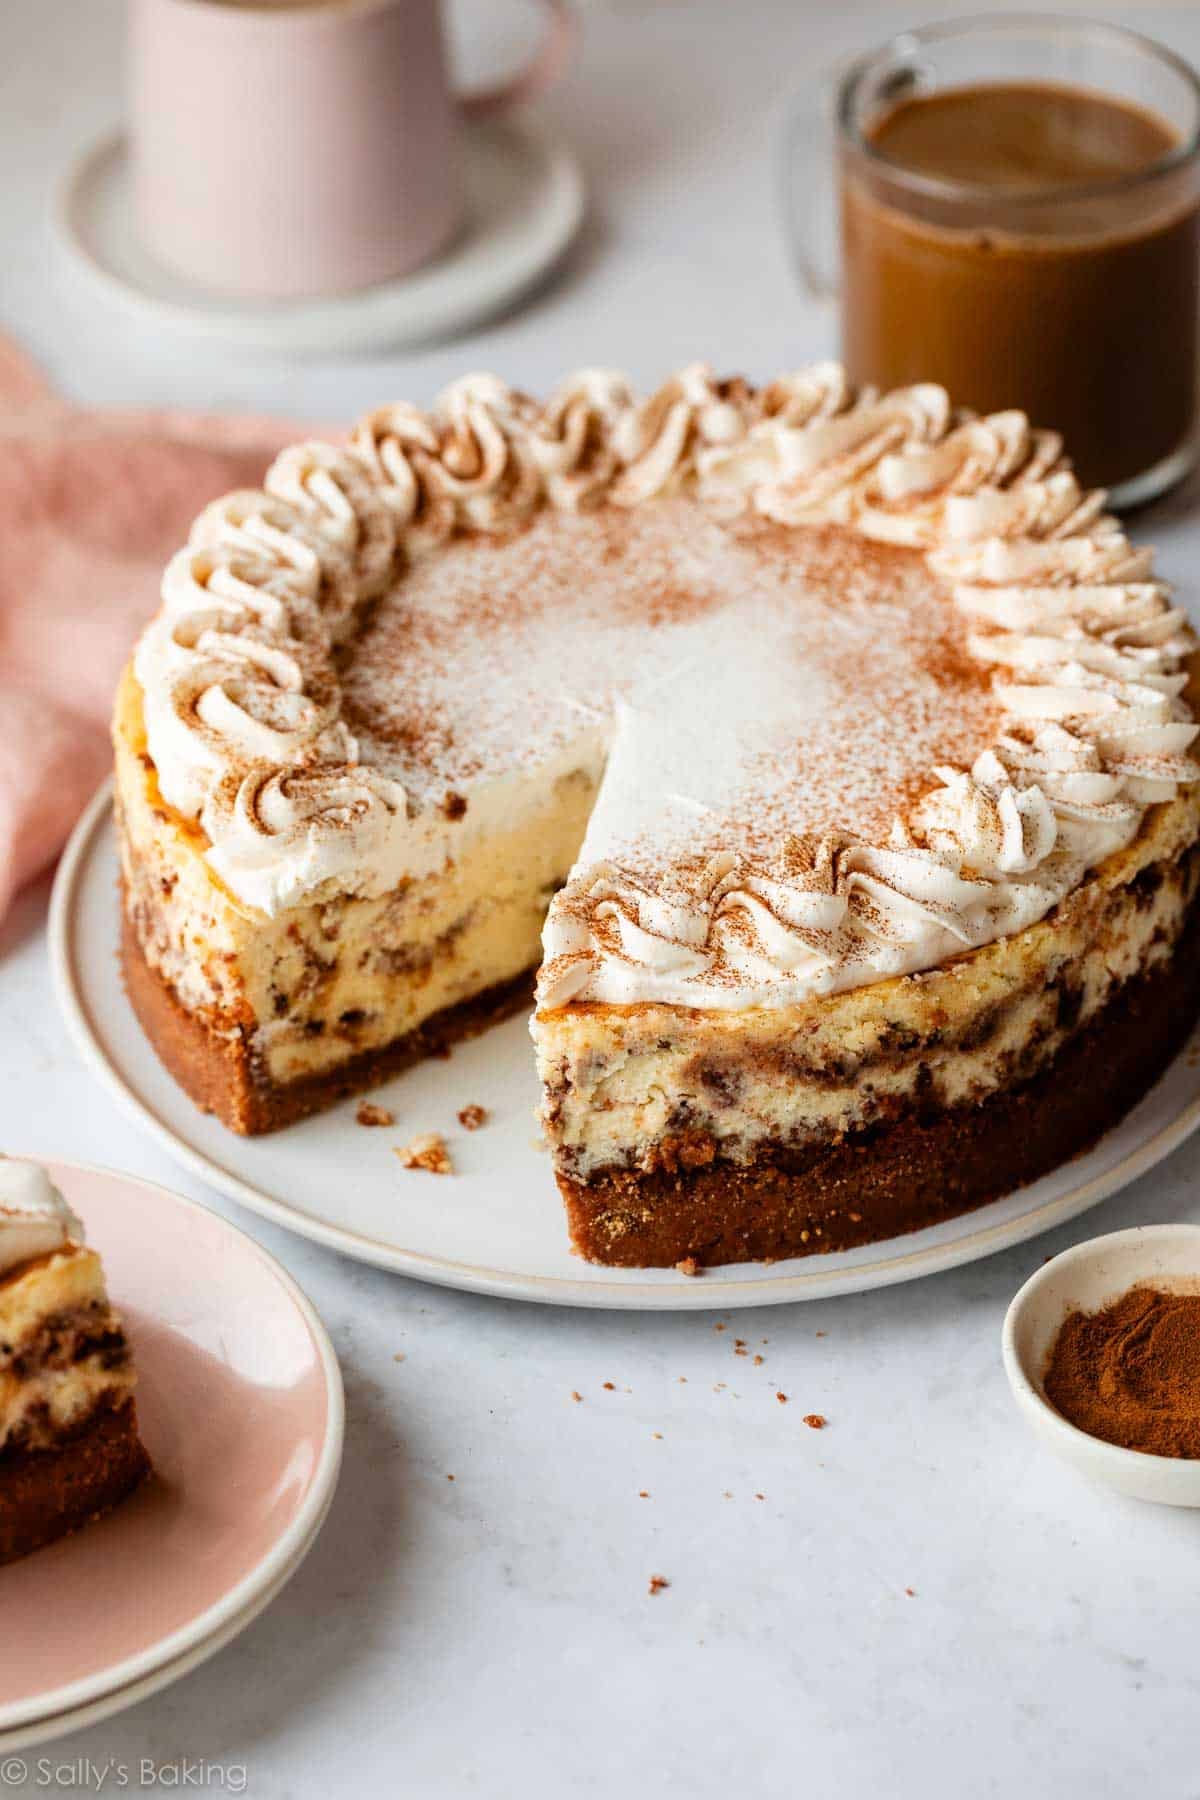
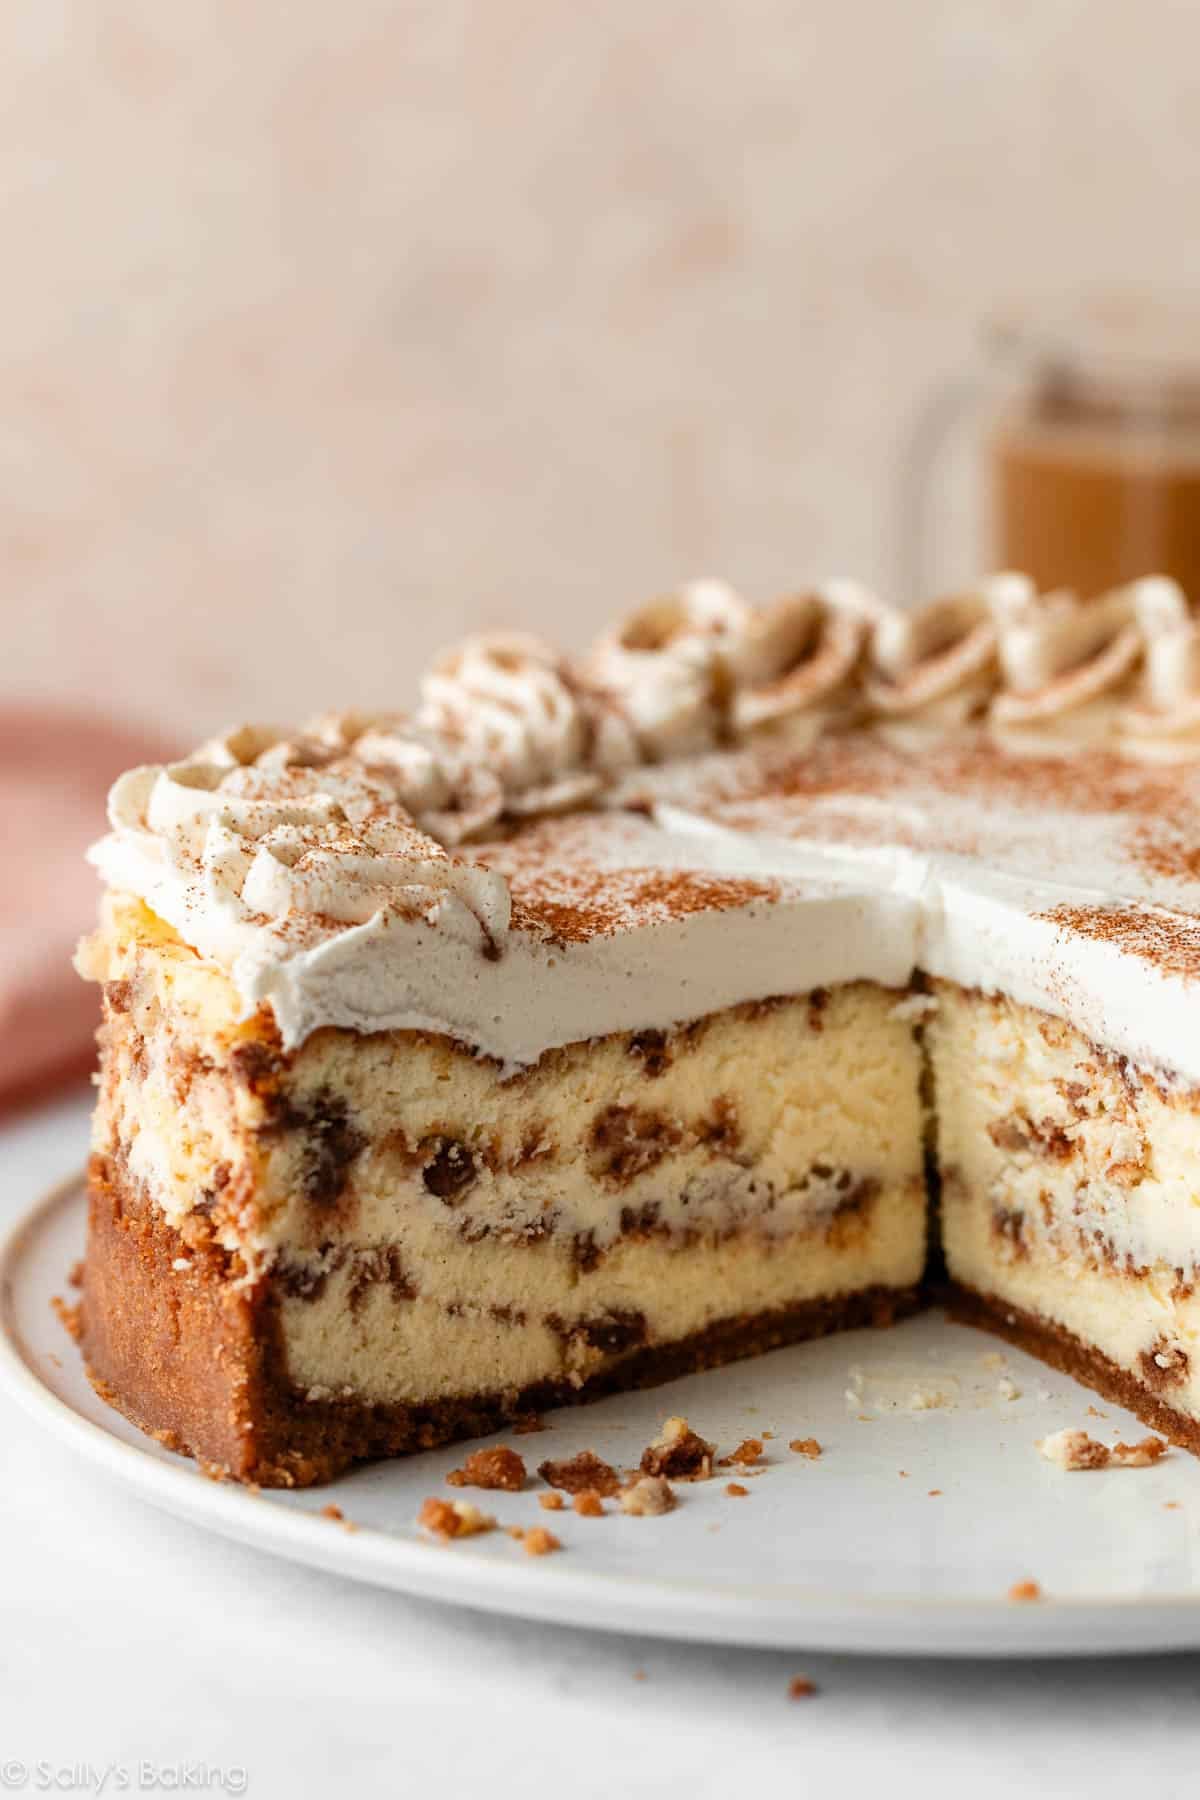
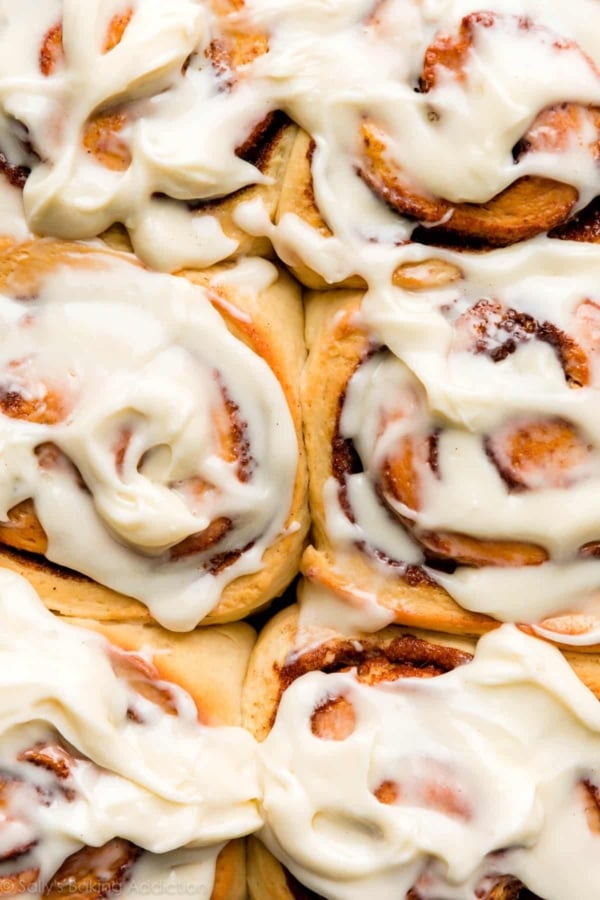
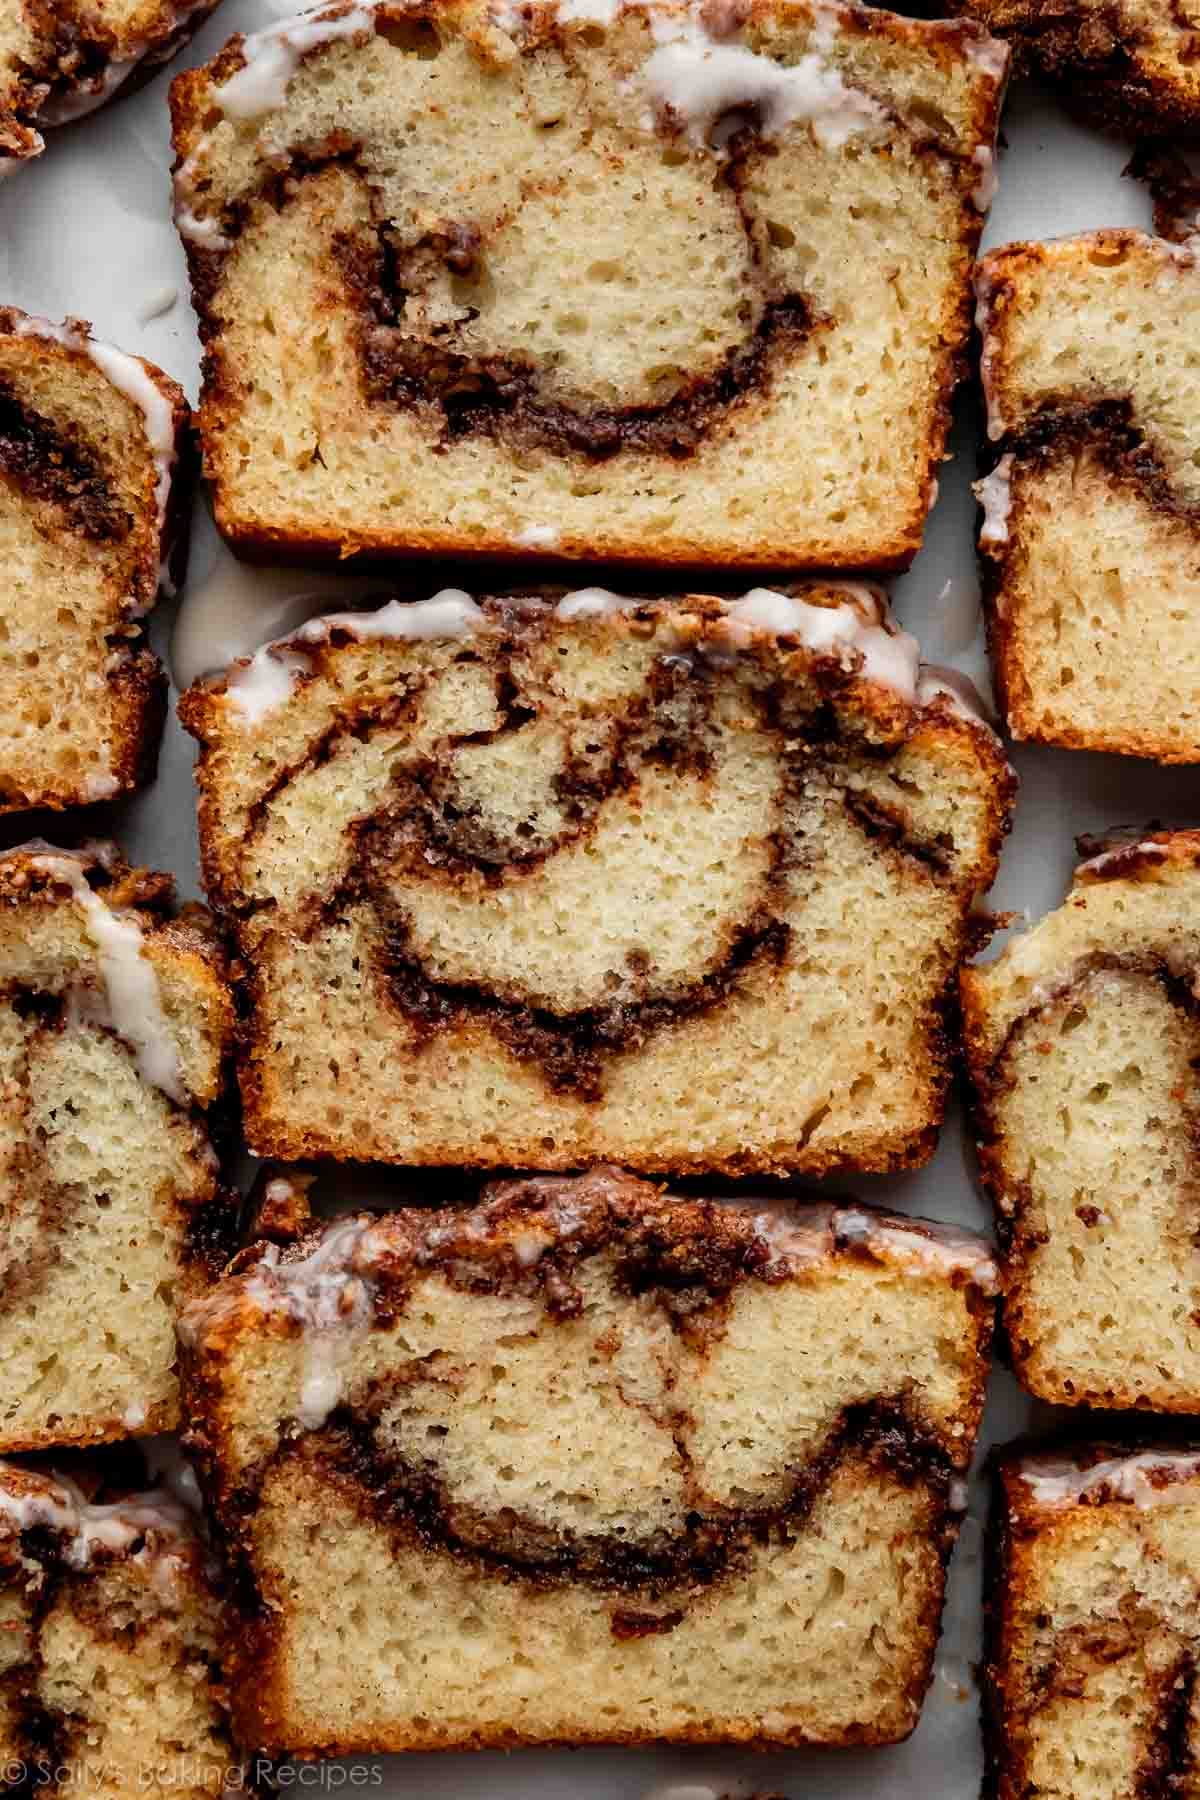
Two favorite indulgences (cheesecake and cinnamon rolls!) come together to make one epic dessert in this cinnamon swirl cheesecake. Swirl crumbles of buttery cinnamon-brown sugar filling into layers of rich, creamy cheesecake, and bake atop a thick graham cracker crust. Top with brown sugar whipped cream and a sprinkle of cinnamon for the perfect finish to this special dessert.
This cinnamon swirl cheesecake strikes the perfect balance when it comes to both flavor and texture: not too sweet but not too tangy; rich and decadent but not too heavy… if Goldilocks had her choice of desserts, she’d choose this one because it’s just right. 😉
One reader, Jennifer, commented: “Excellent! Creamy consistency. Flavorful. Never done a water bath before, but it obviously made a difference. Definitely a keeper! ★★★★★”
One reader, Deitra, commented: “This recipe was fun and easy to follow. It turned out beautifully and was absolutely delicious! It was one of the best cheesecakes I’ve ever eaten. I love the cinnamon! ★★★★★”
One reader, Linda, commented: “I made this as my birthday cake and it was sooo worth it. Best of two absolute favorites. ★★★★★”
Here’s Why You’ll Love This Cinnamon Swirl Cheesecake
- Everything you love about classic cheesecake, plus a cinnamon roll-like filling!
- Creamy, rich, velvety-smooth cheesecake melts in your mouth
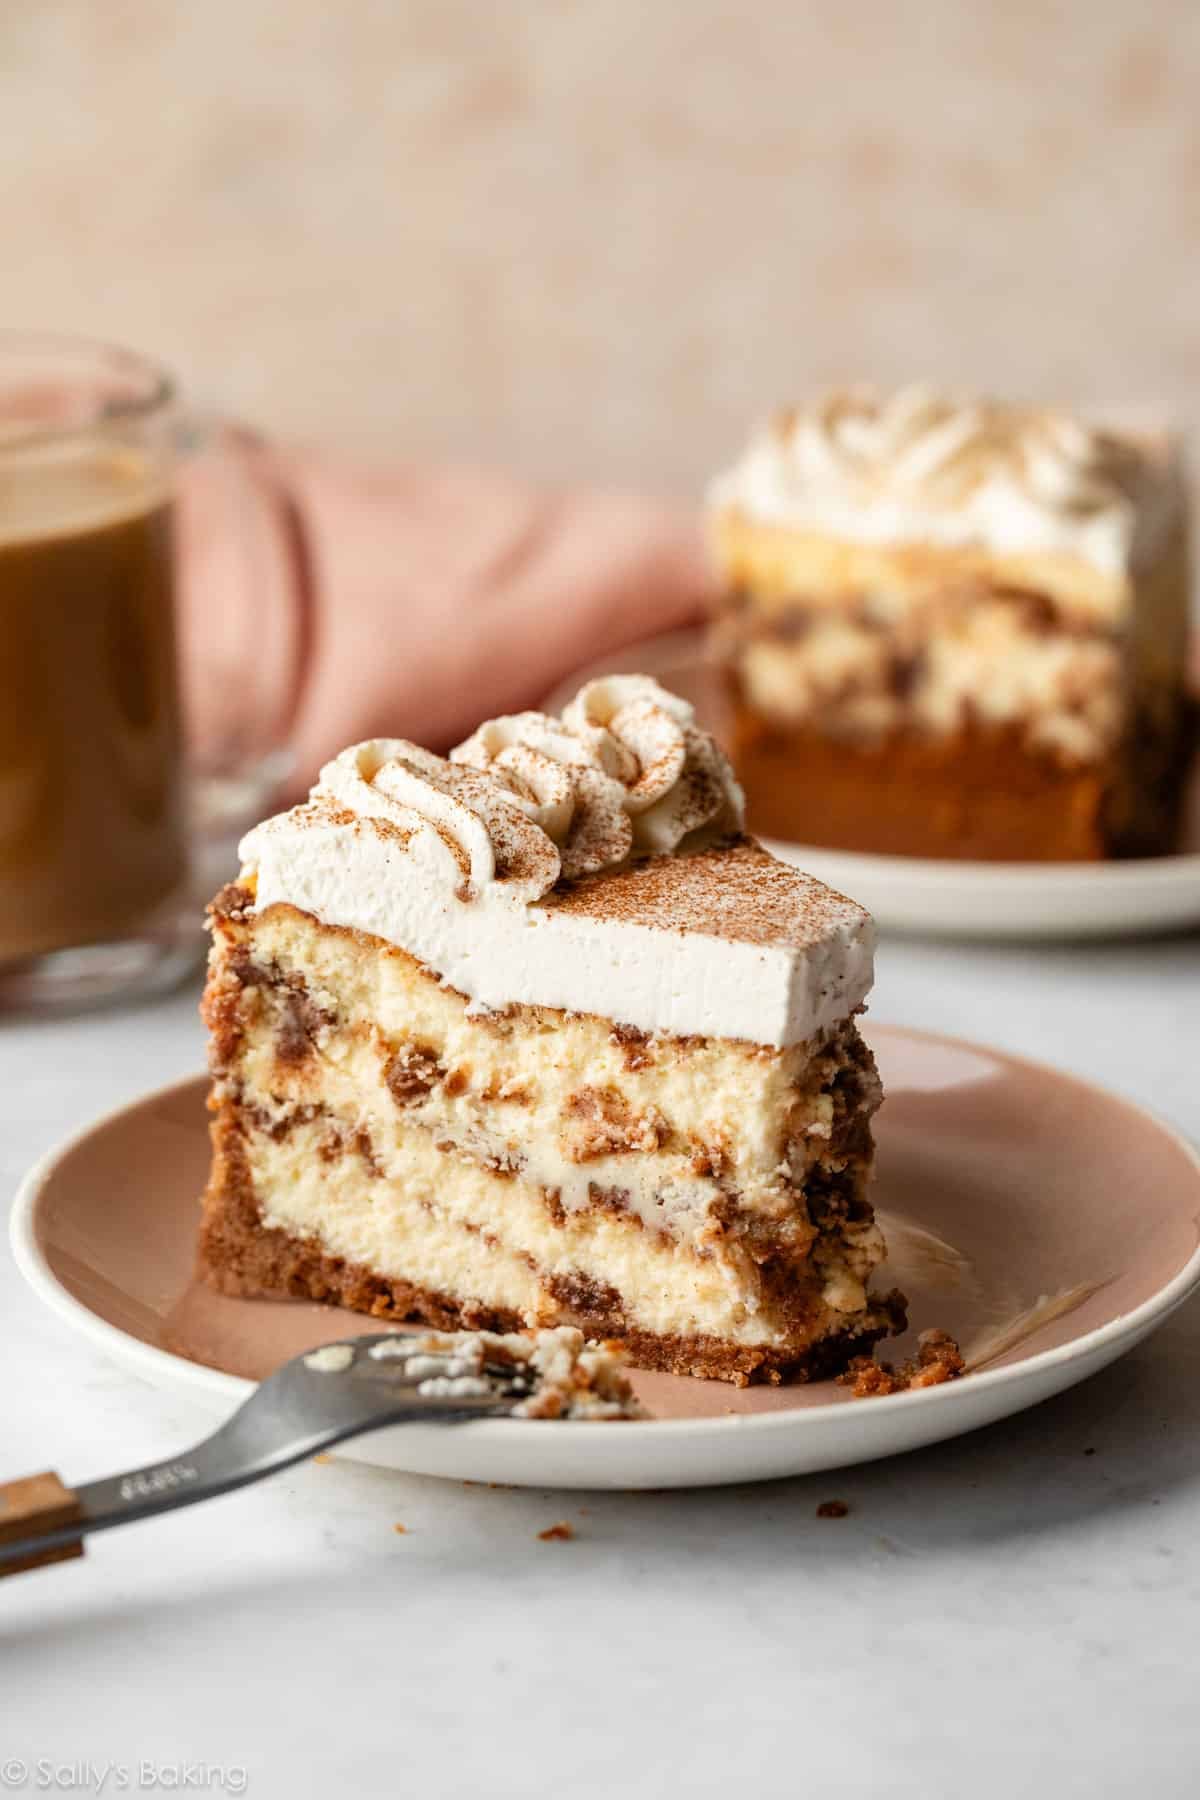
- Cinnamon-brown sugar filling in every bite
- Sandwiched between a thick, buttery graham cracker crust and a fluffy whipped cream topping
- Can make it as smaller-batch cheesecake bars—details below
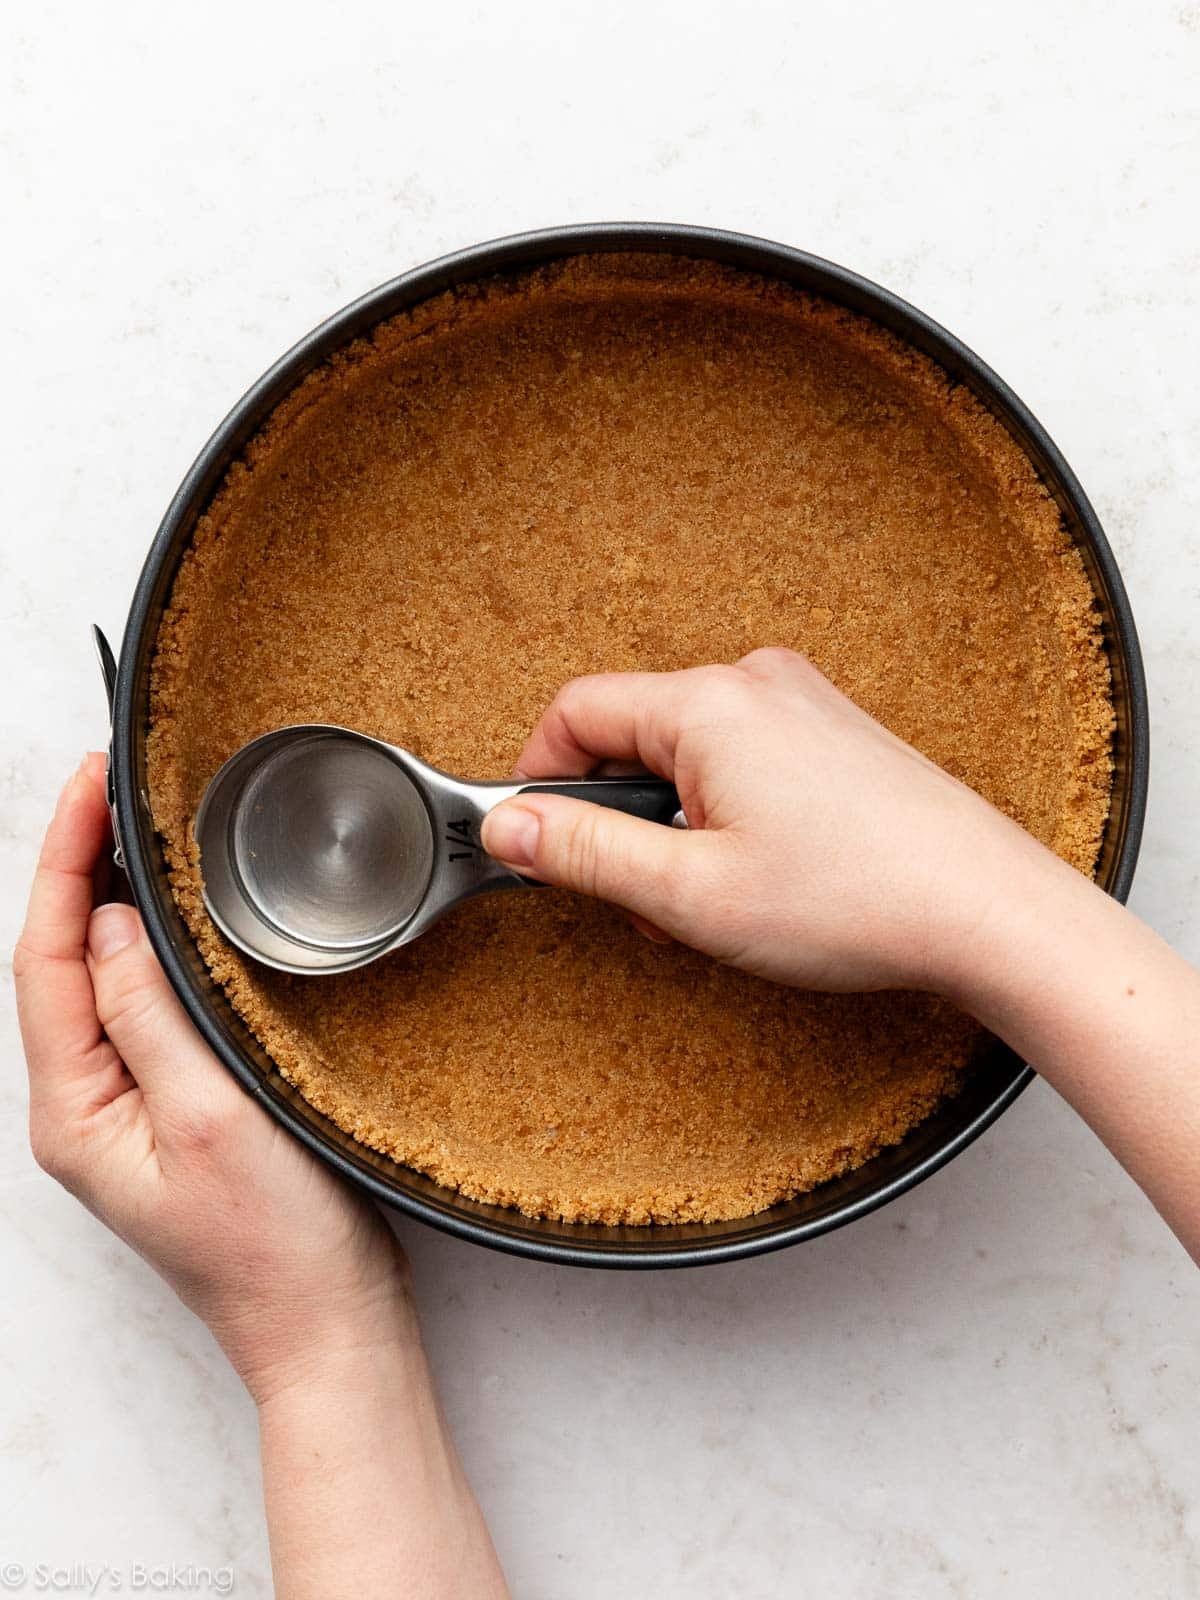
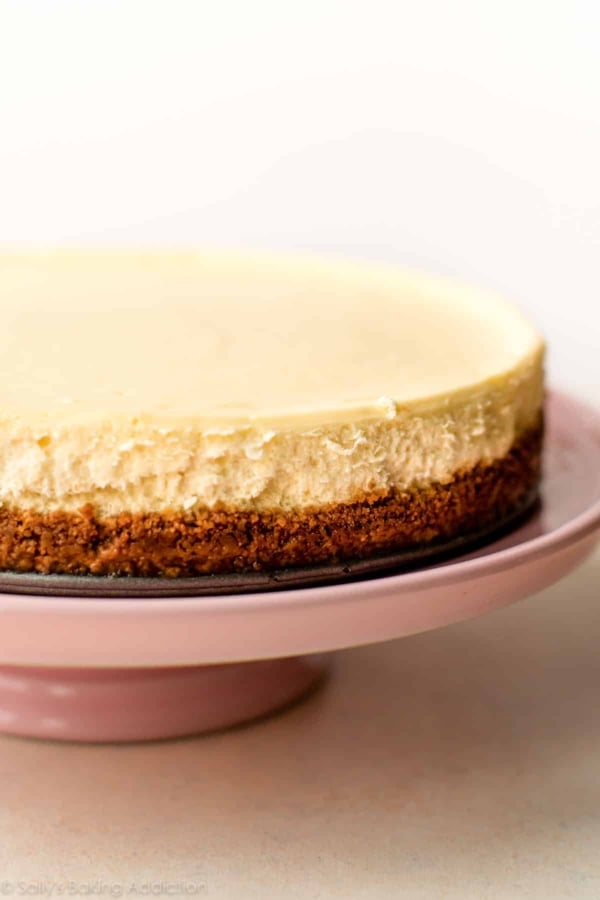
Use a Graham Cracker Crust
The crust is basically the same as my traditional graham cracker crust, but with more crumbs and less butter, because cheesecake is so heavy and wet.
The crust turns out buttery, soft, and crunchy at the same time. Give it a 10-minute head start in the oven before adding the filling.
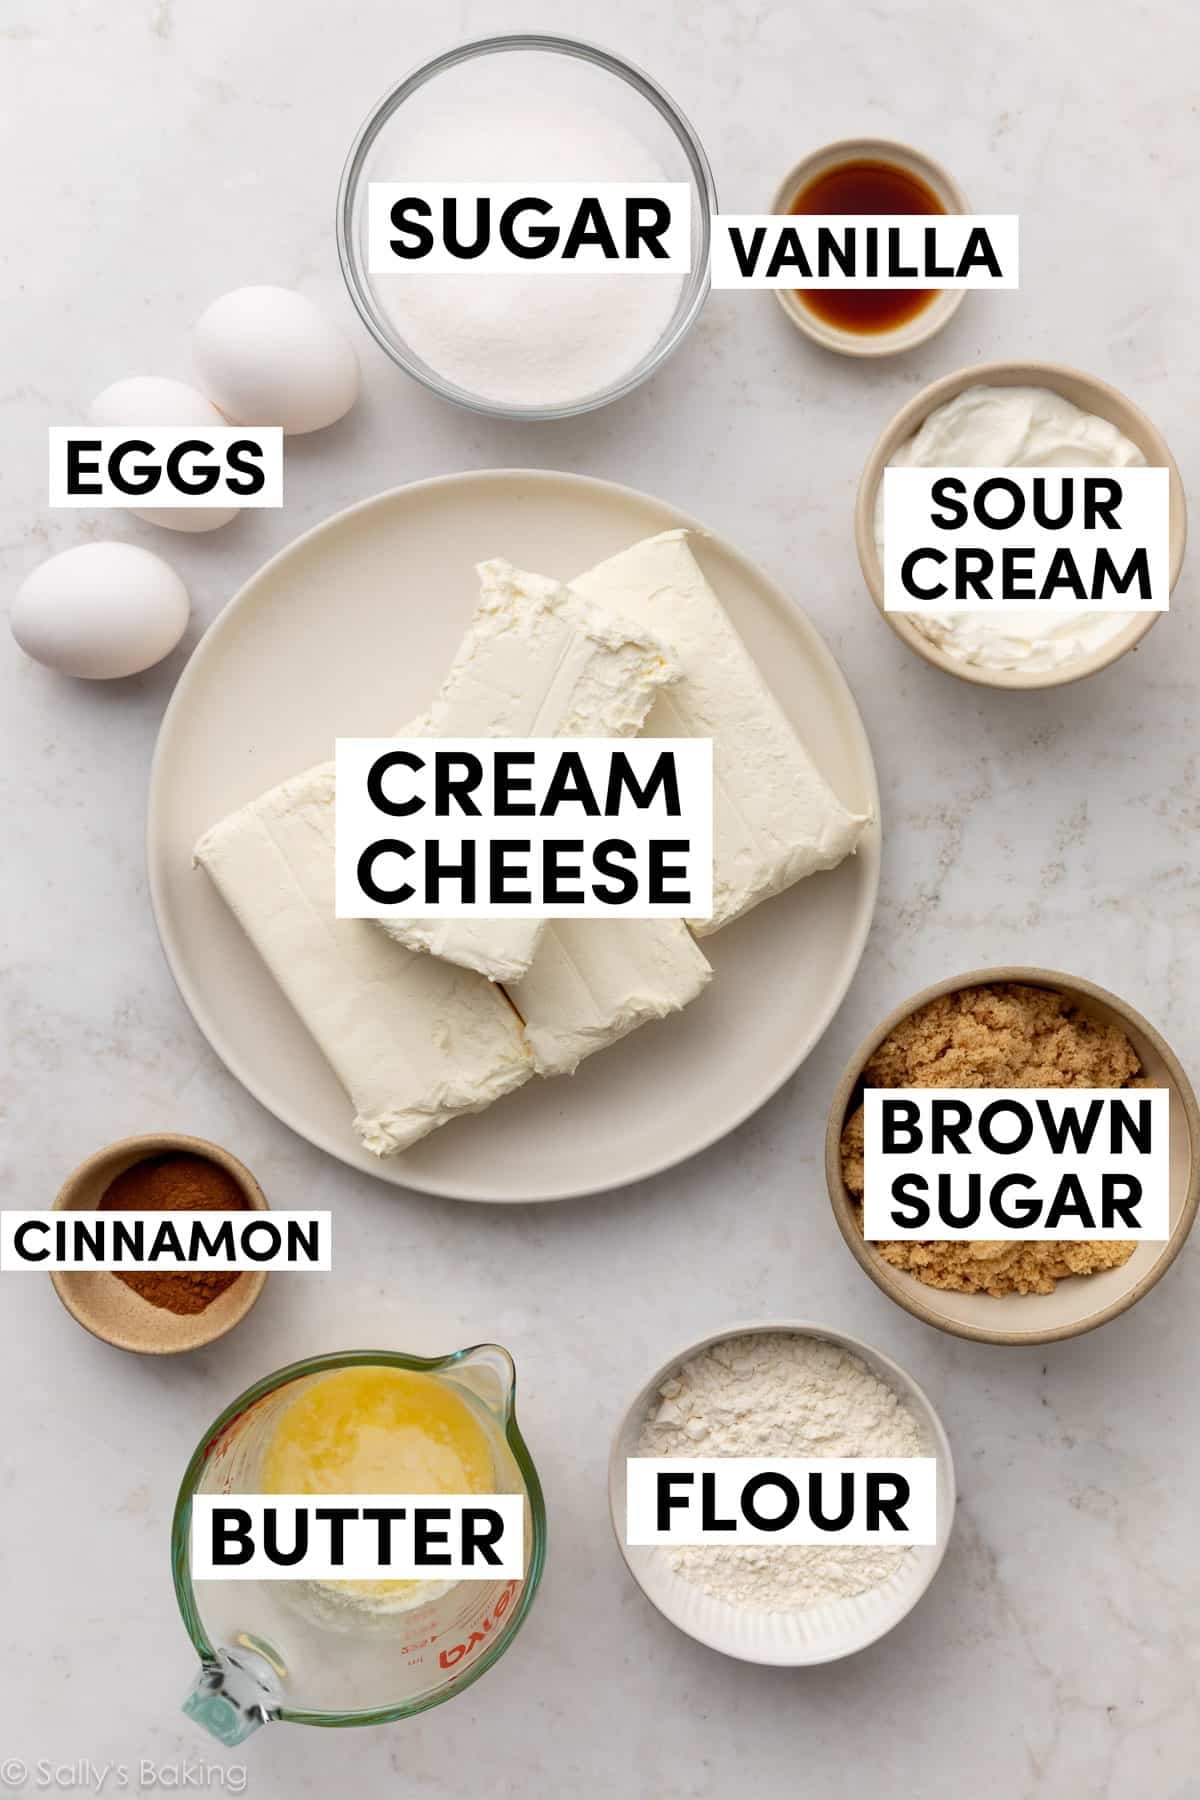
For the Filling & Cinnamon Crumb Swirl
- Brick Cream Cheese: Use 32 ounces of full-fat brick cream cheese. Make sure you’re buying the bricks of cream cheese and not cream cheese spread, which has higher water content and won’t allow your cheesecake to set up.
- Sugar: We’re using granulated sugar to sweeten the cheesecake batter, and brown sugar for the cinnamon crumble swirl (just like we use in the filling for cinnamon rolls).
- Sour Cream: Makes for a smooth and velvety texture, and gives it that lightly tangy flavor. Without it, you’ll just be eating… baked cream cheese.
- Vanilla: Pure vanilla extract adds flavor, especially homemade vanilla extract! You could also use vanilla bean paste instead.
- Eggs: 3 eggs are the final ingredient. You’ll beat the eggs in last, one at a time, until they are *just* incorporated. Do not overmix the batter after you add the eggs. This will whip air into the cheesecake batter, resulting in a cracked, deflated cheesecake.
- Flour, Cinnamon, & Melted Butter: Mixed together with the brown sugar, these ingredients make up the cinnamon-roll-style filling that gets swirled throughout the cheesecake.
The cheesecake batter is my usual go-to, although I reduced the sour cream to make up for the extra volume of all the cinnamon swirl layers. I adapted the cinnamon filling from a cinnamon roll cheesecake I came across on Delish; it’s a scaled-up version of the topping on my cinnamon crunch bread!
How to Assemble Your Cinnamon Roll Swirl Cheesecake
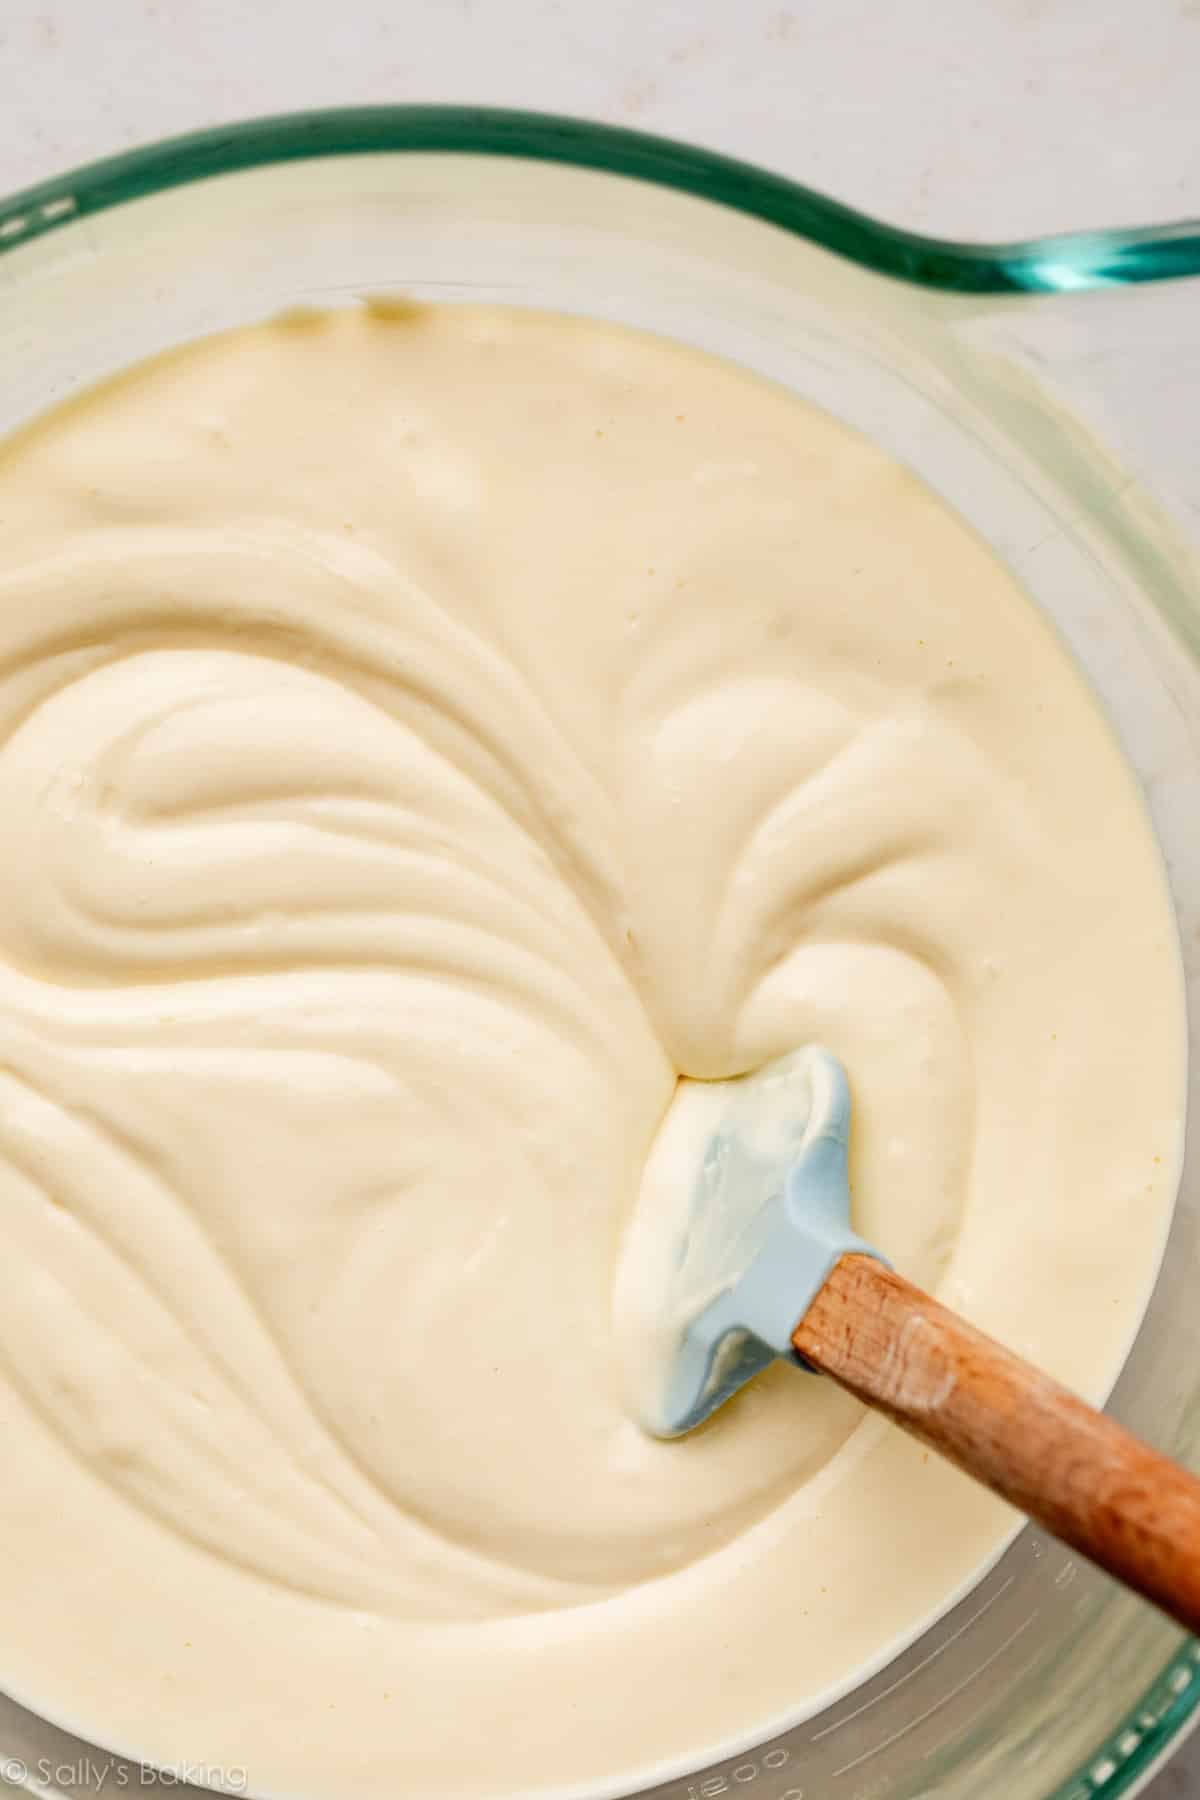
After you’ve made the crust, make the cheesecake batter. It comes together quickly and easily with a mixer. It will be exceptionally creamy, like this:
Making the cinnamon filling is even easier: you just need a bowl and a fork to mix it together.
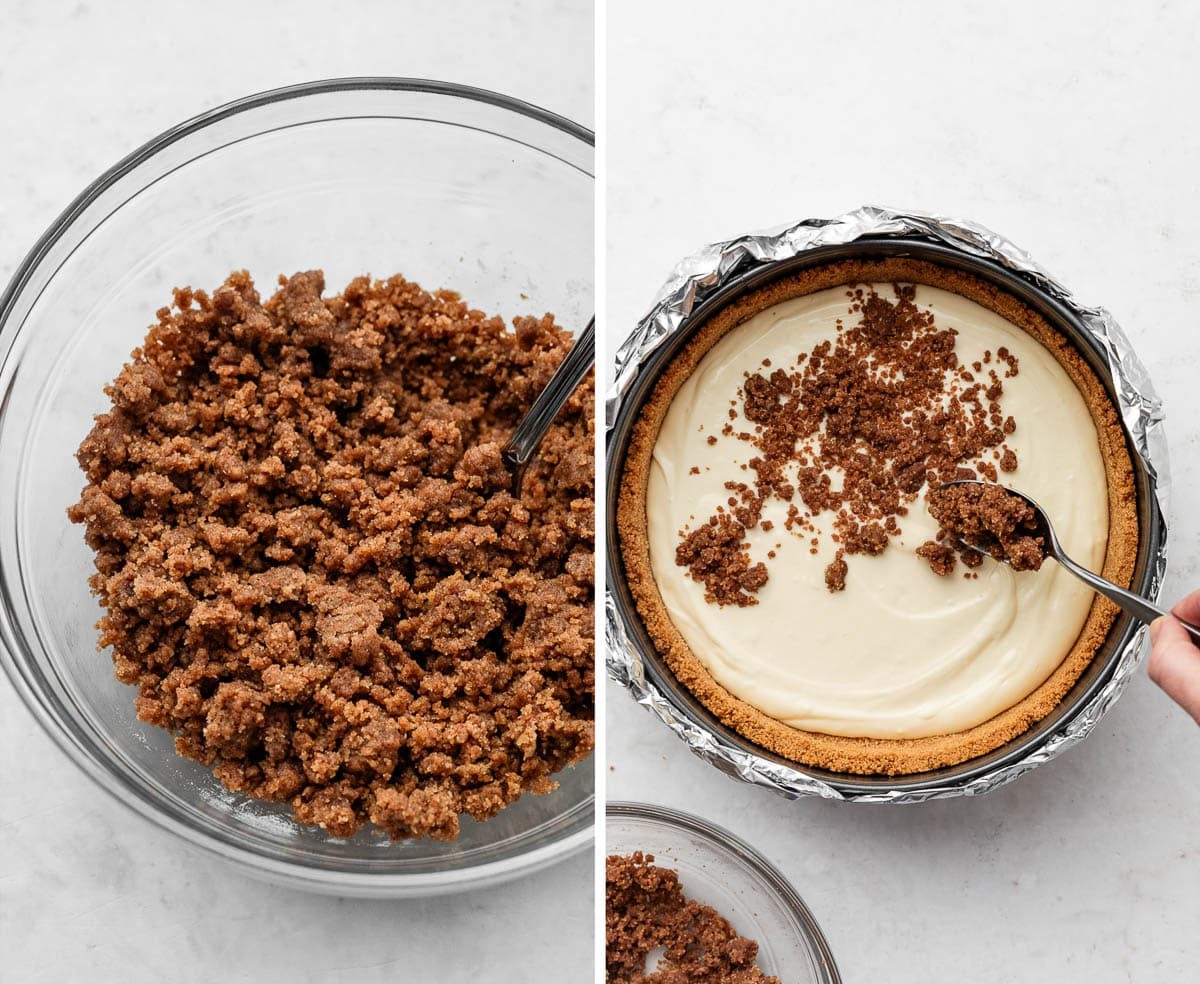
To assemble, layer the cheesecake batter with the cinnamon filling into the crust. 1st layer of cheesecake; 1st layer of cinnamon swirl filling; 2nd layer of cheesecake; 2nd layer of cinnamon swirl; 3rd layer of cheesecake; and 3rd layer of the cinnamon filling sprinkled on top.
Swirl it all together with a knife, like this:
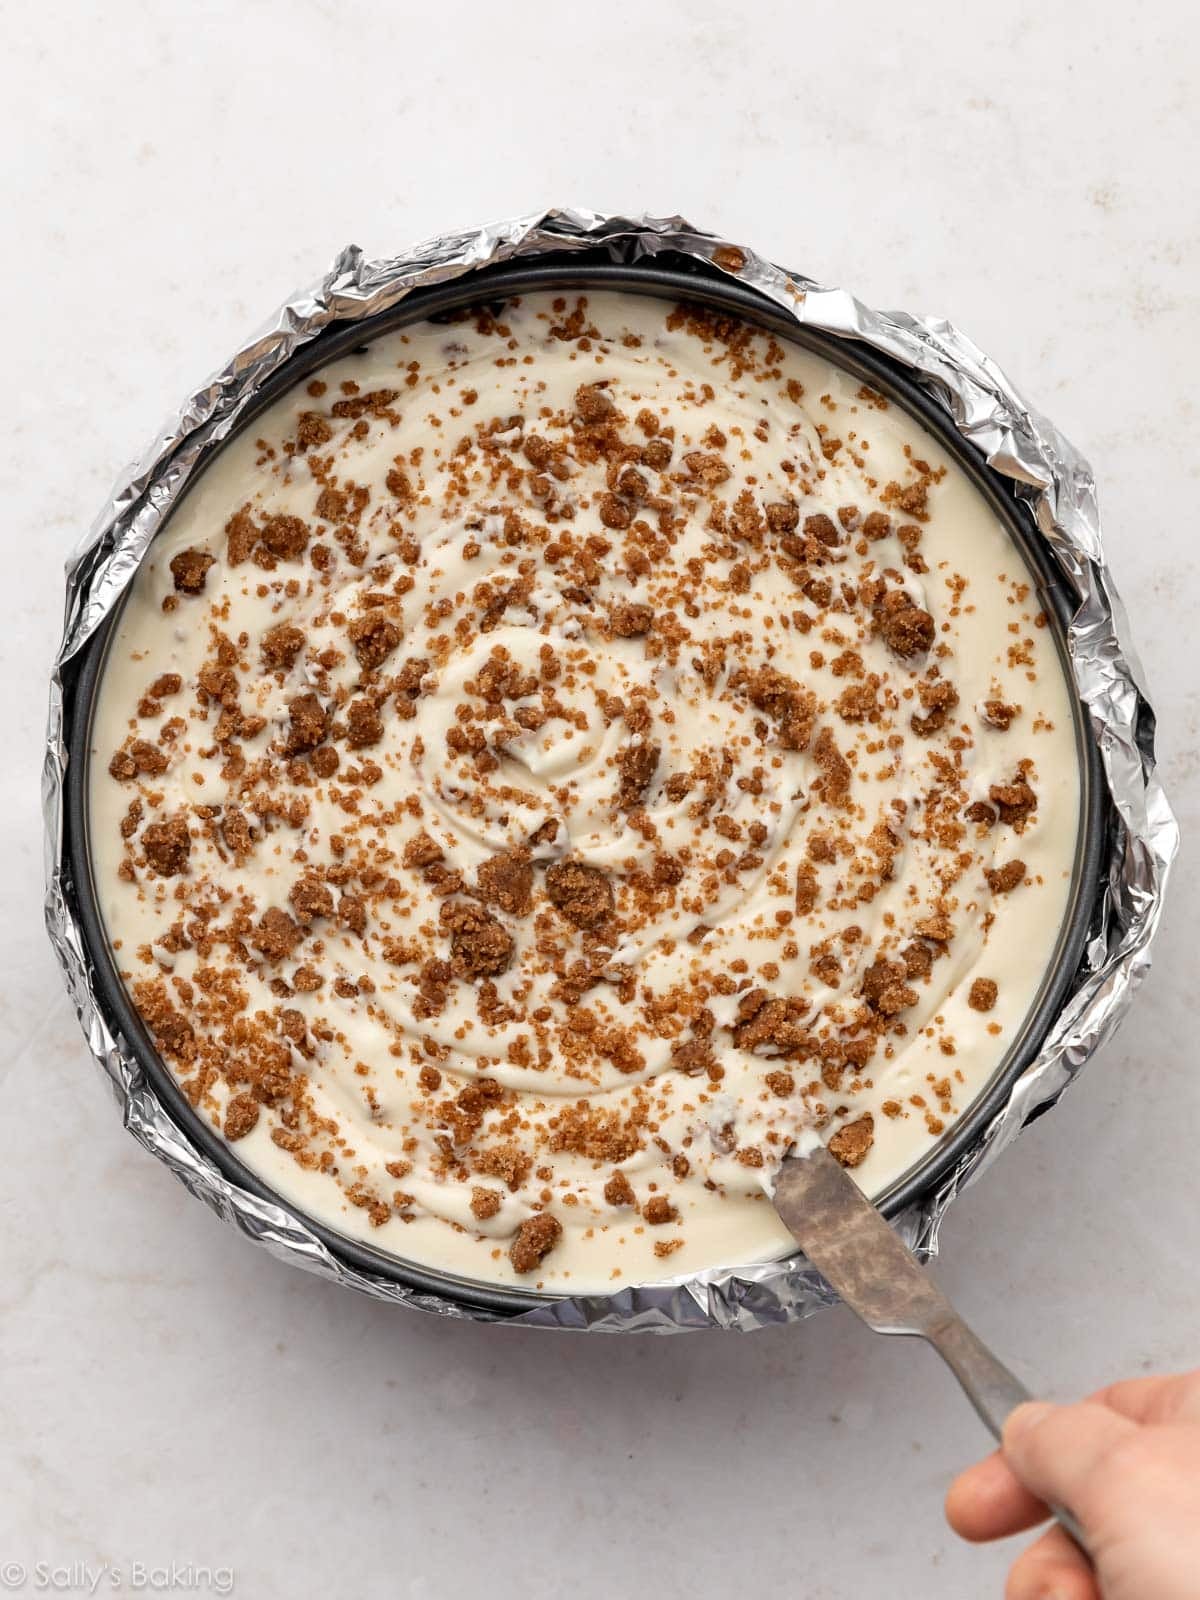
Did you notice how the pan is wrapped in aluminum foil here? That’s because you’ll bake it in a…
Cheesecake Water Bath
I promise a water bath is nothing complicated. All you’re doing is placing the springform pan in a roasting pan, filling it with hot water, and baking. What’s the point, you ask?
The steam from the hot water will lift the cheesecake up slowly and evenly, reducing the risk of cracks on the surface.
I actually have an entire post and video tutorial for How to Make a Cheesecake Water Bath. Trust me when I say that taking a few extra minutes to prepare a water bath for this cheesecake recipe is well worth it.
Cool & Chill (This is Important!)
In addition, you’ll want to…
Cool the cheesecake in the oven. When the cheesecake is done (edges are set but the center is still a bit jiggly), turn the oven off, crack open the oven door, and leave the cheesecake inside for at least 1 hour.
A drastic and sudden change of temperature isn’t ideal for cheesecake—from hot oven to cool counter—so do your best to control the environment by leaving the cheesecake in the water bath in the gradually cooling oven. This helps prevent the cheesecake from sinking back down as it cools—again, reducing the risk of cracks.
After the cheesecake has cooled in the oven for at least 1 hour (or even longer), you can take it out and let it finish cooling at room temperature.
Chill your cheesecake for at least 4 hours or even overnight. The cheesecake will finish setting in the refrigerator, and then you can top it.
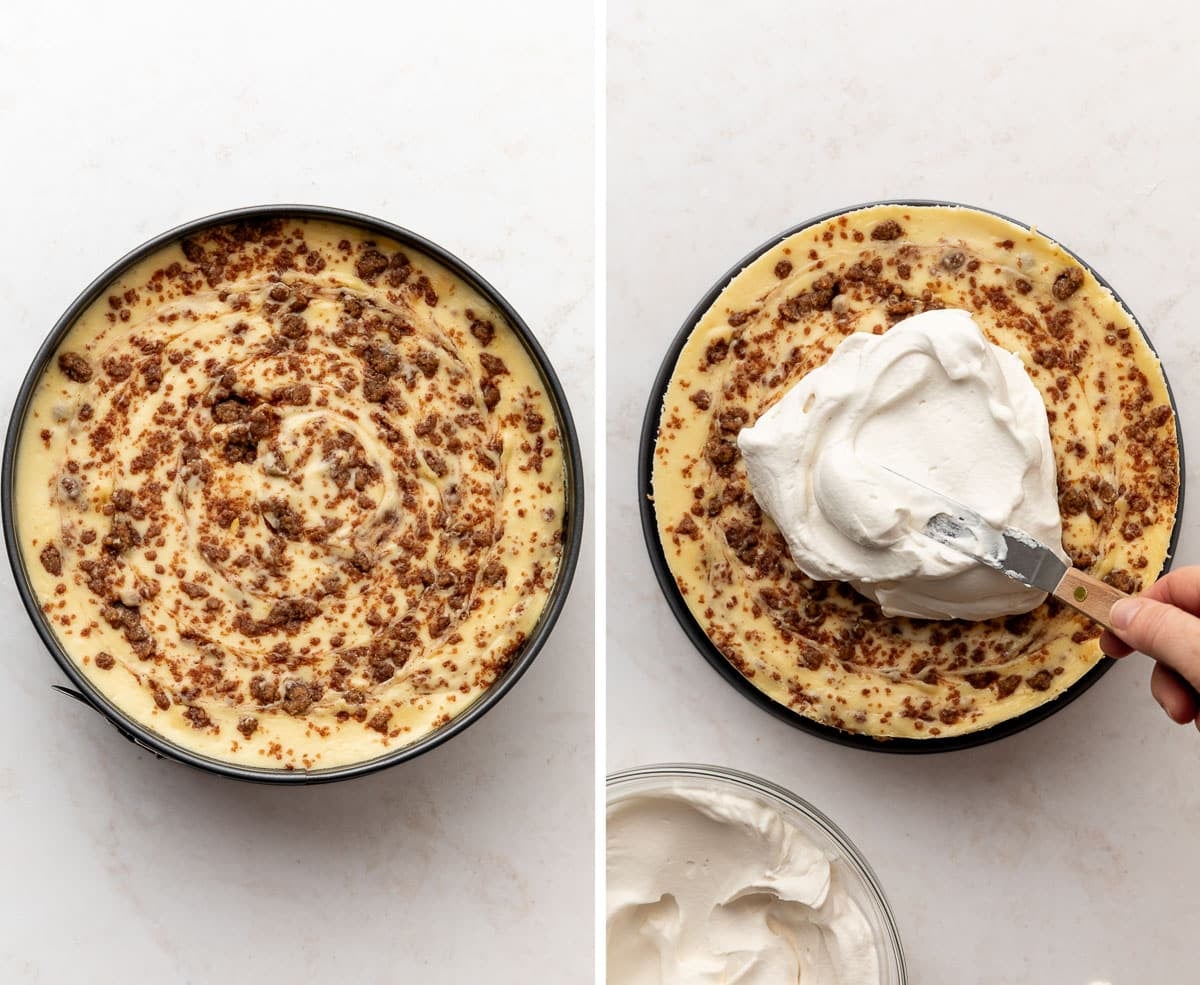
Finishing Touches
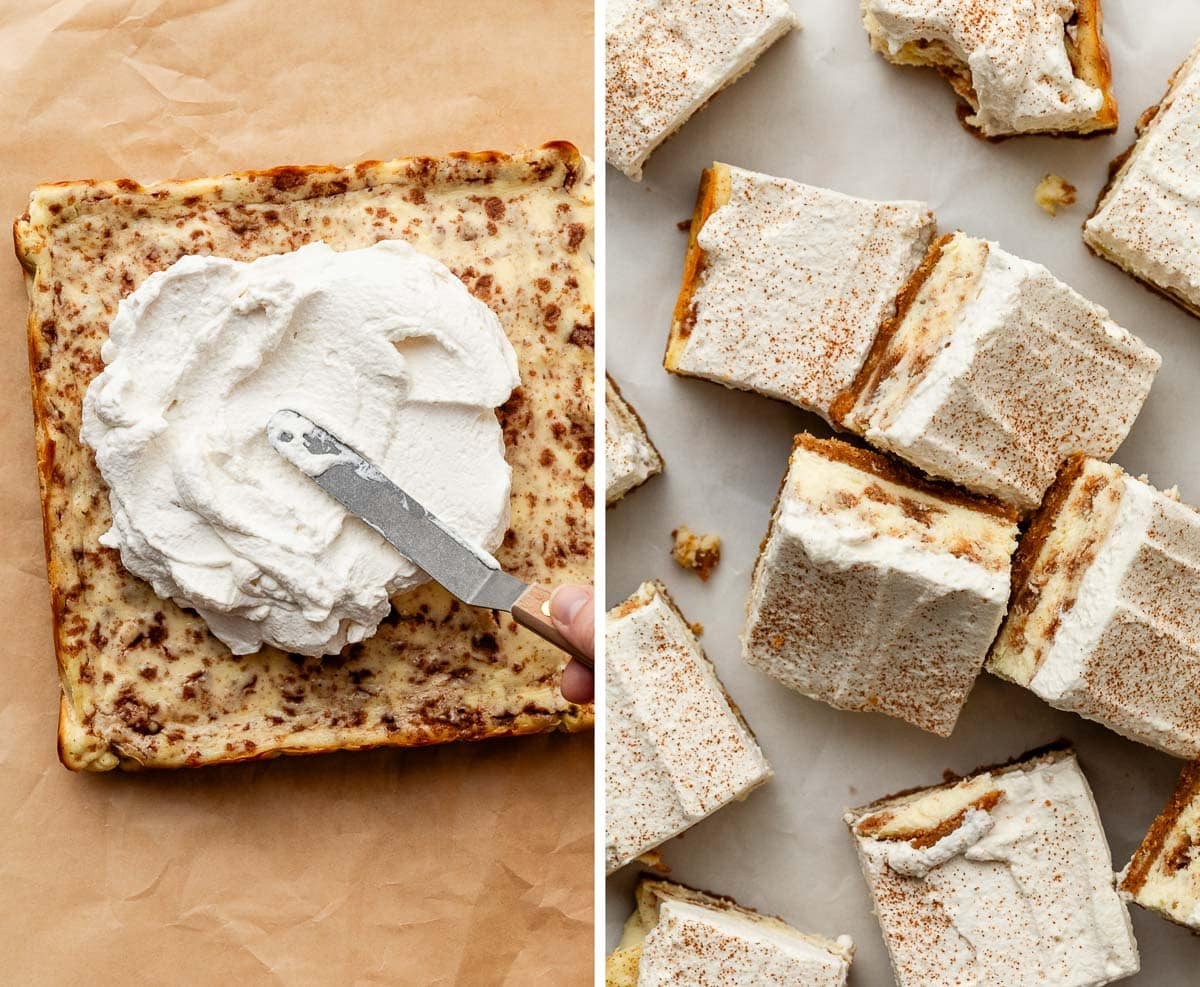
A light layer of whipped cream and a sprinkle of cinnamon is a simple yet beautiful way to top this cinnamon swirl cheesecake.
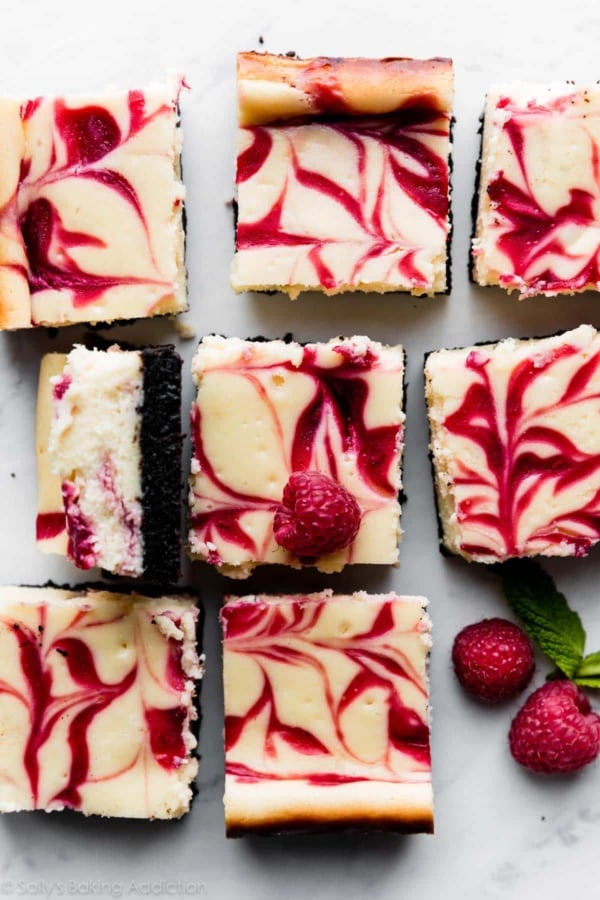
Try It as Cinnamon Swirl Cheesecake Bars
If you’d like to make a smaller-batch version of this recipe, you can (roughly) halve the recipe and make it as cheesecake bars in a 9-inch square baking pan. See the instructions included in the recipe Notes below. We LOVED it this way, too!
Cinnamon Swirl Cheesecake
- Prep Time: 50 minutes
- Cook Time: 75 minutes
- Total Time: 8 hours (includes chilling)
- Yield: serves 12-16
- Category: Dessert
- Method: Baking
- Cuisine: American
Description
Two favorite indulgences come together to make one epic dessert in this cinnamon-roll inspired cheesecake. Swirl crumbles of buttery cinnamon-brown sugar filling into layers of rich, creamy cheesecake, and bake atop a thick graham cracker crust. Top with brown sugar whipped cream and a sprinkle of cinnamon for the perfect finishing touch.
Ingredients
Graham Cracker Crust
- 1 and 1/2 cups (180g) graham cracker crumbs (about 12 full-sheet graham crackers)
- 1/4 cup (50g) granulated sugar
- 5 Tablespoons (71g) unsalted butter, melted
Cheesecake
- 32 ounces (904g) full-fat brick cream cheese, softened to room temperature
- 1 cup (200g) granulated sugar
- 3/4 cup (180g) full-fat sour cream, at room temperature
- 1 and 1/2 teaspoons vanilla extract or vanilla bean paste
- 3 large eggs, at room temperature
Cinnamon Swirl
- 3/4 cup (150g) packed light or dark brown sugar
- 1/2 cup (60g) all-purpose flour
- 1 Tablespoon ground cinnamon
- 5 Tablespoons (71g) unsalted butter, melted
Whipped Cream Topping
- 1 and 1/2 cups heavy cream, cold
- 2 Tablespoons light or dark brown sugar
- 1 teaspoon pure vanilla extract
- optional: ground cinnamon, for garnish
Instructions
- Adjust the oven rack to the lower-middle position, and preheat oven to 350°F (177°C).
- Make the crust: If you’re starting out with full graham crackers, use a food processor or blender to grind them into fine crumbs. Pour into a medium bowl and stir in sugar until combined, and then stir in the melted butter. Mixture will be sandy. Try to smash/break up any large chunks. Pour into an ungreased 9-inch or 10-inch springform pan. With medium pressure using your hand, pat the crumbs down into the bottom and partly up the sides to make a compact crust. Do not pack down with heavy force because that makes the crust too hard. Simply pat down until the mixture is no longer crumbly; you can use the flat bottom of a small measuring cup to help smooth it all out if needed. Pre-bake for 10 minutes. Remove from the oven and place the hot pan on a large piece of heavy-duty aluminum foil (use a double layer for extra protection, if desired). You will wrap the foil around the pan in step 5. Allow crust to slightly cool as you prepare the filling.
- Make the cheesecake: Using a handheld or stand mixer fitted with a paddle attachment, beat the cream cheese and sugar together on medium-high speed in a large bowl until the mixture is smooth and creamy, about 2 minutes. Add the sour cream and vanilla and then beat until fully combined. Scrape down the sides of the bowl as needed. Add the eggs one at a time, beating on medium speed after each addition until just incorporated. After the final egg is incorporated into the batter, stop mixing. To help prevent the cheesecake from deflating and cracking, avoid over-mixing the batter as best you can.
- Make the cinnamon swirl filling: In a medium bowl, using a fork, mix together the brown sugar, flour, and cinnamon until combined. Add the melted butter and mix until everything comes together. The mixture will be sandy and crumbly.
- Wrap the aluminum foil around the springform pan.
- Assemble the cheesecake: Pour about a third of the cheesecake batter into the crust (you can eyeball it; this doesn’t need to be exact). Use a spatula or spoon to smooth it into an even layer. Sprinkle about half of the cinnamon swirl mixture over the top. Pour another third of the cheesecake batter over top of the cinnamon swirl layer, then sprinkle on most of the remaining cinnamon swirl mixture, reserving a couple Tablespoons for the topping. Finally, pour the remaining cheesecake batter over top and smooth it into an even layer. Sprinkle with remaining cinnamon mixture. With a knife, gently swirl the layers of batter and cinnamon filling together. I like to swirl it in a spiral, like a cinnamon roll (though you really can’t tell when it’s done baking, so swirl in any way you like!).
- Prepare the water bath (see recipe Notes for alternate water bath method): If needed for extra visuals, see How to Make a Cheesecake Water Bath; the visual guide will assist you in this step. Boil a kettle of water. You need 1 inch of water in your roasting pan for the water bath, so make sure you boil enough. I use an entire kettle of hot water. Place the wrapped pan inside of a large roasting pan. Carefully pour the hot water inside of the pan and place in the oven. (Or you can place the roasting pan in the oven first, then pour the hot water in. Whichever is easier for you.)
- Bake cheesecake for 65–85 minutes or until the edges are set. Don’t get nervous if your cheesecake takes longer than this. When it’s done, the center of the cheesecake will slightly wobble if you gently shake the pan.
- Cool & chill the cheesecake: Turn the oven off and open the oven door slightly. Let the cheesecake sit in the oven, door slightly ajar, as it cools down for 1 hour. Remove from the oven, then cool cheesecake completely at room temperature. Then, refrigerate the cheesecake for at least 4 hours or overnight.
- Make the whipped cream topping: Using a handheld or stand mixer fitted with a whisk attachment, whip the heavy cream, brown sugar, and vanilla on medium-high speed until medium peaks form, about 3–4 minutes. Medium peaks are between soft/loose peaks and stiff peaks, and are the perfect consistency for topping and piping on desserts.
- Use a knife to loosen the chilled cheesecake from the rim of the springform pan, then remove the rim. Spread a layer of whipped cream over top of the cheesecake (I use an offset spatula) and, if desired, you can transfer some to a piping bag and pipe a design on top. I used Wilton 1M piping tip for the pictured whipped cream border. Lightly dust cinnamon on top, if using. Using a sharp knife, cut into slices for serving. For neat slices, wipe the knife clean and dip into warm water between each slice.
- Cover and store leftover cheesecake in the refrigerator for up to 5 days.
Notes
- Make-Ahead Instructions: This cheesecake can be made the day before. It has to chill for quite some time before serving. Another way to make this cheesecake ahead of time is to freeze it (without the whipped cream topping). Cheesecake can be frozen for up to 3 months. Thaw overnight in the refrigerator. Make the whipped cream topping fresh the day you plan to serve it.
- Special Tools (affiliate links): Food Processor | Glass Mixing Bowls | 9-inch Springform Pan or 10-inch Springform Pan | Electric Mixer (Handheld or Stand) | Silicone Spatula | Roasting Pan | Offset Spatula | Piping Bag (Disposable or Reusable) and Wilton 1M Piping Tip (if piping whipped cream) | Cake Carrier (for storing and transporting)
- Alternate Water Bath Method: This method works as well, and you don’t have to bake the cheesecake IN water. Boil a kettle or pot of water. You need 1 inch of hot water in your roasting pan for the water bath, so make sure you boil enough. Place the cheesecake on the center oven rack of the preheated oven. Place a large metal baking or roasting pan (do not use glass—I usually use a 9×13-inch baking pan or an extra-large cast iron skillet) on the bottom rack. Pour boiling water into the empty pan, about 1 inch deep. Immediately close oven to trap the steam inside. This unique water bath adds steam to the oven without having the cheesecake sit inside the water itself. No need to wrap the springform pan in foil. See How to Make a Cheesecake Water Bath for more information.
- Room-Temperature Ingredients: Bring all cold ingredients to room temperature before beginning. Room-temperature ingredients combine quickly and evenly, so you won’t risk over-mixing. Also, beating cold ingredients together will result in a chunky cheesecake batter, hardly the way you want to begin!
- Halve the Recipe to Make Cheesecake Bars: If you’d like to make this recipe as small-batch cheesecake bars, you can do so in a 9-inch square pan. Line the pan with parchment paper with enough overhang on the sides to easily lift the chilled bars out as a whole. The crust recipe is the same as the full cheesecake. Press it into the bottom of the lined pan and pre-bake it for 8 minutes, same oven temperature. Cheesecake: 16 ounces (454g) cream cheese, 1/3 cup (67g) granulated sugar, 1/3 cup (80g) sour cream, 1/2 teaspoon vanilla, 2 eggs. Cinnamon Swirl: 6 Tablespoons (75g) brown sugar; 1 and 1/2 teaspoons cinnamon; 1/4 cup (30g) all-purpose flour; 3 Tablespoons (43g) butter, melted. Follow the same instructions for preparing the cheesecake batter and cinnamon swirl. Pour half the cheesecake batter into the pan over the crust and smooth it into an even layer. Sprinkle half of the cinnamon filling crumbles over the top. Pour and spread the remaining cheesecake batter over top, then sprinkle the remaining cinnamon filling crumbles over the top. Gently swirl batter with a knife. Bake the bars using the alternate water bath method outlined in recipe Note #3 above. Bake for 30–35 minutes, until the bars are mostly set. Let cool in the pan set on a cooling rack for 30 minutes, then refrigerate for at least 3 hours. For the topping, you can simply halve the whipped cream ingredient amounts.
- Non-US Readers: Don’t have graham crackers where you live? Use 200g ground digestive biscuit crumbs (about 2 cups; 13–14 biscuits), 1/3 cup (67g) granulated sugar, and 6 Tablespoons (85g) melted butter. Pre-bake the crust for a bit longer, about 12–14 minutes. And from what I understand, spreadable cream cheese sold in a tub in countries outside of the US is a little different from the spreadable cream cheese in the US. It’s thicker, sturdier, and more solid and may be OK for this recipe. I have no experience with it, but this is what I’ve heard from other non-US readers.
Cinnamon swirl filling adapted from Delish.com


Reader Comments and Reviews
This was a relatively easy recipe. It’s probably my favorite “baked” cheesecake without the cinnamon. The cinnamon adds flair which makes it unique. Definitely try this if you like cinnamon and rich desserts.
Amazing recipe! I loved the challenge and even though mine turned out cracked and sank down, the whipped cream topping made it turn out looking beautiful! I’ll need to make more cheesecakes to perfect my mistakes but I had fun making this one and will most likely make it again.
Clear and easy instructions that yield bakery style results. If you love cheesecake, make this recipe.
So delicious! perfect combination between coffee cake and cheesecake. My friends and family loved it.
This cheesecake is very good and not very sweet. My only issue with it was that the cinnamon swirl mixture came out more like hard wet mud than sandy, so it was hard to incorporate in layers in the cheesecake. Sometimes in eating the cheesecake you got big chunks of cinnamon sugar mixture which wasn’t the most ideal.
It was soooooo rich and creamy but not overly sweet. My family quickly devoured it. I will definetly make this again!
This cheesecake recipe was delicious, everyone devoured it up. It was my first time making cheesecake I followed the recipe exactly as written and the photos helped me along but overall it was not as hard as I thought and the ending result was perfect. Not a single crack anywhere on the cheesecake and the flavor was spot on. I will definitely be making this one again. Thank you!
So glad this was a hit for you, Amanda! Thanks for giving it a try!
cinnamon delicious!
Very rich but so so good! The whipped cream is a nice balance.
Everyone loved the cinnamon swirl and fresh whipped cream! Very easy to follow and came out great!
I made the mini cheesecakes and they were so easy and delicious!
This recipe was so easy to follow. The cheesecake was super rich and creamy. I’d definitely make this again!
I was so intimidated to try this bake but Sally’s thorough instructions made it so easy and doable. More time consumming than challenging it was a delight to make and everyone who has had it absolutley loved it! Thanks for another great one Team Sally!
Creamy, delicious, and fairly easy to make! I am learning a lot about various cheesecake methods from Sally’s website. I tried the alternate method and I don’t think it worked as great as a traditional water bath. However, the taste is still great!
I loved this recipe and challenge. The recipe was well written and easy to follow! Can’t wait to gift this cheesecake to my coworker that is retiring tomorrow!
It is delicious. My company loved it!
I love the details! Directions are easy to follow and you can’t go wrong with Sallys delicious cheesecakes!
Amazing recipe! Very easy to follow, and fun to make!! Result was beautiful and I can’t wait to make it again ✨
The recipe was easy to follow. The hardest part? Waiting so long for it to chill! I couldn’t wait to dig in and I wasn’t disappointed. This was absolutely delicious!
Delicious! The cheesecake is great to begin with and the cinnamon swirl adds a nice touch.
Amazingly delicious!! So rich and tasty!
Absolutely delicious! I made it in two 9 inch squares instead of the springform pan due to time. I also used cinnamon Graham crackers for the crust. Absolute crowd pleaser!
Yum!! I’ve never made cheesecake before, but it was much easier than I expected it to be. The step by step instructions were so clear and easy to read!! Another amazing recipe!
My husband said this is the best thing I’ve made from Sally. It was a huge success. I did a tray of water beneath my cheesecake and it barely cracked.
I made the bars version. I liked the whipped topping. Not sure I loved the cinnamon swirl here but fun idea and fun to try. Thanks
Great recipe with great instructions! I over baked it but it still was delicious. I really like the cinnamon swirl. I’m going to make this again but going to try the bars.
Delicious. Thank you for making a bar version.
Easy to follow recipe that yielded an AMAZING cheesecake. Creamy texture and a punch of cinnamon flavor. What’s not to love?
This cheesecake was amazing. I made it for a dinner party and it was such a hit! One of the guests (who is not a huge cheesecake fan) took some home and ate it for breakfast the next day. Trust me, it didn’t last long in my house. It got devoured. This is a personal favorite now.
I’m not a fan of chocolate, but love cinnamon, so this was a recipe I HAD to try! Everyone said it was torture smelling it while it was baking, and we all loved it…and I was informed that next time I make it (which means it was a hit) I should edge it with the whipped cream and put apple pie filling in the center on top.