

Today I’m teaching you how to make choux pastry (pâte à choux) with about 100 pictures to show you how it’s done. If you’re not digging all the step-by-step photos, video tutorial, and explanations, scroll down to the recipe to get started. 🙂
By popular request, we’re tackling a French pastry dough: choux pastry, pronounced shoe pastry. Or, in French, pâte à choux. I learned how to make choux pastry in the French baking class I took earlier this summer. We spent an afternoon diving deep into this versatile classic and I’m sharing everything I learned with you today.
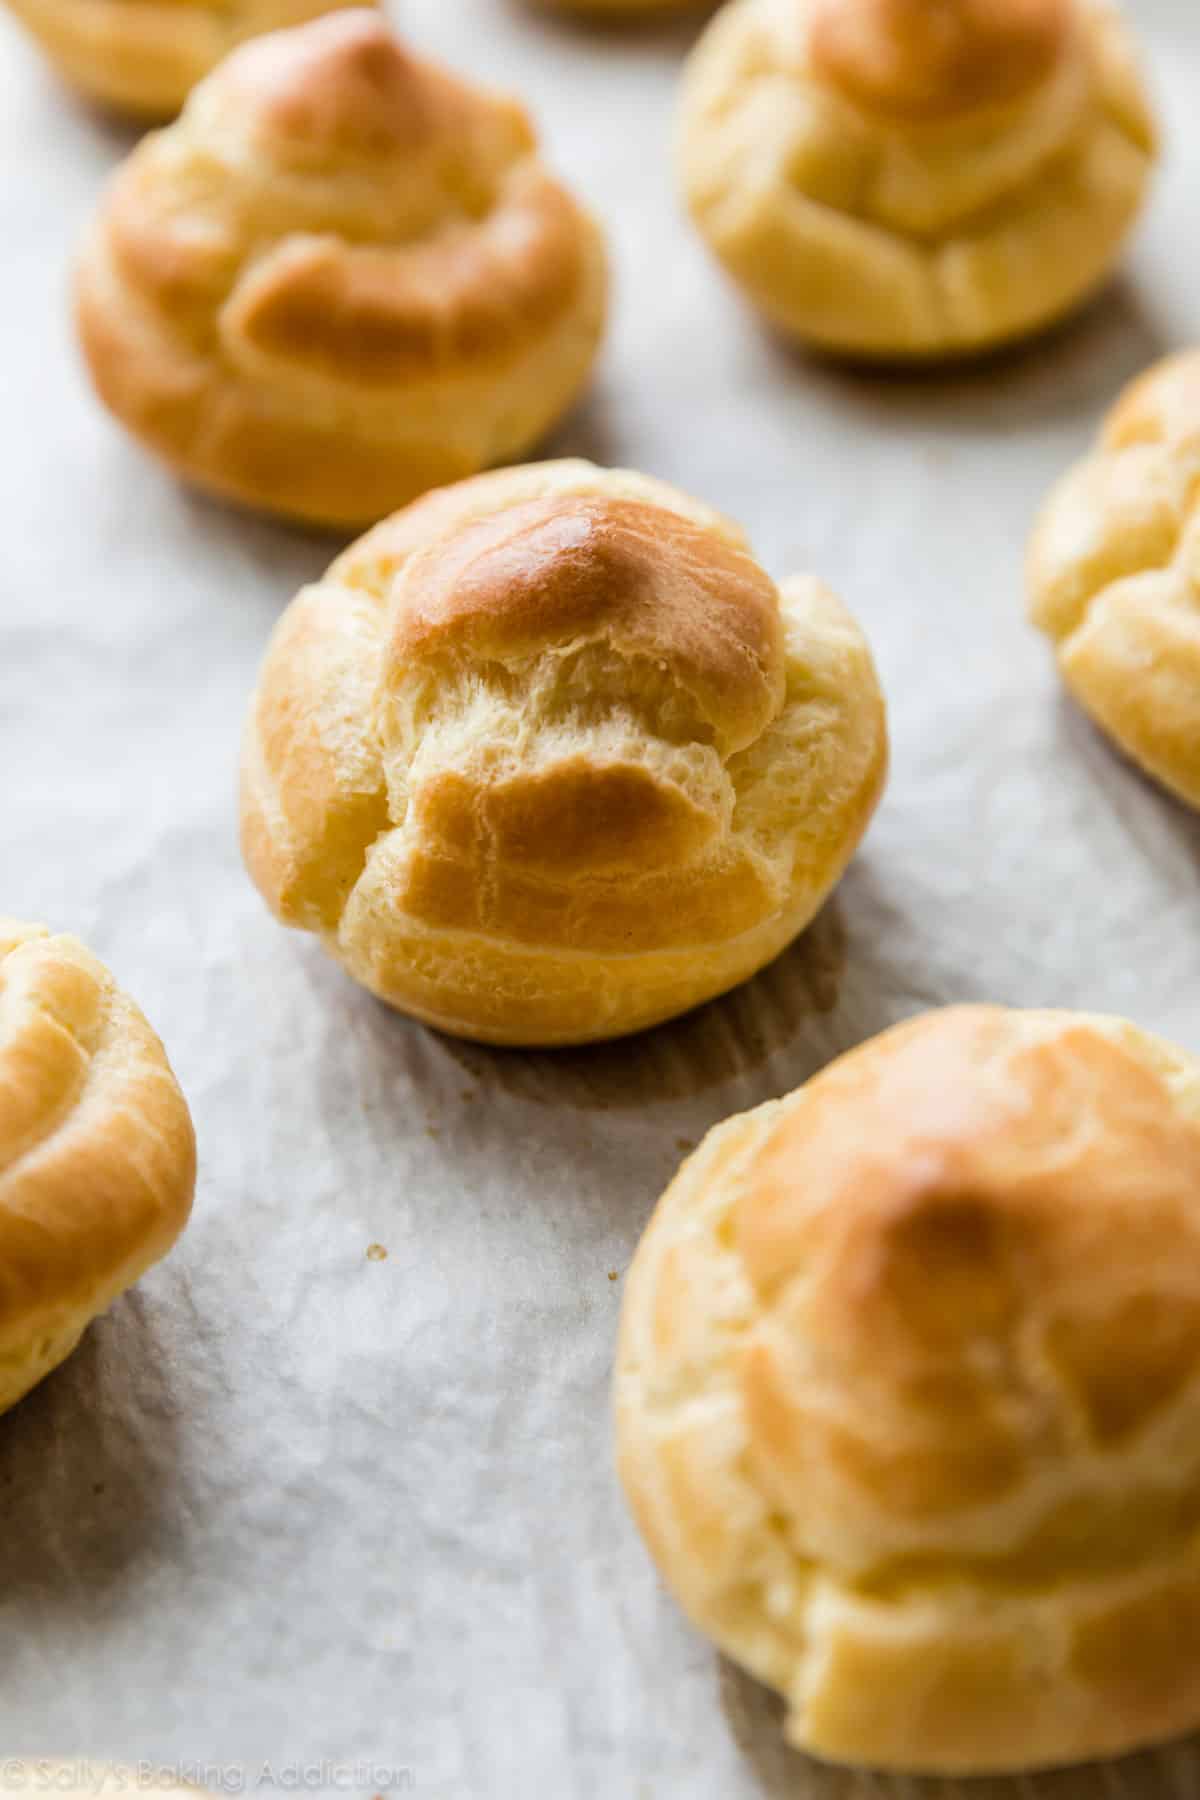
“Choux” means cabbage. So, in other words, cabbage pastry. Why is it called “cabbage” you ask? The name comes from the resemblance the pastry has to tiny cabbages. When baked, the pastry puffs up with little crinkles and ruffles—pictured above. Little cabbages! But instead of cabbage pastry, let’s simply call it choux pastry.
Like other French pastries such as croissants or even croissant bread, choux has the reputation for being difficult, but—as I witnessed with several other bakers in our French pastry class—it’s surprisingly simple. Master this easy recipe and you can make many pastries most bakers are scared to try. Pipe logs and fill with pastry cream for eclairs, pipe dollops and sandwich with whipped cream or ice cream for cream puffs and profiteroles, mix it with cheese and herbs for savory gougères, deep fry it for churros, French cruller donuts, choux beignets, the list goes on.
Choux pastry is a wonderful recipe to master because if you stick to the 1 basic recipe below, the door to DOZENS of other pastries is wide open.
Today I’m showing you how to make sweet cream puffs and profiteroles. Later this week, I’ll show you how to make eclairs. (Update: here is the eclairs recipe!) Feel free to use this basic choux dough in any of the pastries listed above!
TWO SIMPLE RULES FOR CHOUX PASTRY
- Stick to the ingredients and measurements
- Don’t open the oven while it bakes
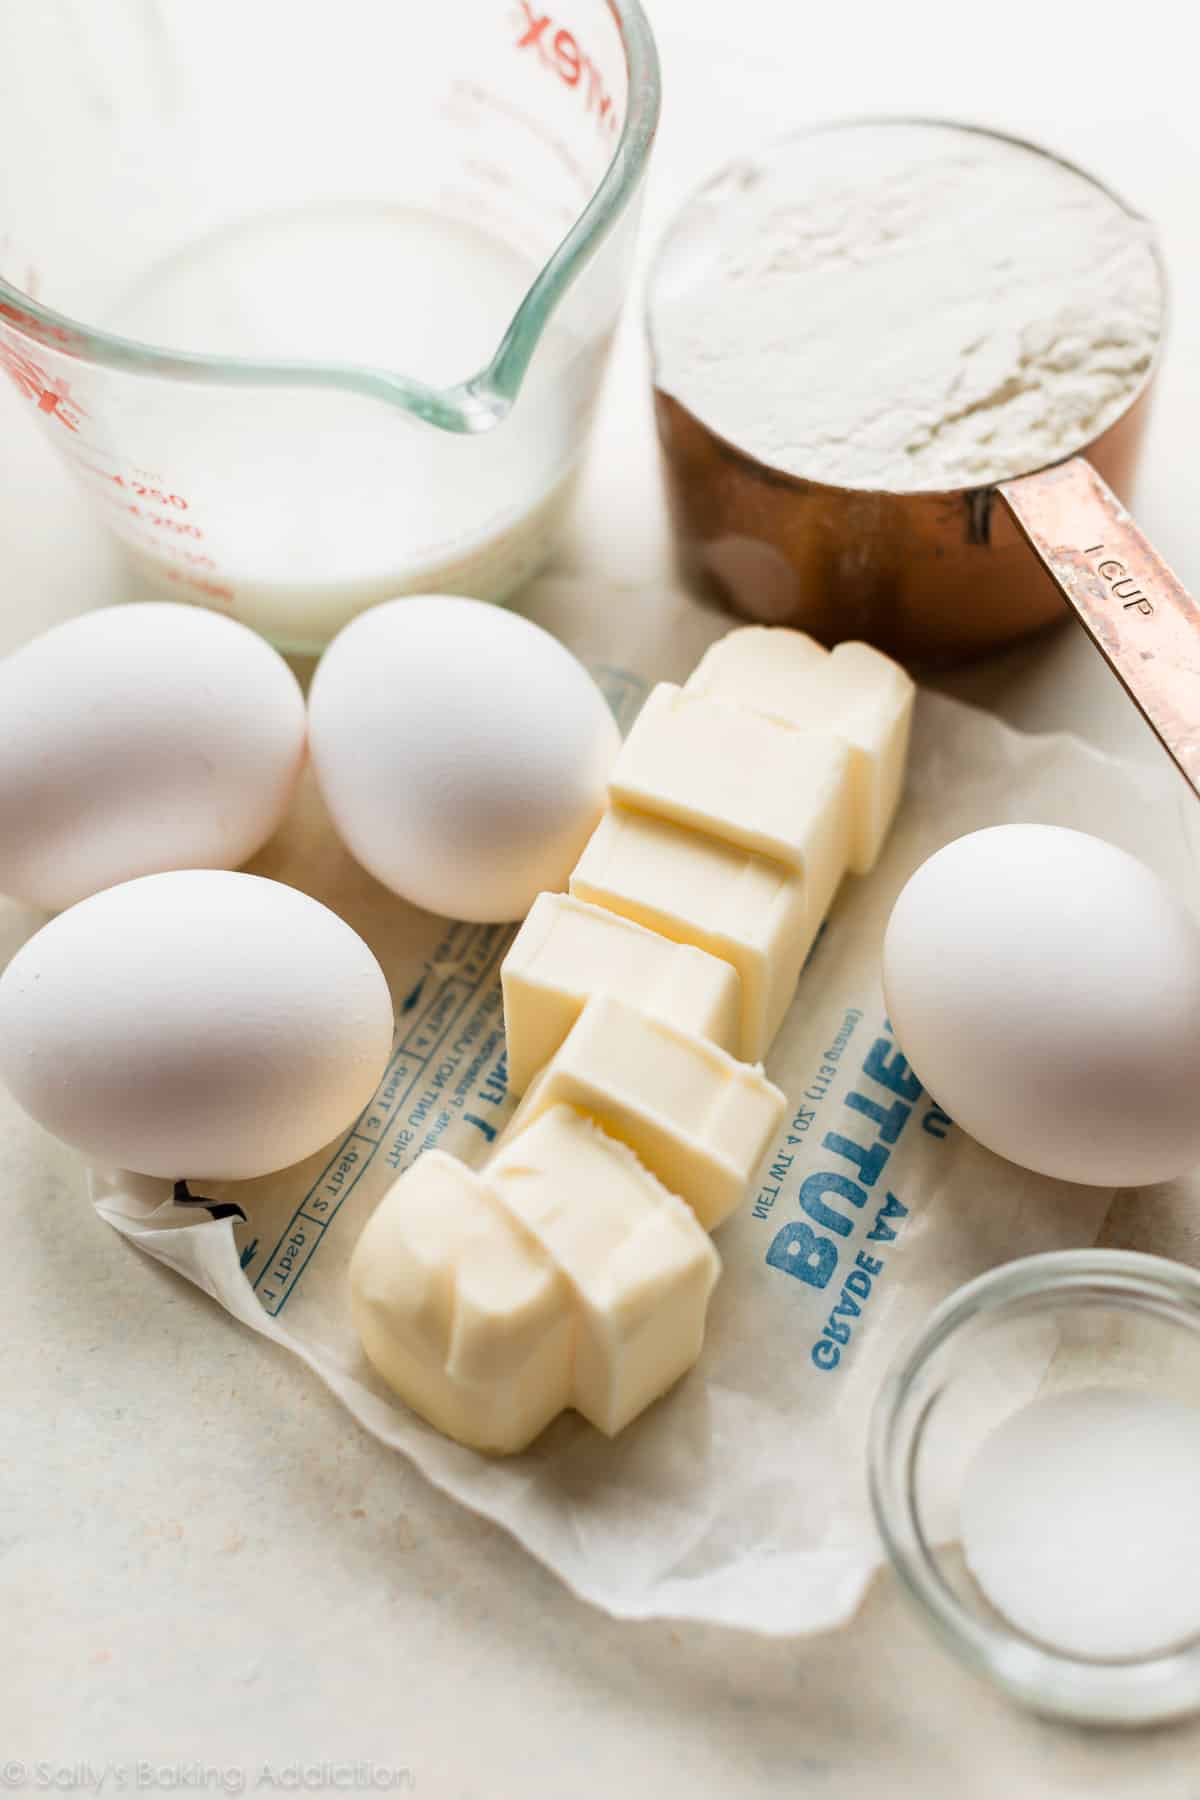
The 7 ingredients are staples that you likely have in the kitchen right now: butter, water, milk, sugar, salt, flour, and eggs. Some recipes use all water instead of milk + water, but I find the combination yields a slightly softer and richer pastry. Not many choux pastry recipes call for sugar, but only 2 teaspoons provide a little flavor. The bulk of the pastry dough is eggs. Eggs provide some leavening, allowing the pastries to puff up when baked. The centers are soft, light, and airy. The exterior is golden and crisp. A beautiful marriage of textures!!
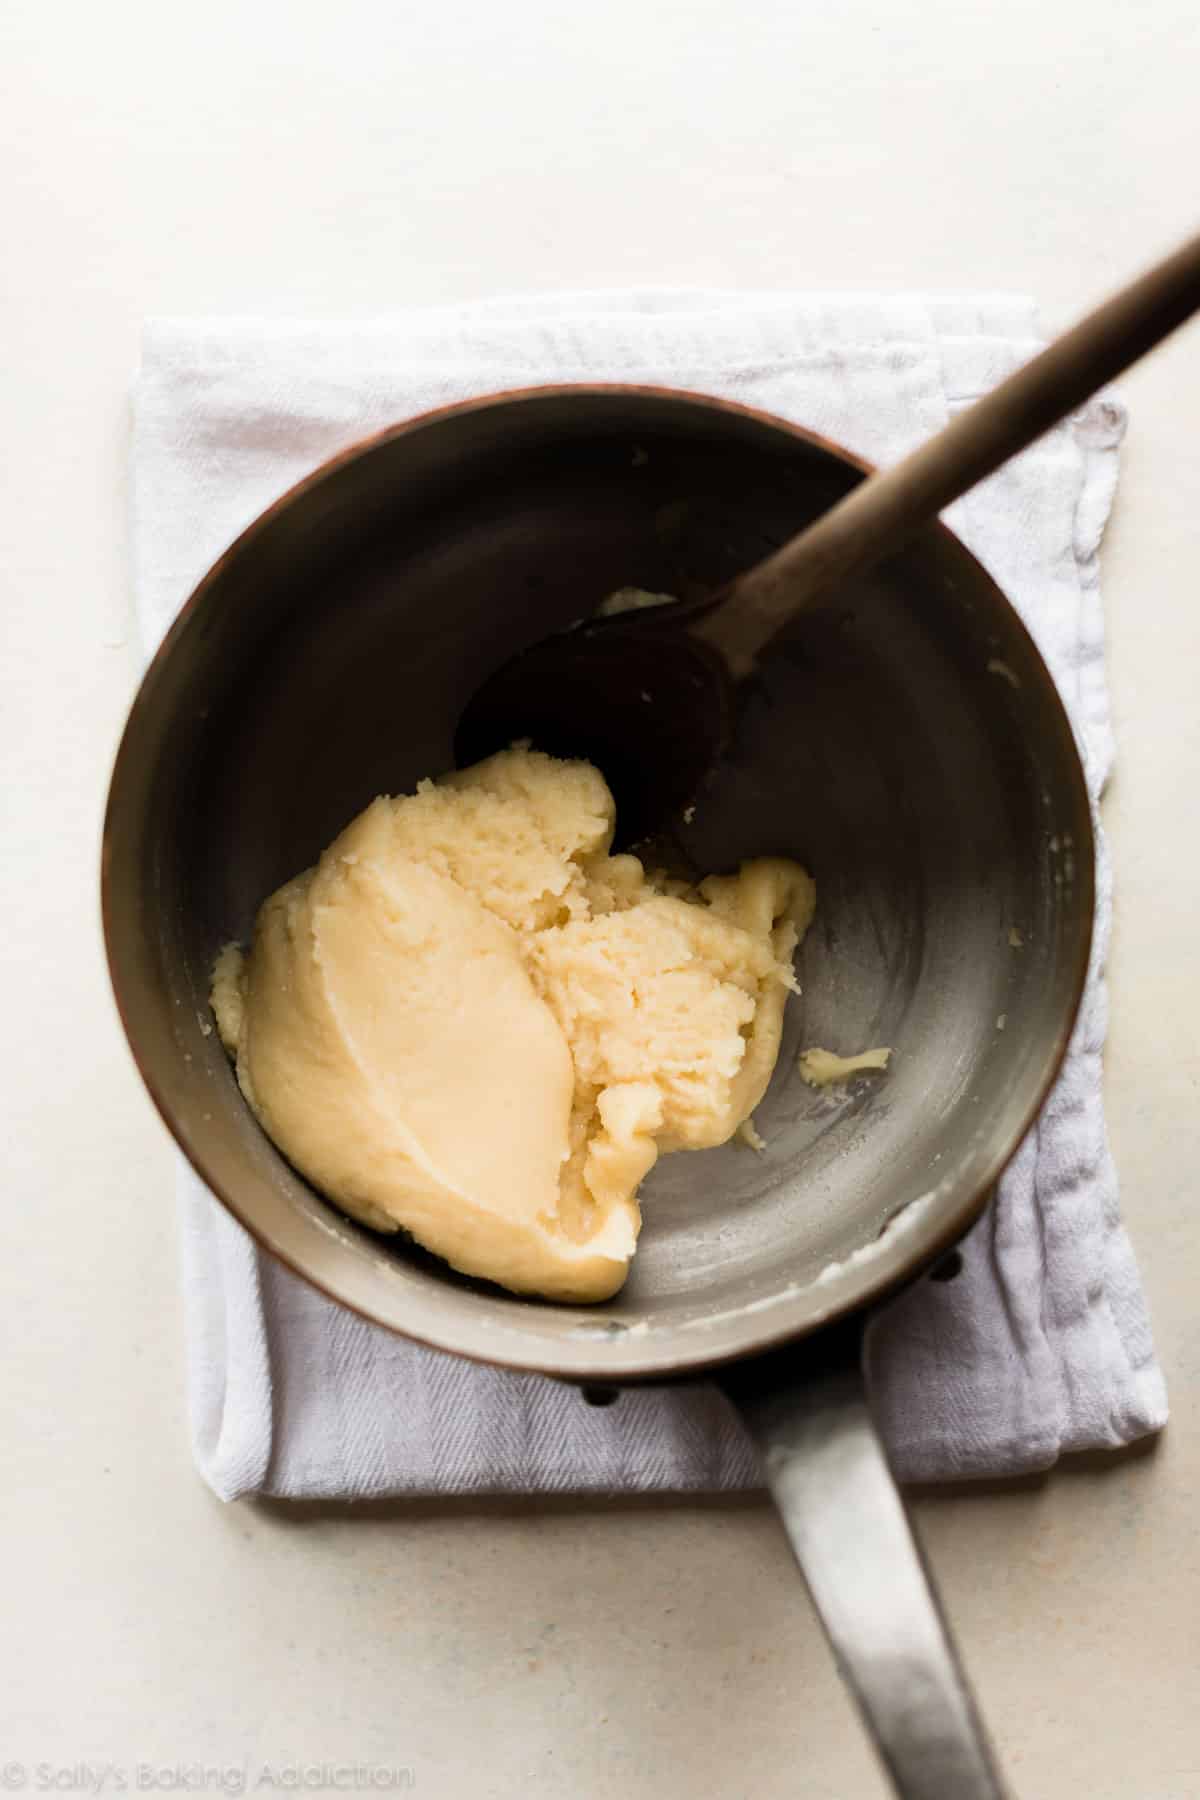
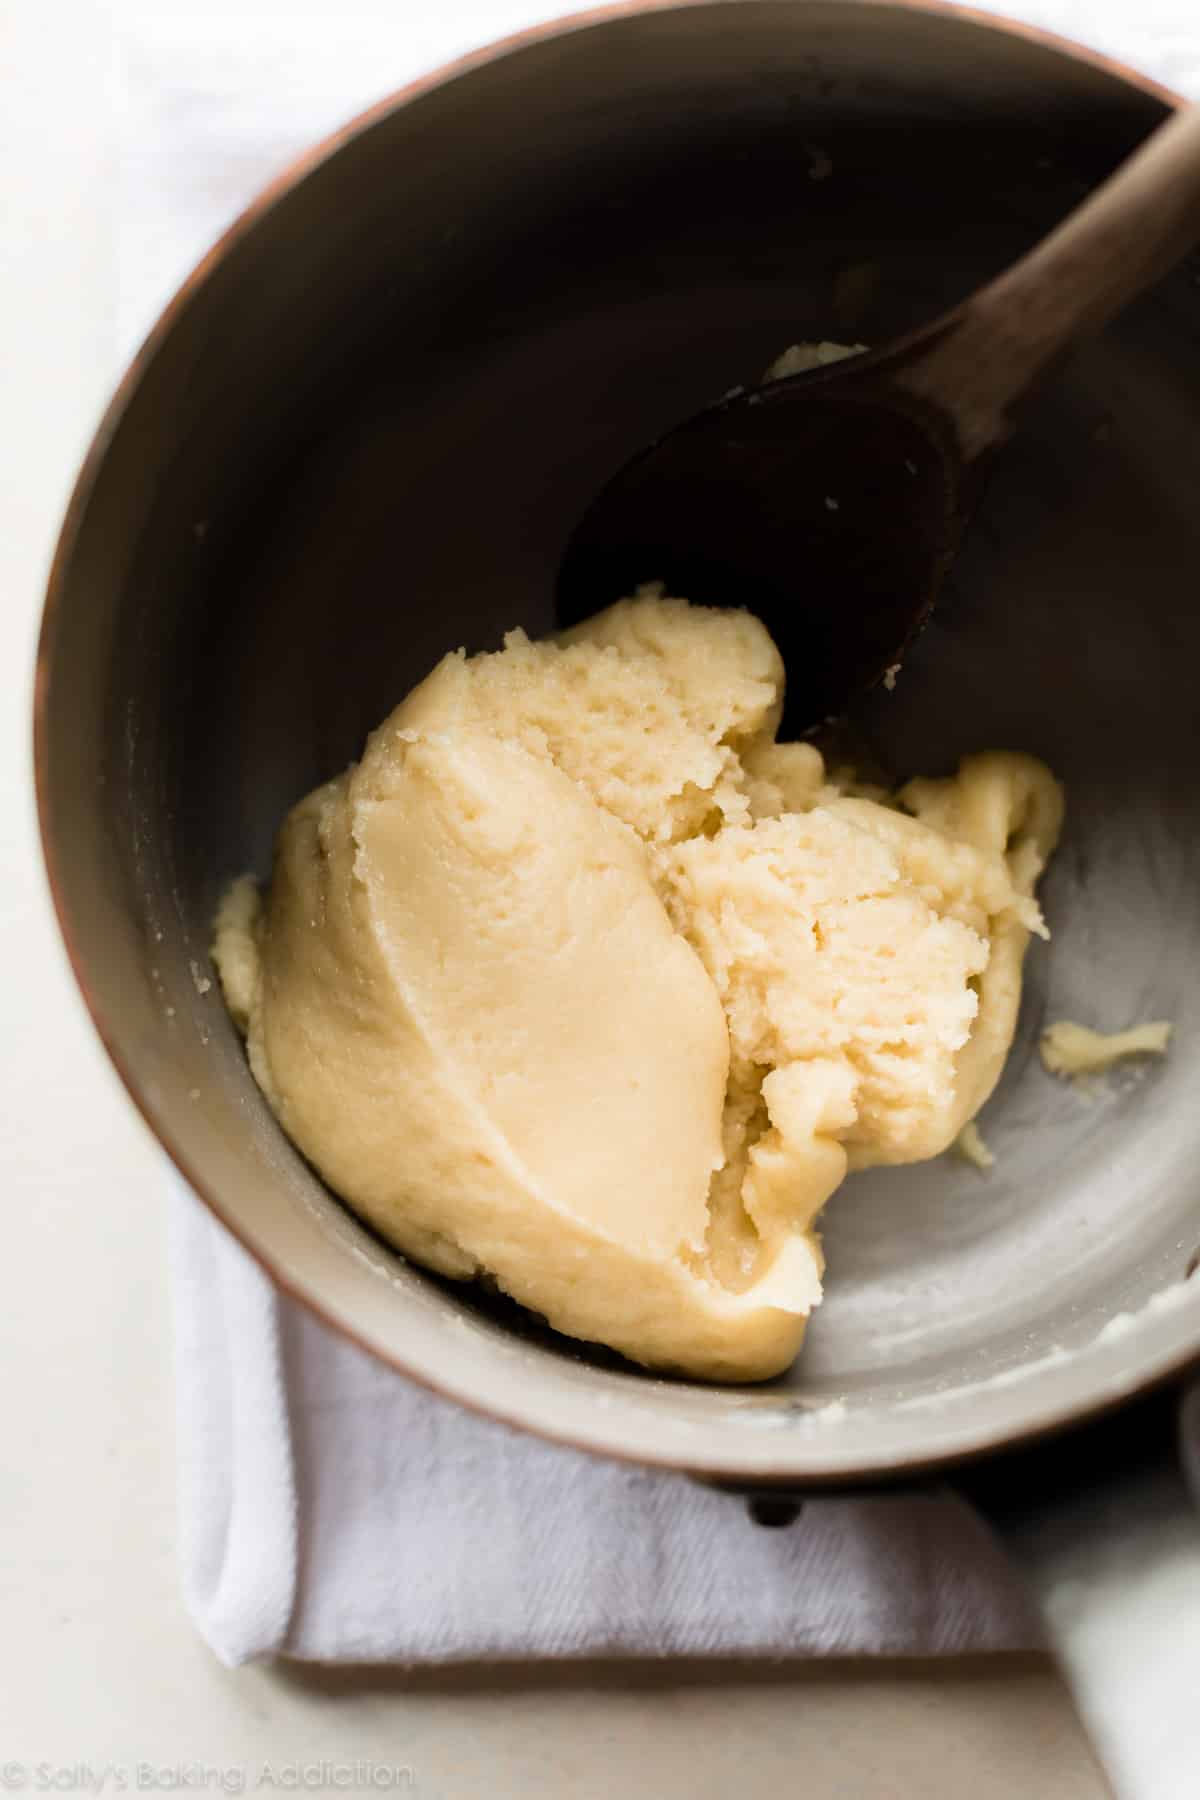
Choux pastry comes together in about 10-15 minutes. Most of the ingredients are cooked together on the stove; this initial cooking causes the starch in the flour to gelatinize, which will help the pastry hold onto steam and puff up. The Spruce Eats has an interesting article explaining the science of choux pastry if you’re into that!
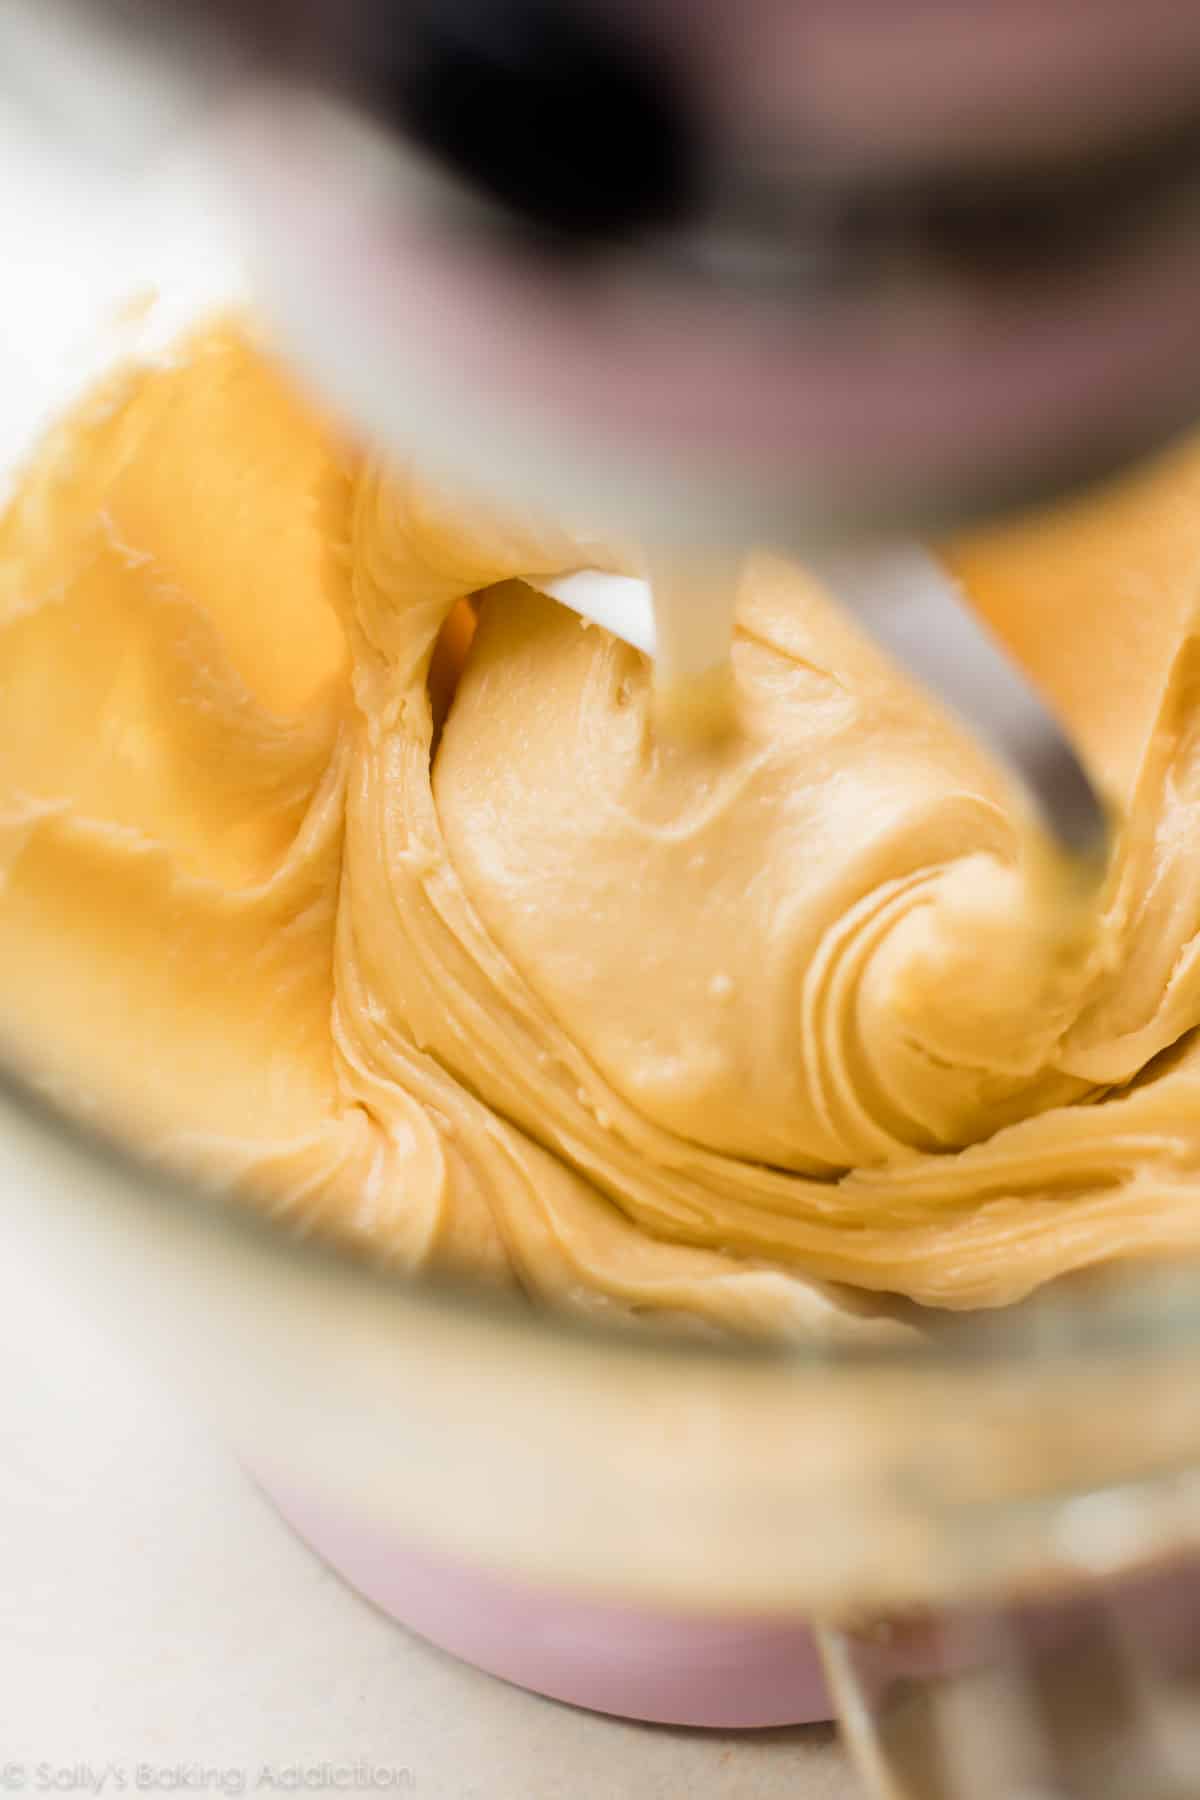
After the choux pastry dough is gently cooked on the stove, transfer to a mixing bowl and add AROUND 4 beaten eggs. That’s the finicky part—the number of eggs in choux pastry isn’t really consistent between batches. Humidity, the exact size of egg, or an accidental extra 1/2 teaspoon of flour creates inconsistencies. 4 beaten eggs is an ideal starting point, though. Only add as much as you need to create a shiny, thick, and smooth dough with a pipeable consistency. I usually leave a few teaspoons of beaten egg behind, which can be used with the egg wash.
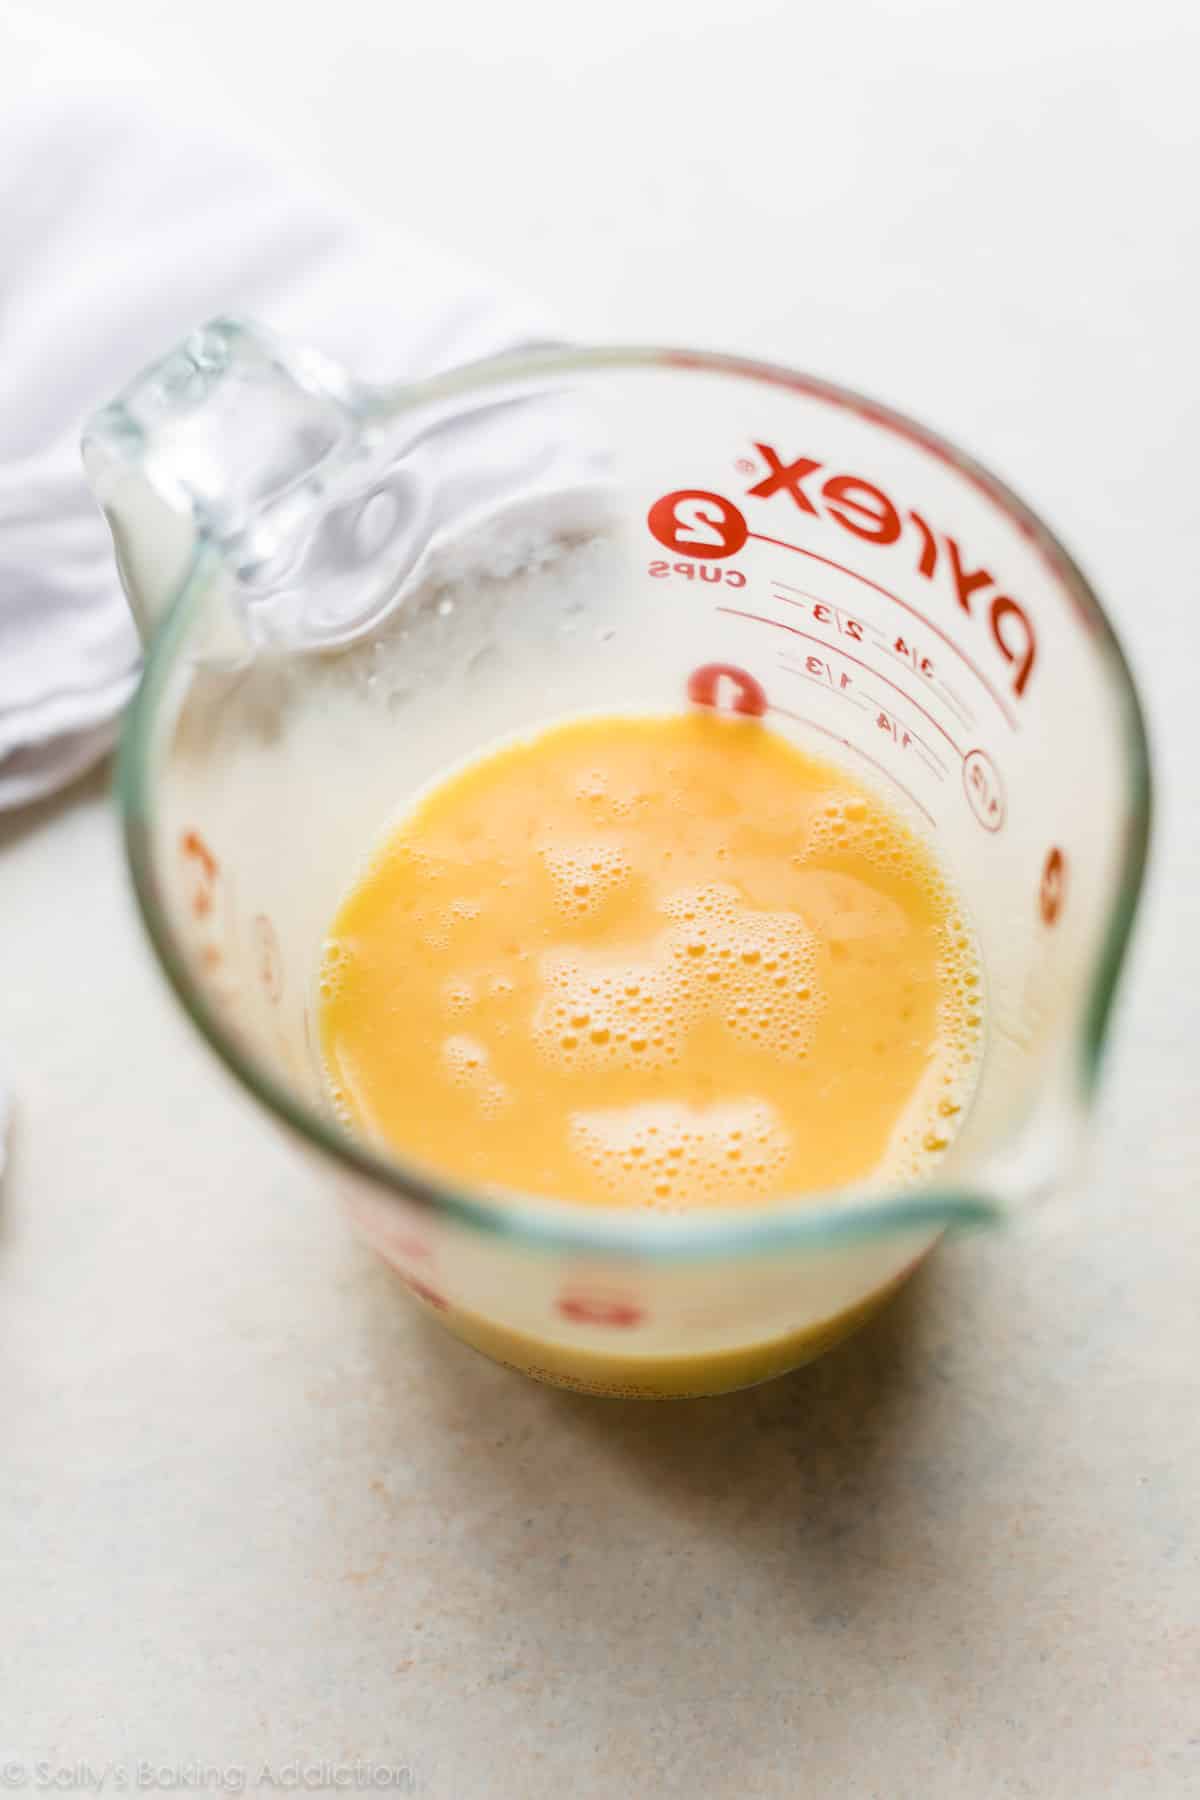
The yolks in the eggs bring most of the flavor and color to choux pastry:
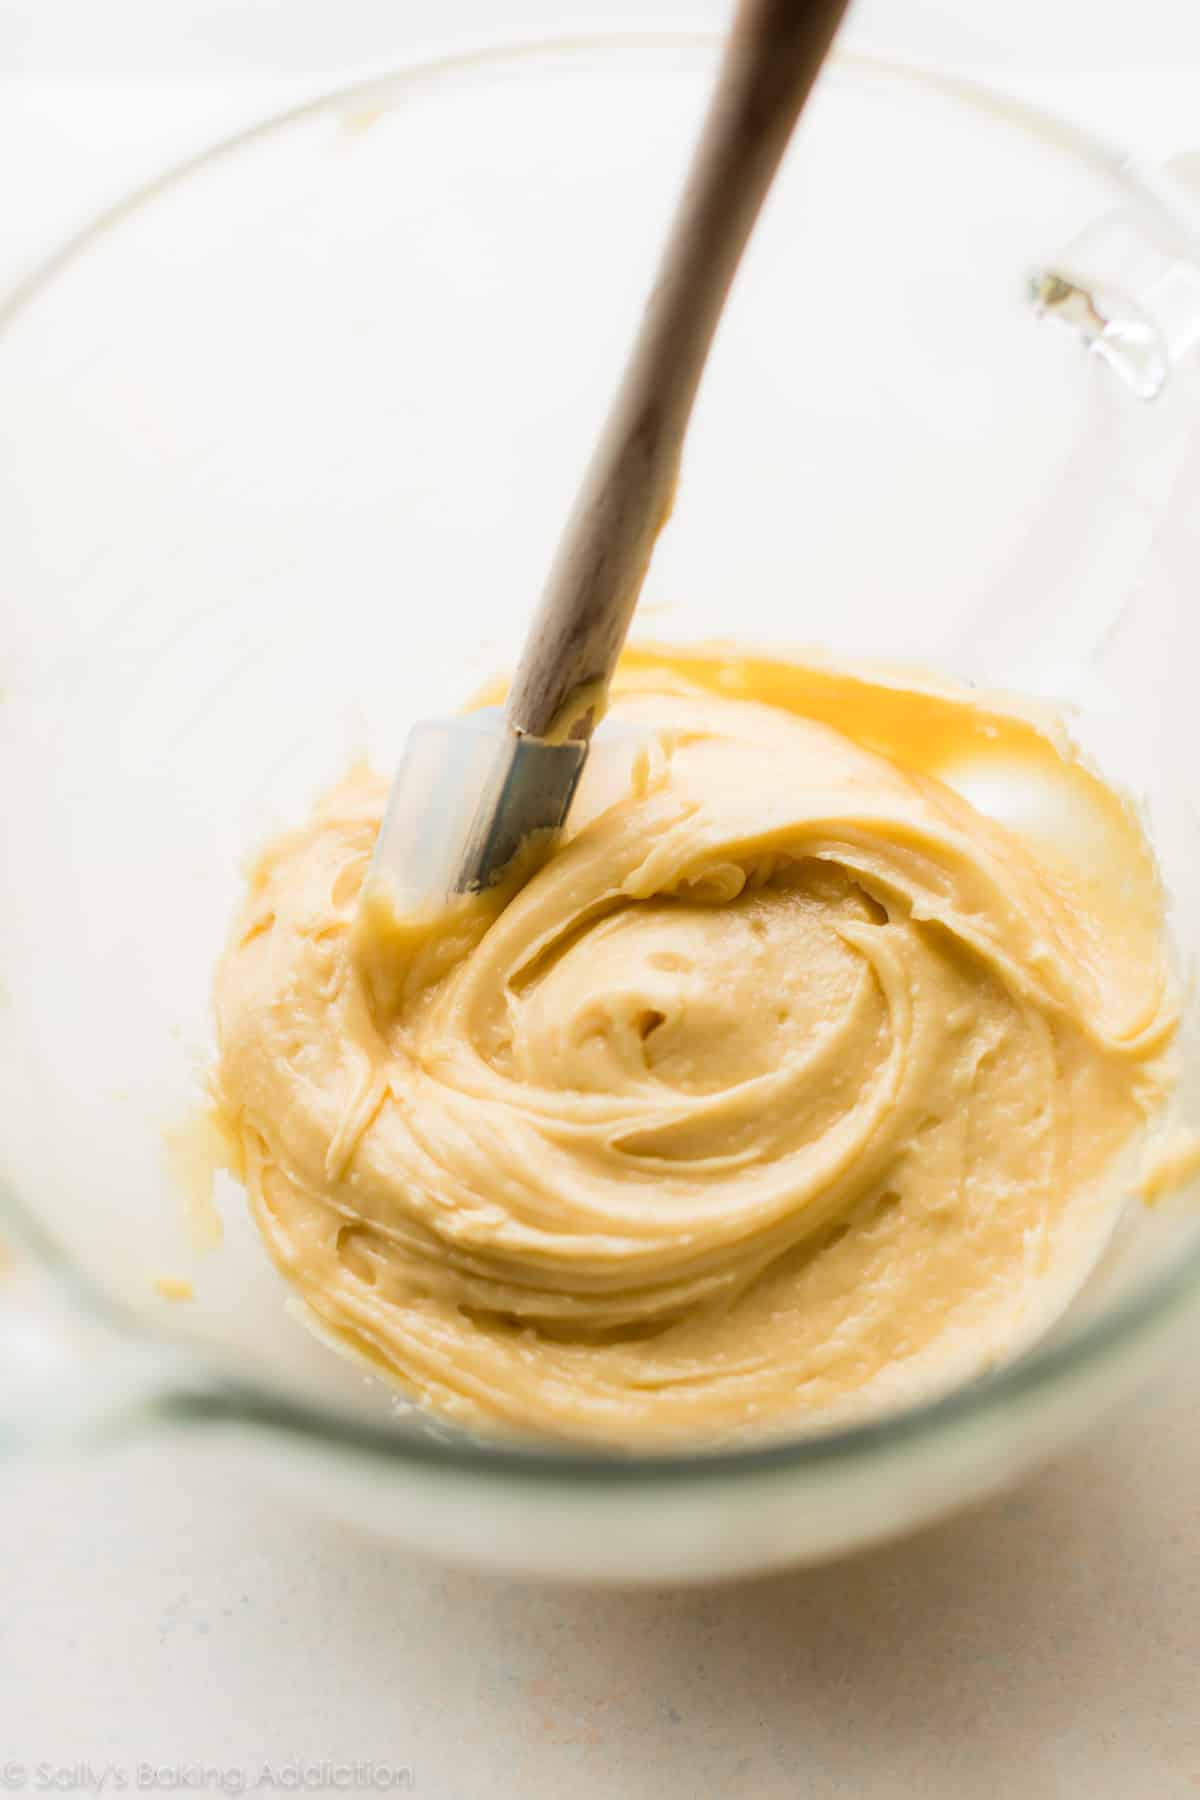
At this point, our choux pastry dough is complete! Yes, that’s really all you need to do before shaping/baking it. Cook 6 ingredients on the stove, then beat in the eggs.
Now let’s make our cream puffs or profiteroles.
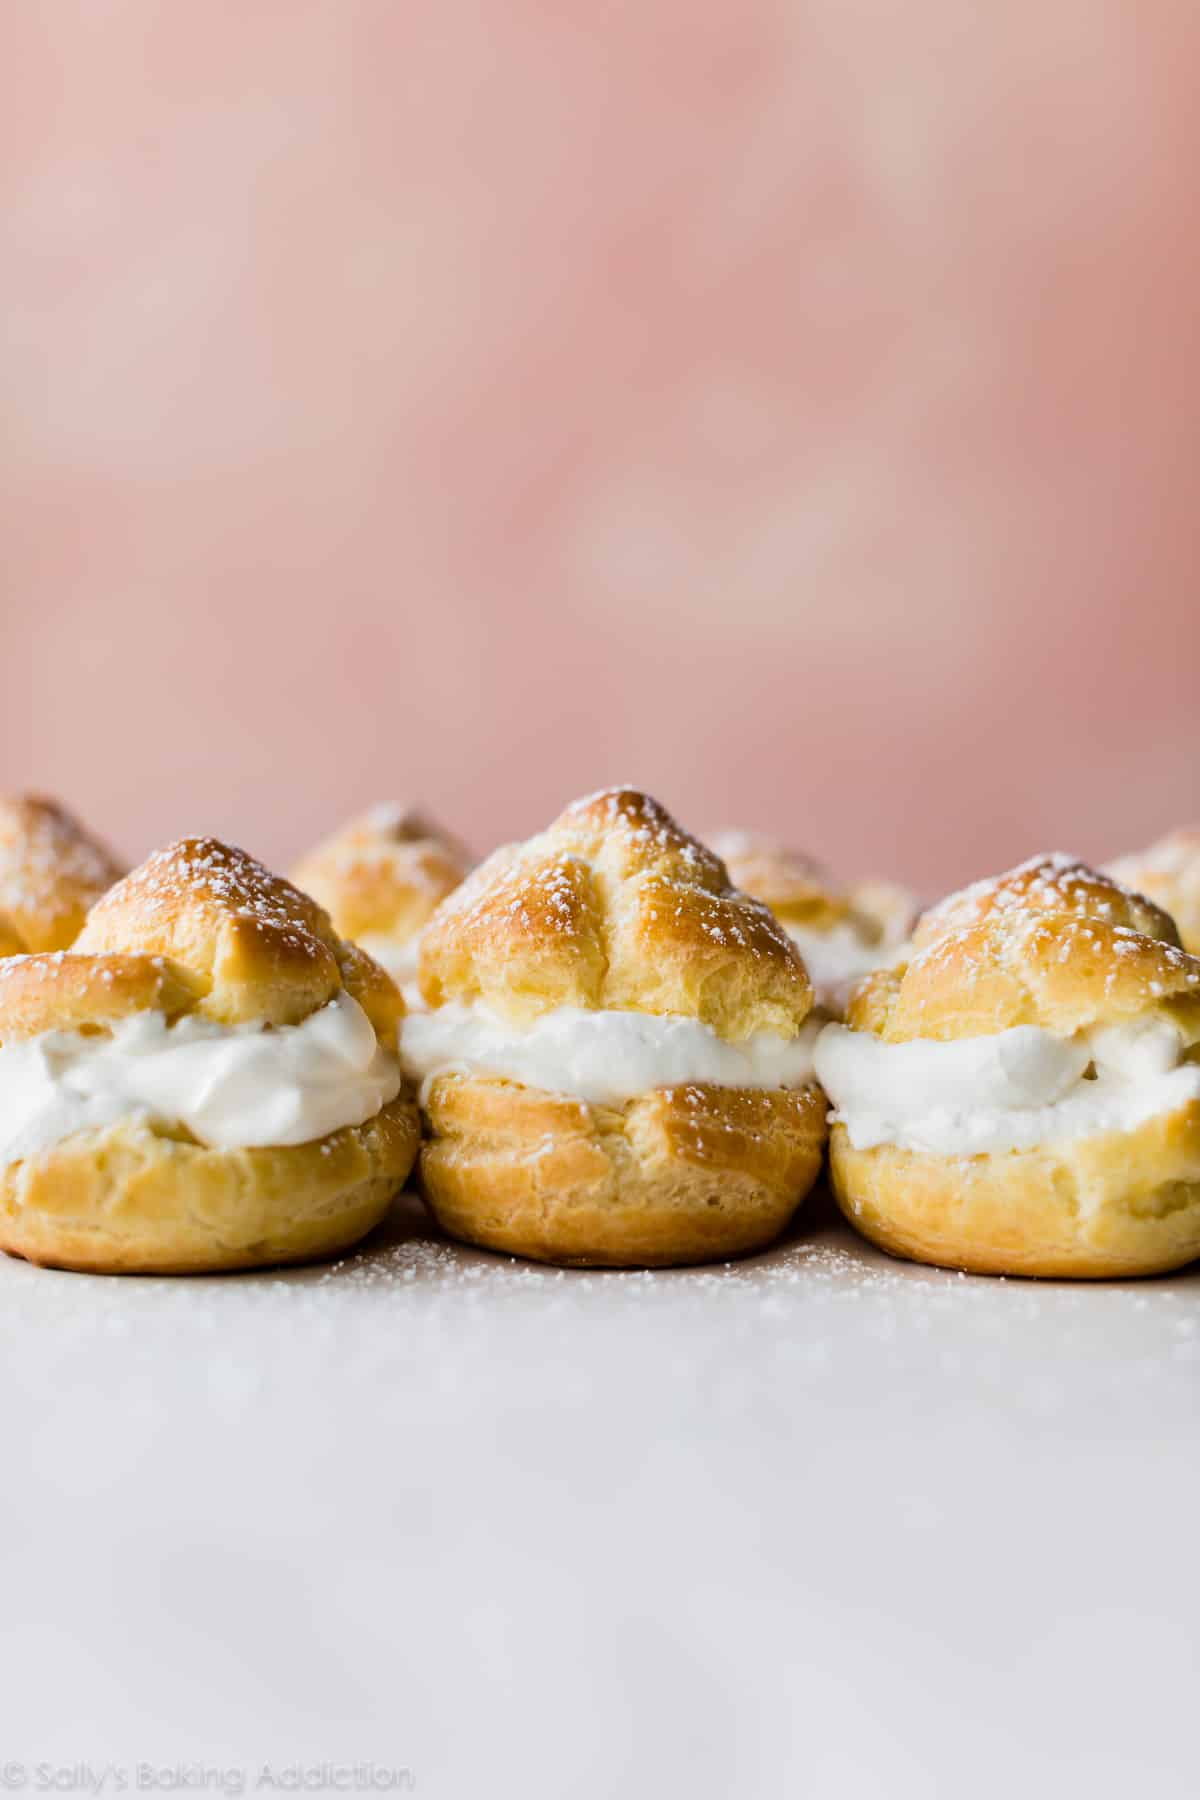
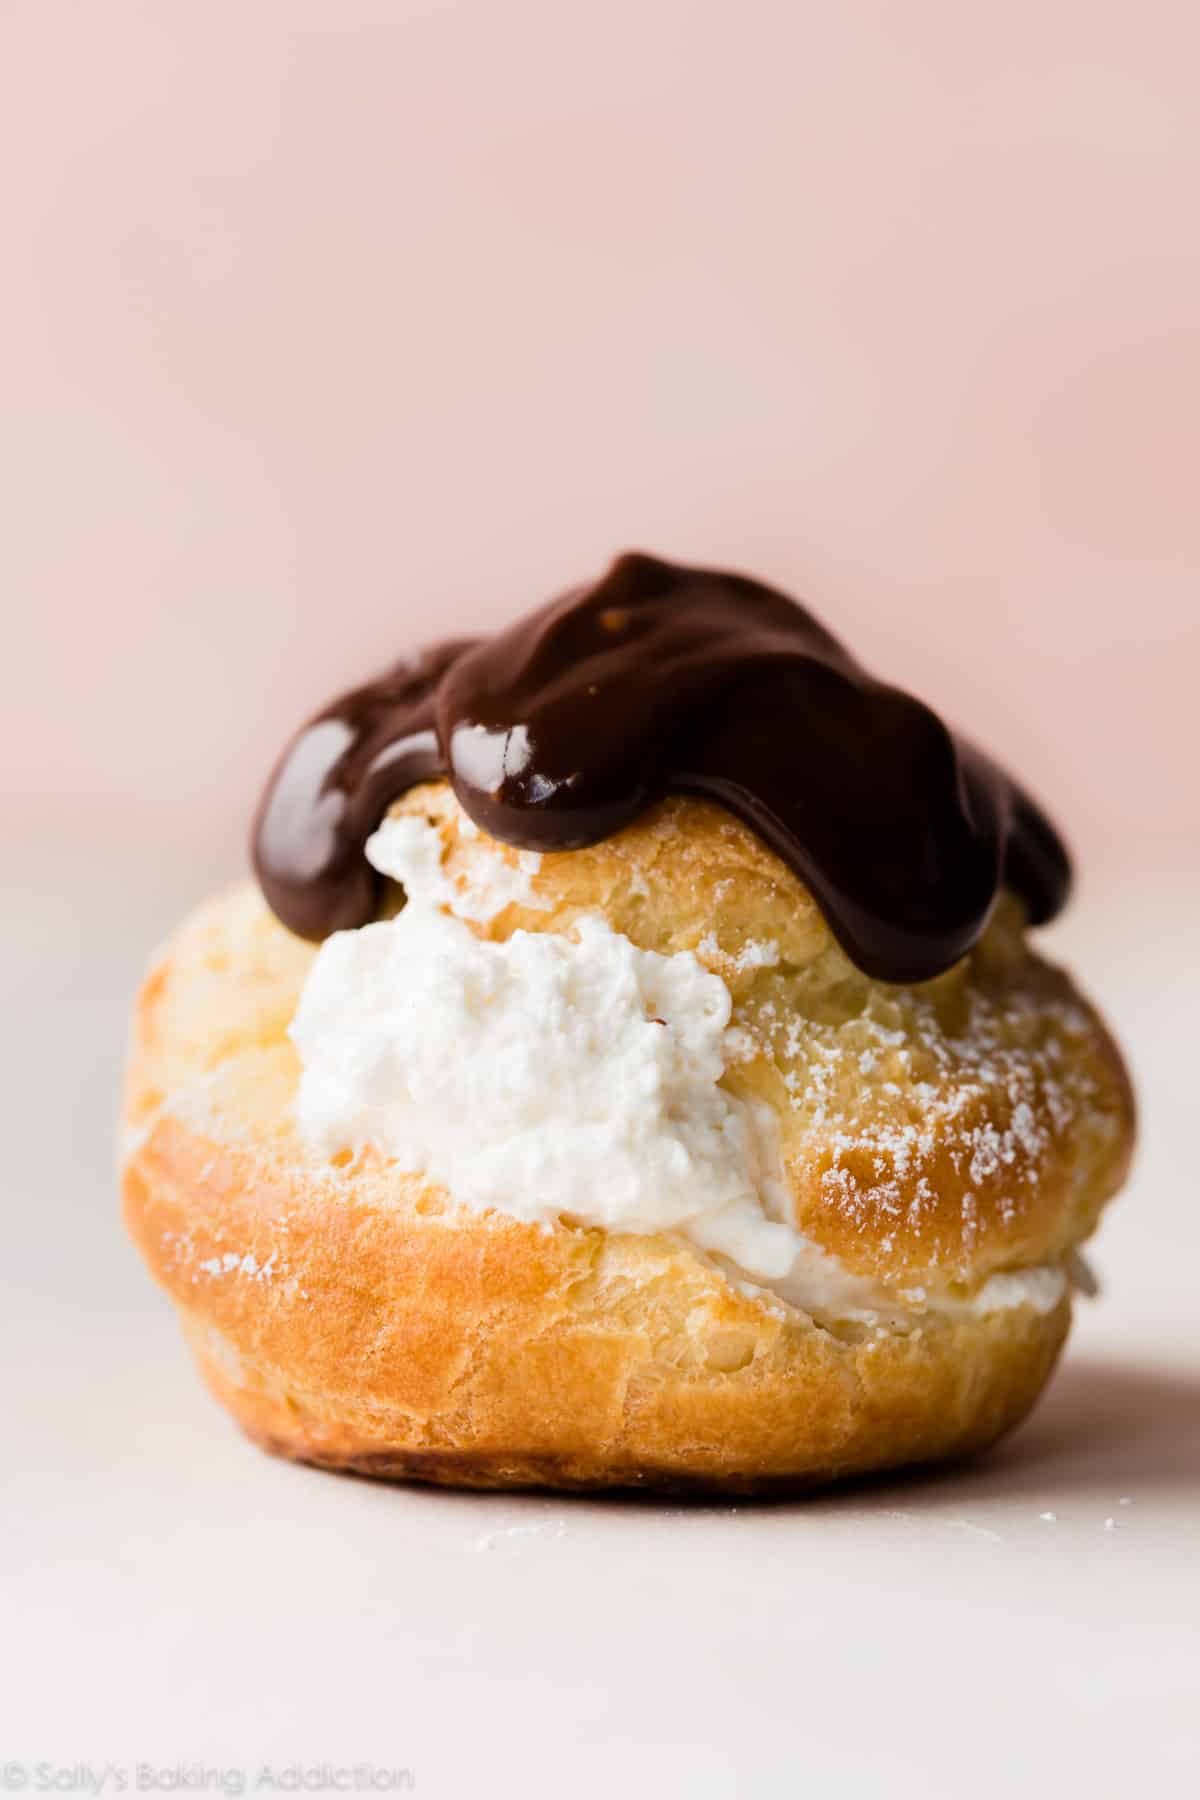
CREAM PUFFS
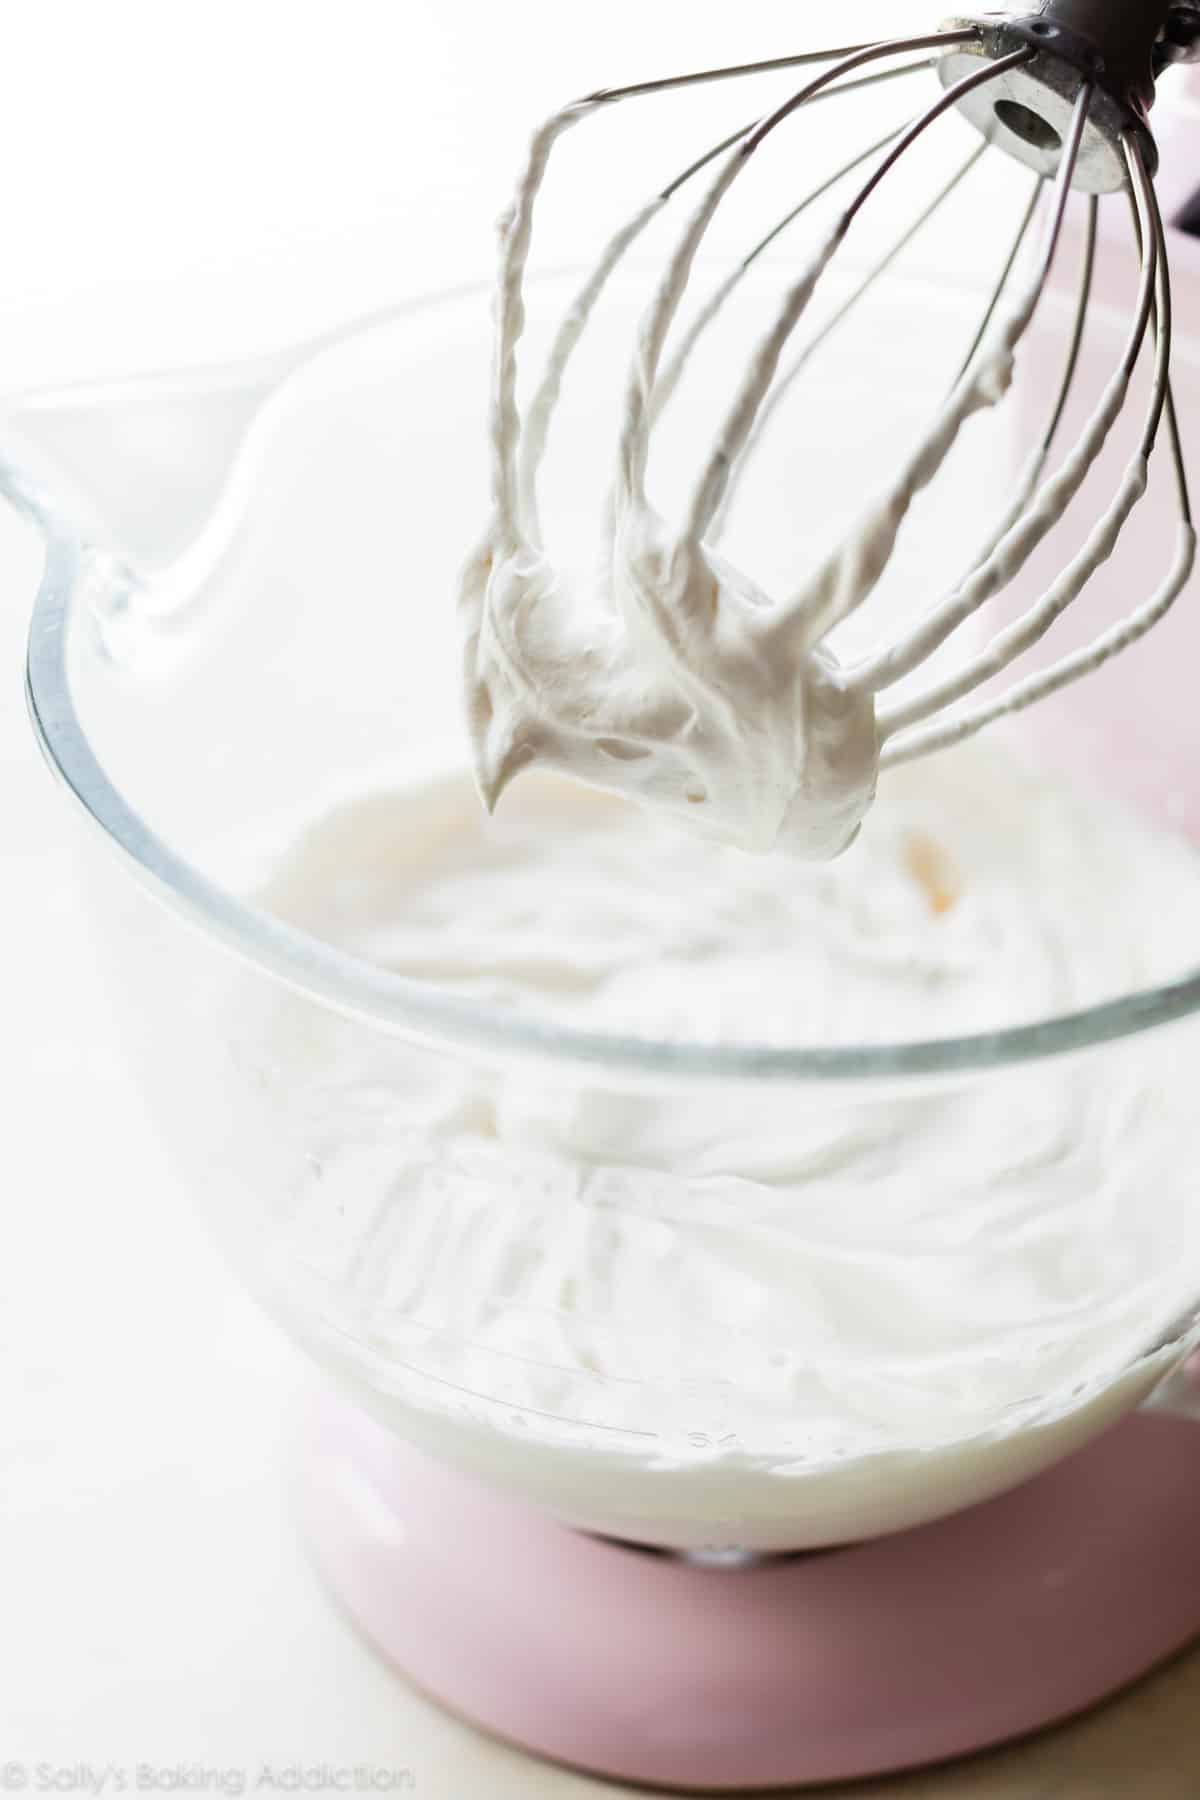
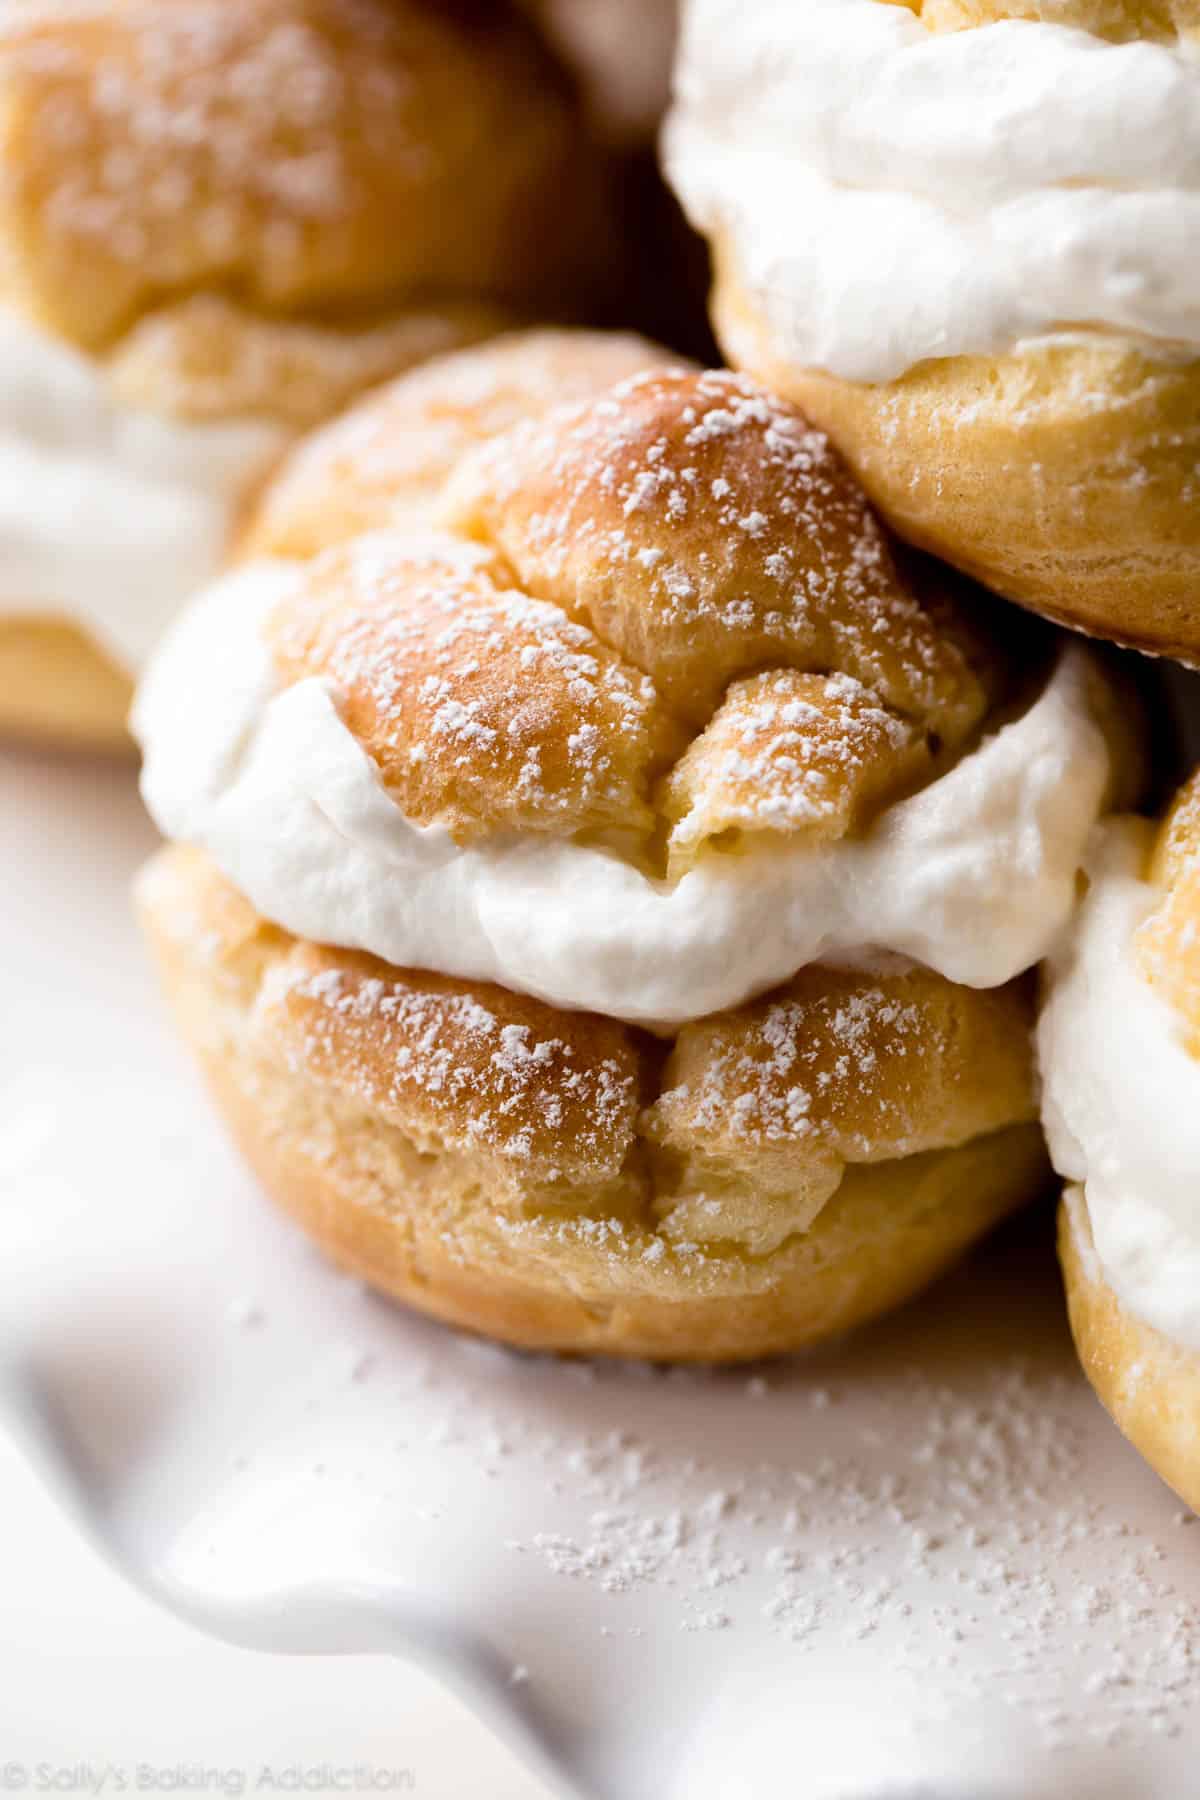
Filled with flavored whipped creams. Today I’m using homemade vanilla whipped cream, aka Crème Chantilly. Top with a dusting of confectioners’ sugar or a spoonful of chocolate ganache.
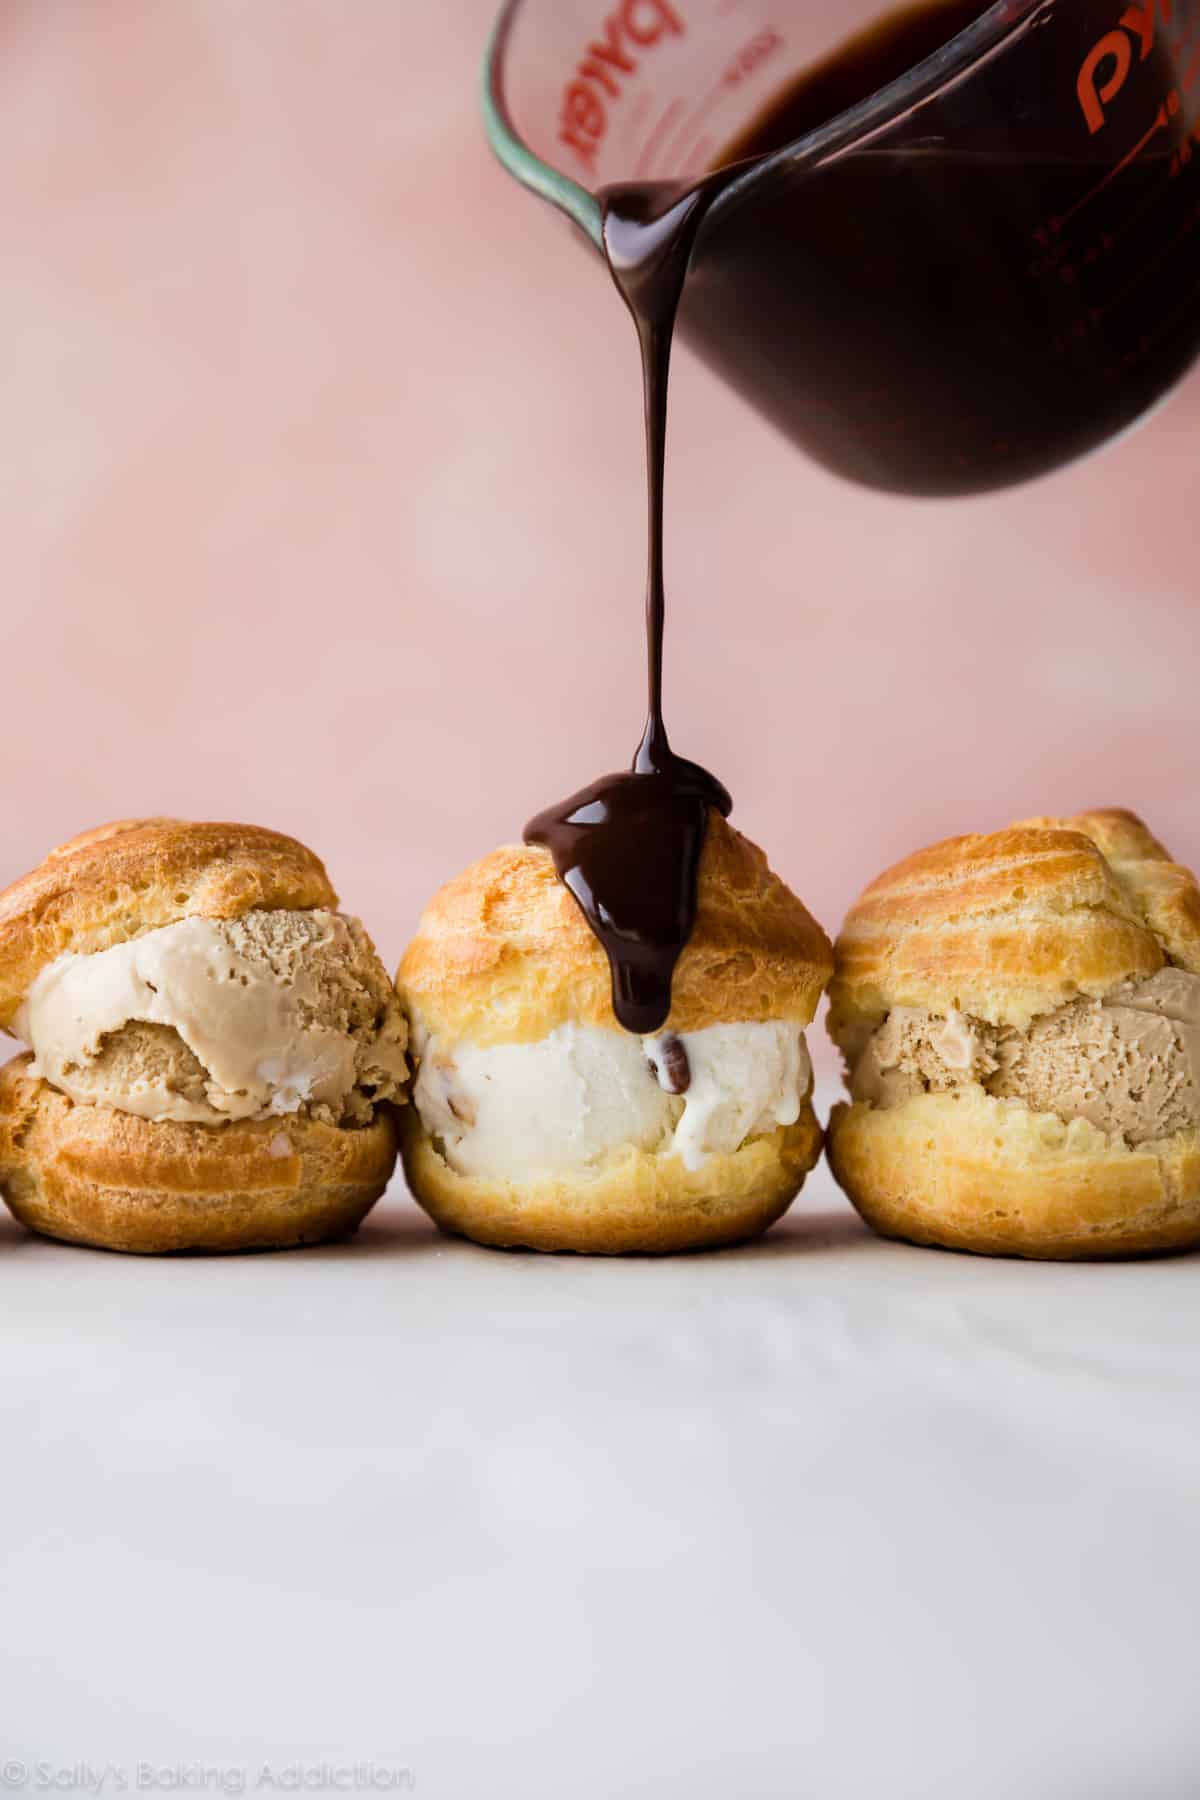
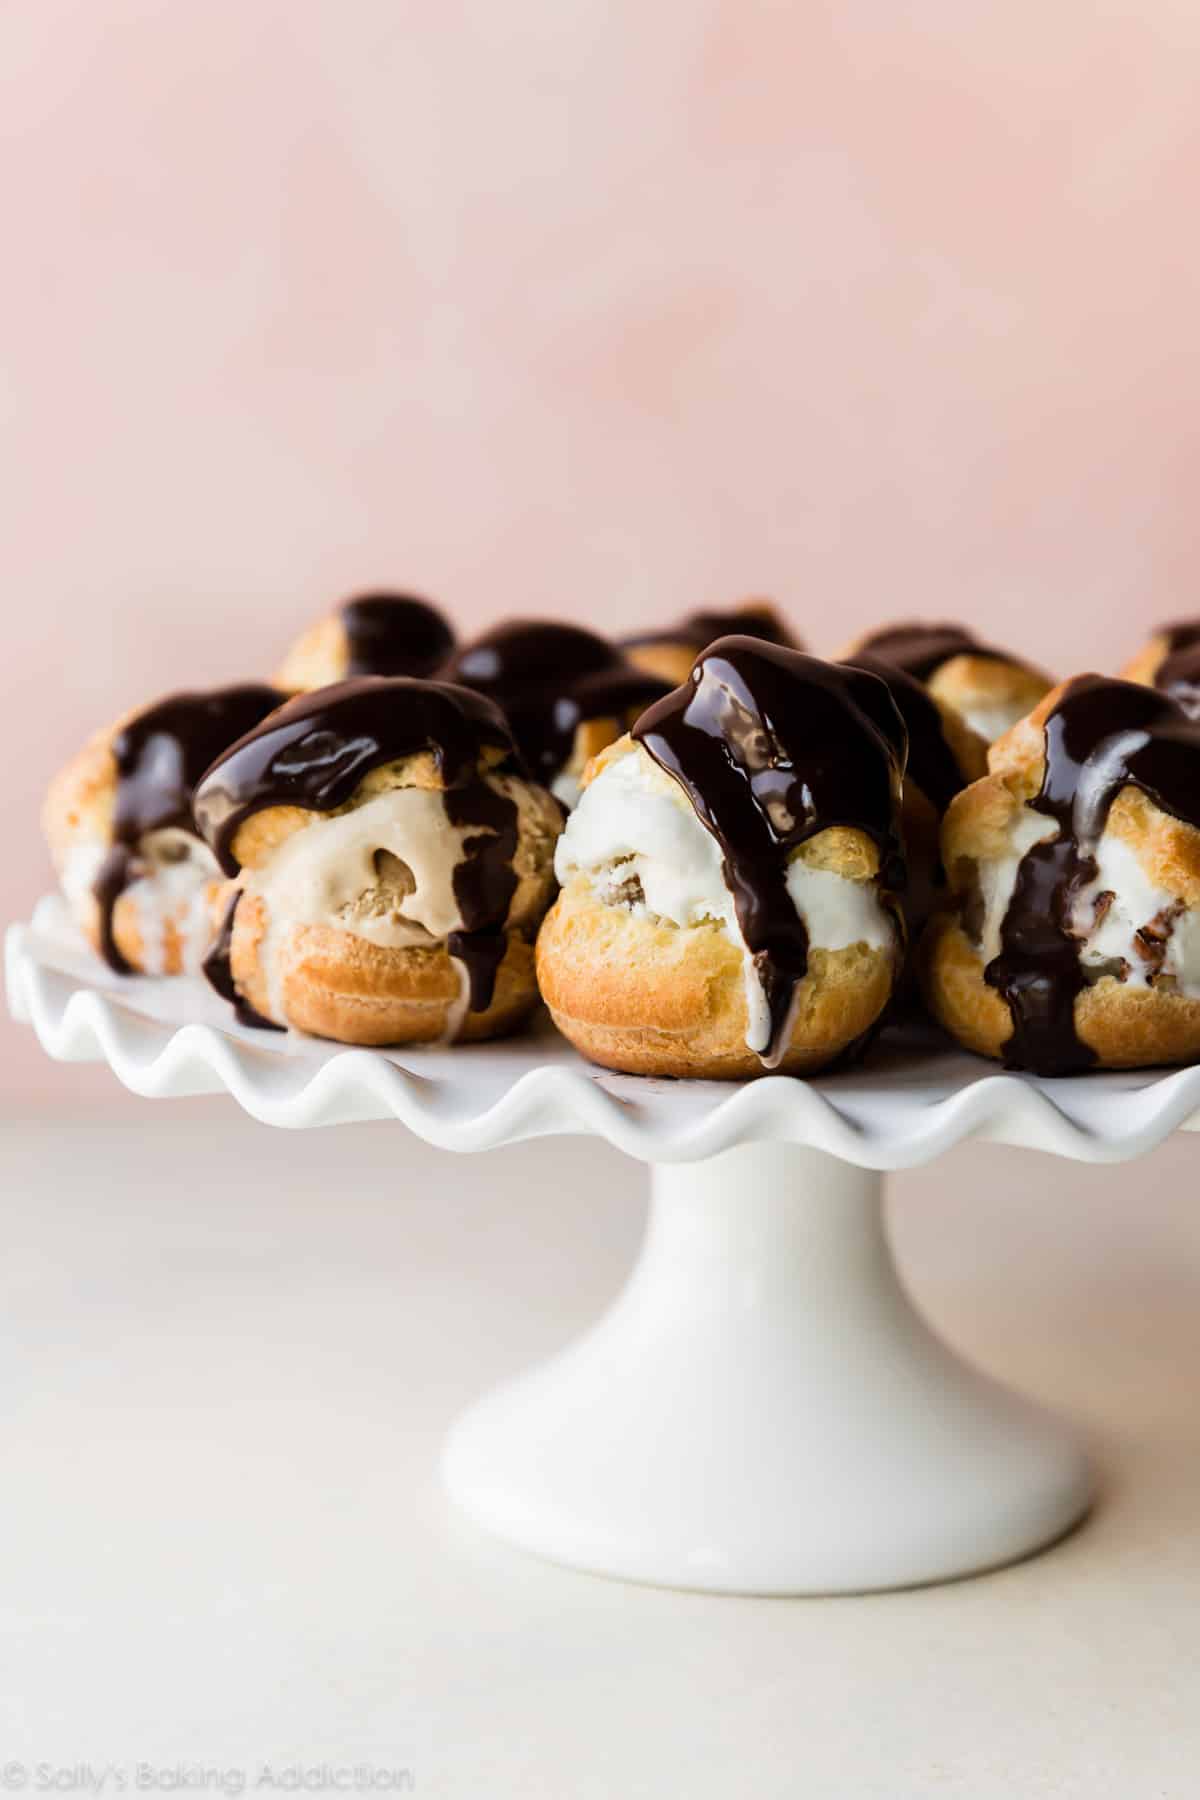
PROFITEROLES
Filled with ice cream and frozen. Topped with chocolate ganache. Profiteroles were my FAVORITE!!! We used butter pecan ice cream and coffee ice cream.
Choux Pastry Video Tutorial
Watch me make the choux pastry and shape/bake into cream puffs and profiteroles:
Do you have a better understanding of the process after watching the video tutorial? Not too scary at all, right? You totally got this!
ONE TRICK I LEARNED
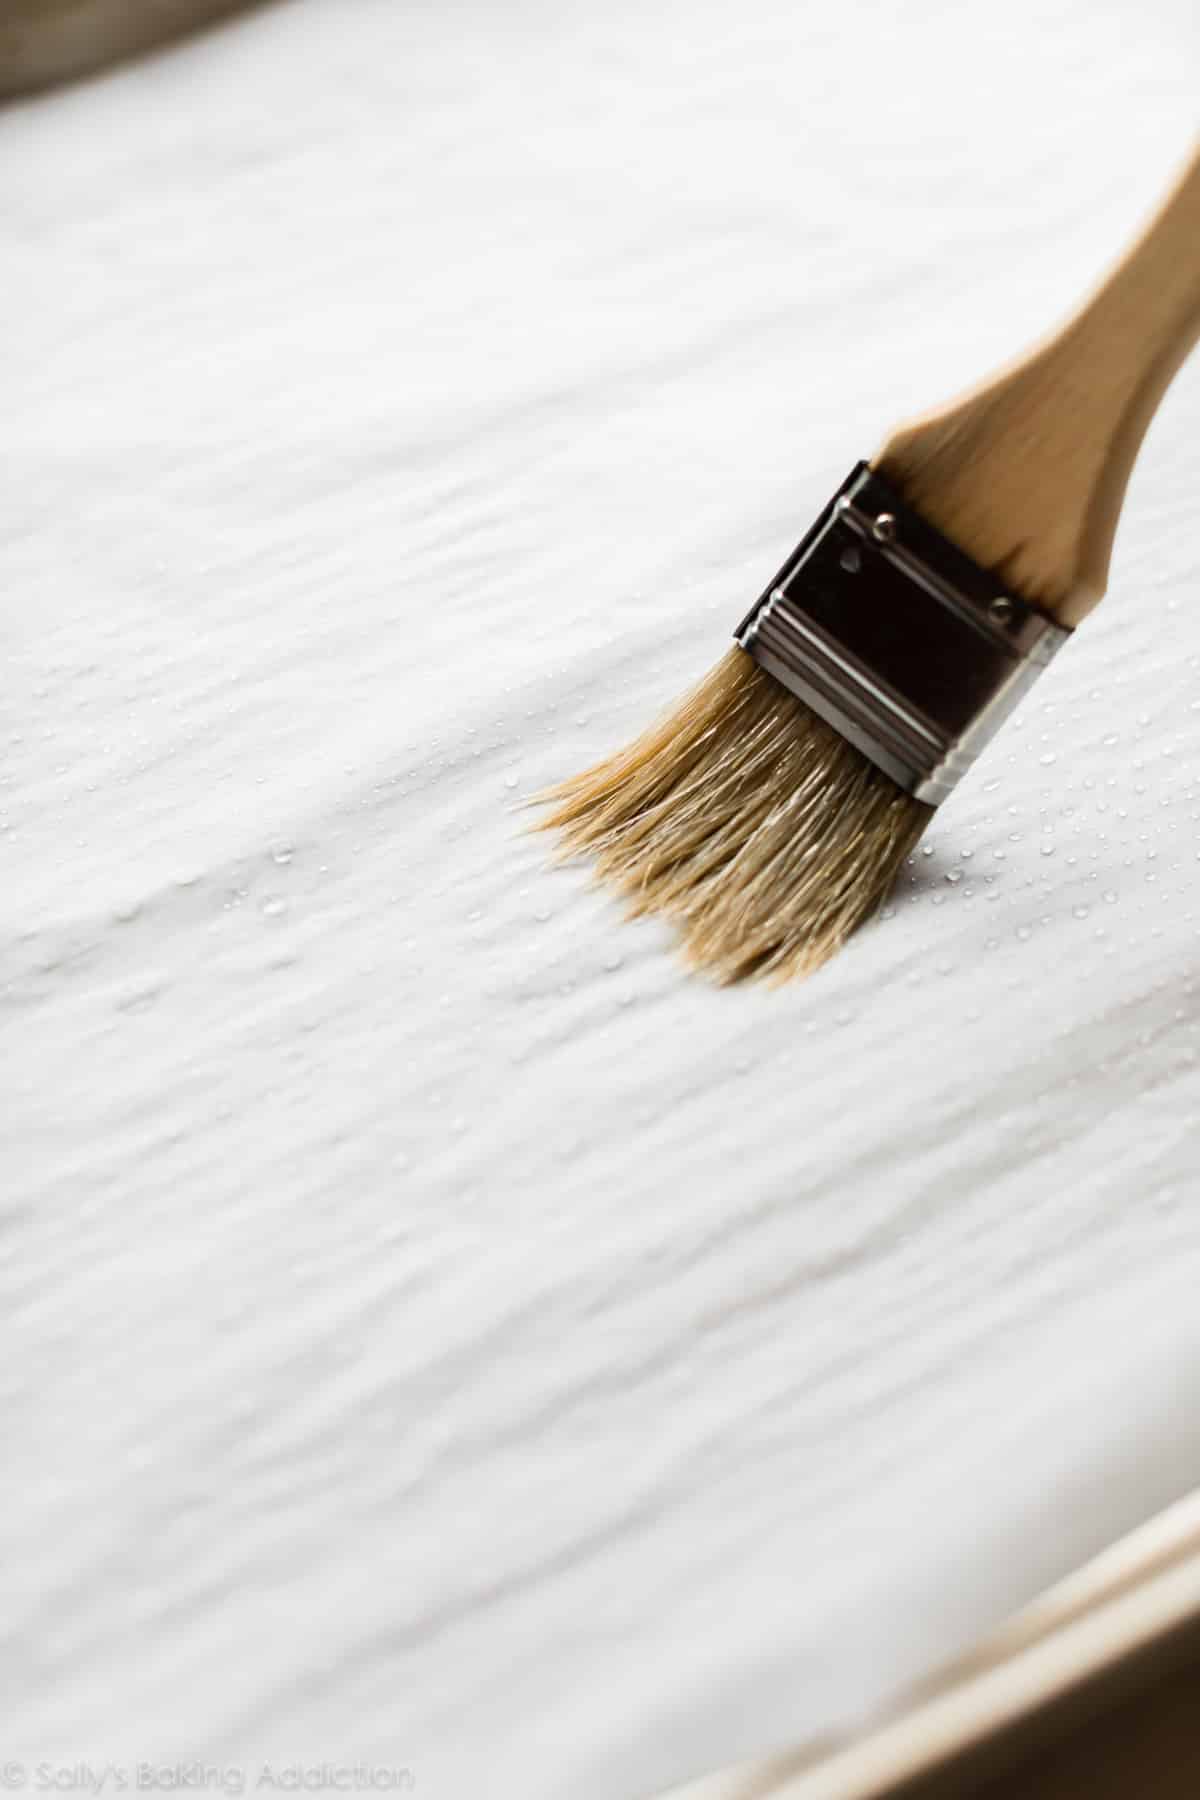
And it makes a huge difference in (1) how much the pastry puffs up and (2) how delicious the pastry tastes. Bake the pastries on parchment paper, the BEST nonstick surface for this choux pastry dough. But before you pipe the dough onto the parchment paper, moisten it with water. You can see me doing this in the video tutorial above.
Why? Think of cheesecake. We bake cheesecakes in a water bath, right? Cheesecake, like choux pastry, is egg-heavy. Eggs need a moist and humid environment in the oven to (1) properly rise and (2) avoid drying out and burning.
Water moistened parchment paper = perfectly puffed up pastries with a deliciously light center and crisp exterior. Pastry perfection.
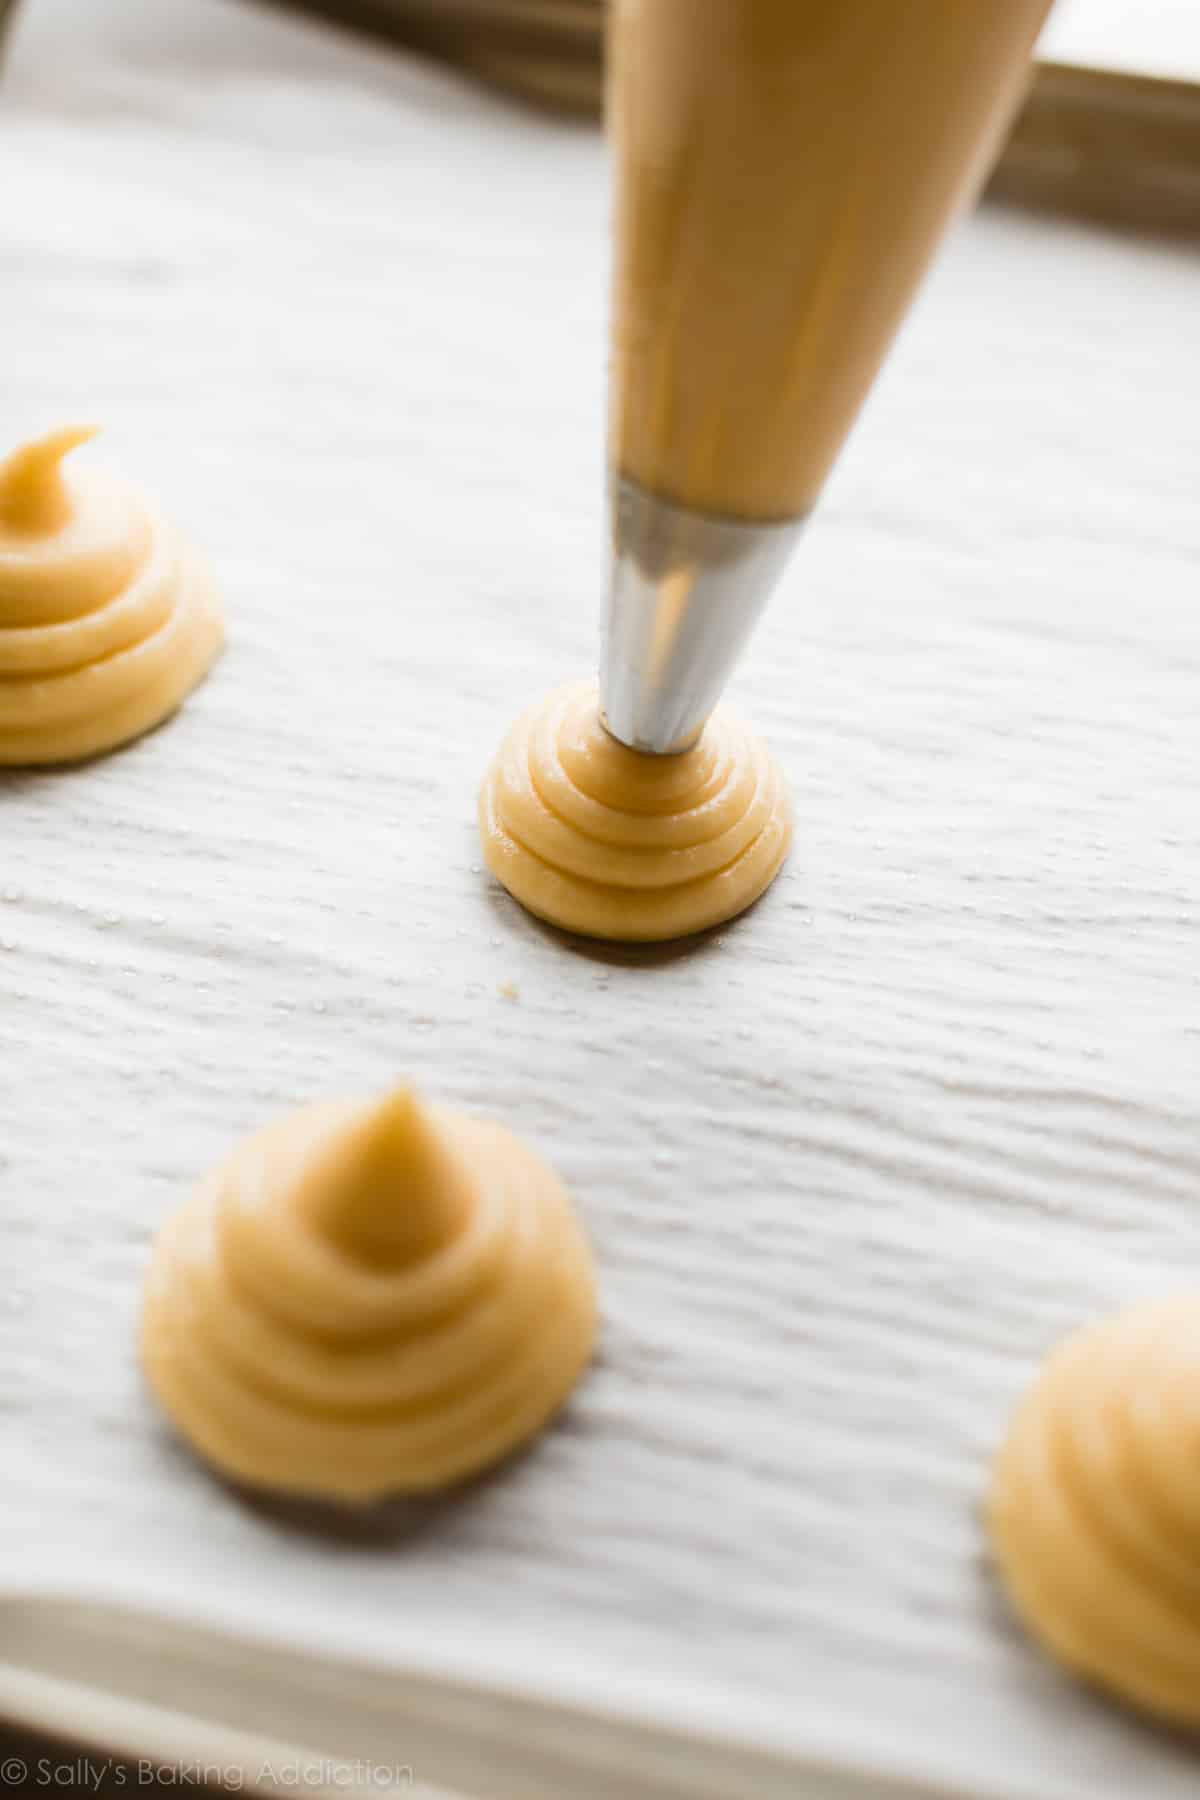
For cream puffs and profiteroles, use Wilton 1A piping tip. Pipe 2-inch mounds about 3 inches apart. (Watch the video above for a good visual.) You could also use a zipped-top bag and cut off the corner for easy piping. Using a water moistened finger, smooth down the peaks and lightly brush each mound with egg wash.
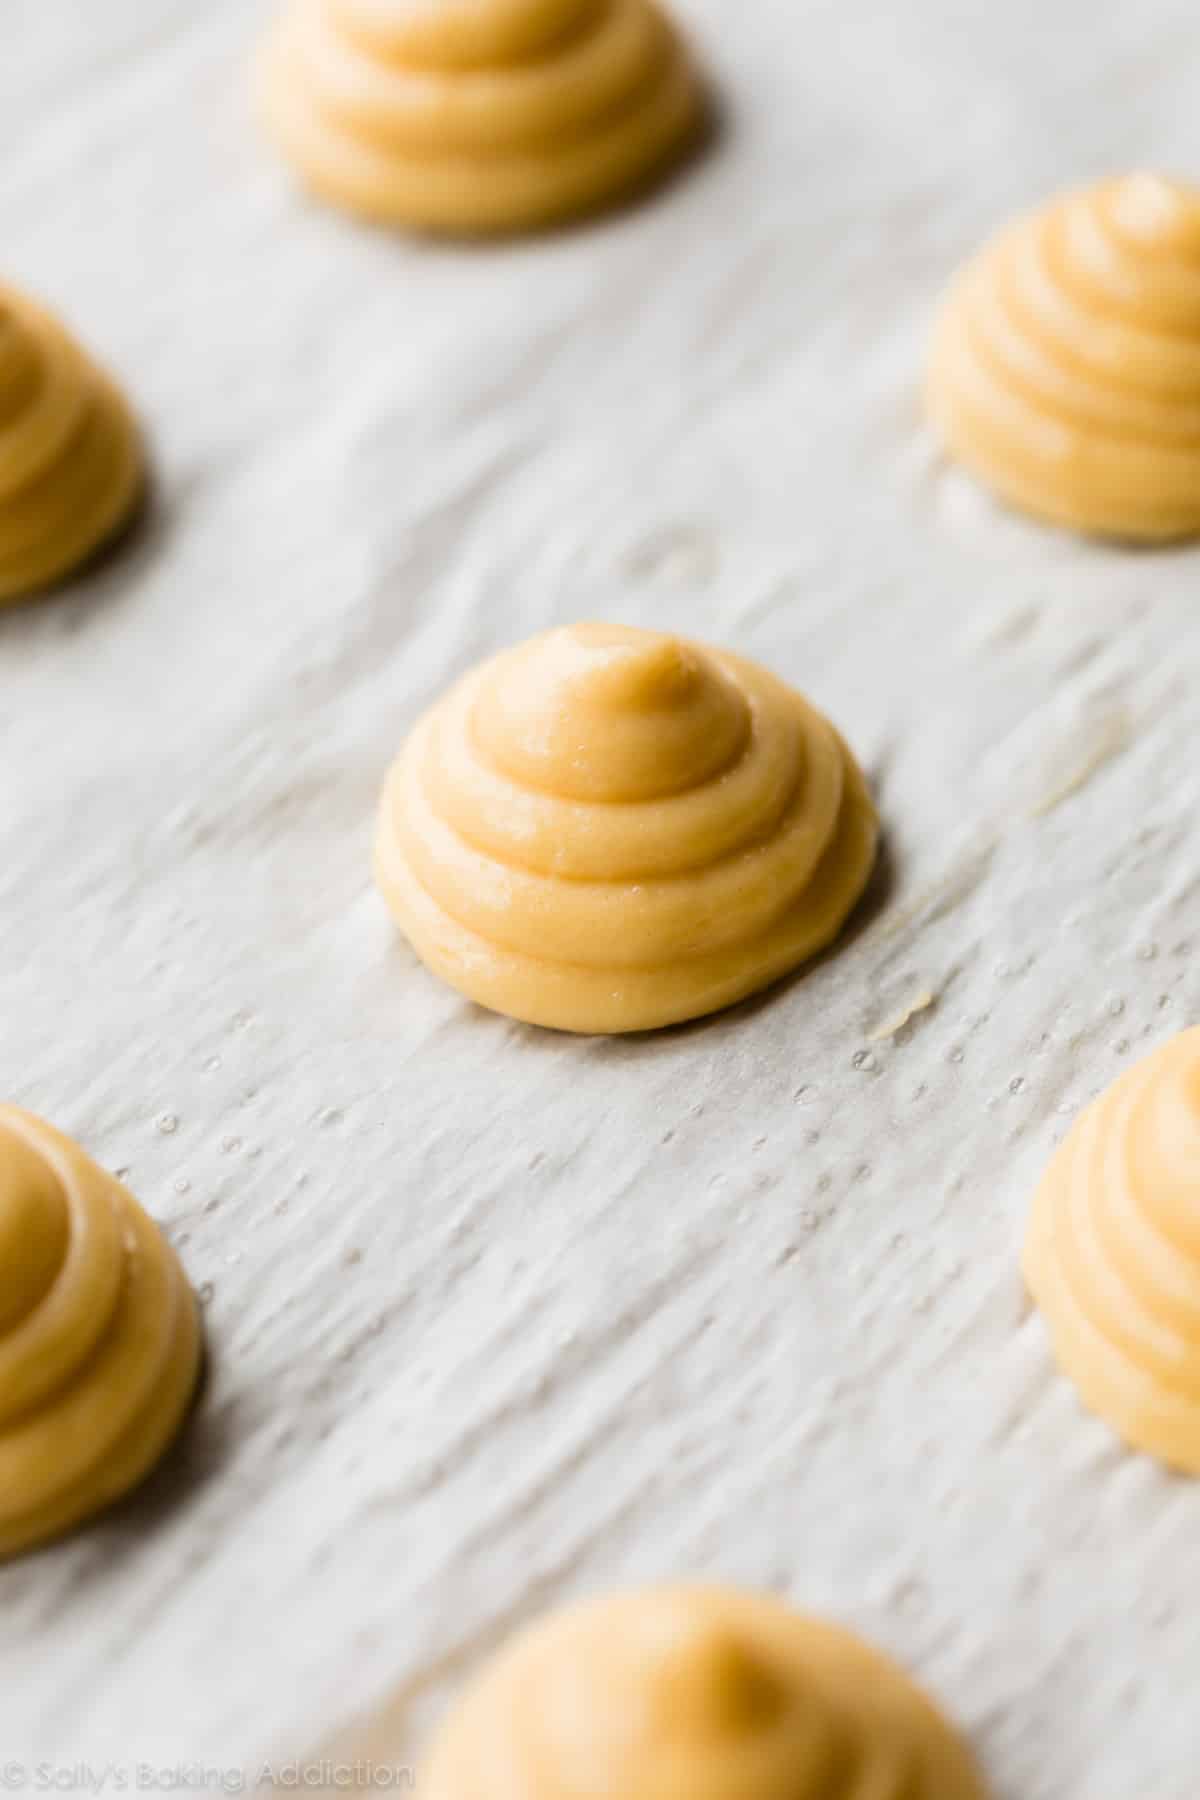
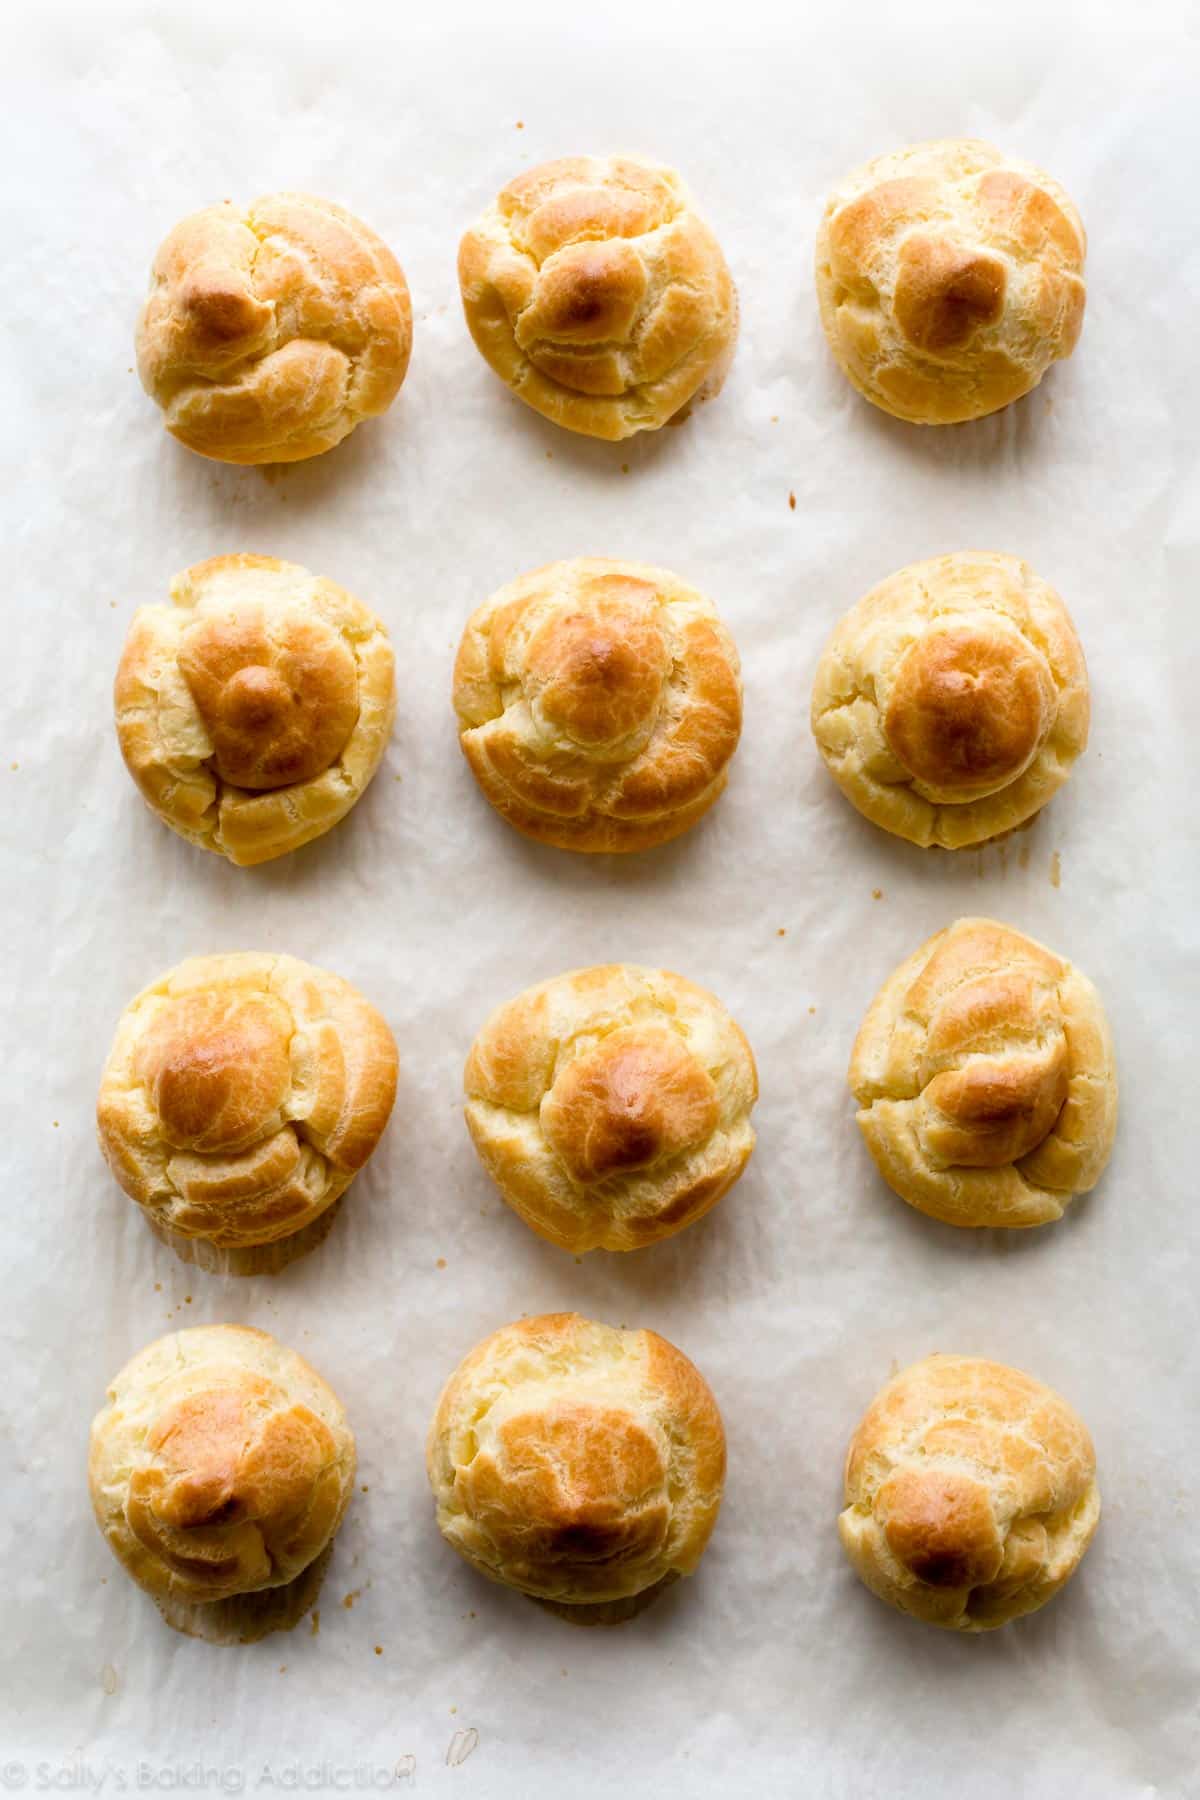
↑ These mounds bake into this golden puffy pastry! ↓
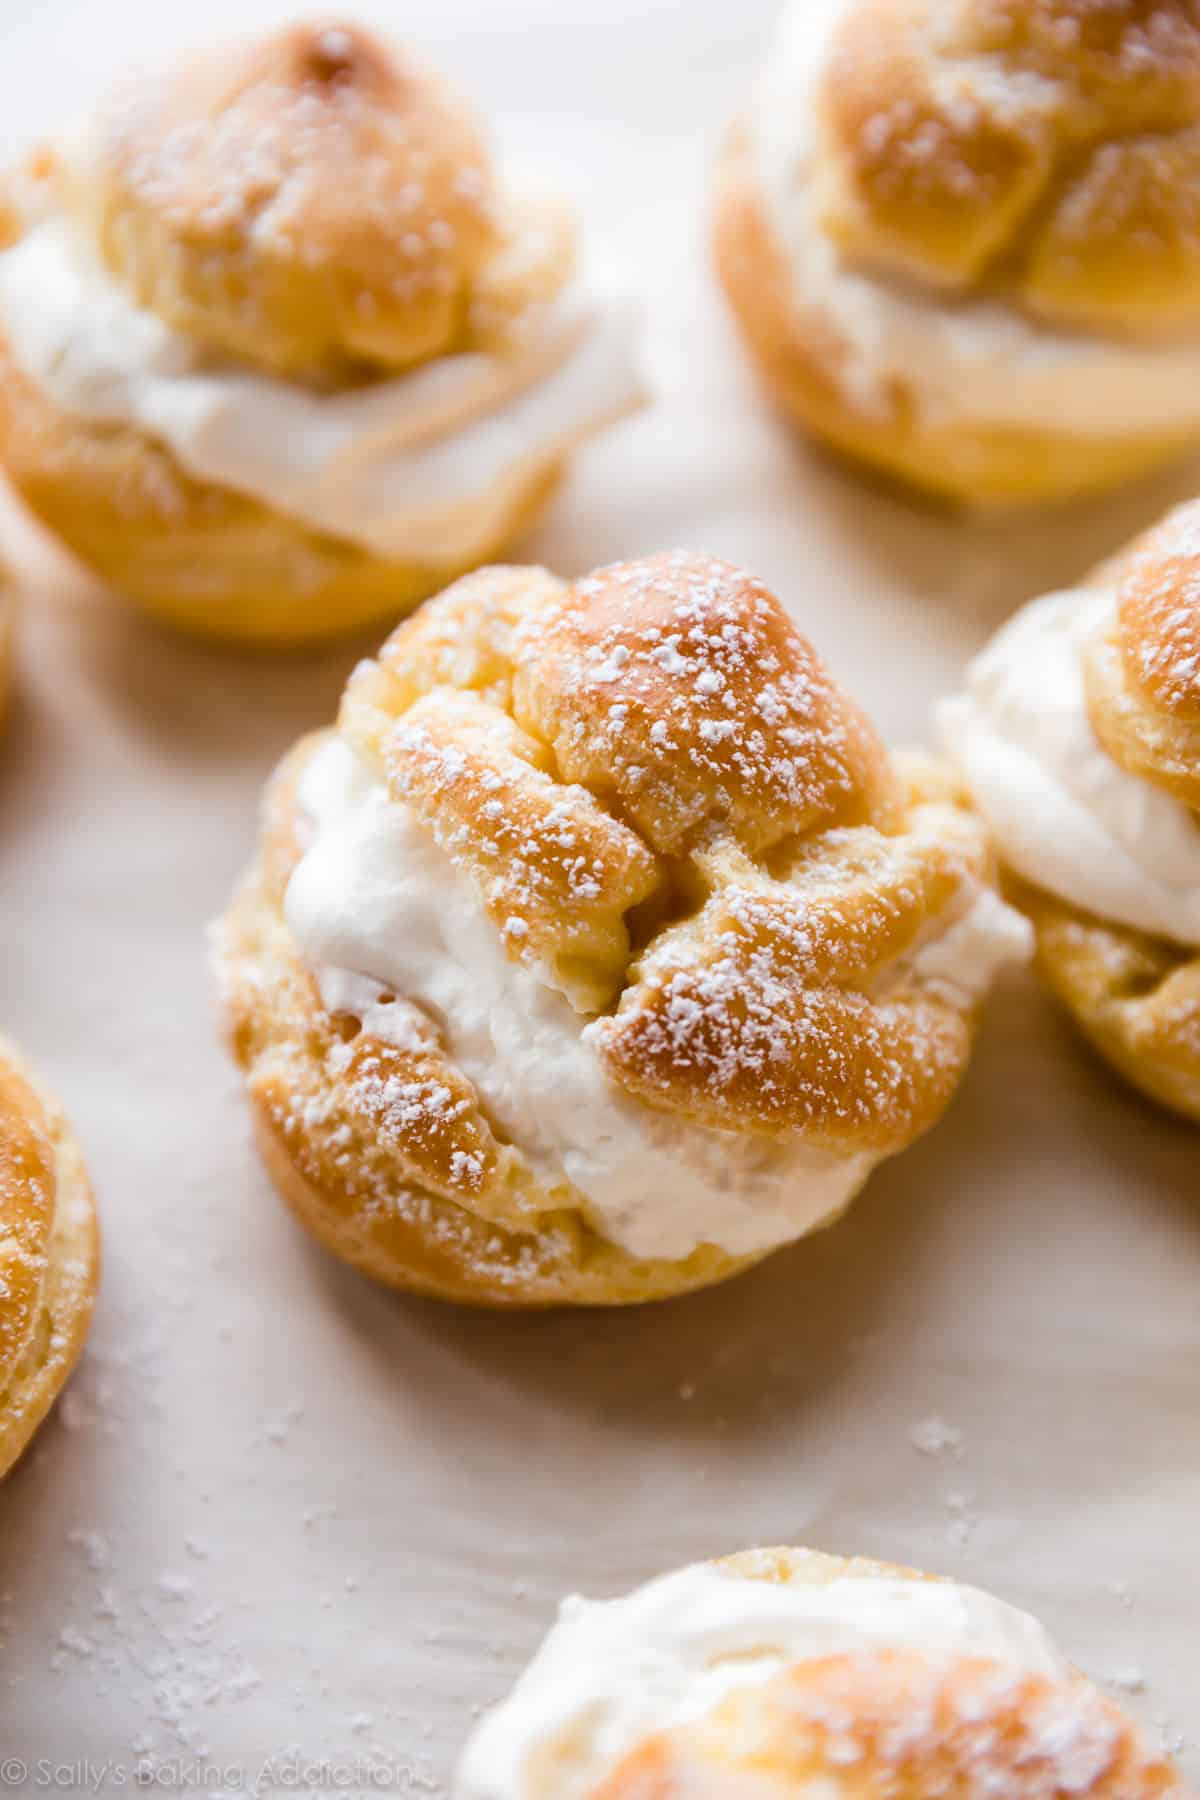
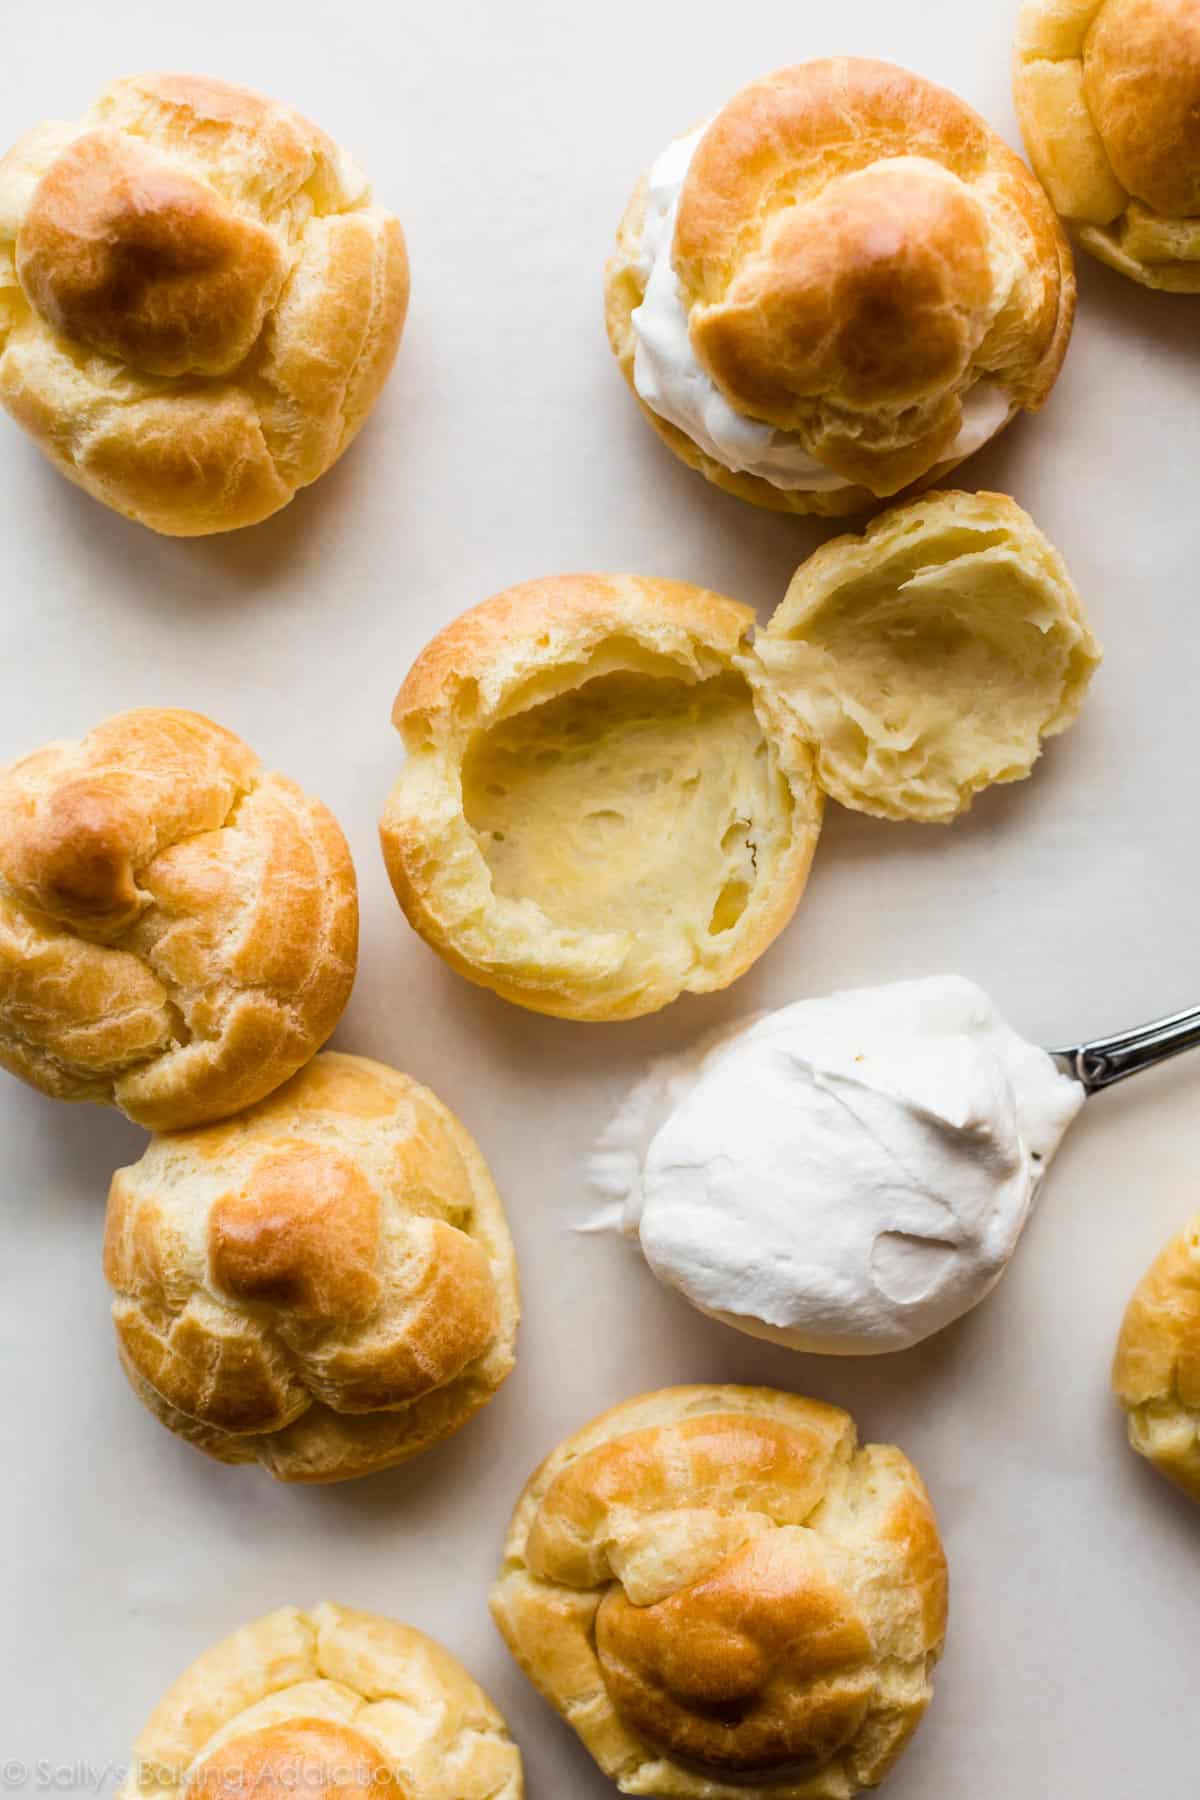
Split open the baked and cooled pastries, then fill with homemade whipped cream, lemon curd, jam, pastry cream, a combination of these, or your favorite filling!! You can also poke a hole in the pastries and pipe the filling inside.
Check out these beautiful hollow pastries, thanks to the steam created from the moisture inside and outside the baking dough!
And for profiteroles, ice cream with a generous shower of chocolate ganache. I teach you how to make these pictured cream puffs and profiteroles in the recipe notes below.
See Your Choux Pastry!
Many readers tried this recipe as part of a baking challenge! Feel free to email or share your recipe photos with us on social media. 🙂
Print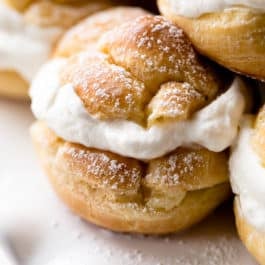
How to Make Choux Pastry (Pâte à Choux)
- Prep Time: 15 minutes
- Cook Time: 35 minutes
- Total Time: 1 hour, 30 minutes
- Yield: 16 puffs
- Category: Dessert
- Method: Baking
- Cuisine: French
Description
Choux Pastry can be used in anything from cream puffs, profiteroles, and eclairs to churros, croquembouche, French cruller donuts, choux beignets, and gougères! It only takes about 10 minutes to prepare and the options for filling and shaping are endless.
Ingredients
Choux Pastry
- 1/2 cup (8 Tbsp; 113g) unsalted butter, cut into 8 pieces
- 1/2 cup (120ml) water
- 1/2 cup (120ml) 2% or whole milk
- 1/4 teaspoon salt
- 2 teaspoons granulated sugar
- 1 cup (125g) all-purpose flour (spooned & leveled)
- 4 large eggs, beaten
- egg wash: 1 egg beaten with 1 Tablespoon milk or water
Instructions
- Watch the video in the blog post above; it will help guide you through the next few steps.
- Make the choux pastry dough: Combine the butter, water, milk, salt, and granulated sugar together in a medium saucepan over medium heat. Stir until the butter has melted. Bring mixture to a simmer. Once simmering, reduce heat to low and add the flour all at once. Stir until the flour is completely incorporated and a thick dough clumps into a ball. Mash the dough ball against the bottom and sides of the pan for 1 minute, which gently cooks the flour. Remove from heat and transfer to the bowl of a stand mixer fitted with a paddle attachment or, if using a handheld mixer, a large mixing bowl. Allow to cool down for a few minutes before adding the eggs in the next step.
- Read this step in full before starting. With the mixer running on low speed, slowly add the eggs in 3-4 separate additions mixing for 30 seconds between each. The mixture will look curdled at first, but will begin to come together as the mixer runs. Pour in the final addition of beaten eggs very slowly. Stop adding when the choux pastry has reached the desired texture: shiny, thick, and smooth with a pipeable consistency. I usually leave a few teaspoons of beaten egg behind, which can be used with the egg wash.
- Your choux pastry dough is complete! You can use it immediately or cover and refrigerate for up to 3 days. There’s no need to bring it to room temperature after refrigerating. In fact, you can store it in a piping bag (see step 6) in the refrigerator and then pipe/bake right away. If it’s too stiff to pipe, though, let it warm to room temperature a bit as the oven preheats.
- For cream puff and profiterole shells: Preheat oven to 400°F (204°C). Line two baking sheets with parchment paper. Lightly brush the parchment with water, which creates a humid environment for the pastry shells allowing them to puff up without drying out or burning.
- Transfer choux pastry dough to a piping bag fitted with a Wilton 1A piping tip. Pipe 2-inch mounds about 3 inches apart. Watch the video in the blog post above for a visual. You can also use a zipped-top bag and cut off the corner for easy piping. Using a water moistened finger, smooth down the peaks and lightly brush each with egg wash.
- Bake for 20 minutes then, keeping the pastries in the oven, reduce oven to 350°F (177°C) and continue to bake for 10-15 more minutes until golden brown. Do not open the oven as the pastries cook, as cool air will prevent them from properly puffing up. Remove from the oven and transfer to a cooling rack. Allow to cool completely before filling.
- Split open pastries and fill with homemade whipped cream, lemon curd, pastry cream, jam, a combination of these, or your favorite filling. You can also poke a hole in the pastries and pipe the filling inside. For my pictured cream puffs and profiteroles, see recipe notes.
- Cover and store leftover filled pastries in the refrigerator for up to 3 days. Cover and store unfilled pastries at room temperature for 1 day, in the refrigerator for 5 days, or freeze for up to 3 months. Thaw in the refrigerator before filling and serving.
Notes
- Make Ahead Instructions: Prepare choux pastry dough through step 3. Cover and refrigerate for up to 3 days or freeze for up to 3 months. Thaw in the refrigerator before shaping and baking.
- Special Tools (affiliate links): Saucepan | Wooden Spoon | Electric Mixer (Handheld or Stand) | Baking Sheets | Parchment Paper | Pastry Brush | Piping Bag (Reusable or Disposable) | Wilton 1A Piping Tip
- Cream Puffs (pictured): Crack open each cooled pastry shell and generously spoon homemade whipped cream (it’s vanilla flavored, so it’s called Crème Chantilly) inside each. Top with a dusting of confectioners’ sugar or drizzle of chocolate ganache (ganache instructions below).
- Profiteroles (pictured): Crack open each cooled pastry shell and fill with a scoop of your favorite ice cream. Freeze for 1 hour or up to 1 day. Top with chocolate ganache. For the chocolate ganache, finely chop two 4-ounce semi-sweet chocolate bars and place in a medium bowl. Heat 1 cup (240ml) heavy cream in a small saucepan until it begins to gently simmer. (Do not let it come to a rapid boil– that’s too hot!) Pour over chocolate and let it sit for 2-3 minutes to gently soften the chocolate. Slowly stir until completely combined and chocolate has melted. Allow to cool for 3 minutes before pouring over pastries.
Adapted from Baltimore Chef Shop, where I took my pastry class 🙂


Reader Comments and Reviews
I have a Wilton 1E piping tip. The stores near me have run out of 1A tips.
– Can I use 1E? It is also round but smaller in diameter.
– Do I need to modify anything if I use 1E?
Thank you!
Hi Bernadette, instead of the 1E tip, you can simply cut off the end of the piping bag. Then, using a water moistened finger, smooth down the peaks and lightly brush each with egg wash. Hope you enjoy this recipe!
I have a question about the pastry cream to fill the cream puffs. I wanted to flavor the pastry cream with maple syrup (a friend brought me some real maple syrup and I want thank her with the cream puffs). Is that possible? Do I use the maple syrup in lieu of vanilla? How much should I use? Thanks so much!
Hi Amy, We have never tested the pastry cream with a maple flavor. However, usually maple syrup doesn’t provide a strong flavor in baked goods (it’s mostly sugar!) so instead we use a maple extract to replace some of the vanilla extract for flavor without changing the recipe. But if you are interested we do have all of these recipes with maple syrup!
Thank you so much!! I’ll have to try one of those recipes. Thanks!!
Hey Sally! What should be the temperature of the eggs?
Hi Sara, The beaten eggs should be room temperature. Happy baking!
Hi Sally,
Can this dough be used to make Louisiana style beignets? Ideally I would refrigerate the dough for 2-24 hours. Roll out 1/4” thick and cut out 2×2” squares and fry as needed. Do you think they would come out airy? Thanks!!
Hi Anthony, Yes, absolutely! Here is a fantastic recipe for them: https://bakerbettie.com/homemade-beignets-pate-choux/
Instead of using a piping bag for the puffs, can I just use an ice cream scoop and dollop the dough onto the parchment paper? I am really bad at piping. I don’t mind if it doesn’t look pretty as long as it still rises and tastes good.
Hi Bernadette, that should work, just be sure to smooth it down with a moistened fingertip as directed in the recipe.
Hi Sally, can 1% milk be used instead of 2% or whole milk? Would the fat content make that big of a difference?
Hi Meghan, 1% milk would be fine.
Hi sally! If I only have small/medium eggs, do I use 5 instead of 4?
Hi Carmi, a large whole egg weighs about 57g (or 50g out of the shell) — using this measurement as a guide, you can beat your eggs until you have the equivalent of 4 large eggs, beaten (or about 200g).
It worked amazingly! Great recipe, did the cream puffs looking forward to trying eclairs next!
This was sssooooo goood!!!
I made it the night before but I didn’t put in enough eggs so it was too hard the next day, so I added one more beaten egg and it was right!!!
Then came the piping but I’m really bad at piping so that one took awhile.
They baked perfectly and cooled very nicely.
I filled them with lemon curd, that one leaked a little but that was because my lemon curd was a little too liquidy anyways, whipped cream, those ones were my favorite I think, I topped the cream ones with chocolate ganache, and then I filled the rest with whipped chocolate ganache, and then I dusted them with powdered sugar.
They were a hit at my youth group, thanks!
Hiiiii Sally and friends!!! Love the blog, you’re the one I always turn to for the best!!!
Multiple questions:
1. How do you fill it with lemon curd?
2. Do you freeze the ice cream ones after you put the ice cream on? Or is it supposed to be fill and serve? (If so I can’t do those )
3. Have you ever tried filling it with whipped chocolate ganache?
Hi Emma! For lemon curd, we simply spoon it onto the middle of the bottom choux pastry shell and then top as normal. For the ice cream profiteroles, freeze for 1 hour or up to 1 day (see recipe notes for more details). Whipped ganache would be delicious as a filling here!
How long should these be cooked if I want to make a mini version? I want them to be mini cupcake size or smaller.
Hi Jackie! We’re unsure of the exact bake time for a mini version, but it would be shorter. Keep a close eye on them.
I make mini puffs (I get around 35 puffs per batch) and I’ve found cutting the time for the 350 degrees segment down to about 8-10 minutes is right around the sweet spot. If you have an oven with a see-through door and a light, I’d keep an eye on them from around 6 minutes onwards.
This is one of my favorite recipes for choux, it’s even replaced the recipe in Grandma’s cookbook.
These were delicious! It’s the first time I made them and they’re so good! Thank you for the recipe!
Where in the world is the recipe for the filling? ❤️❤️
Hi Pippa! See recipe notes for Cream Puff and Profiteroles filling instructions.
How to store uncooked Choux pastry dough? if cling film wrapped in fridge, do i need to bring to room temp before baking?
Hi Sinu, you can store unused pastry dough in the fridge for up to three days. No need to bring to room temperature before using. Hope you enjoy the pastry!
I’ve made this recipe many times, and it tastes good each time I make it, but when I make it in the morning, then leave them unfilled and wait till my guests come, when I fill them, they’re rather soggy. How should I make it in the morning, yet let them keep their firmness till filling?
The party will be at dinner time.
Hi Emily! They’ll get soggy if left out for too long. Our suggestion: Cover and store unfilled pastries at room temperature for 1 day, in the refrigerator for 5 days, or freeze for up to 3 months. Thaw in the refrigerator before filling and serving. Hope this helps!
Sally, these are the best instructions I have ever found for choux pastry. They have never turned out as beautifully! Thank you!
Hi sally, these looked great baking in the oven n when I pulled it out but collapsed and deflated soon after out of the oven! I did pull them out 2 mins earlier cos they were browning. What could have caused it to collapse?
Hi GM, it sounds like they needed to bake just a bit longer. It’s possible your oven runs a bit hot (which would cause the outside to darken before the inside is cooked) – we always recommend using an in-oven thermometer for best results. Hope this is helpful for next time!
Turned out great on my first try. I’ve failed at making macaron over and over again and wanted to try something different. These instructions and videos were great and these turned out really well on the first try.
Puffed up really nice as well, and weren’t too over done. I baked for 20 minutes, then an additional 10 at the reduced temp.
I didn’t have the appropriate piping tip so I had to use a smaller tip which was difficult to pipe such large mounds. They still turned out really good.
Any suggestions on piping bags? I really hate to use these disposable ones. Which size bags do you typically use? I used some cheapo silicone ones I got from amazon with a cake decorating tip and think I’d like to invest in a better bag and tip set.
Have you tried using silicone mats instead of parchment paper?
Hi Tyler, so glad you enjoyed these! We use and love these reusable piping bags: https://www.amazon.com/Wilton-Reusable-Featherweight-Decorating-Multipack/dp/B072WMCD9Y/ with a Wilton 1A tip. Parchment paper really works best for choux pastry!
Thanks, Lexi! I’ve picked up one of the suggested bags on Amazon Canada since they were in stock. I’ll try these out when they arrive. Hopefully they are easier to fill than the cheap, bulky, silicone bag I have now.
Awesome recipe. This was the first time I’ve made choux pastry. And they turned out great!
I was wondering, how do i make churrors from this recipe? Thanks.
Hi Anthea, so glad you loved this recipe! For churros, we would recommend the same temperature for frying these homemade doughnuts: 375°F (191°C)
Hi Sally! I made these twice and turned out okayish. They were a little doughy in the middle but I cooked them for the entire recommended time. I was wondering if I wanted to make these in mini size so like 1/4th of the size of 1 of these cream puffs how long would they cook for then? Would they turn out less doughy? Thank you!
Hi Zuzanna, it sounds like they may needed to bake a bit longer. It’s possible your oven runs a bit hot (which would cause the outside to darken before the inside is cooked) – we always recommend using an in-oven thermometer for best results. You can certainly try making them smaller as well. We’re unsure of the exact bake time, but keep a close eye on them. Thanks so much for giving this recipe a try!
Hi Sally. Thank you for the excellent tutorial. My first batch was a success. So much so that I made a second batch the next day because they were gobbled up. Question: Can you use two baking sheets on different racks at the same time? I’m thinking it might inhibit browning, but would like to do this to make more smaller ones and to separate the savories from the sweets. Thanks, again.
Hi Jo, glad to hear your first batch was such a success! For best results, we recommend baking one sheet at a time. Baking two on different racks can cause them to bake and brown unevenly, especially if one is so much closer to the heating element. Best to do them separately!
Hi Sally, I made these and they were super easy. Perfectly golden brown and delicious. Great detail!!! So easy to follow and I am only 10 years old. Love all the recipes!
Loved the recipe. Knowing my oven, I baked at 375° for 20 minutes; later lowered to 330° for 10 minutes. Filled them with your Homemade Whipped Cream and dusted with Confectioner’s sugar. They came out perfect! Thank you for the recipe and all the tips. Will do them again and again
Thank you for the recipe and video! This was my first time making choux and they came out perfect! I just need to practice piping more. I cut the recipe in half and it worked great. Thanks again!
I wish we could share pictures when we do a review. These came out great but I pulled them early otherwise they would have been overcooked. Love this recipe. Will make again. Love another review who said to use for egg salad. Great idea. Will have to freeze some. Hope they can go into freezer.
Hi Pamela! You can freeze baked Choux for up to 3 months. Enjoy!
Great recipe, perfect every time.
I read all the above comments. Like a few others mine came out too thin…runny batter I presume. My question is Should I beat 4 eggs in a glass and add only enough to the mixture to reach the pipeable consistency? Will this not result in less eggs in the batter?
Made these and first time came out perfect. If I wanted to make cream puffs 2 to 3 times larger how would I adjust baking time?
Hi Nancy, thank you! It’s hard for me to say since I haven’t tested it myself. I would add at least 4 more minutes to the bake time, but keep a close eye on them.
Way too many eggs, mine turned out super runny and I only added half the eggs suggested.
I had the same issue. Tried making the dough twice and used half the eggs the 2nd time and it was still runny
Make sure you are using Large eggs and not Xlarge eggs as it will change the consistency of the batter. Another thing is fresh chicken eggs are NOT uniform in size as the store bought eggs are. You may need to weigh the eggs to get the correct amount that you would from store bought large eggs
Made this recipe 3 times & it still comes runny just given up don’t know where I’m going wrong help
This is an awesome recipe!!! I was able to follow the instructions ver easily, and I am twelve. This are super delish and fun to make! Thank you so much Sally for all your amazing recipes! They are all so good at explaining every step, and walking you through it! Do you think these would be goid with nutella pastery cream or whipped cream? Thanks again!
Hi Sophie, yes, either of those would be delicious! We’re so glad to hear you enjoyed this recipe.