

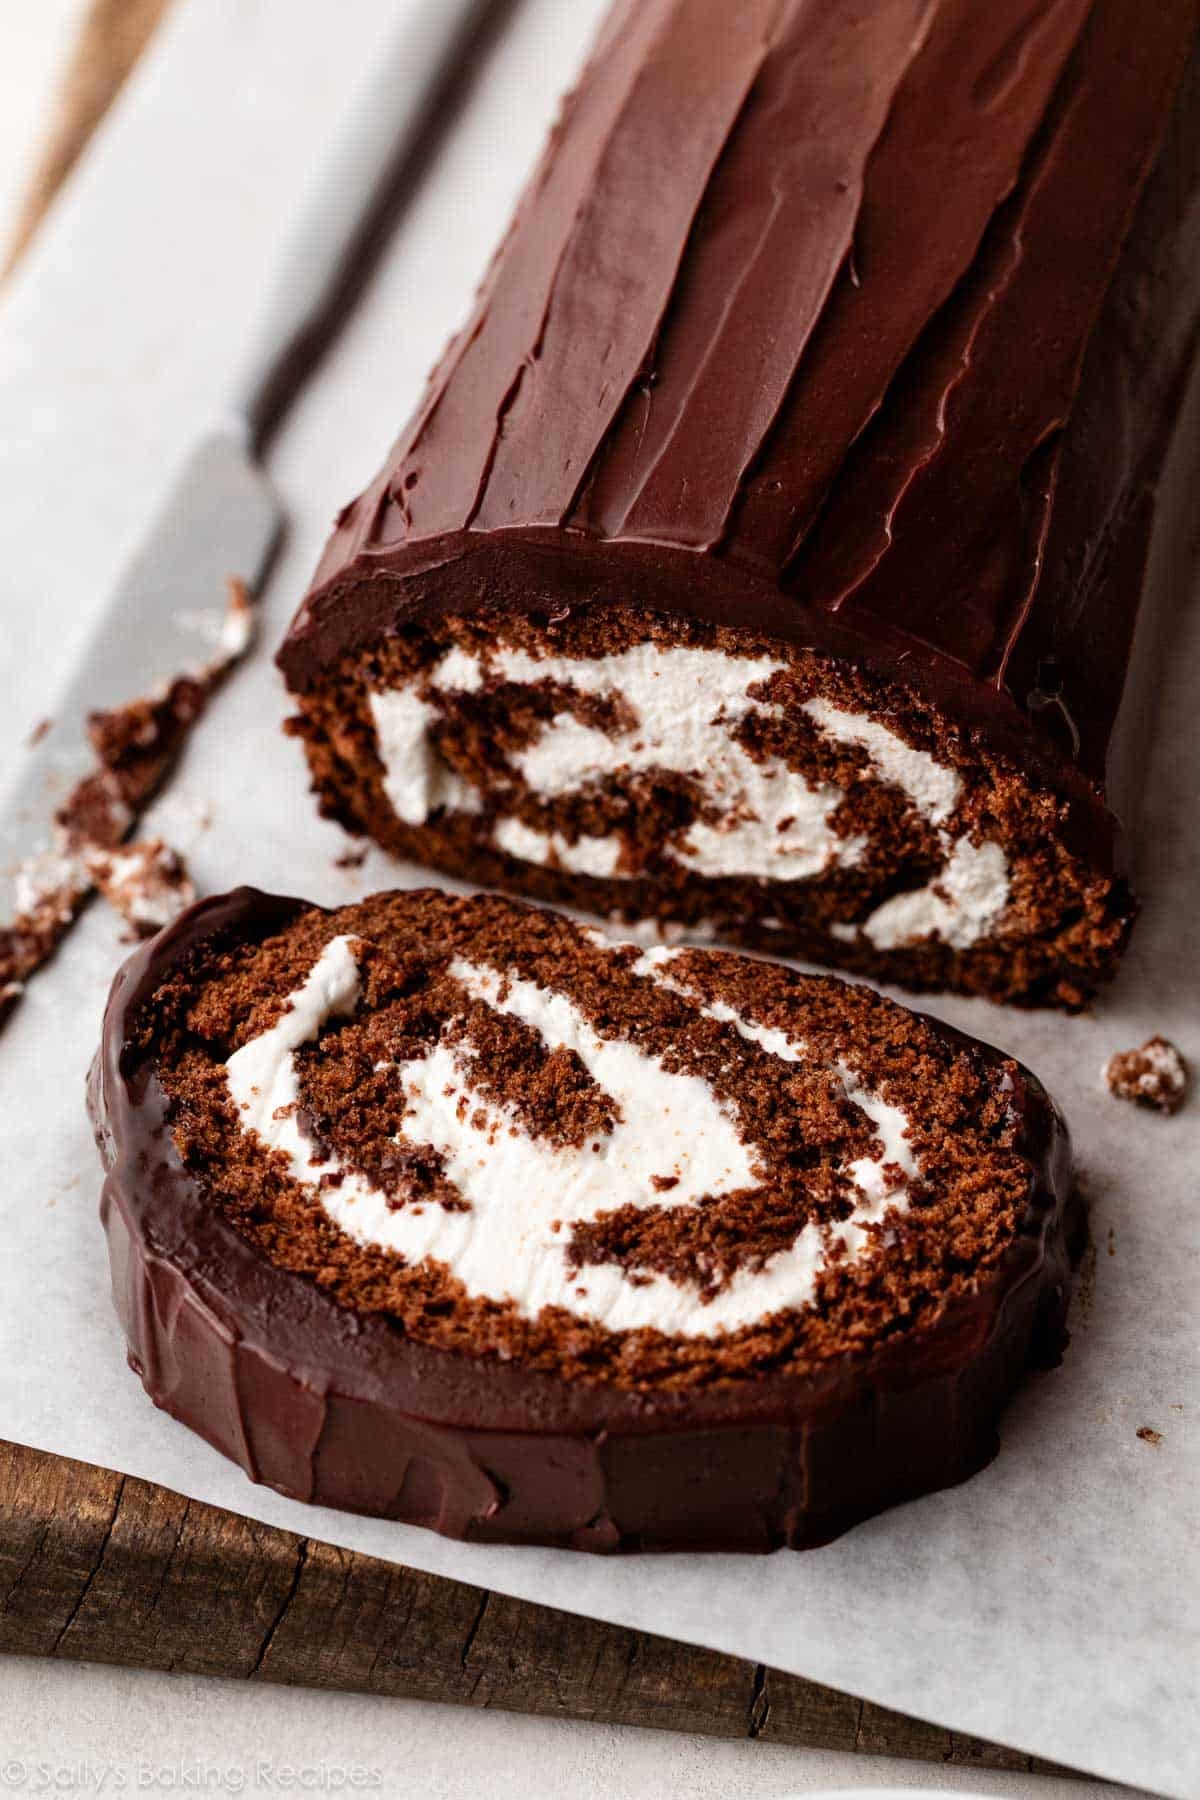
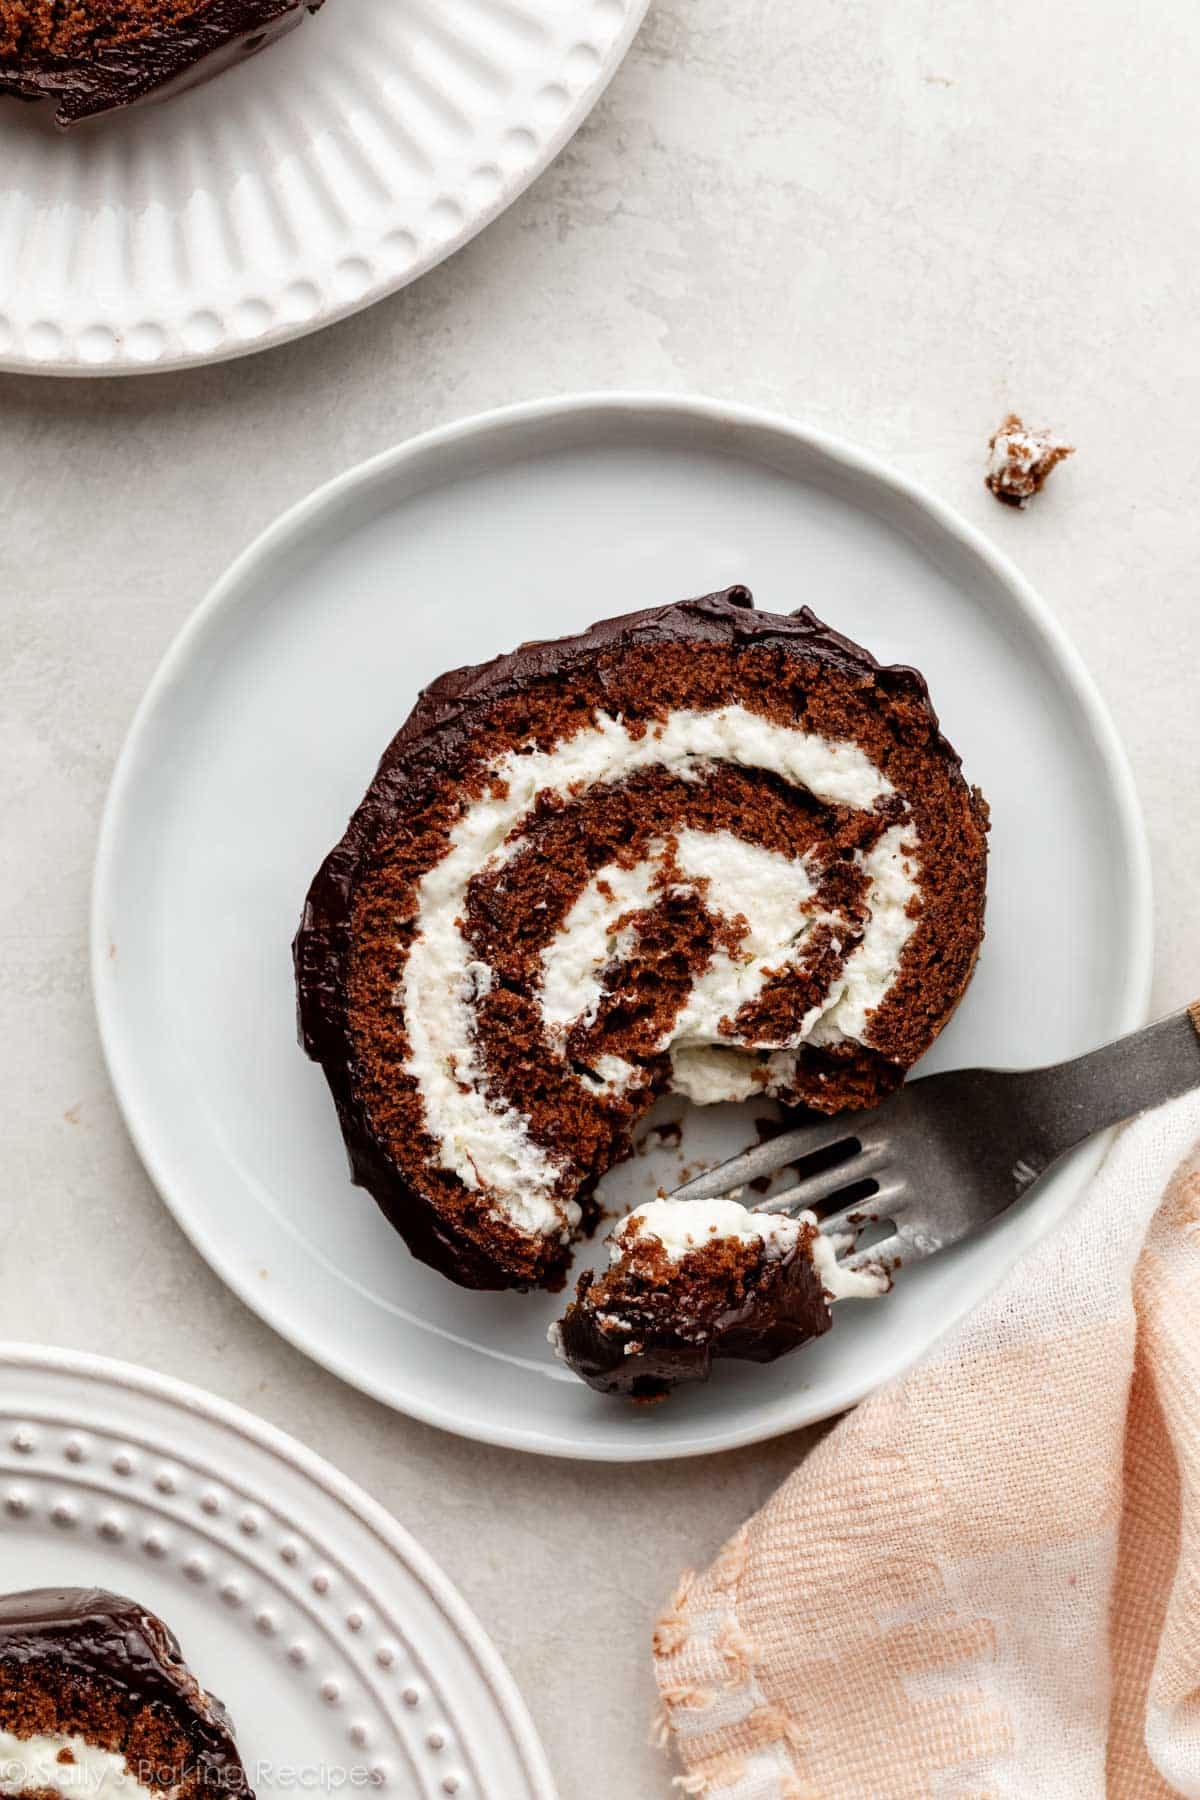
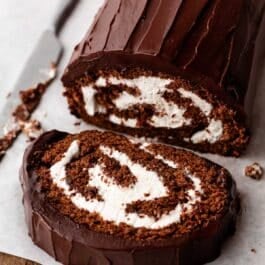
A nod to a classic childhood favorite, this chocolate cake roll combines light chocolate sponge cake with sweet vanilla whipped cream and dark chocolate ganache. Rich and totally irresistible, this beautifully spiraled dessert just might hypnotize you into reaching for another slice! You are getting very… hungry…
I originally published this recipe in 2019 and have made a few small updates to produce a moister, deeper flavored cake.
I love recreating nostalgic treats, like the packaged ones that were always a thrill to find in your lunchbox. Making childhood favorites from scratch—like brown sugar cinnamon pop tarts, mini animal cracker cookies, rice krispie treats, cream-filled chocolate cupcakes, and, of course, oatmeal creme pies!—is so rewarding, because not only do they bring back happy memories, but also the homemade versions invariably taste even better (and definitely fresher) than the store-bought packaged originals (check out these copycat desserts to make at home for more ideas!) This chocolate cake roll—aka Ho Ho, Swiss Roll, and Yodel—is another nostalgic favorite.
I first published this recipe in 2019, but recently revisited it and retested it to see if I could improve it. I always like to continue to work on recipes, including ones that have been published and may not have the best reviews.
In the case of this Swiss roll recipe, some reviewers reported that their chocolate sponge cake was dry, cracking or breaking when they tried to roll it, and didn’t have enough chocolate flavor. When I see a pattern of reviews with concerns over the same thing, I will revisit the recipe and try making various tweaks until I’m confident I’ve fixed the issues readers have been having.
The updated recipe is below, and similar to a Tiramisu Cake Roll recipe that you’ll find in my New York Times best-selling cookbook, Sally’s Baking 101. Different flavors, but I met some of the same challenges while developing the recipe.
After making many (many!) more chocolate cake rolls, I’m proud to announce this chocolate cake roll is better than ever! You’ll notice a few ingredient tweaks in the updated recipe, including swapping out the melted butter for vegetable oil, and the addition of buttermilk, both of which add extra moisture to the sponge cake crumb.
This New & Improved Chocolate Cake Roll Has:
- A light, fluffy, and moist texture
- More pure cocoa flavor
- A sweet vanilla whipped cream filling
- A rich dark chocolate ganache topping
It’s also easier to roll up, and much less prone to cracking as you roll.
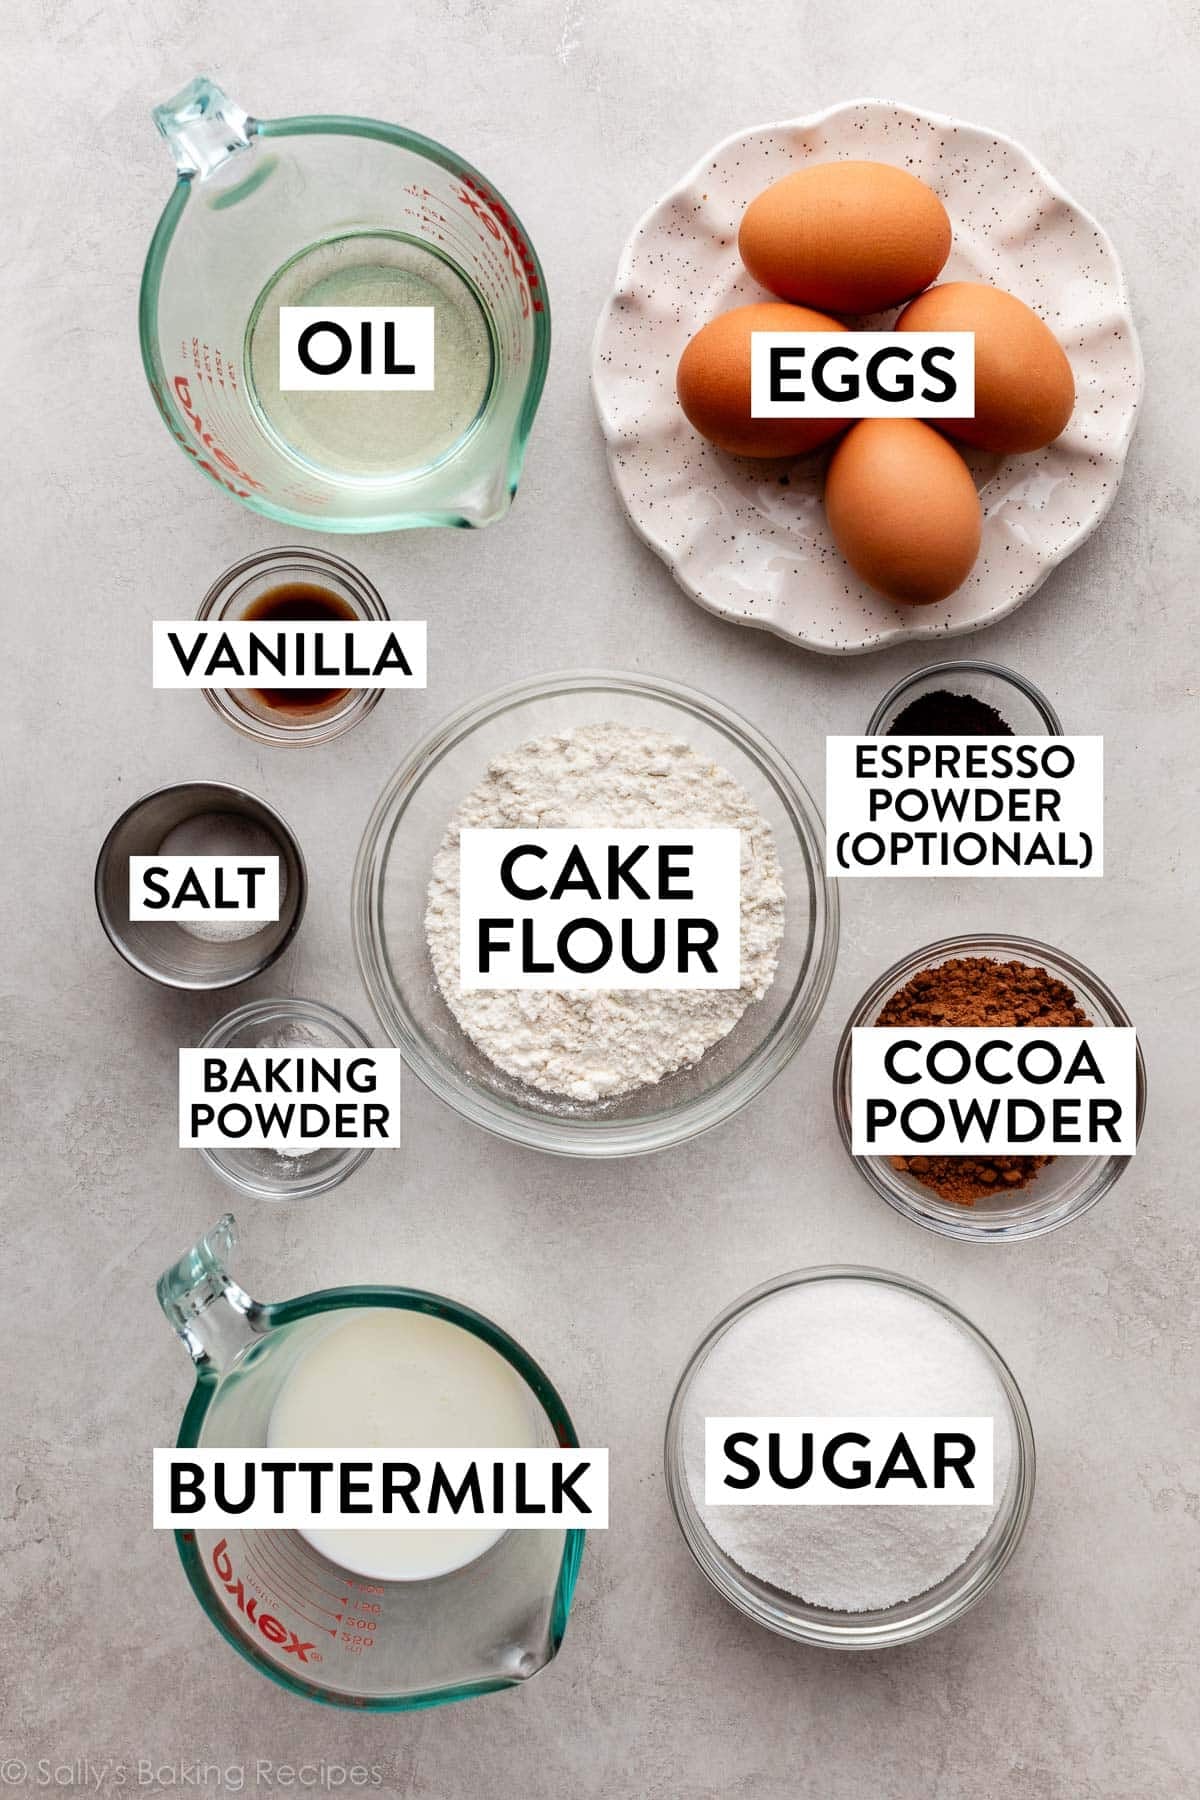
Key Ingredients for Chocolate Sponge Cake:
- Cake Flour or All-Purpose Flour: You can use either. My team and I extensively tested the recipe and there is no difference either way.
- Unsweetened Cocoa Powder: You can use either Dutch-process cocoa powder OR natural cocoa powder. I really love this brand of Dutch-process cocoa.
- Separated Eggs: Eggs are the workhorse of this recipe, mostly providing structure and moisture. You need 4 separated eggs. You’ll whip the egg whites into medium peaks to introduce a hefty amount of air into the light batter.
- Oil: As I tested this recipe, one of my main avoidances was a dry sponge cake. Oil makes for a moister chocolate cake than if you were to use butter (which is what the old recipe called for). It’s what we use in these super-moist chocolate cupcakes, too.
- Buttermilk: Another key moisture provider that makes a big difference in the texture of this sponge cake. If you don’t have buttermilk, whole milk works instead.
- Espresso Powder: Just a small amount heightens the cocoa flavor; it doesn’t taste like coffee at all. You can find espresso powder in the coffee aisle at your grocery store or online.
Step-by-Step Photos
You need a few bowls, a sifter/sieve, and a handheld or stand mixer fitted with a whisk attachment.
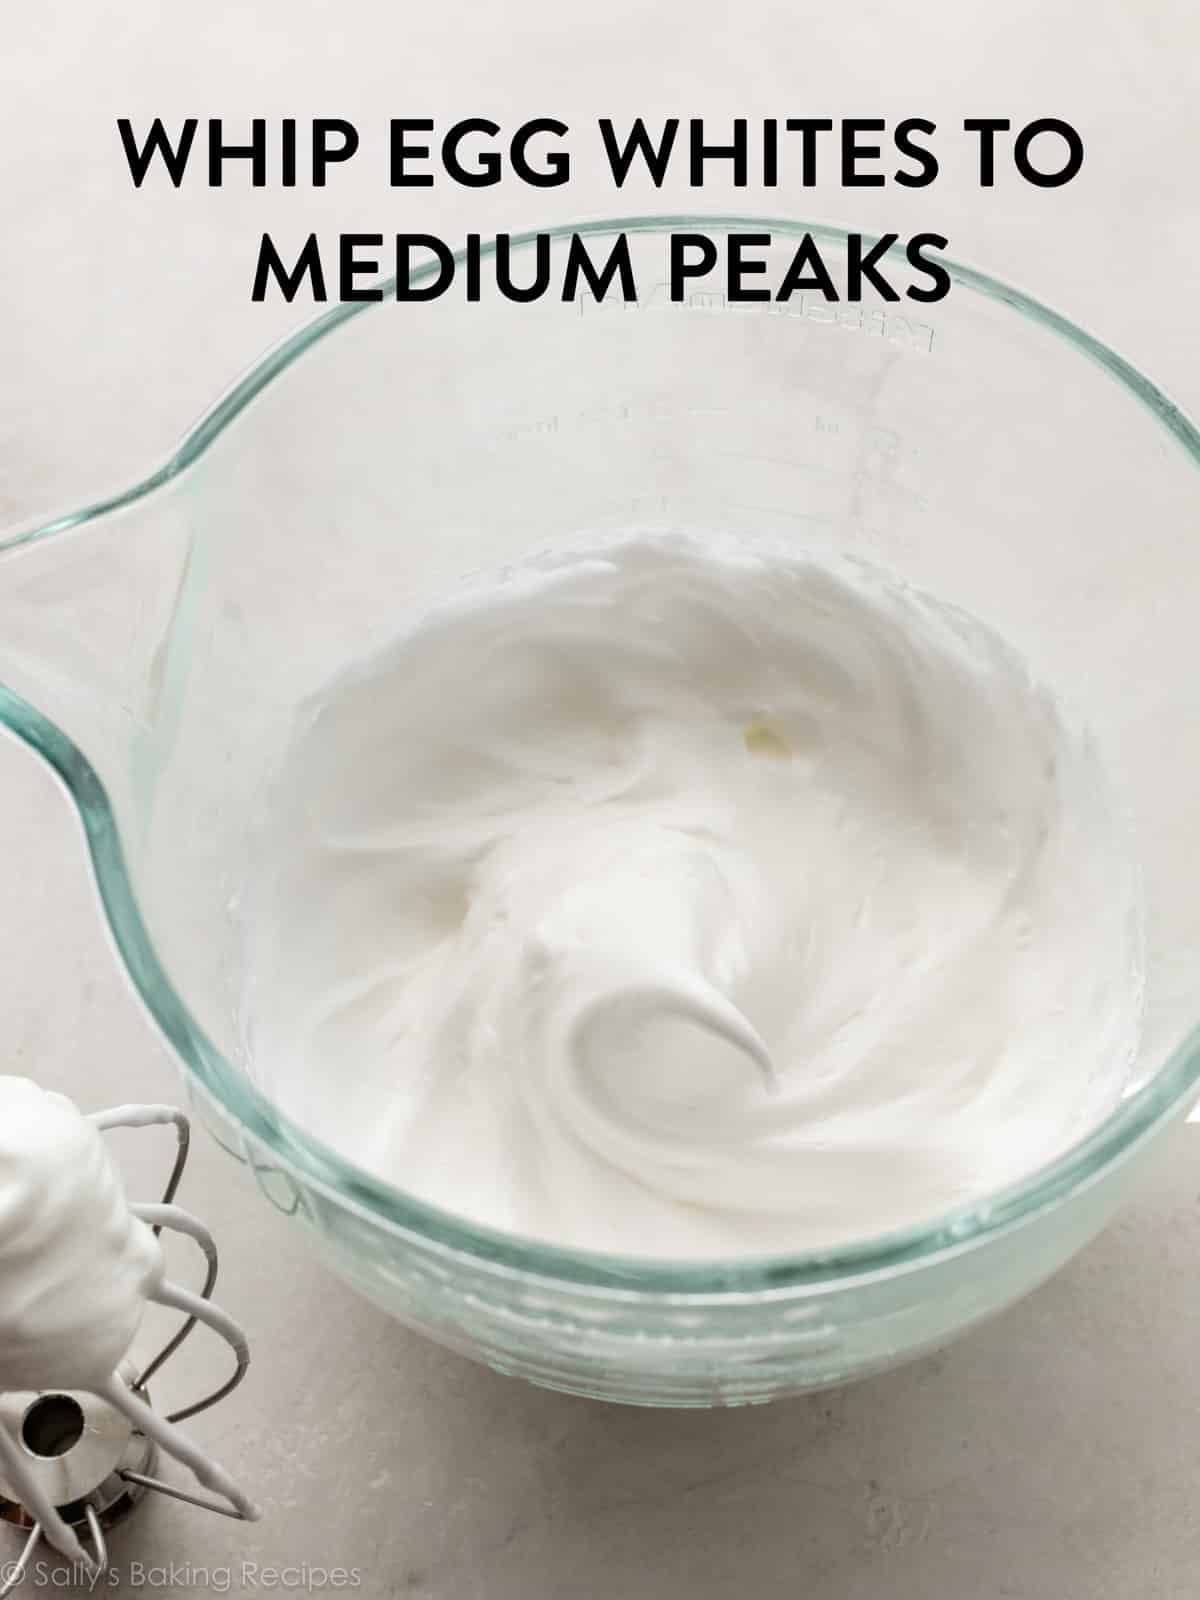
Whip egg whites & some of the sugar into medium peaks: This takes at least 4–5 minutes, so don’t get discouraged if you think it’s taking too long, especially if it’s humid where you live. Keep beating!
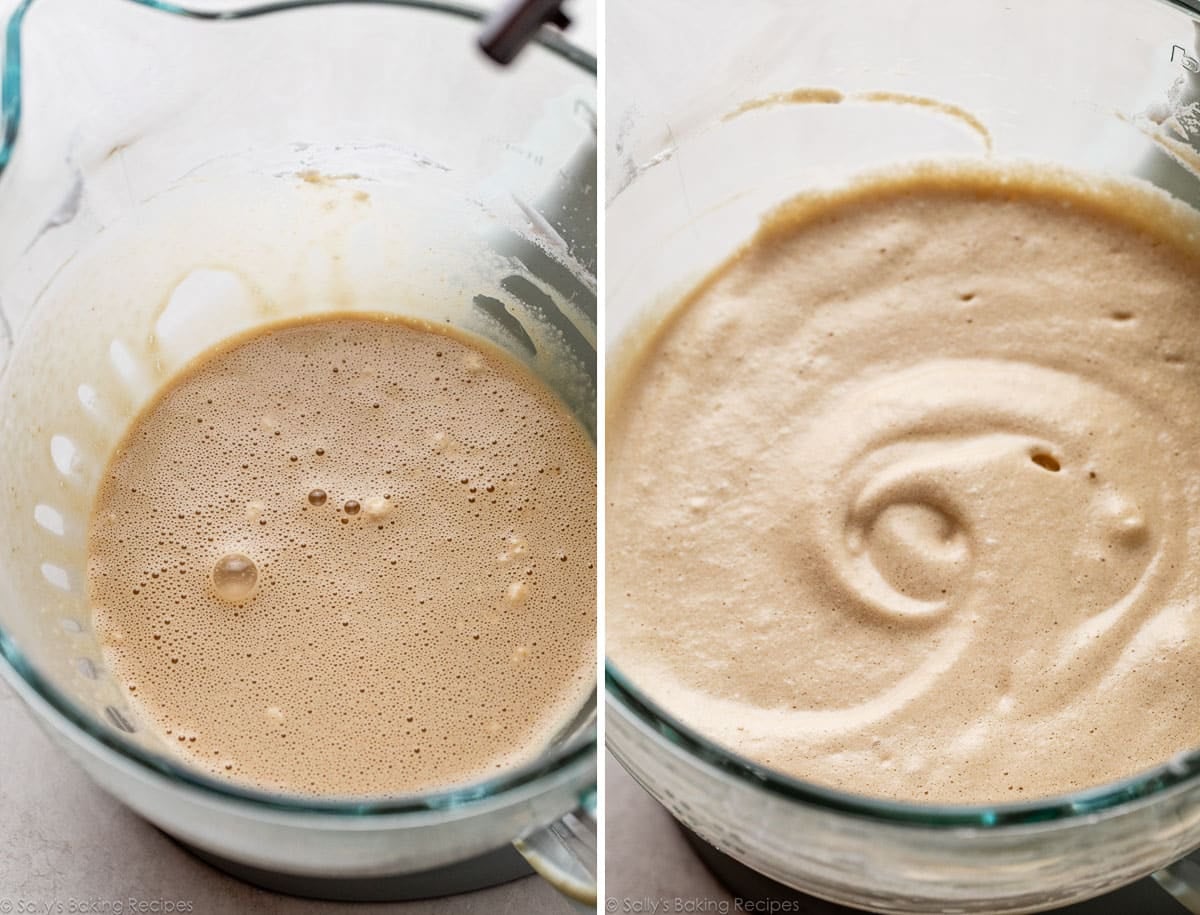
Separately, beat egg yolks and remaining sugar, then add vanilla, oil, buttermilk, and espresso powder.
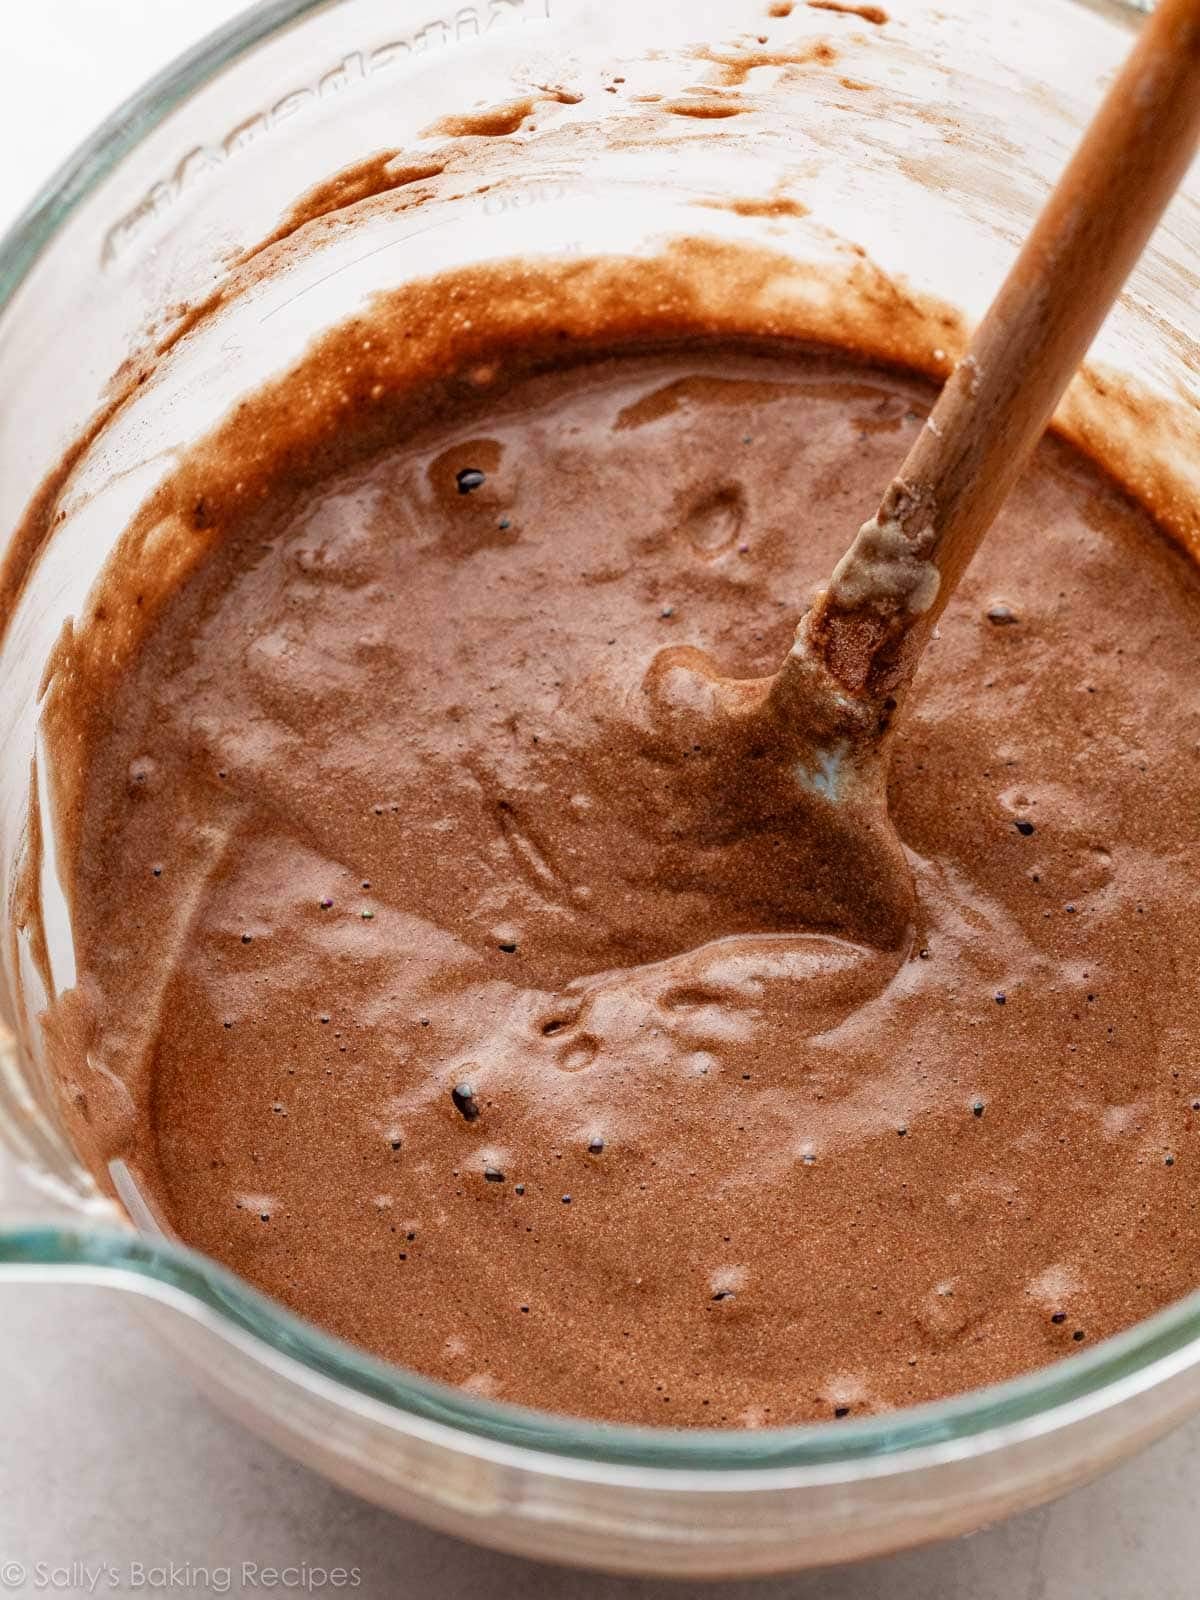
Then you’ll fold in the egg whites in 2 additions, making sure not to deflate the batter. At this point, the batter is light & foamy:
Sift dry ingredients: One of the most important steps in this recipe is to sift the dry ingredients together. Pick up a large sieve. If you bake often, it will come in handy!
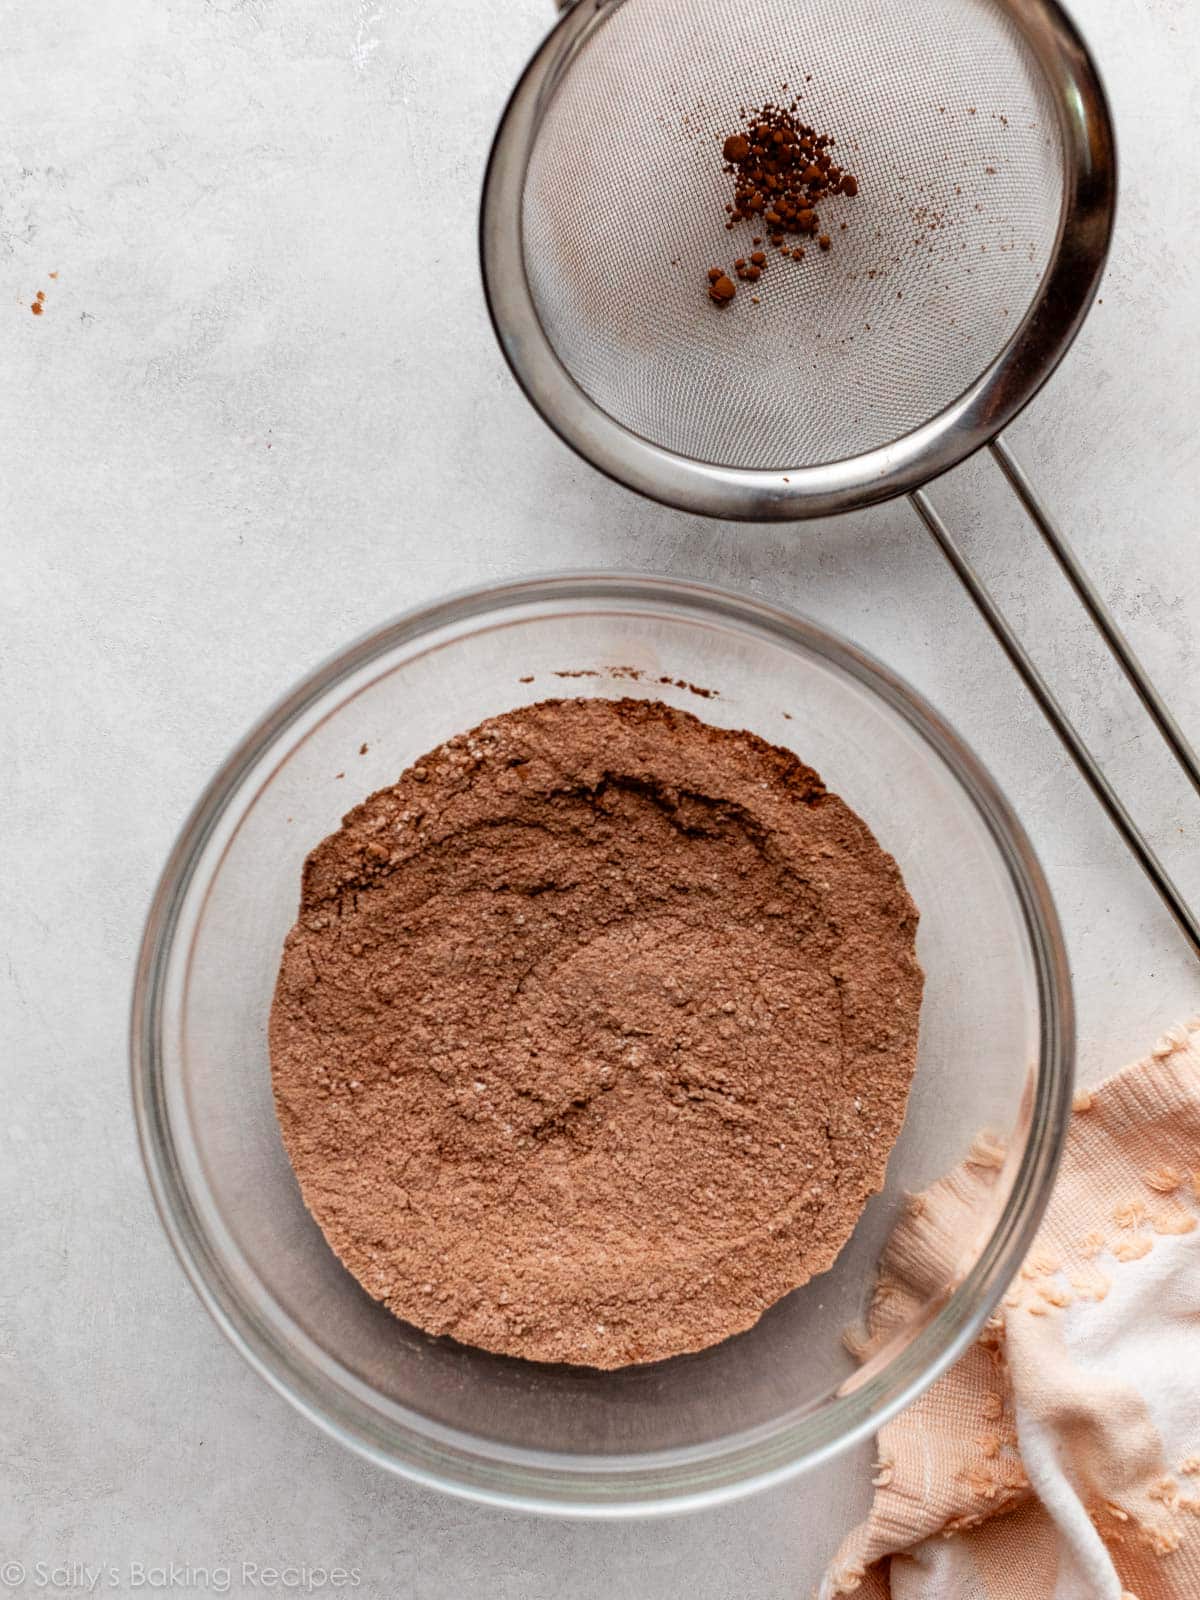
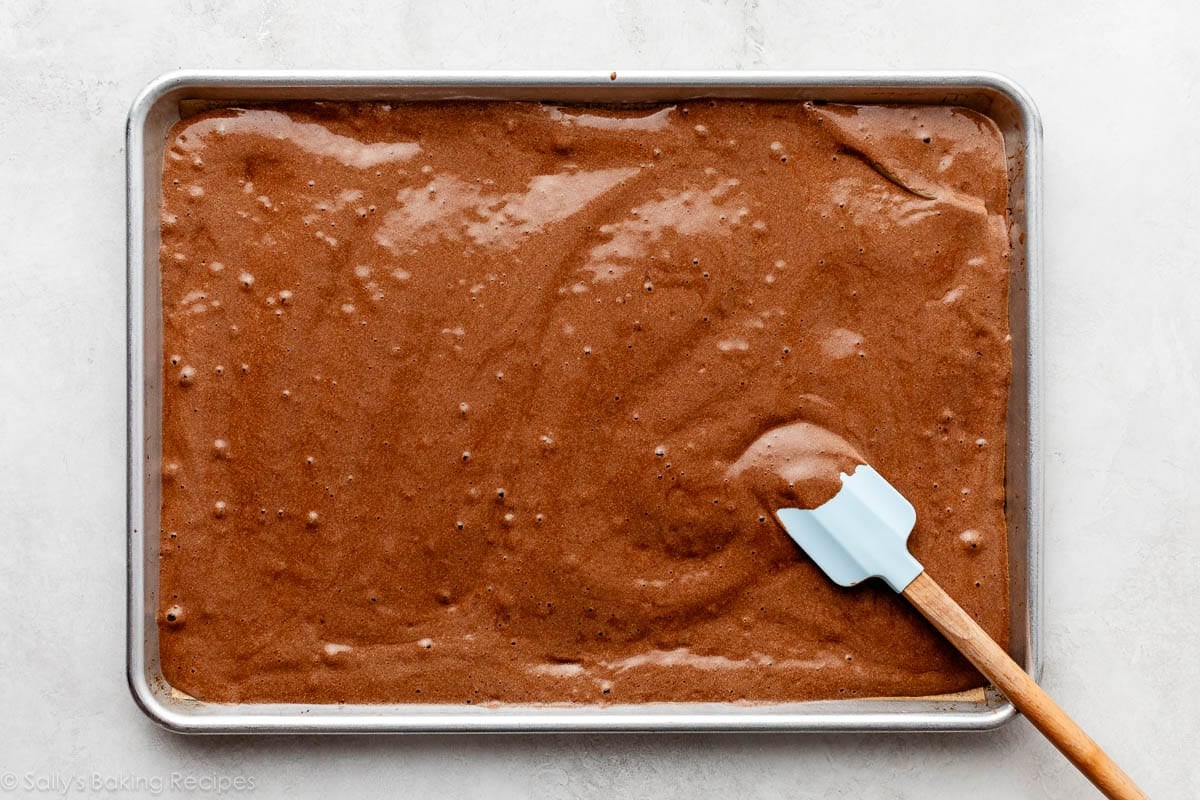
Then sift them into the egg white/yolk mixture. Fold the batter together gently to combine and then spread the batter into the 12×17-inch baking pan.
Bake for only around 13–14 minutes. This is a very thin cake.
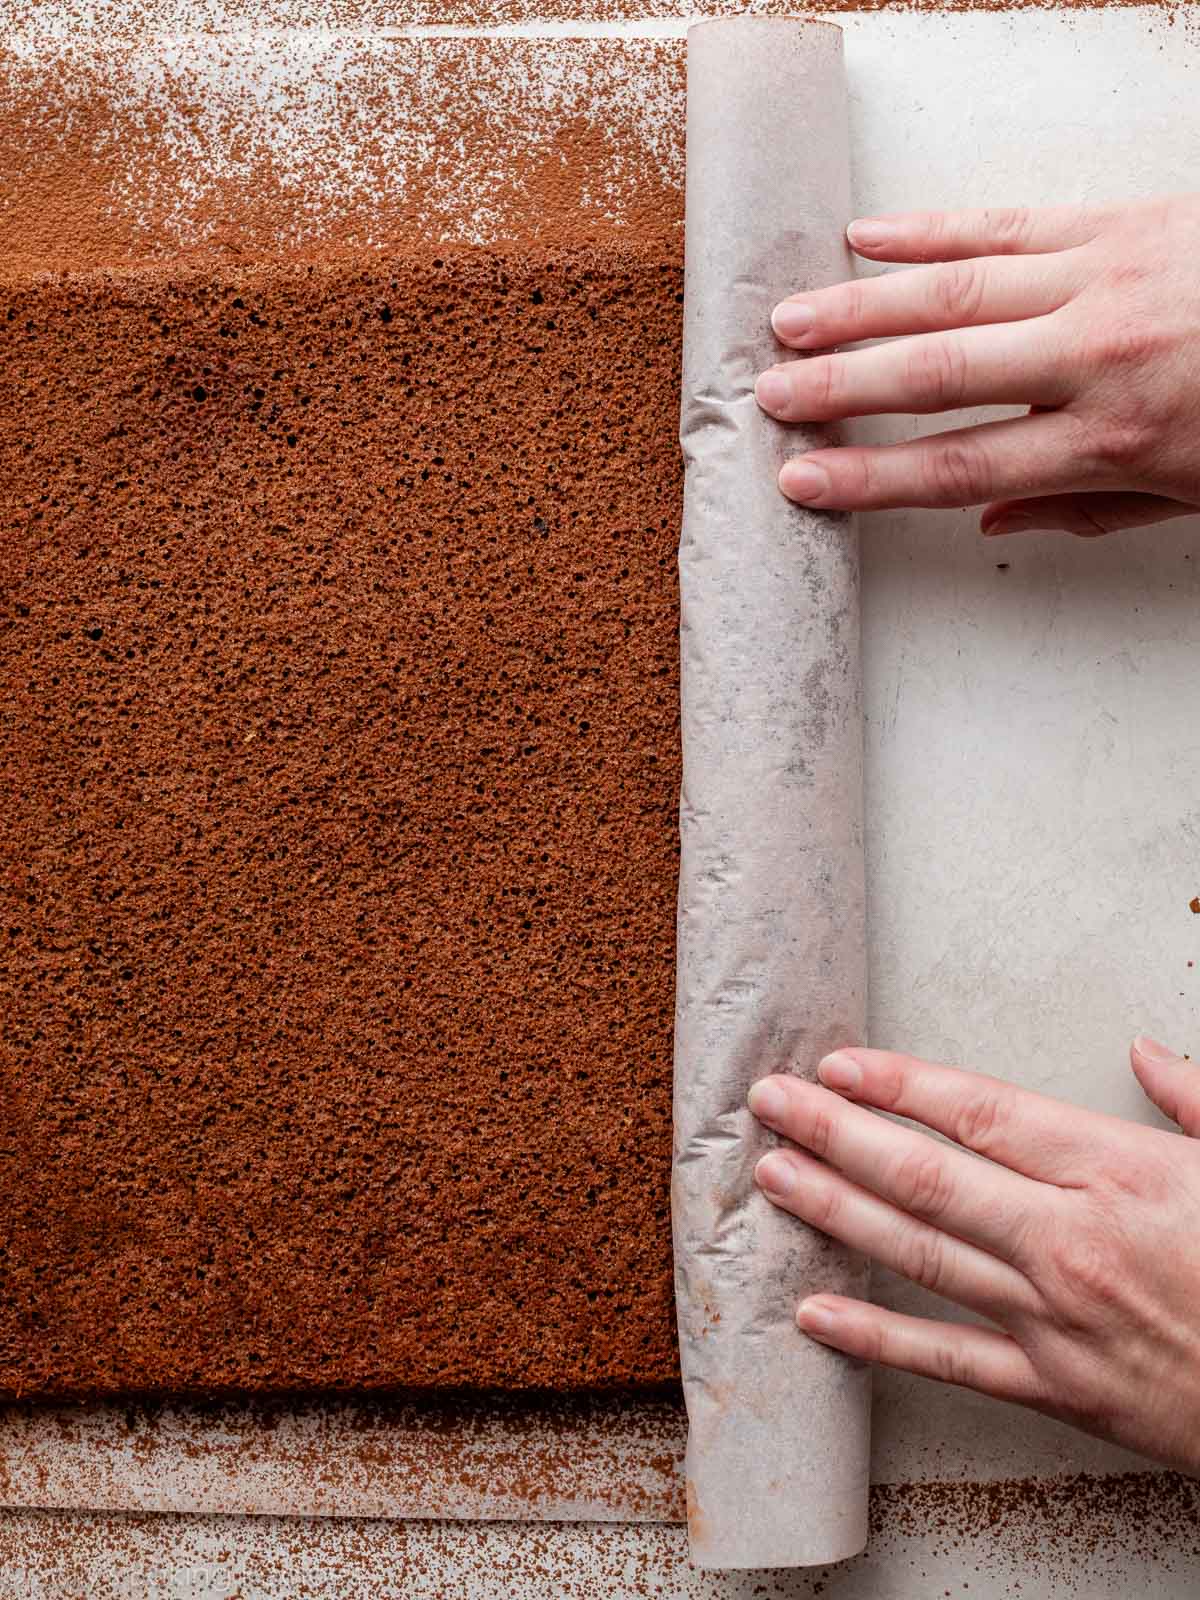
Invert the warm cake: No time for cooling! Immediately invert the warm cake onto parchment paper or a clean thin kitchen towel dusted with cocoa powder.
Cool in rolled-up shape: Gently roll the cake up with the parchment/towel. Let it cool at room temperature in the rolled-up shape so when it’s time to roll it up with the whipped cream filling, it’s already “familiar” with the shape. (And won’t resist or crack as much!)
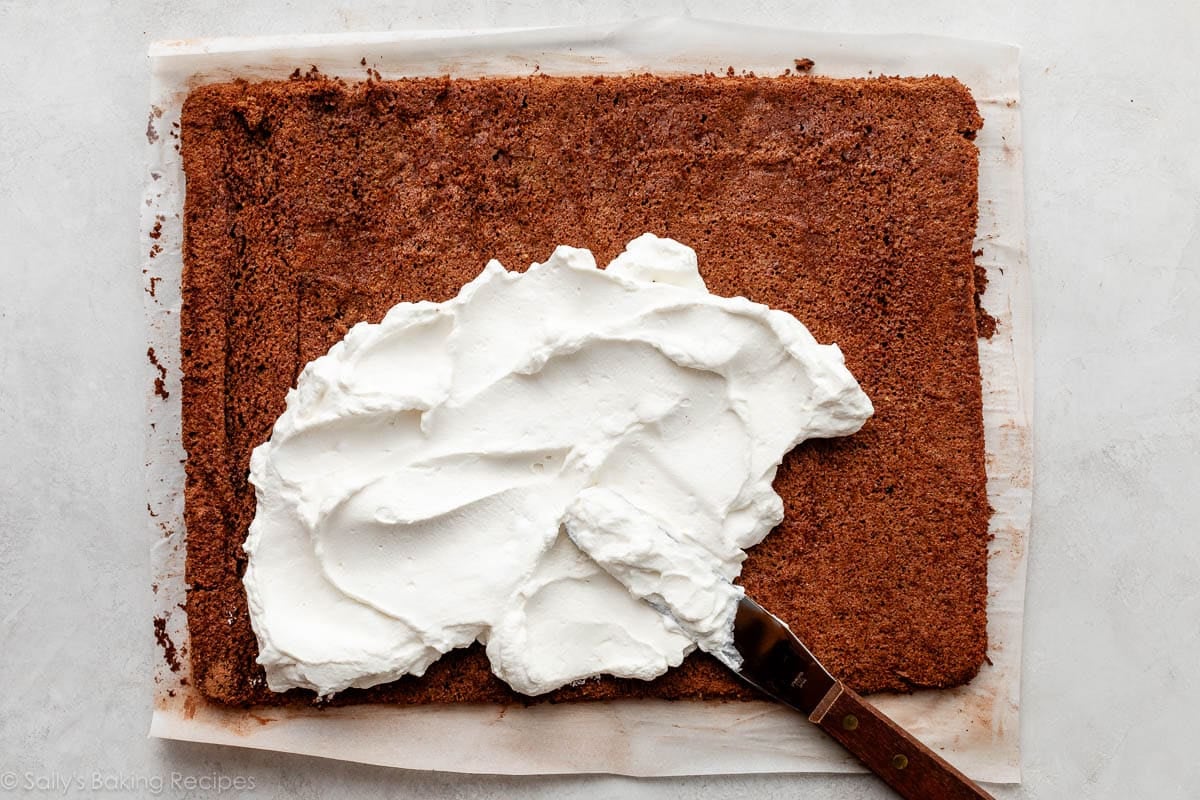
Assemble: Once cool, unroll the cake, add whipped cream, roll back up (without the parchment paper this time), then top with ganache.
Swiss Roll Cake Filling
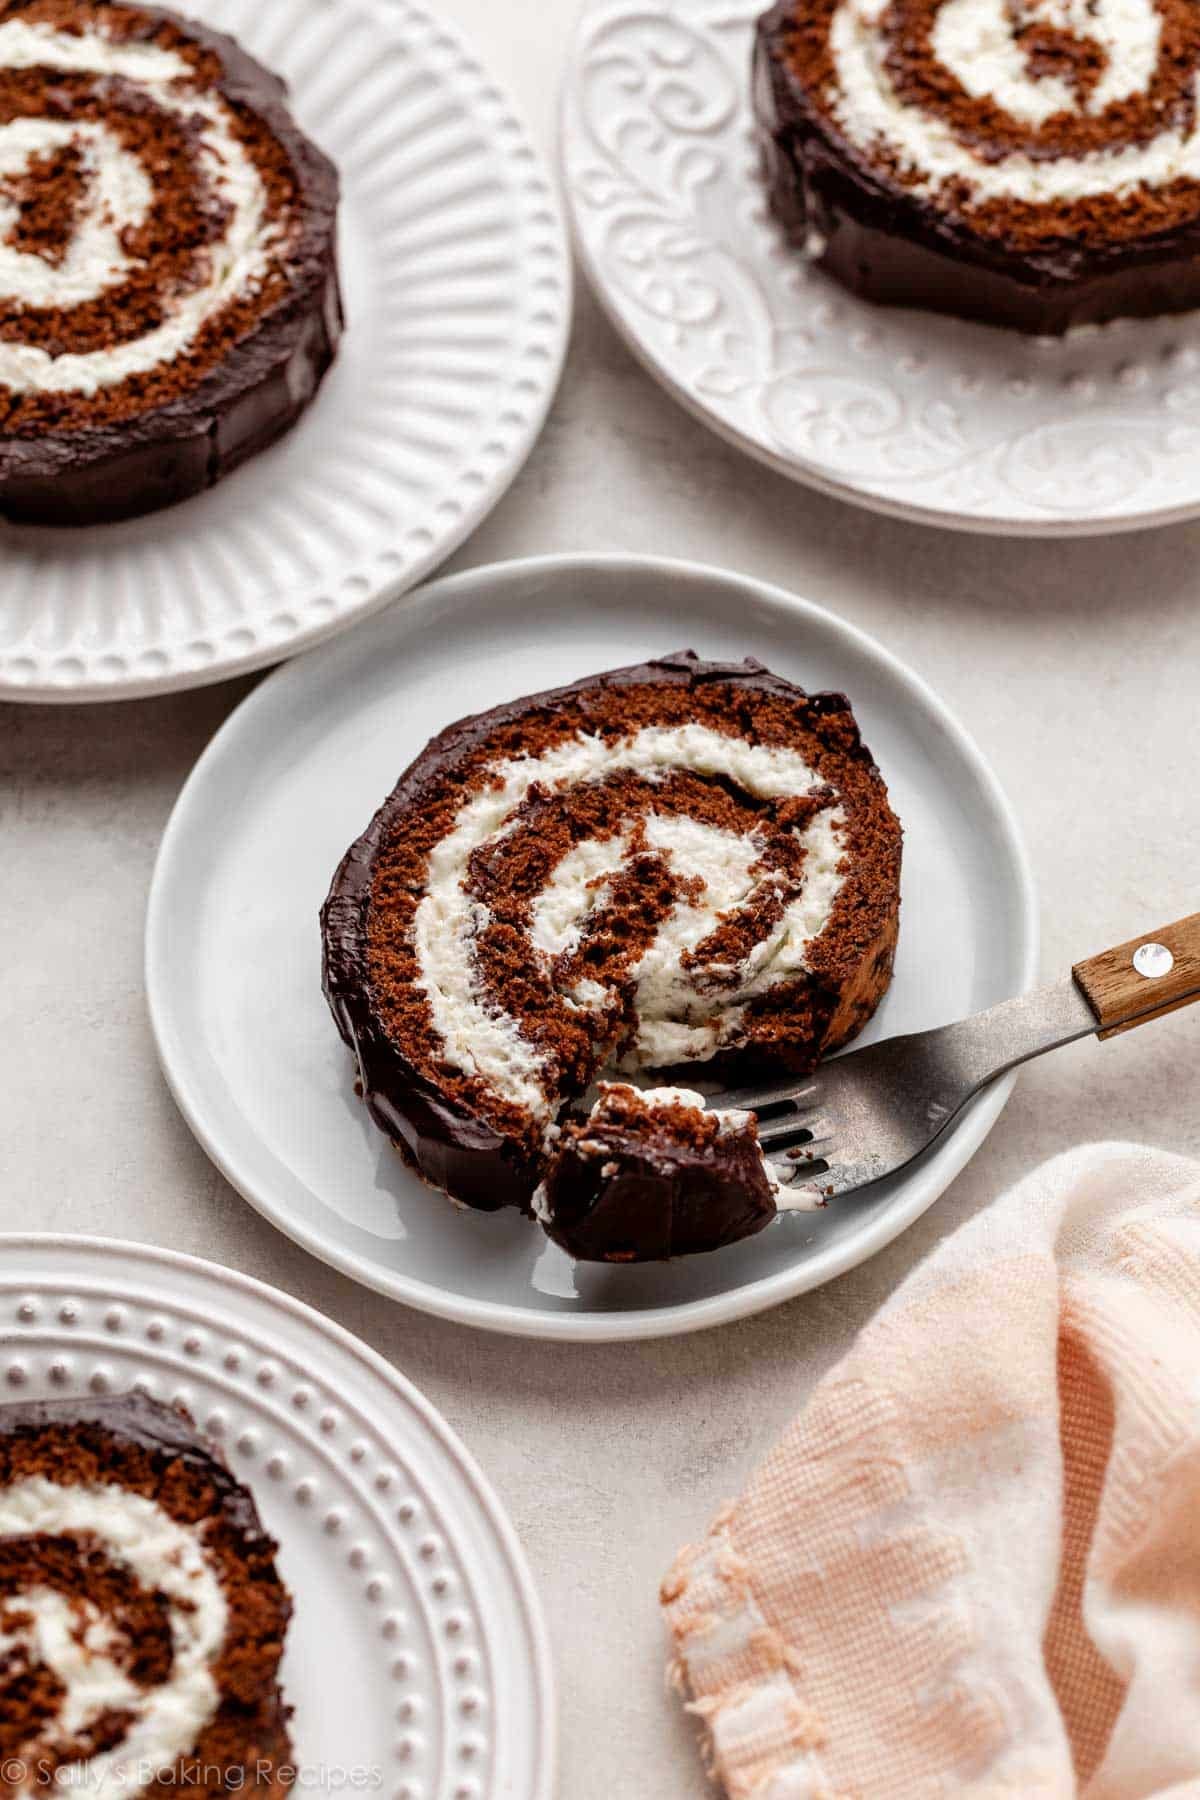
The whipped cream filling inside the cake roll is billowy and soft with deliciously sweet vanilla flavor—a light and lovely contrast to the rich chocolate ganache we’ll spread on top. Because the ganache is pretty dark, I use a bit more sugar and vanilla extract compared with my usual whipped cream recipe. You can use either confectioners’ sugar or granulated sugar in the whipped cream—see my recipe Note. And this is optional, but I always add some store-bought marshmallow creme (“fluff”) to this whipped cream filling, which gives it the most remarkable flavor. Taste testers were raving over it!
Roll the cake back up (without parchment this time), then set it aside as you prepare the chocolate ganache.
In lieu of the whipped cream, a pastry cream filling would also be fantastic.
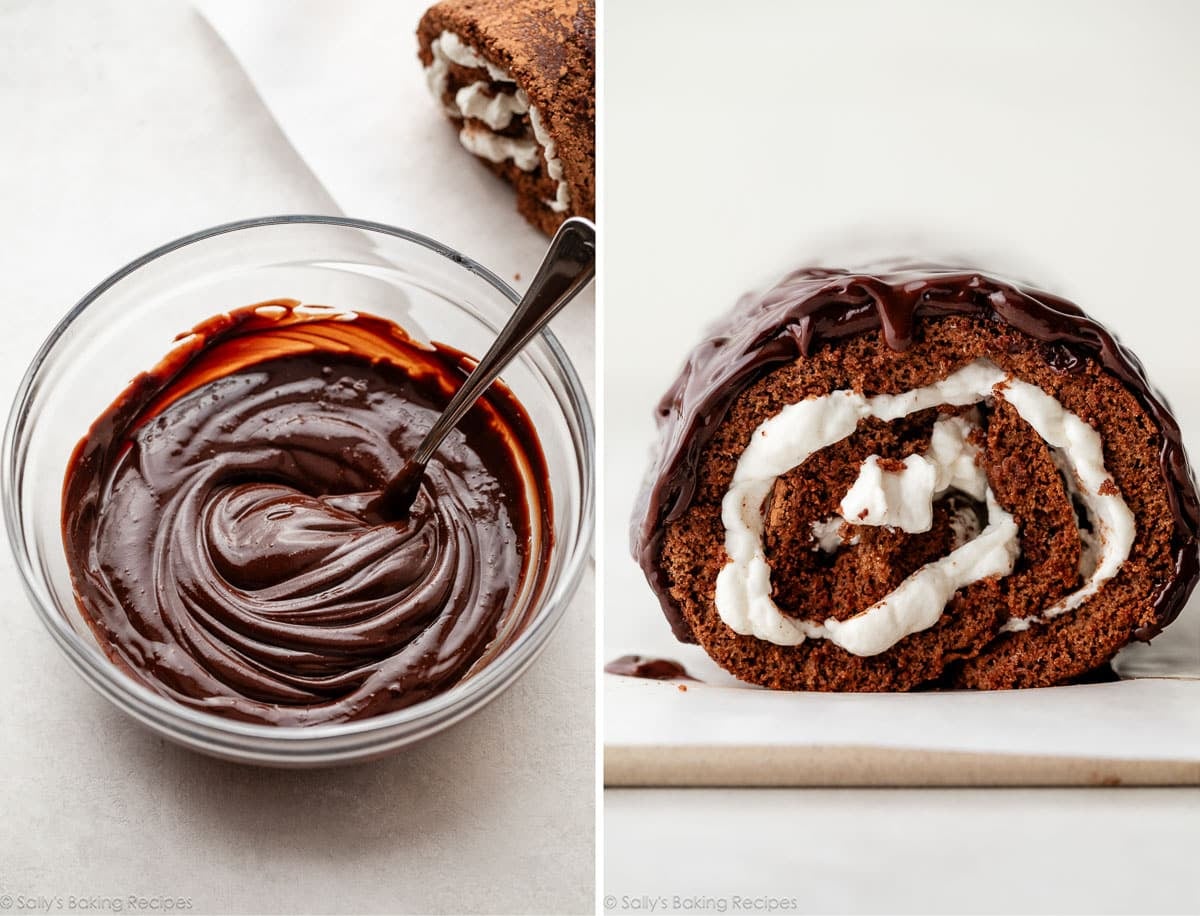
Chocolate Ganache Topping
The only thing simpler than homemade whipped cream is homemade chocolate ganache. Simply combine warm cream with finely chopped chocolate, then stir the two together until completely smooth. I like to add a teaspoon of corn syrup for an extra glossy finish, but that’s totally optional.
I have 2 chocolate ganache success tips for you:
- Use real chocolate such as Baker’s or Ghirardelli baking bars found in the baking aisle. I prefer the bars labeled Bittersweet (60% cacao). Avoid chocolate chips, which contain stabilizers to prevent them from melting completely.
- Chop up the chocolate into super-fine pieces. The smaller the pieces, the quicker it melts and the smoother it tastes.
Chill the cake roll so the chocolate ganache sets, which makes slicing a bit neater. (Though there’s still plenty of lick-your-finger moments!)
Chocolate Cake Roll Success Tips
- Prevent the cake from cracking: Cake rolls can crack when you roll them; this is completely normal. In fact, the pictured cake roll above cracked! Do not get discouraged, because you can piece it back together easily, then cover it with filling. What I find helps prevent cracking is rolling it up initially when it’s still warm, and rolling it up slowly. Also, let the cake roll cool at room temperature for that initial cooling (before unrolling and adding the filling). If it’s cold when you unroll it to spread the filling on, it usually cracks.
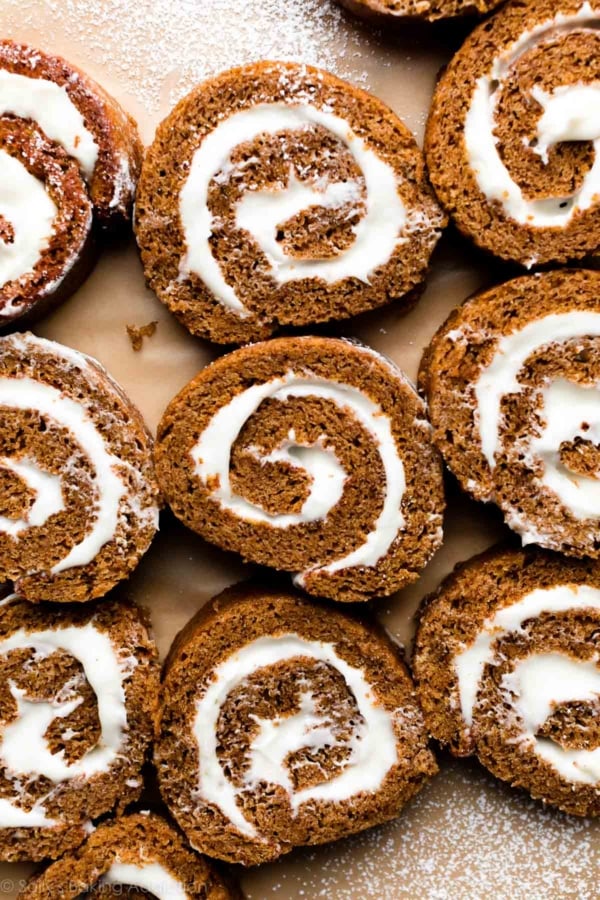
- Make it thicker: I use and recommend a 12×17-inch half sheet pan. You can also use a 10×15-inch pan, like we use for pumpkin roll, but note that the bake time is 5 minutes longer and the cake is thicker. I prefer the thinner cake with this chocolate/fluffy whipped filling combo. I also find the thinner cake isn’t as prone to cracking.
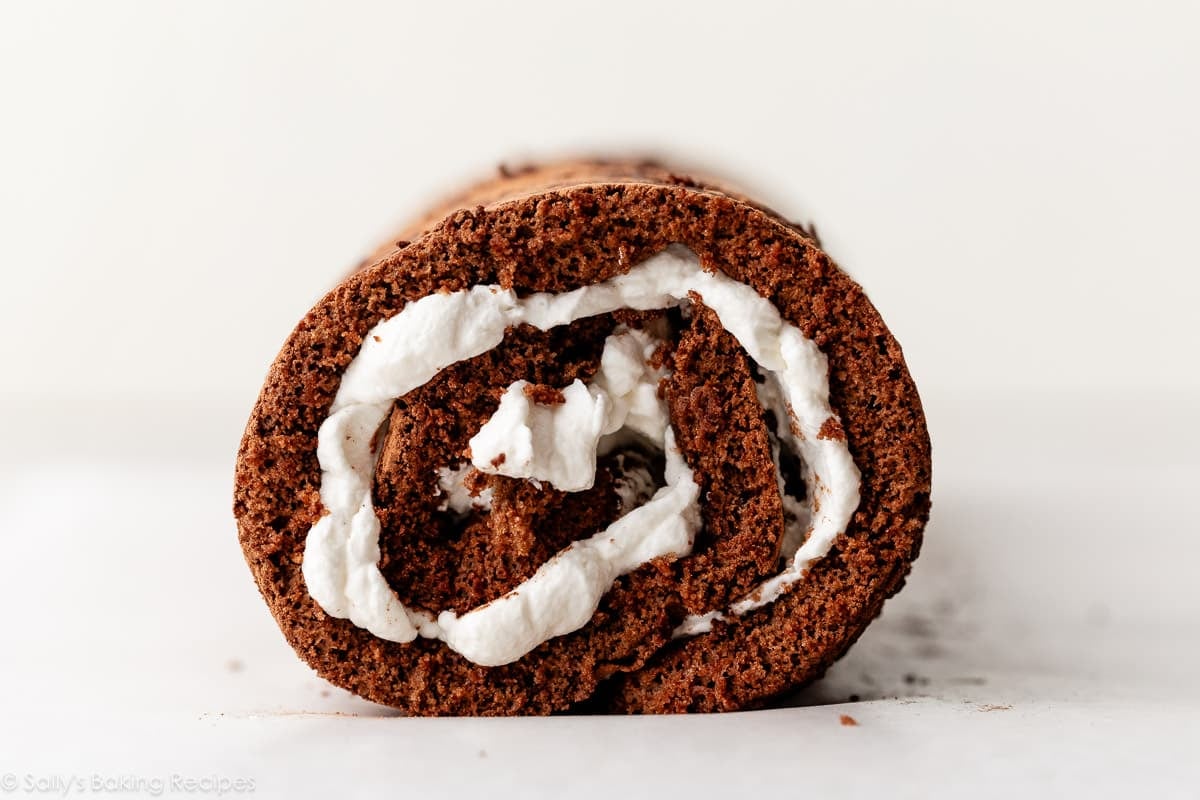
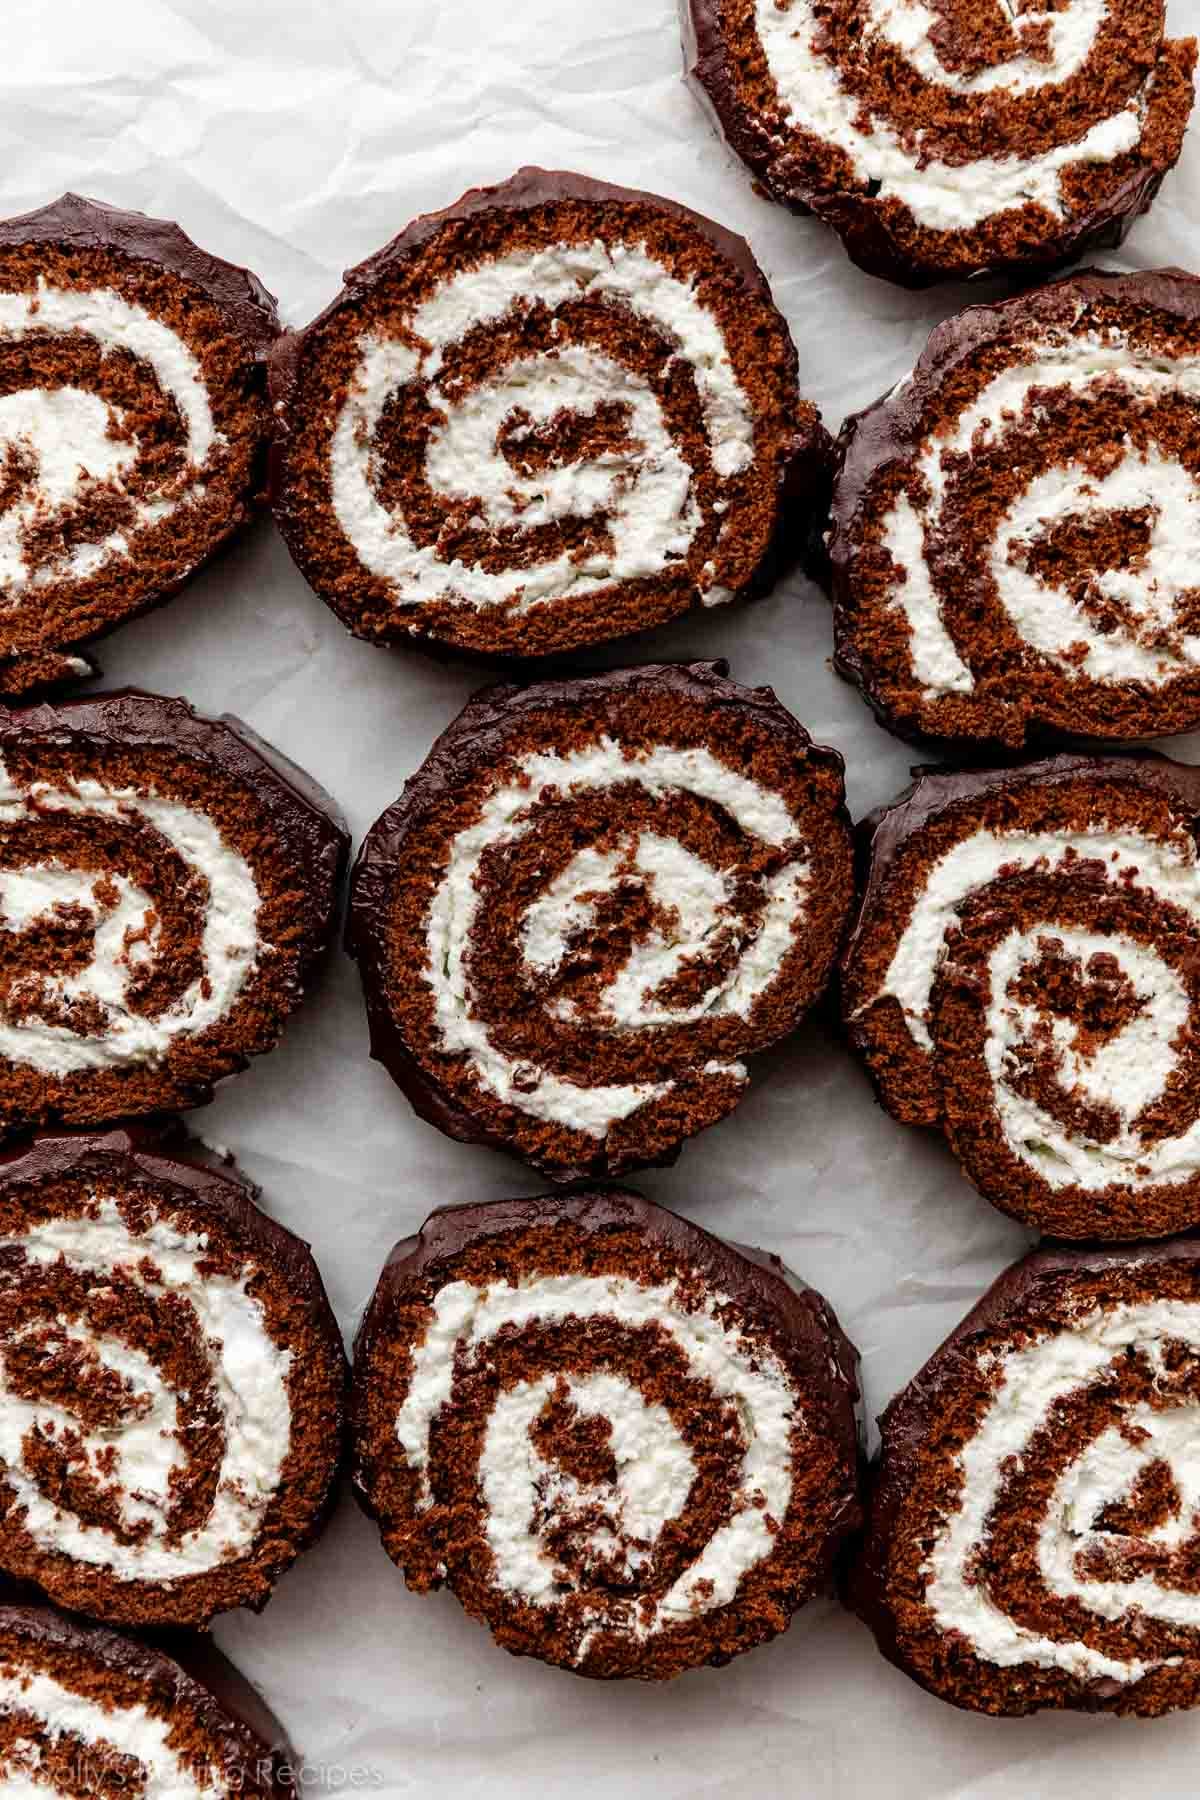
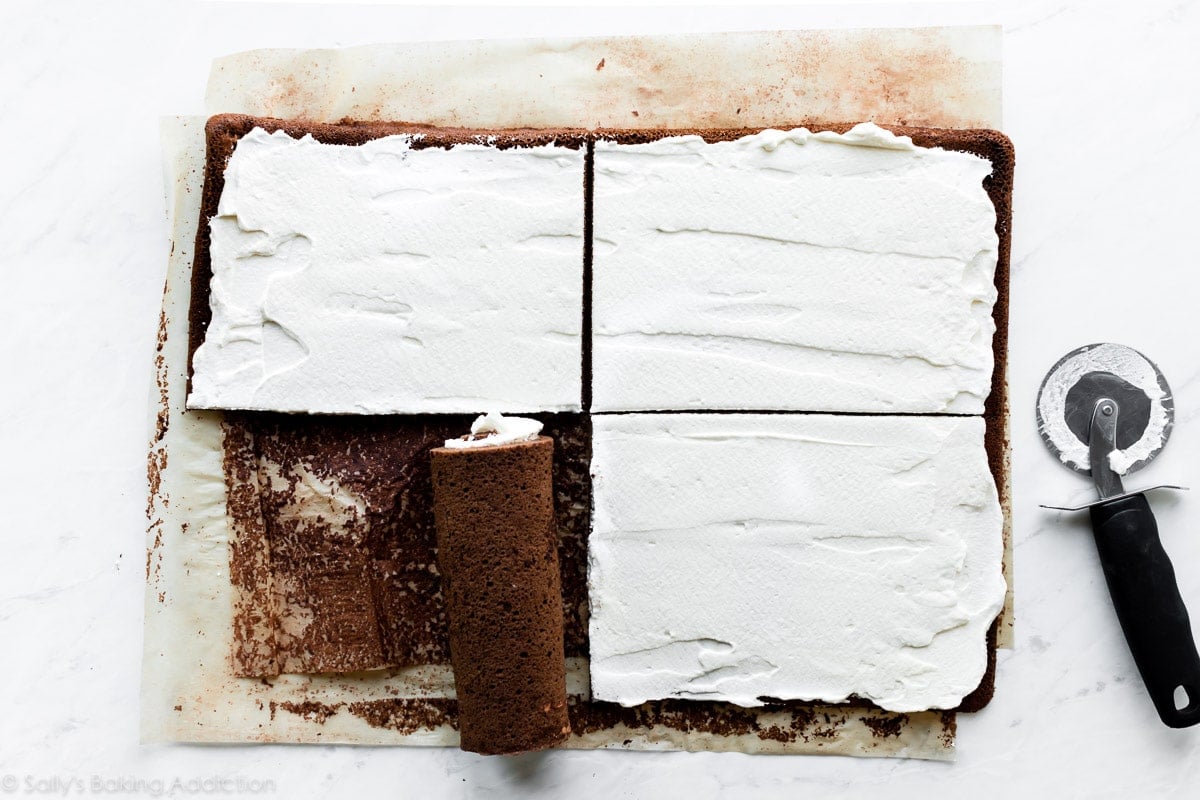
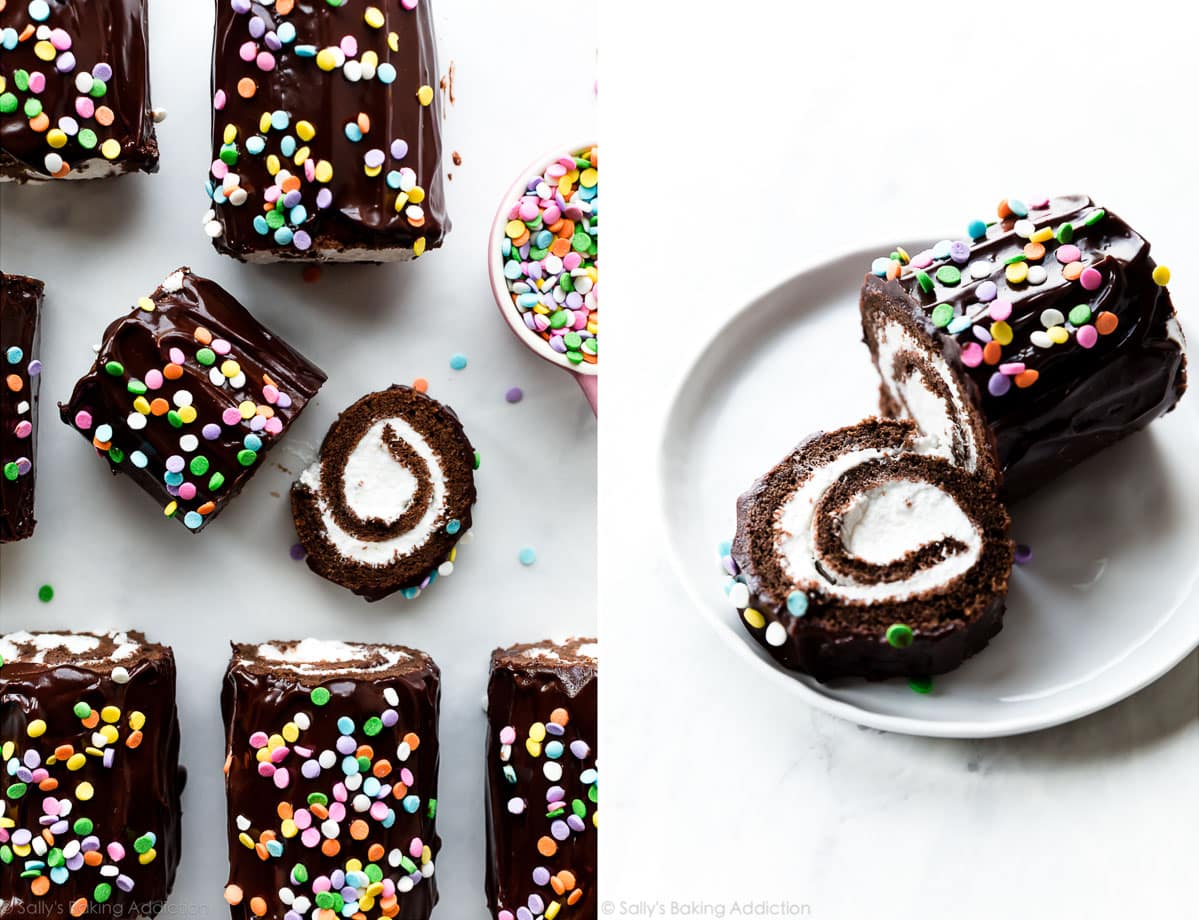
- Make them mini size (pictured below): You can also make mini chocolate cake rolls, which are closer in size to the Hostess or Little Debbie snack cakes we love. If you’re making the mini size, cut the cake into 4 equal pieces. Roll each up, then slice in half to yield 8 mini cake rolls.
Chocolate Swiss Roll Cake
- Prep Time: 1 hour
- Cook Time: 10 minutes
- Total Time: 3 hours, 40 minutes
- Yield: 10-12 slices
- Category: Dessert
- Method: Baking
- Cuisine: American
Description
Rich and totally irresistible, this chocolate cake roll is for chocolate lovers everywhere. Follow this carefully explained step-by-step recipe for best success. Recipe was updated and improved in 2024. It’s moist and full of chocolate flavor!
Ingredients
- 3/4 cup (95g) cake flour or all purpose flour (spooned & leveled)*
- 1/4 cup (21g) unsweetened natural or Dutch-process cocoa powder, plus more for rolling
- 1 teaspoon baking powder
- 1/2 teaspoon salt
- 4 large eggs, at room temperature and separated
- 3/4 cup (150g) granulated sugar, divided
- 1/4 cup (60ml) vegetable oil
- 1/4 cup (60ml) buttermilk or whole milk
- 1 and 1/2 teaspoons pure vanilla extract
- 1 teaspoon espresso powder (optional)
Vanilla Whipped Cream
- 1 cup (240ml) cold heavy cream or heavy whipping cream
- 3 Tablespoons (38g) granulated sugar or confectioners’ sugar
- 1 teaspoon pure vanilla extract
- optional: 2 Tablespoons marshmallow creme (“Fluff”)
Chocolate Topping
- 1/2 cup (120ml) heavy cream or heavy whipping cream
- one 4 ounce bar (113g) semi-sweet chocolate, finely chopped
- optional for glossy shine: 1 teaspoon light corn syrup
Instructions
- Preheat oven to 350°F (177°C). Grease a 12×17-inch baking pan with nonstick spray or butter, then line it with parchment paper so the cake seamlessly releases in step 7. Spray or grease the parchment paper, too. We want an extremely nonstick surface for this cake roll.
- Make the cake: Using a fine mesh sieve, sift the cake flour, cocoa powder, baking powder, and salt together. Set aside.
- Using a hand mixer or a stand mixer fitted with whisk attachment, beat the egg whites and 1/4 cup (50g) granulated sugar together on high speed for 4–5 minutes or until foamy-looking medium peaks form. (Medium peaks have a slight droop, and aren’t quite stiff.) Transfer to another bowl.
- Using the same mixing bowl you just had the egg whites in (no need to clean it), add the egg yolks and remaining sugar. Mix on high speed for 1 minute, and then add the oil, milk, vanilla, and espresso powder. Beat together on high speed for 2 minutes. Mixture will be thin and a little bubbly on top. Add half of the whipped egg whites into the egg yolk mixture. Mix on low speed for 10 seconds. Repeat with remaining egg whites and mix on low for 10 seconds.
- Sift in the flour mixture, and then fold the batter together with a silicone spatula until combined. Do not over-mix. Batter is light and fluffy.
- Spread batter evenly into prepared pan. It will be a very thin layer. Shimmy the pan on the counter to smooth out the top. Bake for 12–14 minutes or until the top of the cake lightly springs back when touched with your finger. Do NOT over-bake.
- Prepare to roll/roll the cake: As the cake bakes, place a piece of parchment paper (larger than the cake) or a thin kitchen/tea towel flat on the counter. (Note: I find a kitchen/tea towel is better to help prevent cracking.) Using a fine mesh sieve, dust parchment/towel with about 2 Tablespoons of cocoa powder. Once the cake comes out of the oven, quickly run a knife around the edges to loosen it from the pan. Immediately invert it onto the parchment/towel. Peel off the parchment paper that was on the bottom of the cake as it baked. Starting with the narrow end, begin tightly rolling the hot cake up with the parchment/towel. Do this slowly and gently. The cake will be warm. Allow the cake to cool completely at room temperature rolled up in the parchment/towel, about 3 hours. Feel free to set it aside for up to 1 day. (Note that letting it cool in the refrigerator and then unrolling it when it’s cold will cause it to tear and break. I strongly recommend letting it cool slowly at room temperature.)
- Make the whipped cream: Using a hand mixer or a stand mixer fitted with a whisk attachment, whip the heavy cream, sugar, and vanilla extract on medium-high speed until medium to stiff peaks form, about 2–3 minutes. Then beat in the marshmallow creme, if using.
- Slowly and gently unroll the cake. Spread whipped cream evenly on top, leaving about a 1/2-inch border around the cake. Gently roll the cake back up, without the parchment/towel this time. Place on a wire rack set on a baking sheet (to catch any drips of ganache). Set aside on the counter or in the refrigerator as you prepare the ganache.
- Make the ganache topping: Place chopped chocolate and corn syrup, if using, in a medium bowl. Heat the cream in a small saucepan until it begins to gently simmer. (Do not let it come to a rapid boil—that’s too hot.) Pour over chocolate, then let sit for 2–3 minutes to gently soften the chocolate. Slowly stir until completely combined and chocolate is completely melted. Ganache is smooth and glossy.
- Pour ganache all over cake roll. Feel free to spoon up any dripped ganache and spoon over the cake again. Refrigerate for at least 30–60 minutes before slicing and serving.
- Cover leftover cake and store in the refrigerator for up to 3 days.
Notes
- Make Ahead & Freezing Instructions: You can prepare the cake through step 7 and let the cake cool at room temperature for 1 day before continuing with step 8. Prepared cake roll, with filling, freezes well for up to 2–3 months. Thaw overnight in the refrigerator before topping with ganache and serving. For best taste and texture, I don’t recommend freezing with the ganache topping.
- Special Tools (affiliate links): 12×17-inch Baking Sheet | Parchment Paper | Electric Mixer (Handheld or Stand) | Glass Mixing Bowls | Fine Mesh Sieve | Silicone Spatula or Wooden Spoon | Cooling Rack | Linen Kitchen Towels | Espresso Powder
- Mini Chocolate Cake Rolls: Follow the recipe exactly as written. After spreading the whipped cream on top of the cake in step 9, cut the cake into 4 (approx. 6-inch x 8.5-inch) rectangles. Starting with the narrow end, roll each mini roll up. Slice in half to make 8 mini cake rolls. Continue with the recipe. Top with sprinkles if desired.
- Pan Size: I use and recommend a 12×17-inch half sheet pan. You can also use a 10×15-inch pan, like we use for pumpkin roll, but note that the bake time is 5 minutes longer and the cake is thicker. I prefer the thinner cake with this chocolate/fluffy whipped filling combo. I also find the thinner cake isn’t as prone to cracking.
- Flour: You can use either cake flour or all-purpose flour. My team and I extensively tested this recipe with both and there was no difference. Use 95g of either.
- Espresso Powder: This deepens chocolate flavor in desserts. This cake roll does not taste like coffee at all. You can find espresso powder in the coffee aisle at the grocery store or online. If desired, you can leave it out.
- Sugar in Whipped Cream: Some bakers swear by granulated sugar in whipped cream; others swear by confectioners’ sugar. If you’re only working with a couple Tablespoons of sugar, it doesn’t really make a difference. Use either.
- Optional Marshmallow Creme: For a little marshmallow flavor, beat marshmallow creme into the whipped cream. This is totally optional.
- Updated in 2024: Based on reader feedback about the cake tasting dry, lacking flavor, and cracking, I made some updates and the updated recipe is what you see above. To make the original recipe, swap oil for the same amount of melted butter, reduce the cocoa powder in the cake to 3 Tbsp (15g), reduce the flour to 1/2 cup (63g), and skip the milk. Bake time is 10 minutes.


Reader Comments and Reviews
Is the whipped cream filling stable enough to last over several days? I will be taking this to a picnic and the rest will go home with birthday boy.
I was thinking about using 7-minute frosting instead.
Hi Dolce, we recommend keeping this refrigerated for up to 3 days.
Long time baker but first time I tried a cake roll, and I was nervous! But the directions were perfect and it worked great! Next time I’ll add the marshmallow cream to thicken up the whipped cream layer.
My husband’s only request for his birthday was a Swiss roll cake! It came out perfectly. I followed your directions to a tee! I had trouble inverting it and it cracked in half (oops – need to work on that) but it still rolled up just fine and stuck together with the whipped cream frosting! 🙂 DELISH. It will be a birthday tradition from now on!
I have made this cake roll recipe several times, and my family loves it and looks for more. It’s easy to make even for a beginner…Make it and totally enjoy.
When I leave the cake rolled at room temperature for a day, do I cover it in a tupperware or just leave it on the counter?
Hi Sophia, since it is “covered” with the parchment or clean towel, no need to put it in a tupperware. You could lightly cover it with another clean towel if you wish.
Thank you for all of the hard work you put into developing these wonderful recipes. I have been a big fan for many years now. I have a question, would lite milk ruin the outcome of this cake? It’s all I have in. Thank you 🙂
Hi Natasha, a lower fat milk should work in a pinch. Hope you enjoy this one!
I used 2% milk and it came out just GREAT!
It ended up being too moist, and fell apart. I’d switched canola oil for avocado and baked for 13 minutes.
This definitely looked like a giant HoHo, but the flavor and texture of the filling weren’t a match to the original. It’s probably for the best, because what chemicals are even in that stuff?!? But a little disappointing because it tastes recognizably like sweetened whipped cream, not HoHo filling, even with the fluff added.
I also found it challenging to get the fluff fully incorporated into the whipped cream. The cream deflated a lot when I added the fluff, and then it needed a lot more whipping to get rid of lumps.
All that said, it’s tasty and looks impressive, so I’m happy!
Coming back to comment again after spending several days eating the results! I think the extra beating to incorporate the fluff into the cream pushed it into over-whipped territory, so next time I would add the fluff well before stiff peaks. And I found that the whole thing tasted much better when I sprinkled salt over each slice, so I would add more salt to the recipe next time too. I do want to try it again!
This was easy to make. It was lacking chocolate flavor in the cake and the cake was a bit dry.
Hi Joanne, we’re so sorry to hear you were disappointed in the cake. We recently updated this recipe with some key changes to produce a deeper chocolate flavor and moister crumb—is it possible that your cake was over-baked just a bit? That’s often the culprit for dry, tasteless cakes. We’d be happy to help you troubleshoot further!
Hello, How much marshmellow cream should I add when making the filling ? Looking forward to making this for Easter.
Hi Holly, we recommend 2 Tbsp!
Hi! I want to make 2 of these cakes at once. Can I double the recipe, or will that be too much batter to work with at once? Thank you! You are my go-to recipe blog when I’m looking for any dessert.
Hi Erin, for the best taste and texture, we recommend making the batter in 2 separate batches instead of doubling.
Good, but took way longer than 14 mins to bake
Hi Melinda, I’m curious about your elevation. I’m preparing to make this myself, yet, being g at 6300 ft. I’m concerned there may be alterations needed. I had perfected pumpkin roll cake when I lived at close to sea level. Now, my formerly great pumpkin roll cake doesn’t turn out like it used to before. Thoughts, anyone???
Use a good thermometer and check your oven temperature.
Hello,Sally.
I have made this swiss roll three times so far and it came out perfect. Very fluffy,no cracks and with exceptional taste .Everyone who tasted it was delighted with this wonderful swiss roll.
Thank you for your recipes.
Tried this twice… both times the cake would not crack when I rolled it up to let it cool. Then I let it sit for three hours the first time and the second time I let it sit all night. When I unrolled the cake the next day the first one stuck to the towel and had 4 gigantic cracks. The second one stuck to the parchment paper and once again, cracked. Then when I started rolling the second one with the filling it was chaos. The more I rolled it the more it cracked. Any ideas why this is happening? If it’s helpful, I used cake flour instead of all purpose. Thanks in advance! Also the cake did still taste amazing!
Hi Emily, is the cake overbaked by chance? That’s often the culprit when the cake still cracks, even when it’s not cold. If you wish to try again, you can try reducing the bake time by a few minutes and that should help. Let us know if we can help troubleshoot further!
First time making this, I used chocolate pastry cream instead of whipped cream. It is so delicious. I was worried about how thin it was in the pan before I baked it but it turned out great.
Hi! How would you adjust baking time for a round pan instead of a sheet? I would love to make this as a two layered cake (a small one, maybe 6-7 inches)
Hi Danielle, for a 6 inch layer cake version of this recipe, we would use our chocolate cupcakes batter instead. That batter bakes up beautifully in three 6 inch cake pans. Here’s more on baking cupcake recipes in 6 inch cake pans.
I was wondering about using a cream cheese filling instead of whipping cream? I make with pumpkin roll
Hi Carole, this would be fantastic with the cream cheese filling from our pumpkin roll!
im sorry im kinda confused at step 7 if I make the cake and then leave it for a day can I put in the fridge overnight and then just take it out and let it come to room temperature or is it best to just leave it room temp the whole time
Hi Janet, you can let it cool/rest at room temperature for up to a day.
This might be more of a fault of me as a baker than the recipe, but unfortunately my cake has zero structural integrity, at least half of my slices fell apart while trying to plate them even after leaving it in the fridge all night. I’m not really sure what went wrong, the cake slightly cracked but I was hoping with the help of the filling setting and the ganache it would be fine (it looks great). Flavor-wise the cake is absolutely stunning, and the consistency is perfectly light and fluffy. I wish I knew how to get it to hold together better, then I would 100% make it for any occasion I have to bring dessert.
Hi Sophia, with a soft cake and a soft filling it will be a little squishy when you slice it, that’s normal and expected. I’d recommend baking the cake for a little longer–try 2 additional minutes. Extend the refrigeration time (before you add the filling) as well. Hope these small tweaks help keep the cake roll together better for you!
I’m excited to make this recipe. I want to bring it to work with me. What do you think would be the best way to transport it?
Hi John! If you have a large enough plastic container (like Tupperware), that would be the best option. You can use it upside down (put the cake on the lid and add the bottom as a cover on top). Otherwise, you can put it on a plate and put it in a box for transport.
Baked right perfect. Excellent tasting without any eggy after-taste. Cream cheese stabilized whipped cream with sliced maraschino cherries, and a coat of chocolate ganache. Perfect after dinner treat. Thank you.
I made this as the base for a Yule Log this Christmas and my family loved it! I used a 10×15” pan without any issues and left it rolled up overnight before I needed to fill it. One issue I discovered when taste-testing it is that if you’re using a towel to roll it up, the cake may take on the scent/taste of the towel (if you use any scented detergents or were storing it somewhere with a scent). I actually had a layer of parchment paper between the cake and the towel as well so it mostly only affected the ends of my cake, which I cut off.
This is one of my favorite recipes! It usually cracks which can be hidden by ganache. The recipe changes definitely helped with the cracking. Thanks for all the amazing recipes!!
I made this for a New Year’s Eve celebration. It was a delicious and perfect recipe. I didn’t have the marshmallow cream but it seems ok without. Everyone raved at what a perfect giant ho ho and not over-sweet! People asked for the recipe which I was happy to share. Thanks for the detailed instructions and I also watched the video which was nice to see.
Meant to give 5-stars along with my earlier comments.
My kids and I made this and loved it!!
My family and I loved this recipe! I baked it for Christmas dinner and it was a hit. I added chopped cherries for a hint of fruity flavor. Unfortunately, the dough did crack. I was able to roll it tight and cover it with plastic wrap. I kept it for a couple of hours in the fridge before covering it with chocolate. I tried with a kitchen towel and with parchment paper. Both times they cracked.
This is my go to recipe for my Christmas dessert, but I noticed it has changed since the last time I made it. Is there a way to get the original recipe?
Instructions for the old recipe are detailed in the recipe Notes. Enjoy!
I enjoyed making this so much. Taking it to my son’s and daughter in law’s house. They are hosting Christmas dinner for the first time as newlyweds. Read through entire recipe and came out perfect. Thank you so much for a great recipe. Sally you never cease to amaze me. My counter is currently covered with cookies thanks to your cookie cookbook. Have a Merry Christmas and a blessed New Year
I have tried so many chocolate cake roll recipes and they always fall apart. This one did not and was my first success! Thank you for the great instructions!
I made a version of this for my Culinary Certification Midterm in 2hrs. I was a Black Box of secret ingredients Dr Pepper, Coffee and mango Chutney. The judges were talking about my cake. It was my first time too
I am so disappointed. I made this for Christmas dessert and it did come out dry. I saw the note AT THE VERY END about changes in recipe. Why in the world don’t you alter the recipe at the very beginning. I never heard of such a thing. I’ll never use another one of your recipes. This was a lot of work to be disappointed!!!
Hi Kathy, the recipe above reflects the updates made to the recipe. A dry cake could be caused by a few things and we’re happy to help troubleshoot. There could have been too much flour or cocoa powder in the batter. How did you measure them? Make sure to spoon and level (instead of scooping) to avoid packing in too much flour or cocoa powder into your measuring cups – or use a kitchen scale. You can read more about properly measuring baking ingredients in this post. And be very careful not to over-bake. This thin cake recipe is very easy to over-bake and all ovens are different. Hope these tips help for next time and sorry you had trouble with this recipe.
Sally there isn’t anything wrong with your instructions of this perfect cake roll. It’s not the recipe it’s the person making it. Very ungrateful and so instead of taking the blame, that it must have been something they did or didn’t do right, they blame you. Not to worry, I’ve made this and many times I might add. Always perfect. Thank you so much.As the professional, “we” have plenty to learn. Not you in the slightest. Bless your beautiful heart.