

This easy cheesecake pie is perfect for cheesecake lovers who want a quicker, easier alternative to making a classic cheesecake. The smooth and creamy filling is made of just 6 simple ingredients, and there’s no springform pan or water bath step required. It’s delicious on its own, or you can top it with raspberry sauce, whipped cream, hot fudge, lemon curd, fresh berries, or salted caramel.
This pie recipe wasn’t actually in my original plan for posting on the website, but it just kind of… happened. I was working on perfecting the recipe and technique for graham cracker crust, and needed something easy and reliable to use on repeat for a filling… approximately 75 cheesecake pies later, I thought: Well, I should probably share this recipe, too!
One reader, Jeff, commented: “I made this and it is one of the best cheesecakes I have had. It is easy and has a very New York cheesecake flavor. I make a lot of water bath cheesecakes and I found this to be just as creamy and flavorful as any others I have made. ★★★★★“
Here’s Why You’ll Love This Easy Cheesecake Pie
- It’s cheesecake… without the fuss
- Batter & crust come together quickly
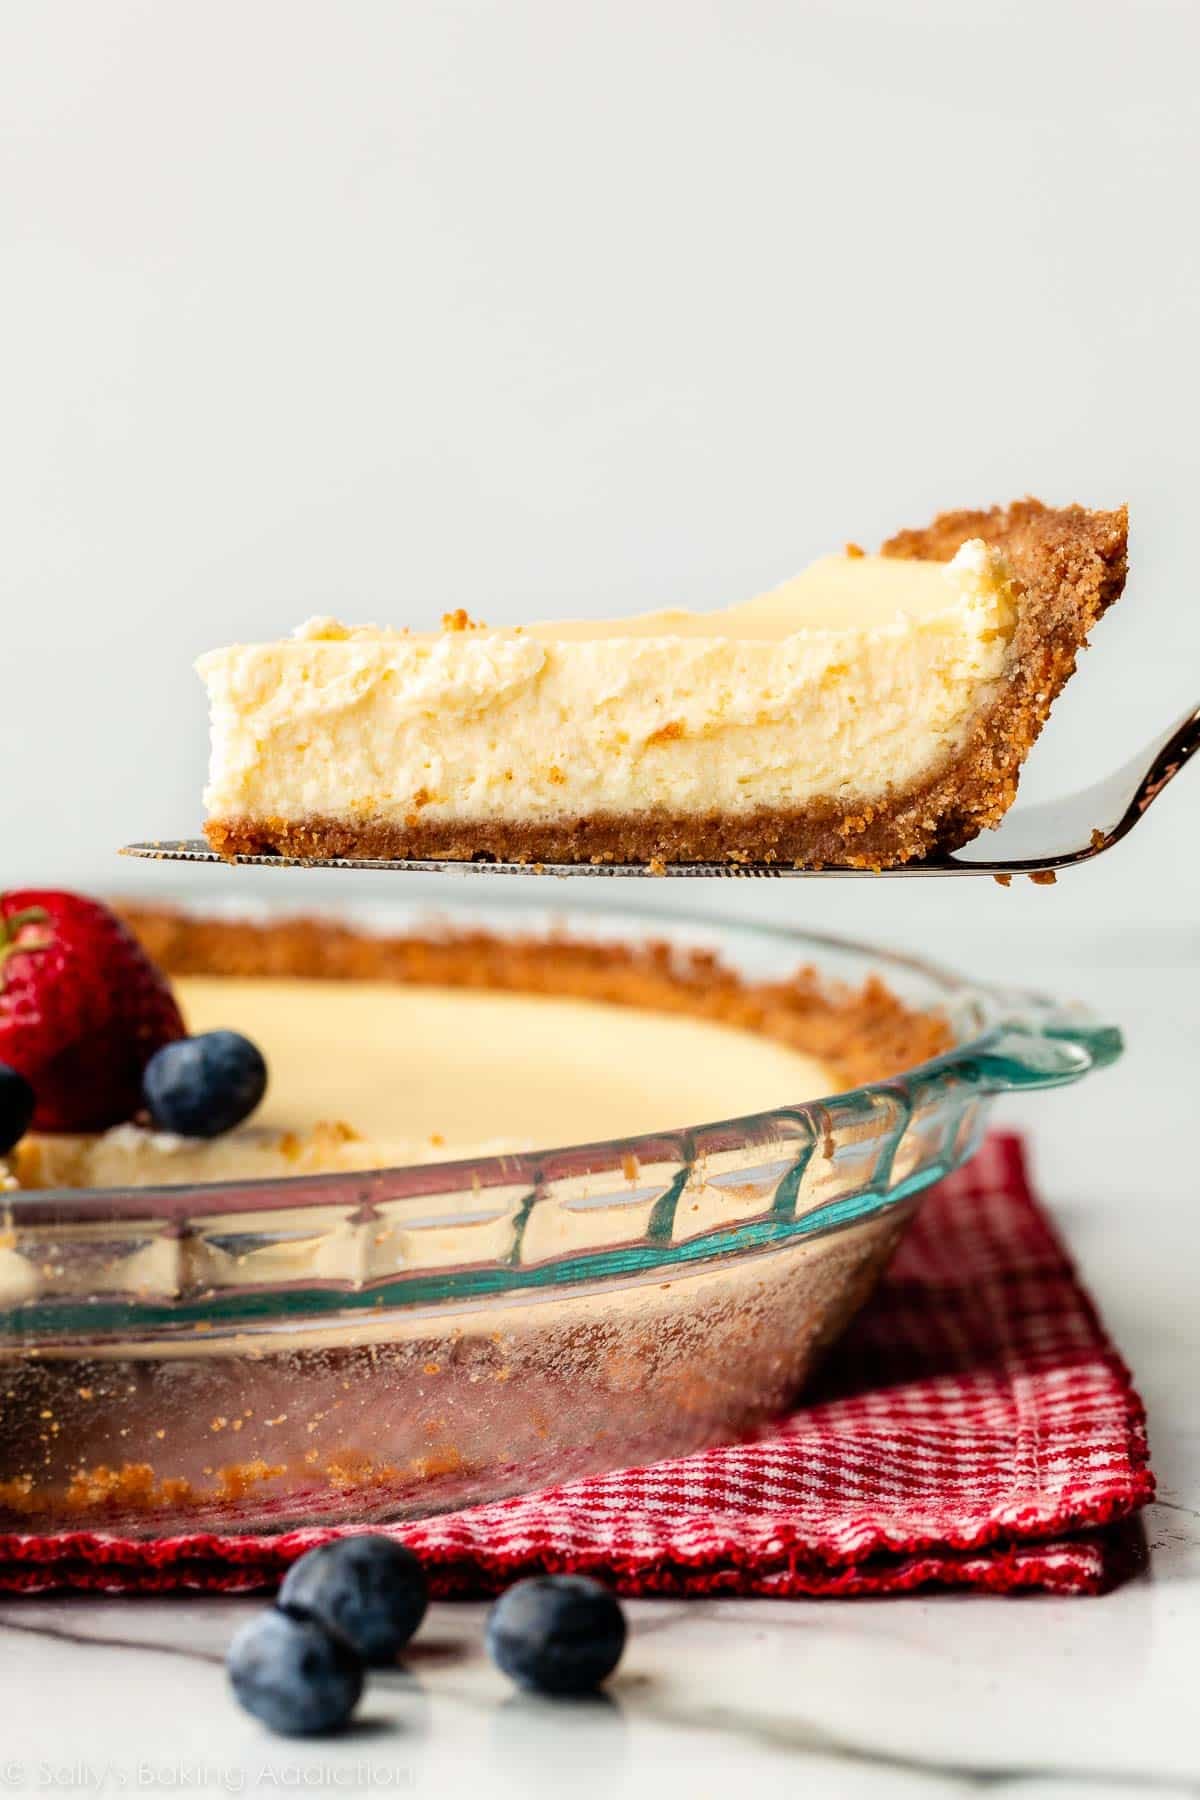
- Same velvety, creamy texture and tangy-sweet taste as my classic cheesecake
- 6 simple ingredients, plus a 3-ingredient graham cracker crust
- Bakes and cools much faster than a regular cheesecake
- It’s very adaptable to taste and season, depending on toppings
What Is the Difference Between Cheesecake and Cheesecake Pie?
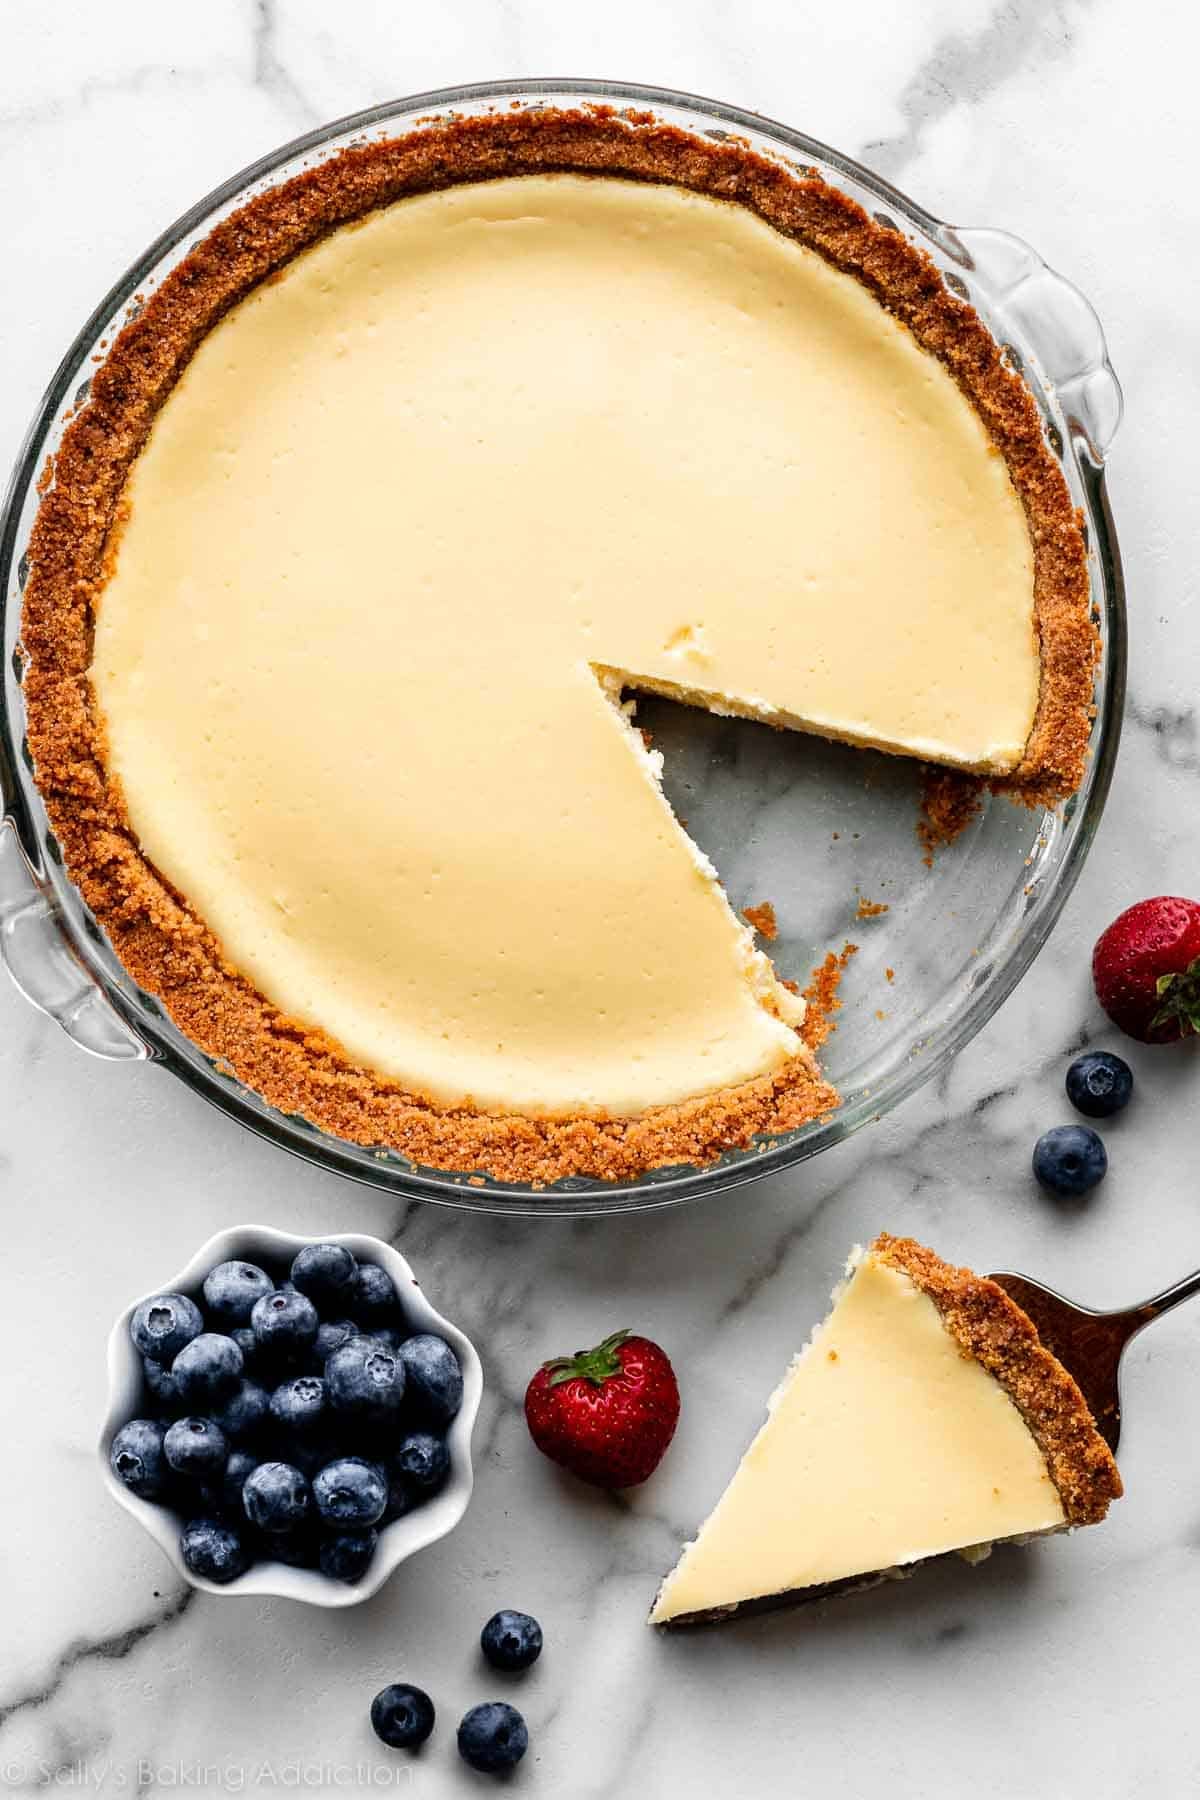
Today’s cheesecake pie is like a regular cheesecake, only (1) the filling layer isn’t as thick and tall and (2) you bake it in a pie dish instead of a springform pan. Basically, the taste and texture are the same, but you don’t have as much filling in each bite.
If you’re in the mood for real, classic cheesecake… definitely put in the time and effort to make a real, classic cheesecake. However, if you love cheesecake and don’t have the energy (whether that’s physically or emotionally!) for a water bath, accidentally over-baking or under-baking it, exceptionally long cooling and chilling times, plus the possibility of large cracks on the surface, just make a cheesecake pie!
(Because regular cheesecake can be finicky, right?!)
I have made at least 12 of these in the past few weeks and every single taste tester, neighbor, family member, and friend has said it tastes exactly like regular cheesecake. (And that’s because it is! Only thinner!) You’re going to love this dessert.
And if you are in the mood for a fall inspired flavor, try pumpkin cheesecake pie next.
Can I Skip the Water Bath?
Yes! As if there wasn’t enough to persuade you to make this cheesecake pie! You see, water baths are used to help an egg-heavy dessert like traditional cheesecake bake in a humid environment. The humidity evenly bakes the rich and creamy filling so it doesn’t burn, sink, and/or crack. Since today’s filling isn’t as tall, we don’t have those problems. So, skip the water bath today!
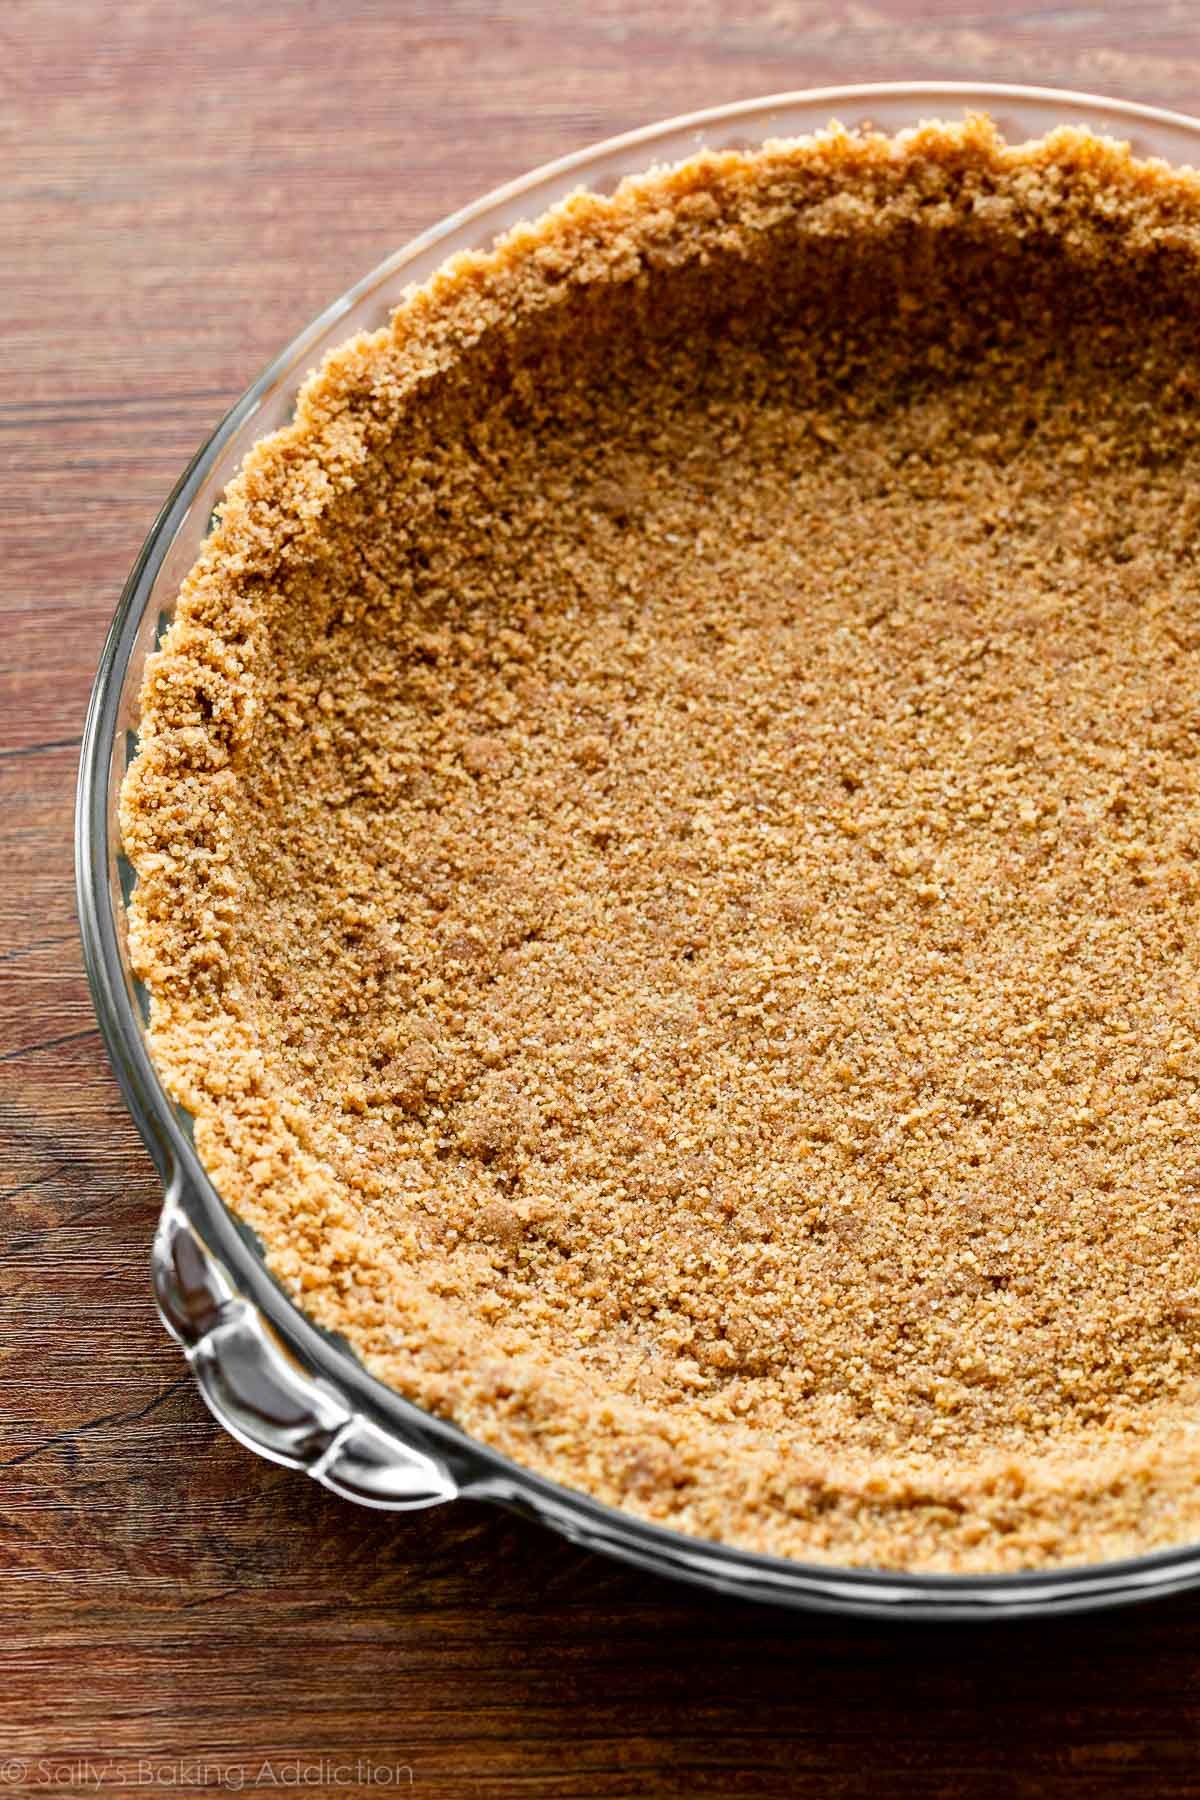
Success Tips for a Perfect Graham Cracker Crust
We’re using my perfected graham cracker crust recipe. You need 3 ingredients including graham cracker crumbs, sugar, and melted butter. The ratio of ingredients is imperative and what you’ll find below (and also on the graham cracker crust page) yields a crisp, crumbly crust that holds shape beautifully. But what’s more important than the ingredients is the technique you use to press the crust into the pan.
Over the years, I’ve learned exactly what makes and (literally) breaks a great graham cracker crust:
- Use your hands first: Press the bottom and around the sides with medium-firm pressure until the crumbs aren’t moving around anymore—you don’t want any loose crumbs. You can even use a small flat-bottomed measuring cup to help smooth out the surface.
- Don’t pack too tightly: The crust needs to be compact, so it doesn’t crumble apart, but not so tight that it bakes into a hard, dense crust. You really just want to pack it until the shape has set and it’s no longer crumbly.
- Keep it rounded: This sounds a bit odd, but you don’t want a right angle at the bottom edges where the sides and the bottom meet. Instead, you want it a little bit rounded so it stays connected when you slice into it—so the side crust doesn’t immediately separate from the bottom crust. Slide a spoon around the inside of the crust where the sides and bottom meet, to get that rounded shape.
Or you could use an Oreo cookie crust or Biscoff pie crust instead if you’d like.
Here is a photo of the rounded crust. Be sure to pre-bake this for 10 minutes before adding the filling.
Grab These 6 Ingredients for the Filling:
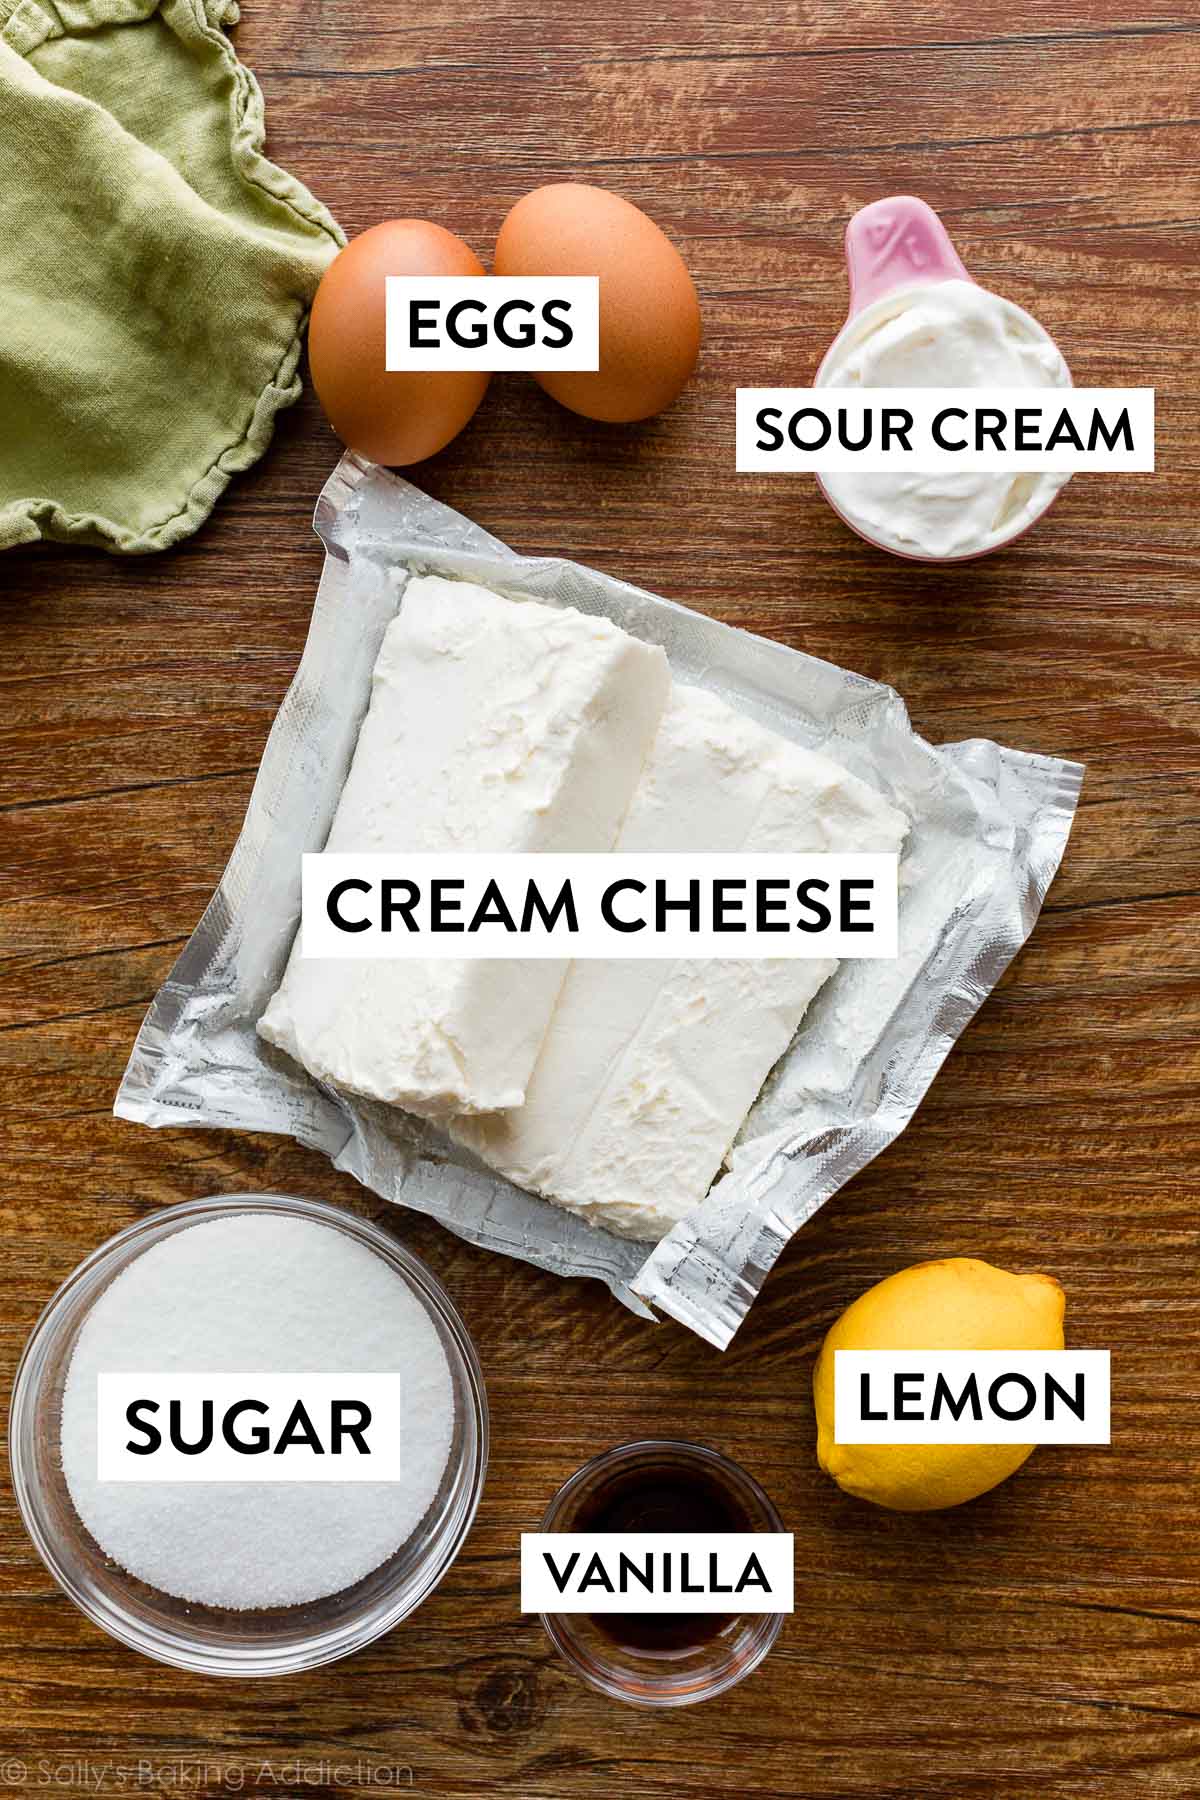
- Bricks of Cream Cheese: Philadelphia cream cheese isn’t affiliated with this post, but it IS my favorite cream cheese brand. Whichever brand you use, make sure you’re using bricks of full-fat cream cheese and not the cream cheese in a tub you would use for spreading on bagels. Same rule applies when making cream cheese frosting and strawberry cream cheese pie.
- Granulated Sugar: You’ll love that this cheesecake isn’t overly sweet. Vanilla sugar would be great here.
- Sour Cream: My team and I tested this cheesecake pie several (several!!!!) times and there was a major difference between the pies with sour cream and the pies without sour cream. You need 1/4 cup of sour cream to help bind the ingredients together and smooth out the filling so it tastes creamy. Without it, the filling tasted like cream cheese, not cheesecake.
- Vanilla Extract: Feel free to use homemade vanilla extract in this pie!
- Lemon Juice: A splash of lemon juice adds freshness and depth of flavor—I recommend you don’t leave it out. This cheesecake pie does not taste like lemon cheesecake.
- Eggs: A main ingredient in any baked cheesecake! Careful not to over-mix these, and be sure to add them right at the end.
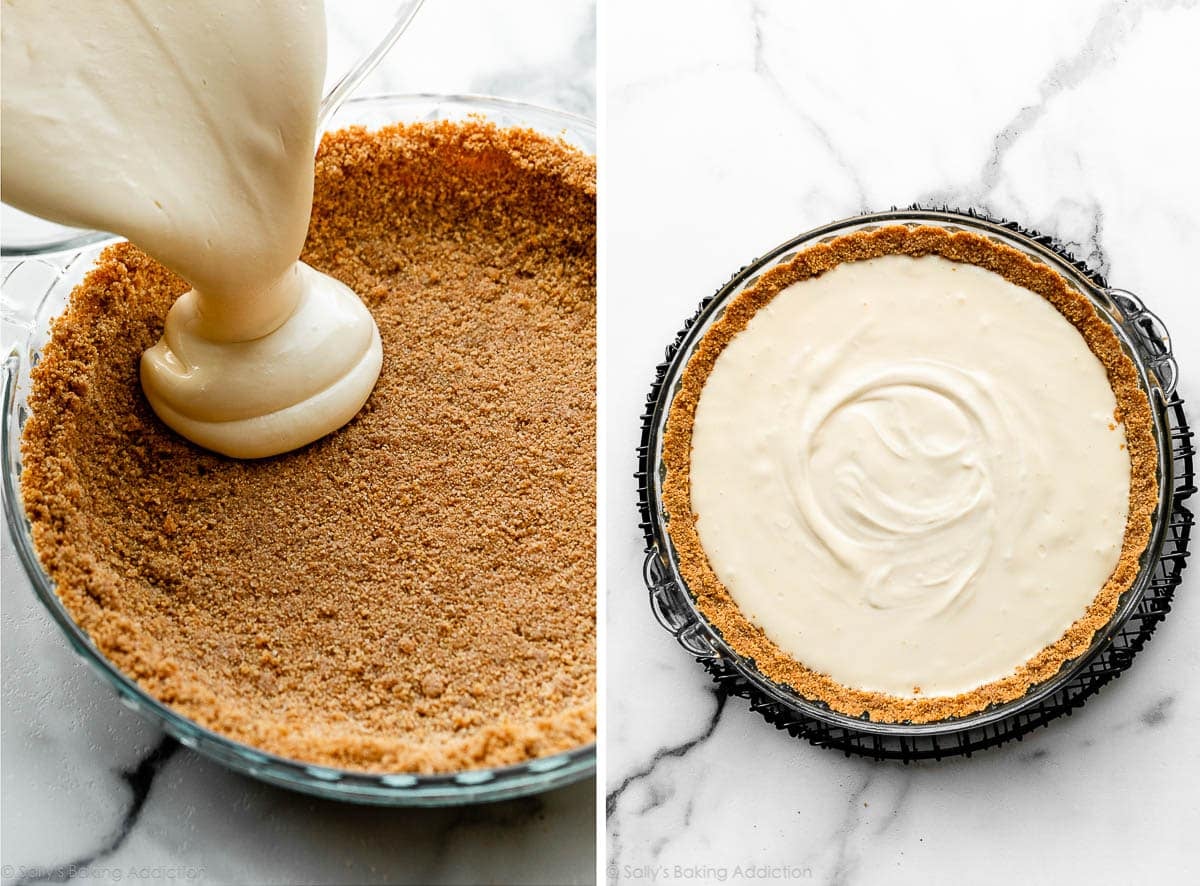
Pour the filling into the warm pre-baked crust, and then bake:

Can I Add Chocolate Chips to the Filling?
I have no idea if anyone would even ask this question, but I love chocolate chips in cheesecakes and the answer is YES! Feel free to add 3/4 cups mini or regular semi-sweet chocolate chips to the batter. (What we do when making amaretto cheesecake.) This version would be tasty served with salted caramel on top.
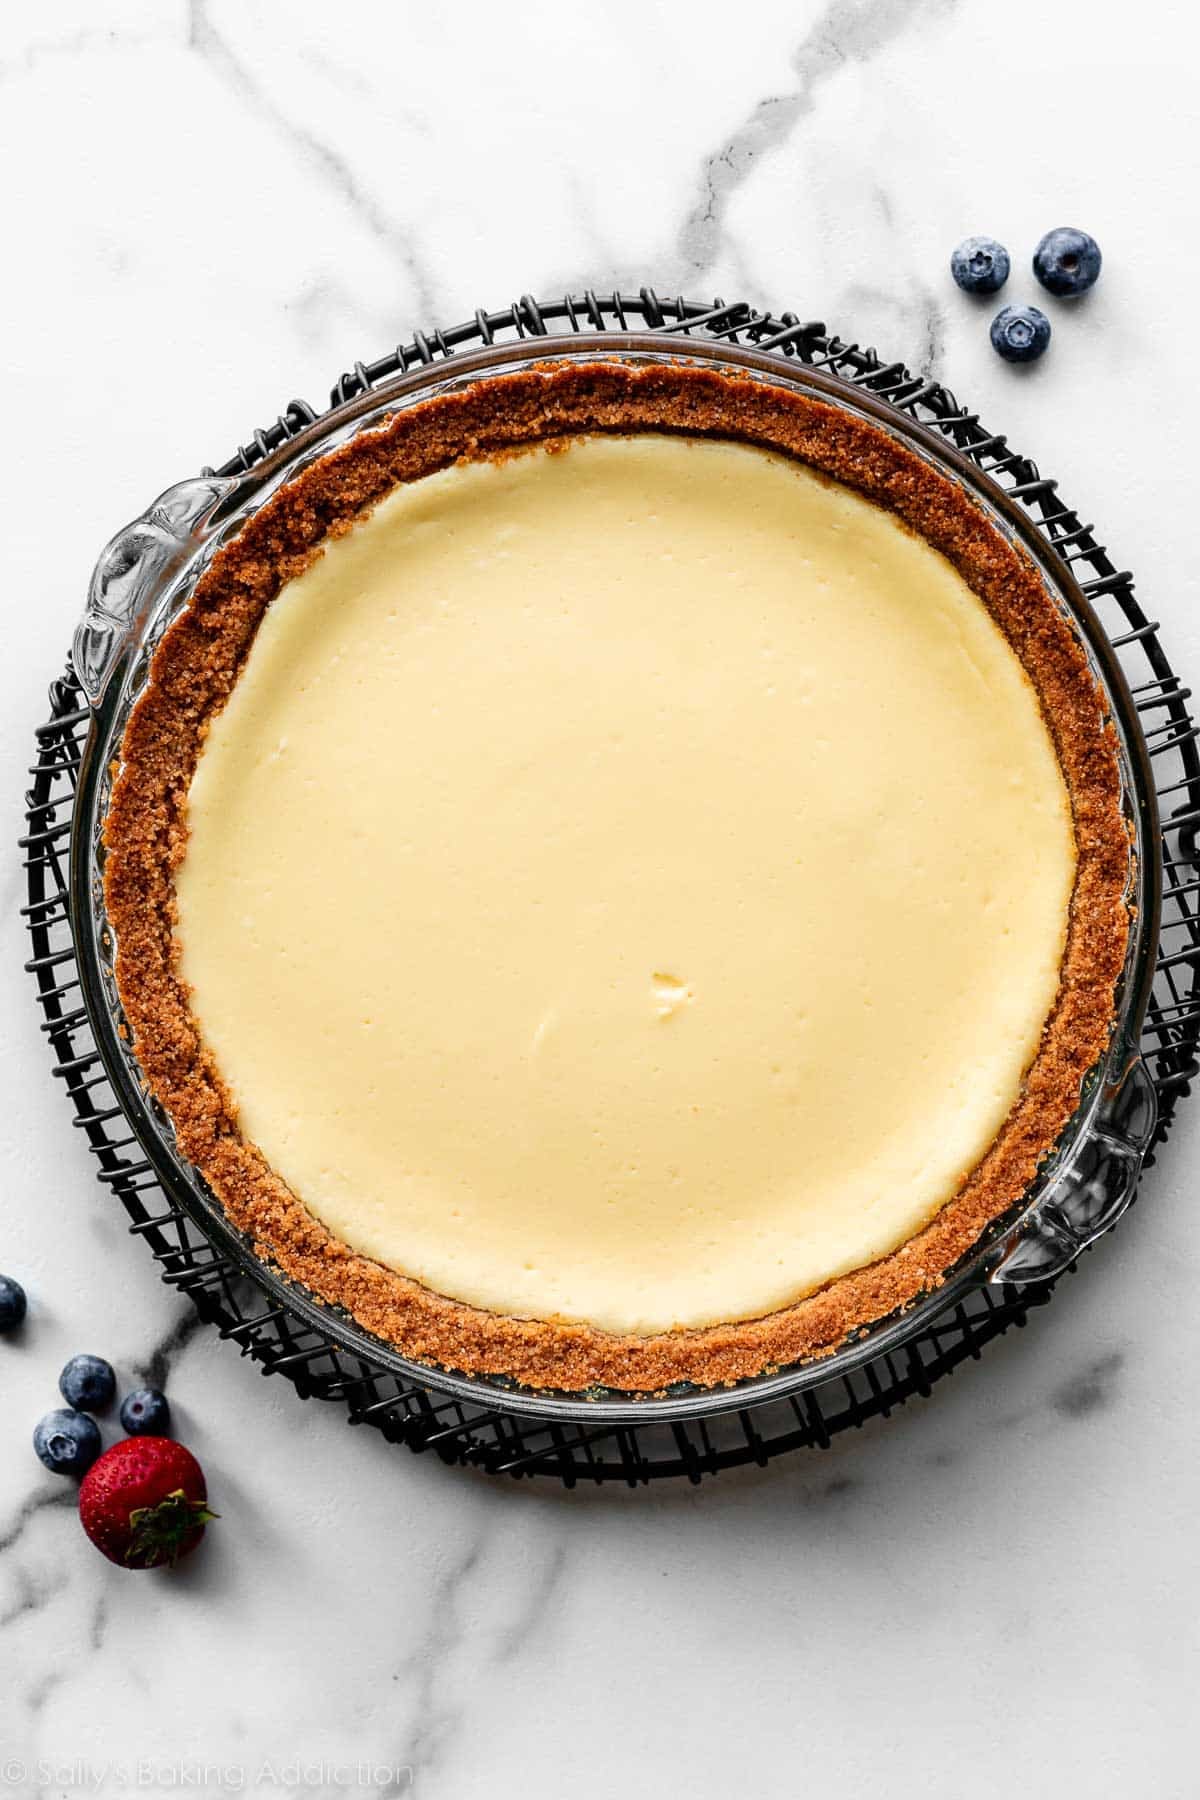
Cooling & Chilling Is a Breeze
You know how you have to wait a few hours for a regular cheesecake to cool and then you have to wait some more for it to chill in the refrigerator? You’re doing the same thing here, only in a fraction of the time. The cheesecake cools for about 1 hour at room temperature (no need to let it cool in the oven like some cheesecake recipes!) and then you chill it for about 2–3 hours before serving.
Low-maintenance cheesecake!
What to Serve With Cheesecake Pie
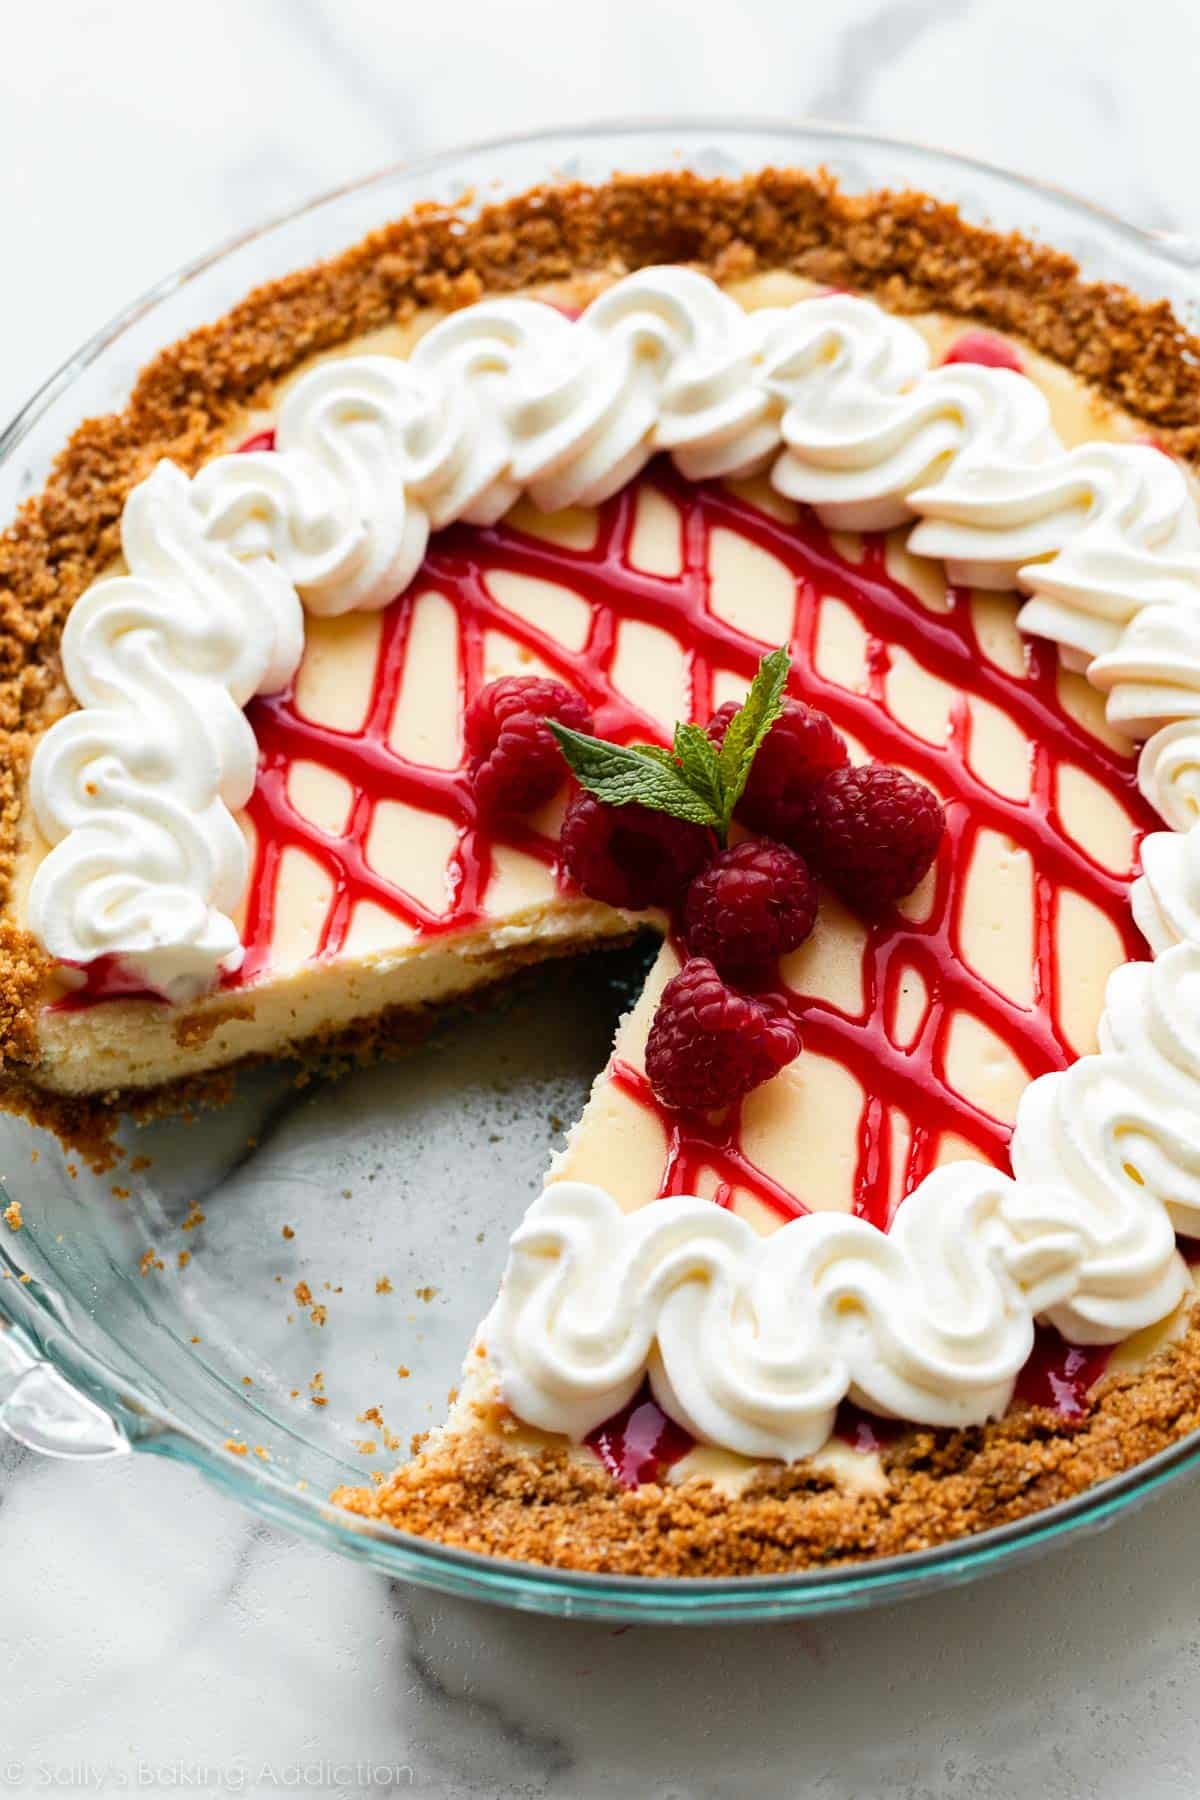
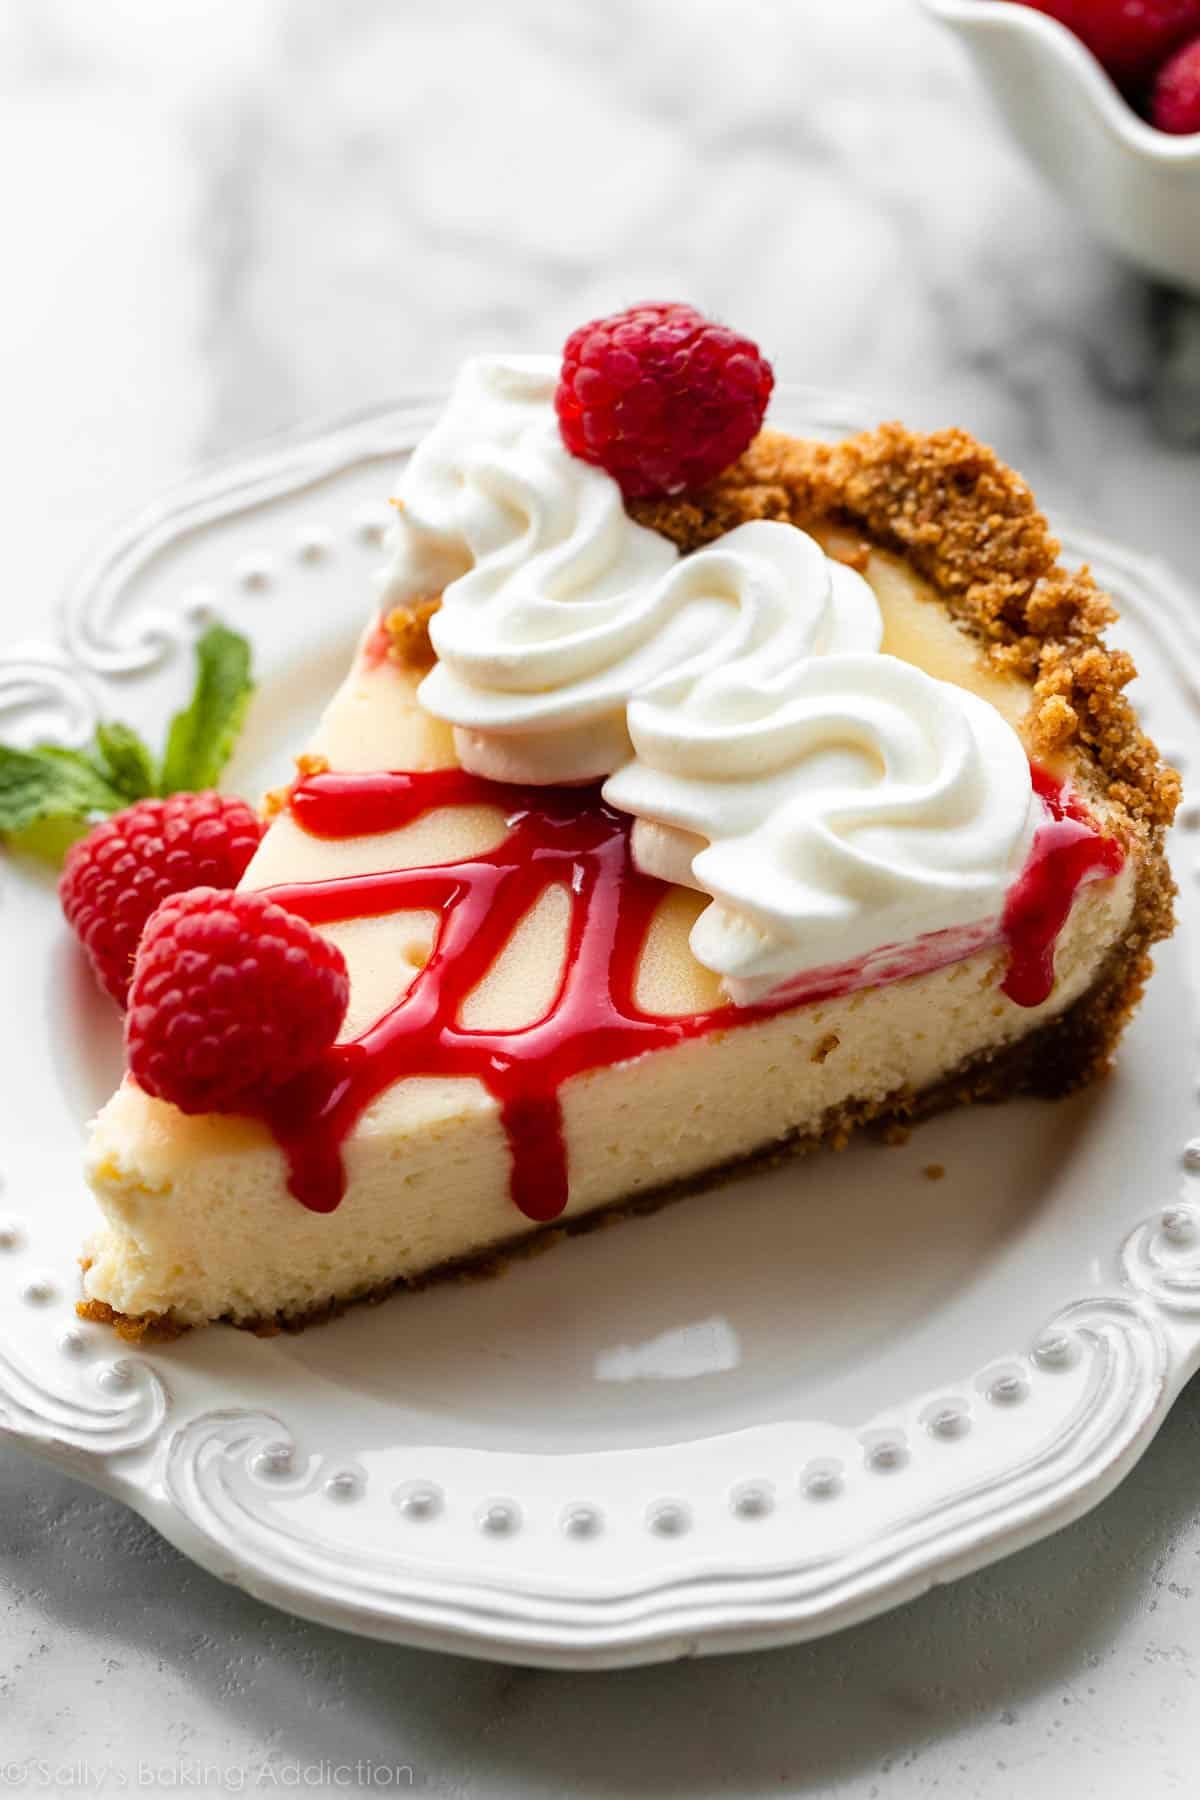
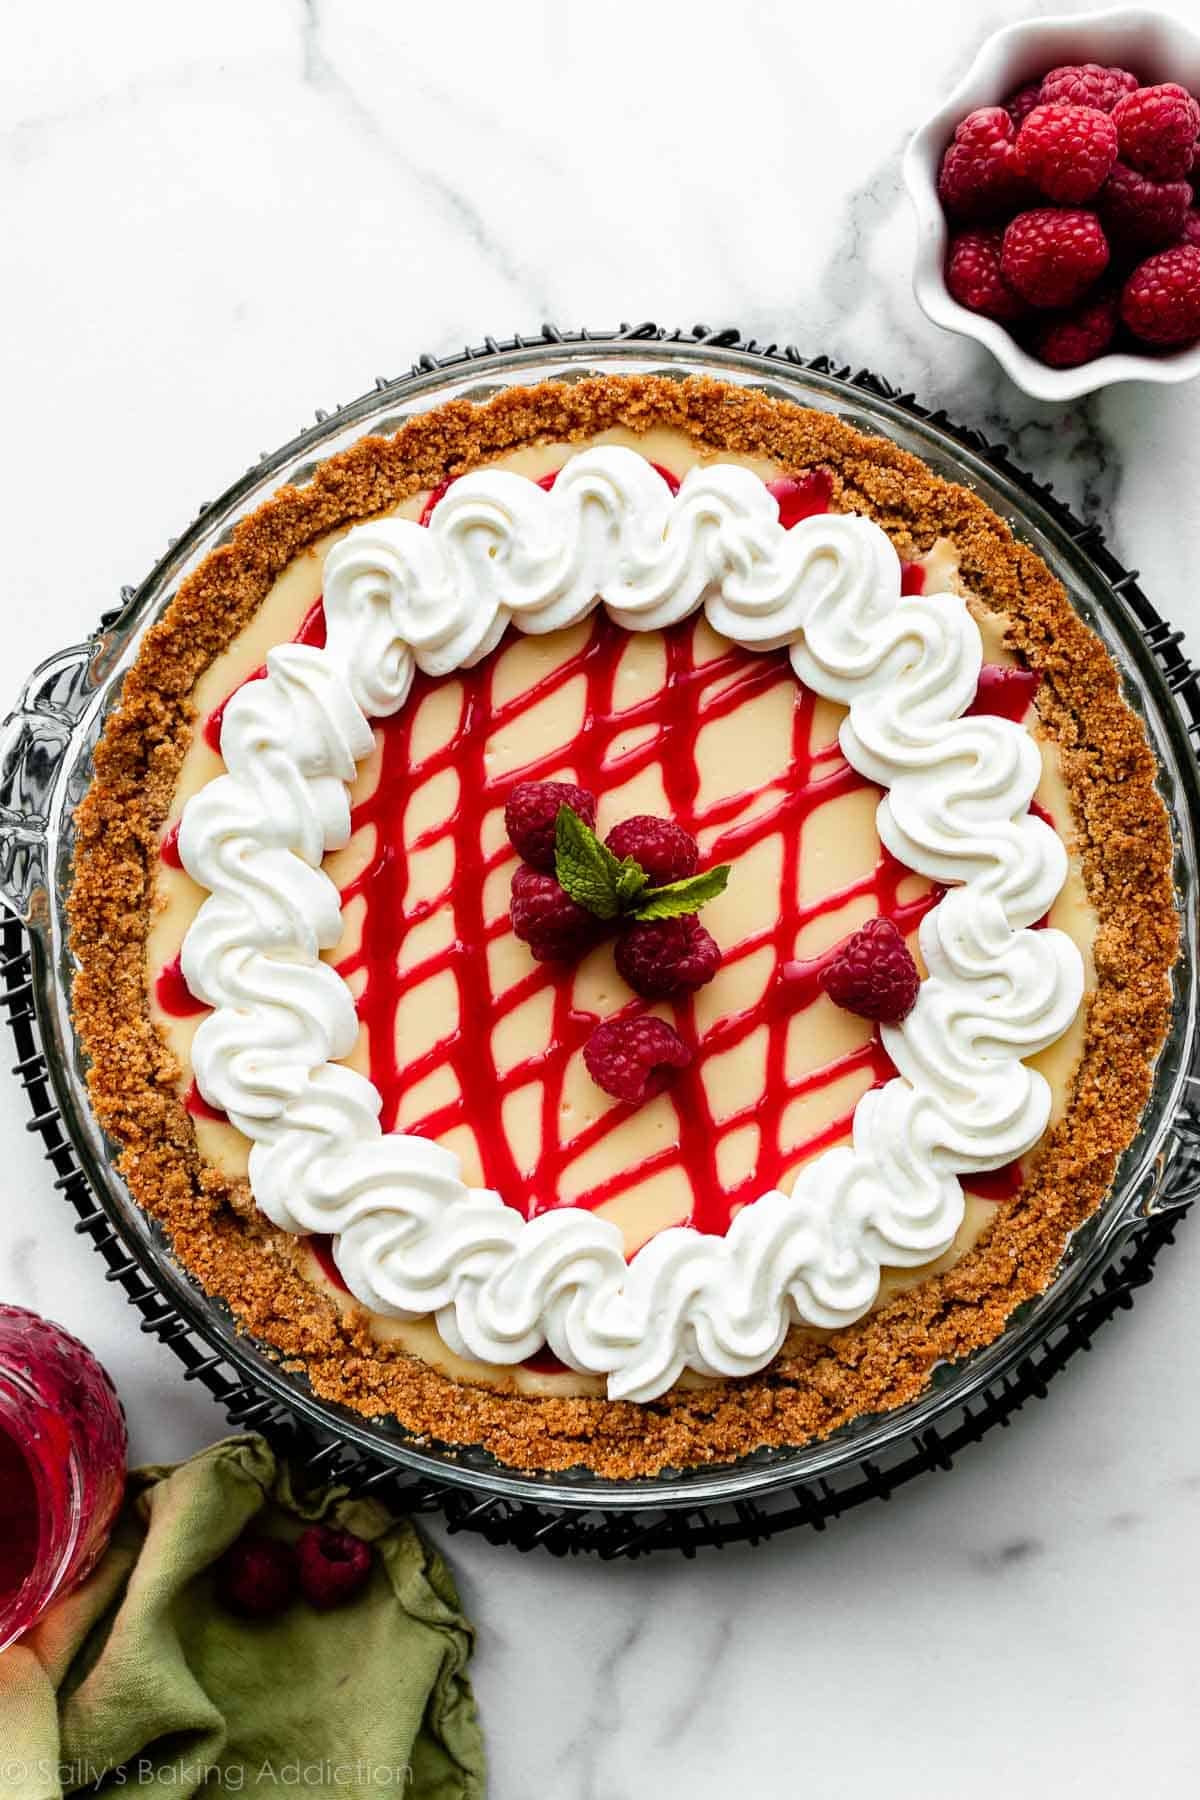
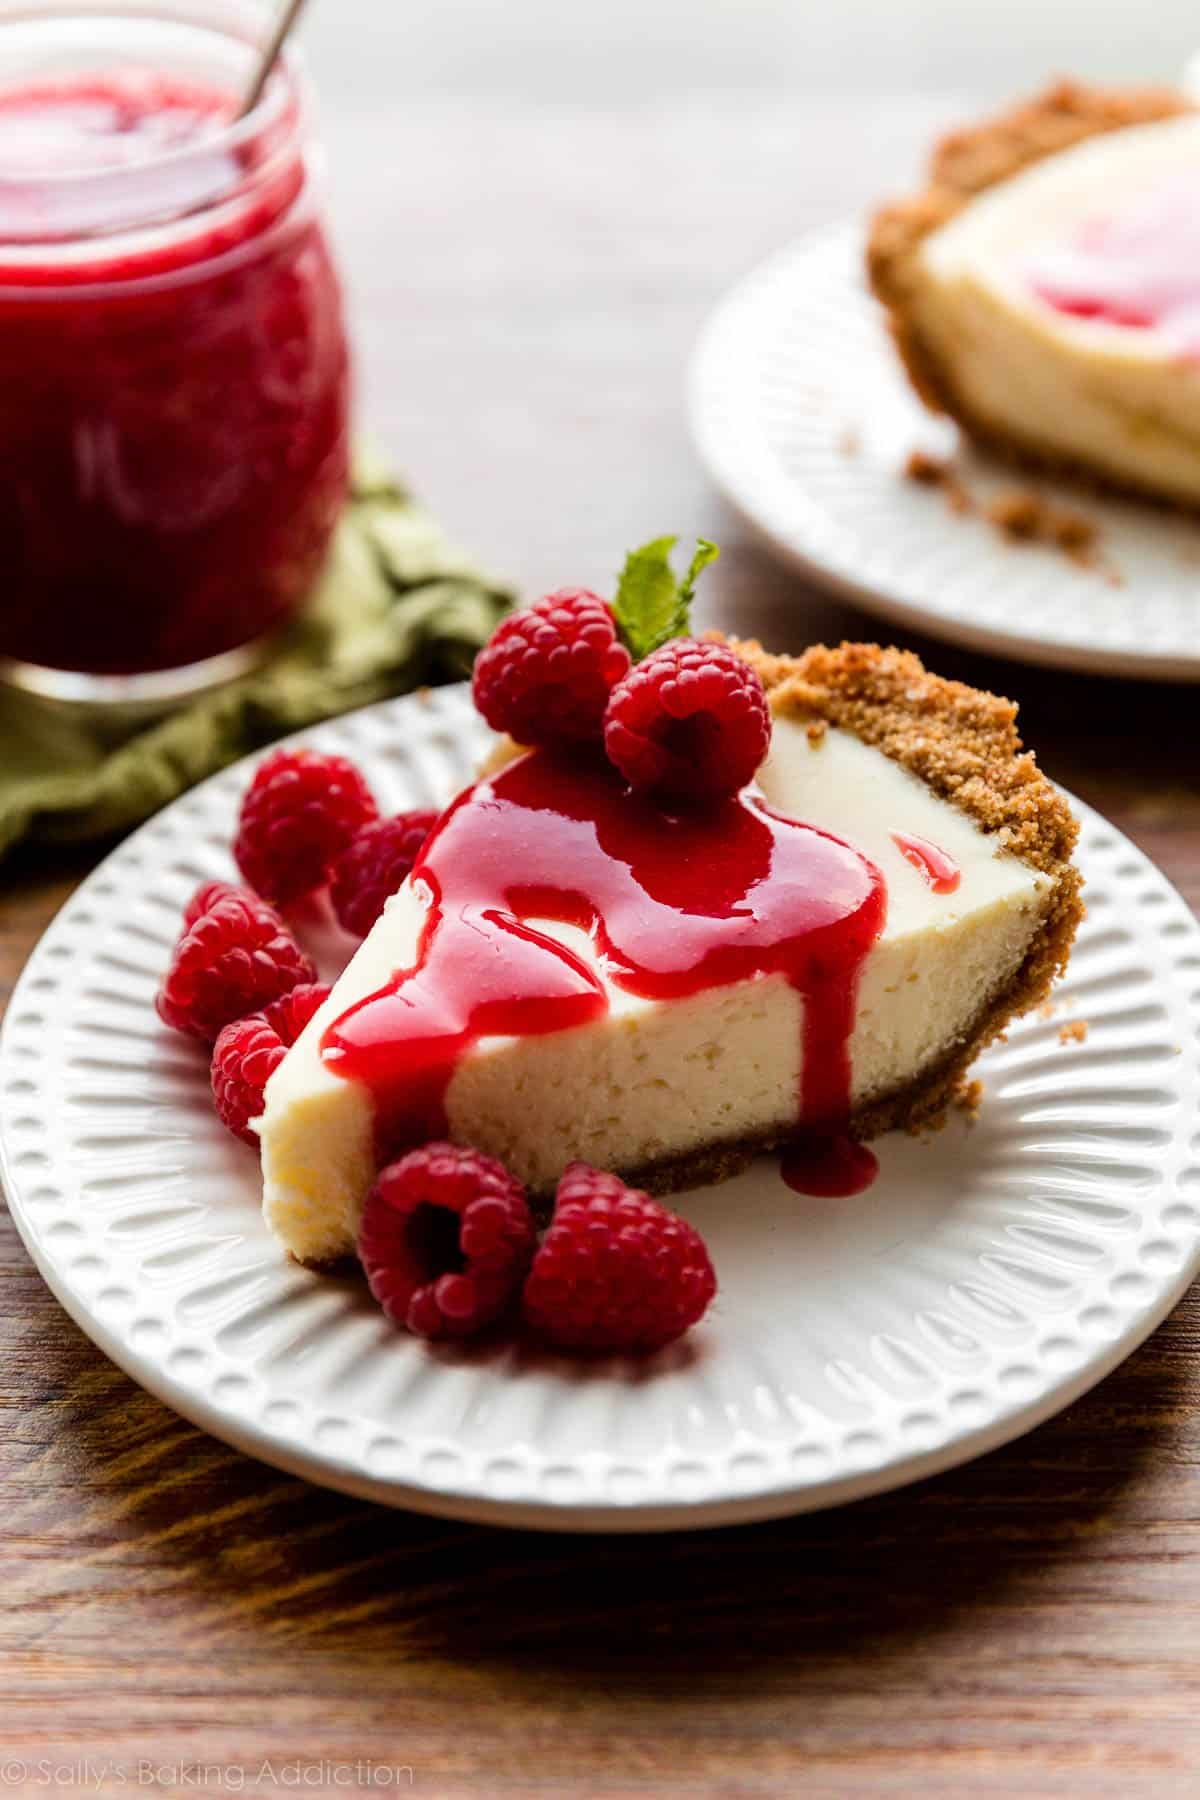
You can, of course, serve the cheesecake pie plain, but I like to add raspberry sauce, whipped cream, and fresh raspberries. Or you can spruce it up with:
- Salted caramel
- Blueberry sauce/swirl from blueberry swirl cheesecake (you can prepare a blueberry swirl cheesecake pie by using the same swirling instructions in that recipe)
- Chocolate ganache or red wine chocolate ganache
- Strawberry sauce
- Lemon curd
- Brown sugar pecan topping from pecan pie cheesecake
- We slightly scaled down the filling to make room for extra toppings in this caramel apple cheesecake pie
Talk about a versatile dessert recipe!
Easy Cheesecake Pie
- Prep Time: 20 minutes
- Cook Time: 45 minutes (includes crust pre-bake)
- Total Time: 4 hours
- Yield: one 9-inch pie
- Category: Dessert
- Method: Baking
- Cuisine: American
Description
This is regular cheesecake… made easier! Enjoy a creamy, velvety smooth filling with a crispy, crunchy graham cracker crust. Skip the water bath and use a pie dish instead of a springform pan. Feel free to serve with optional toppings listed in recipe Note.
Ingredients
Graham Cracker Crust
- 1 and 1/2 cups (180g) graham cracker crumbs (about 12 full sheet graham crackers)
- 1/4 cup (50g) granulated sugar
- 6 Tablespoons (85g) unsalted butter, melted
Filling
- 16 ounces (452g) full-fat brick cream cheese, softened to room temperature
- 1/2 cup (100g) granulated sugar
- 1/4 cup (60g) full-fat sour cream, at room temperature
- 1 teaspoon pure vanilla extract
- 1 teaspoon fresh lemon juice
- 2 large eggs, at room temperature
- optional for topping: raspberry dessert sauce, fresh raspberries, & whipped cream
Instructions
- Preheat oven to 350°F (177°C).
- Make the crust: If you’re starting out with full graham crackers, use a food processor or blender to grind them into fine crumbs. Stir the graham cracker crumbs and granulated sugar together in a medium bowl, and then stir in the melted butter. The mixture will be thick, coarse, and sandy. Try to smash/break up any large chunks. Pour the mixture into an ungreased 9-inch pie dish. With medium pressure using your hand, pat the crumbs down into the bottom and up the sides to make a compact crust. Do not pack down with heavy force because that makes the crust too hard. Simply pat down until the mixture is no longer crumby/crumbly. Tips: You can use a small flat-bottomed measuring cup to help press down the bottom crust and smooth out the surface, but do not pack down too hard. And run a spoon around the bottom “corner” where the edge and bottom meet to help make a rounded crust—this helps prevent the crust from falling apart. For more shaping technique tips, see the graham cracker crust recipe page.
- Bake the crust for 10 minutes. Make the filling in the next step as the crust bakes.
- Make the filling: Using a handheld or stand mixer fitted with a paddle attachment, beat the cream cheese and granulated sugar together on medium-high speed in a large bowl until the mixture is smooth and creamy, about 3 minutes. Scrape down the sides and up the bottom of the bowl with a rubber spatula as needed. Add the sour cream, vanilla extract, and lemon juice, and then beat until fully combined and very smooth. Scrape down the sides and up the bottom of the bowl with a rubber spatula as needed to combine—you don’t want any lumps. Then on medium speed, add the eggs one at a time, beating after each addition until just blended. After the second egg is incorporated into the batter, stop mixing. If you still see some lumps at this point, switch to a whisk and whisk by hand just until you break up the large lumps. Some small lumps are OK.
- Lower the oven temperature to 325°F (163°C) and spread the cheesecake filling into the warm crust.
- Bake the pie for 35 minutes or until the center is almost set. Check it at the 25-minute mark, and if it’s browning too quickly on top and around the edges, tent it with aluminum foil for the last 10 minutes of baking.
- Set the pie on a wire rack and cool for 1 hour at room temperature. Then place it in the refrigerator and chill for at least 2 hours and up to 2 days before serving. (Cover if chilling it for longer than a few hours.)
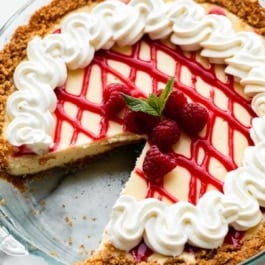
- Feel free to garnish the pie with any of the optional toppings listed in the notes right before or a couple hours before serving. (Keep pie refrigerated if you decorate it and plan to serve later.) I use a squeeze bottle to drizzle raspberry sauce on top and a piping bag fitted with Wilton 1M piping tip to zigzag whipped cream on top. For neat slices, use a clean sharp knife, and wipe the knife clean between each slice. Tip: The first slice is never pretty! Much easier to slice after that first piece is out.
- Cover and store leftover pie in the refrigerator for up to 5 days.
Notes
- Make Ahead Instructions: This cheesecake pie can be made up to 2 days in advance. See step 7. It’s best if the crust is still a bit warm when you pour in the filling, so I don’t recommend pre-baking the crust in advance. You can also freeze the baked and cooled cheesecake for up to 3 months. Thaw overnight in the refrigerator before serving.
- Special Tools (affiliate links): Food Processor | Glass Mixing Bowl | 9-inch Pie Dish | Electric Mixer (Stand Mixer or Handheld) | Cooling Rack
- Oreo Cookie Crust: You can use an Oreo cookie crust instead of a graham cracker crust.
- Toppings: My favorite toppings for this pie are raspberry sauce, fresh raspberries, and whipped cream, which are pictured in the post. You can also top the baked and cooled cheesecake with salted caramel, lemon curd, strawberry topping, chocolate ganache, or red wine chocolate ganache.
- Room Temperature Ingredients: Bring all cold ingredients to room temperature before beginning. Room temperature ingredients combine quickly and evenly, so you won’t risk over-mixing. Also, beating cold ingredients together will result in a chunky cheesecake filling, hardly the way you want to begin!
- Non-US Readers: If graham crackers are not available where you live, we have also tested this pie with a crust made from digestive biscuits, and it turned out great. Use 200g ground digestive biscuit crumbs (about 2 cups; 13–14 biscuits), 1/3 cup (67g) granulated sugar, and 6 Tablespoons (85g) melted butter. Pre-bake the crust for a bit longer, about 12–14 minutes. And from what I understand, spreadable cream cheese sold in a tub in countries outside of the US is a little different from the spreadable cream cheese in the US. It’s thicker, sturdier, and more solid and should be OK to make this pie. I have no experience with it, but this is what I’ve heard from other non-US readers. If you try it, let us know how it turns out!


Reader Comments and Reviews
Hi my cheesecake was not at all runny when I ran a knife through it after the 35 min mark is that normal? Also can you post a picture of the oven rack position where to keep the cheesecake on as I know it’s center but I’m still want to make sure as the picture helps
Yes, after 35 minutes the pie should be just about set and not runny. If you feel it was over-baked, next time check it at the 25-minute mark, and if it’s browning too quickly on top and around the edges, tent it with aluminum foil for the last 10 minutes of baking.
Texture of the cake was great but tasted very eggy and the crust was all crumbly even after pre baking it
Also it’s important to note to prevent eggy flavor it shouldn’t be over cooked, baking in a glass pan means baking at a 25d farenheight lower than the stated temp as glass conducts heat differently than metal ; I think the eggs got over cooked cause the temp should be 300 instead of 325 as my cheesecake was very brown on top and had eggy flavor
The Easy Cheesecake Pie was easy to make, however the result was a pie that was very dense and heavy. Did I miss something in the directions?
Directions and measurements were perfect! This couldn’t have been any better had I bought it in a store. So easy, I’m completely satisfied! I can’t wait to make it again.
This is so good. I made it for Easter. Thank you for this recipe and all of your wonderful recipes
Why would I ever go back to making a standard cheesecake? This recipe is perfect! And as the name implies – EASY. This was my first time making this recipe. I will admit I made a cream cheese substitution. I used a non-Philadelphia brand full fat block + Philadelphia 1/3 fat block. I normally would follow your suggestion, but the price of cream cheese is crazy these days. I crossed my fingers and it paid off. This was the best cheesecake I think I’ve ever made (and I am a harsh critic). I made it for Easter and everyone was thrilled with the result. I topped it with your blueberry sauce after slicing and it was amazing. It’s a definite keeper. Thanks for another great recipe.
Great recipe! My in-laws keep giving me Costco boxes of biscoff cookies, so I ground those up instead of grahams! Since they’re so sweet, I skipped the sugar and replaced that weight with biscoff. Same amount of sugar and it was so good and a way to get rid of pantry clutter!
How do you know when the filling is cooked? After 35 min, the center is still very liquidy. Is it like pumpkin pie and it needs to be slightly jiggly?
Hi Michi! Yes, you want to bake it until the center is almost set. If it’s browning too quickly on top and around the edges tent it with aluminum foil and continue to bake until the center is almost set.
Have you ever tried to make this with Monkfruit?
Hi Rhonda, we haven’t tried this recipe with monkfruit sweetener. For best taste and texture (and so you don’t waste your time trying to adapt this recipe since it may not work properly), it may be more useful to find a recipe that is specifically formulated for sugar substitutes like monkfruit sweetener. Thank you!
This recipe is so good! It’s perfect when you want a delicious cheesecake but only need enough for 4-6 people. Also, not having to do the water bath makes it so much quicker. Topped it with lemon curd and whipped cream. Delicious. I will definitely be making it again!
Hello. Mine puffed up quite bit in the oven. Did I over mix? It has deflated now while cooling. Will it taste ok?
HI CA, that’s completely normal with cheesecake, and cheesecake-like desserts. Should taste just fine!
Can you add melted chocolate to make a chocolate cheesecake?
Hi Monika, we haven’t tested the recipe that way, so aren’t sure of the results. But it would be fantastic topped with chocolate ganache!
Can I add 1/2 C lemon juice to make this a lemon cheesecake pie?
Hi, 1/2 cup of extra liquid would be too much in this batter. Instead, I recommend 1/4 cup of lemon juice and then reduce the sour cream by about 2 Tablespoons. The batter should be able to hold the extra liquid—I’ve done it before in my larger cheesecake recipe.
I want to make this recipe for a person that is highly reactive to lemon (citric acid). What could I replace this with? It may not have the depth or tanginess without the lemon.
Do you think 1/2 tsp almond extract would be nice?
Hi Dree, almond extract could be lovely! Let us know if you give it a try.
I’ve made this recipe 3x now and it is a hit every time! The second time I experimented with a ginger snap crust and (homemade) lemon curb topping! Yum! This pie is a delicious base and so versatile that it can include any seasonal fruit topping!
You said to use a thermometer but didn’t say what temp is considered almost done?
Hi Janet! We’re unsure where you’re seeing that instruction, but we do always recommend using an in-oven thermometer to ensure that your oven in the correct temperature.
I love this recipe. It’s so easy and delicious. I made it 2 days ahead to serve Christmas Eve. Served it with homemade raspberry sauce. Love your recipes. Thank you so much.
Delicious! The crust is perfection! The cheesecake filling is rich and not too sweet, just right. Thank you, Sally, your recipes are always the best!
I would like to make small cheesecakes, like cupcake size or in individual ramekins. Is this do-able?
Hi Deb, Using smaller tins shouldn’t be a problem, just divide up the crust and filling. The crust pre-bake and filling bake times will change and we’re uncertain how long both would be without testing it and knowing the exact sizes of your tins. So, just keep a watchful eye on them. The cheesecake is done when the center is just about almost set. (Only slightly jiggly.)
Can’t wait to try this- can I make it ahead of time then freeze it? I saw that it said refrigerate or freeze for up to 5 days so I wanted to double check. Usually baked goods that can be frozen are good for 2-3 months in the freezer. Thanks!
Hi Tara! Yes, you can absolutely freeze the cheesecake for longer. Freeze the baked and cooled cheesecake for up to 3 months. Thaw overnight in the refrigerator before serving.
I baked this today for my birthday and it was delicious! I live in Australia so I followed the directions for using digestive biscuits in the crust and the amounts were spot on. I made the raspberry sauce and whipped cream topping and my whole family loved it. This will be our new go to cheesecake! Thanks for another awesome recipe!
This is by far the best recipe I have tried from your website (and I am a big fan of most of your recipes!) I LOVED the cheesecake. I would believe someone if they made this and told me it was from the Cheesecake Factory! However one thing I didn’t like was the crust. It was incredibly crumbly and just fell apart when we cut into it. I even added extra butter just because it was not holding together at all when mixing it. I am considering maybe adding an egg next time. Do you think this would improve the crust?
Thanks Sally and the Team!
I wanted to make a smaller cheesecake since we already had such a large spread of Thanksgiving desserts. I thought “a smaller pie-size version would be nice” and then viola – searched your site and found this! Thank you so much for such a fantastic alternative! You are always my go-to for when someone makes a dessert request!
Your pie plate links to a 9.5 inch pan, but recipe says 9 inch, does recipe need to be adjusted? My pan is 9.5 inch.
Hi Diane, yes you can use the 9.5 inch pie dish. That is what is pictured. 9-9.5 inches is perfect.
I was wondering if I’m out of grahamcrackers can I use a premade grahamcracker crust for the recipe?
Thanks for your help!
Hi Pamela, you can use a pre-made crust. I still recommend pre-baking it.
Hi, how long do you think this could store in the freezer for? I would love to make a few and keep them in the freezer to pull out when needed.
This cream cheese pie is the BEST!! It is easy and delicious….as good as your best cheesecake!!
I give it 5 stars. Any cheesecake lover will thoroughly enjoy this dessert. Your guests or family with ask for seconds….I promise!!!
Hi, Sally! Love the beautiful presentation of your cheesecake. i will unquestionably make my cheesecake just like yours next time I make it. The color is perfect for Christmas. Thank you for your easy to follow instructions!
Can I use plain Greek yogurt in place of sour cream?
Absolutely!
This is my very first time trying and after looking through several recipes I chose this one, because I didn’t want to waste 32 oz of cream cheese if I couldn’t even make it right with 16… haha. I followed the directions 100% And this turned out so great! My grandson will be so pleased. You couldn’t have bought it in a store and had it taste any better. Now my appearance is going to need some work because I made the crust too tall in the back. I’m just so proud of myself hahaha thank you so much
Loved the taste but my pie cracked!! What did I do wrong?
Hi Paula! The pie was likely over-baked or baked at too high of a temperature. We always recommend using an in-oven thermometer for most accurate results 🙂
To make ahead do you pre bake the crust? Thanks
Love this trying to make ahead for holiday
Hi Jean, It’s best if the crust is still a bit warm when you pour in the filling, so we don’t recommend pre-baking the crust in advance. See the make ahead instructions in the recipe notes for details.
Thanks, so I should not make the pie and filling ahead. Maybe make crust ahead and filling then put together day of?