

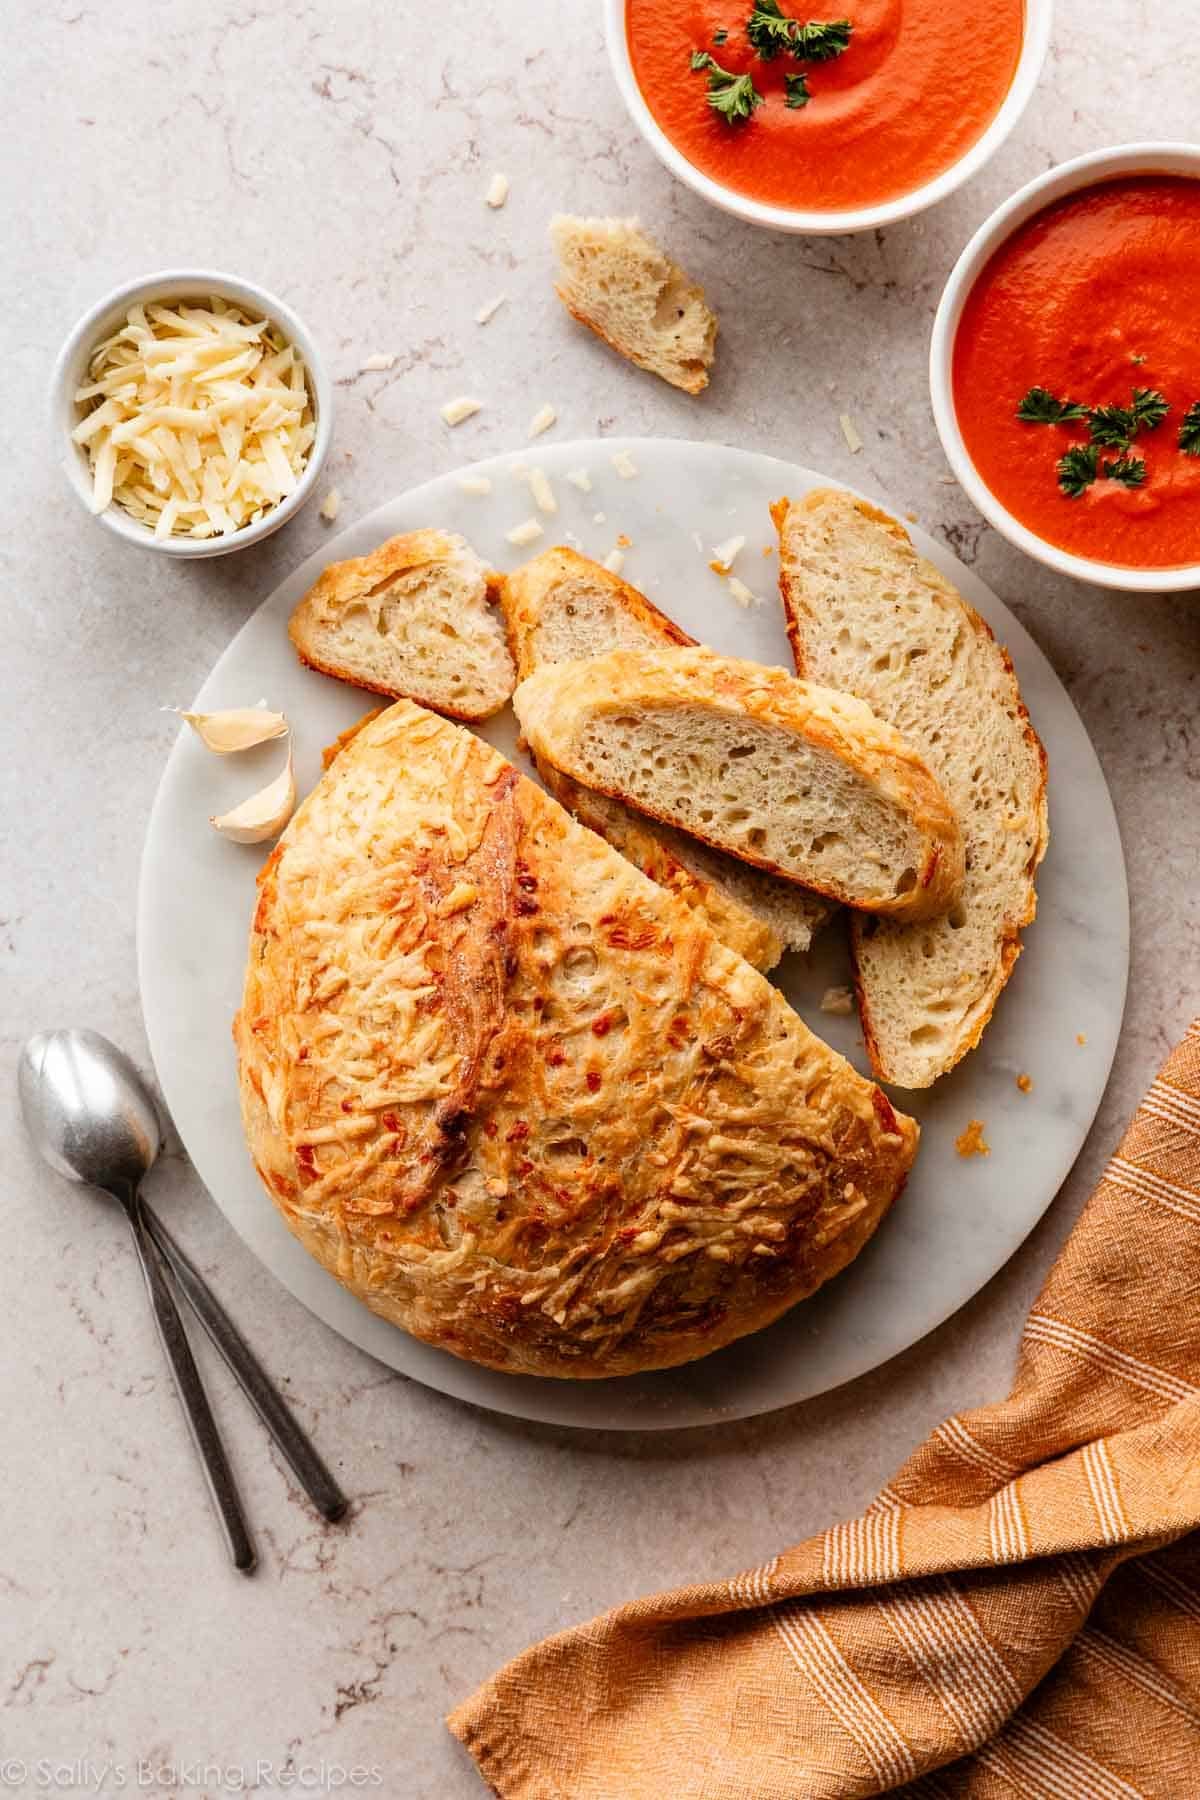
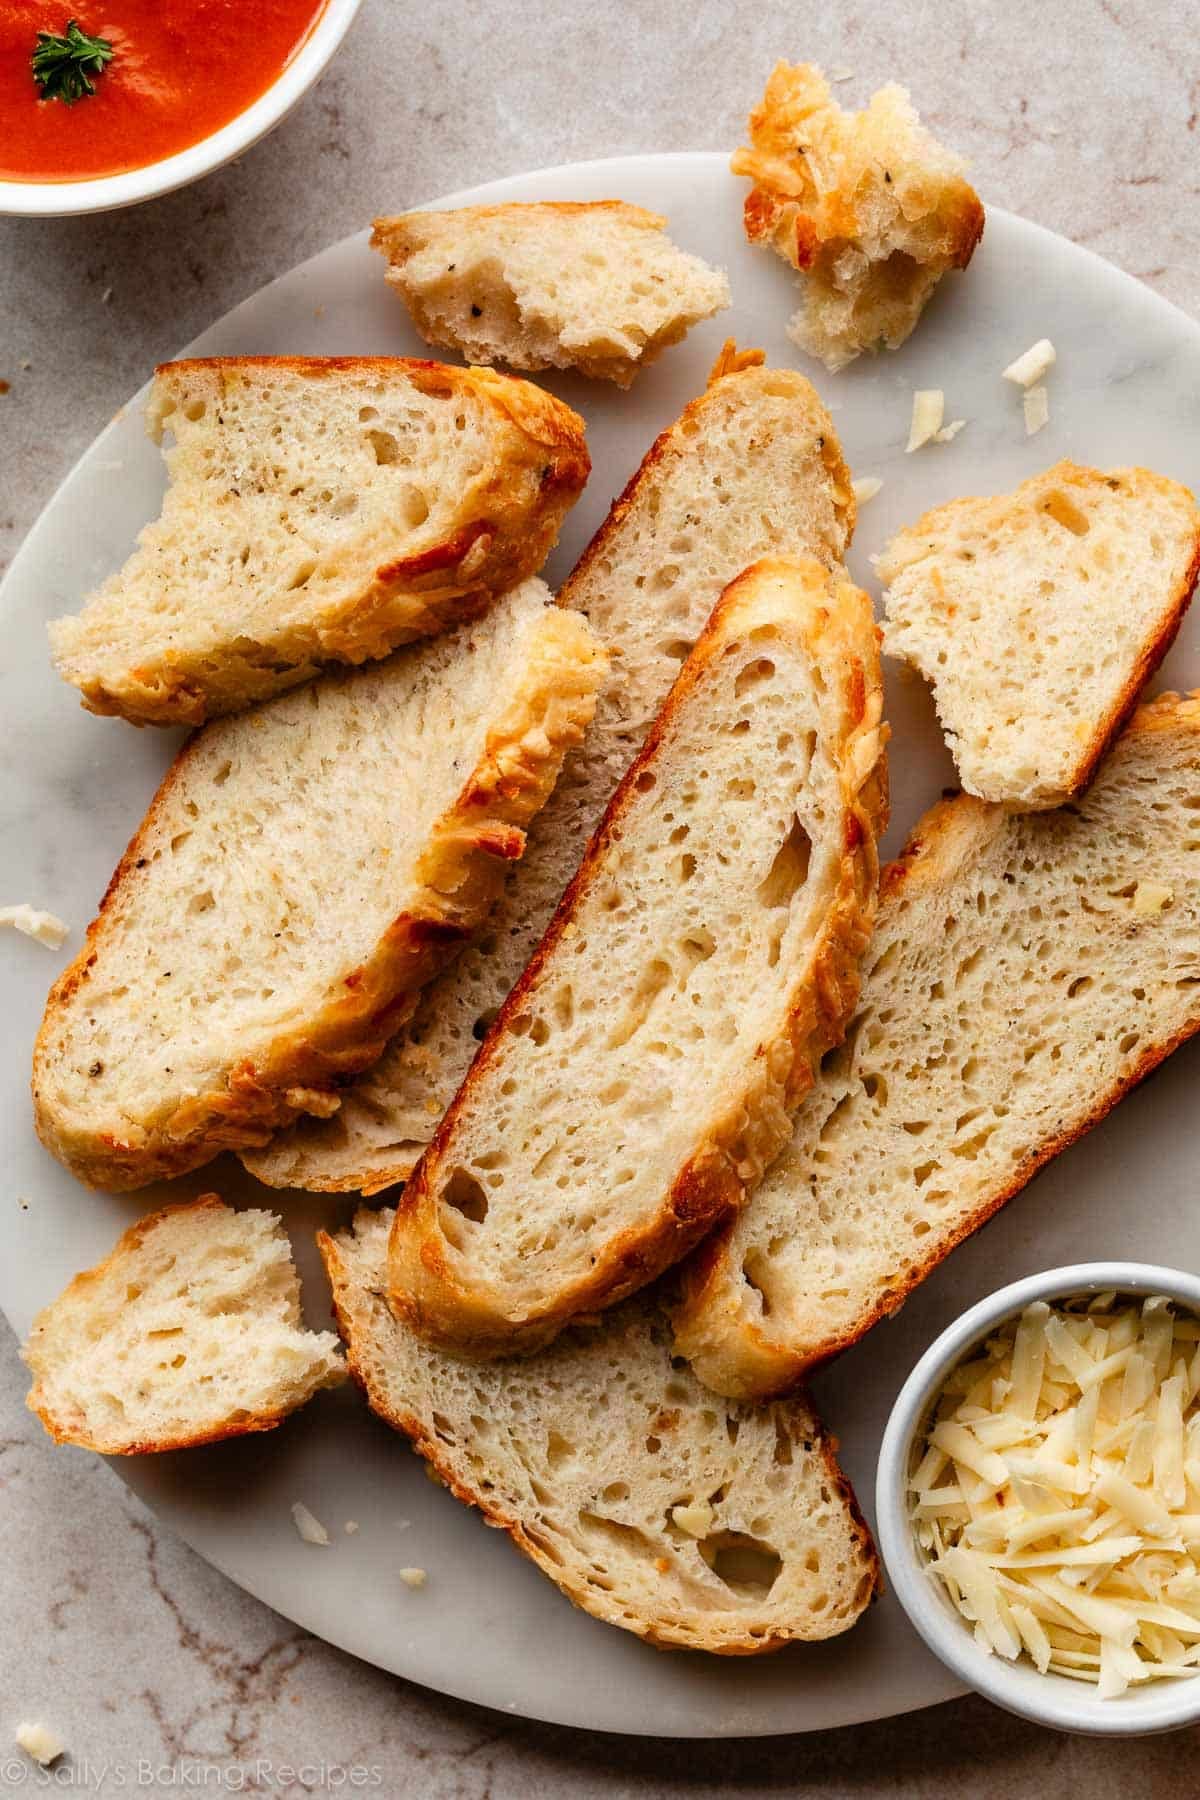
This chewy, cheesy asiago-crusted skillet bread is packed with the savory flavors of asiago cheese, plus a hint of garlic and black pepper. Baking the dough in a skillet helps form a thick and extra crispy bottom crust. You’ll use an easy no-knead method to make this yeast bread, which produces a beautiful homemade loaf with minimal hands-on work.
This recipe is brought to you in partnership with Red Star Yeast.
If you’ve ever had the pleasure of biting into an asiago bagel, you know how the salty, savory flavor of the asiago cheese mingles with the malty, yeasty flavor of the bagel in every chewy bite. And how the cheese sprinkled on top bakes in and forms a delicious crust on the exterior. (Are you drooling yet?!)
I wanted to replicate that wonderful flavor and chewy texture, but as a loaf of bread. This recipe nails it, and unlike homemade bagels, there’s NO kneading, individual shaping, or boiling steps involved.
Why You’ll Love This Asiago Cheese Bread
- No mixer, no complicated shaping, and no kneading required
- Short + simple list of ingredients
- Flavors of asiago cheese, garlic, and black pepper
- Ready the same day you start making it
- Tastes phenomenal with tomato soup or creamy cauliflower potato soup
- EASY: If you can stir ingredients together, you can make this bread!
Are You a Yeast Beginner?
This Baking with Yeast Guide is a wonderful starting point. I answer many common yeast FAQs in easy-to-understand explanations, so you can learn the basics before beginning.
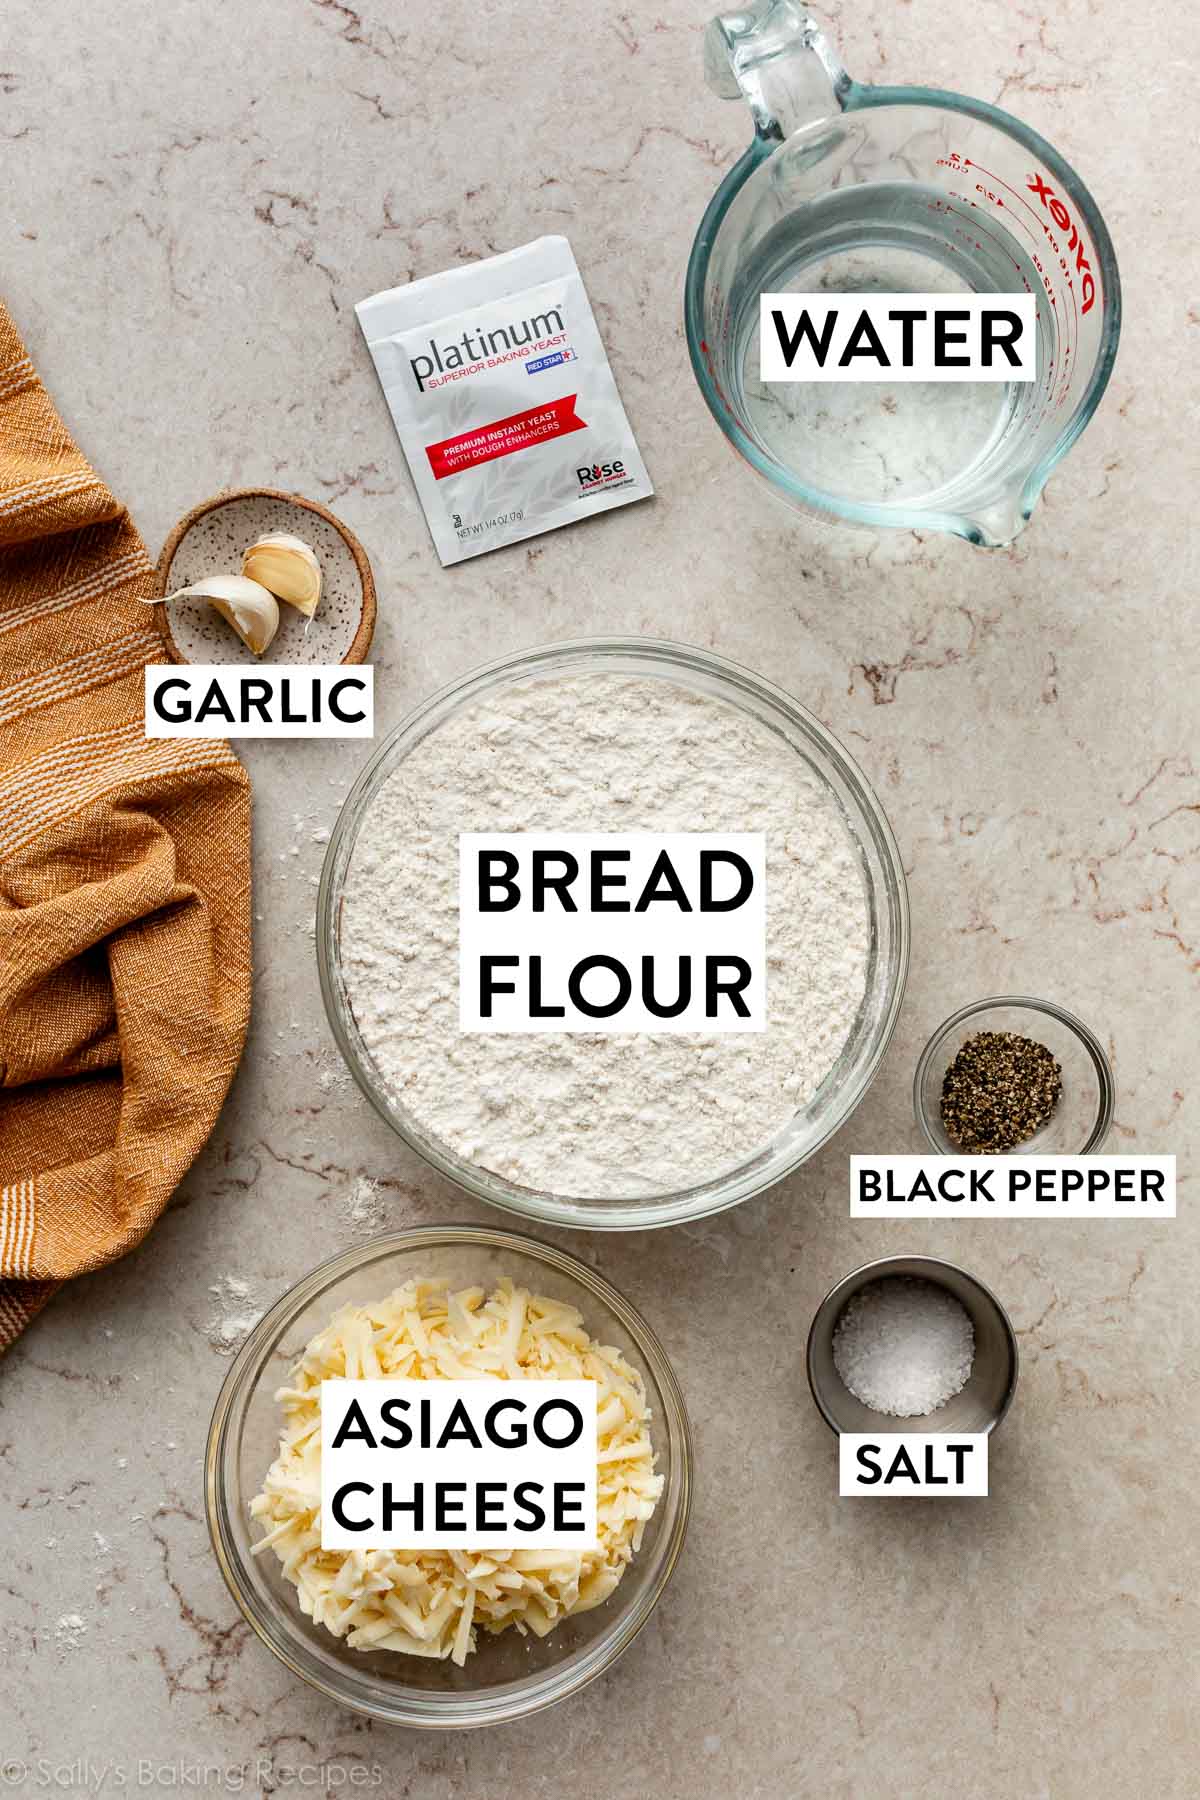
Grab These Ingredients
With so few ingredients, each one has an important job:
- Bread Flour: While you could use all-purpose flour in this recipe, I recommend using bread flour because it produces a stronger, chewier bread.
- Salt & Pepper: I recommend using coarse sea salt because I find the bread’s flavor lacking with regular table salt. Likewise, while you can use regular finely ground pepper, I recommend freshly grinding black peppercorns for the best taste.
- Instant Yeast: I always use Platinum Yeast by Red Star, which is an instant yeast. The Platinum yeast is fantastic because its careful formula strengthens your dough and makes working with yeast simple. You only need 1 standard packet of yeast (2 and 1/4 teaspoons) to get the job done.
- Garlic: 2 minced cloves add a subtle background flavor that lets the asiago cheese take center stage, but feel free to add more.
- Asiago Cheese: Use a box grater to freshly shred it.
- Water: You’ll need a little warm water to bring all the ingredients together. I usually use cool, room-temperature water in olive bread and artisan homemade bread, two other no-knead doughs, but with the shorter rise time for this bread, warm water helps the yeast work faster.
Asiago cheese flavor: it’s an Italian alpine cow’s milk cheese, and the flavor ranges from mildly sweet and nutty to sharp and tangy, depending on how long it’s aged. A good substitute for the asiago in this bread recipe is freshly grated Parmesan, Pecorino-Romano, or white cheddar.
I use it in this savory sun-dried tomato quick bread, too.
I’ve found that some brands of asiago cheese can have a particularly… pungent aroma. But rest assured, that magically disappears during baking, and the baked bread will smell and taste absolutely delicious.
What is No-Knead Bread?
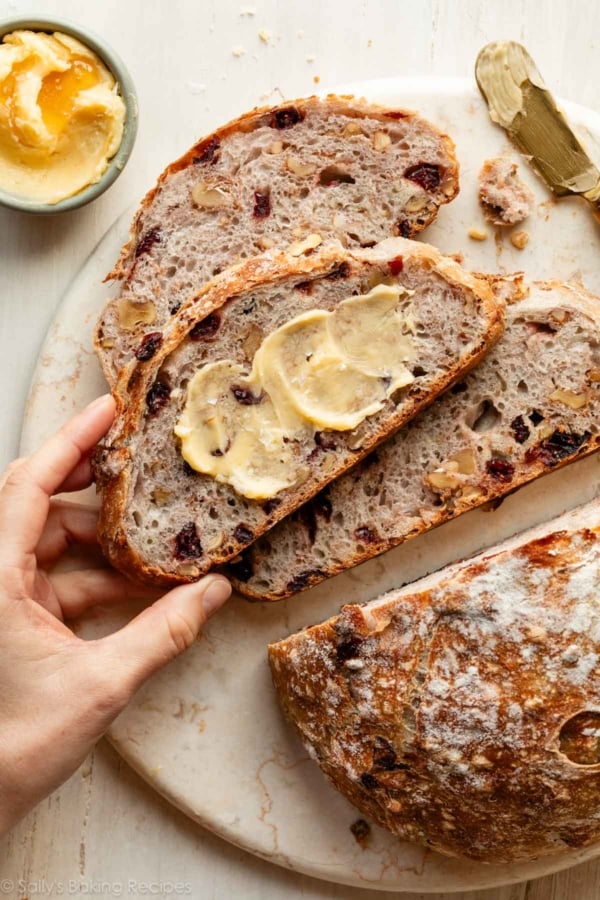
This no-knead method of making homemade bread is super popular among home bakers, and originally came from Jim Lahey of Sullivan Street Bakery in NYC. After using his method to make cranberry nut no-knead bread, many readers asked for more flavor variations. Since then, I’ve also published no-knead olive bread, super seeded oat bread, honey oat bread, jalapeño cheddar bread, and crusty no-knead pizza bread.
I love making bread like this.
For today’s no-knead asiago bread, I made a few changes. Instead of letting the dough rest for 12–18 hours, we’re shortening that time to just 3 hours. We’re using a little more yeast (1 standard packet) to speed up the process. This is a bread you can start making the same day you plan to eat it and most of the “work” is completely hands off as the dough rises.
How to Make No-Knead Asiago-Crusted Skillet Bread
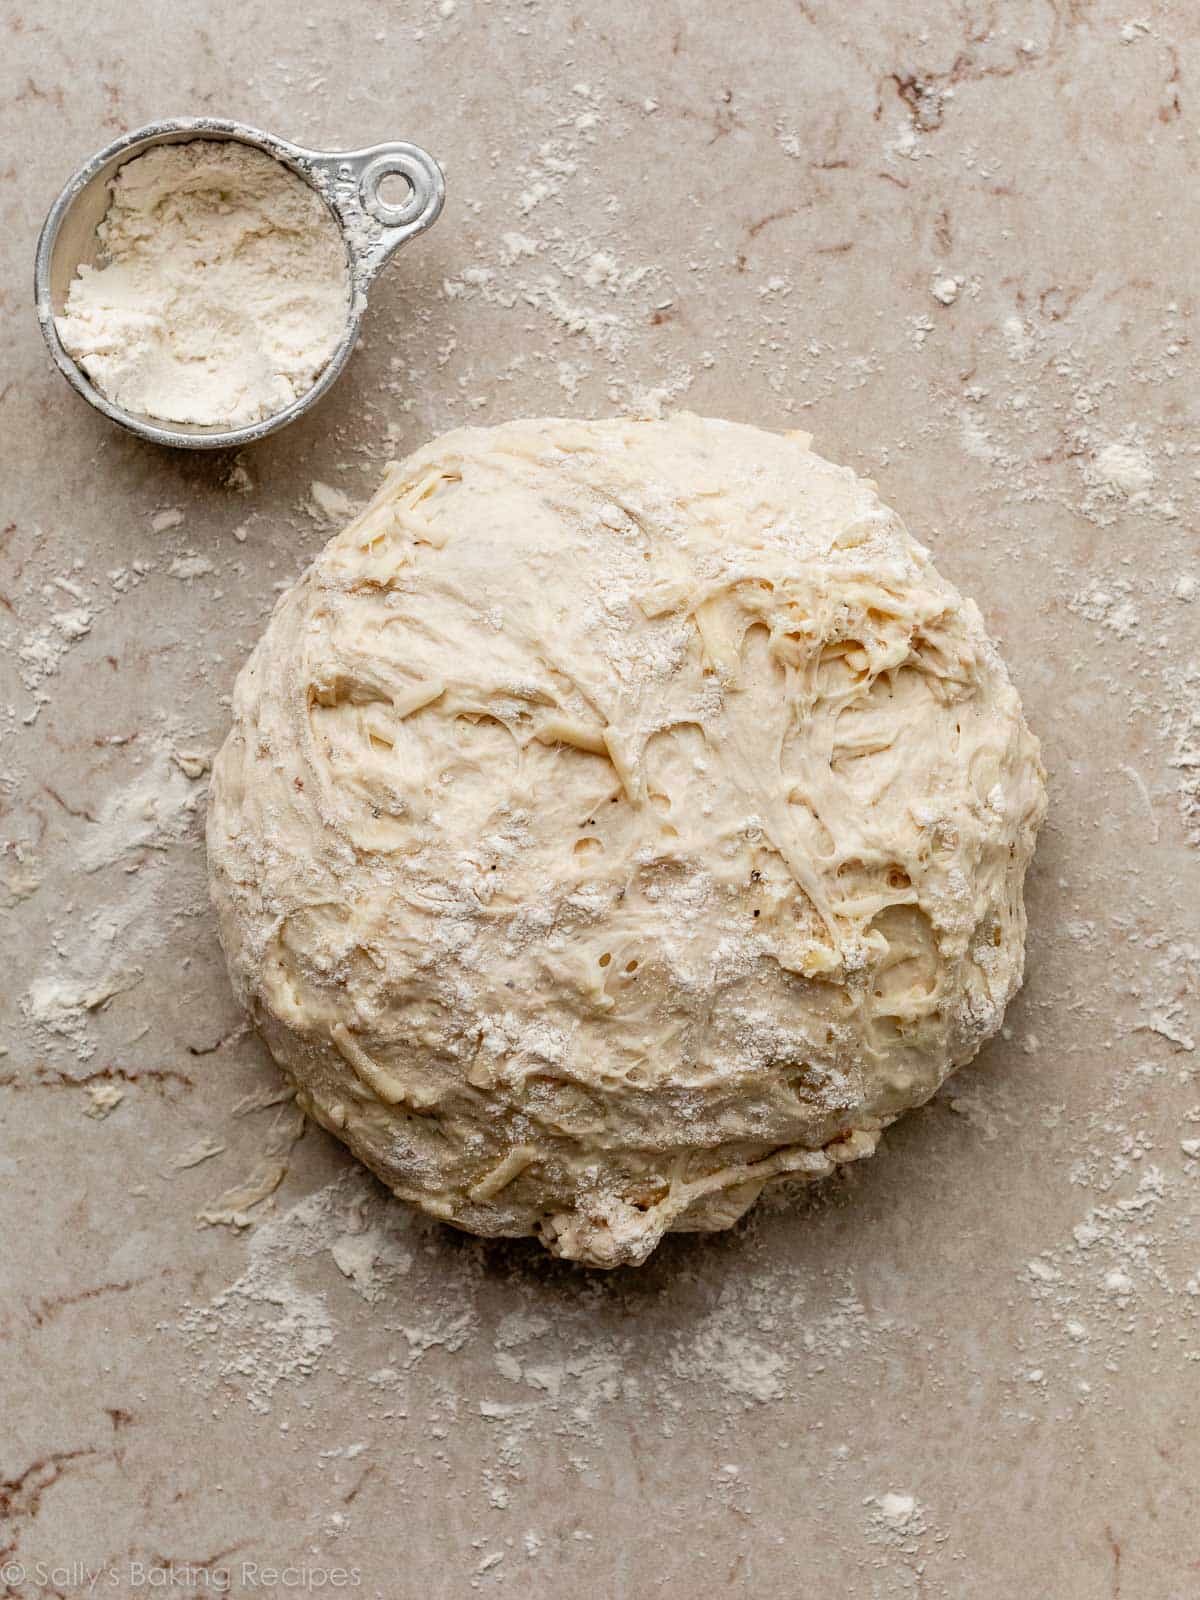
This process truly couldn’t be easier. Stir all the ingredients together by hand. Expect a very sticky dough:

Cover the bowl and let the dough rise for 3 hours. The dough will stretch to the sides of the bowl and have air bubbles on the surface:

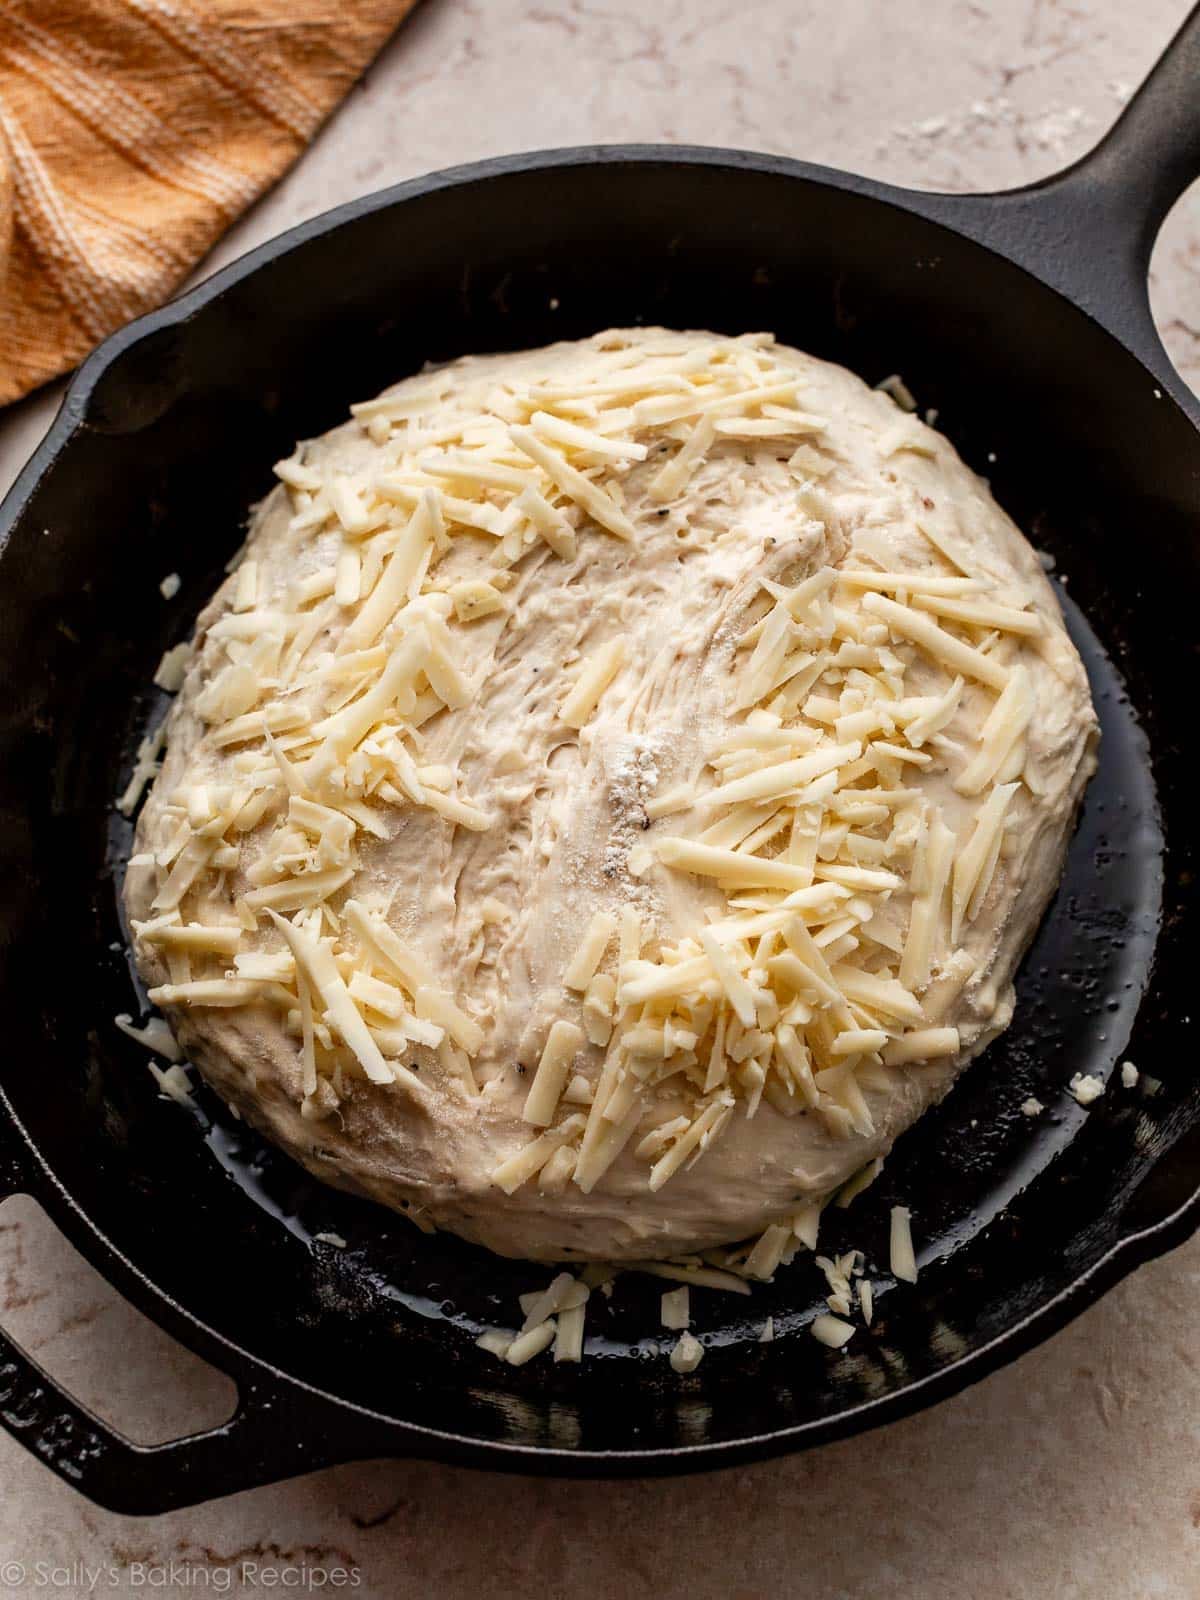
Use a spatula to help remove the sticky dough from the bowl then use generously floured hands to shape the dough into a ball. Place it in an oven-safe skillet.
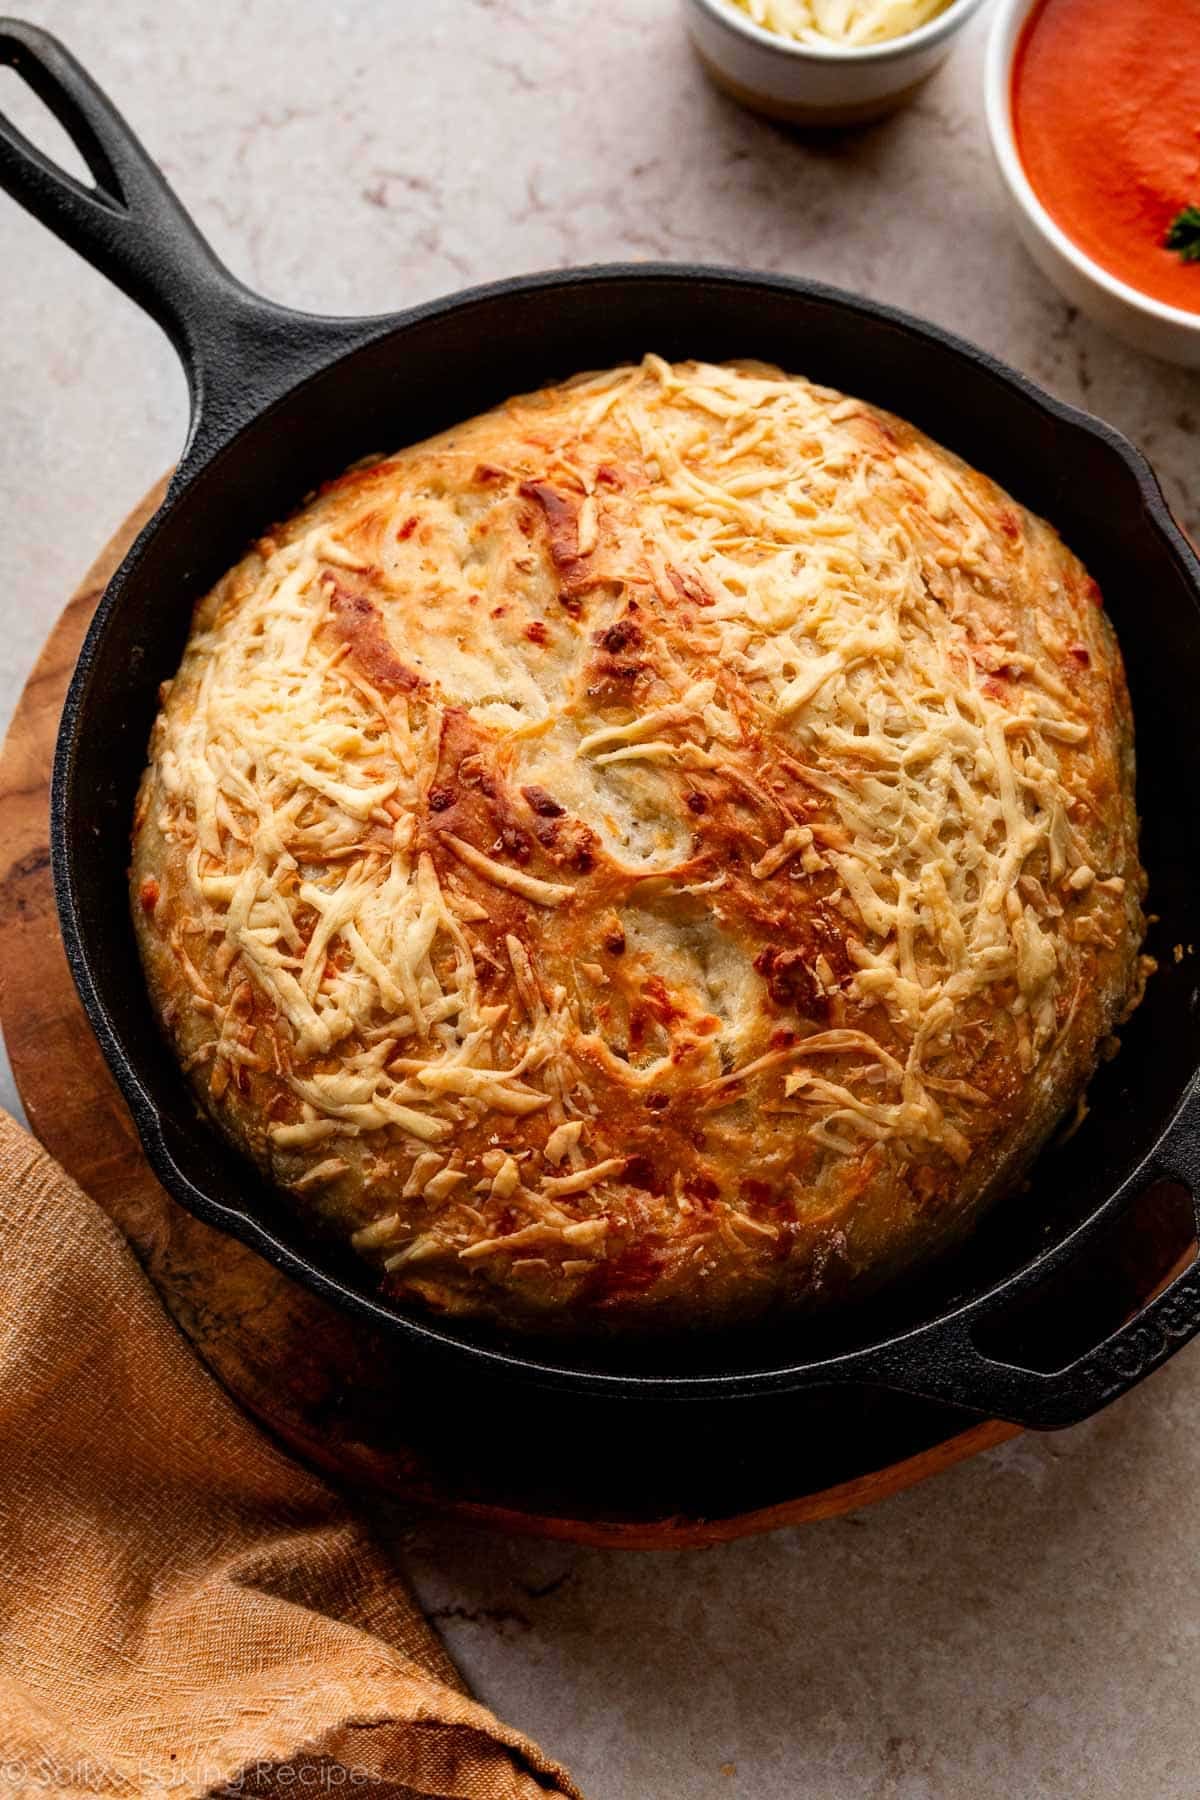
Let it rest for 30 minutes, and then score it with sharp knife or bread lame, top with more asiago cheese, and bake.
I love that this bread has a similar flavor to twisted cheese bread, but requires none of the complicated shaping.
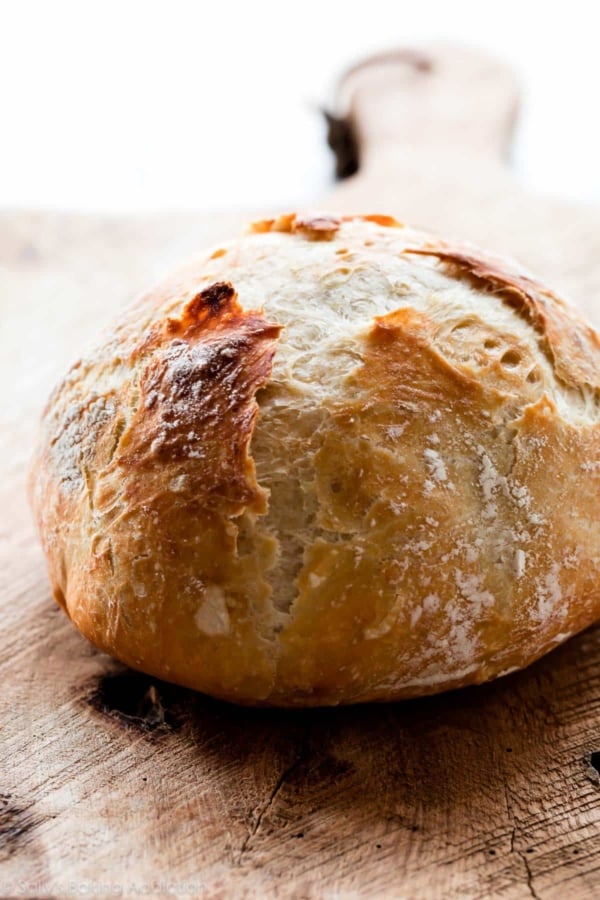
Why Bake Bread in a Skillet?
Though I usually bake no-knead bread in a Dutch oven or on a baking sheet, I wanted the crust to be the main focus here. Baking the bread in a cast iron skillet helps develop a thick, extra crispy crust on the bottom.
If you need a recommendation, I own and love this cast-iron skillet. I have both the 10-inch and the 12-inch sizes and you can use either for this bread. They’re incredible quality for the price, and I use them to make all kinds of recipes, from skillet brownies to my Dutch baby pancake recipe, plus frittatas, skillet sea salt & herb rolls, honey cornbread, apple cider chicken, and more. Talk about a versatile pan to have in your kitchen!
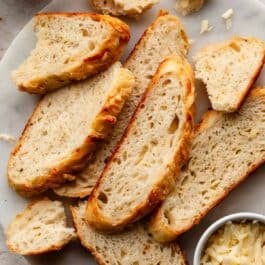
Because of the sticky dough and cheese, this bread is flatter than most boules. But this just means a higher crust to interior ratio!
Keep this recipe on standby for when that craving for warm homemade cheese bread hits. Because you know when you start thinking about warm homemade cheese bread, you can’t stop thinking about it.
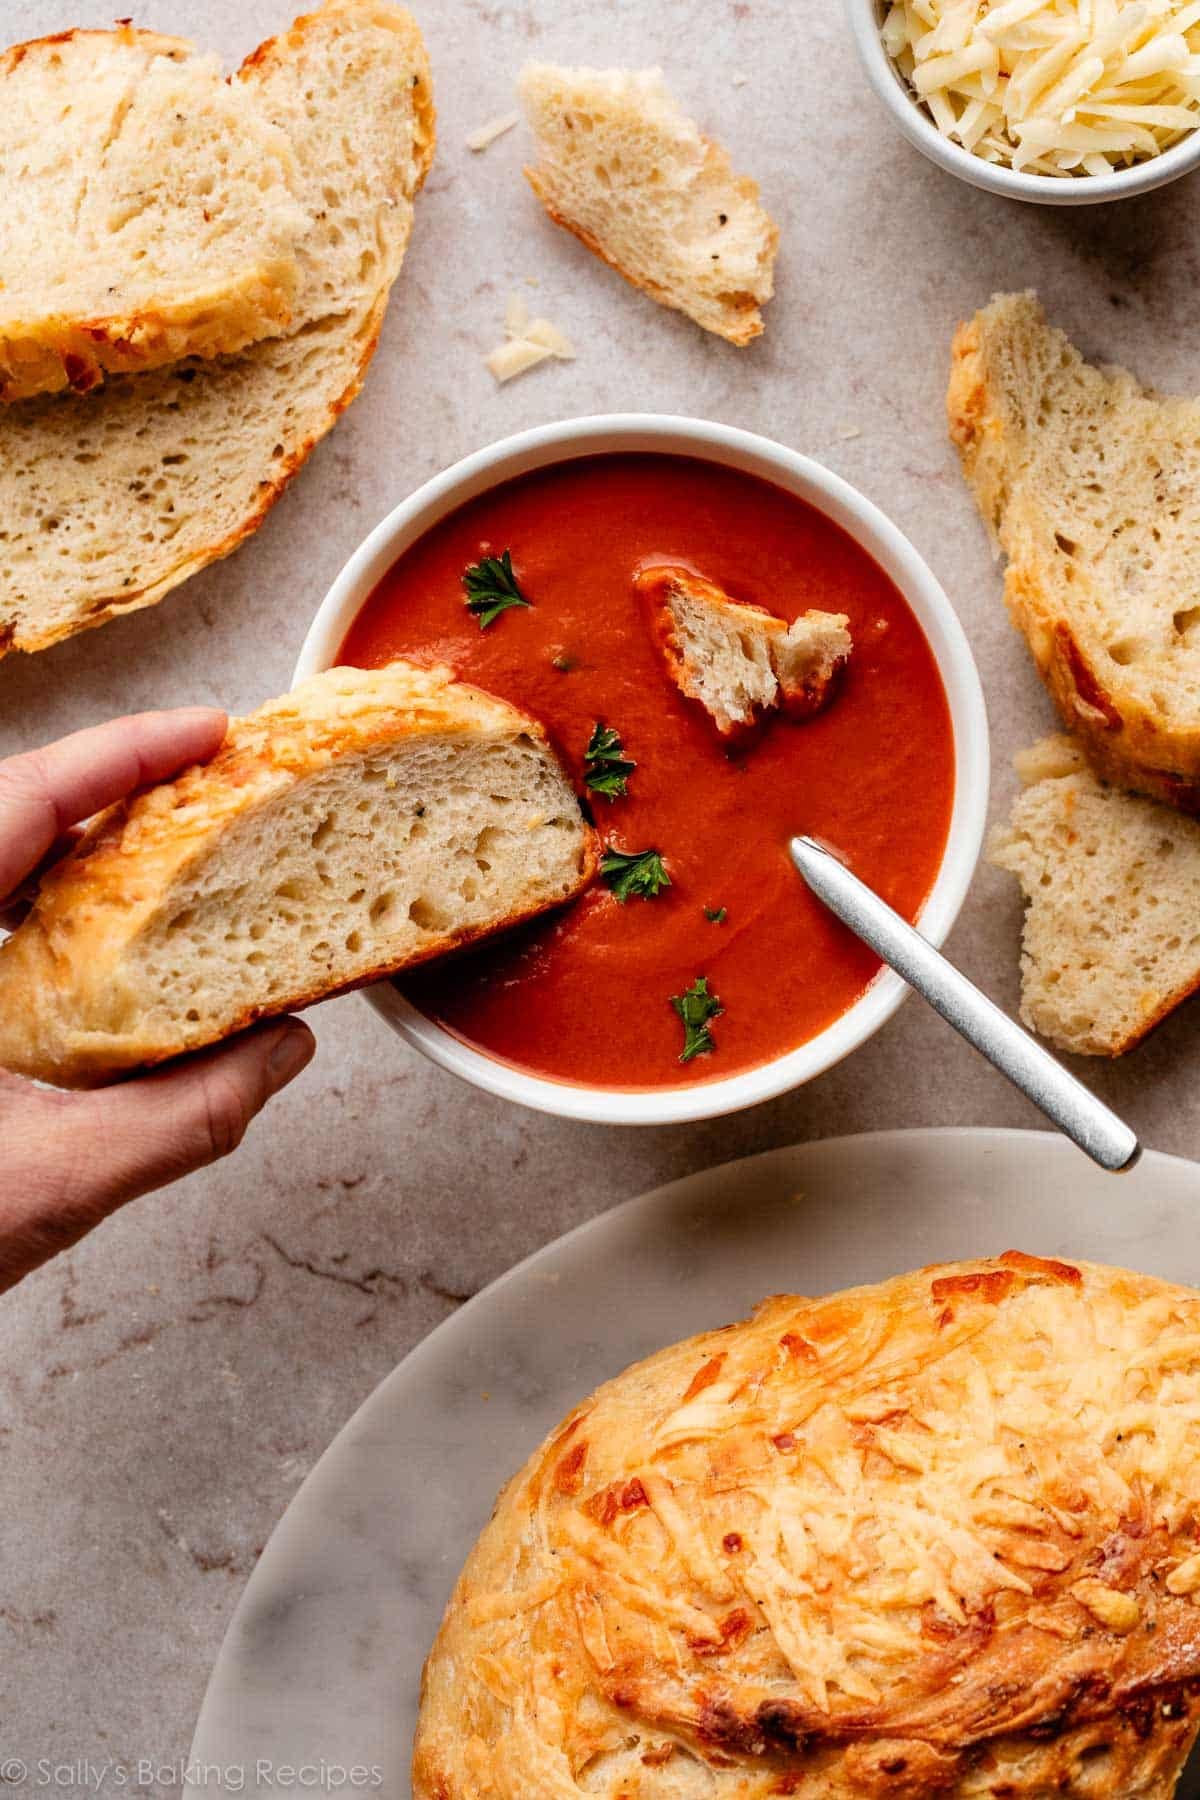
This asiago bread is simply perfect with a bowl of tomato soup and I love to dip it in homemade Italian dressing. Or serve it alongside:
- Frittata
- Bruschetta Chicken with Zucchini Noodles
- Maryland Crab Cakes
- Vegetarian Pumpkin Chili
- Minestrone Soup
- Creamy Chicken Noodle Soup
Asiago-Crusted Skillet Bread
- Prep Time: 20 minutes
- Cook Time: 35 minutes
- Total Time: 4 hours, 30 minutes
- Yield: 1 loaf; 10-12 servings
- Category: Bread
- Method: Baking
- Cuisine: American
Description
Homemade bakery-style bread has never been easier. This no-knead asiago-crusted bread is baked in a skillet and requires minimal hands-on work! If you’re new to working with yeast, reference my Baking with Yeast Guide for answers to common yeast FAQs.
Ingredients
- 3 and 1/4 cups (423g) bread flour (spooned & leveled), plus more as needed
- 2 teaspoons coarse salt*
- 1/2 teaspoon freshly ground black pepper*
- 2 and 1/4 teaspoons Platinum Yeast from Red Star (1 standard-size packet)
- 2 cloves garlic, minced
- 1 and 1/4 cups (125g) shredded asiago cheese, divided
- 1 and 1/2 cups (360ml) warm water (about 95°F (35°C))
Instructions
- *No need to grease the bowl, and do not use a mixer in this step because the dough is too sticky for a mixer.* In a large bowl, stir together the bread flour, salt, pepper, yeast, and garlic. Add 1 cup (100g) of the cheese and stir until combined. Make a well in the center of the flour mixture, and pour in the warm water. Using a silicone spatula or wooden spoon, mix to combine. The dough will be shaggy and pretty sticky. If it’s extremely wet, add another 2 Tablespoons of flour. Gently shape the dough into a ball in the center of the bowl. Cover the bowl tightly. Allow to rise for 3-3.5 hours at room temperature. See Make Ahead Instructions if you want to extend this time.
- Grease a 10- to 12-inch oven-safe skillet with oil, butter, or nonstick spray. Turn the dough out onto a generously floured work surface and, using floured hands, shape into a ball as best you can. Doesn’t have to be perfect. Place dough in the skillet, cover it, and let it rest for 30 minutes as the oven preheats.
- Preheat the oven to 425°F (218°C).
- Using a very sharp knife or bread lame (you could even use kitchen shears), gently score a slash or X into the surface of the dough, about 1/2 inch deep. (“Score” = shallow cut.) Top the bread with the remaining 1/4 cup (25g) asiago cheese, pressing it lightly into the surface so it sticks.
- Bake for 30–35 minutes, or until the bread is golden brown. How to test for doneness: Give the warm bread a light tap. If it sounds hollow, it’s done. For a more accurate test, the bread is done when an instant-read thermometer reads the center of the loaf as 195°F (90°C).
- Remove skillet from the oven, carefully remove the bread from the skillet, and allow to cool on a cooling rack for 20 minutes before slicing.
- Cover and store leftover bread at room temperature for up to 2-3 days or in the refrigerator for up to 1 week.
Notes
- Make Ahead & Freezing Instructions: After the dough rises at room temperature, you can refrigerate it for up to 8 more hours before proceeding with step 2. I don’t recommend any longer than that. To freeze, bake the bread, allow it to cool, wrap tightly in a layer of plastic wrap then a layer of aluminum foil, and freeze for up to 3 months. Thaw in the refrigerator and allow to come to room temperature before serving.
- Special Tools (affiliate links): Box Grater | Glass Mixing Bowls | Silicone Spatula or Wooden Spoon | Cast-Iron Skillet | Bread Lame | Instant-Read Thermometer | Cooling Rack | Coarse Sea Salt
- To Bake in a Dutch Oven: Use a 5–6-quart or larger Dutch oven or any large oven-safe pot. In step 2, after the dough has finished rising, turn the dough out onto a generously floured work surface and, using floured hands, shape into a ball as best you can. Transfer the dough to a large piece of parchment paper. (Large enough to fit inside your pot and one that is safe for high heat. I use this parchment and it’s never been an issue.) Place the dough inside the Dutch oven by lifting it up with the parchment paper and placing it all—the parchment paper included—inside the pot. Cover and let it rest for 30 minutes as the oven preheats. Proceed with step 3. Bake for 25 minutes with the lid on (if you don’t have a lid for your oven-safe pot, that’s OK, just skip covering it). Carefully remove the lid and continue baking for 10 more minutes until the bread is golden brown or until the internal temperature reaches 195°F (90°C).
- To Bake on a Baking Sheet: In step 2, place the dough ball on a parchment paper lined or generously floured nonstick baking pan. Proceed with steps 3 and 4. After the oven is preheated, place scored dough/baking pan on the center rack. Then place a shallow metal pan (I usually use a metal 9×13-inch baking pan; do not use glass) on the bottom oven rack. Carefully and quickly pour 3–4 cups of boiling water into it, and then quickly shut the oven door to trap the steam inside. The steam helps create a crispier crust, similar to a crust that forms when using a cast iron skillet. Proceed with step 5.
- Flour: For absolute best flavor and chewy texture, I strongly recommend using bread flour. You can use a 1:1 substitution of all-purpose flour in a pinch with no other changes to the recipe. Do not use whole wheat flour in this dough. We have not tested this recipe with gluten-free flour.
- Salt: Use a coarse salt, such as coarse sea salt, in this bread. I find the flavor slightly lacking when using regular table fine salt. If you only have fine salt, reduce to 1 and 1/2 teaspoons.
- Pepper: Use freshly ground black pepper. If using finely ground, reduce to 1/4 teaspoon.
- Yeast: I always use Platinum Yeast from Red Star, an instant yeast. You can use any instant yeast in this dough. If using active dry yeast, the rise time is usually slightly longer, about 4 hours. Reference my Baking with Yeast Guide for answers to common yeast FAQs.
- Asiago Cheese: The flavor ranges from mildly sweet and nutty to sharp and tangy, depending on how long it’s aged. A good substitute for the asiago in this bread recipe is freshly grated Parmesan, Pecorino-Romano, or white cheddar.


Reader Comments and Reviews
Really good bread! However, if I had cooked it as along as recommended it woud have been all dried out!! I find this often with recipes recommending a hotter oven and long cooking time than necessary and I have a new stove. The same was true with my last stove and oven. I cooked this bread at least 15 minutes less than recommended.
Very easy recipe. My only change was doubling the amount of freshly ground pepper; I love pepper and this gave the bread a bit more zing. I also let it rise almost 6 hours (long story). The resulting dough had a very strong odor, stronger than the Asiago cheese alone. The finished bread still had a strong odor but diminished when toasted allowing the full flavor of the cheese, garlic, and pepper to come through. The finished bread looked great and had the perfect bite.
My family LOVED this bread….it magically disappeared from the serving tray within minutes!
This bread is simply scrumptious!! My husband has made it for the second time and both times it came out perfect! Crusty with a good soft center. There should be no worries about making this recipe as it’s easy and oh so very tasty. I don’t think anyone will be disappointed.
I can hardly wait o try this recipe. Reading the comments encouraged me to try it since I’m always unsure of myself when trying bread recipes. My question is since I cannot find the platinum yeast in any stores near me, is there any substitute yeast I can use?
Hi Susan, a brand of instant or active dry yeast will work great. Hope you enjoy the bread!
This bread was easy and PERFECT!!!
Hi Carol, I’m so glad to read you enjoy this bread recipe! Thanks for reporting back.
SO GOOD. My family devoured this. Followed the recipe exactly and it came out perfectly. Bread intimidates me but this was such an easy recipe to make. This is a new favorite.
I bake bread every week using various recipes from Sally’s Baking. This recipe may be the best yet. I followed the recipe except for topping the bread with more cheese. I was impatient and did not allow for cooling, so I sliced it out of the oven. It was awesome dipped into olive oil. Impatience at times is rewarded.
I just made the Asiago Skillet Bread, and it was easy and delicious. I followed rhe recipe exactly.
I have made this about four times since you posted it, it is delicious! I’ve done a similar type using a dutch oven, the no-knead bread – my husband loves this one the best! More crunchy top as it spreads around the skillet. I used Gryuere in the dough, and extra sharp cheddar because that’s what I had on hand and wanted to try it right away. Awesome, our new favorite! Love your recipes
This bread is fantastic and so easy to make. I used a mix of asiago and parmigiano. Also more garlic. Delicious
This was my first time using a cast iron skillet to bake bread. It turned out great! The crust was perfect and the bread had lots of flavor.
Oooh, can I expect to see a tomato soup on your website soon? I’ll wait to make the bread until that day comes 🙂
I hope so! This was from the prepared section at my grocery store.
This recipe is so easy and so flavorful!! I love the Asiago cheese in the dough and the topping. It was the perfect pairing with a spaghetti dinner. This definitely will be in the regular rotation!
I am NOT a bread baker but this recipe was easy! In fact, my dog managed to reach half the loaf left on my counter and my family begged me to make it again! I used Fleischman’s RapidRise Plus yeast (measure because the packets were not the amount called for in the recipe) and it worked great.
I love to make bread. This recipe is SO easy, and SO delicious!!!! A great loaf for any first-time bread bakers out there who are intimidated by baking bread.
Hi Sally! I love this recipe so much, and I love YOU so much! Keep up the great work! ❤️
Thank you so much Emma!
I made this today. It is so simple and so tasty! I love all your no knead breads. This one is so flavorful and the crispy crust and tender inside are perfect! Thanks so much!
I made this yesterday, and it turned out amazing!!! SOOOO delicious!!! And easy, of course.
So very good! Love the flavor of the cheese, garlic and pepper! Crunchy crust, tender crumb. Will make it again!
As soon as I hear back from you genius bakers on Sally’s fine team, I’m out the door to the cheese store. So here are my questions: If I were to add some chopped walnuts and dried cranberries to this bread – and I really, really want to – a) how much of each would you recommend, and b) when should I incorporate them. Or, I suppose, c) if Sally had thought walnuts and cranberries would work in this bread, she would already have suggested it so shut up, John, and go get the cheese. Thank you for yet another delicious sounding recipe!
Haha! I think walnuts and dried cranberries would be wonderful in this bread, and SO very flavorful. I would add up to 3/4 cup each (95-105g).
Sally can you use a a 4 quart , enameled coated, cast iron braiser to bake in?
Hi Debbie, that should work, but since it’s slightly smaller than a 5-6- qt. Dutch oven, you’ll want to bake it with the top off. Bake time may take slightly longer, too. Be sure to grease it or use parchment. Hope you enjoy the bread!
Can you use non stick (even ceramic coated) oven bakeware?
Hi Laurie, yes absolutely. Be sure to grease it or use parchment.
Can you use gluten free 1-1 flour?
Hi Marie, we haven’t tested it, so we’re unsure of the results. Let us know if you do give it a try!
No lid is used if baking in a cast iron skillet, unlike the Dutch oven?
Correct. Of course it depends on the oven-safe skillet you are using, but it’s not deep enough for the bread to rise if it has a lid on.
Do you have any suggestions for incorporating some sourdough starter into the mix? I’d love to use some of my discard in this if I could.
Hi Megan, we haven’t tested this bread with sourdough starter, but let us know if you try anything.
This sounds delicious! I can hardly wait to make it. I have one question. I usually measure my flour by weight. The bread flour I use (King Arthur Bread Flour) weighs 120 g per cup, so 3 1/4 cups should weigh 390g. The recipe calls for 3 1/4 cups or 423g. Which weight should I use with King Arthur flour, 423g or 390G?
Hi Noreen, I usually use King Arthur Baking flour as well. Even though the package says 120g/1 cup, I usually get about 125g and that is for all-purpose flour. Bread flour weighs a little bit more. You’ll have better luck using the weight given here.
Excited for this new recipe! Will it work also with Cheddar cheese or Parmesan
Hi Deb, absolutely! A good substitute for the asiago in this bread recipe is freshly grated Parmesan, Pecorino-Romano, or white cheddar.
Should I use parchment for the Dutch oven method, as I did with your phenomenal Homemade Artisan Bread?
Love your blog. Although I consider myself a good baker, I learn something new from all of your posts. Thank you!
Hi Eileen, yes, you’ll use parchment paper for the Dutch oven method. See recipe Note.
Must you use glass bowl only? I don’t have glass bowls. I have melamine and stainless steel bowls
You can use any large mixing bowl.
This sounds delicious, I plan to make this soon.