

This apple cinnamon babka features sweet apples and a thick cinnamon filling twisted inside a rich and buttery yeasted dough. Finish the indulgent loaf with a buttery brown sugar cinnamon crumble topping and bake until golden brown. This is a must-try recipe and it’s impossible not to love!
This recipe is brought to you in partnership with Red Star Yeast.
What Is Babka?
Babka has a rich history. When I read more about the treat as I worked on today’s recipe, I learned that it originated in the early 1800s with the Polish Jewish community. Leftover challah dough was filled with jam or cinnamon, rolled up, and baked. The babka we see all over the place today, I read, is much richer and sweeter than its ancestor. You can find it filled with chocolate or almond paste—this is my favorite chocolate version—or the newer babka variations with pizza fillings, Nutella, pesto, and more. Food52 has an in-depth article all about babka if you want to read more about its history and popularity today.
I first tried my hand at homemade babka a couple years ago. Who’s made the Nutella babka recipe before? If you loved it, you’re in for a treat today. If you’re not a fan of Nutella, you’re also in for a treat today. I revamped the dough so it’s (1) even richer (2) even flakier and (3) only yields 1 loaf instead of 2. In terms of taste and texture, it’s more like a brioche loaf than croissant bread. We’re filling it with a thick layer of sweet cinnamon and you can use your favorite variety of apples. If I’m being honest, this apple cinnamon babka has to be one of the best things I’ve ever made with apples. Between all the recipe testing, today’s photos, the video, and making it for a few friends, I’ve baked about 12 loaves by now. And there’s NEVER a crumb leftover.
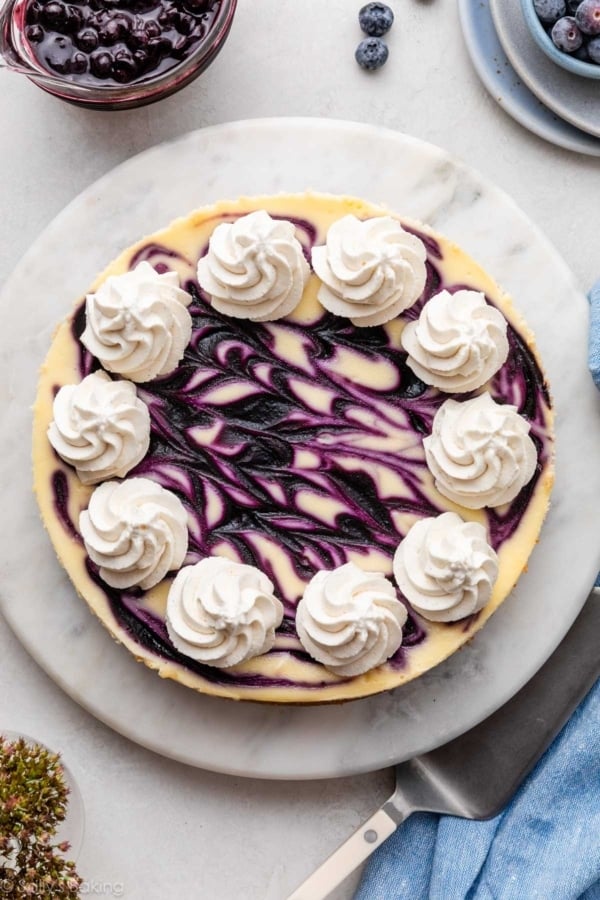
Update: I now have a lemon blueberry babka recipe, too!
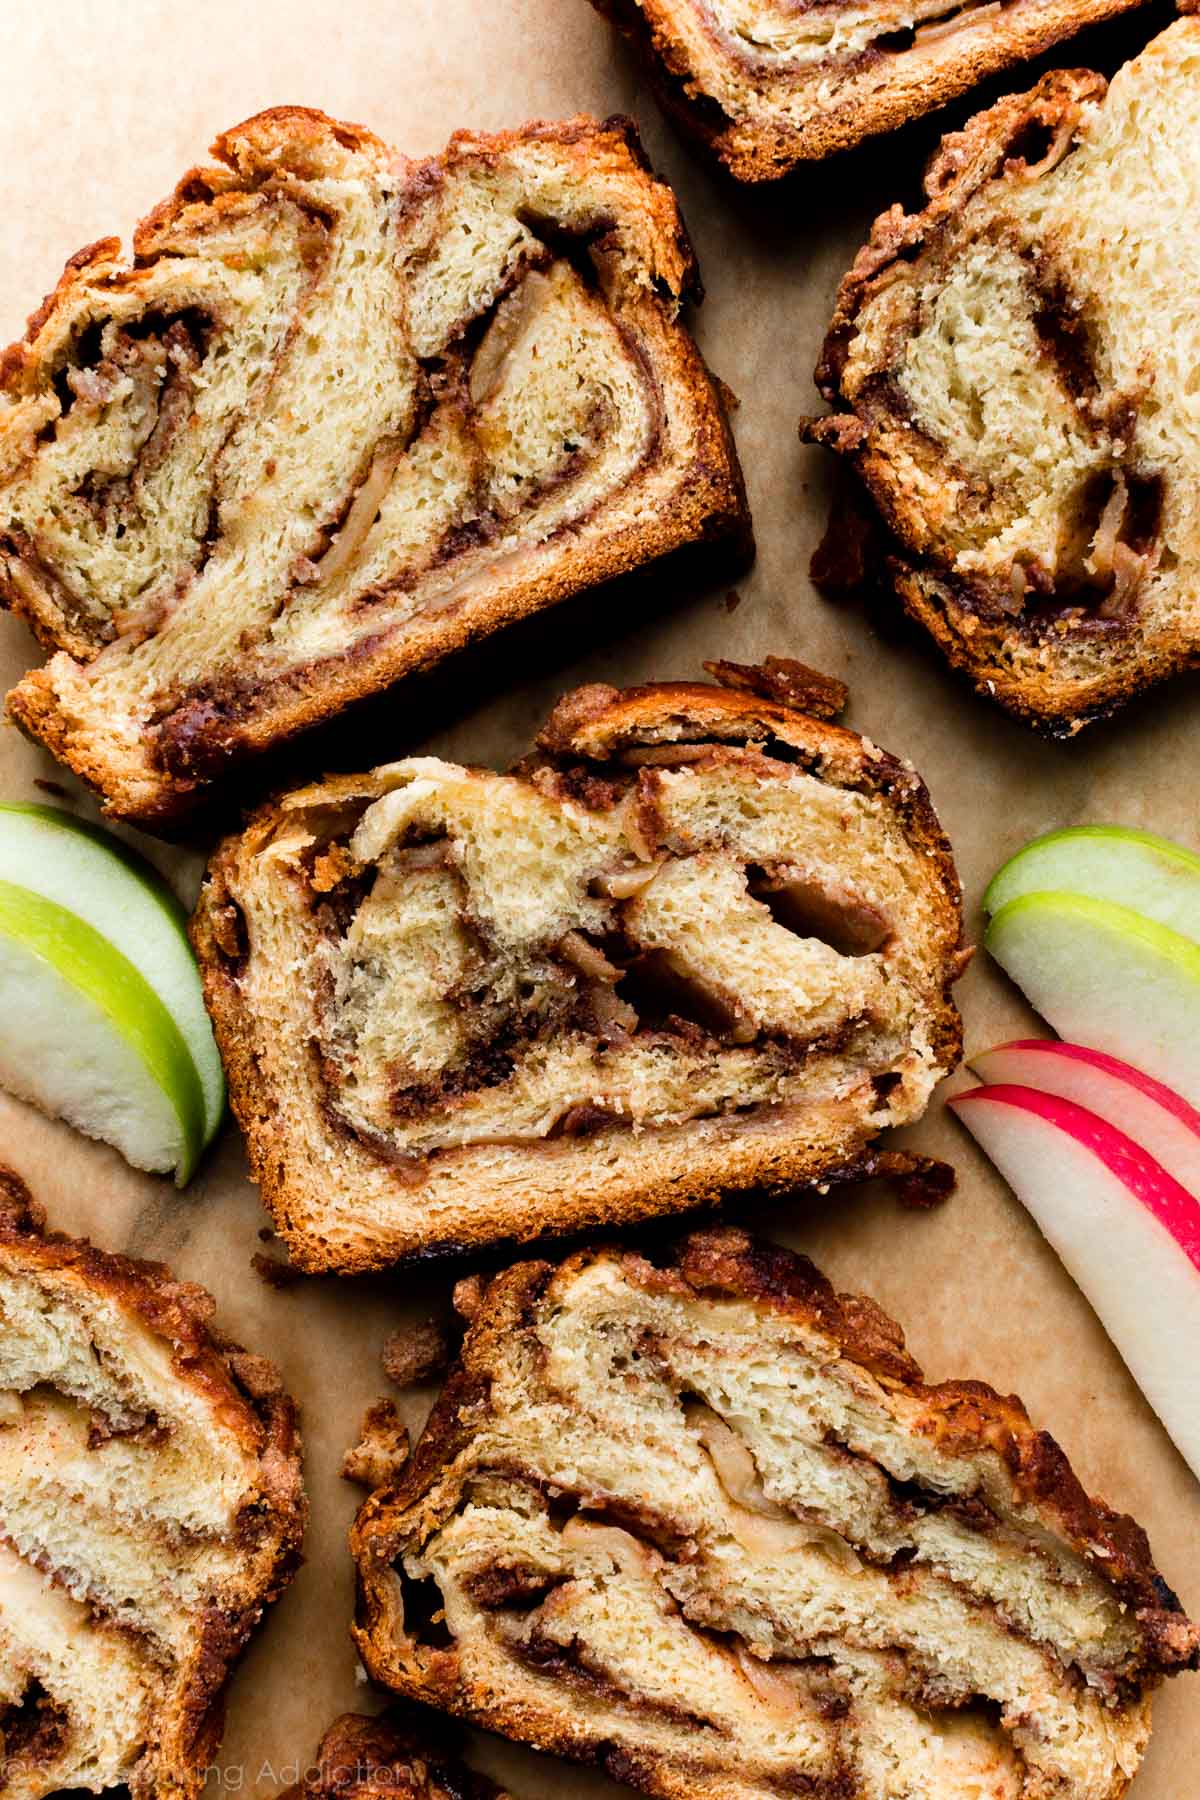
In case you’re wondering, our self control is stuck inside one of those apple cinnamon swirls. I’m positive you’re going to obsess over it too.
One reader, Meagan, commented: “AMAZING! I have baked a lot of Sally recipes, but this one is MY FAVORITE. It was honestly super easy and the taste, consistency, etc. was INCREDIBLE. LOVED and will make it again (and again and again). ★★★★★”
Another reader, Yudith, commented: “Thanks so much for this amazing recipe, Sally! I had never made Babka before, but your instructions were so clear that it was not nearly as difficult as I thought it would be. Another delicious recipe from your blog, as always! ★★★★★”
Detailed Overview: How to Make Apple Cinnamon Babka
The full written recipe is below, but let me walk you through the steps so you can understand the process before starting.
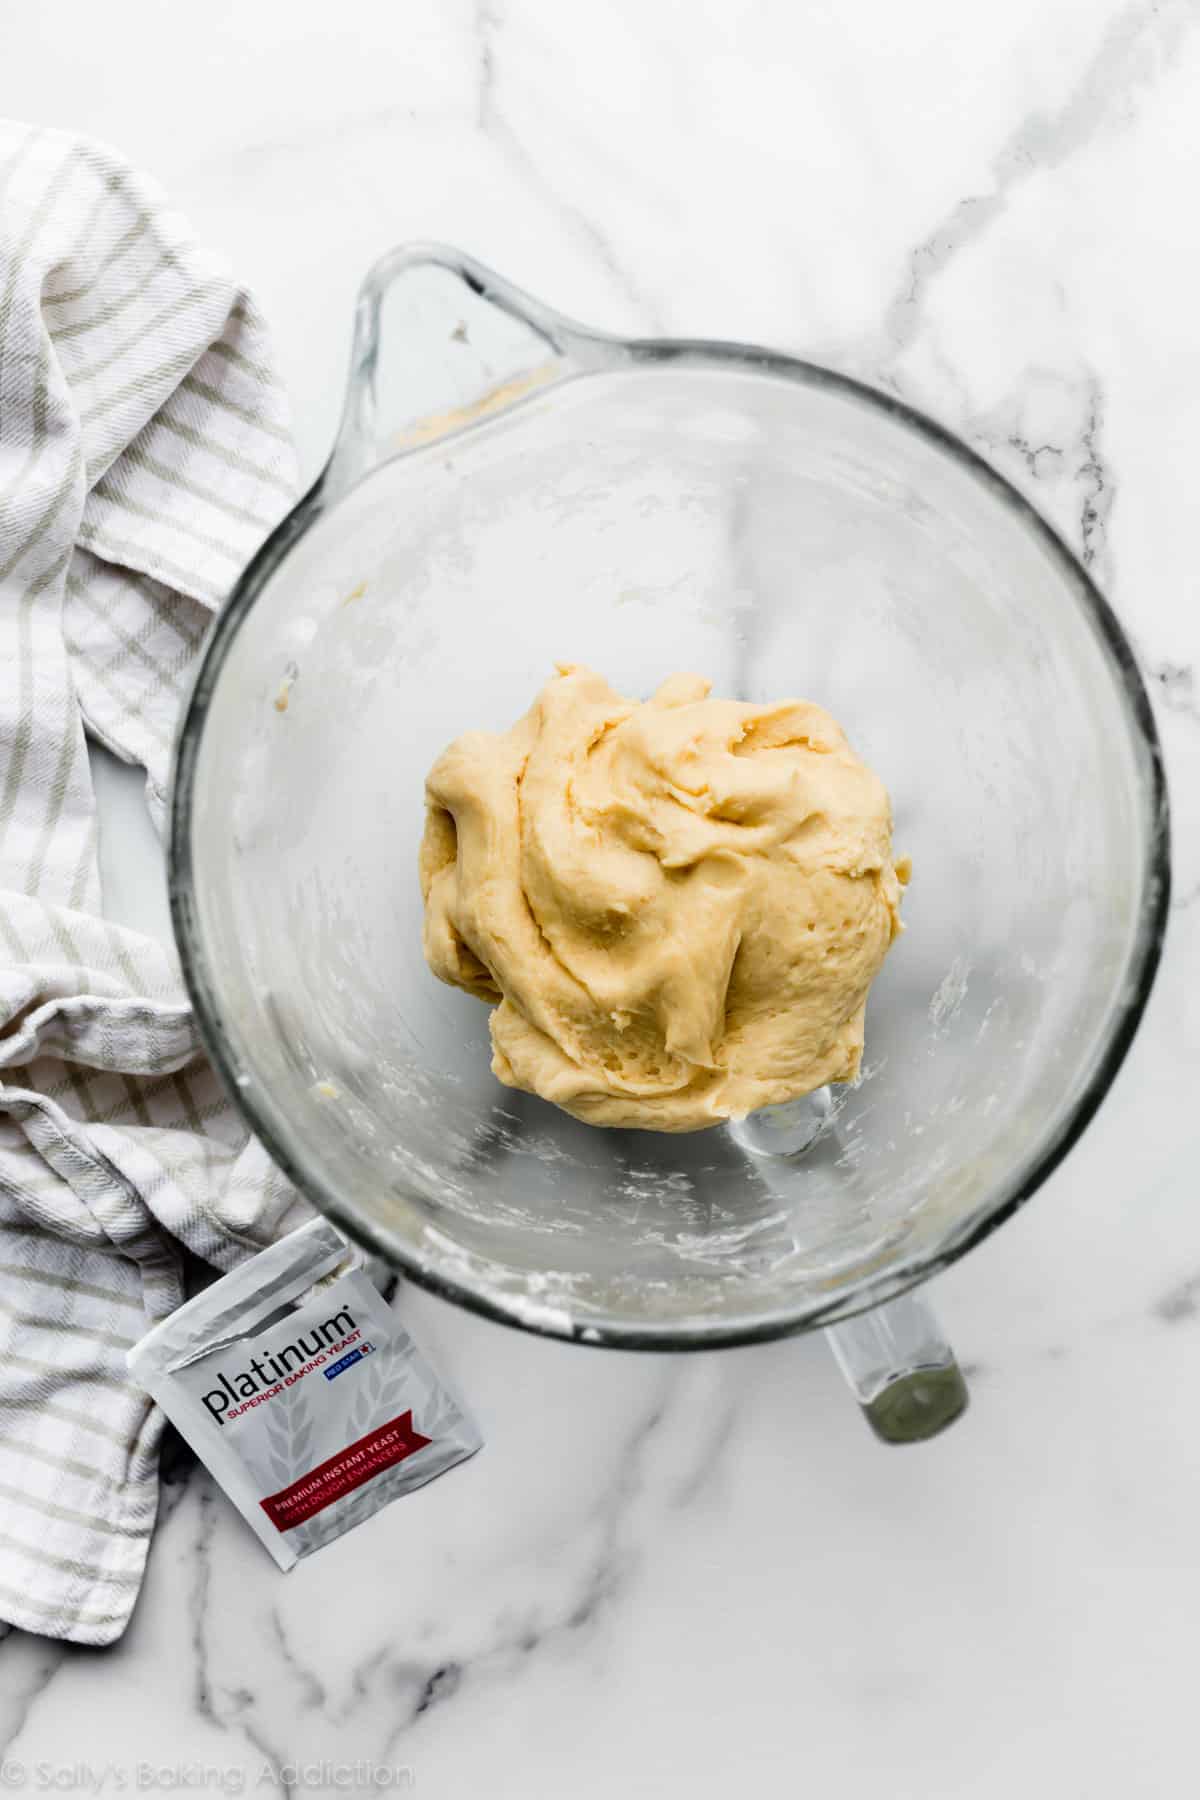
- The dough. You need milk, yeast, sugar, butter, egg yolks, salt, and flour. Why only egg yolks? They make the richest tasting dough. We’re not wasting the egg whites, though—we’ll use one in the filling and one to brush on the dough before adding the topping. The dough is very soft, supple, and almost creamy-feeling. After the dough is prepared, it’s time to knead it. You can knead the dough with your mixer or by hand. You can watch me knead the dough in the video tutorial above, or in my separate How to Knead Dough post. Add additional flour as needed to prevent the dough from sticking to your work surface.
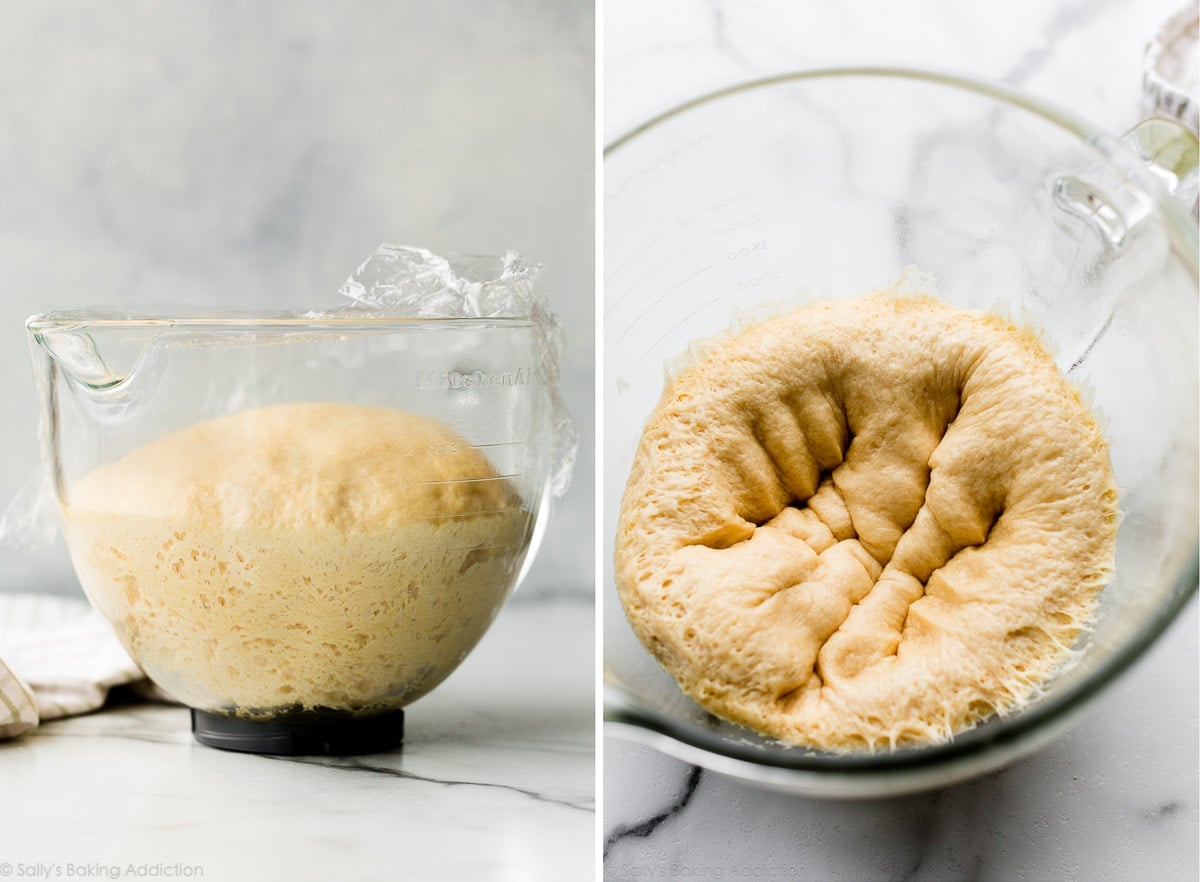
- Extended rise time. Allow the prepared dough to rise in a relatively warm environment for 3–4 hours or until nearly double in size. This dough is rich with fat, so it takes longer than other doughs to rise. Don’t be nervous if it’s closer to 4–5 hours—it’s a heavy dough and needs extra time to rise.
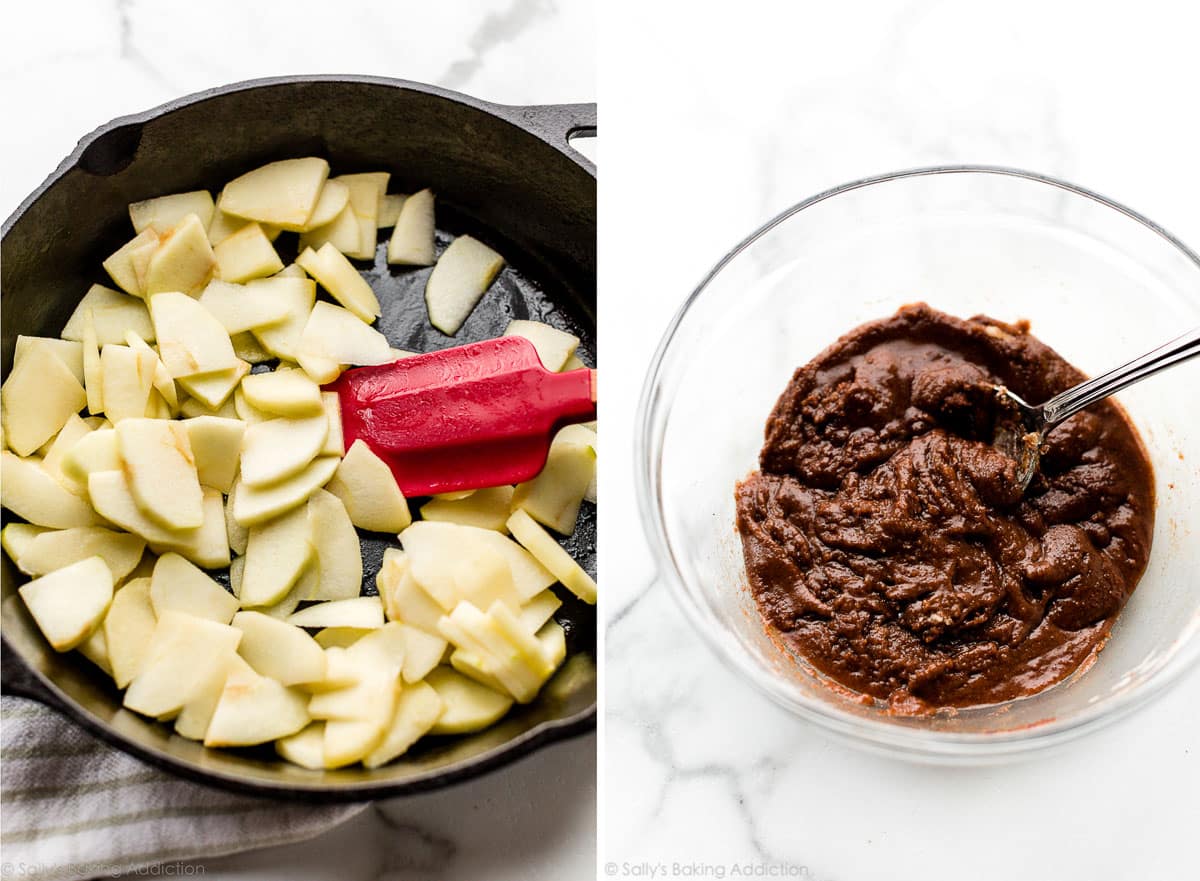
- The apple cinnamon filling. First, soften the apples on the stove with a little butter. (Step 5 in the recipe below.) Second, combine melted butter, brown sugar, flour, cinnamon, salt, and vanilla extract until crumbly and combined. Stir in one of the leftover egg whites. The egg white helps solidify the cinnamon filling, so it’s extra thick and crumbly inside. Like cinnamon crunch bread and cinnamon swirl quick bread, this babka is heavy on the cinnamon. We really want it to stand out!
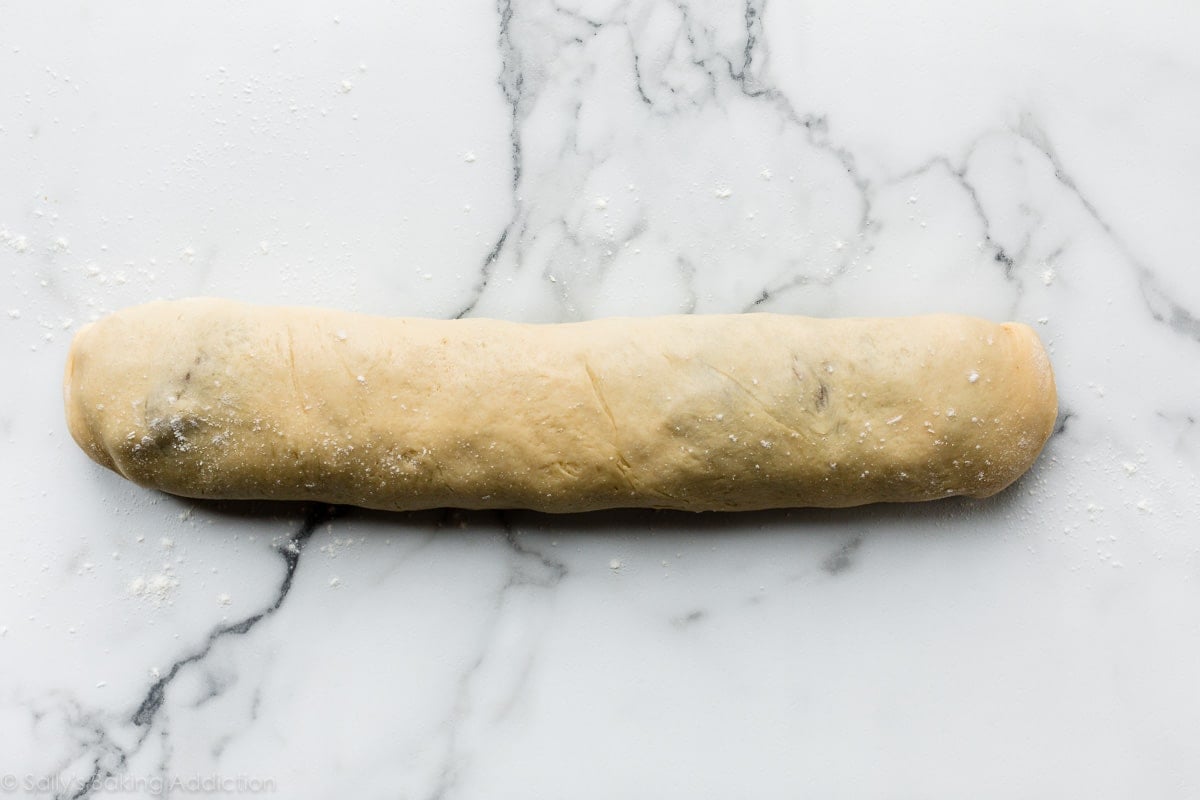
- Shape the babka dough: As noted in the written recipe below, punch down the dough then roll it out into a 12×16-inch rectangle. Gently spread the brown sugar cinnamon filling all over the dough, then top with the apples. We’re shaping today’s babka a little differently than the Nutella babka. In that recipe, you slice the rolled dough down the center to expose the Nutella inside. That proved to be very difficult here, as all the apples spilled out. Instead, tightly roll up the dough to form a 16-inch log. Fold in half, then twist it to form a figure 8. Use the video tutorial above for a visual and detailed directions below as your guide.
- 2nd rise: Let the shaped babka rise in a greased loaf pan for about 1–1.5 hours.
- Crumble topping: The crumble topping is totally optional. But it uses some of the same ingredients you need for the dough and filling, so why not? Mix a little brown sugar, flour, and cinnamon together. Add cold butter and using a pastry cutter or a fork, cut it into the brown sugar mixture until crumbles form.
- Finish it off before baking: Remember that other egg white? We’ll use it here. Carefully brush the surface of the babka with the last remaining egg white. Using a toothpick, poke 10–12 holes all over the top of the loaf. Why are you doing this? It actually allows steam to escape from inside the loaf so the layers don’t separate. I learned this trick from Food52. Finally, sprinkle the crumble topping on top.
- Time to bake: The bread takes about 1 hour, give or take. If you notice the top browning too quickly, loosely tent the pan with aluminum foil.
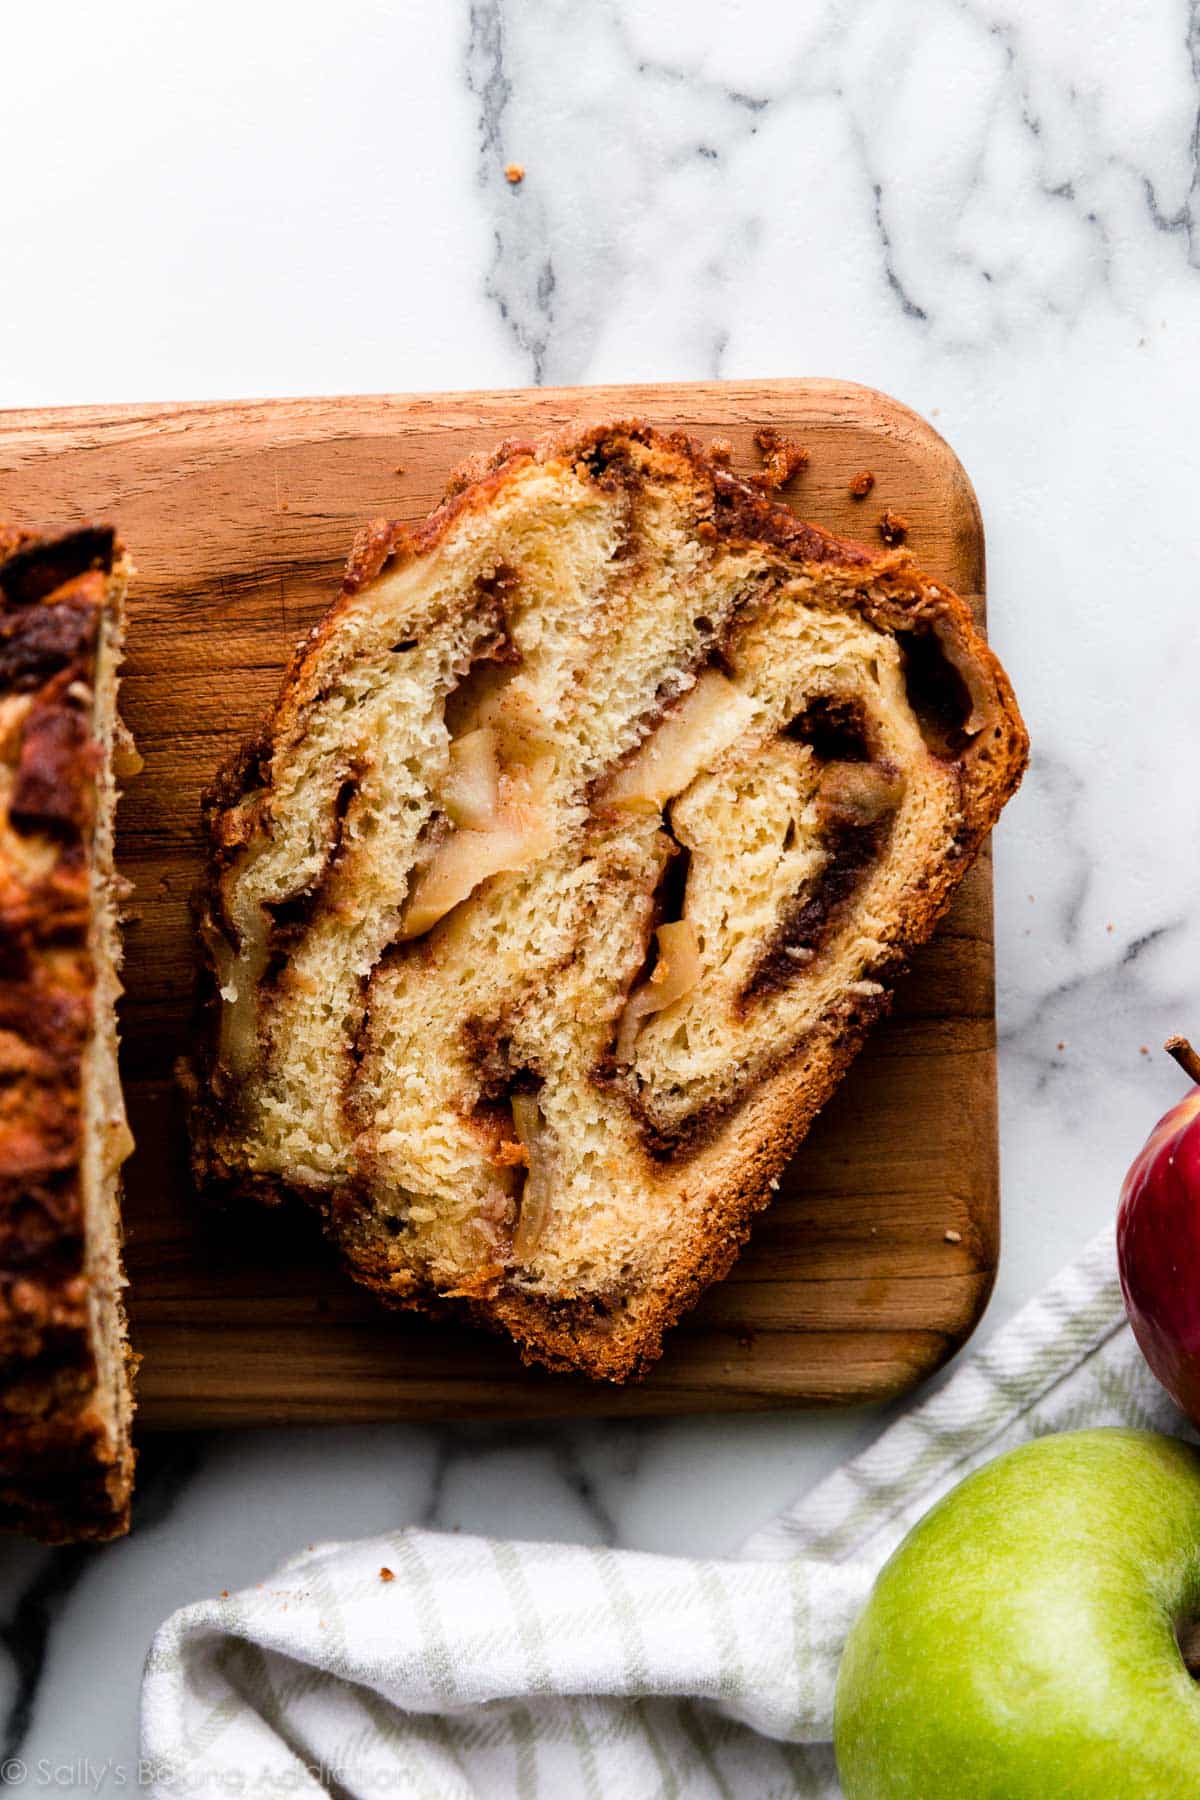
Serving/Slicing Tip: For neat slices, I recommend cooling the babka completely before slicing. The bread has so much filling that it will fall apart if sliced warm.
Step-by-Step Photos
Here is the dough after you mix the dough ingredients together:
Here is the dough after it rises and then after you punch it down:
Soften the apples on the stove and make the cinnamon filling:
Spread cinnamon filling on rolled out dough and top with apples:

Roll it up into a log:
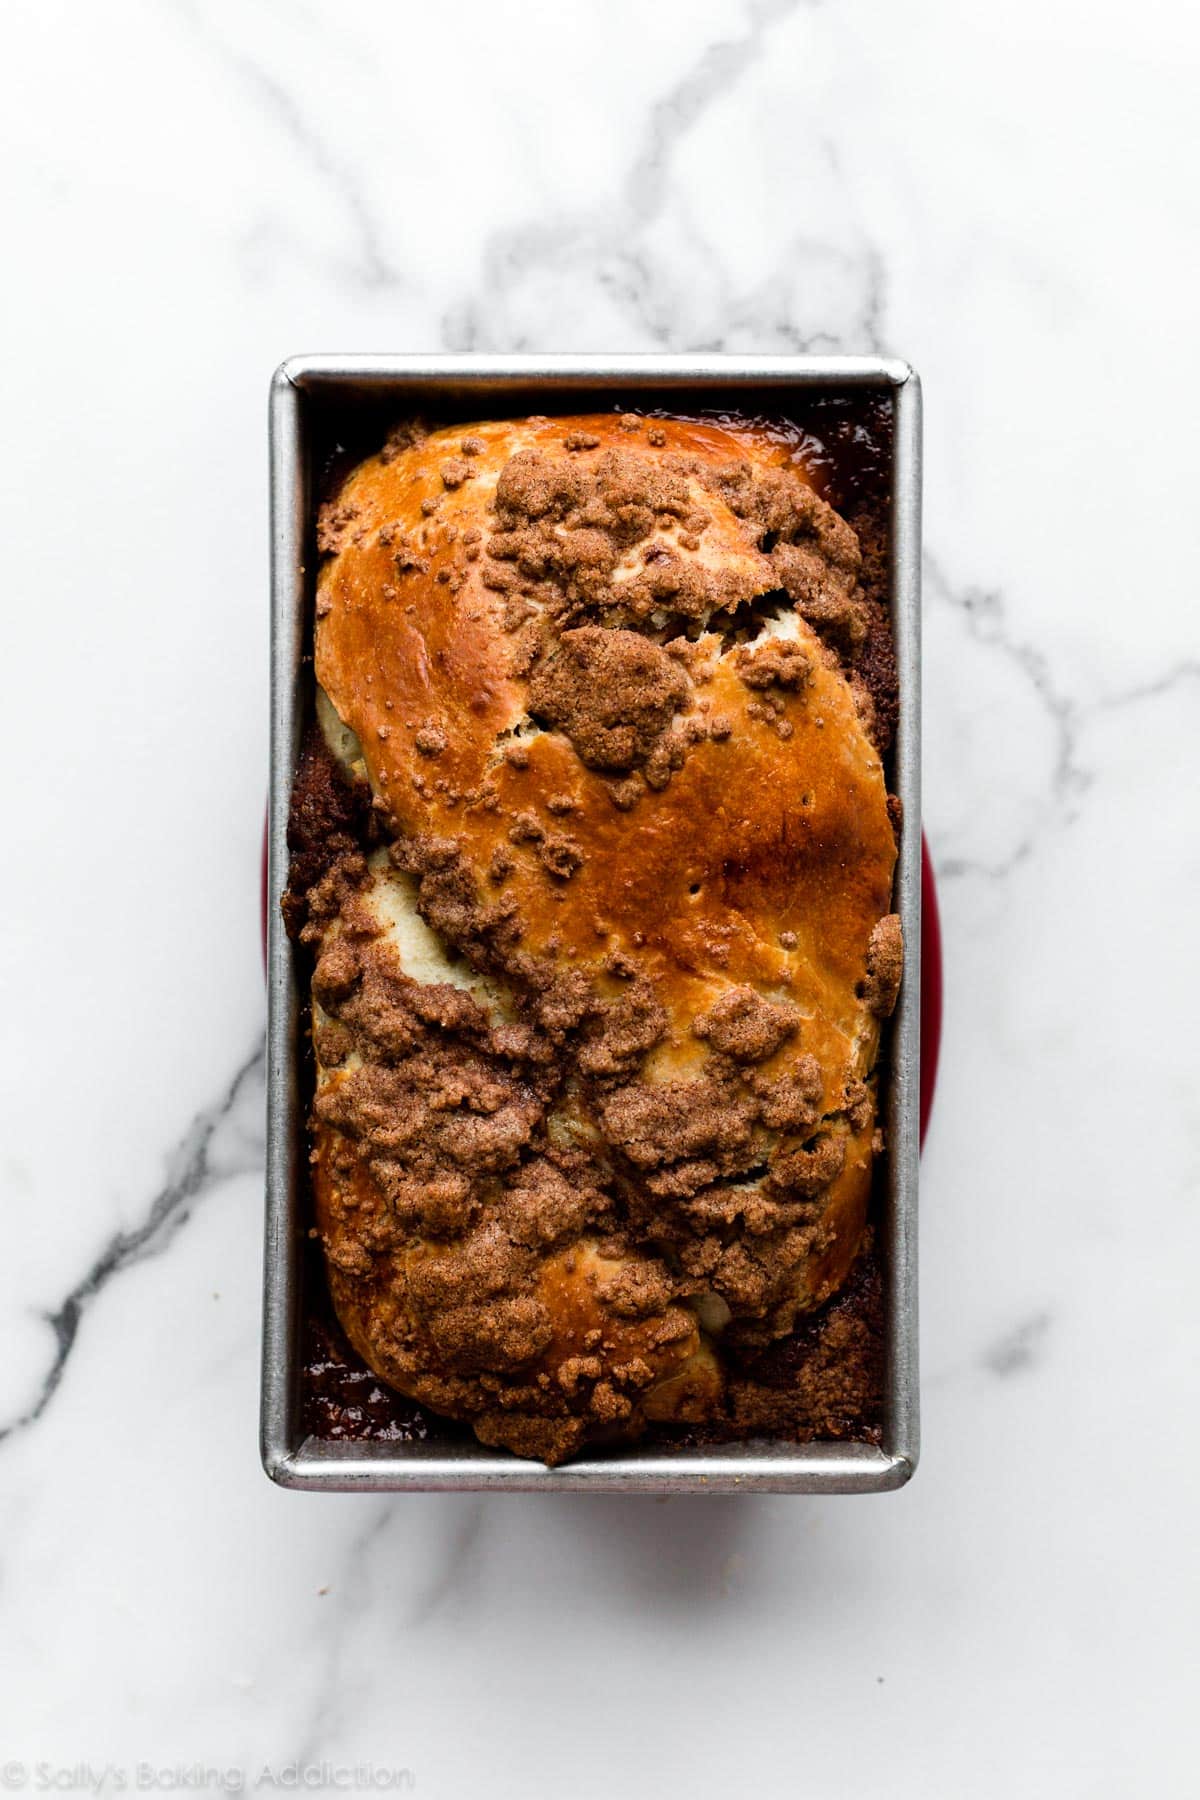
Left photo below (before 2nd rise): Fold log in half, then twist into a figure 8. Place into your greased loaf pan, then let it rise until puffy, about 1 hour.
Right photo below (after 2nd rise): Dough is nice and puffy. Brush with egg white, poke holes in the loaf to prevent separation, then top with crumble topping.

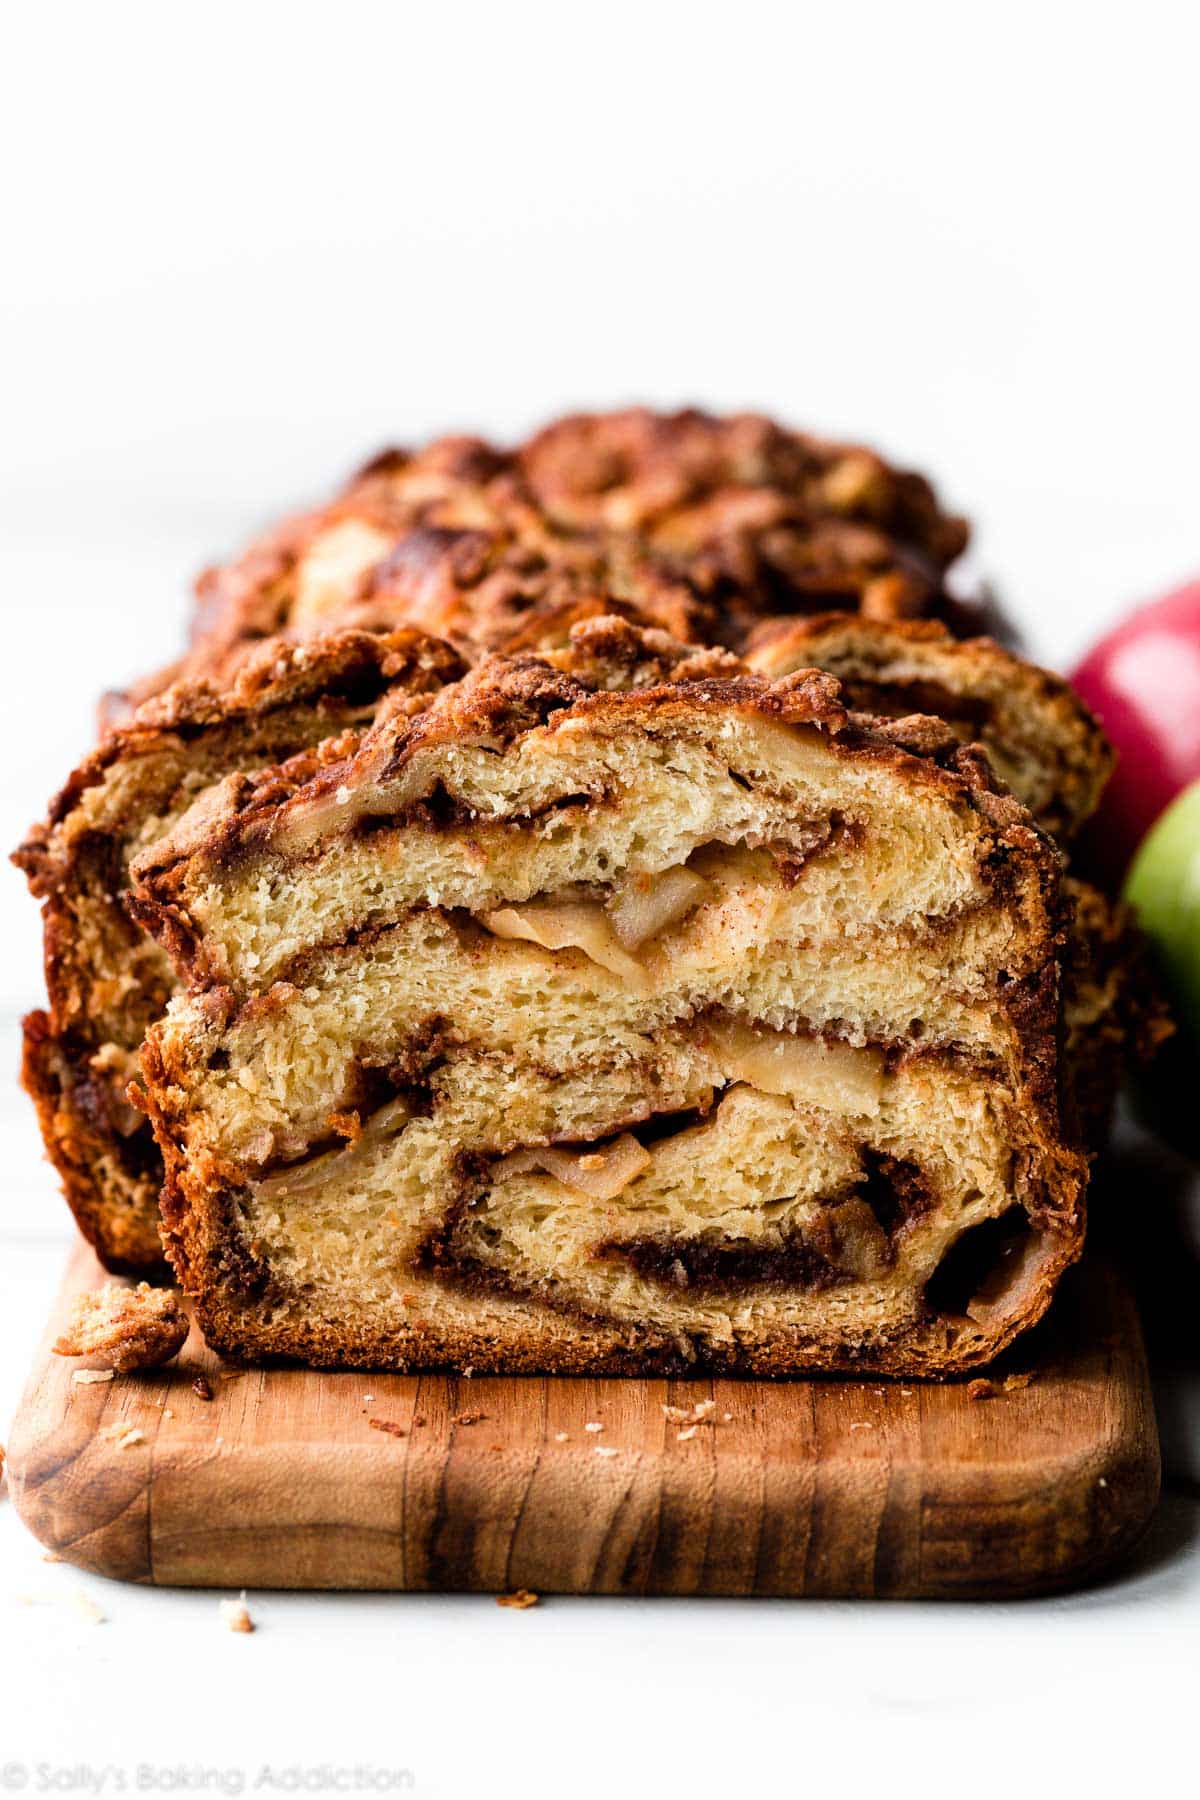
Bake until golden brown. The brown sugar cinnamon topping melts down, some apple cinnamon filling may seep out creating jammy-like edges and crevices, and the entire kitchen smells like fall. This is SO GOOD:
In Short, This Apple Cinnamon Babka Is:
- Extra flaky
- Buttery, moist, and overflowing with apple cinnamon filling
- Mesmerizing with all those delicious swirls
- Topped with buttery brown sugar cinnamon crumbles
- Irresistible & addictive (we COULDN’T STOP EATING THIS)
- Satisfying, especially on a cool rainy day
- Worth all the effort, trust me!
For an easier apple cinnamon recipe without yeast, you’ll enjoy this apple cinnamon bread. And don’t forget to try my classic apple pie & apple cobbler, fresh and easy apple cake, or apple cider French toast if you find yourself with a plethora of apples!
Print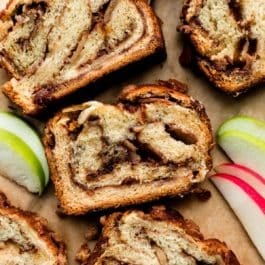
Apple Cinnamon Babka
- Prep Time: 5 hours
- Cook Time: 1 hour
- Total Time: 6 hours, 30 minutes
- Yield: 1 loaf
- Category: Bread
- Method: Baking
- Cuisine: Jewish
Description
This apple cinnamon babka features sweet apples and a thick cinnamon filling twisted inside a rich and buttery yeasted dough. See recipe notes for freezing and overnight instructions.
Ingredients
- 2/3 cup (160ml) whole milk, warmed to about 110°F (43°C)
- 2 and 1/4 teaspoons (7g) Platinum Yeast from Red Star (1 standard packet)*
- 1/3 cup (62g) granulated sugar, divided
- 5 Tablespoons (71g) unsalted butter, sliced into 1 Tbsp-size pieces and softened to room temperature
- 2 large egg yolks (reserve 2 egg whites for filling and topping)
- 1 teaspoon salt
- 2 and 2/3 cups (334g) all-purpose flour (spooned & leveled), plus more as needed and extra for work surface and hands
Filling
- 3 Tablespoons (43g) unsalted butter, divided
- 2 large apples, peeled and thinly sliced into bite-size pieces (2–2.5 cups, or 250–313g)*
- 1 teaspoon lemon juice
- 1 cup (200g) packed light or dark brown sugar (or a mix of both)
- 1/4 cup (31g) all-purpose flour
- 2 and 1/2 teaspoons ground cinnamon
- 1/4 teaspoon salt
- 1 and 1/2 teaspoons pure vanilla extract
- 1 large egg white (reserved from dough)
Crumble Topping (Optional)
- 2 Tablespoons (25g) packed light or dark brown sugar
- 2 Tablespoons (15g) all-purpose flour
- 1/4 teaspoon ground cinnamon
- 2 Tablespoons (28g) unsalted butter, cold and cubed
Brush on Assembled Loaf
- 1 egg white (reserved from dough)
Instructions
- Prepare the dough: Whisk the warm milk, yeast, and 1 Tablespoon of sugar together in the bowl of your stand mixer fitted with a dough hook or paddle attachment. Cover and allow to sit for 5 minutes. *If you don’t have a stand mixer, use a handheld mixer or mix the dough by hand using a silicone spatula or wooden spoon.*
- Add the remaining sugar, the butter, egg yolks, salt, and 1 cup (125g) flour. Beat on low speed for 30 seconds, scrape down the sides of the bowl with a silicone spatula, then add another 1 cup of flour. Beat on medium speed until relatively incorporated (there may still be chunks of butter). Scrape down the sides of the bowl with a silicone spatula. Add 1/2 cup of flour and beat on medium speed until the dough begins to come together. As the mixer runs, add another 2–4 Tablespoons of flour depending on how wet the dough looks. (I usually add another 2 Tbsp, which makes it about 2 and 2/3 cups of flour total.) This should be a very soft and almost creamy-feeling dough. Do not add more flour than you need.
- Knead the dough: Keep the dough in the mixer (and switch to the dough hook if using the paddle) and beat for an additional 6-8 full minutes, or knead by hand on a lightly floured surface for 6-8 full minutes. (If you’re new to bread-baking, my How to Knead Dough video tutorial can help here.) If the dough becomes too sticky during the kneading process, sprinkle 1 teaspoon of flour at a time on the dough or on the work surface/in the bowl to make a soft, slightly tacky dough. Do not add more flour than you need because you do not want a dry dough. After kneading, the dough should still feel a little soft. Poke it with your finger—if it slowly bounces back, your dough is ready to rise.
- 1st Rise: Lightly grease a large bowl with nonstick spray. Place the dough in the bowl, turning it to coat all sides. Cover the bowl with aluminum foil, plastic wrap, or a clean kitchen towel. Allow the dough to rise in a relatively warm environment for 3–4 hours or until nearly double in size. This dough is rich with fat, so it takes longer than other doughs to rise. (If desired, use my warm oven trick for rising. See my answer to Where Should Dough Rise? in my Baking with Yeast Guide.)
- Towards the end of rise time, you can prepare the filling: Melt 1 Tablespoon of butter in a large skillet on the stove over medium heat. Add the apples. Stir and cook until the apples are slightly softened, about 3 minutes. Remove from heat and stir in lemon juice to help prevent browning. Set aside. For the rest of the filling in this step, make sure you don’t prepare it too far in advance because the butter will solidify and spreading onto the dough will be difficult. Melt remaining 2 Tablespoons of butter in a medium heatproof bowl in the microwave (or use the stove). Stir in brown sugar, flour, cinnamon, salt, and vanilla extract until crumbly and combined. Stir in the egg white. Set aside.
- Grease a 9×5-inch loaf pan.
- Shape the dough: When the dough is ready, punch it down to release the air. Flour a work surface, your hands, and a rolling pin. Roll the dough out into a 12×16-inch rectangle. Carefully and slowly spread the cinnamon filling mixture on top. (The dough is quite soft underneath and you don’t want to tear it.) Add the apples in a single layer. Using floured hands, tightly roll up the dough to form a 16-inch long log. If any parts of the dough feel soft as you roll it up, add a sprinkle of flour as I do in the video above. Place the log on its seam. Fold in half, then twist it to form a figure 8. Pinch the ends together. Use the video tutorial and photos above as a visual. Place in prepared loaf pan.
- 2nd Rise: Cover shaped babka with aluminum foil, plastic wrap, or a clean kitchen towel. Allow to rise until it’s puffy and nearly reaches the top of the loaf pan, about 1–1.5 hours.
- Towards the end of rise time, you can prepare the crumble topping: Mix the brown sugar, flour, and cinnamon together. Add the cold butter and using a pastry cutter or a fork, cut butter into the brown sugar mixture until pea-size crumbles form. Refrigerate until ready to use.
- Preheat oven to 350°F (177°C). Place a baking sheet on a lower oven rack to catch any juices or crumbles that may drip/drop down. (Has only happened to me once!)
- Carefully brush the surface of the babka with last remaining egg white. Using a toothpick, poke 10–12 holes all over the top of the loaf. This allows steam to escape from inside the loaf so the layers don’t separate. Sprinkle with crumble topping.
- Bake: Bake for 60–65 minutes or until golden brown on top. If you gently tap on the loaf, it should sound hollow. If you notice the top browning too quickly, loosely tent the pan with aluminum foil. (I usually add aluminum foil over the loaf around the 25-minute mark.) Remove from the oven and allow bread to cool in the pan for at least 30 minutes before slicing and serving. For neat slices as pictured above, I recommend cooling completely before slicing. A serrated knife is best for slicing.
- Cover leftover babka tightly and store at room temperature for 2 days or in the refrigerator for up to 1 week.
Notes
- Freezing Instructions: Baked babka freezes wonderfully. Wrap the cooled loaf in plastic wrap, then a layer of aluminum foil. Freeze for up to 3 months. Thaw wrapped loaf overnight in the refrigerator or at room temperature, then warm to your liking. You can also freeze the dough. After punching down the dough in step 7, wrap the dough tightly in plastic wrap, then a layer of aluminum foil. Freeze for up to 3 months. Thaw overnight in the refrigerator, then punch the dough down again to release any air bubbles. Continue with the rest of step 7.
- Overnight Instructions: Prepare the dough through step 3. Place into a greased bowl (use nonstick spray to grease). Cover tightly and place in the refrigerator for up to 24 hours. Remove from the refrigerator and allow the dough to come to room temperature, then let it rise until doubled in size, about 3 hours. Continue with step 5. I don’t recommend shaping the bread the night before as it will puff up too much overnight.
- Special Tools (affiliate links): Stand Mixer or Large Glass Mixing Bowl | Rubber Spatula or Wooden Spoon | 9×5-inch Loaf Pan | Rolling Pin | Pastry Cutter | Pastry Brush
- Yeast: Platinum Yeast from Red Star is an instant yeast. Any instant yeast works. You can use a 1:1 substitution of active dry yeast instead with no changes to the recipe. Rise times will be slightly longer if using active dry yeast. Reference my Baking with Yeast Guide for answers to common yeast FAQs.
- Apples: Use your favorite variety of apple. I typically use Granny Smith, Fuji, or Honeycrisp.


Reader Comments and Reviews
Hi Sally, I made this recipe today, no refrigeration. But the dough did not rise the second time. The yeast I used was Red Star quick rise that had an expiration date of July 2021. I work with yeast to make challah. Not sure what happened. It is in the oven now,hopefully it will still be good,
Thanks
Hi Marla! Thank you for giving this recipe a try. Perhaps the dough needed a little longer to rise. One trick we like to use to speed up the process is to preheat the oven to 150°F (65°C), then immediately turn the oven off. Wait a few minutes, then place the dough in the bowl inside the oven with the oven door cracked open. This will be a warm environment for your dough to rise. Here’s more helpful tips for baking with yeast as well!
I let it rise 3 hours the first time and 1 1/2 hours the second time. Never had a problem with the challah.
smelled amazing and everyone loved it !!
Absolutely excellent! While this was pretty time intensive (or maybe just seemed that way with a small person running around), it was well worth it! So delicious with a wonderful dough. Thank you for sharing!
Silly question but can I make this without the apples?
Sure can! Or you might like our Nutella Babka recipe, too.
Hi Sally,
This is a great recipe. I also love your nutella babka recipe. Can you tell me why this recipe has 2 rise and the nutella one has only 1 rise? Does it have anything to do with the type of filling?
Thanks
Hi Shahla, I’m glad you tried and loved this apple babka recipe. This dough is much denser with fat (butter) and benefits from a longer 2nd rise. It doesn’t have to do with the filling.
Hi there. I’m looking for some advice. Mine came out fairly soggy and sticky at the bottom (I’m assuming from the juices in the apples). Is there anything I could have done differently? It still tasted amazing! Just trying to troubleshoot for next time! Thank you for all of your helpful hints and tricks along the way!
Such a delicious recipe, will definitely be making this again! I already had a friend request it for her birthday!
Sally, I’m so happy right now, I could cry! Thank you for walking us through this recipe so patiently. I made your nutella babka over the summer, and it was my first attempt at a real yeast bread. Yesterday, I made this babka and WOW. It’s SO good, and even though my roll-up was a mess (I had filling oozing out of my pan, woops!), it turned out beautiful!! I’m so proud of this bake, and I cannot thank you enough for giving me and all of the SBA community the confidence to try out new recipes. Warm holiday wishes to you and yours!
Mine totally ripped apart as i was putting it in the tin (i think i overstuffed it and wasn’t careful enough with the dough) and i thought about trashing it but I’m so glad i made it! was delicious regardless!!!
This babka tastes delicious and not overly sweet like the chocolate babka I have tried at Trader Joes! I love how it is like a cross between an apple pie and cinnamon roll. I relied on the video to help me make it, and it was not too difficult at all. Thank you Sally!
i made this today and it turned out wonderfully!! it was my first time making a babka and it was so fun to make! your detailed instructions and video made the recipe so easy to follow!! thanks for another fabulous recipe!!
So delicious, will make it again. Next time, I will cut the loaf in half and eat from the middle out so get all the apple flavor, Maybe save the ends for a delicious french toast??
By any chance is this the Linda Plachy from Natick High School? If so…what a riot! I am looking up how to make a babka and I was reading the comments from this recipe. When I saw your name I thought it might be you.
Of so…email me!
Joanie Linsky
Thank you for the recipe!
I’m relatively new at baking and had issues rolling the dough. I don’t know if the apples caused the filling to start melting or the filling was too wet, but everything oozed out and became unworkable. I tried unrolling it, and rolling it again, but made it worse :'(
Any tips for the next I try?
Out of this world delish! The first loaf I think the milk was too warm because I didn’t get as much foam as I expected, and both the first and 2nd rise were ok but less than expected. The 2nd loaf, was perfect. The rise was great and the dough is very easy to work with to roll up and twist. The bread is beautifully layered, and is even more delicious than it looks! I brought it to some friends and everyone absolutely loved it! I served it both warm and cold, both are outstanding.
This is my 2nd recipe if yours I’ve tried; 1st was your amazing coconut cake!
Question, if I want the dough a little more soft(moist) should I cover with foil like you suggest next time or cook a few minutes less?
Hi Jennifer, I wouldn’t reduce the bake time for this bread. Instead, try tenting it with foil as it bakes. Should help keep the edges a little softer.
I made this a few days ago and it was wonderful!
So moist and flaky.
I did halve the sugar amount for the cinnamon filling as I couldn’t bring myself to add a full cup. I also added another apple.
Thank you for the recipe.
I will definitely make it again.
Maureen
I’m finally trying this today. Right now is on the last rise then I will bake. I see some pooling in my loaf pan but I’m not too worried. I “may” have not rolled my loaf up tight enough? Time will tell but so far I am pleased with the dough making part and feel I did correctly. It is a very nice dough and I enjoyed kneading it!. I really haven’t worked with yeast recipes a lot and kind of intimidating but I decided late summer of setting a goal, during continued pandemic and winter in Minnesota, to work on my yeast recipe baking skills! So I found the Platinum yeast you recommend and bought a bunch (in case a shortage). I printed out your focaccia recipe earlier today and going to try that later this week.
As always – love your recipes, videos and website!
Laurie
Oh my goodness is this delicious! I made it today subing half the flour for whole grain spelt flour and it turned out great! I brought it over to a friend’s house for coffee and we almost ate the whole thing. I will definitely make this again soon.
I started this recipe a little late in the day and I am still waiting for it to finish the first rise. Would it be possible to let it do the first rise overnight and finish in the morning? I would assume I’d let it finish rising in the fridge?
Hi Erin, You can do the first rise in the refrigerator! See the recipe notes for detailed overnight instructions.
I may be adding things incorrectly, but I only used 1.5 + 3 tbs of flour for the dough (followed the instructions) even though the ingredients listed 2.5?
Hi Sara! Add the flour in stages. Add 1 cup at first, then another 1 cup, then 1/2 cup and any more to bring the dough together.
LOVED this!! One of my favorites from your blog! Your recipes never disappoint!! 🙂
This is the first negative outcome of one of Sally’s Baking Addiction recipe I’ve had…I have pretty much using Sally’s recipe index until now…I know some of these recipes are tedious an/or complicated but the instructions, notes, videos all make it worthwhile..but…my rise took almost 5 hours and I bake daily..I couldn’t get the filling to spread..because of the egg wash I couldn’t get the loaf out the pan…When I scoop out a spoon full it’s delicious..but weighing the hours ..not worth the work..I’ll make cinnamon & apple rolls …Jodi
Hi, I’d like to make this but am having a hard time finding a 9×5 loaf pan. Would you be able to share what loaf pan you used for this? Thanks in advance!
Hi Jo, You can visit the post Stock Your Kitchen with These 8 Baking Pans and the loaf pan that we recommend is number 8. Let us know if you try this recipe!
I have just put my dough for first rise. I have never made an enriched dough before and was wondering if that is why the knead time is so much less?
This came out so wonderfully! I followed the recipe exactly and had no issues—the dough was beautiful, there were no issues with leakage when baking, and it rose and baked beautifully in 65 minutes. I put the dough in a warm but off oven to rise (heated the oven to 200 degrees F then turned it off, put the bowl inside and kept the oven door slightly open) and it only took about 45 minutes to double in size. My husband and I both loved it and I will definitely be making it again! Thank you for yet another wonderful recipe Sally!
This recipe is amazing. Came out like a dream! My very picky toddler kept stealing bites when I had any.
This is a fantastic recipe! The perfect fall treat. It turned out so delicious!! Thank you for another great recipe!
Looking forward to trying this! I only have a glass loaf dish/pan. Would that work? If so, do any adjustments have to be made for cook time? Thanks!
Hi Megan, Glass pans can take longer to heat up so your bake time may be longer. Keep your eye on it using your oven light and bake until golden brown on top. If you gently tap on the loaf, it should sound hollow when it’s finished baking.
This is an amazing recipe and it turned out so well, and delicious!
The whole house smelled wonderful:)
There was a bit of juice overflowing in the pan. This made it hard to get the cake out of the pan once it cooled. Would you suggest lining the pan with baking paper?
Hi Ana, We are so happy you enjoyed this recipe! You can try lining the bottom of your pan with parchment next time.
Hi, is it better to use normal or cooking apples here, the recipe doesn’t specify.
Can’t wait to try this, it looks excellent!
Hi Sarah! See recipe note.